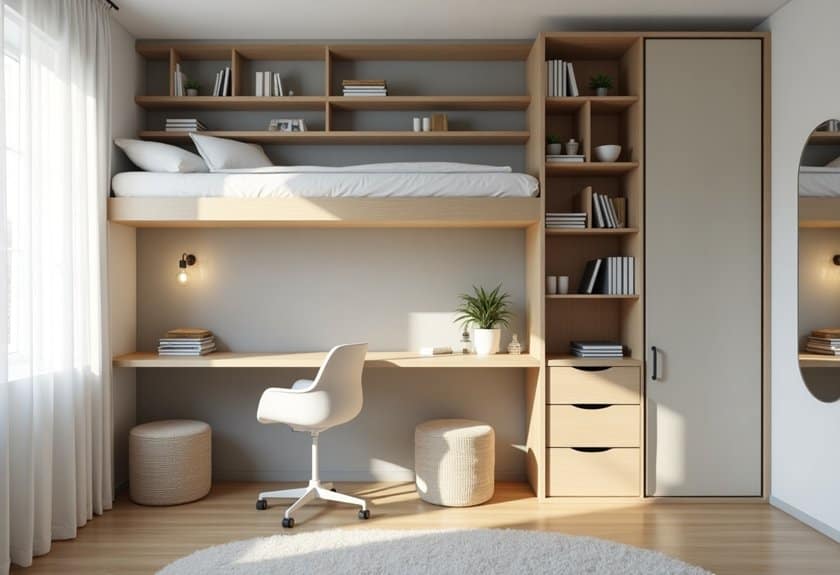
If you’re tired of bumping into furniture in your cramped bedroom, you’re not alone! I’ve been there – trying to squeeze every inch of storage out of a tiny space. After transforming countless small bedrooms (including my own 8×10 disaster), I’ve discovered some genius organization tricks that’ll make your room feel twice as big. From vertical storage solutions to hidden compartments you never knew existed, these space-saving hacks will revolutionize how you think about your bedroom’s potential.
Maximize Vertical Space With Wall-Mounted Storage
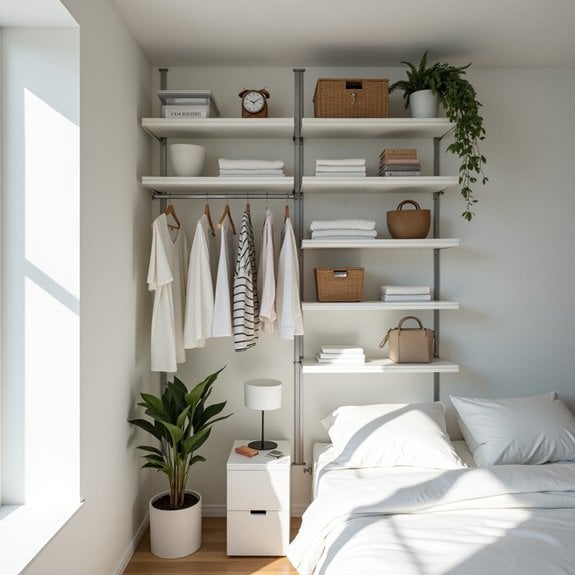
Making the most of vertical space is crucial in small rooms where floor space is at a premium. Wall-mounted storage solutions can effectively double or triple your available storage capacity while keeping essential items easily accessible and maintaining an open, uncluttered feel in your living space.
Utilizing wall space strategically not only helps organize belongings but also creates visual interest and can make a room appear larger. When items are lifted off the floor and arranged vertically, it draws the eye upward and creates a more spacious atmosphere while keeping frequently used items within arm’s reach.
Required Items:
- Stud finder
- Level
- Drill and drill bits
- Screwdriver
- Wall anchors
- Mounting brackets
- Floating shelves
- Wall-mounted organizers
- Storage hooks
- Measuring tape
- Pencil
- Wall-mounted storage containers
- Cable management solutions
Start by mapping out your wall space using a measuring tape and pencil, marking the studs with a stud finder. Plan your storage layout by considering item height and weight distribution, ensuring heavier items are mounted directly into studs.
Install mounting brackets and shelving units working from bottom to top, using a level to ensure straight alignment. Group similar items together and consider their frequency of use when determining placement height.
Create designated zones for different categories of items, such as daily essentials at eye level and seasonal items higher up. When mounting storage solutions, leave enough space between units for easy access and to prevent a cluttered appearance. Install adjustable systems where possible to allow for future reorganization as needs change.
Additional Tips: Consider using clear containers or adding labels to wall-mounted storage to easily identify contents. Incorporate a mix of open and closed storage solutions to hide visual clutter while keeping frequently used items accessible.
Regularly assess and adjust your system to ensure it continues to meet your needs, and don’t forget to account for proper weight distribution when loading shelves and organizers.
Choose Multi-Functional Furniture Pieces
Living in a small space requires strategic thinking and creative solutions to maximize every square foot. Multi-functional furniture pieces are essential investments that can transform a cramped room into a versatile living area while maintaining style and functionality.
The key to successful small-space living lies in selecting furniture that serves multiple purposes, effectively reducing the number of individual pieces needed. This approach not only saves precious floor space but also creates a more organized and clutter-free environment that adapts to various daily activities.
Required Items:
- Measuring tape
- Floor plan or room layout sketch
- List of daily activities performed in the space
- Budget worksheet
- Furniture catalog or online resources
- Storage containers
- Space-planning software (optional)
Begin by evaluating your space and identifying areas where multi-functional furniture would have the most impact. Focus on primary pieces like ottomans with hidden storage, murphy beds that transform into desks, or expandable dining tables that can serve as workstations.
Consider vertical space by incorporating loft beds with study areas underneath or wall-mounted folding tables that can be tucked away when not in use.
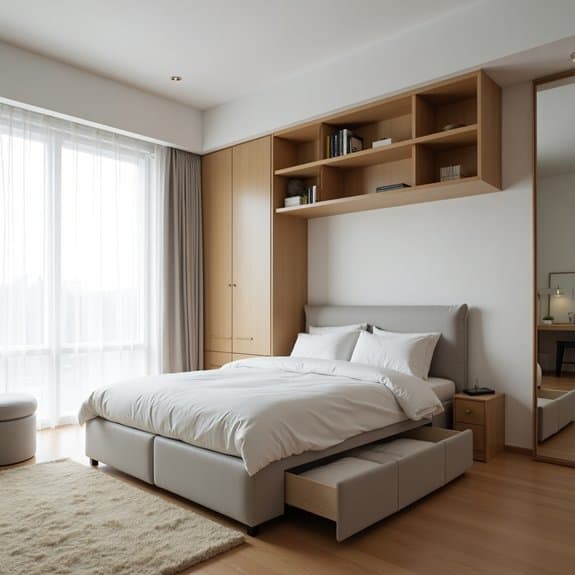
Prioritize furniture pieces that offer storage solutions within their design. Select coffee tables with drawers or lift-top mechanisms, beds with built-in storage drawers, and modular seating that can be reconfigured based on needs.
Ensure each piece serves at least two distinct functions to maximize its value in the space. Position these items strategically to maintain clear pathways and create designated zones for different activities.
Additional Tips:
When selecting multi-functional furniture, consider the ease of transformation between functions, durability of moving parts, and overall weight of pieces.
Opt for furniture with wheels or lightweight designs for easy reconfiguration, and choose neutral colors or classic styles that can adapt to changing needs and preferences over time.
Regular maintenance of mechanical components will ensure longevity and smooth operation of convertible furniture pieces.
Utilize Under-Bed Storage Solutions
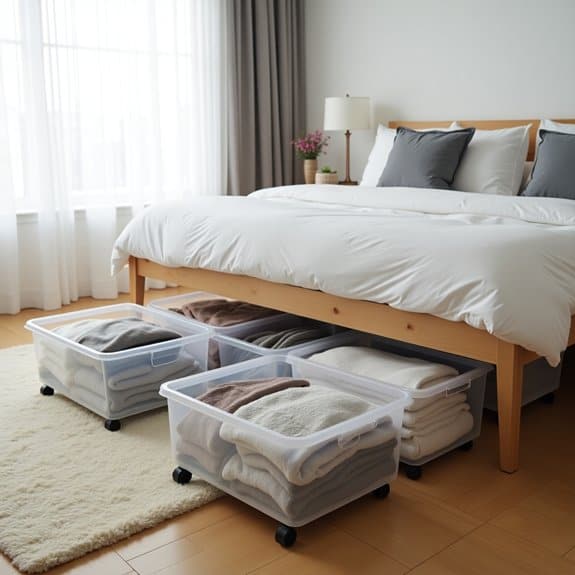
Making the most of under-bed space is crucial in small rooms where every square inch counts. This often-overlooked area can provide substantial storage capacity equivalent to a large dresser or cabinet, without consuming any additional floor space in your room.
Under-bed storage is particularly effective for seasonal items, extra bedding, clothing, or rarely used possessions that don’t require frequent access. When properly organized, this space can significantly reduce clutter in closets and drawers while keeping items dust-free and easily accessible when needed.
Required Items:
- Under-bed storage containers or drawers
- Bed risers (if needed)
- Measuring tape
- Labels
- Vacuum storage bags
- Anti-dust covers
- Drawer dividers
- Clear plastic bins
- Storage bags with handles
Start by measuring the available space under your bed, including height, width, and depth. If the clearance is insufficient, install bed risers to create additional space.
Sort items into categories based on frequency of use and season. Pack items in appropriately sized containers, using vacuum storage bags for soft items like clothing or bedding to maximize space. Position frequently accessed items near the foot or sides of the bed for easier reach, while seasonal items can be stored toward the headboard area.
Label all containers clearly on multiple sides for easy identification.
Maintaining an organized under-bed storage system requires periodic attention. Every three months, pull out containers to clean underneath, check for moisture or pests, and reassess stored items. Rotate seasonal items as needed and ensure storage containers remain in good condition.
Consider using clear containers for better visibility or maintaining an inventory list taped inside your closet door for quick reference.
Install Space-Saving Closet Systems
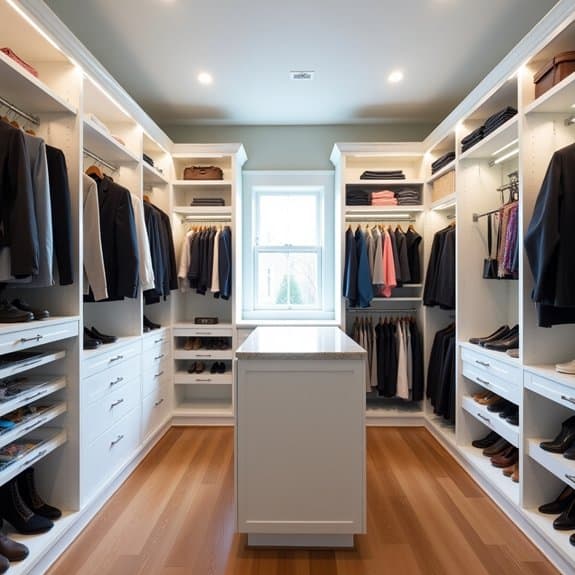
A well-organized closet system is crucial for maximizing storage in small spaces, turning chaotic cramped areas into efficient storage solutions. When properly installed, these systems can double or even triple your usable space while making items more accessible and visible.
Space-saving closet systems represent a significant upgrade from traditional rod-and-shelf setups, offering customizable combinations of hanging rods, drawers, shelves, and specialized storage components. This systematic approach to closet organization not only helps maintain order but also protects clothing and accessories while making daily routines more efficient.
Required Items:
- Measuring tape
- Level
- Drill and drill bits
- Screwdriver
- Wall anchors
- Stud finder
- Pencil
- Basic closet system kit
- Additional storage components
- Wire cutters
- Safety goggles
- Work gloves
Start by removing everything from your existing closet and taking precise measurements of the space, including height, width, and depth. Map out your storage needs by categorizing items and determining the ratio of hanging space to shelving and drawers needed.
Purchase a closet system that fits your space and storage requirements, ensuring it includes appropriate mounting hardware.
Install the main support track first, securing it to wall studs for maximum stability. Add vertical standards (the slotted pieces that hold shelves and rods) according to your planned configuration. Work systematically to attach shelves, rods, and additional components, checking level alignment at each step.
Consider installing double hanging rods where appropriate to maximize vertical space, and incorporate specialized organizers for shoes, accessories, or folded items based on your needs.
To maximize your new closet system’s effectiveness, implement zones for different types of items, using drawer organizers and bins to contain smaller pieces. Consider adding motion-sensor lights to improve visibility, and install hooks on empty wall spaces for additional hanging storage.
Regularly assess and adjust the configuration as your storage needs change, and maintain organization by immediately returning items to their designated spots after use.
Create Storage Nooks in Unexpected Places
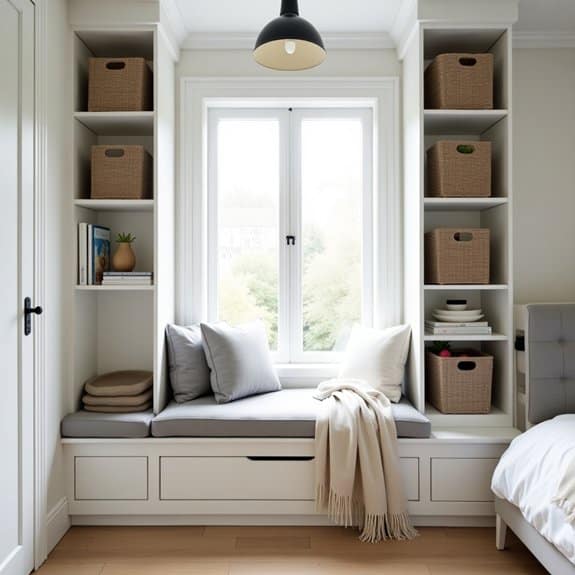
In small spaces, every square inch counts, and conventional storage solutions often aren’t enough to accommodate all our belongings. Creating storage nooks in unexpected places allows us to maximize space utilization while maintaining a clutter-free environment. These hidden storage spots can transform otherwise wasted spaces into functional storage areas.
Finding and utilizing these unconventional storage spaces not only helps declutter your room but also adds character to your living space. From under-stair storage to hollow ottoman spaces, these creative solutions can double or triple your storage capacity without compromising your room’s aesthetic appeal.
Required Items:
- Measuring tape
- Level
- Drill and screws
- Storage containers or baskets
- Floating shelves
- Command hooks
- Storage ottoman or bench
- Under-bed storage containers
- Door-mounted organizers
- Corner shelf units
Begin by surveying your room and identifying potential storage nooks. Look for spaces behind doors, corners, above windows, and under furniture. Measure these areas precisely to determine what type of storage solution will fit.
Install floating shelves in corners or above doorways, ensuring they’re properly secured to wall studs for safety. Transform dead space behind doors by mounting organizers or hooks for items like accessories, tools, or cleaning supplies.
Utilize the space under beds by adding storage containers on wheels for easy access. Consider replacing traditional furniture with storage alternatives, such as ottomans with hidden compartments or beds with built-in drawers.
For spaces between furniture pieces or in tight corners, install custom-cut shelving units or use modular storage systems that can be configured to fit unusual spaces. Remember to maintain visual harmony by using consistent storage containers or baskets that complement your room’s decor.
Additional Tips: Always consider weight limits when installing overhead storage, and ensure proper lighting in these nooks for easy access. Label contents clearly and rotate items seasonally to maintain organization.
Keep frequently used items in easily accessible nooks while storing rarely used items in harder-to-reach spaces. Regular assessment of these storage areas will help prevent them from becoming catch-all spaces for clutter.
Implement Door and Over-Door Organization
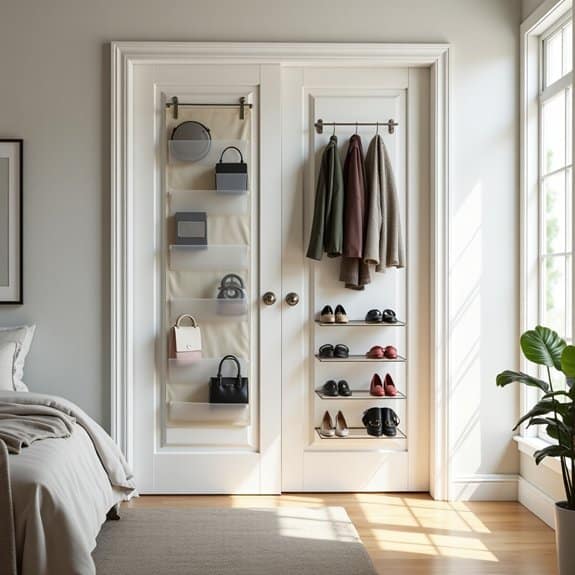
Maximizing door space is essential in small rooms where every square inch counts. Doors provide an often-overlooked vertical storage opportunity that can significantly increase your room’s storage capacity without consuming precious floor space.
Door and over-door organization systems transform this underutilized surface into valuable storage real estate. Whether it’s a bedroom, bathroom, or closet door, these solutions can hold everything from shoes and accessories to cleaning supplies and pantry items, keeping them accessible yet out of sight.
Required Items:
- Over-door hooks
- Over-door organizer with pockets
- Door-mounted rack system
- Command hooks or adhesive strips
- Tension rods
- S-hooks
- Measuring tape
- Level
- Screwdriver
- Wall anchors (if needed)
- Door-mounted mirror with storage
Start by measuring your door’s dimensions, including thickness, to ensure proper fit of organizers. Install an over-door hook system at the top of the door, ensuring it’s level and secure.
Add pocket organizers, positioning frequently used items at eye level. For heavier items, mount racks directly to the door using appropriate hardware and wall anchors. Consider installing a combination of different storage solutions – hang a mirror with storage on one side while utilizing pocket organizers on the other.
When organizing items, group similar things together and assign specific zones. Place everyday items in easily accessible pockets, while seasonal or less frequently used items can go in higher or lower compartments.
If using multiple organizing systems, ensure they don’t interfere with each other or prevent the door from closing properly. For optimal results, regularly assess and adjust your door organization system.
Consider weight distribution to prevent door strain, and use clear pockets or labels for easy identification. Avoid overloading organizers beyond their weight capacity, and periodically check that all mounting hardware remains secure.
Remember to account for door movement and ensure all items are properly secured to prevent shifting or falling when the door opens and closes.
Optimize Corner Spaces With Smart Solutions
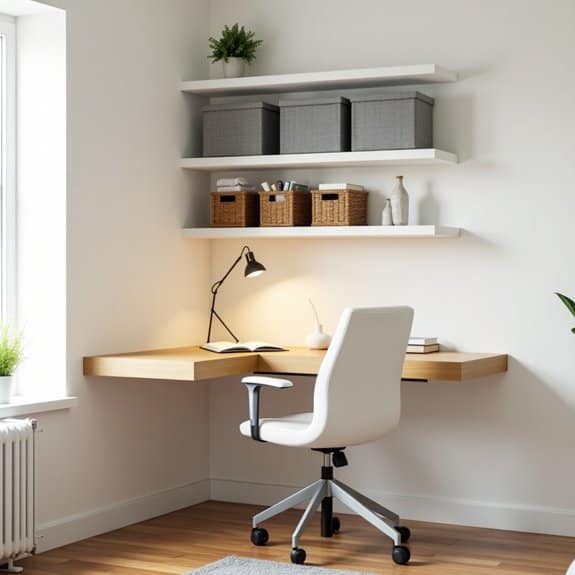
Corners are often the most underutilized spaces in small rooms, becoming catchalls for clutter or remaining completely empty. These forgotten angles actually represent valuable real estate that, when properly organized, can significantly increase a room’s storage capacity and functionality.
By implementing smart corner solutions, you can transform these overlooked spaces into efficient storage zones that work harmoniously with your room’s layout. Making the most of corner spaces requires thinking vertically as well as horizontally.
Corner spaces present unique opportunities for installing specialized storage systems, floating shelves, or multi-functional furniture that can maximize every inch while maintaining a clean, organized appearance. Strategic corner organization can create additional storage without making the room feel cramped or cluttered.
Required Items:
- Corner shelving units
- Floating corner shelves
- Corner desk (if applicable)
- L-shaped storage bench
- Corner cabinet
- Mounting hardware
- Level
- Measuring tape
- Pencil
- Drill
- Wall anchors
- Corner tension rods
Start by measuring your corner space carefully, including height, width, and depth measurements from both walls. Install corner shelving units starting from the bottom up, ensuring each shelf is properly secured with wall anchors.
For maximum efficiency, arrange items by frequency of use, with commonly accessed items at eye level and less-used items stored higher up or lower down. When positioning furniture or storage solutions, maintain a triangle of space in front of the corner installation for easy access.
Layer your storage by combining different elements – for example, a corner cabinet with floating shelves above it, or a corner desk with wall-mounted organizers overhead. Ensure all installations are secure and weight-bearing capacity is considered for each shelf or unit.
To maximize the effectiveness of your corner organization, use clear containers or baskets to group similar items together, and label everything clearly. Consider installing LED strip lighting under shelves or inside corner units to illuminate dark corners and make items easier to locate.
Regular maintenance of your corner organization system will help prevent clutter from accumulating and ensure the space remains functional and efficient.
Use Floating Shelves and Hidden Storage
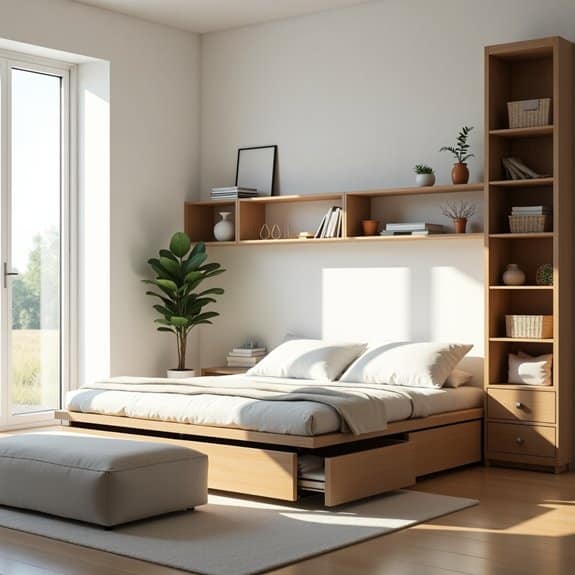
Maximizing vertical space in small rooms is crucial for maintaining an organized and clutter-free environment. Floating shelves provide elegant storage solutions without consuming precious floor space, while hidden storage compartments make use of often-overlooked areas in a room.
Strategic placement of floating shelves and concealed storage spaces can transform a cramped room into a functional living area. These organization methods not only create additional storage but also contribute to a cleaner aesthetic by keeping items off the floor and maintaining clear sight lines throughout the space.
Required Items:
- Floating shelves
- Wall anchors and mounting hardware
- Stud finder
- Level
- Drill and drill bits
- Measuring tape
- Pencil
- Storage containers or baskets
- Under-bed storage containers
- Ottoman with storage
- Behind-door organizers
Start by mapping out your wall space using a pencil and measuring tape, marking stud locations with a stud finder. Install floating shelves at varying heights, ensuring proper weight distribution and considering the items you’ll store.
Place frequently used items at eye level and less-used items higher up. Create zones on the shelves based on usage patterns – daily items, decorative pieces, and storage boxes.
For hidden storage, utilize spaces under furniture and behind doors. Install under-bed storage containers on wheels for easy access. Choose furniture pieces with built-in storage, such as ottomans with removable tops or beds with drawer systems.
Maximize corner spaces with corner-specific floating shelves and use behind-door organizers for additional vertical storage.
To maintain organization longevity, implement a rotation system for seasonal items and regularly assess stored items for continued relevance. Use clear containers or labels to easily identify contents, and maintain a consistent organizational system across all storage spaces.
Consider installing LED strip lighting under floating shelves to illuminate stored items and create ambient lighting, making the room feel larger while maintaining functionality.
Declutter With the One-In-One-Out Rule
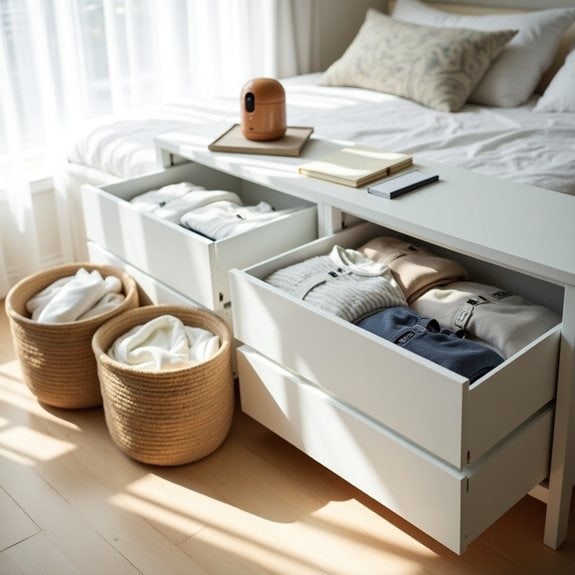
Maintaining an organized small space requires consistent effort and a systematic approach to preventing clutter accumulation. The one-in-one-out rule serves as a fundamental principle for maintaining order, ensuring that your space remains manageable and functional throughout the year.
This organizational method creates a sustainable cycle of possession management by requiring the removal of an existing item whenever a new one enters your space. This practice not only prevents overcrowding but also encourages mindful purchasing habits and regular evaluation of your belongings’ usefulness.
Tools Needed:
- Donation box or bag
- Trash bags
- Labels or marker
- Storage containers
- Inventory list
- Calendar or reminder system
- Measuring tape
- Storage bins for sorting
The one-in-one-out rule implementation begins with a comprehensive inventory of your current possessions, categorized by type (clothing, books, electronics, etc.). When acquiring a new item, immediately identify its corresponding category and select an existing item for removal. The removed item should be either donated, sold, or discarded, depending on its condition.
Create a designated space for outgoing items and process them weekly to maintain the system’s effectiveness.
For successful long-term implementation, establish a tracking system. Keep a simple log of items entering and leaving your space, noting dates and categories. This creates accountability and helps identify patterns in consumption.
Consider setting specific days each month for processing outgoing items to prevent them from accumulating in your temporary storage area.
Additional Success Tips: Create category-specific guidelines for what constitutes a replacement item to avoid loopholes in the system. For example, a new winter coat should replace an existing coat rather than a t-shirt.
Regularly reassess your needs and adjust the rules accordingly, particularly during seasonal changes or lifestyle transitions. Remember that digital items, such as apps or files, can also follow this rule to maintain organized electronic spaces.
Invest in Bedside Storage Alternatives
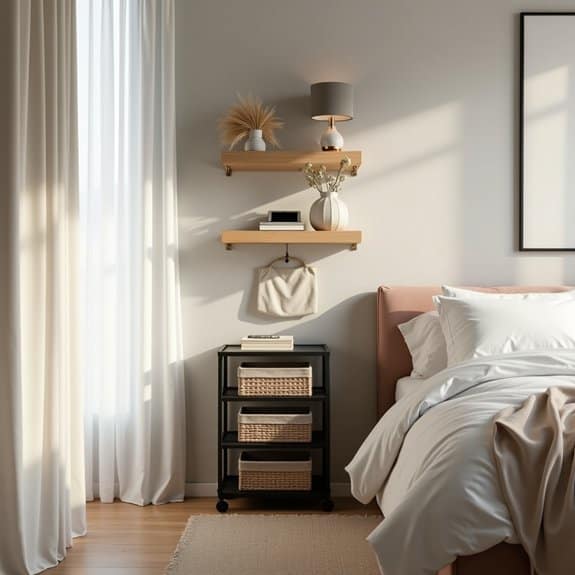
A well-organized bedside area is crucial for maintaining a clutter-free bedroom and ensuring essential items remain within arm’s reach. Proper bedside storage can transform a cramped sleeping space into a functional sanctuary, eliminating the need for bulky traditional nightstands that consume valuable floor space.
Maximizing bedside storage through alternative solutions not only helps maintain order but also contributes to a more peaceful sleeping environment. Creative storage options can accommodate everything from books and electronics to personal items and medications while maintaining a minimal footprint in your small room.
Required Items:
- Floating shelves
- Bedside caddy or pocket organizer
- Command hooks or mounting hardware
- Storage baskets or containers
- Bed risers (optional)
- Over-the-bed shelf unit (optional)
- Narrow rolling cart (optional)
- Wall-mounted magazine rack
- Cable management clips
Begin by assessing your bedside needs and available wall space. Install floating shelves at an appropriate height, ensuring they’re secure and level. For items requiring frequent access, attach a bedside caddy to your mattress or bed frame, utilizing the vertical space between your bed and wall.
If using a rolling cart, position it flush against the wall and organize items by frequency of use, with daily essentials on the top tier. Create designated zones within your storage solutions: one area for electronics and charging stations, another for reading materials, and a third for personal items like glasses or medications.
Use small containers or baskets to keep loose items contained and organized. If opting for bed risers, utilize the created under-bed space for larger items in flat storage containers. To maintain organization and maximize these storage alternatives, regularly assess and purge unnecessary items.
Keep charging cables tidy with cable management clips, and rotate stored items seasonally. Consider using drawer organizers or small boxes within your storage solutions to prevent smaller items from becoming jumbled, and always maintain a clear path around your bed for safety and accessibility.

