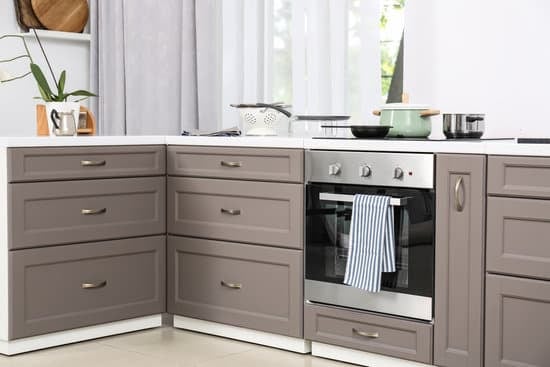
Are you looking to give your kitchen cabinets a fresh new look? Painting them can be a cost-effective and transformative solution. But before you dive in, it’s important to know how long the process will take. In this article, we’ll guide you through the steps of preparing your cabinets, choosing the right paint and supplies, and provide you with a step-by-step guide for painting your kitchen cabinets. We’ll also discuss drying and curing times, as well as share some tips for a successful cabinet painting project.
Preparing Your Cabinets for Painting
It doesn’t take long to prepare your cabinets for painting. Start by cleaning your cabinets thoroughly to remove any dirt, grease, or dust that may prevent the paint from adhering properly. Use a gentle cleaner and a soft cloth to avoid damaging the surface. Make sure to pay extra attention to areas around the handles and knobs where grease tends to build up.
Next, remove all hardware from your cabinets. This includes handles, knobs, hinges, and any other removable parts. Carefully unscrew them using a screwdriver or a drill if necessary. Keep all the screws in a safe place so you don’t lose them.
By taking these simple steps before painting, you ensure proper adhesion of the paint and achieve better results. It may seem like an extra step, but it’s crucial for a successful cabinet painting project. Safety first!
Choosing the Right Paint and Supplies
To choose the right paint and supplies for your kitchen cabinets, you’ll need to consider various factors. Here are four important things to keep in mind:
- Choosing the right brushes and rollers: Opt for high-quality brushes with nylon or polyester bristles that can handle the thickness of paint. Look for rollers made specifically for smooth surfaces like cabinets to ensure an even application.
- Testing paint colors: Before committing to a color, it’s essential to test it on a small area of your cabinet. This will help you see how the color looks in different lighting conditions and against other elements in your kitchen.
- Safety first: When selecting paint, opt for low or no VOC (volatile organic compounds) options. These paints emit fewer harmful fumes, making them safer for you and your family while painting in an enclosed space like a kitchen.
- Don’t forget the primer: Using a high-quality primer designed for cabinets is crucial as it helps create a smooth surface, improves adhesion, and enhances durability.
By considering these factors when choosing your paint and supplies, you’ll be on your way to achieving beautifully painted kitchen cabinets that are both safe and visually appealing.
Step-by-Step Guide to Painting Your Kitchen Cabinets
Start by preparing your kitchen cabinets for painting. Before you begin, make sure to remove all cabinet hardware such as handles and hinges. This will allow for a smoother painting process and prevent any accidental paint spots on your hardware. Next, clean the cabinets thoroughly with a mild detergent to remove any grease or grime that may affect the paint’s adhesion. Once the cabinets are clean and dry, it’s time to apply your chosen painting technique. Whether you decide to use a brush, roller, or sprayer, be sure to apply thin coats of paint and allow each coat to dry completely before applying the next one. This will ensure a professional-looking finish and prevent any drips or streaks. Finally, once the cabinets are fully painted and dried, reattach the cabinet hardware for a polished look.
Drying and Curing Times
Once the cabinets are fully painted and dried, you’ll need to wait for them to cure before using them. Proper drying and curing times are essential for a durable finish that will stand up to everyday use in your kitchen. Here are some important tips to ensure the best results:
- Allow the cabinets to dry for at least 24 hours before handling or applying any additional coats of paint.
- Optimize drying time by using proper ventilation, such as opening windows or using fans, to help circulate air and remove moisture.
- Avoid rushing the process by using drying techniques like setting up a dehumidifier in the room or placing a space heater nearby (following safety precautions).
- Apply thin coats of paint instead of thick ones, as this allows for faster drying and better adhesion.
- Consider using quick-drying paint products specifically designed for cabinets.
By following these drying techniques and paint application methods, you can ensure that your kitchen cabinets will be properly cured and ready for use in no time while maintaining a safe environment throughout the process.
Tips for a Successful Cabinet Painting Project
For a successful cabinet painting project, make sure you properly prepare the surfaces and choose the right paint and equipment. This will ensure that your kitchen cabinets look fresh and beautiful for years to come. When it comes to cabinet color options, consider choosing a shade that complements your kitchen decor and personal style. Whether you prefer classic white or bold and vibrant hues, there are endless possibilities to transform your cabinets into a focal point of the room.
To avoid common painting mistakes, take your time with each step of the process. Clean the cabinets thoroughly to remove any grease or grime before applying the paint. Prime them to create a smooth surface for better adhesion. Use high-quality brushes or rollers to achieve an even finish. Remember to apply thin coats of paint instead of thick ones, allowing proper drying time between each coat. Lastly, protect your work area by covering floors and countertops with drop cloths or plastic sheets.
By following these tips, you can confidently tackle your cabinet painting project while ensuring safety and achieving professional-looking results.
Conclusion
So, how long does it take to paint your kitchen cabinets? Well, it may vary depending on the size of your kitchen and the complexity of your cabinets. On average, though, you can expect the process to take a few days. Preparing the cabinets and choosing the right supplies is crucial for a successful project. Following a step-by-step guide and allowing enough drying and curing time will ensure professional-looking results. With patience and attention to detail, you’ll have beautifully painted kitchen cabinets in no time!

