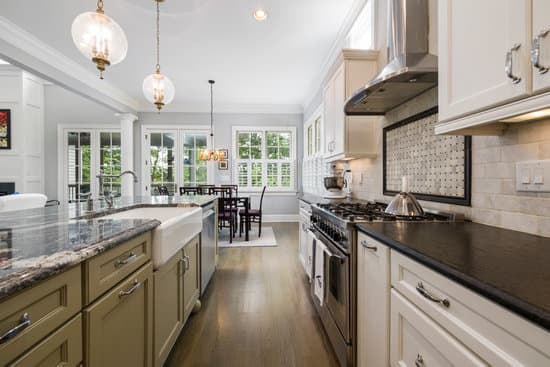
Are you struggling with limited storage space in your small kitchen? Don’t worry, we’ve got you covered! In this article, we’ll guide you through the process of adding a pantry to your compact kitchen. By assessing your space and needs, choosing the right pantry design, maximizing vertical storage, organizing efficiently, and incorporating styling tips, you’ll be able to create a functional and safe pantry that fits perfectly into your small kitchen. Say goodbye to clutter and hello to a well-organized space!
Assessing Your Space and Needs
When adding a pantry to a small kitchen, it’s important to assess your space and needs. Start by evaluating options for where the pantry could go. Look for unused areas such as corners or walls that can be utilized effectively. Consider installing shelves or cabinets to optimize the available space. Safety is paramount, so make sure the pantry doesn’t obstruct walkways or create hazards. Keep in mind that you want easy access to your food items without tripping over things or knocking them off shelves. Also, consider how much storage you require based on your cooking habits and family size. Think about whether you need additional shelving for canned goods, spices, or larger appliances like blenders or mixers. By carefully assessing your space and needs, you can create a functional and safe pantry in your small kitchen.
Choosing the Right Pantry Design
To make the most of your limited space, consider selecting a pantry design that maximizes storage options. Pantry organization is crucial in a small kitchen to ensure everything has its place and can be easily accessed. Look for a pantry design that includes adjustable shelves or pull-out drawers to accommodate different sizes of items and maximize vertical space. This will allow you to store more items without taking up valuable counter or floor space. Additionally, consider using door-mounted racks or organizers to utilize the inside of the pantry door for additional storage. Pantry storage should prioritize safety, so opt for designs that have secure closures to prevent items from falling out and causing accidents. With the right pantry design, you can achieve efficient organization and maximize your small kitchen’s storage capabilities.
Maximizing Vertical Storage
Consider selecting a pantry design that includes adjustable shelves or pull-out drawers to maximize vertical space and achieve efficient organization in your limited kitchen area. Utilizing wall space is crucial when adding a pantry to a small kitchen. Install floating shelves or wall-mounted racks to take advantage of this unused area. These creative shelving ideas will not only provide extra storage but also add a stylish touch to your kitchen decor.
When installing any type of shelving, make sure it is securely mounted to the wall studs for safety purposes. Use heavy-duty anchors or brackets if needed. Additionally, be mindful of weight distribution when placing items on the shelves to prevent overloading and potential accidents.
To further optimize vertical storage, consider installing hooks or magnetic strips on the inside of cabinet doors or along the walls. This allows you to hang utensils, measuring cups, and other frequently used items within easy reach while keeping them neatly organized.
By utilizing every inch of available wall space and incorporating creative shelving ideas, you can efficiently maximize vertical storage in your small kitchen pantry while maintaining a safe environment.
Organizing Your Pantry
One way to efficiently organize your pantry is by utilizing adjustable shelves or pull-out drawers. These storage solutions allow you to maximize the space in your small kitchen while keeping everything easily accessible and organized. When it comes to pantry organization, safety should be a top priority. Make sure to properly secure any shelves or drawers to prevent accidents and ensure stability. Additionally, consider using clear containers for storing dry goods like pasta, rice, and snacks. This not only keeps them fresh but also allows you to quickly see what you have on hand. Utilize labeled bins or baskets for grouping similar items together, making it easier to find what you need without rummaging through cluttered shelves. By implementing these pantry storage ideas, you can create a functional and safe space in your small kitchen.
Styling and Decorative Tips for Small Kitchens
Make your limited space feel more inviting and stylish by incorporating vibrant colors, hanging decorative artwork, and using open shelving to display your favorite kitchen accessories. When it comes to small kitchens, finding the right storage solutions is essential. Look for space-saving ideas that maximize every inch of your pantry. Install adjustable shelves or use stackable containers to make the most of vertical space. Utilize the back of cabinet doors by adding hooks or racks for hanging utensils or pot holders. Consider investing in magnetic strips to keep frequently used knives within reach but out of the way. Another clever trick is to use clear storage bins with labels so you can easily see what’s inside without rummaging through everything. By implementing these creative ideas, you can transform your small kitchen into a functional and visually appealing space.
Conclusion
Now that you have learned how to add a pantry to your small kitchen, it’s time to put your knowledge into action. Assess your space and needs, choose the right pantry design, and maximize vertical storage. Once you have your pantry set up, don’t forget to organize it efficiently and add some stylish decor. With these tips, you can make the most of your small kitchen and create a functional pantry that suits your needs. Happy organizing!

