Are you tired of dealing with a cluttered and disorganized closet? If so, it’s time to take matters into your own hands and create a functional and efficient storage space. In this article, we will guide you through the process of making a closet that suits your needs while ensuring safety every step of the way. From assessing your space to building the frame and adding shelves, you’ll learn all the necessary steps to transform your messy closet into an organized haven. Let’s get started!
Assessing Your Space and Needs
Assessing your space and needs is crucial before starting to make a closet. It’s important to maximize the available space while organizing your clothes in a way that ensures safety. Begin by measuring the dimensions of your space, taking note of any obstacles like windows or doors. This will help you determine the size and layout of your closet. Consider what types of clothing you have and how much storage you require, as this will influence the design choices you make. Think about incorporating shelves, hanging rods, and drawers to accommodate different items. Additionally, assess if you need additional features such as shoe racks or accessories organizers. By carefully evaluating your space and needs, you can create a functional and safe closet that efficiently maximizes every inch available for storing your clothes.
Designing Your Closet Layout
When designing your closet layout, you’ll want to consider the different areas for storage and organization. To maximize storage and make the most of your space, here are a few key points to keep in mind:
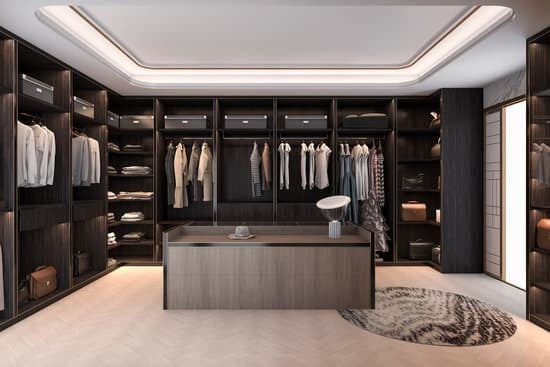
- Utilize hanging rods: Install multiple hanging rods at different heights to accommodate various lengths of clothing.
- Add shelves and drawers: Incorporate shelves and drawers to store folded clothes, accessories, or shoes neatly.
- Use hooks and racks: Install hooks on the walls or doors for hanging belts, scarves, or hats. Racks can be useful for organizing handbags or ties.
- Include a shoe rack: A designated shoe rack will help keep your footwear organized and prevent tripping hazards.
By choosing closet organization solutions that cater to your specific needs, you can create a functional space that maximizes storage while ensuring safety in your closet.
Gathering Materials and Tools
To gather the materials and tools you’ll need, start by creating a list of necessary items and head to your local hardware store. Safety should always be a top priority when working on any project, so make sure to choose the right materials for your closet. Opt for sturdy wood or metal shelves that can support the weight of your clothes and accessories. Additionally, select durable brackets and screws to secure everything in place. When it comes to tools, you’ll want a measuring tape to determine the dimensions of your space accurately. A level will help ensure that everything is straight and even. Don’t forget about a power drill for making holes and installing screws. Lastly, have a safety goggles and gloves handy to protect yourself during construction.
Building the Closet Frame
Once you have gathered all the necessary materials and tools, you can begin building the frame for your closet. Safety should always be a priority when working on any construction project. Here are some steps to follow:
- Measure the dimensions of your closet space accurately. This will ensure that your frame fits perfectly.
- Cut the pieces of lumber according to your measurements using a saw. Make sure to wear safety goggles and gloves while cutting.
- Assemble the frame by attaching the cut pieces together using screws or nails. Use a drill or hammer for this step.
- Install hanging rods inside the frame. These rods will provide space for hanging clothes and keeping them organized.
Remember to double-check all measurements before cutting and assembling to avoid any mistakes. By following these steps, you will be able to build a sturdy closet frame that meets your storage needs while ensuring safety throughout the process.
Adding Shelves and Storage Components
After assembling the frame, you can start adding shelves and storage components to maximize organization in your closet. This step is crucial for maximizing space and ensuring that everything has its place. Begin by installing adjustable shelves, as they allow you to customize the height according to your needs. These shelves are perfect for storing folded clothes, shoes, or bins filled with accessories. To further optimize space, consider incorporating storage components such as hanging organizers or drawer units. Hanging organizers are great for keeping scarves, belts, and ties neatly hung up while drawer units provide a convenient spot for smaller items like jewelry or socks. Remember to secure all shelves and components properly to ensure safety while using the closet daily. With these organizational tools in place, your closet will become a haven of tidiness and efficiency.
Conclusion
So there you have it! Now that you’ve assessed your space and needs, designed your closet layout, gathered materials and tools, built the closet frame, and added shelves and storage components, you are well on your way to creating a functional and organized closet. By following these steps, you can customize your closet to fit your specific needs and maximize storage space. Don’t forget to add any finishing touches or decorations to make it truly yours. Enjoy your newly built closet!


