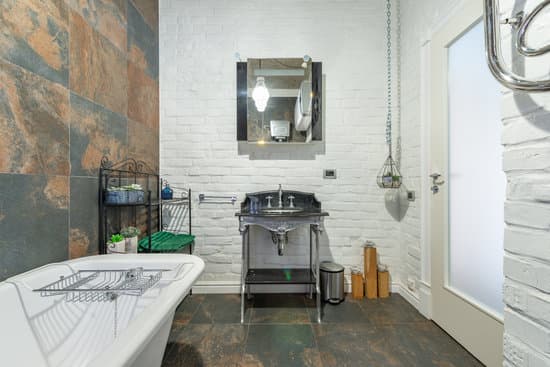
Are you tired of staring at cracked and discolored grout in your bathroom tiles? Don’t worry, because we’ve got you covered! In this article, we will guide you through the step-by-step process of fixing grout in your bathroom tiles. With just a few simple tools and materials, you can restore the beauty and functionality of your bathroom in no time. Get ready to roll up your sleeves and give your bathroom a much-needed makeover!
Assessing the Grout Damage
Now you’ll want to take a closer look at the grout damage in your bathroom tile. Evaluating the extent of the damage is crucial before starting any repairs. Begin by examining each tile carefully, checking for cracks, chipping, or missing grout lines. Pay close attention to areas that are exposed to moisture, like around the shower or near the sink. If you notice extensive damage or widespread discoloration, it may be necessary to remove and replace all the grout in that section.
Before you can proceed with fixing the grout, you need to prepare the surface properly. Start by cleaning the tiles thoroughly using a mild detergent and warm water solution. Scrub away any dirt, mold, or mildew that may have accumulated in between the tiles. Rinse well and allow it to dry completely before moving forward with any repairs.
By assessing and preparing the grout damage appropriately, you will ensure a successful outcome when fixing your bathroom tile’s grout.
Gathering the Necessary Tools and Materials
First, you’ll need to gather all the required tools and materials. Safety is a top priority when working with grout in your bathroom tile. Start by choosing the right grout color that matches your existing tiles or complements the overall look of your bathroom. This will ensure a seamless finish and enhance the aesthetic appeal of your space. Additionally, it’s important to follow proper grout sealing techniques to prevent future damage and maintain the longevity of your bathroom tiles. Make sure to have a grout float, sponge, bucket, and an old towel handy for the application process. Remember to wear safety goggles and gloves to protect yourself from any potential hazards while working with grout. By gathering these necessary tools and materials, you’ll be well-prepared for fixing the grout in your bathroom tile safely and effectively.
Removing the Old Grout
To begin the process, it’s essential to carefully remove the outdated grout from your bathroom tiles. Here are some grout removal techniques to ensure a safe and effective process:
- Start by wearing protective gear such as gloves and safety goggles to prevent any injuries.
- Use a grout saw or a multi-tool with a grout removal attachment to carefully scrape away the old grout. Be sure to work in small sections at a time.
- Apply gentle pressure and keep the tool at an angle to avoid damaging the surrounding tiles.
- Once you have removed the majority of the grout, use a vacuum cleaner or a damp cloth to clean up any debris left behind.
Preventing future grout damage is also crucial. Consider sealing your newly applied grout regularly to protect it against moisture and stains. Additionally, make sure to maintain proper ventilation in your bathroom and promptly address any leaks or water damage.
By following these steps, you can successfully remove old grout while ensuring safety and preventing future damage.
Applying the New Grout
Once you have finished removing the old grout, it’s time to apply the new grout to your bathroom tiles. Before you begin, consider the different grout color options available. Choosing a color that matches or complements your tiles will give your bathroom a cohesive and polished look.
To start applying the new grout, make sure the tile surface is clean and dry. Mix the grout according to the manufacturer’s instructions, ensuring that it has a smooth consistency. Using a rubber float, spread the grout over the tiles at a 45-degree angle, pressing it into all of the gaps between them. Work in small sections to prevent the grout from drying too quickly.
Once you have applied all of the new grout, let it sit for about 10-15 minutes before wiping away any excess with a damp sponge. Afterward, allow it to cure for at least 24 hours before applying a grout sealer to protect against stains and moisture damage.
By following these steps and taking proper safety precautions, you can achieve beautiful and long-lasting results when applying new grout to your bathroom tiles.
Finishing Touches and Maintenance Tips
To keep your newly grouted tiles looking their best, regularly clean them with a mild detergent and warm water. This simple maintenance routine will help prevent dirt and grime from building up and discoloring the grout. When choosing the right grout color, consider one that complements your bathroom tiles and enhances the overall aesthetic. Darker colors tend to hide stains better, while lighter colors can brighten up the space. To further protect your grout from future damage, apply a high-quality grout sealer after it has fully cured. This will create a protective barrier against moisture and stains. Additionally, avoid using harsh chemicals or abrasive cleaners that could erode the grout over time. By following these tips, you can ensure that your bathroom tiles remain beautiful and intact for years to come.
Conclusion
In conclusion, fixing the grout in your bathroom tile is a doable task that can help restore the beauty and functionality of your tiles. By following the steps outlined in this article, you can assess the damage, gather the necessary tools and materials, remove the old grout, apply new grout, and add finishing touches. Remember to maintain your newly repaired grout by regularly cleaning it and sealing it as needed. With a little effort and know-how, your bathroom tiles will be looking brand new again in no time.


