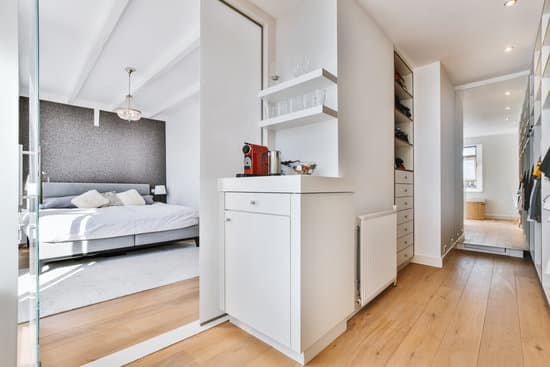
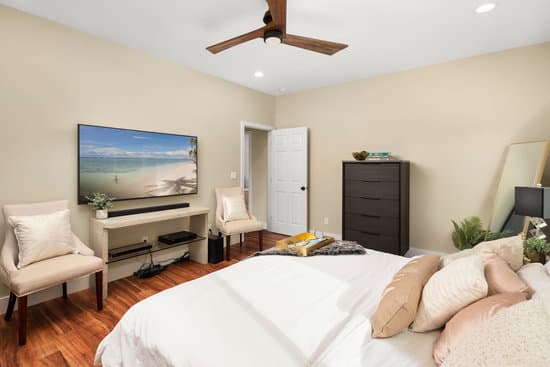
Are you in need of extra living space but don’t want to go through the hassle of an addition? Converting your garage into a bedroom might be the perfect solution. In this article, we will guide you through the step-by-step process of transforming your garage into a cozy and safe bedroom. From assessing feasibility and obtaining permits, to designing the layout and adding finishing touches, you’ll have all the information you need to create a functional and inviting space for yourself or guests.
Assessing Feasibility and Planning
Converting a garage into a bedroom requires assessing if it’s feasible and planning accordingly. Before diving into this project, it is essential to consider budget considerations and safety factors. Firstly, determine your budget to ensure that you can cover the costs of the conversion process, such as insulation, flooring, and wall finishes. Additionally, evaluate the existing electrical wiring in the garage. It is crucial to have a professional inspect and upgrade the electrical system if needed for safety purposes. This will ensure that your new bedroom meets all necessary electrical codes and regulations. Safety should always be a top priority when converting any space into a livable area, so investing in proper electrical work is essential for peace of mind.
Dealing with Permits and Regulations
When transforming an existing garage space, it’s important to consider the necessary permits and regulations. Understanding zoning requirements and navigating building codes are crucial steps in converting a garage into a bedroom. Before starting any work, you should research your local zoning laws to ensure that residential use is allowed in your area. Some neighborhoods may have restrictions or regulations that prohibit this type of conversion. Additionally, you need to comply with building codes to ensure the safety and structural integrity of the new bedroom. This includes proper insulation, ventilation, electrical wiring, and fire safety measures. Obtaining permits from your local building department is essential to avoid fines or legal issues down the line. Remember, following these regulations will not only keep you safe but also maintain the value of your property.
Designing the Bedroom Layout
To ensure a functional living space, it’s important to carefully plan the layout of the transformed area. Start by considering furniture placement. Measure the dimensions of the room and take into account any architectural features, such as windows or doors, that may affect where you can place furniture. Think about how you want to use the space – will it primarily be a bedroom or will it also serve as a multipurpose area? This will help determine what type of furniture you need and where to position it for optimal functionality.
Next, focus on lighting design. Adequate lighting is essential for both safety and ambiance. Consider installing a combination of overhead lights, task lighting (such as bedside lamps), and accent lighting (like wall sconces). Make sure there are light switches conveniently located near entrances/exits, including one near the bed for easy access during nighttime.
By carefully planning furniture placement and incorporating proper lighting design, you can create a comfortable and safe bedroom from your garage conversion project.
Insulating and Weatherproofing the Space
Insulate and weatherproof your space to ensure it remains comfortable and protected from the elements. When converting a garage into a bedroom, it’s crucial to consider insulation techniques and weatherproofing materials to guarantee safety and comfort. Proper insulation will help regulate temperature, preventing heat loss during winter and heat gain during summer. Consider insulating the walls, ceiling, and even the floor with materials like foam board insulation or fiberglass batts. Additionally, weatherproofing materials such as caulk or weatherstripping can be applied around windows, doors, and any other gaps to keep out drafts and moisture. This not only improves energy efficiency but also prevents water damage or mold growth. By investing in these measures, you can create a cozy bedroom that protects you from external elements while ensuring peace of mind.
Adding Finishing Touches and Decor
Adding finishing touches and decor will help create a cozy and inviting atmosphere in your newly transformed space. When choosing furniture for your garage-turned-bedroom, opt for pieces that are both functional and comfortable. Look for sturdy bed frames, dressers with ample storage, and chairs or sofas that provide relaxation. Safety is paramount, so ensure that any furniture you choose meets the necessary safety standards.
Selecting a color scheme is an important step in creating the desired ambiance. Consider using neutral tones like soft grays or warm beige to create a calming effect. Adding pops of color through accessories such as pillows, curtains, or artwork can bring life to the room without overwhelming it. Remember to choose materials that are easy to clean and maintain to avoid any potential hazards or allergy triggers.
By carefully selecting furniture and colors, you can transform your garage into a comfortable and safe bedroom that reflects your personal style while maintaining a cozy environment.
Conclusion
In conclusion, converting a garage into a bedroom can be a rewarding project that adds value to your home. By assessing feasibility and planning ahead, obtaining necessary permits, and carefully designing the layout, you can create a comfortable and functional space. Don’t forget to insulate and weatherproof the area for optimal comfort. Finally, adding finishing touches and decor will create a cozy atmosphere that will make your new bedroom feel like a seamless addition to your home. Enjoy your transformed space!

