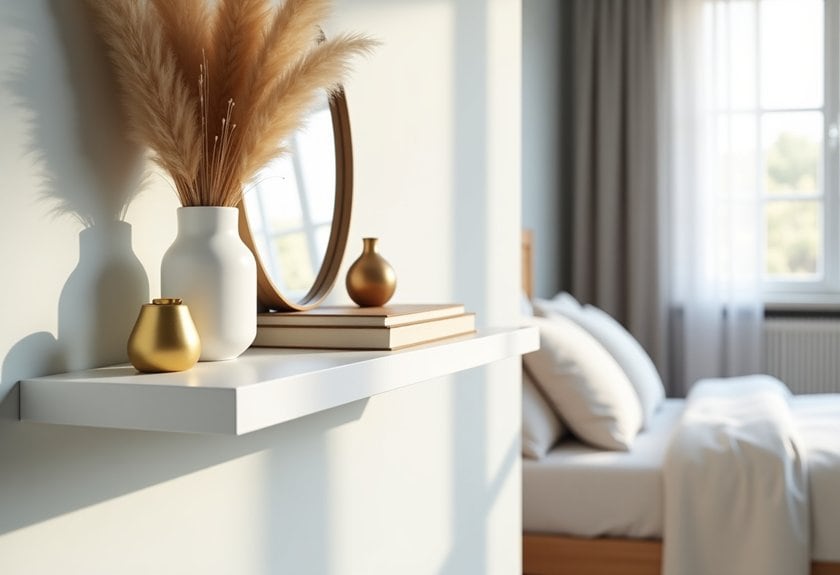
You’re about to discover how transforming your bedroom’s storage can completely change your space! As someone who’s tested countless shelf configurations in my own room, I can tell you that the right organization system does more than just store your stuff – it creates a personalized sanctuary. From color-coordinated book displays that pop to clever hidden storage that maximizes every inch, these 15 trending ideas will help you turn cluttered corners into Instagram-worthy vignettes. Let’s start with my absolute favorite approach…
Color-Coded Book Arrangements
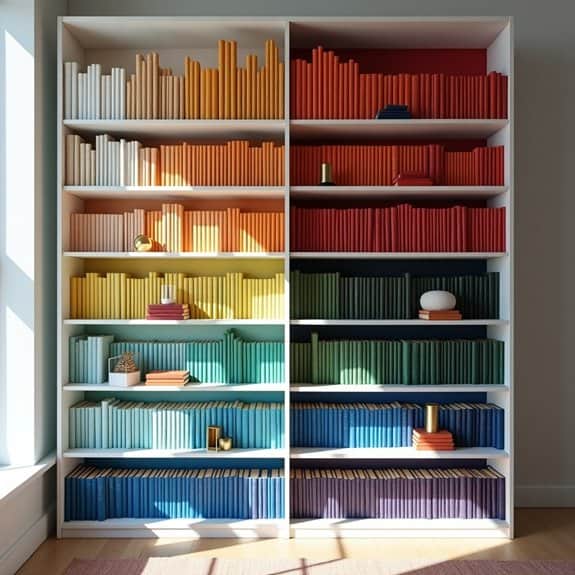
Color-coding books creates a visually striking display that transforms ordinary bookshelves into artistic focal points within a bedroom. Beyond aesthetics, this organization method makes finding specific books easier and maintains a cohesive look that can complement existing room decor.
This systematic approach to book organization reduces time spent searching for titles while creating a natural flow that’s pleasing to the eye. Whether working with a small collection or an extensive library, color-coding brings order to chaos and can make a powerful design statement in any bedroom space.
Required Items:
- Books
- Clean cloth for dusting
- Step stool or ladder
- Bookends
- Measuring tape
- Post-it notes or temporary labels
- Storage boxes for overflow
Sort all books by dominant spine color, starting with white and moving through the rainbow spectrum (red, orange, yellow, green, blue, purple), ending with brown and black. Remove dust jackets to reveal true spine colors if desired. Create color groupings on the floor first to visualize the arrangement.
Position books vertically, arranging shades within each color group from lightest to darkest. Consider height variations within color blocks to create visual interest while maintaining stability. For multi-colored books, choose the predominant color or create a separate mixed-color section.
For optimal functionality and style, place the most visually appealing color combinations at eye level. Keep proper book care in mind by not overcrowding shelves and using bookends to prevent volumes from tilting. Consider incorporating white space between color blocks to create distinct sections and prevent visual overwhelm.
Additional Tip: Photograph your final arrangement for reference when reshelving books after use. Keep a small staging area for new acquisitions until you have time to properly integrate them into the color scheme. For books that don’t fit the desired aesthetic, consider storing them elsewhere or using decorative covers that match your color scheme while maintaining alphabetical order within each color group for easy location.
Floating Corner Shelf Systems
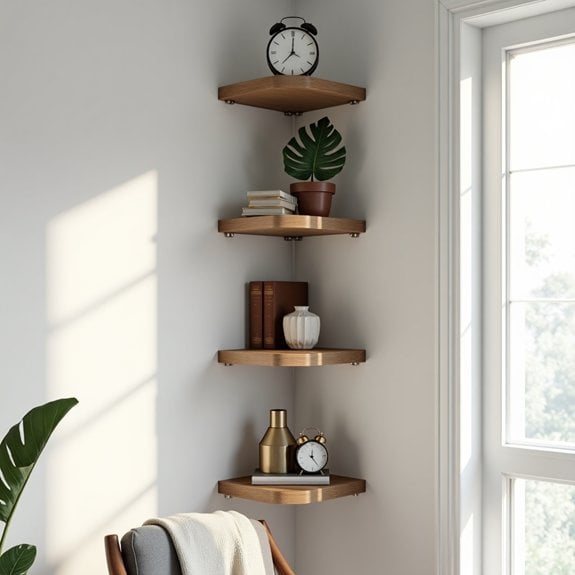
Corner spaces in bedrooms often go underutilized, making floating corner shelf systems an elegant solution for maximizing storage while maintaining a clean, modern aesthetic. These systems can transform dead space into functional storage areas that complement your bedroom’s design while providing valuable real estate for books, décor, and personal items.
When properly organized, floating corner shelves create visual interest and depth in your bedroom while keeping essential items within arm’s reach. The key to successful corner shelf organization lies in strategic placement and thoughtful arrangement of items, ensuring both functionality and visual appeal.
Required Items:
- Level
- Measuring tape
- Pencil
- Wall anchors
- Screwdriver
- Floating corner shelves
- Storage baskets or containers
- Decorative bookends
- Cleaning supplies
- Step ladder or sturdy chair
Start by measuring your corner space and installing the floating shelves according to manufacturer specifications, ensuring they’re level and secure. Place heavier items on lower shelves for stability, and arrange books, decorative pieces, and personal items in descending order of size from bottom to top.
Group similar items together, using attractive containers or baskets to corral smaller objects and maintain a cohesive look. Create deliberate spaces between items to prevent a cluttered appearance and allow each piece room to breathe.
For optimal organization, designate specific shelves for different purposes – perhaps the lower shelves for books and storage containers, middle shelves for frequently accessed items, and upper shelves for decorative pieces.
Consider the visual weight of items when arranging them, balancing larger pieces with smaller ones to maintain aesthetic harmony.
Additional Tips: Regularly dust and reorganize your corner shelf system to prevent clutter accumulation. Rotate decorative items seasonally to keep the display fresh and interesting.
When styling shelves, follow the rule of thirds by creating visual triangles with your arrangements, and incorporate different heights and textures to add depth and interest to your display. Consider using LED strip lighting under shelves to add ambiance and highlight displayed items.
Plant-Focused Display Shelving
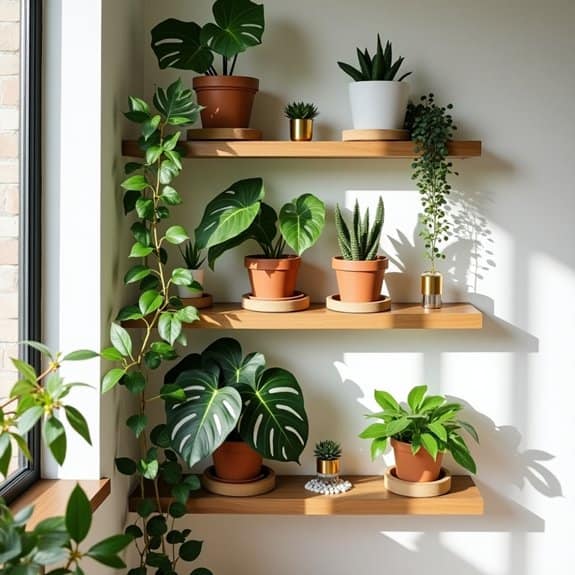
Creating a dedicated plant display area in your bedroom transforms the space into a calming sanctuary while maximizing the benefits of indoor plants. Properly organized plant shelving not only showcases your botanical collection but also ensures optimal growing conditions and creates a natural focal point in the room.
Strategic plant shelf organization considers factors like light exposure, humidity levels, and plant sizes while maintaining visual appeal. A well-planned plant display helps prevent overcrowding, allows for proper air circulation, and makes plant care routines more manageable while adding a sophisticated design element to your bedroom.
Required Items:
- Sturdy wall-mounted shelves or freestanding shelf unit
- Plant drainage trays or saucers
- Moisture-resistant shelf liners
- Plant stands of varying heights
- Grow lights (if needed)
- Plant misting bottle
- Small watering can
- Plant care tools
- Decorative rocks or pebbles
- Plant labels or markers
Begin by assessing the natural light in your bedroom and selecting a location that provides appropriate lighting for your plants. Install shelving units ensuring they can support the weight of potted plants and leaving adequate space between shelves for plant growth.
Group plants according to their light and water requirements, placing sun-loving varieties on upper shelves closer to windows and shade-tolerant species on lower shelves. Arrange plants in varying heights and textures, using plant stands or risers to create visual interest and ensure smaller plants receive sufficient light.
Position larger plants at the ends of shelves or on lower levels for stability, and incorporate trailing plants to soften shelf edges. Place moisture-loving plants together to maintain consistent humidity levels, using pebble trays filled with water if needed. Ensure all pots have proper drainage and corresponding saucers to protect shelving surfaces.
Additional Tips: Rotate plants quarterly to encourage even growth and prevent overcrowding. Include easy access paths for regular maintenance and watering. Consider using decorative elements like small sculptures or crystals between plant groupings to enhance visual appeal without overwhelming the display.
Monitor shelf stability regularly, especially as plants grow and become heavier, and adjust shelf positioning seasonally to accommodate changing natural light patterns.
Mixed Media Storage Solutions
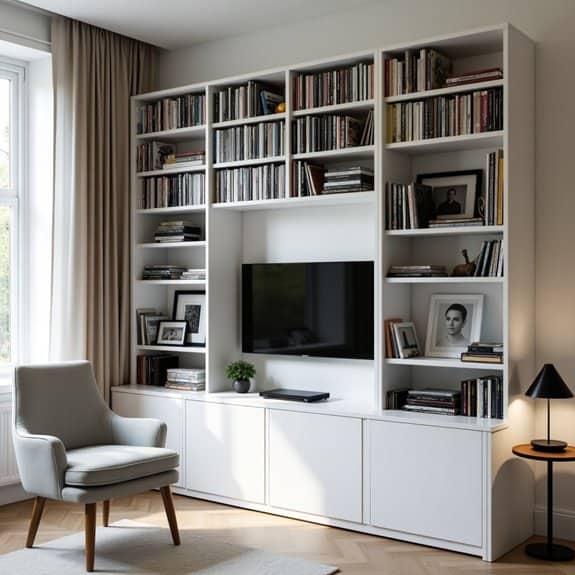
Organizing mixed media items in a bedroom requires careful consideration as these collections often include various formats like books, magazines, DVDs, vinyl records, and digital devices. A well-organized mixed media storage system not only protects valuable items but also creates an aesthetically pleasing display while maximizing accessibility.
Creating dedicated zones for different types of media prevents damage and makes it easier to locate specific items when needed. This organization method also helps maintain proper storage conditions for each medium, as different materials require different care and handling to preserve their quality over time.
Required Items:
- Adjustable shelving units
- Media-specific organizers or dividers
- Bookends
- Storage bins or baskets
- Label maker
- Dust-proof containers
- Cable management solutions
- Measuring tape
- Level
- Microfiber cleaning cloths
Start by categorizing all media items by type and frequency of use. Install adjustable shelving units at appropriate heights, ensuring heavier items like vinyl records and coffee table books are stored on lower shelves for stability. Position frequently accessed items at eye level for convenience.
Create designated sections for each media type, using appropriate organizers and dividers to maintain separation and prevent items from falling or leaning. For electronic media and devices, incorporate cable management solutions and ensure proper ventilation. Use dust-proof containers for delicate items and position them away from direct sunlight or heat sources.
Implement a logical organizational system within each category, such as alphabetical order for books and movies, or chronological order for magazines and periodicals.
Additional organization tips: Rotate seasonal or themed media items to the front of displays during relevant times of the year. Regularly assess and declutter your collection, removing damaged items or digitizing content when possible.
Consider using vertical space with wall-mounted shelving to maximize floor space, and incorporate proper lighting to showcase your collection while making it easier to locate specific items.
Minimalist Box Shelf Layouts
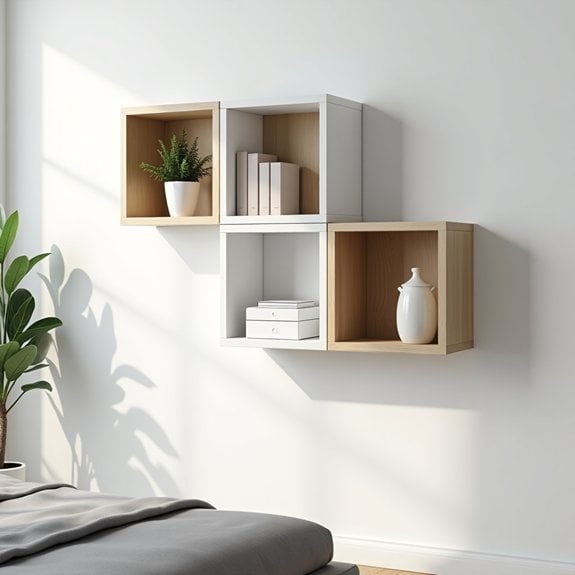
A well-organized minimalist box shelf system transforms bedroom spaces by creating clean lines and purposeful storage while maintaining a serene aesthetic.
These contemporary shelving solutions maximize vertical space without overwhelming the room’s visual harmony, making them perfect for modern bedrooms seeking balance between functionality and style.
Minimalist box shelves require thoughtful organization to maintain their sleek appearance while serving practical storage needs. The key lies in curating items that both serve a purpose and complement the minimalist design, ensuring each shelf compartment contributes to the room’s overall peaceful atmosphere.
Required Items:
- Box shelves (various sizes)
- Level
- Measuring tape
- Pencil
- Wall anchors
- Screwdriver
- Dust cloth
- Storage boxes or baskets
- Bookends
- Clear containers
- Labels
Begin installation by mapping out your shelf arrangement on the wall using a level and pencil, ensuring proper spacing between units.
Mount the box shelves securely using appropriate wall anchors, starting with the largest units first. Once mounted, clean each compartment thoroughly before organizing items.
Sort belongings into categories: books, decorative items, and essential storage. Place heavier items in lower compartments for stability, and position lighter objects in upper sections.
Group similar items together while maintaining negative space in some compartments to preserve the minimalist aesthetic. Incorporate a maximum of three items per shelf section, allowing each piece room to breathe.
Use clear containers or neutral-colored storage boxes to conceal necessary but visually distracting items, maintaining clean lines throughout the arrangement.
Additional Tips: Rotate displayed items seasonally to prevent dust accumulation and maintain visual interest.
Consider the rule of thirds when arranging objects within each box shelf, and periodically reassess the necessity of stored items to prevent clutter accumulation.
Use drawer organizers or small boxes within larger compartments to maintain order for smaller items while preserving the minimalist appearance.
Vintage Suitcase Wall Shelves
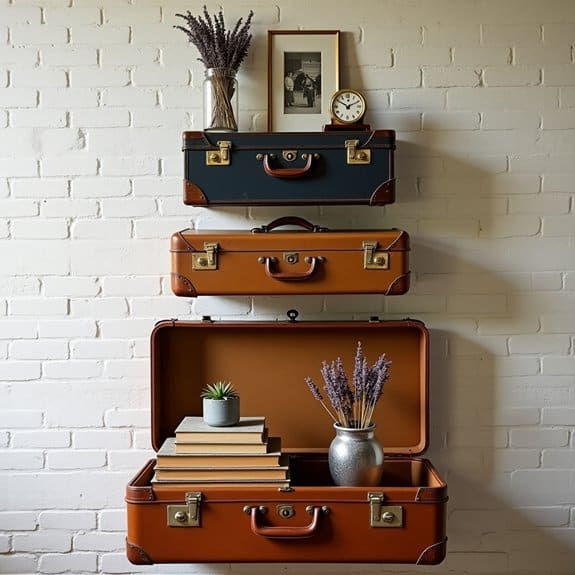
Transforming vintage suitcases into wall shelves adds a unique, nostalgic touch to bedroom decor while creating functional storage space. These conversation pieces serve as both artistic elements and practical storage solutions, perfect for displaying collectibles, books, or everyday items while maintaining a vintage aesthetic.
The key to successful vintage suitcase shelving lies in selecting the right pieces and properly securing them to create stable, reliable storage. When properly installed, these repurposed pieces can support a significant amount of weight while adding character and charm to any bedroom wall arrangement.
Required Items:
- Vintage suitcases (2-4 pieces)
- Wall anchors and screws
- Level
- Drill
- Screwdriver
- Measuring tape
- Pencil
- Stud finder
- L-brackets
- Cleaning supplies
- Safety goggles
- Work gloves
Select suitcases in good structural condition and clean them thoroughly inside and out. Remove any interior lining if damaged or musty.
Mount L-brackets inside each suitcase at strategic points, ensuring they’re hidden from view when installed. Use a stud finder to locate wall supports, then mark mounting points with a pencil. Install wall anchors where studs aren’t available, and secure the suitcases to the wall using appropriate screws.
Arrange suitcases at varying heights and depths to create visual interest, ensuring each is level before final installation.
To maximize the longevity and functionality of vintage suitcase shelves, regularly check the security of wall mountings and clean displays monthly. Consider adding small LED strip lighting inside larger cases to highlight displayed items, and use smaller cases for lighter objects to prevent strain on wall mounts.
Rotate displayed items seasonally to prevent dust accumulation and maintain fresh appeal in your bedroom’s design.
Geometric Pattern Shelf Styling
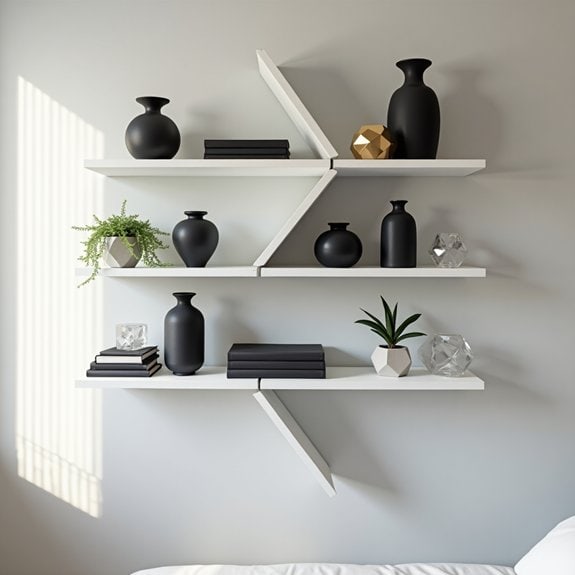
Creating geometric patterns while styling shelves adds a modern, artistic dimension to bedroom storage while maintaining functionality. The deliberate arrangement of items in geometric configurations transforms ordinary shelving into a visual centerpiece that draws the eye and creates a sense of intentional design.
Geometric shelf styling requires careful planning and consideration of both form and function. When done correctly, this organization method can make a space feel more ordered and sophisticated while still providing practical storage solutions for everyday items.
Required Items:
- Storage containers of varying heights
- Decorative objects in different shapes
- Books of various sizes
- Measuring tape
- Level
- Sticky notes
- Paper and pencil for planning
- Clean cloth
- Glass cleaner
- Shelf risers (optional)
- Bookends
Start by clearing the shelves completely and sketching your desired geometric pattern on paper. Consider triangles, diamonds, or alternating squares as base patterns. Arrange your largest items first, positioning them to create the foundational shapes of your pattern.
Group similar items together in clusters that form geometric shapes, maintaining visual balance through color coordination and size progression. Layer smaller items in front of larger ones while maintaining clear geometric lines.
For maximum impact, keep consistent spacing between objects and utilize negative space to emphasize the geometric patterns. Incorporate varying heights within each geometric grouping to create depth and dimension. Always ensure heavier items are placed directly on the shelf surface rather than balanced on risers or other objects.
To maintain the geometric aesthetic long-term, take photos of your final arrangement for reference, and create a simple diagram showing where each item belongs. Regularly dust and adjust items to maintain precise angles and spacing.
Consider rotating decorative elements seasonally while maintaining the same geometric framework to keep the display fresh while preserving the organized structure.
Gallery Wall With Built-In Storage
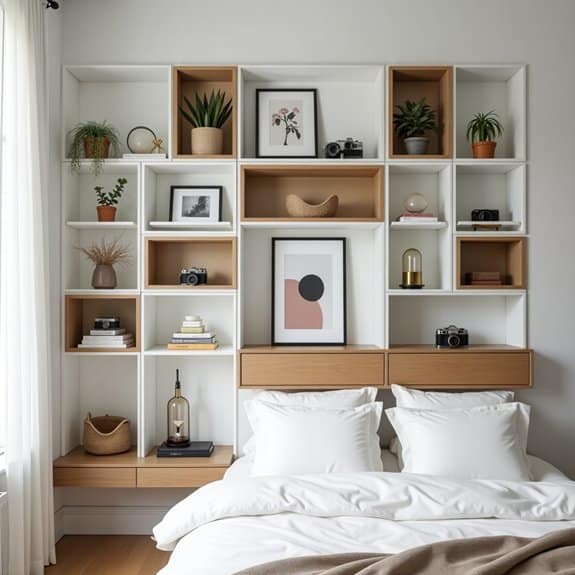
Creating a gallery wall with built-in storage transforms an ordinary bedroom wall into a functional piece of art. This dual-purpose solution maximizes vertical space while displaying cherished photos, artwork, and decorative items alongside practical storage options for everyday essentials.
By combining aesthetic appeal with storage functionality, this organization method helps reduce clutter on other surfaces while maintaining a curated, personal atmosphere. The built-in storage component ensures frequently used items remain within easy reach without compromising the visual impact of your carefully arranged gallery display.
Required Items:
- Floating shelves of varying lengths
- Picture frames
- Wall anchors and screws
- Level
- Measuring tape
- Pencil
- Drill
- Storage boxes or baskets
- Decorative objects
- Artwork or photographs
- Command strips or picture hooks
- Storage containers that complement your decor
Start by planning your gallery wall layout on the floor, arranging frames and shelves to achieve a balanced composition. Measure the wall space and transfer your design using painter’s tape to visualize the final arrangement. Install the floating shelves first, ensuring they’re properly anchored to support both display items and storage needs.
Space shelves at varying heights to create visual interest while maintaining functionality. Once the shelves are secure, integrate storage solutions such as decorative boxes, baskets, or containers that complement your aesthetic. Position these storage elements between artwork and frames, maintaining a cohesive look.
Group similar items together on shelves, using the storage containers to house smaller objects while leaving space for decorative elements that enhance the overall display.
Additional Tips: Maintain visual harmony by selecting storage containers in coordinating colors or materials. Rotate displayed items seasonally to keep the gallery wall fresh while reassessing storage needs. Consider incorporating LED strip lighting under shelves to highlight displays and provide ambient lighting. Remember to leave some open space between elements to prevent the wall from appearing cluttered or overwhelming.
Natural Wood and Metal Combinations
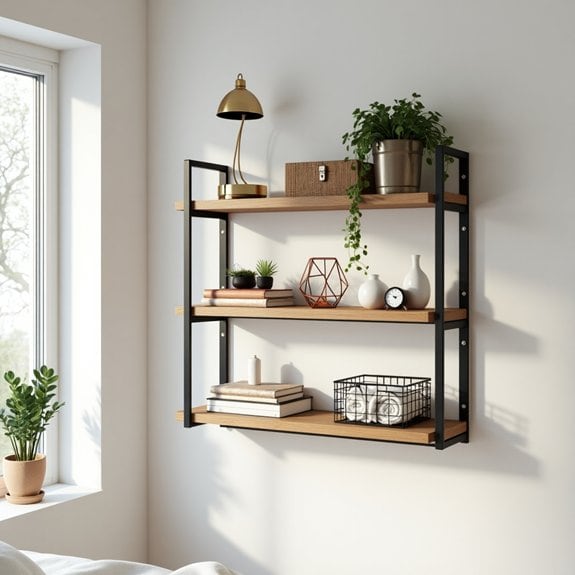
Combining natural wood and metal elements in bedroom shelving creates a perfect balance between warmth and industrial sophistication. This versatile pairing has become increasingly popular in modern home design, offering both durability and aesthetic appeal while providing practical storage solutions for everyday items.
The key to successful wood and metal shelf organization lies in understanding how to balance these contrasting materials effectively. When properly arranged, these elements can create a cohesive look that enhances your bedroom’s overall design while maximizing storage efficiency and maintaining visual harmony.
Required Items:
- Wood and metal floating shelves
- Wall anchors and mounting hardware
- Level
- Drill
- Measuring tape
- Pencil
- Cleaning supplies
- Wire baskets
- Wooden storage boxes
- Metal bookends
- Decorative objects
- Command strips or hooks
Start by planning your shelf layout on paper, considering both the visual weight of wood versus metal elements and their practical functions. Mount the heavier wood shelves at lower levels, with lighter metal shelves positioned above.
Arrange items by grouping similar materials together – wooden boxes and natural elements on wooden shelves, while metal containers and industrial-style accessories complement metal shelving. Create depth by alternating materials and textures, keeping heavier items closer to the wall for stability.
When organizing items on your shelves, follow the rule of thirds: dedicate one-third to storage solutions (baskets, boxes), one-third to practical items (books, electronics), and one-third to decorative elements. This balance ensures both functionality and visual appeal while maintaining the industrial-meets-natural aesthetic.
Additional Tips: Incorporate metal hooks beneath wooden shelves for hanging lightweight items, and use clear organizing containers on metal shelves to maintain visual lightness. Regular dusting and maintenance of both materials will preserve their appearance and prevent wear.
Consider using removable adhesive products for smaller decorative elements to avoid damaging the shelving materials while allowing flexibility in your arrangement.
Decorative Basket Storage Solutions

Decorative basket storage has become an essential element in modern bedroom organization, combining functionality with aesthetic appeal. These versatile containers transform cluttered shelves into stylish displays while keeping personal items neatly concealed and easily accessible.
Beyond their visual appeal, basket storage solutions offer practical benefits for maintaining an organized bedroom. They create designated spaces for different categories of items, prevent dust accumulation, and make it simple to maintain order long-term while adding texture and warmth to your bedroom’s décor.
Required Items:
- Assorted decorative baskets (various sizes)
- Labels or tag holders
- Measuring tape
- Shelf liner (non-slip)
- Drawer organizers or small containers
- Basic cleaning supplies
- Storage bins for sorting
- Label maker or markers
Start by measuring your shelves and selecting appropriately sized baskets that complement your bedroom’s style. Group similar items together during a preliminary sorting phase, considering both frequency of use and logical groupings.
Arrange larger baskets on lower shelves for heavier items, and position smaller ones at eye level for frequently accessed belongings. Line each shelf with non-slip liner to prevent basket movement and protect the surface.
Label each basket clearly to maintain organization long-term, using either attractive tags or a label maker for consistency. Consider using clear bins for items you need to identify quickly, and opt for lidded baskets for seasonal or private items.
Maximize vertical space by stacking compatible baskets, but ensure they remain easily accessible. To ensure success with your basket organization system, regularly assess and adjust the contents of each basket.
Schedule quarterly maintenance to prevent overflow and maintain the system’s efficiency. Consider using smaller containers within larger baskets to separate items further, and always leave some empty space in each basket to accommodate new items while maintaining a clean, organized appearance.
Asymmetrical Floating Shelf Designs
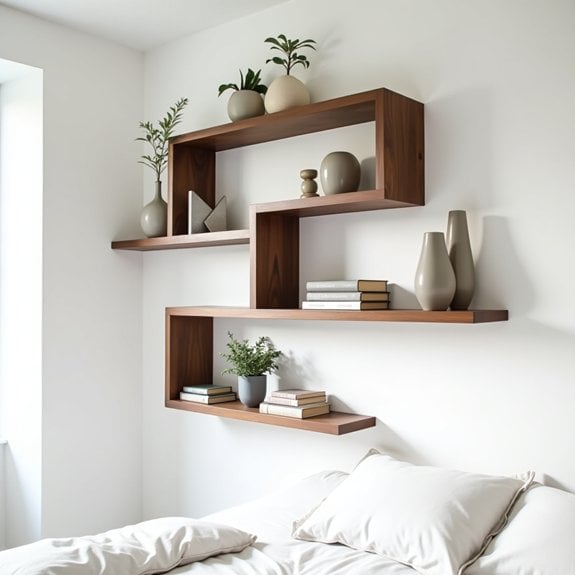
Asymmetrical floating shelves bring a modern, artistic touch to bedroom organization while maximizing storage space in an unconventional way. Unlike traditional straight-lined shelving, these dynamic arrangements create visual interest through deliberately unbalanced patterns, turning storage solutions into statement pieces that complement your bedroom’s aesthetic.
The key to successful asymmetrical shelf organization lies in creating a balanced imbalance – while individual shelves may be placed at varying heights and lengths, the overall arrangement must maintain a sense of intentional design. This approach allows for both practical storage and artistic expression, making it particularly suitable for displaying both decorative items and everyday essentials.
Required Items:
- Floating shelves of varying lengths
- Level
- Measuring tape
- Pencil
- Wall anchors
- Screwdriver
- Stud finder
- Paper templates
- Painter’s tape
- Drill
Start by planning your asymmetrical arrangement on the floor or by creating paper templates to test different configurations on the wall. Begin with a focal point shelf, typically the largest or most centrally positioned piece, and build your design outward.
Maintain approximately 12-18 inches of space between shelves to prevent overcrowding, and consider the visual weight of items you’ll display when determining shelf placement. Install the shelves starting from the center and working outward, frequently stepping back to ensure the arrangement maintains its artistic balance.
For optimal organization, group items by size, color, or function while maintaining negative space between objects. Place heavier items closer to shelf brackets for stability, and vary the heights of displayed pieces to create depth.
Consider incorporating both horizontal and vertical elements in your arrangement to enhance the dynamic feel of the asymmetrical design.
Additional Tips: Photograph your preferred arrangement before installation to use as a reference guide during the mounting process. When styling your shelves, follow the “rule of thirds” by dividing each shelf into three sections and varying the height and depth of objects within these sections.
Regularly reassess and adjust your display to prevent cluttered accumulation and maintain the intentional asymmetrical aesthetic.
Vertical Storage Maximization
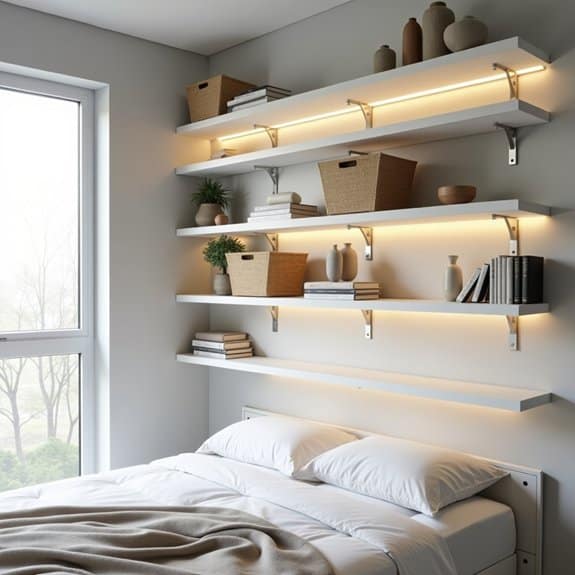
Maximizing vertical storage space in bedrooms has become increasingly crucial, especially in urban living where square footage comes at a premium. By utilizing wall height effectively, residents can dramatically increase their storage capacity while maintaining a clean, uncluttered floor space that promotes relaxation and good sleep habits.
Vertical storage solutions transform overlooked wall space into functional storage areas, creating organized zones for everything from books and decorative items to clothing and personal accessories. This approach not only maximizes storage potential but also adds visual interest to the room while keeping essential items easily accessible.
Required Items:
- Floating shelves
- Wall anchors and screws
- Stud finder
- Level
- Drill
- Measuring tape
- Pencil
- Wall brackets
- Shelf dividers
- Storage bins or baskets
- Step ladder
Start by conducting a thorough wall assessment using a stud finder to locate secure mounting points. Measure and mark shelf locations, ensuring adequate spacing between levels for stored items. Install the lowest shelf first, using wall anchors in areas without studs, and work your way up, maintaining consistent spacing and checking level alignment at each step.
For maximum efficiency, place frequently used items at eye level, with seasonal or rarely accessed items on higher shelves. Consider implementing a zone system, dedicating specific shelf areas to different categories of items. Install shelf dividers to create distinct sections and prevent items from mixing.
Incorporate a combination of open shelving for decorative items and closed storage solutions, such as bins or baskets, for items that could create visual clutter.
Additional Tips: Maintain a clearance of at least 12 inches between the top of furniture and the lowest shelf to ensure easy access. Label storage containers clearly and reassess your vertical storage system every few months, adjusting shelf heights or zones based on changing needs.
Consider installing LED strip lighting under shelves to illuminate darker areas and create ambiance while making items easier to locate.
Curated Collection Displays
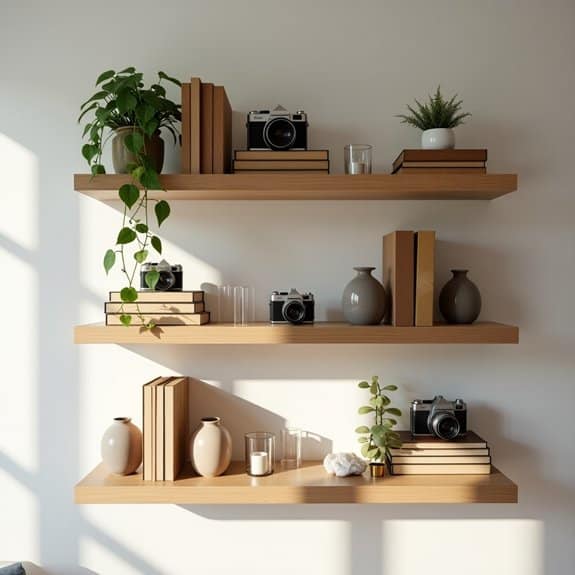
Creating thoughtfully organized displays of collections transforms ordinary bedroom shelves into personalized gallery spaces that showcase your interests and personality. Whether displaying books, artwork, memorabilia, or decorative objects, a well-curated shelf arrangement adds visual interest while maintaining order and purpose in your bedroom sanctuary.
Proper organization of collection displays not only makes your items more visually appealing but also protects and preserves them while making them easily accessible. Strategic arrangement can create focal points in your bedroom, establish visual rhythm, and contribute to a cohesive design scheme that enhances your overall room aesthetic.
Required Items:
- Microfiber cleaning cloths
- Glass cleaner
- Shelf risers or platforms
- Bookends
- Small decorative boxes
- Clear display stands
- Label maker
- Storage bins
- Measuring tape
- Level
Begin by removing all items from your shelves and thoroughly cleaning the surfaces. Sort your collections by category, size, and color to identify natural groupings. Create a hierarchy by placing larger items at the back of the shelves and smaller pieces toward the front, using risers or platforms to create varying heights.
Maintain visual balance by alternating dense groupings with open space, and consider implementing the rule of thirds when arranging items. For book collections, mix horizontal and vertical stacking to create visual interest while keeping series and genres together.
Collections should tell a story through their arrangement. Connect pieces through common elements such as color, theme, or material. Position most-used items at eye level and create dedicated zones for different types of collections.
Consider rotating seasonal items or periodically changing displays to keep the arrangement fresh and prevent dust accumulation.
Additional Tips: Incorporate proper lighting to highlight special pieces, and use museum gel or mounting putty to secure delicate items on higher shelves. Photograph your successful arrangements to reference when refreshing displays, and maintain a regular dusting schedule to keep collections looking their best.
Consider leaving 20% of shelf space empty to prevent overcrowding and allow for future additions to your collections.
Hidden Storage Shelf Systems
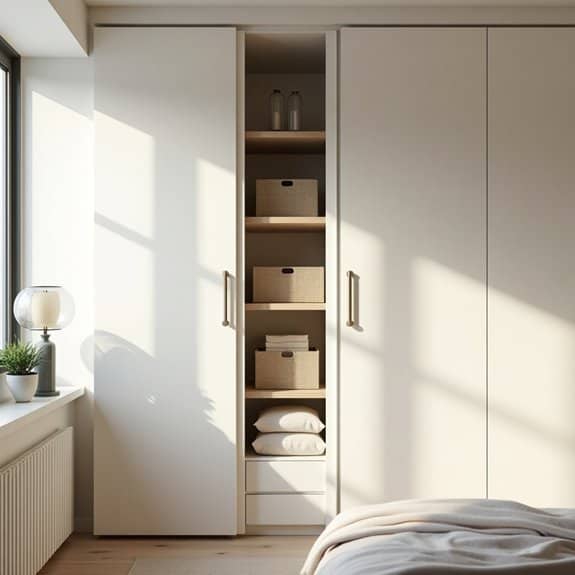
Hidden storage shelf systems represent a game-changing solution for bedroom organization, combining functionality with aesthetic appeal. These innovative systems maximize space utilization while maintaining a clean, uncluttered appearance that contributes to a peaceful bedroom environment.
By implementing hidden storage shelving, you can transform dead space into valuable storage areas, particularly in smaller bedrooms where every square inch counts. These systems can be installed in walls, under windows, behind headboards, or integrated into existing furniture, providing discrete storage solutions that maintain the room’s visual harmony.
Required Items:
- Measuring tape
- Level
- Pencil
- Stud finder
- Power drill
- Screwdriver
- Wall anchors
- Mounting brackets
- Shelf panels
- Cabinet hinges (for concealed doors)
- Door pulls or handles
- Wood screws
- Track system (if applicable)
Begin by measuring and marking your intended installation areas, using a stud finder to locate wall supports. Install mounting brackets securely into wall studs or use appropriate wall anchors for sufficient support.
For recessed systems, carefully cut into drywall between studs, ensuring proper clearance for shelf depth and framework. Mount track systems or bracket supports according to manufacturer specifications, ensuring perfect levelness for smooth operation.
When installing concealed door panels, attach hinges precisely to ensure proper alignment and seamless closure. Test the movement of all moving parts before securing shelves permanently.
Organize items by frequency of use, placing commonly accessed items at eye level and heavier items on lower shelves to maintain stability. For optimal organization and longevity, incorporate adjustable shelf heights to accommodate changing storage needs, and consider adding LED strip lighting for better visibility.
Use matching containers or baskets to maintain visual consistency when doors are open, and implement a regular maintenance schedule to ensure mechanisms continue functioning smoothly. Label contents discretely on the inside of doors to maintain the clean exterior appearance while keeping items easily locatable.
Multi-Functional Bedside Shelving
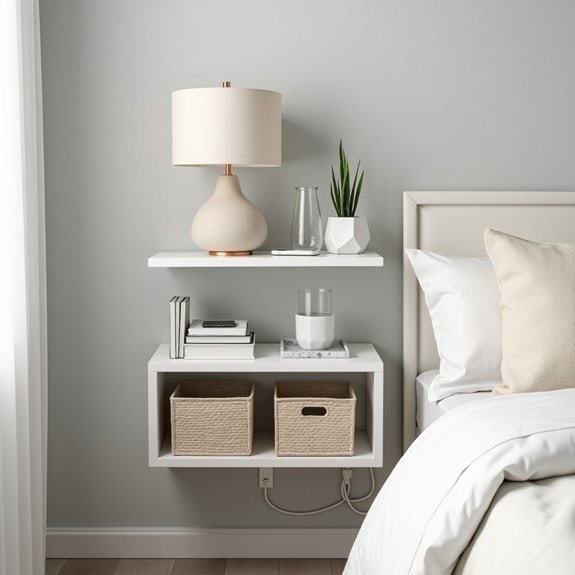
A well-organized bedside shelving system serves as the command center for your nightly routine and morning essentials. The space directly next to your bed impacts both the functionality of your daily transitions and the overall aesthetic of your bedroom, making it crucial to maximize its potential through thoughtful organization.
Multi-functional bedside shelving eliminates clutter while keeping necessary items within arm’s reach. By implementing a strategic organization system, you can transform this space into an efficient storage solution that accommodates books, electronics, medications, water bottles, and decorative elements without creating visual chaos.
Required Items:
- Bedside shelf unit or floating shelves
- Small storage containers or baskets
- Drawer organizers or dividers
- Cable management solutions
- Desktop organizer or small tray
- Bookends
- Labels
- Microfiber cleaning cloth
Start by removing everything from your current bedside shelving and sorting items into categories: daily essentials, occasional use, and decorative pieces. Install your chosen shelving system at a comfortable height, ensuring easy access from bed.
Position daily-use items like reading materials, electronics, and water on the middle shelf for optimal reach. Reserve the top shelf for ambient lighting and decorative elements that create a calming atmosphere. Utilize the bottom shelf for less frequently accessed items stored in attractive containers.
For electronics, implement a charging station on one shelf using cable management solutions to keep cords tidy and accessible. Place small containers or trays on flat surfaces to corral loose items like reading glasses, remote controls, or medications.
If incorporating drawers, use organizers to separate items by category and prevent them from shifting. Consider implementing a rotation system for your bedside shelving, regularly evaluating items to ensure they truly deserve precious bedside real estate.
Use vertically oriented storage solutions when possible to maximize space, and maintain a consistent color scheme with storage containers to create a cohesive look. Remember to dust and reorganize the shelves weekly to maintain both functionality and aesthetic appeal.

