Are you looking to add a touch of magic and coziness to your bedroom? Hanging fairy lights is a simple yet effective way to transform your space into a whimsical retreat. In this article, we will guide you through the process of safely hanging fairy lights in your bedroom, from choosing the right lights to creating different lighting effects. Get ready to create a warm and enchanting ambiance that will make you never want to leave your room!
Choosing the Right Fairy Lights for Your Bedroom
When choosing the right fairy lights for your bedroom, it’s important to consider the color and style that will best fit your decor. There are different types of fairy lights available that can enhance your bedroom’s ambiance. Opt for warm white or soft pastel colors to create a cozy and inviting atmosphere. Avoid using bright or flashing lights as they may disrupt your sleep quality. It’s crucial to prioritize safety when selecting fairy lights for your bedroom. Look for lights that are certified and meet safety standards to prevent any electrical mishaps. Remember, creating a soothing environment is key to promoting better sleep, so choose fairy lights that emit a gentle glow rather than harsh, bright light.
Planning Your Fairy Light Placement
Before you start, it’s important to plan where you want to place your twinkling lights. Safety should be your top priority when hanging fairy lights in your bedroom. To ensure an even distribution of light, properly measure and space out the lights along the desired area. This will help prevent any potential hazards such as tangled cords or overloaded outlets. Additionally, consider incorporating the fairy lights into different bedroom decor themes. Whether you have a bohemian-inspired room or a minimalist aesthetic, there are various ways to incorporate fairy lights seamlessly into your existing decor. For a whimsical touch, drape them over a canopy bed or hang them on the wall behind some sheer curtains. Remember to always follow safety guidelines and use appropriate fixtures when installing your fairy lights for a dreamy and safe atmosphere in your bedroom.
Preparing Your Bedroom for Hanging Fairy Lights
To ensure a safe and seamless installation, it’s important to prepare your bedroom for the placement of twinkling lights. Before hanging fairy lights, take a moment to assess the space and plan where you want them to go. Consider the outlets available and make sure they are easily accessible for plugging in the lights. Clear any clutter or obstacles from the area where you’ll be hanging them to prevent accidents or damage. Additionally, check that your fairy lights are in good working condition and free from any frayed wires or loose bulbs.
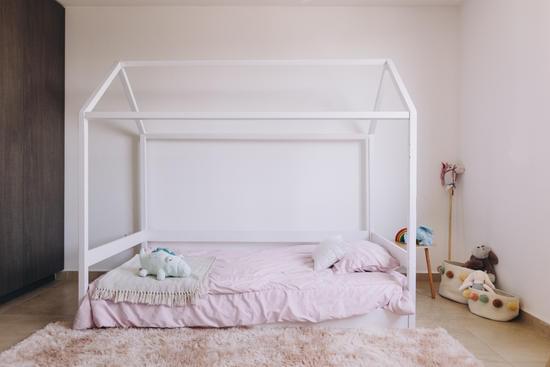
When incorporating fairy lights into your bedroom decor, think about creating a cozy ambiance. You can drape the lights around your bed frame, hang them on the walls, or even string them across a canopy for a whimsical touch. Experiment with different placements until you find what suits your style best. Remember to always follow manufacturer instructions when installing and handling electrical equipment for your safety.
Hanging Fairy Lights Safely and Securely
Ensure that you safely and securely install the twinkling lights in your bedroom by following these steps. When hanging fairy lights without damaging walls, it’s important to use removable hooks or adhesive clips specifically designed for this purpose. These options allow you to easily attach the lights without leaving any marks or residue on your walls. Make sure to clean the surface before applying the hooks or clips to ensure a strong hold. Additionally, finding the right height for hanging fairy lights is crucial for both aesthetic and safety reasons. Avoid placing them too low where they may be easily knocked down or create a fire hazard. Conversely, don’t hang them too high where they lose their effect. Aim for a height that allows you to enjoy their magical glow while keeping them out of harm’s way.
Creating Different Lighting Effects with Fairy Lights
Transform your space with various lighting effects using these versatile twinkling lights. Here are four ways to create a cozy ambiance and romantic atmosphere with fairy lights:
- Drape them across the ceiling: Hang fairy lights in a crisscross pattern across your bedroom ceiling for a dreamy and enchanting effect. The soft glow will instantly transform your room into a magical haven.
- Wrap them around furniture: Wind fairy lights around your bed frame or dresser for a warm and inviting feel. This will add a touch of romance to your space, perfect for creating an intimate atmosphere.
- Place them in jars or lanterns: Fill glass jars or lanterns with fairy lights to create an ethereal glow that radiates throughout the room. This simple yet stunning display will bring a cozy and calming vibe to any corner.
- Create a canopy of lights: Hang long strands of fairy lights from the ceiling to form a beautiful canopy over your bed. This creates an intimate and whimsical setting, ideal for relaxing or spending quality time with loved ones.
By incorporating these lighting effects, you can easily transform your bedroom into a cozy retreat filled with romantic vibes using fairy lights.
Conclusion
So there you have it, hanging fairy lights in your bedroom can add a magical touch to your space. By choosing the right lights, planning their placement, and preparing your room properly, you can create a cozy and enchanting atmosphere. Remember to hang the lights safely and securely to avoid any accidents. With a little creativity, you can also experiment with different lighting effects to transform your bedroom into a dreamy haven. So go ahead and let the fairy lights work their magic!

