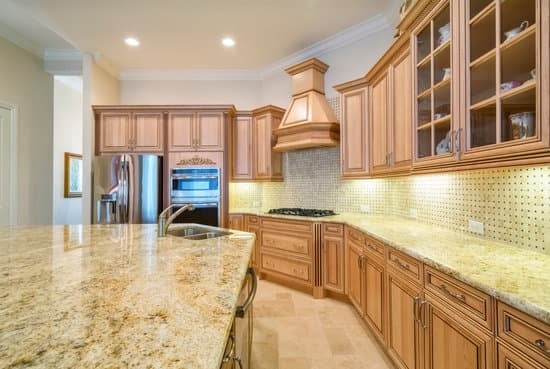
Are you tired of rummaging through your kitchen cabinets, struggling to find what you need? It’s time to upgrade your space with pull out shelves! In this article, we will guide you through the process of building and installing these handy shelves. By following our step-by-step instructions and gathering the necessary tools, you’ll be able to transform your kitchen cabinets into organized havens. Get ready to maximize storage and enjoy a safer, more efficient cooking experience!
Assessing Your Cabinet Space
You’ll need to take a close look at your cabinet space to determine if it’s suitable for pull out shelves. Safety comes first, so make sure your cabinets are in good condition and able to support the weight of the shelves. Start by emptying your cabinets and giving them a thorough clean. Next, measure the width, depth, and height of each cabinet to ensure you choose the right size pull out shelves that will maximize space. Consider utilizing vertical dividers or adjustable racks to further optimize storage. When choosing the right shelving materials, opt for sturdy options like hardwood or plywood that can withstand heavy items without sagging or breaking. Lastly, keep in mind any potential obstructions such as plumbing or electrical outlets when planning the placement of your new pull out shelves.
Gathering the Necessary Tools and Materials
To start, collect all the required tools and materials for making these convenient storage additions. Here are four essential items you’ll need:
- Measuring tape: Accurate measurements are crucial for ensuring your pull-out shelves fit perfectly in your cabinets.
- Screwdriver or drill: These tools will be necessary for attaching the hinges and tracks to your cabinet and shelves securely.
- Plywood or solid wood: Choosing the right wood is essential for durability and strength. Opt for hardwood such as oak or maple, which can withstand heavy loads.
- Level: This tool will help ensure that your shelves are straight and balanced.
When choosing the right wood for your shelves, keep in mind factors such as moisture resistance and weight-bearing capacity. Additionally, consider tips for adjusting shelf heights to accommodate different items of various sizes. Always prioritize safety by wearing protective gear like gloves and goggles when working with tools and materials.
Measuring and Cutting the Shelves
Start by measuring and cutting the shelves to ensure they fit perfectly in your cabinet. Safety should be your top priority during this process. Accurate measurements are crucial for a successful installation. Take the time to double-check all measurements before making any cuts.
When it comes to shelf customization options, you have a few choices. You can opt for adjustable shelves that allow you to rearrange them as needed or fixed shelves for a more stable solution. Additionally, consider the thickness of the shelves based on the weight they will need to support.
Using a tape measure, carefully measure the length, width, and depth of your cabinet space. It’s important to account for any obstructions such as pipes or electrical outlets. Once you have accurate measurements, use a circular saw or table saw to cut your shelves accordingly.
Remember, precise measurements and clean cuts are key to achieving professional-looking pull-out shelves that fit seamlessly into your kitchen cabinets.
Assembling and Installing the Pull Out Shelves
Once the shelves are cut to size, it’s time to assemble and install them in your cabinet. Start by gathering all the necessary materials: screws, a screwdriver, a drill, and possibly some wood glue. Lay out the pieces on a flat surface and follow the manufacturer’s instructions for assembly. Use caution when handling sharp edges or power tools.
When assembling the shelves, make sure all the joints are secure and tight. Double-check that each piece is aligned properly before screwing them together. If you encounter any issues during assembly, such as misaligned holes or gaps between pieces, try using clamps to hold everything in place while you make adjustments.
Once assembled, carefully slide the shelves into your cabinet, making sure they fit snugly. Test their movement by pulling them in and out several times to ensure they glide smoothly. If you experience any sticking or wobbling, check for loose screws or obstructions within the cabinet.
By following these assembling tips and troubleshooting common issues like misalignment or sticking, you can safely install pull-out shelves in your kitchen cabinets.
Organizing and Enjoying Your Newly Upgraded Cabinets
Now that you’ve upgraded your cabinets, it’s time to organize them and enjoy the benefits of your hard work. One of the key advantages of pull out shelves is maximizing storage space. Take advantage of this by arranging your items in a way that makes the most efficient use of the available space. Group similar items together and place frequently used items within easy reach. Additionally, pull out shelves make maintenance and cleaning a breeze. Regularly wipe down the shelves with a damp cloth to remove any spills or debris. To further simplify cleaning, consider using drawer liners to protect the shelves from stains or scratches. By keeping your newly upgraded cabinets organized and clean, you can fully enjoy their functionality and convenience while ensuring safety in your kitchen space.
Conclusion
Congratulations! You have successfully upgraded your kitchen cabinets with the addition of pull-out shelves. By assessing your cabinet space, gathering the necessary tools and materials, measuring and cutting the shelves, assembling and installing them, and finally organizing your items on these new shelves, you have transformed your kitchen into a more functional and organized space. Enjoy the convenience and ease of accessing your items with these newly installed pull-out shelves in your kitchen cabinets!

