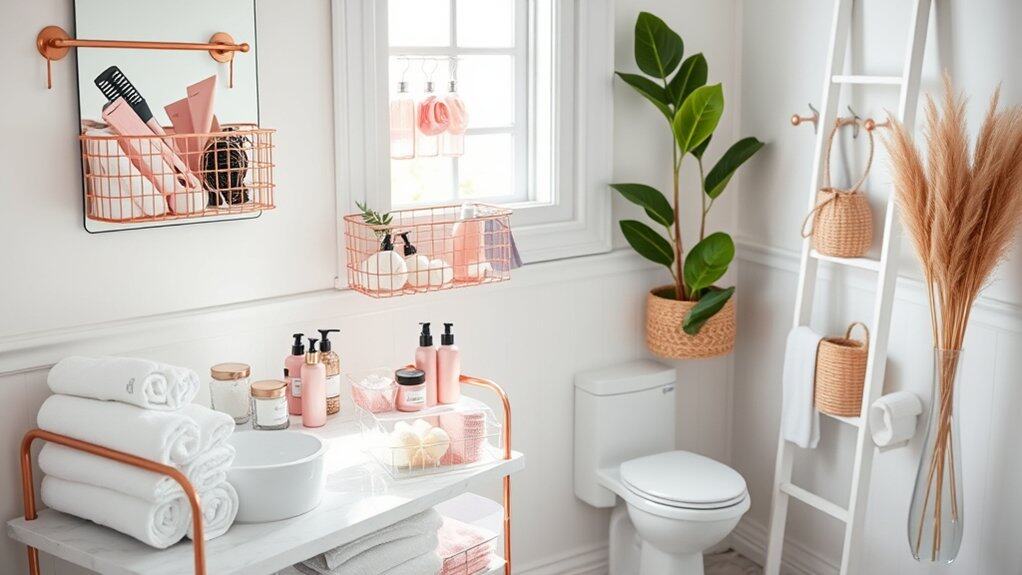
Did you know that the average person spends over 400 days of their life in the bathroom? That’s why having an organized and stylish space isn’t just about aesthetics – it’s about making the most of your daily routine! I’ve transformed countless chaotic bathrooms into Instagram-worthy spaces, and I’m excited to share my favorite organization hacks. From magnetic makeup holders to color-coded storage solutions, these eight fun ideas will help you create the bathroom of your dreams.
Mason Jar Beauty Station
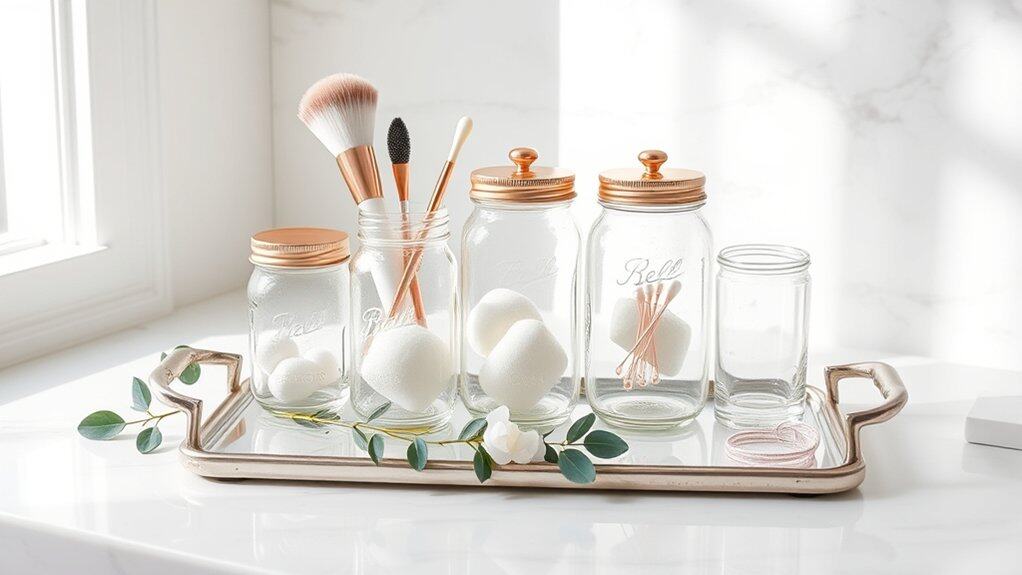
A well-organized beauty station is essential for maintaining a clutter-free bathroom and streamlining your daily routine. Mason jars offer an elegant, practical solution that combines aesthetics with functionality, allowing you to easily see and access your beauty essentials while adding a touch of vintage charm to your space.
Mason jar organization transforms scattered beauty supplies into an efficient system where everything has its place. This method not only protects items from bathroom moisture but also helps prevent product waste by keeping everything visible and properly stored, ultimately saving both time and money.
Required Items:
- Assorted mason jars (various sizes)
- Waterproof labels
- Clean rags or paper towels
- Bathroom-safe tray or stand
- Optional decorative elements (ribbon, paint, etc.)
- Optional mason jar soap pump converter
- Optional drawer liner or non-slip mat
Start by thoroughly cleaning and drying all mason jars. Sort beauty items by category: cotton swabs, makeup brushes, hair accessories, skincare tools, and other daily essentials.
Select appropriate jar sizes for each category – taller jars work well for brushes and cotton swabs, while wider mouth jars are ideal for cotton balls and face pads. Place items in their designated jars, ensuring frequently used products are most accessible.
Arrange the filled jars on your chosen tray or stand, positioning taller items toward the back and shorter ones in front for easy visibility. If using decorative elements, add them now to coordinate with your bathroom’s aesthetic.
Apply waterproof labels to identify contents, particularly if storing similar-looking items.
Additional Tips: Consider using a mason jar soap pump for liquid products like facial cleanser or hand soap. Place a moisture-absorbing packet in jars containing powder-based products to prevent clumping.
Rotate items seasonally to maintain freshness, and clean jars monthly to prevent product buildup. Install adequate lighting around your station to enhance visibility and create an inviting vanity space.
Pretty Storage Baskets and Bins
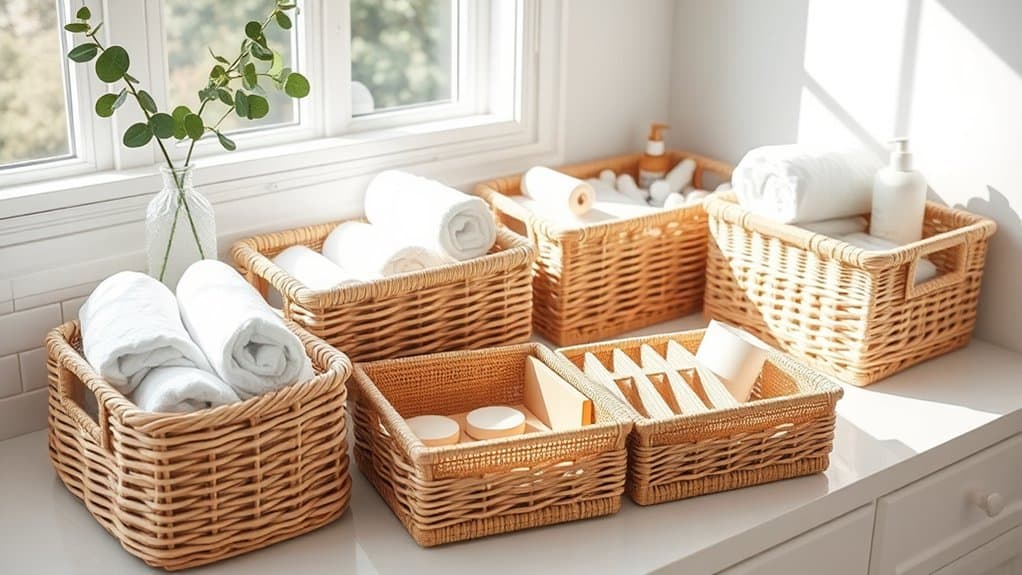
Storage baskets and bins serve as both functional organizers and decorative elements in a bathroom, transforming cluttered countertops and cabinets into aesthetically pleasing spaces. These versatile containers help create designated spots for everything from toiletries to makeup, making daily routines more efficient while maintaining a cohesive design aesthetic.
When properly implemented, attractive storage solutions can significantly impact the overall feel of a bathroom while providing practical organization. Coordinated baskets and bins create visual harmony while keeping essential items easily accessible and protected from moisture and dust.
Required Items:
- Variety of decorative storage baskets
- Clear plastic bins
- Wire mesh containers
- Woven storage boxes
- Labels or label maker
- Drawer dividers
- Measuring tape
- Container liners (optional)
- Small organizing cups
- Shelf liner
Start by measuring your available storage spaces, including under-sink areas, shelves, and countertops. Sort bathroom items into categories such as hair care, skincare, makeup, and dental products. Select appropriately sized containers that complement your bathroom’s décor, ensuring they fit the designated spaces properly. Choose water-resistant materials for items stored near water sources.
When placing your organized containers, position frequently used items in easily accessible locations. Use clear bins for products you need to monitor for replacement, and decorative baskets for items that are used less frequently or need to be concealed. Create levels within larger baskets using smaller containers or dividers to maximize vertical space and prevent items from becoming jumbled.
For optimal organization maintenance, implement a system of regular review every three months. Remove expired products, wipe down containers, and reassess the effectiveness of your storage solution. Consider using shelf liners to protect surfaces and prevent containers from sliding, and label each basket clearly to maintain the system long-term.
Remember to choose containers with proper ventilation if storing damp items to prevent mildew growth.
Magnetic Makeup Organization
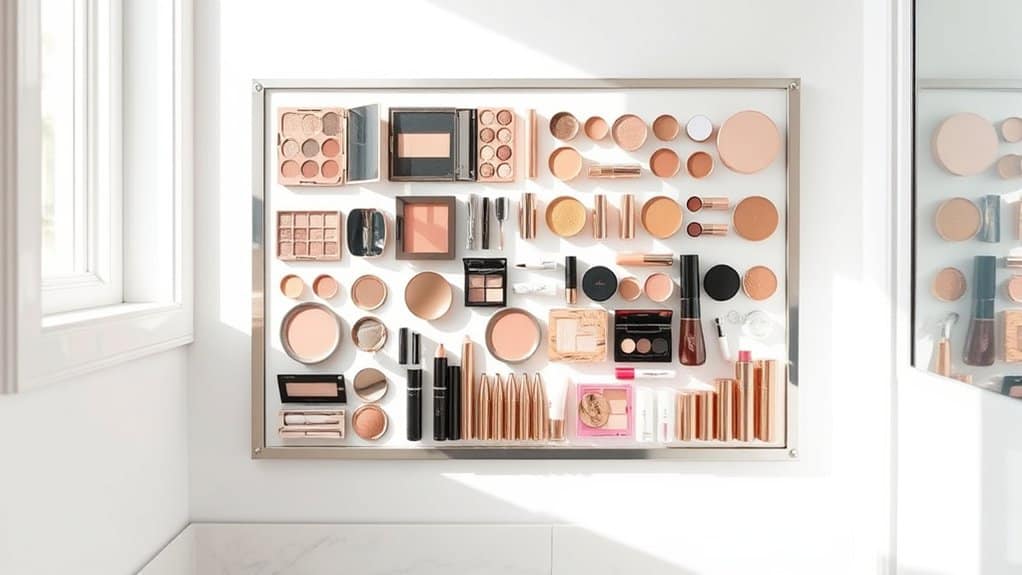
Organizing makeup using magnetic solutions revolutionizes the way we store and access our daily beauty essentials. A cluttered makeup collection not only creates frustration during morning routines but can also lead to expired products being overlooked and valuable counter space being wasted.
Magnetic makeup organization transforms vertical wall space into a functional beauty command center, keeping products visible, accessible, and protected. This system works particularly well in smaller bathrooms where counter space is limited, and it creates an aesthetically pleasing display that makes selecting products both efficient and enjoyable.
Required Items:
- Magnetic board or sheet metal
- Strong magnets (various sizes)
- Magnetic tape
- Double-sided adhesive strips
- Small magnetic containers
- Command strips or wall anchors
- Scissors
- Measuring tape
- Level
- Cleaning supplies
Mount the magnetic board at eye level in your bathroom using appropriate wall anchors or command strips. Clean all makeup items thoroughly before attaching magnets. For palettes and larger items, attach magnetic tape to the back using double-sided adhesive strips. For smaller items like individual eyeshadows or compacts, use small magnetic containers to group similar products together.
Arrange products by frequency of use, with daily items at eye level and occasional products above or below. Test the magnetic strength of each attachment before fully committing to the arrangement. Categories can be created using colored magnetic tape as borders or labels to separate different types of makeup.
Consider leaving some space for future additions and rearrange items periodically based on seasonal use or changing preferences. To maintain the system’s effectiveness, regularly clean the magnetic board and check magnet strength monthly. Keep heat-sensitive products away from direct sunlight and consider adding a small shelf below the magnetic board for items that are too heavy or awkward for magnetic mounting.
Remove expired products promptly and reorganize remaining items to maintain an efficient, attractive display.
Color-Coded Hair Tool Storage
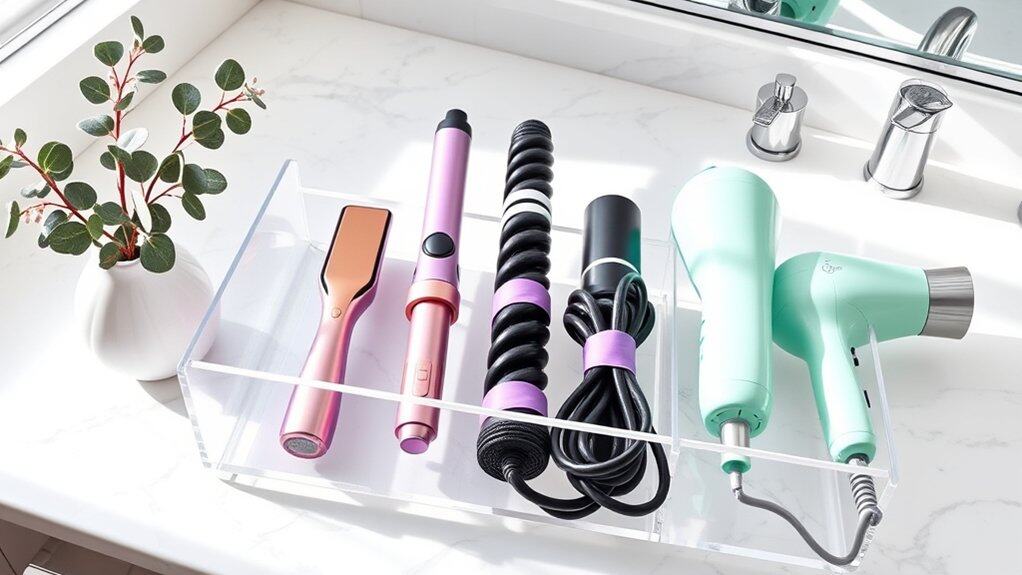
Organizing hair tools is essential for maintaining a clutter-free bathroom and protecting expensive styling equipment. With multiple styling tools being used regularly, a disorganized collection can lead to tangled cords, damaged equipment, and frustrating morning routines.
Color coding your hair tool storage not only creates a visually appealing organization system but also helps identify different tools quickly. This system is particularly beneficial for households with multiple users, making it easier to keep track of personal items and maintain order in shared spaces.
Required Items:
- Heat-resistant storage containers or holders
- Colored silicone bands or tape
- Label maker
- Wall-mounted holders or hooks
- Drawer organizers
- Storage basket with compartments
- Cable ties
- Heat-resistant mat
- Drawer liner
Start by sorting all hair tools by category (straighteners, curling irons, blow dryers, etc.) and assign a specific color to each type. Wrap colored silicone bands or tape around the handles or cords of each tool category.
Install wall-mounted holders or arrange drawer organizers according to your space, ensuring each designated area can accommodate the tools while keeping cords managed. Place heat-resistant mats in the storage areas to protect surfaces.
For drawer storage, line the drawers with heat-resistant material and create designated sections using drawer organizers. Bundle cords neatly using matching colored cable ties, leaving enough slack for easy access while preventing tangles. Position frequently used items in easily accessible locations, with less-used tools stored in secondary spaces.
Additional Tips: Consider implementing a cool-down station with a heat-resistant mat where tools can safely cool before storage. Regularly inspect colored bands or tape for wear and replace as needed. Keep a small container for spare color-coding materials in your organization system.
For shared bathrooms, add name labels alongside color coding to prevent confusion among multiple users.
Vertical Space Solutions With Hanging Organizers
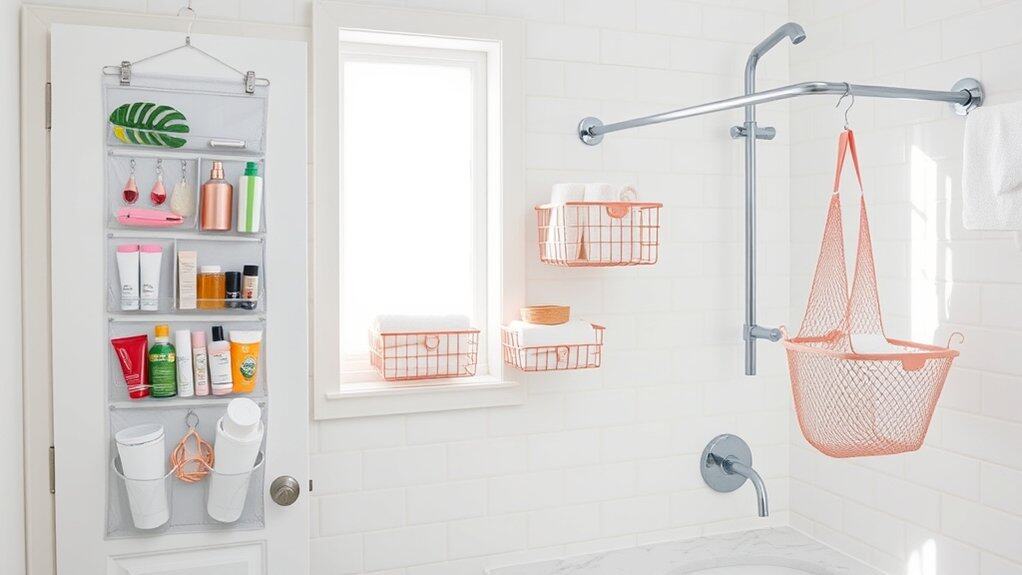
Maximizing vertical space in a girls’ bathroom is essential for creating an organized and clutter-free environment. With limited counter and cabinet space, utilizing the vertical areas of walls and doors can dramatically increase storage capacity while keeping frequently used items easily accessible.
Hanging organizers transform unused vertical spaces into functional storage solutions, creating designated spots for everything from hair accessories to skincare products. This organizational approach not only saves valuable counter space but also makes it easier to locate items quickly during rushed morning routines.
Required Items:
- Over-the-door hanging organizers
- Adhesive wall hooks
- Shower rod tension hooks
- Clear pocket organizers
- Command strips
- Measuring tape
- Level
- Pencil
- Drill and anchors (if mounting permanently)
- Storage baskets with hanging capabilities
- S-hooks
Start by assessing your vertical spaces, including the back of the bathroom door, empty wall areas, and cabinet doors. Measure these spaces carefully to ensure proper fit of hanging organizers.
Install over-the-door organizers first, utilizing both sides of the door if possible. For wall-mounted solutions, mark mounting points with a level and pencil before securing hooks or organizers with appropriate hardware. Position frequently used items at eye level and heavier items closer to the bottom of hanging systems.
When arranging items within hanging organizers, group similar products together. Designate specific pockets for categories like hair accessories, skincare products, makeup, and personal care items. Use clear pocket organizers for better visibility and easy access to contents.
Consider installing a second shower rod parallel to your existing one to hang additional organizers or baskets.
For optimal results, regularly assess the functionality of your hanging organization system. Adjust placement of items based on usage patterns, and ensure weight is evenly distributed to prevent sagging or damage to mounting hardware.
Consider using labels on pockets or sections to maintain organization long-term, and periodically clean both the organizers and the items stored within them to prevent dust accumulation.
Decorative Tray Styling
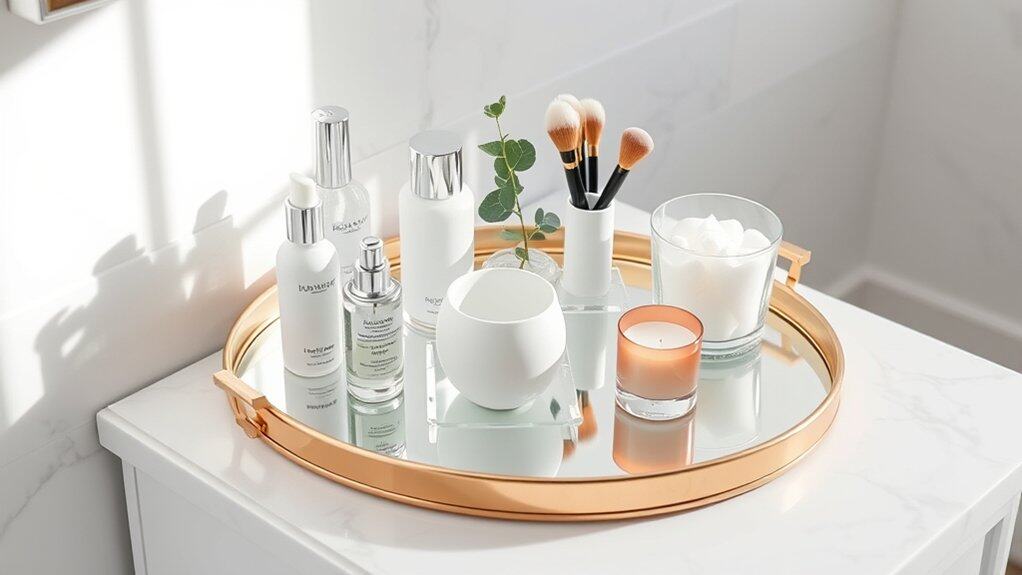
A well-styled decorative tray transforms a cluttered bathroom counter into an elegant, organized space that makes daily routines more enjoyable. These trays not only contain bathroom essentials but also create a purposeful display that adds sophistication to the overall bathroom aesthetic.
Organizing bathroom items on decorative trays prevents products from scattered placement while making them easily accessible. This method of organization establishes designated zones for different categories of items, reducing morning rush confusion and maintaining a clean, presentable bathroom space.
Required Items:
- Decorative tray (mirrored, metallic, acrylic, or ceramic)
- Small containers or cups for vertical storage
- Drawer organizers or small bins
- Clear acrylic risers
- Small decorative bowls
- Adhesive non-slip pads
- Labels (optional)
- Small vase or plant holder
- Cotton swab/ball holders
Position the decorative tray in a convenient spot on the counter, ensuring it doesn’t interfere with sink usage. Group similar items together within the tray, such as skincare products, hair accessories, or makeup essentials. Use small containers or cups to store vertically-oriented items like makeup brushes, keeping them upright and easily accessible.
Place frequently used items toward the front of the tray and less-used items toward the back, utilizing risers to create levels for better visibility. Create visual balance by varying heights of items and incorporating both functional and decorative elements. Consider adding a small plant or fresh flowers to bring life to the arrangement.
Ensure all containers and items are properly cleaned before placing them on the tray, and use non-slip pads underneath to prevent sliding. To maintain the organized tray system, regularly assess items for relevance and remove products that are expired or unused.
Clean the tray and containers weekly to prevent product buildup, and adjust the arrangement seasonally based on changing needs. Consider rotating decorative elements monthly to keep the display fresh and inspiring while maintaining its practical purpose.
Upcycled Container Display
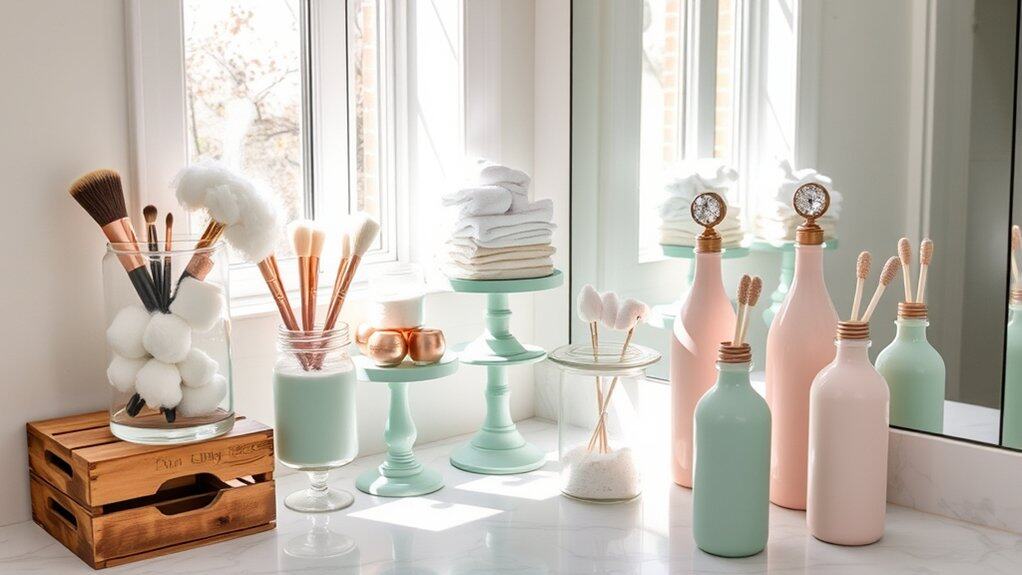
Transforming everyday containers into stylish bathroom storage solutions not only helps reduce waste but also creates a personalized and eco-friendly organizational system. Upcycled containers add character to your bathroom while providing practical storage for toiletries, cosmetics, and bathroom essentials.
Creating an upcycled container display allows you to customize storage solutions to your specific needs while maintaining a cohesive aesthetic. When properly executed, these displays can transform cluttered countertops into an organized, visually appealing arrangement that makes items easily accessible while adding decorative flair to your bathroom space.
Required Items:
- Clean glass jars (various sizes)
- Empty candle containers
- Metal tins
- Decorative paper or contact paper
- Spray paint
- Adhesive labels
- Clean wooden boxes
- Mason jars
- Cleaning supplies
- Sandpaper
- Clear sealant
- Basic tools (scissors, glue gun)
Select containers that match your storage needs and clean them thoroughly, removing all labels and adhesive residue. Sand any rough edges on metal containers and wipe them down. Apply primer if necessary, then paint containers in coordinating colors or leave them in their natural state for a rustic look.
Group containers by function: dedicate larger jars for cotton balls and bath items, medium containers for makeup brushes and tools, and smaller vessels for hair accessories and bobby pins.
Consider heights when arranging your display, placing taller items in the back and shorter ones in front for easy access. Create levels using sturdy boxes or stands to add visual interest and maximize vertical space. Label each container clearly to maintain organization, using either decorative tags or waterproof labels that complement your bathroom’s design scheme.
For optimal results, rotate your containers seasonally to ensure they remain clean and functional. Place frequently used items in easily accessible containers at the front of your display. Consider using clear containers for items you need to monitor quantity-wise, and keep moisture-sensitive items in containers with secure lids.
Regularly assess the effectiveness of your container arrangement and adjust as needed to maintain both functionality and aesthetic appeal.
DIY Bathroom Storage Labels
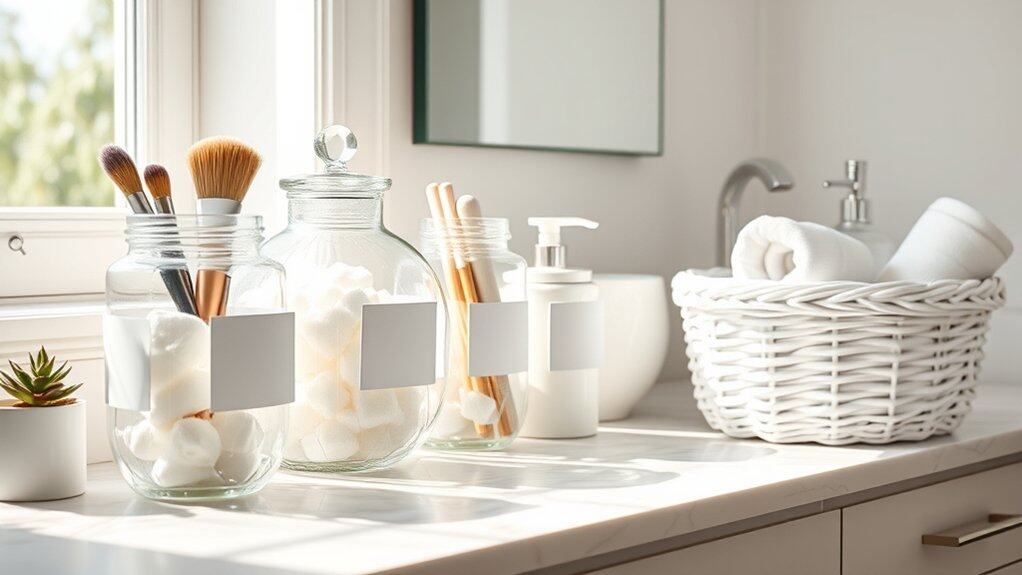
Creating clear, attractive labels for bathroom storage is a game-changer in maintaining an organized space. When every container, drawer, and basket has a designated purpose that’s clearly marked, it becomes significantly easier to maintain order and ensure items return to their proper places after use.
Labels not only serve a practical purpose but also add a decorative element to your bathroom organization system. Whether using a minimalist approach with simple white labels or incorporating fun designs and colors, bathroom storage labels can complement your décor while making your daily routine more efficient.
Required Items:
- Label maker or printer
- Clear waterproof label sheets
- Scissors
- Measuring tape
- Clear contact paper (for protection)
- Storage containers/baskets
- Cleaning supplies
- Permanent marker
- Design software (optional)
- Card stock (optional)
Start by thoroughly cleaning and drying all surfaces where labels will be applied. Measure each container or space to determine appropriate label sizes. If using a label maker, select a font style and size that’s easily readable from a reasonable distance.
For printed labels, create a template in your design software, ensuring consistent sizes and styles across all labels. Categories should be clear and specific – “Hair Products,” “First Aid,” “Daily Essentials,” rather than vague terms. Apply labels slightly above eye level on shelves and centered on containers.
For areas exposed to moisture, seal labels with clear contact paper or use waterproof materials. For enhanced organization, implement a color-coding system within your labels – perhaps blue for cleaning supplies, green for beauty products, and red for first aid items.
Consider adding symbols or icons alongside text for quick visual recognition. Maintain a master list of your labeling system for future reference when replacing items or reorganizing spaces.
Additional Tip: Create a few blank labels in the same style and keep them stored safely. This allows you to maintain consistency when adding new categories or replacing damaged labels without having to recreate your entire labeling system.
Review and update your labels every few months to ensure they still reflect your current storage needs and organization system.

