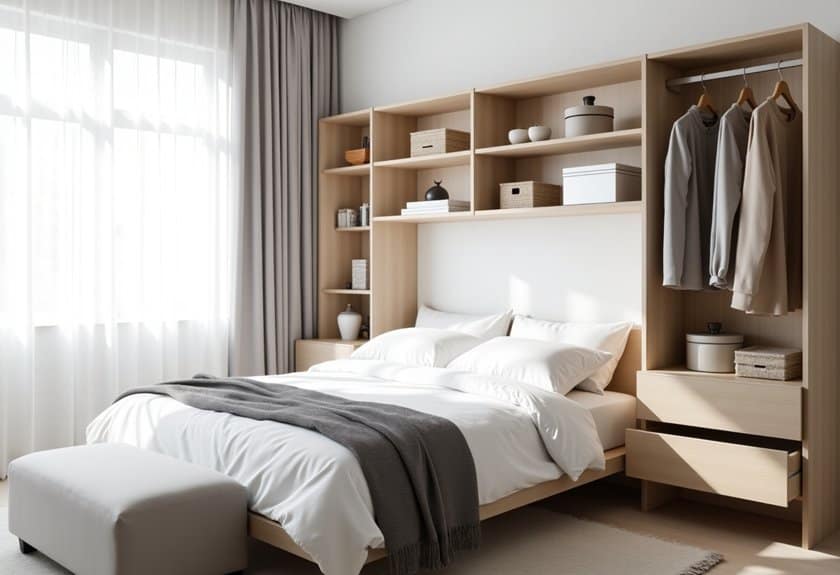
You’ve probably stared at your cluttered bedroom wondering where to even begin. Trust me, I’ve been there! Whether you’re dealing with a tiny space or just want to maximize every square inch, organizing your bedroom doesn’t have to feel overwhelming. After transforming countless bedrooms (including my own), I’ve discovered 15 game-changing solutions that’ll help you create a serene, organized space. Ready to turn your bedroom into a clutter-free sanctuary that actually stays that way?
Vertical Storage Solutions for Small Spaces
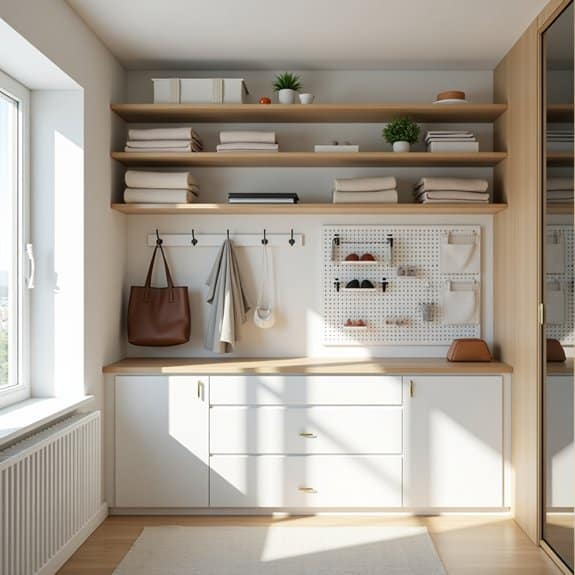
Making the most of vertical space in a small bedroom is essential for maximizing storage capacity while maintaining a clutter-free environment. When floor space is limited, utilizing wall height and vertical storage solutions can effectively double or triple your storage options without compromising the room’s functionality.
Vertical storage transforms often-overlooked wall spaces into valuable organization zones, creating a more streamlined and efficient bedroom layout. This approach not only helps maintain order but also creates visual interest through layered storage solutions while keeping essential items easily accessible.
Required Items:
- Wall anchors and screws
- Floating shelves
- Over-door organizers
- Wall-mounted hooks
- Tension rods
- Stackable storage boxes
- Command strips
- Measuring tape
- Level
- Power drill
- Pencil
- Stud finder
Start by assessing your walls and identifying sturdy mounting points using a stud finder. Install floating shelves at varying heights, beginning at eye level and working upward, ensuring proper weight distribution. Mount hooks beneath shelves for hanging items like bags, scarves, or jewelry.
Utilize the space behind doors by installing over-door organizers or hooks for additional storage. For closet areas, implement double-hanging rods to maximize vertical space, with longer items on top and shorter items below. Install shelf dividers and stackable containers on existing shelves to create distinct zones for different items.
Consider adding a pegboard system for adaptable storage that can evolve with changing needs. To ensure long-term success with vertical storage, regularly assess weight limits on mounted items and adjust organization systems seasonally.
Maintain clear access paths to frequently used items, and avoid overcrowding vertical spaces, which can create visual clutter and safety hazards. Consider using clear containers on higher shelves to easily identify contents without requiring a step stool.
Under-Bed Rolling Storage Systems
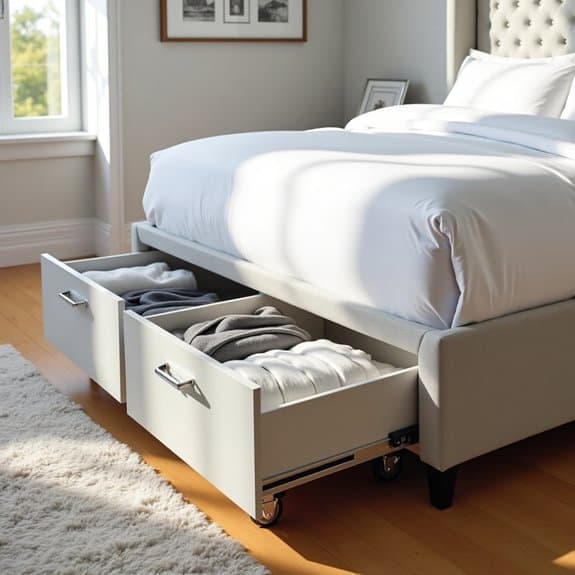
Making use of under-bed space is one of the most effective ways to maximize storage in any bedroom, regardless of size. This often-overlooked area can provide valuable square footage for storing seasonal items, extra bedding, clothing, or rarely used possessions without creating visual clutter in your living space.
Rolling storage systems specifically designed for under-bed use offer the perfect solution for accessing items without the hassle of lifting the bed or struggling to reach deep underneath. These systems protect stored items from dust while keeping them organized and easily accessible through smooth-rolling mechanisms that pull out like drawers.
Required Items:
- Under-bed storage containers with wheels
- Measuring tape
- Labels or label maker
- Drawer dividers or organizers
- Vacuum storage bags
- Anti-dust covers
- Bed risers (if needed)
- Clear plastic bins
- Storage containers inventory list
First, measure the available space under your bed, including height, width, and depth. Clear out the area completely and vacuum thoroughly. If needed, install bed risers to create additional clearance for larger storage containers.
Sort items you plan to store by category, ensuring frequently accessed items are placed in containers that will be positioned toward the outer edges for easy access. Group similar items together in appropriately sized containers, using vacuum storage bags for bulky textiles like winter clothing or extra bedding.
Label each container clearly on multiple sides, and create an inventory list noting the contents and location of each container. Position the containers strategically, with frequently used items nearest the room’s entrance and seasonal items toward the head of the bed.
For optimal organization maintenance, invest in containers with clear tops or sides to easily identify contents, and consider using drawer dividers within larger containers to prevent items from shifting.
Implement a seasonal rotation system, reviewing and reorganizing contents every six months to ensure stored items remain relevant and accessible when needed. Regular cleaning of the wheel mechanisms will ensure smooth operation and prevent dust buildup that could impede movement.
Floating Nightstand Alternatives
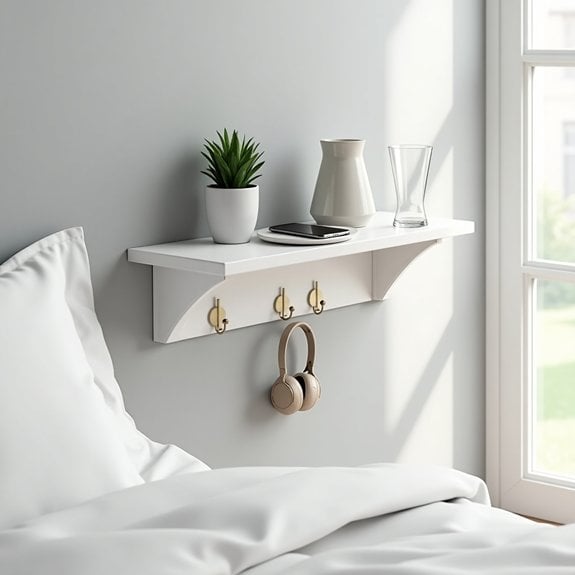
When traditional nightstands take up too much floor space or don’t fit your bedroom’s aesthetic, floating nightstand alternatives offer a modern and space-saving solution. These creative alternatives can transform your bedroom’s functionality while maintaining a clean, minimalist look that makes your space appear larger and more organized.
Floating nightstand alternatives not only free up valuable floor space but also provide essential storage for bedside necessities without the bulk of conventional furniture. These versatile solutions can be customized to match your specific needs and style preferences, whether you prefer industrial, modern, or rustic designs.
Required Items:
- Wall brackets or mounting hardware
- Level
- Drill and drill bits
- Screwdriver
- Wall anchors
- Measuring tape
- Pencil
- Floating shelf
- Cable management clips
- Small storage containers
- Decorative hooks
Start by selecting your preferred floating nightstand style, whether it’s a simple shelf, wall-mounted crate, or repurposed materials. Measure the desired height for your floating nightstand, typically 2-4 inches above mattress level for easy reach. Mark the wall carefully and use a level to ensure straight installation.
Install wall brackets or mounting hardware according to manufacturer specifications, using appropriate wall anchors for your wall type.
Once mounted, organize your floating nightstand space by designating specific zones for different items. Create a charging station for electronics using cable management clips to keep cords tidy. Use small containers or trays to corral items like reading glasses, remote controls, or medications.
Consider adding hooks beneath the floating surface for hanging items like headphones or sleep masks.
To maintain organization long-term, implement a regular decluttering schedule and limit items to daily essentials. Consider adding battery-operated lighting solutions to eliminate the need for table lamps, and use vertical space above the floating nightstand by installing additional small shelves or artwork to complete the look while maintaining functionality.
Closet Door Organization Hacks

Closet doors represent valuable yet often overlooked storage space in bedrooms. These vertical surfaces can be transformed into functional organizing zones, effectively doubling your storage capacity without taking up any floor space. When properly utilized, closet doors can house everything from accessories and shoes to daily planning materials and grooming essentials.
Maximizing closet door space not only helps declutter the rest of your bedroom but also keeps frequently used items within arm’s reach. This organization method is particularly valuable for small bedrooms or shared spaces where every square inch counts, and it allows you to maintain a clean, systematic approach to storing everyday items.
Required Items:
- Over-the-door hooks
- Clear pocket organizers
- Command strips or hooks
- Mirror with storage
- Door-mounted rack
- Measuring tape
- Level
- Screwdriver
- Wall anchors
- Small baskets or containers
- Label maker
Start by measuring your closet door dimensions, including thickness, to ensure any organizational tools will fit properly. Install an over-the-door organizer at the top, ensuring it’s secure and doesn’t interfere with door closure.
Mount additional storage solutions like hooks or racks at varying heights, using appropriate mounting hardware for your door type. Create designated zones for different categories of items – upper areas for less-frequently used items, eye-level for daily essentials, and lower sections for shoes or heavy items.
For optimal functionality, sort items by frequency of use and establish a logical placement system. Position frequently used items at eye level, and store seasonal or occasional items in higher or lower spaces. Utilize clear storage solutions where possible to maintain visibility of stored items, and implement a labeling system for enclosed storage containers.
To maintain your newly organized closet door system, regularly assess and adjust the layout based on changing needs. Consider rotating seasonal items, cleaning storage solutions monthly, and implementing a one-in-one-out rule to prevent overcrowding.
Additionally, test door function periodically to ensure added storage doesn’t impede movement or damage the door over time.
Multi-Purpose Furniture Solutions
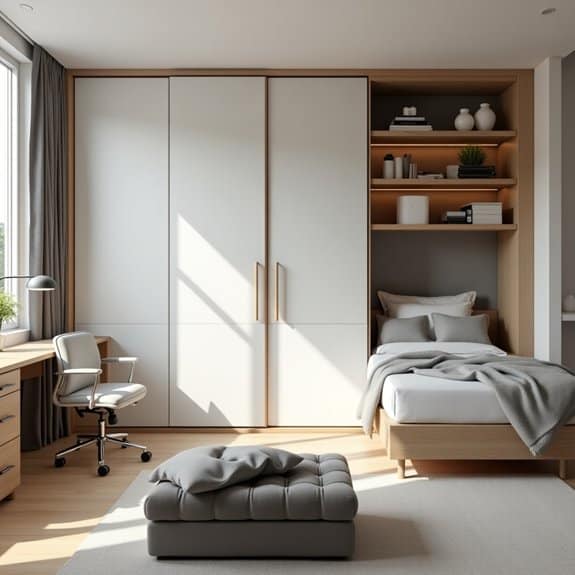
Making the most of your bedroom space through multi-purpose furniture is essential for modern living, particularly in smaller homes and apartments. Well-chosen pieces that serve multiple functions can effectively double your available space while maintaining a clean, uncluttered aesthetic.
Multi-purpose furniture solutions transform your bedroom from a single-function space into a versatile area that adapts to your changing needs throughout the day. From storage ottomans that double as seating to murphy beds that convert into desks, these practical solutions maximize every square foot while maintaining style and functionality.
Required Items:
- Measuring tape
- Floor plan or room dimensions
- Multi-purpose bed frame with storage
- Storage ottoman or bench
- Folding desk or murphy bed
- Bedside tables with drawers
- Stackable storage boxes
- Floating shelves
- Cable ties
- Labels
- Assembly tools
Start by measuring your room and creating zones for different activities. Position your bed as the focal point, selecting a model with built-in storage drawers underneath. Install a murphy bed system if space is particularly tight, allowing the area to function as a home office or workout space during the day.
Place storage ottomans at the foot of the bed, using them for both seating and storing extra bedding or seasonal items. When selecting bedside tables, opt for models with multiple drawers or shelving. Install floating shelves above furniture pieces to maximize vertical space without consuming floor area.
For desk solutions, consider wall-mounted folding desks that can be tucked away when not in use, or invest in a bed system with an integrated desk component.
Additional Tips: Rotate your multi-purpose furniture seasonally to ensure even wear and maintain functionality. Regular assessment of stored items helps prevent accumulation of unnecessary items in storage spaces.
Keep instruction manuals for convertible furniture pieces in an easily accessible location, and periodically check and tighten any hardware to maintain proper operation of moving parts.
Decluttering With the One-In-One-Out Rule
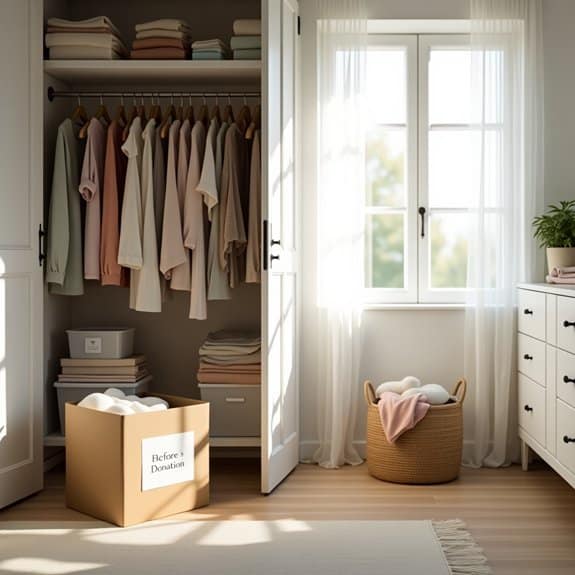
Maintaining an organized bedroom starts with establishing sustainable habits that prevent clutter from accumulating. The One-In-One-Out Rule serves as a fundamental principle for keeping your space manageable and preventing the gradual buildup of unnecessary items that often leads to overwhelming disorder.
This method creates a natural balance in your bedroom storage while forcing mindful consumption habits. By removing one item for every new addition, you maintain equilibrium in your space and ensure that your carefully organized systems don’t become overwhelmed with excess belongings over time.
Required Items:
- Donation box or bag
- Trash bag
- Storage containers
- Labels
- Notepad and pen
- Camera (optional, for inventory)
The One-In-One-Out Rule implementation begins with a complete inventory of your current belongings. Sort items into categories like clothing, accessories, books, and decorative items. When acquiring something new, immediately identify an existing item from the same category to remove. For clothing, pair new purchases with similar items – a new sweater means an old sweater must go. For books, remove one from your shelf before adding another.
This system requires consistent documentation. Keep a simple log of items entering and leaving your space, noting the date and category. Store the donation box in an accessible location, making it easier to maintain the habit. When the box fills up, schedule regular donation runs to prevent items from returning to circulation in your room.
Success Tips: Create a monthly review system to assess your adherence to the rule. Photograph your organized spaces as reference points, allowing you to maintain the same level of organization.
Consider implementing a 24-hour waiting period before new purchases to ensure they truly warrant removing an existing item from your space. This thoughtful approach helps break impulsive buying habits while maintaining your decluttered environment.
Smart Drawer Divider Techniques
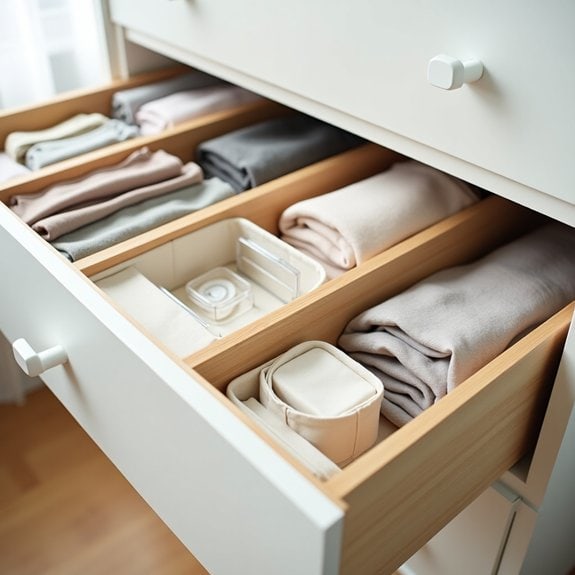
Well-organized drawers are the foundation of a clutter-free bedroom, serving as designated spaces for everything from socks to accessories. When drawers are properly divided and organized, finding items becomes effortless, saving precious time during busy mornings and preventing the frustration of searching through jumbled contents.
Drawer dividers transform chaotic storage spaces into systematic compartments, allowing for better visibility and easier maintenance of folded clothing and personal items. This organization method not only maximizes available space but also helps protect delicate items from damage and extends the life of your belongings through proper storage.
Required Items:
- Adjustable drawer dividers
- Drawer liner material
- Measuring tape
- Small storage boxes or containers
- Labels
- Scissors
- Cleaning supplies
- Storage bins (various sizes)
Start by removing everything from the drawer and cleaning the interior thoroughly. Measure the drawer’s dimensions and plan your divider layout based on the items you’ll be storing. Install adjustable drawer dividers perpendicular to each other, creating a grid pattern that accommodates different-sized items.
For smaller items like accessories or undergarments, use smaller containers or boxes within the divided sections to prevent items from shifting. Consider the frequency of use when deciding placement within the drawer – keep frequently accessed items toward the front and seasonal or rarely used items toward the back.
Group similar items together, such as pairing socks with socks and undergarments with undergarments. Layer items vertically when possible, allowing you to see everything at a glance rather than stacking items on top of each other.
Additional Tips: Label each section clearly to maintain organization long-term, and reassess your drawer organization every few months to ensure it still meets your needs. Consider using clear containers to easily identify contents, and implement a one-in-one-out rule to prevent overflow.
Remember to leave about 10% of space in each compartment to prevent overcrowding and maintain easy access to items.
Hidden Storage Behind Artwork

Making use of wall space behind artwork presents an innovative solution for maximizing storage in bedrooms where space is at a premium. This clever organizational approach allows you to maintain a clean, aesthetic appearance while secretly storing valuable items or everyday essentials behind decorative pieces.
The hidden storage behind artwork method is particularly effective for storing smaller valuables, important documents, or items you want quick access to without cluttering visible spaces. This system combines functionality with design, turning ordinary wall art into dual-purpose storage solutions that maintain your room’s visual appeal.
Required Items:
- Hinged artwork or mirror
- Wall-mounted storage box or recessed cabinet
- Wall anchors and screws
- Level
- Drill and drill bits
- Measuring tape
- Pencil
- Stud finder
- Screwdriver
- Safety goggles
Installation begins with selecting an appropriate wall space and using a stud finder to locate secure mounting points. Mount the recessed storage cabinet or box between wall studs, ensuring it’s level and properly anchored. The cabinet should be deep enough to accommodate your intended items but shallow enough to maintain a flush appearance when closed.
Install the artwork or mirror using appropriate hinges, ensuring they’re properly aligned and can support the weight of your chosen piece. When setting up the storage space, consider installing small hooks, mini shelves, or organizing compartments inside the cabinet to maximize its utility.
Test the opening and closing mechanism several times to ensure smooth operation and proper alignment. Make sure the artwork sits flush against the wall when closed to maintain the illusion of a standard wall decoration.
For optimal results, choose artwork that complements your room’s decor while being appropriately sized to conceal the storage area completely. Consider installing a small LED light inside the cabinet for better visibility, and use felt pads on contact points to prevent scratching and reduce noise when opening and closing.
Regular maintenance of hinges and periodic checking of wall anchors will ensure long-term reliability of your hidden storage solution.
Corner Space Maximization Strategies
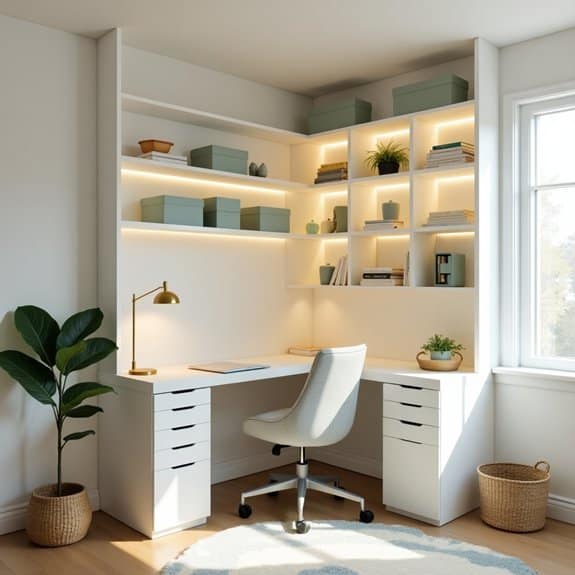
Corner spaces in bedrooms often become neglected dead zones or catch-alls for clutter, but these angular areas actually offer valuable storage and functional opportunities. When properly utilized, corners can transform into productive spaces that enhance the room’s overall organization while maintaining visual harmony.
Maximizing corner spaces requires strategic thinking about vertical storage, multi-functional furniture, and creative solutions that work with, rather than against, the angular nature of corners. These often-overlooked areas can become perfect spots for everything from reading nooks to specialized storage systems, effectively increasing your bedroom’s usable space by up to 20%.
Required Items:
- Corner shelving units
- Tension rods
- Corner desk (if desired)
- Storage boxes or baskets
- Measuring tape
- Level
- Wall anchors
- Screwdriver
- Corner clothing rack
- LED strip lights
- Command hooks
Start by measuring your corner space precisely, including height and width on both walls, noting any baseboards or ceiling moldings. Remove all items from the corner and clean thoroughly.
Install corner shelving units starting from the bottom up, ensuring each shelf is properly anchored and level. For clothing storage, mount a corner clothing rack at an appropriate height, or install tension rods in a V-formation to maximize hanging space. Position storage boxes or baskets on lower shelves for items used less frequently.
For desk setups, position the corner desk first, then arrange vertical storage above it in a way that creates a productive workspace without feeling cramped. Layer lighting solutions by combining overhead lighting with task lighting on the desk surface and ambient lighting via LED strips behind shelving units.
Additional optimization tips: Use clear containers to easily identify contents, implement a color-coding system for various categories of items, and maintain a regular cleaning schedule to prevent corner spaces from becoming cluttered again.
Consider installing mirrors in corners to create the illusion of more space while providing functionality, and regularly reassess your corner organization system to ensure it continues meeting your needs effectively.
Seasonal Clothing Rotation Methods
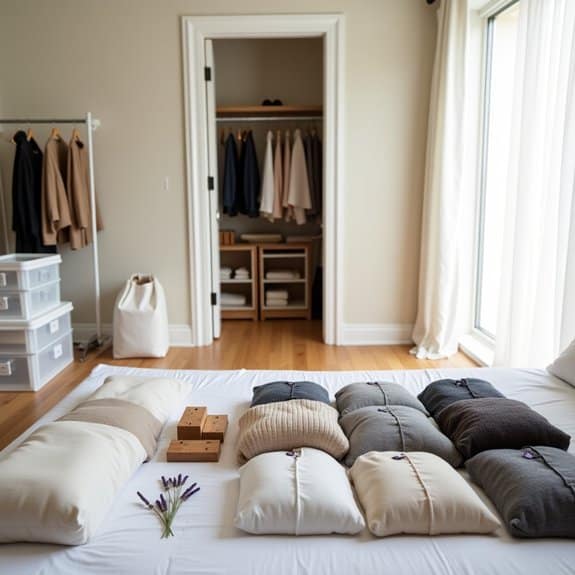
Managing seasonal clothing rotation is a crucial aspect of maintaining an organized and clutter-free bedroom. When clothes for all seasons compete for space in your closet and drawers, it becomes difficult to find what you need and properly care for your garments. A well-planned rotation system ensures that your current-season clothes are easily accessible while protecting off-season items from damage, dust, and unnecessary wear.
Implementing a seasonal clothing rotation system not only maximizes your storage space but also helps you assess your wardrobe twice a year. This practice allows you to evaluate what you actually wear, what needs repair, and what should be donated, ultimately leading to a more curated and functional closet.
Required Items:
- Storage containers with lids
- Vacuum storage bags
- Cedar blocks or lavender sachets
- Labels and marker
- Cleaning supplies
- Garment bags
- Storage bins
- Inventory checklist
- Moth repellent
- Clean sheets or tissue paper
Sort all clothing by season, setting aside transitional pieces that work year-round. Clean all garments thoroughly before storage – even those that appear clean, as invisible body oils and food particles can attract insects.
Carefully fold heavy sweaters and winter wear, placing them in vacuum storage bags to minimize bulk. Store delicate items in breathable garment bags with cedar blocks or lavender sachets to prevent moth damage. Label all containers clearly with contents and season.
For items going into storage, arrange them by category (sweaters, coats, boots) and use appropriate storage solutions for each type. Place heavier items at the bottom of storage containers and lighter items on top. Store containers in a cool, dry place away from direct sunlight.
Keep an inventory list of stored items to avoid unnecessary purchases and make the next rotation easier. Before storing any season’s clothing, perform a quick condition check of each item. Repair any damaged pieces, remove stubborn stains, and donate items that no longer fit or haven’t been worn in the past year.
Consider taking photos of stored items and creating a digital inventory on your phone for easy reference when planning future purchases or outfits.
Jewelry and Accessory Display Solutions

Organizing jewelry and accessories is crucial for preserving their condition and ensuring easy access to your favorite pieces. When items are tangled, thrown together, or hidden away, they often go unworn and can become damaged, defeating the purpose of having these beautiful accessories in the first place.
A well-organized jewelry and accessory system not only protects your investments but also transforms your daily routine. When you can see and access all your pieces easily, you’re more likely to wear them, mix and match effectively, and make getting ready a more enjoyable experience.
Required Items:
- Jewelry stand or tree
- Drawer organizers or dividers
- Hanging organizer with clear pockets
- Small hooks or adhesive holders
- Decorative trays or dishes
- Soft fabric-lined boxes
- Ring holders
- Drawer liner material
- Clear storage containers
- Small zip-top bags
Start by sorting all jewelry and accessories into categories: necklaces, bracelets, rings, earrings, watches, and other accessories. Remove any tarnished, broken, or unwanted pieces for cleaning or disposal.
Install wall-mounted hooks or a pegboard for hanging necklaces and bracelets to prevent tangling. Place frequently worn pieces in easily accessible locations on decorative trays or stands on your dresser top.
For drawer storage, line the drawers with protective material and insert organizers or dividers. Arrange smaller items like rings and earrings in compartmentalized containers, keeping pairs together.
Use hanging organizers with clear pockets for items like scarves, belts, and chunky necklaces that need to maintain their shape.
Additional Tips: Implement a “one-in-one-out” rule to maintain organization and prevent overcrowding. Consider seasonal rotation of accessories, storing off-season items in protective containers.
Clean jewelry regularly and inspect for damage during organization maintenance. Keep frequently worn pieces separate from special occasion items, and consider photographing your organized collection for insurance purposes.
Bedside Charging Station Organization
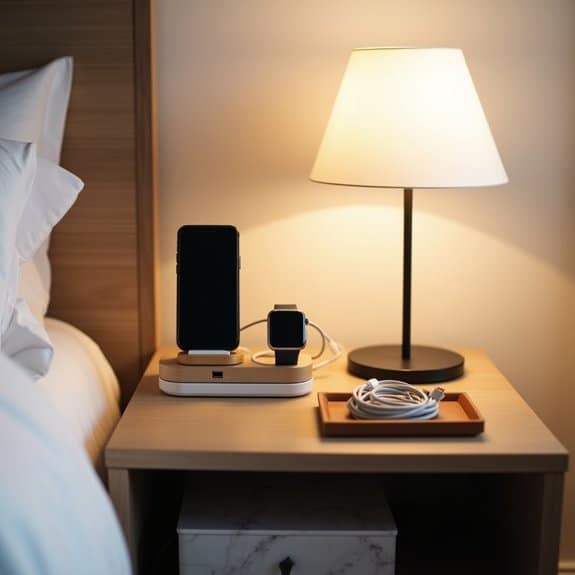
A well-organized bedside charging station is crucial in today’s connected world, where most people rely on multiple devices throughout the day. An effective charging setup eliminates the frustration of tangled cords, missing cables, and the morning scramble to find fully charged devices.
Creating a dedicated charging station not only keeps your essential devices powered but also maintains the aesthetic appeal of your bedroom. A clutter-free charging area reduces visual stress and creates a more peaceful sleeping environment, while ensuring all devices are readily accessible when needed.
Required Items:
- Multi-port USB charging hub
- Cable management clips or ties
- Small drawer organizer or tray
- Surge protector
- Cable labels
- Cord covers or sleeves
- Desktop charging stand
- Cable clips with adhesive backs
- Small storage box or basket
Start by selecting an accessible location near your bedside table, ideally with easy access to a power outlet. Install the surge protector and secure it to the side or back of your nightstand using adhesive strips or cable management clips. Connect your multi-port USB charging hub to the surge protector, positioning it on top of your bedside table or in a dedicated drawer.
Organize your cables by type and length, using cable ties or sleeves to prevent tangling. Label each cord clearly to avoid confusion. Route cables through cord covers or clips, securing them along the edge of your furniture to maintain a clean appearance. Position your charging stand or tray in an easily accessible spot, ensuring it can accommodate all frequently used devices.
For optimal organization, establish a consistent charging routine by always returning devices to their designated spots. Consider using a small basket or box to store extra cables and charging accessories, keeping them nearby but out of sight.
Regularly assess your charging needs and remove any unused cables or outdated charging equipment to prevent clutter accumulation.
Wall-Mounted Storage Solutions
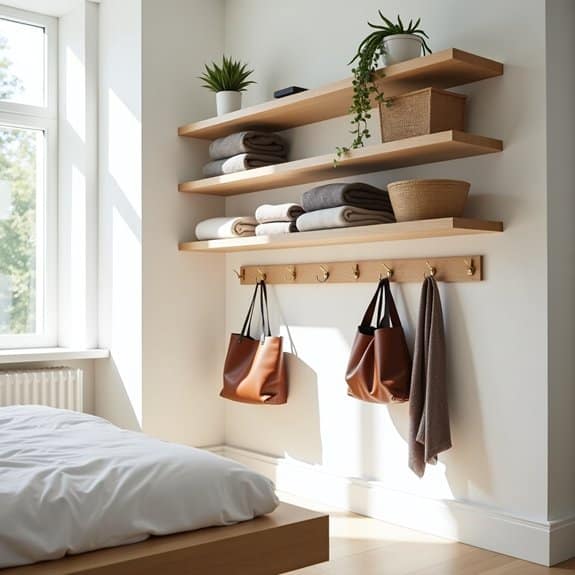
Making the most of vertical space through wall-mounted storage solutions has become essential in modern bedrooms where floor space is often limited. Wall storage not only helps keep belongings organized but also creates a cleaner, more spacious feeling in the room while adding visual interest to otherwise blank walls.
Wall-mounted storage represents one of the most efficient ways to maximize bedroom space without sacrificing style or functionality. These solutions can accommodate everything from books and decorative items to clothing and accessories, while keeping frequently used items within easy reach and protecting them from dust.
Required Items:
- Wall anchors and screws
- Level
- Drill and drill bits
- Measuring tape
- Pencil
- Stud finder
- Floating shelves
- Wall-mounted hooks
- Hanging organizers
- Wire baskets or bins
- Mounting brackets
- Screwdriver
Start by mapping out your wall space using a measuring tape and pencil, marking the locations for shelves and hooks. Use a stud finder to locate solid mounting points, ensuring heavier items will be properly supported.
Install floating shelves at varying heights, keeping frequently used items at eye level and less-used items higher up. Mount hooks in clusters for hanging bags, accessories, or clothing items, ensuring proper spacing between each hook for easy access.
Position wire baskets or bins on sturdy brackets to store smaller items like socks, accessories, or folded clothing. Consider installing a combination of open and closed storage solutions to maintain a clean appearance while maximizing functionality.
Remember to leave enough space between storage elements to prevent the wall from looking cluttered. For optimal organization success, rotate items seasonally and regularly assess what’s being stored on the walls.
Install adjustable systems when possible to allow for changing storage needs, and consider using clear containers or labels to easily identify contents. Keep heavier items on lower shelves for safety and convenience, and maintain a consistent style across all wall-mounted elements to create a cohesive look.
Custom Headboard Storage Ideas
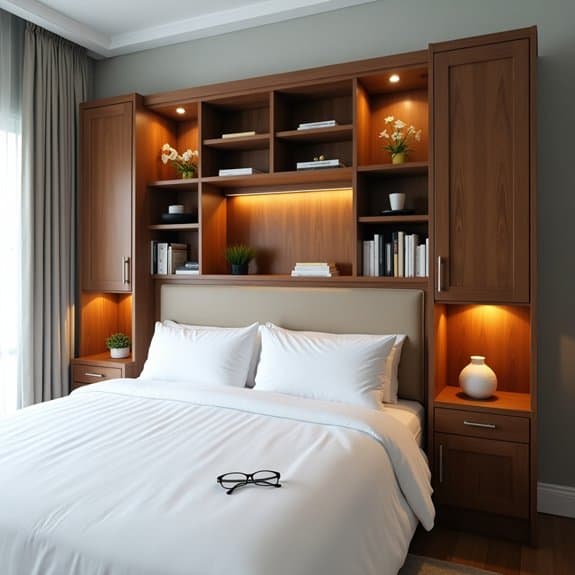
A well-designed headboard storage system transforms your bedroom by maximizing vertical space while keeping essential items within arm’s reach. Custom headboard storage eliminates the need for additional nightstands or shelving units, creating a sleek, clutter-free environment that promotes better rest and relaxation.
Incorporating storage into your headboard design serves multiple purposes, from displaying decorative items to storing books, electronics, and personal items. This solution is particularly valuable in smaller bedrooms where space optimization is crucial, allowing you to maintain organization without sacrificing style or functionality.
Required Items:
- Measuring tape
- Level
- Pencil
- Screwdriver
- Wall anchors
- Storage bins or baskets
- LED strip lights (optional)
- Shelf dividers
- Mounting brackets
- Wood or MDF boards
- Wood screws
- Sandpaper
- Paint or finish materials
Start by measuring your bed’s width and the available wall space above it. Design your storage system to extend slightly beyond the bed’s width for a balanced look. Install wall-mounted shelving units or build custom compartments that integrate seamlessly with your existing headboard.
Create a combination of open shelving for frequently accessed items and closed storage for items you want concealed. When installing the storage system, ensure all components are properly anchored to wall studs for stability. Incorporate different-sized compartments to accommodate various items – smaller sections for electronics and charging stations, medium-sized cubbies for books and magazines, and larger spaces for decorative storage boxes or baskets.
Consider adding built-in lighting to illuminate specific areas and create ambiance. For optimal organization and maintenance, implement a zone system within your headboard storage. Designate specific areas for different categories of items, use drawer organizers or small containers to prevent smaller items from getting lost, and regularly assess stored items to prevent clutter accumulation.
Consider incorporating adjustable shelving options to adapt to changing storage needs over time.
Clear Container Systems for Visual Organization

Visual organization through clear containers transforms bedroom storage from chaotic to intuitive. When items are visible and properly categorized, daily routines become smoother, and finding specific items becomes effortless. The transparency of clear containers eliminates the need to open multiple boxes or containers to locate what you need.
Clear container systems work particularly well for clothing accessories, seasonal items, and daily essentials. This method not only maximizes space but also creates a clean, streamlined aesthetic that can reduce visual clutter and mental stress, making your bedroom a more peaceful environment.
Required Items:
- Clear plastic storage containers (various sizes)
- Labels or label maker
- Drawer dividers
- Clear shoe boxes
- Clear hanging organizers
- Measuring tape
- Container lid organizer
- Clear storage bins
- Drawer liner material
- Dust-proof covers (optional)
Start by measuring your storage spaces and acquiring appropriately sized clear containers. Sort items into categories based on use frequency and type – accessories, seasonal wear, special occasion items, and daily essentials. Place frequently used items in easily accessible containers at eye level or in prime drawer space.
For drawer organization, use smaller clear containers as dividers to create compartments for items like socks, undergarments, and accessories. Position seasonal or less-frequently used items in larger clear containers on higher shelves or under the bed. Label each container clearly, even if contents are visible, to maintain organization long-term.
For closet storage, utilize clear hanging organizers for items like scarves, belts, or handbags, ensuring they remain visible while protected from dust. To maintain the effectiveness of your clear container system, regularly reassess and adjust container placement based on usage patterns.
Consider using vacuum-sealed bags inside clear containers for bulky seasonal items, and rotate contents seasonally. Keep container lids organized in a separate system to prevent misplacement and maintain easy access to all stored items.

