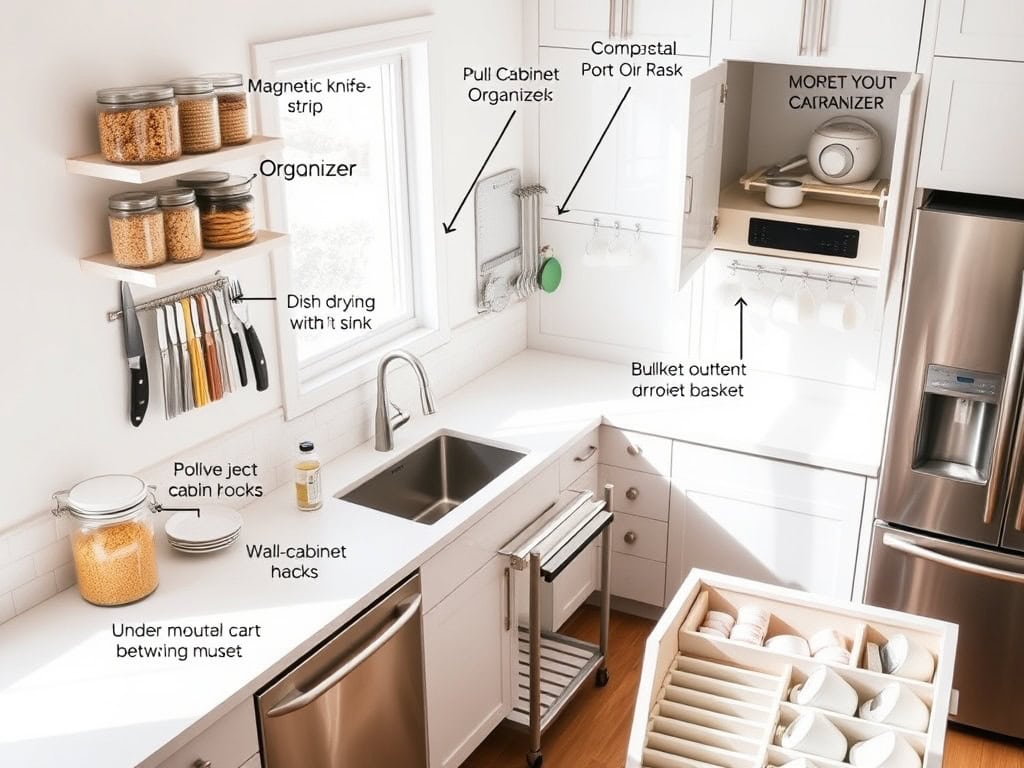
If you’re tired of battling your tiny kitchen’s limited space, you’re not alone! I’ve spent years perfecting organization hacks in my 80-square-foot cooking corner, and I’ve discovered some game-changing solutions that’ll transform your cramped quarters into an efficient culinary workspace. Whether you’re dealing with minimal counter space or awkward cabinet configurations, these nine smart organization ideas will help you reclaim every precious inch of your kitchen real estate.
Install a Magnetic Knife Strip
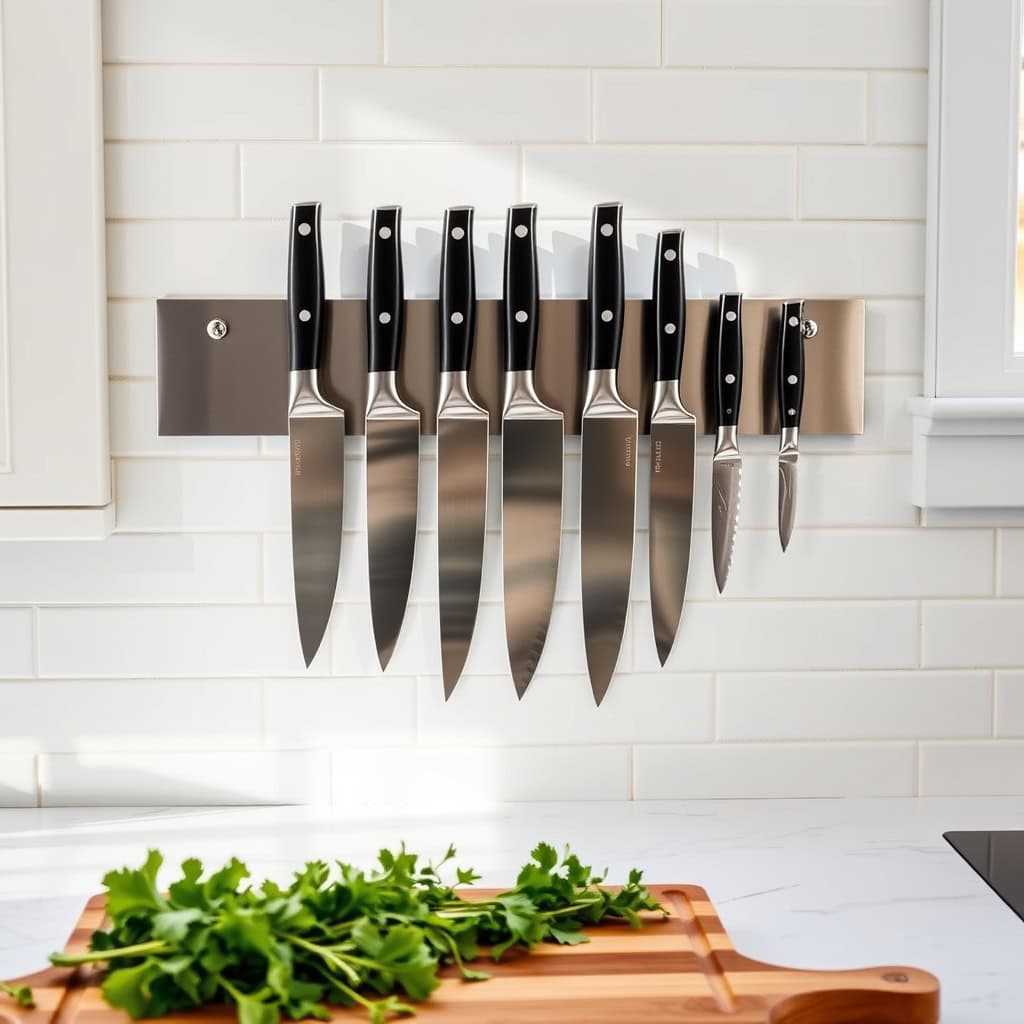
A well-organized knife storage solution is crucial for any functional kitchen, not only for safety but also for maintaining the quality of your knives. Traditional knife blocks take up valuable counter space and can harbor bacteria in their slots, while drawer storage can dull blades and create safety hazards when reaching for utensils.
Installing a magnetic knife strip transforms an unused wall space into an efficient, accessible storage solution. This modern approach to knife organization keeps your essential tools within easy reach while creating an attractive display that adds a professional touch to your kitchen. The magnetic strip also allows knives to dry completely after washing, preventing potential rust or bacteria growth.
Required Items:
- Magnetic knife strip
- Electric drill
- Level
- Pencil
- Measuring tape
- Wall anchors
- Screws
- Screwdriver
- Stud finder
Choose an easily accessible wall space near your primary food prep area, ideally away from high-traffic zones where people might bump into the knives. Use a stud finder to locate wall studs, marking their positions with a pencil.
Hold the magnetic strip against the wall at your desired height (typically eye level) and use a level to ensure it’s perfectly straight. Mark the mounting holes with a pencil. If you can’t mount directly into studs, install wall anchors at the marked spots. Drill pilot holes, then secure the magnetic strip using the provided screws, ensuring it’s firmly attached to the wall.
For optimal organization and safety, place larger knives at one end and smaller ones at the other. Position knives with handles facing the same direction and ensure adequate space between each blade.
Test the magnetic hold by gently placing each knife on the strip – they should attach firmly but still be easy to remove. Clean the magnetic strip regularly with a damp cloth to prevent dust accumulation and maintain its attractive appearance.
Use Vertical Space With Over-Door Organizers
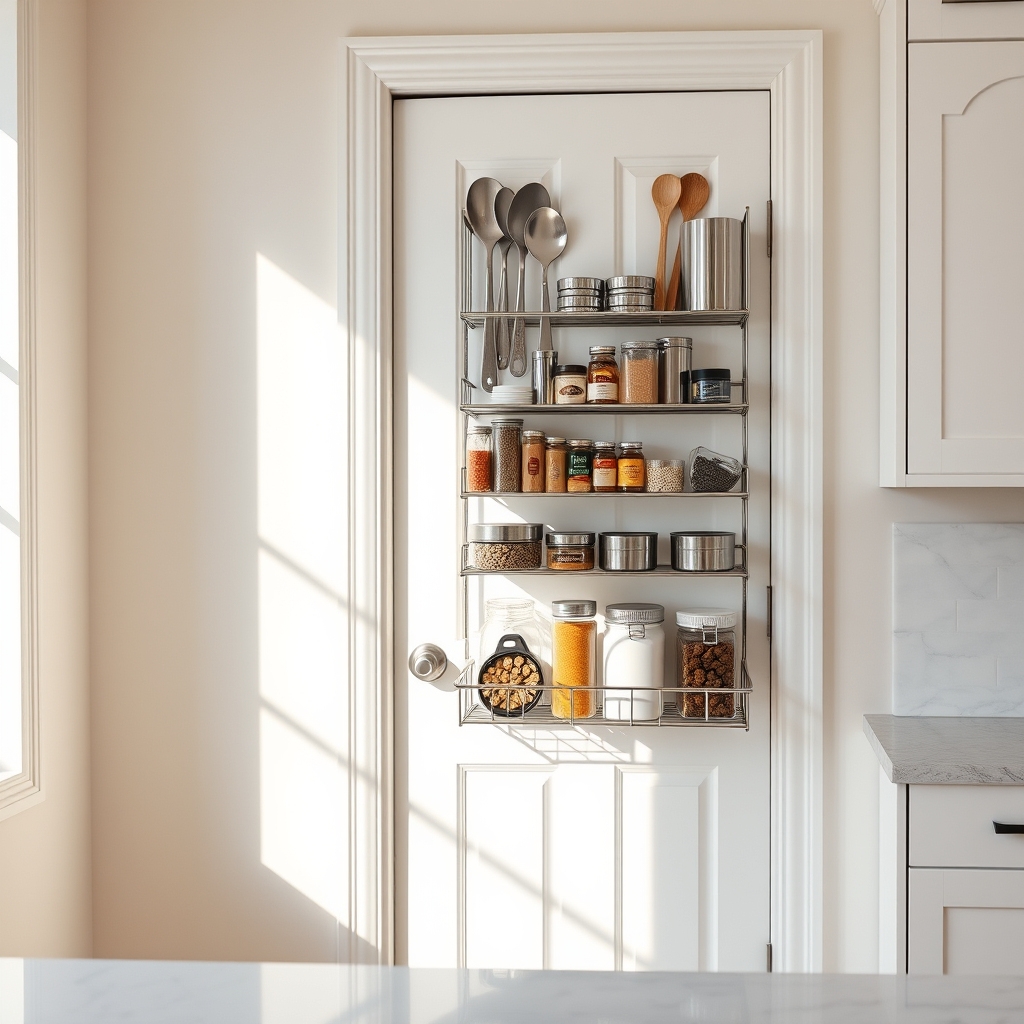
Maximizing vertical space in the kitchen is essential for creating additional storage without sacrificing valuable counter or cabinet space. Over-door organizers represent an often overlooked solution that can transform unused door space into functional storage areas for pantry items, cleaning supplies, or cooking utensils.
These organizers take advantage of typically wasted space while keeping frequently used items easily accessible. Installing over-door organizers can significantly reduce clutter in cabinets and drawers, leading to a more organized and efficient kitchen workspace.
Required Items:
- Over-door organizer rack(s)
- Measuring tape
- Door bumpers or protective pads
- Level
- Screwdriver (if mounting is required)
- Command strips (optional)
- Door hooks (if not included)
- Storage bins or baskets (optional)
Start by measuring both the width and thickness of your cabinet or door to ensure proper fit of the organizer. Remove the organizer from its packaging and attach any included door hooks or mounting hardware.
If the organizer comes with adjustable shelves or pockets, configure them based on the items you plan to store. Place protective pads where the organizer makes contact with the door to prevent scratching or damage.
For permanent installation, consider securing the organizer with screws if mounting holes are provided. This prevents shifting and adds stability. Arrange items in the organizer with heavier objects at the bottom and lighter items toward the top. Group similar items together and consider using additional bins or baskets to contain smaller objects.
Additional Tips: Regularly check that door hooks remain secure and tighten any loose components. Consider labeling different sections to maintain organization.
If storing cleaning supplies, ensure the door can still close properly and that items don’t interfere with nearby cabinets or appliances. To prevent door damage, periodically rotate heavy items and avoid overloading the organizer beyond its weight capacity.
Add Rolling Storage Carts
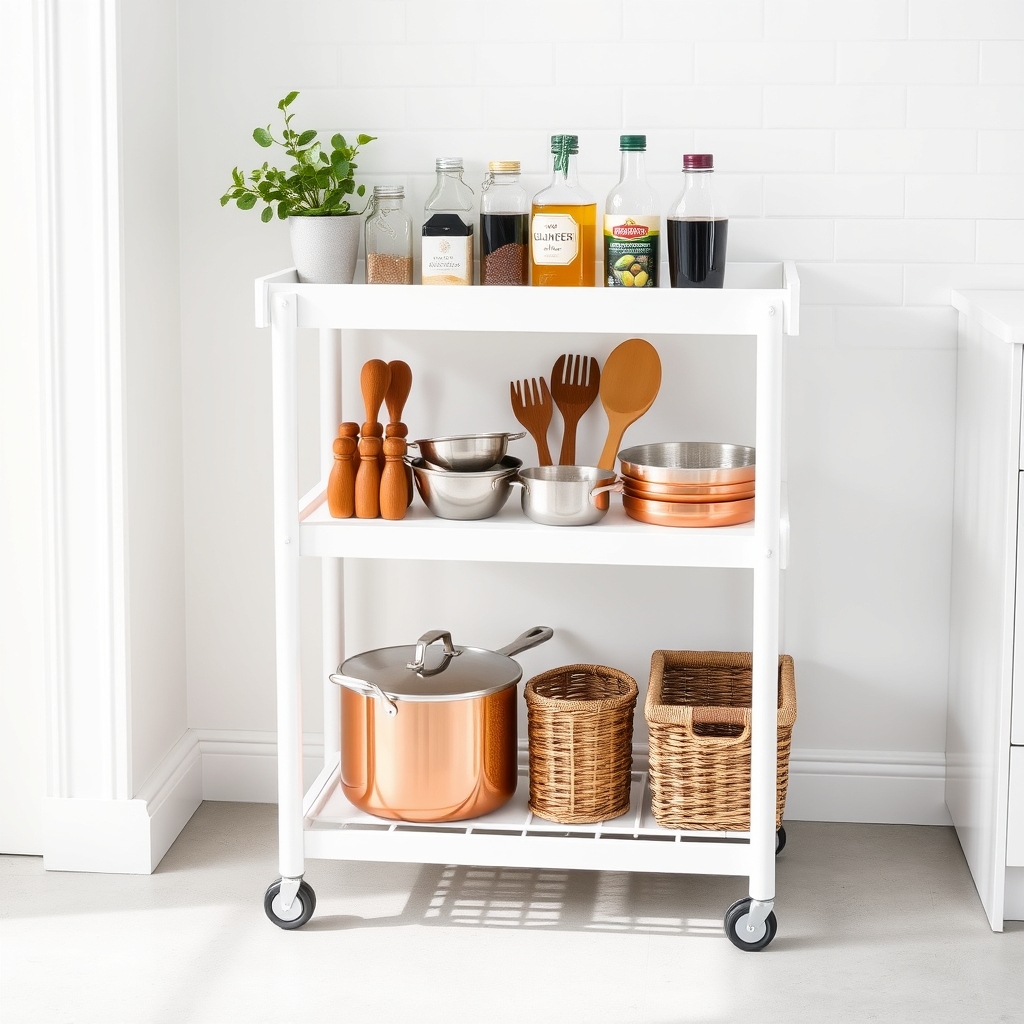
Rolling storage carts are a game-changing solution for kitchens of any size, offering flexible storage that can be moved wherever needed. These versatile units create instant storage space while maintaining the ability to reconfigure your kitchen layout at a moment’s notice, making them particularly valuable in smaller kitchens or spaces where permanent storage is limited.
The mobility of rolling carts allows you to keep frequently used items close at hand when cooking, then roll them out of the way when not in use. This dynamic storage solution can transform dead space into functional areas, whether you’re using the cart for pantry items, cooking utensils, or small appliances.
Required Items:
- Rolling storage cart
- Drawer organizers or bins
- Labels
- Shelf liner (optional)
- Storage containers
- Measuring tape
- Cleaning supplies
- Cabinet hooks (optional)
- Bungee cords or straps (optional)
Select a rolling cart that fits your space and needs, measuring carefully to ensure it can move freely through doorways and around corners. Clean the cart thoroughly and install shelf liner if desired.
Group similar items together and assign specific zones to each shelf – heavy items on the bottom, frequently used items in the middle, and lighter items on top. Use containers and organizers to maximize vertical space and prevent items from shifting during movement. Consider adding hooks to the sides for additional hanging storage.
When organizing the contents, create a logical flow that matches your cooking habits. The top shelf can house everyday items like coffee supplies or cooking oils, while middle shelves might contain frequently used tools or pantry items. The bottom shelf is ideal for heavier items like small appliances or bulk ingredients.
Use clear containers to maintain visibility and add labels to ensure items return to their designated spots. For optimal use, regularly assess and adjust the cart’s contents based on your changing needs.
Keep the wheels clean and well-maintained for smooth operation, and consider using drawer liners or non-slip mats to prevent items from shifting while moving the cart. If storing in a specific location, mark the floor space with tape to ensure the cart always returns to its home position when not in active use.
Create a Pegboard Wall System
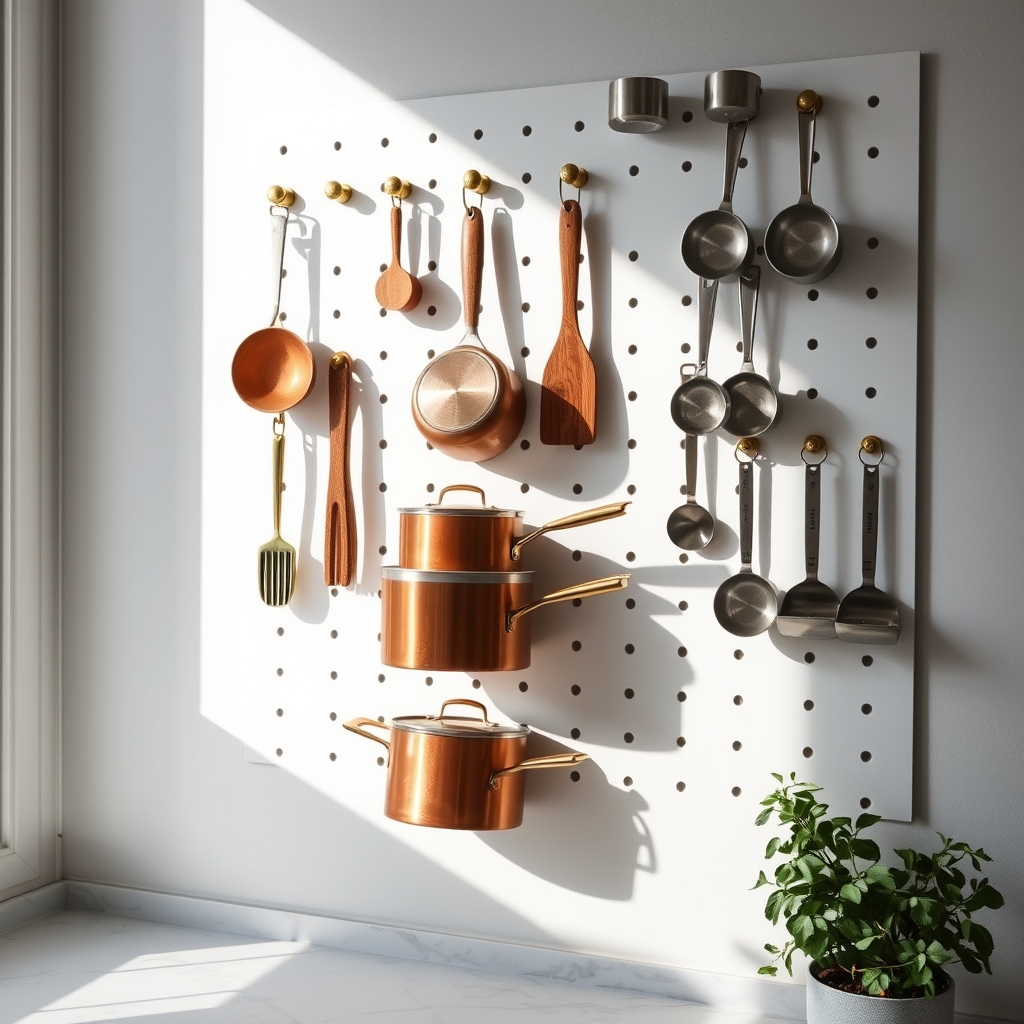
A pegboard wall system transforms unused wall space into a highly functional storage solution that keeps essential kitchen tools within arm’s reach. This versatile organization method has been a favorite among professional chefs and home cooks alike, offering customizable arrangements that can evolve with changing needs and cooking styles.
Installing a pegboard system not only maximizes vertical storage space but also creates an attractive display that can showcase your cookware while keeping countertops clear. This organization method is particularly valuable in smaller kitchens where every inch of space counts, and it allows for quick access to frequently used items during meal preparation.
Required Items:
- Pegboard (sized to fit your wall space)
- Pegboard hooks of various sizes
- Wall anchors and screws
- Power drill
- Level
- Measuring tape
- Pencil
- Spacers or furring strips
- Paint (optional)
- Various pegboard accessories (shelves, baskets, tool holders)
Installation begins with measuring your wall space and cutting the pegboard to size if necessary. Mount furring strips to the wall first, creating a gap between the wall and pegboard that allows hooks to be inserted easily. Secure the pegboard to the furring strips using screws and wall anchors, ensuring it’s level.
Paint the pegboard if desired to match your kitchen’s aesthetic. Once mounted, plan your tool arrangement by grouping similar items together and positioning frequently used tools at eye level. Install various hooks and accessories, starting with larger items like pots and pans, then moving to smaller tools like spatulas and measuring cups.
Consider weight distribution and ensure heavier items are properly secured with appropriate hooks. To maintain an effective pegboard system, regularly assess your tool arrangement and adjust as needed. Use hook locks to prevent hooks from lifting out when removing items, and keep a few extra hooks on hand for new additions to your kitchen tool collection.
Consider adding labels beneath frequently moved items to maintain organization and ensure tools return to their designated spots after use.
Maximize Cabinet Space With Shelf Risers
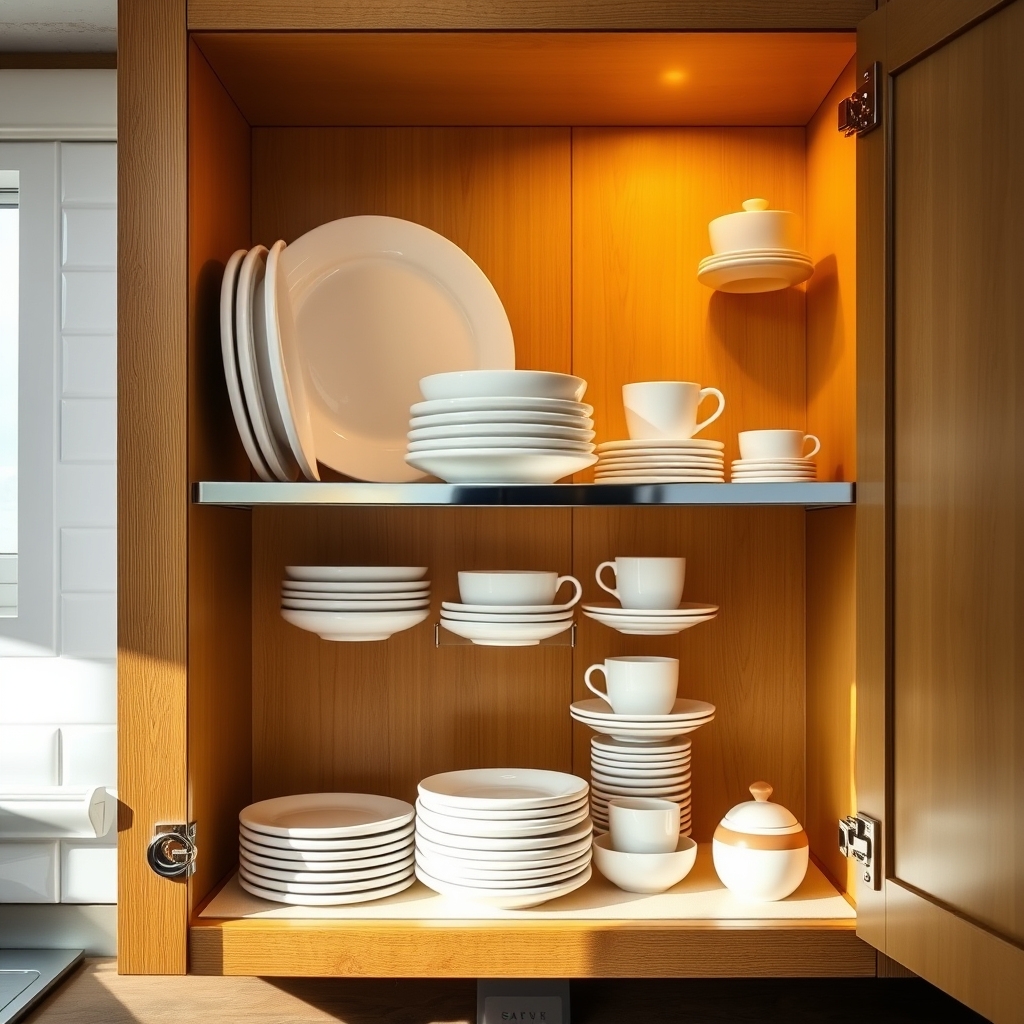
Making the most of cabinet space is crucial in any kitchen, regardless of its size. Poorly utilized vertical space often results in wasted storage potential and cluttered, inefficient cabinets that make cooking and meal preparation more challenging than necessary.
Shelf risers are transformative organizing tools that instantly double your storage capacity by creating additional levels within existing cabinets. These simple yet effective solutions allow for better visibility of items, prevent stacking that can lead to damaged dishes, and make it easier to access everything from plates to spice containers.
Required Items:
- Cabinet shelf risers (various sizes)
- Measuring tape
- Cabinet liner (non-slip)
- Label maker
- Cleaning supplies
- Storage containers (if needed)
- Notepad and pen
Start by removing all items from the cabinet and measuring the available space, including height, width, and depth. Clean the cabinet thoroughly and install non-slip liner material.
Select appropriately sized shelf risers that leave enough clearance for items both above and below. Position the risers toward the back of the cabinet for larger items and closer to the front for smaller ones, creating a stadium-style arrangement that maximizes visibility.
Group similar items together, placing frequently used items at the front and occasional-use items toward the back. When returning items to the cabinet, place heavier, larger items on the bottom level and lighter, smaller items on the raised shelves.
Create zones within the cabinet based on use frequency and function. Consider using clear storage containers for loose items to maintain organization and prevent smaller objects from falling through gaps in the risers.
Additional tip: Review your shelf riser organization system every three months, adjusting the layout based on changing needs and usage patterns. Remove items that haven’t been used in six months to maintain efficient use of space, and periodically clean both the risers and cabinet surfaces to prevent dust buildup and maintain a hygienic storage environment.
Mount Under-Cabinet Storage Solutions
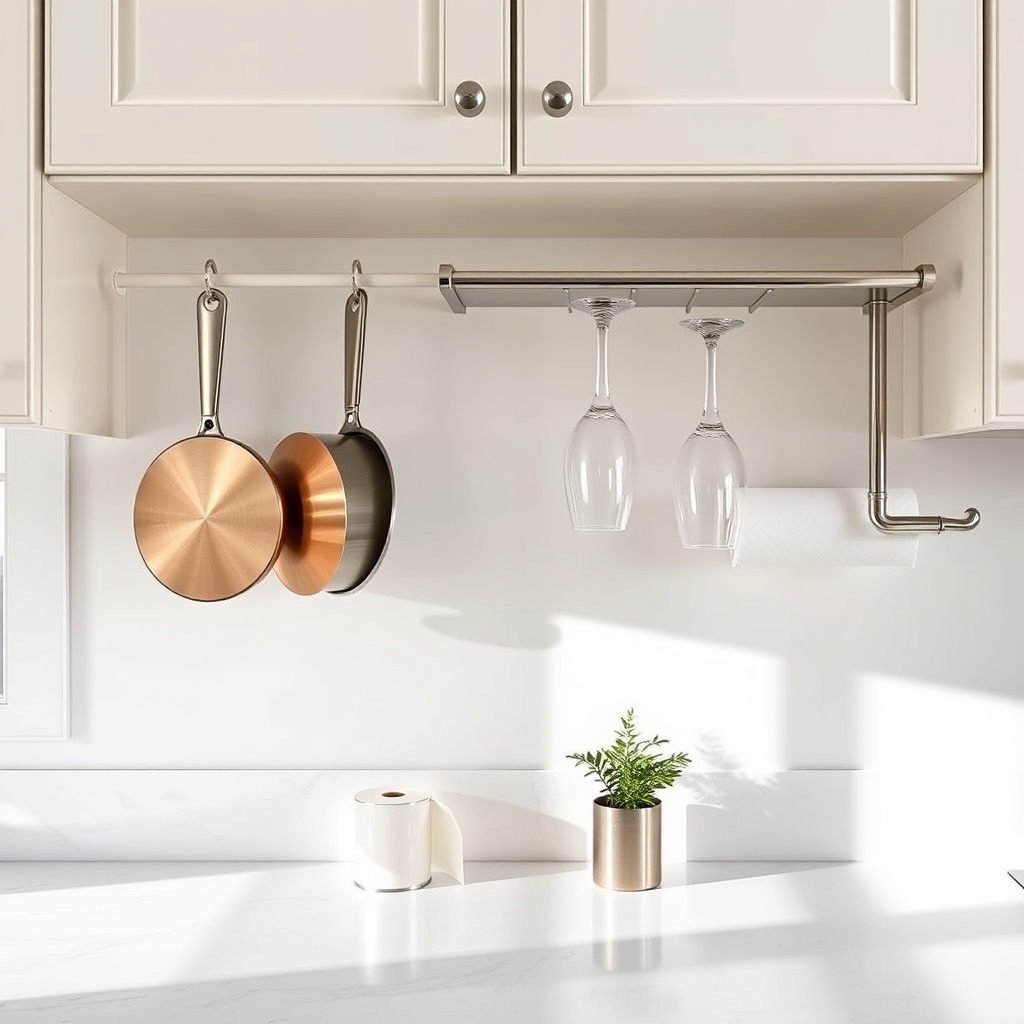
Making use of under-cabinet space is one of the smartest ways to maximize kitchen storage without sacrificing valuable counter space. This often-overlooked area provides prime real estate for storing frequently used items while keeping them easily accessible and your countertops clutter-free.
Under-cabinet storage solutions can transform your kitchen’s functionality by creating designated spaces for everything from wine glasses and coffee mugs to paper towels and cooking utensils. This organization method not only increases storage capacity but also helps maintain a clean, streamlined appearance in your kitchen.
Required Items:
- Under-cabinet hooks or racks
- Mounting screws and anchors
- Power drill
- Screwdriver
- Measuring tape
- Pencil
- Level
- Under-cabinet wine glass holders
- Paper towel holders
- Utensil bars
- Cabinet-mounted baskets
- Adhesive strips (if drilling isn’t possible)
Installation and organization should begin with measuring the available space under your cabinets and planning the layout of your storage solutions. Mark mounting points with a pencil, ensuring they’re level and properly spaced.
For permanent installations, drill pilot holes and secure mounting hardware using appropriate anchors for your cabinet material. Install each storage solution according to its specific instructions, being careful not to overcrowd the space.
When mounting multiple storage solutions, consider their practical arrangement. Place frequently used items in easily accessible locations, and group similar items together. For example, position the coffee mug rack near your coffee maker, and mount the wine glass holder close to your wine storage area.
Ensure there’s adequate clearance between mounted items and your counter surface to prevent interference with daily tasks.
Additional Tips: Regularly inspect mounted hardware to ensure it remains secure, and avoid overloading storage solutions beyond their weight capacity. Consider using clear command hooks or adhesive mounting solutions for rental properties or when you want to avoid drilling.
Keep heavier items closer to the cabinet’s base for better stability, and maintain some open space between mounted items to prevent a cluttered appearance. Clean under-mounted items regularly, as this area can collect dust and cooking residue.
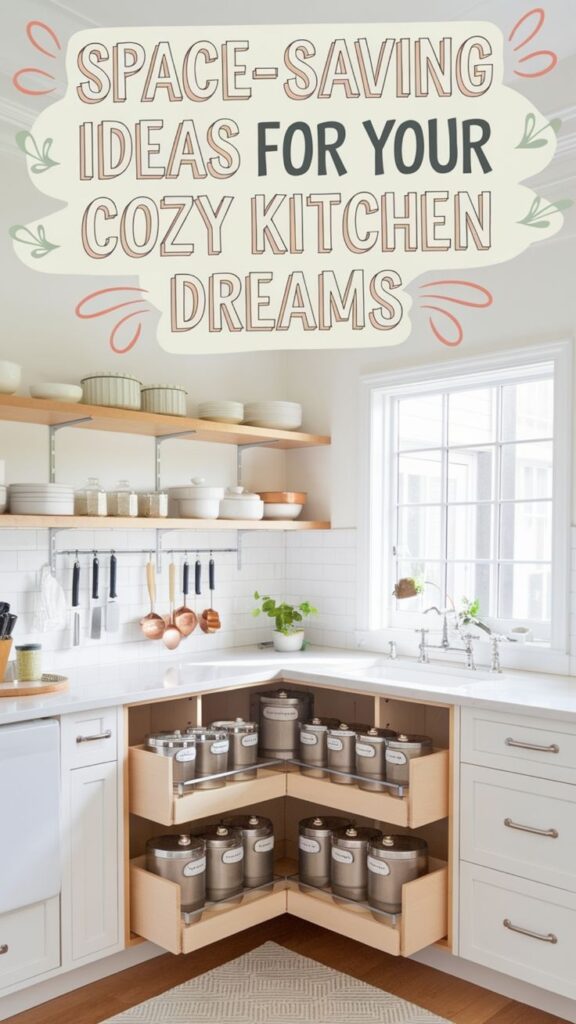
Utilize Corner Space With Lazy Susans
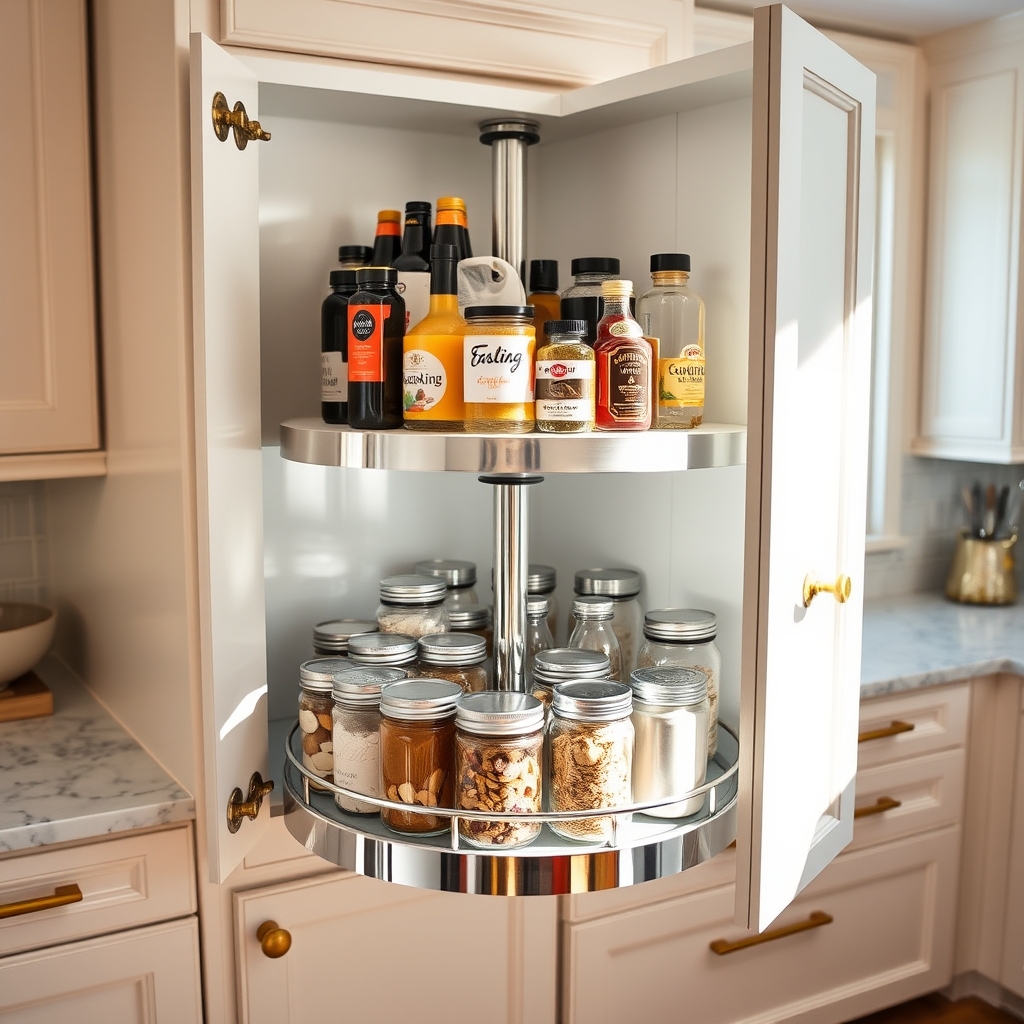
Corner cabinets often become the black holes of kitchen storage, with items disappearing into deep recesses and becoming forgotten or difficult to access. Lazy Susans transform these awkward spaces into functional storage areas by creating rotating platforms that bring items from the back directly to the front with a simple spin.
Maximizing corner cabinet space with Lazy Susans not only increases storage capacity but also improves visibility and accessibility of kitchen items. This organization method prevents the need to crawl into cabinets or move multiple items to reach what’s needed, saving time and reducing frustration during meal preparation.
Required Items:
- Single or multi-tier Lazy Susan turntables
- Measuring tape
- Cabinet cleaning supplies
- Non-slip liner
- Storage containers or bins
- Labels and marker
- Cabinet organizer clips (optional)
- Level
Start by removing everything from the corner cabinet and cleaning the space thoroughly. Measure the cabinet’s dimensions, paying special attention to the depth and width to ensure proper Lazy Susan fit. Install the Lazy Susan mechanism according to manufacturer instructions, ensuring it’s level and rotates smoothly. For double-tier systems, secure both levels properly before proceeding.
Sort items by frequency of use and category. Place frequently used items on the top tier if using a multi-level system. Group similar items together, such as baking supplies, canned goods, or cooking oils. Position taller items toward the center of the Lazy Susan where there’s typically more vertical clearance, and shorter items around the edges.
Additional Tips: Consider using clear containers or bins on the Lazy Susan to prevent items from sliding during rotation. Label the edges of the Lazy Susan to mark categories, making it easier to locate items quickly. Regularly test the rotation mechanism and tighten any loose parts. Keep a small gap between items to prevent them from catching during rotation, and periodically review contents to remove expired or unused items.
Implement a Command Center for Meal Planning
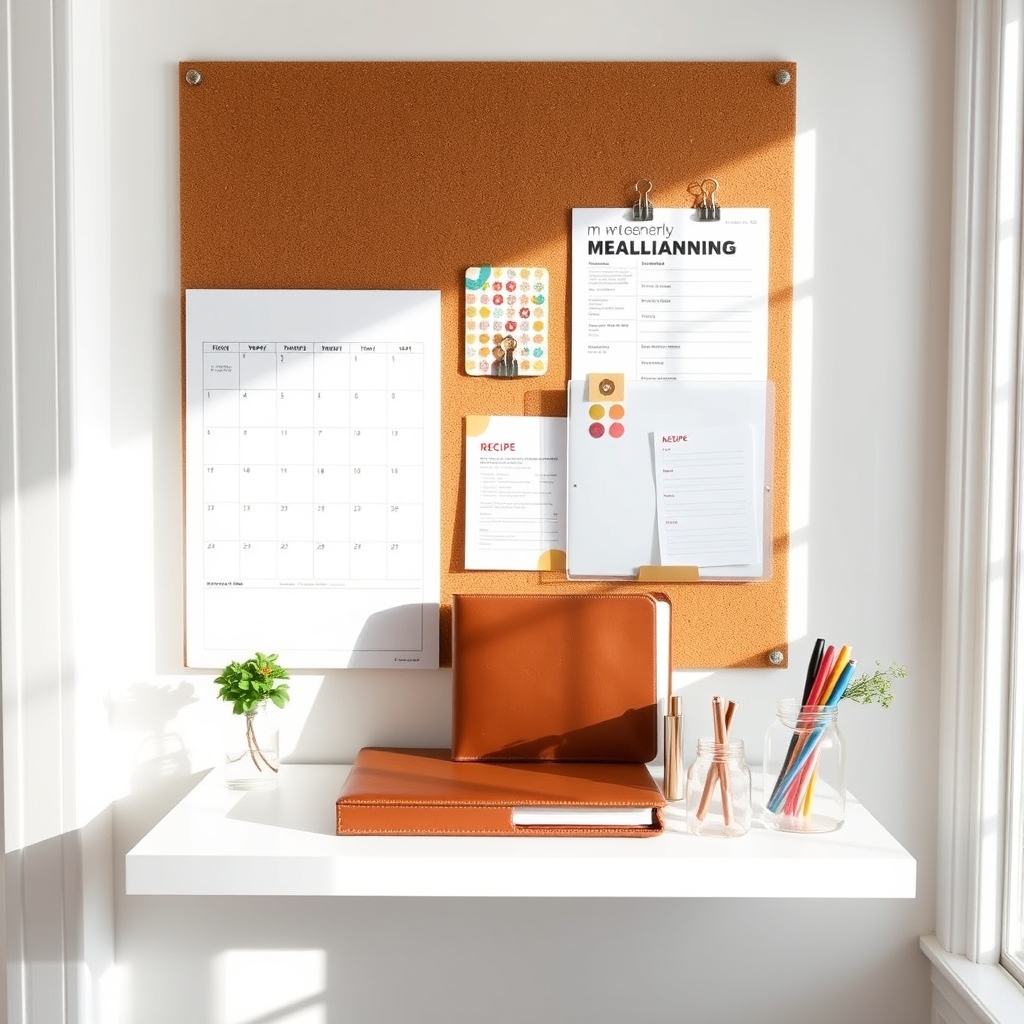
A well-organized meal planning command center serves as the heart of kitchen operations, streamlining daily food preparation and reducing the mental load of answering “what’s for dinner?” This dedicated space transforms random meal decisions into a systematic approach, helping families save money, reduce food waste, and maintain healthier eating habits.
Creating a command center specifically for meal planning consolidates all essential planning tools, recipes, and schedules in one accessible location. This organization hub eliminates the scattered approach to meal preparation and creates a central point for family members to check menus, contribute ideas, and maintain shopping lists.
Required Items:
- Wall calendar or weekly planner
- Bulletin board or magnetic board
- Menu planning templates
- Clear folder or binder for recipes
- Dry erase markers
- Magnetic clips
- Notepad for shopping lists
- Small containers for pens and markers
- Command hooks or mounting hardware
- Clear plastic sleeves for frequently used recipes
Select a visible wall space in your kitchen that’s easily accessible but away from cooking areas. Mount the bulletin board at eye level and position the calendar alongside it. Create designated zones within the command center: one for the current week’s menu, another for recipes under consideration, and a third for the running shopping list.
Install clear folder holders below or beside the bulletin board to store your recipe binder and meal planning templates. Add magnetic clips or pushpins to hold frequently used recipes, takeout menus, and important notes.
Organize your recipe binder with dividers for different categories such as breakfast, lunch, dinner, and seasonal meals. Implement a color-coding system using different colored markers or pins to distinguish between meal types, shopping priorities, or family members’ responsibilities.
Set up a routine to update the meal plan weekly, preferably during a quiet time when you can thoughtfully consider the upcoming schedule and family preferences.
Success Tips: Maintain the command center’s effectiveness by establishing a weekly review routine where you clear outdated items, refresh the meal plan, and update shopping lists. Consider taking photos of your meal plan to have a mobile reference, and encourage family members to participate in meal planning by providing a suggestion box or designated area for recipe requests.
Keep frequently used recipes in clear sleeves to protect them from splatter and make them easily visible while cooking.
Declutter Countertops With Wall-Mounted Solutions
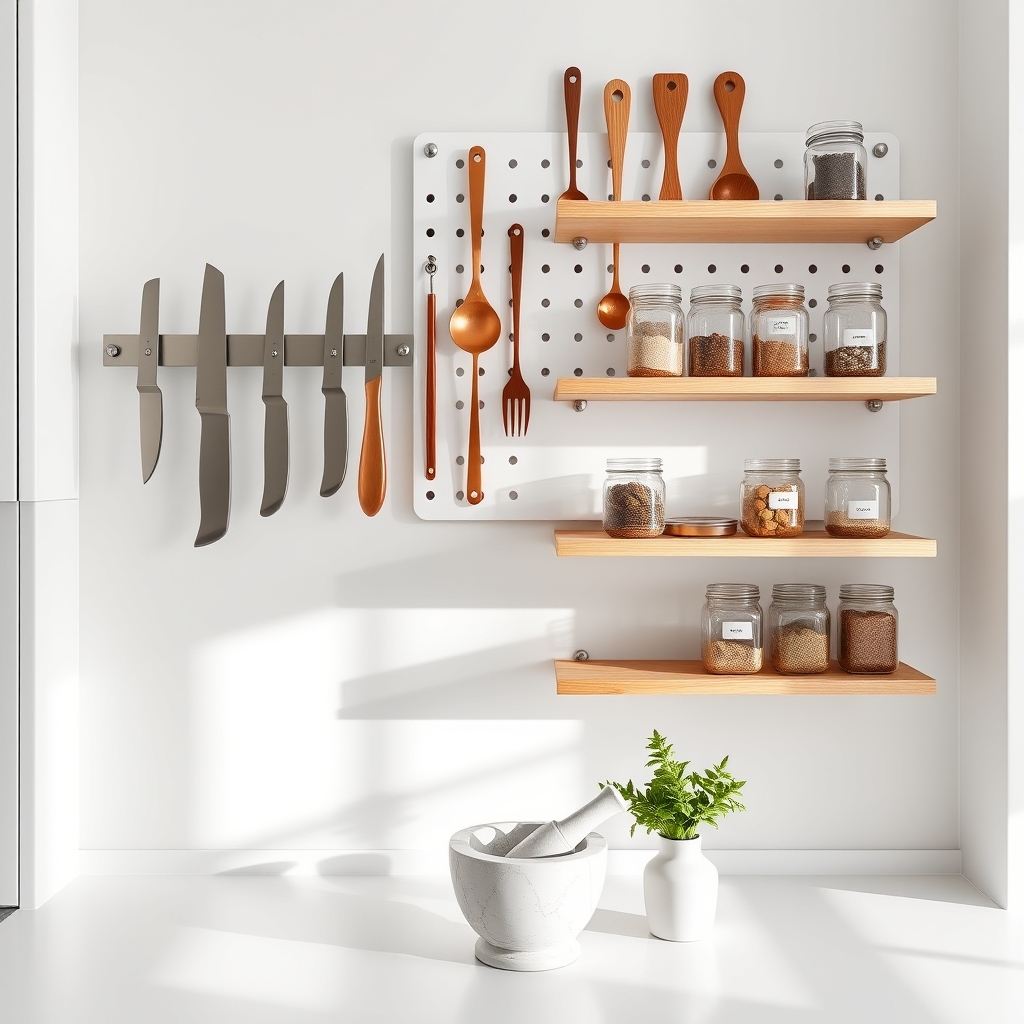
A cluttered kitchen counter not only impacts the visual appeal of your space but also significantly reduces your working area and cooking efficiency. Counter space is premium real estate in any kitchen, and utilizing vertical wall space can transform a cramped cooking environment into an organized, functional workspace.
Wall-mounted solutions offer a practical approach to keeping frequently used items accessible while freeing up valuable counter space. This organizational method creates a more streamlined workflow, reduces cleaning time, and makes it easier to maintain an orderly kitchen environment that inspires cooking and creativity.
Required Items:
- Wall brackets or mounting hardware
- Magnetic knife strip
- Pegboard and hooks
- Floating shelves
- Wall-mounted spice rack
- Under-cabinet organizers
- Measuring tape
- Level
- Drill and drill bits
- Screwdriver
- Wall anchors
- Pencil for marking
Start by assessing your wall space and measuring available areas above countertops, ensuring you maintain adequate clearance for food preparation. Select mounting locations that align with your cooking workflow, keeping frequently used items within easy reach.
Install larger items like pegboards or floating shelves first, ensuring they’re properly anchored to wall studs for maximum stability. Follow by mounting smaller organizational tools such as magnetic strips for knives or spice racks in complementary positions.
When arranging items on your wall-mounted solutions, group similar items together and position them based on frequency of use. Heavy items should be stored on sturdy shelves mounted directly into wall studs, while lighter items can be hung on pegboard hooks or lightweight racks.
Maintain a clean aesthetic by aligning items neatly and leaving appropriate spacing between different storage solutions.
Additional Tips: Consider installing under-cabinet lighting to illuminate your newly organized wall space, making items easier to locate and creating ambiance.
Regularly evaluate the effectiveness of your wall-mounted storage and adjust placement as needed based on your cooking habits. Keep a few areas of wall space clear to prevent visual overwhelm and maintain a balanced appearance in your kitchen.

