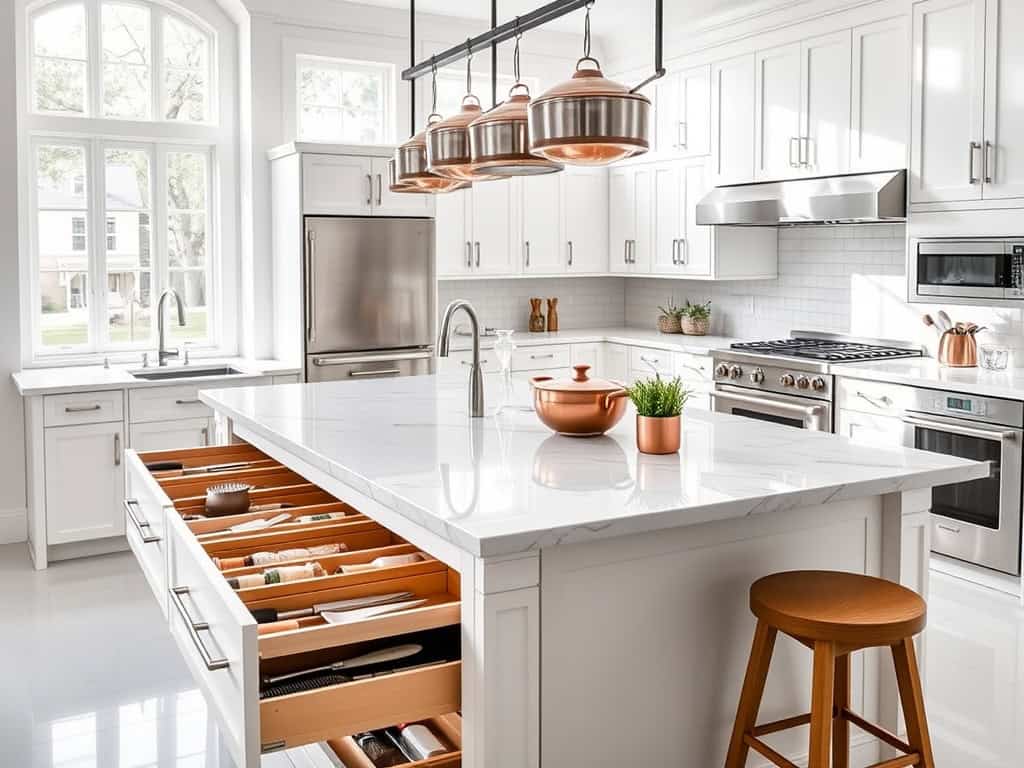
You’ve probably noticed that your kitchen island becomes a catch-all spot for everything from mail to mixing bowls. Trust me, I’ve been there! But with a few smart organization strategies, you can transform this valuable space into the functional centerpiece it’s meant to be. I’ll show you nine game-changing tips that’ll help you maximize every inch of your island, streamline your cooking workflow, and keep clutter at bay. Ready to make your kitchen island work harder for you?
Create Designated Zones for Different Activities
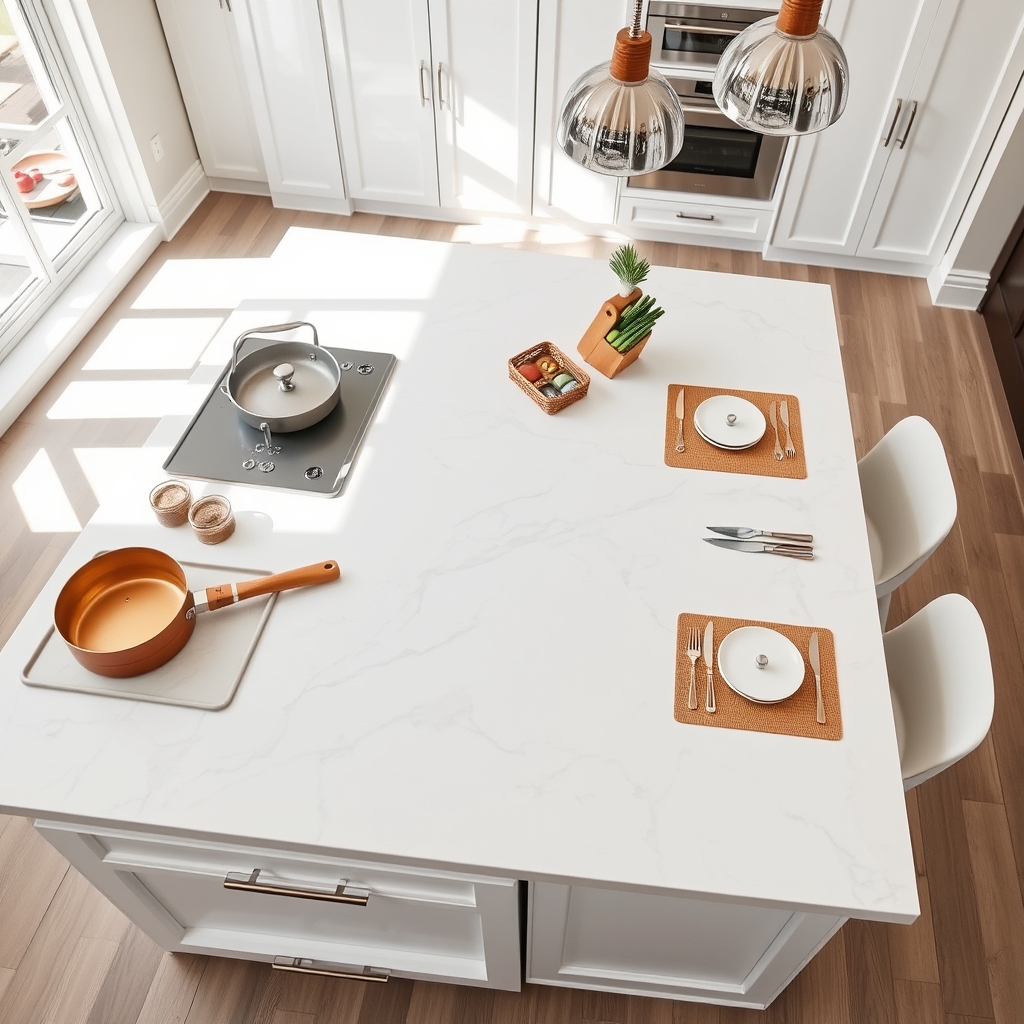
A well-organized kitchen island serves as the heart of kitchen functionality, acting as a multipurpose workspace that can streamline cooking, food prep, and entertainment activities. When properly zoned, your kitchen island becomes more than just additional counter space – it transforms into an efficient command center that enhances workflow and reduces kitchen chaos.
Creating designated zones on your kitchen island prevents cross-contamination, minimizes clutter, and ensures that everyone in the household knows where to find and return items. This systematic approach to organization makes meal preparation more efficient and helps maintain order even during busy cooking sessions.
Required Items:
- Storage containers
- Drawer organizers
- Labeled bins
- Non-slip shelf liners
- Cabinet organizers
- Counter storage solutions
- Cleaning supplies
- Measuring tape
- Paper and pen for planning
Start by assessing your kitchen island’s current layout and identifying the main activities that typically occur there. Measure your island’s surface area and divide it into distinct zones based on your needs, such as food prep, cooking, cleaning, and casual dining.
Position frequently used items within easy reach of their designated zones, and store lesser-used items in lower cabinets or drawers. Install drawer organizers and cabinet systems that correspond to each zone’s purpose. For example, place cutting boards and knife storage in the food prep zone, cleaning supplies near the sink area, and serving ware in the dining zone.
Use vertical space efficiently by incorporating hooks, magnetic strips, or overhead racks where appropriate. For maximum organization success, regularly evaluate and adjust your zones based on changing needs and habits.
Implement a “clean as you go” policy to maintain organized zones, and consider using clear containers or labels to help family members maintain the system. Remember that the most effective organization system is one that can be easily maintained by all household members.
Install Pull-Out Storage Solutions
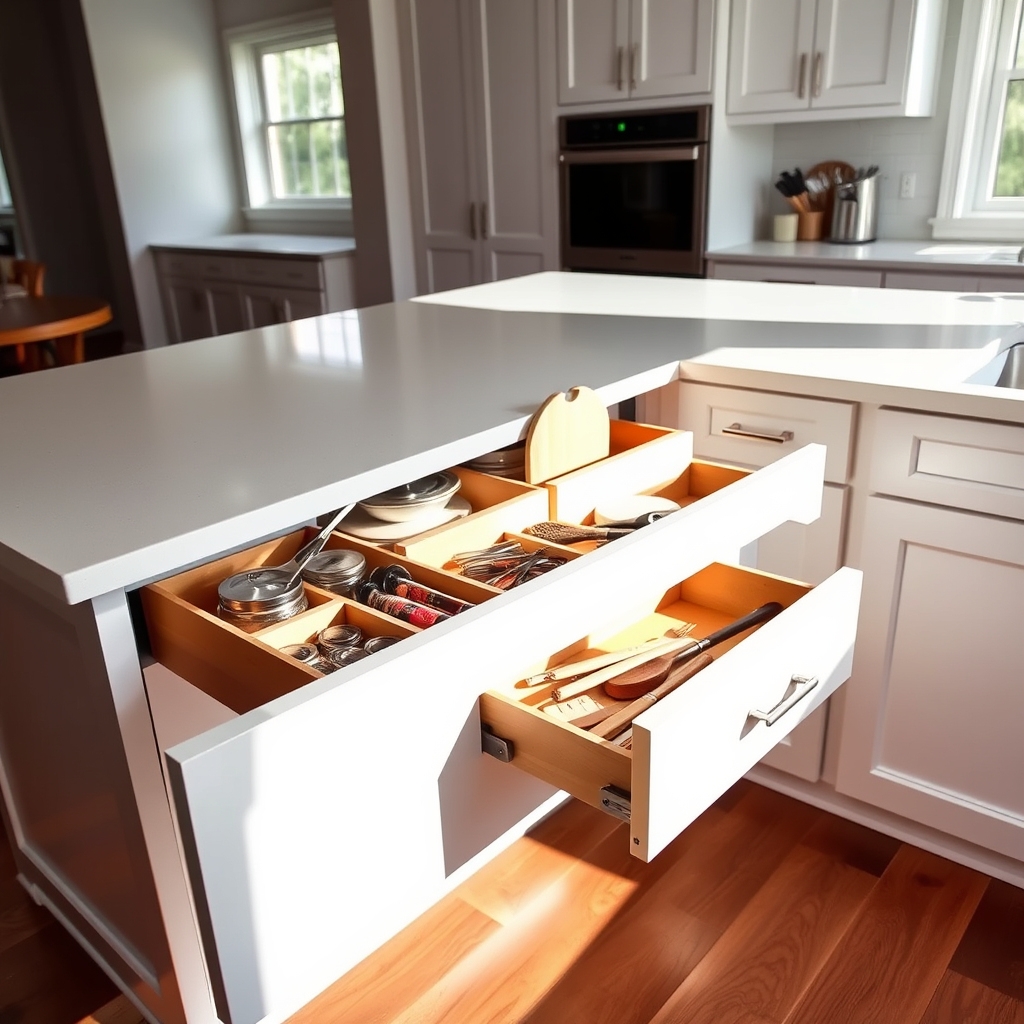
Maximizing storage space in your kitchen island is essential for maintaining an efficient and clutter-free cooking environment. Pull-out storage solutions transform awkward, hard-to-reach spaces into easily accessible storage areas that can accommodate everything from cooking utensils to pantry items.
Installing pull-out storage solutions in your kitchen island can dramatically increase its functionality while keeping items organized and within arm’s reach. These modifications can save time during meal preparation and ensure that every inch of available space is utilized effectively.
Required Items:
- Pull-out cabinet organizers
- Measuring tape
- Screwdriver
- Power drill
- Mounting screws
- Wood shims
- Level
- Pencil
- Cabinet hardware template
- Safety glasses
- Work gloves
Start by measuring the interior dimensions of your cabinet spaces, including width, height, and depth. Select pull-out organizers that fit within these measurements, leaving adequate clearance for smooth operation.
Remove existing shelves or organizers from the cabinet space. Using the hardware template, mark mounting points for the slides on both cabinet walls. Install the slide mechanisms, ensuring they’re level and properly aligned. Attach the pull-out unit to the slides, testing the movement to confirm smooth operation.
Once the basic framework is installed, organize items by category and frequency of use. Place frequently used items in easily accessible front sections. Consider using drawer dividers or small containers within the pull-out units to prevent items from shifting during operation. Label sections clearly to maintain organization long-term.
Additional Tips: Before installing pull-out units, test the weight capacity of your chosen hardware and ensure it matches your storage needs.
Consider installing soft-close mechanisms to prevent slamming and extend the life of your pull-outs. Regularly clean and lubricate the slides to maintain smooth operation and prevent wear. Keep heavier items toward the bottom of pull-out units for better stability and easier access.
Maximize Vertical Space With Hooks and Racks
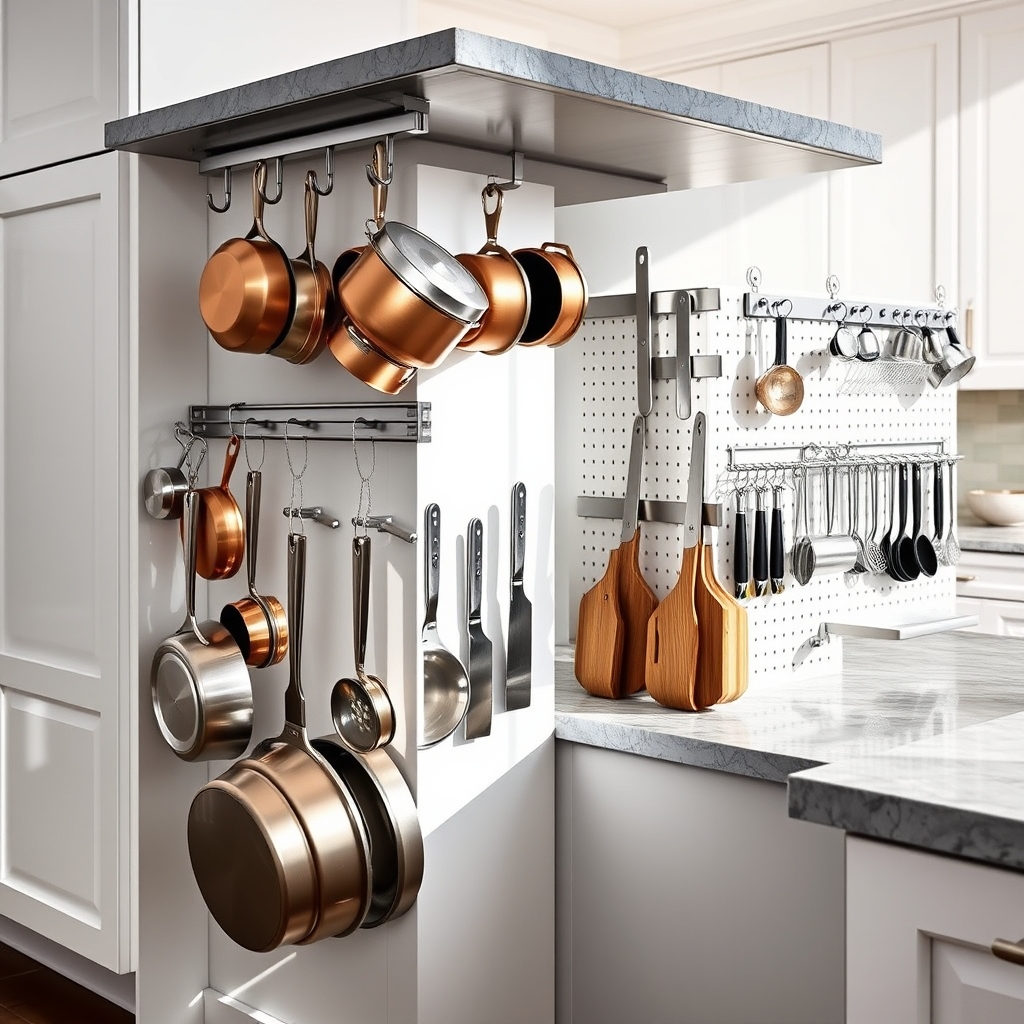
Vertical storage space is often overlooked in kitchen organization, yet it represents valuable real estate that can significantly increase your storage capacity. By utilizing the sides and underneath areas of your kitchen island with hooks and racks, you can create easily accessible storage solutions that keep frequently used items within arm’s reach.
Making use of vertical space not only maximizes storage but also improves workflow efficiency in the kitchen. When commonly used utensils, pots, pans, and cooking tools are hung strategically, they become part of an organized system that enhances the cooking experience while keeping countertops clear and clutter-free.
Required Items:
- S-hooks
- Towel bars
- Pegboard systems
- Magnetic strips
- Under-cabinet hooks
- Mounting hardware
- Drill and screwdriver
- Level
- Measuring tape
- Pencil
- Wall anchors
- Utility rack systems
Begin by measuring the available vertical space on your kitchen island’s sides and underneath areas. Mark potential mounting points for racks and hooks, ensuring they won’t interfere with seating or movement around the island.
Install towel bars or pegboards on the sides of the island, using appropriate anchors for your island’s material. Position magnetic strips at eye level for metal utensils and tools.
For underneath storage, mount utility racks or hook systems that can hold pots, pans, and larger cooking tools. Space these items strategically to prevent clustering and ensure easy access. Consider installing a combination of different hook sizes to accommodate various items, from heavy cookware to lightweight utensils.
Additional Tips: Rotate items seasonally to keep frequently used tools most accessible. Install hooks at varying heights to maximize space usage and prevent items from tangling. Consider using clear containers or baskets with hooks for smaller items that might get lost.
Regularly assess the functionality of your system and adjust hook placement as needed to optimize your workflow.
Implement a Smart Drawer Organization System
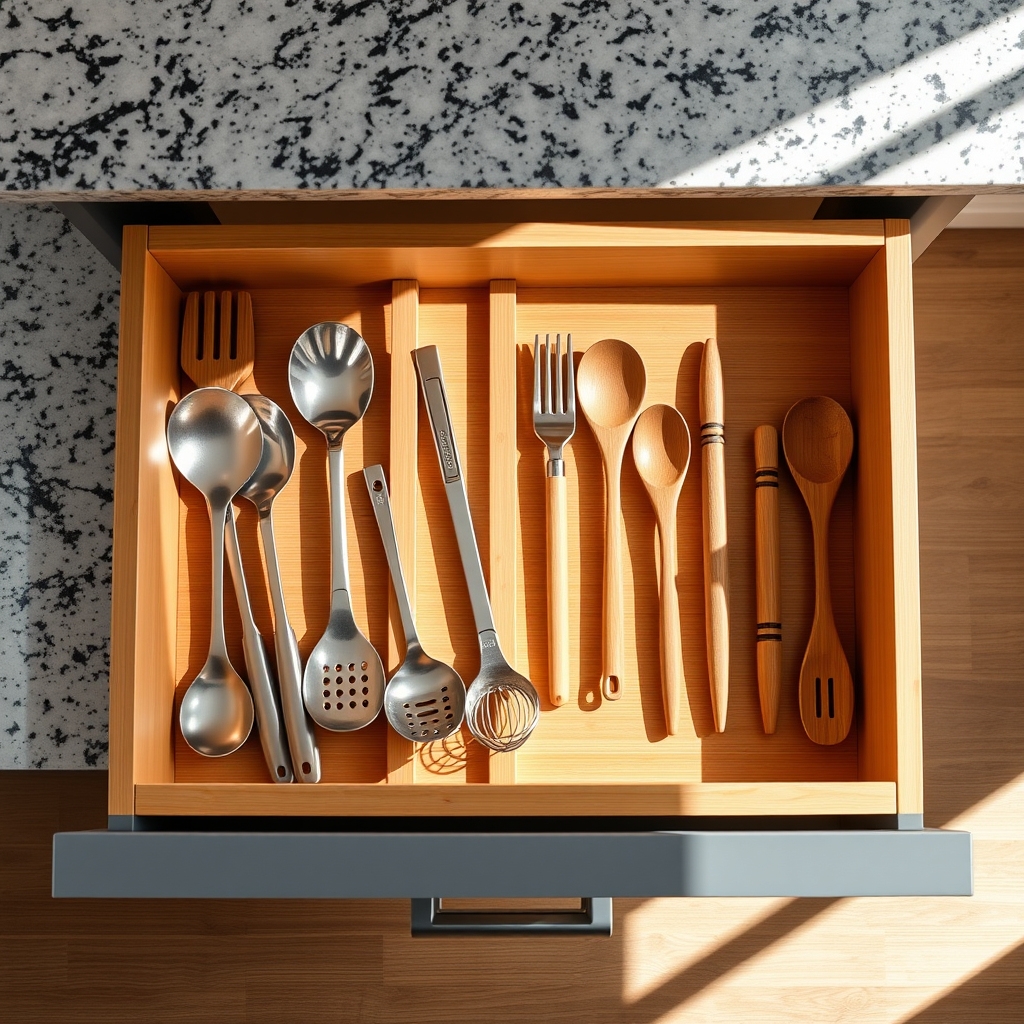
A well-organized drawer system in your kitchen island is fundamental to creating an efficient cooking and prep space. When drawers are properly organized, you save valuable time during meal preparation, reduce frustration from searching for items, and maximize the storage potential of your kitchen island.
Kitchen island drawers often serve as prime real estate for frequently used items, making it crucial to implement a system that keeps everything accessible and logical. An organized drawer system prevents clutter buildup, protects your kitchen tools from damage, and maintains a clean, professional-looking kitchen space.
Required Items:
- Drawer dividers
- Drawer liner material
- Measuring tape
- Storage containers
- Label maker
- Drawer organizer trays
- Expandable utensil holders
- Clear plastic bins
- Drawer stops
- Shelf liner
Start by completely emptying all drawers and measuring their dimensions. Group similar items together, such as cooking utensils, cutlery, or baking tools. Install drawer liners to protect the drawer bottom and prevent items from sliding.
Place drawer dividers or organizer trays that fit your specific measurements, ensuring they accommodate your grouped items efficiently. Create designated zones within each drawer based on frequency of use and logical workflow. Position frequently used items in the most accessible drawers, while storing seasonal or specialty items in lower drawers.
Implement a front-to-back organization system, placing shorter items in front and taller items in back for better visibility. For optimal maintenance of your drawer organization system, regularly assess the functionality of your layout and adjust as needed.
Remove items that haven’t been used in six months, clean drawer organizers monthly, and consider using clear containers for small items that tend to scatter. Maintain the system by returning items to their designated spots immediately after use and periodically checking that drawer dividers remain properly aligned.
Add Built-In Charging Stations and Tech Storage
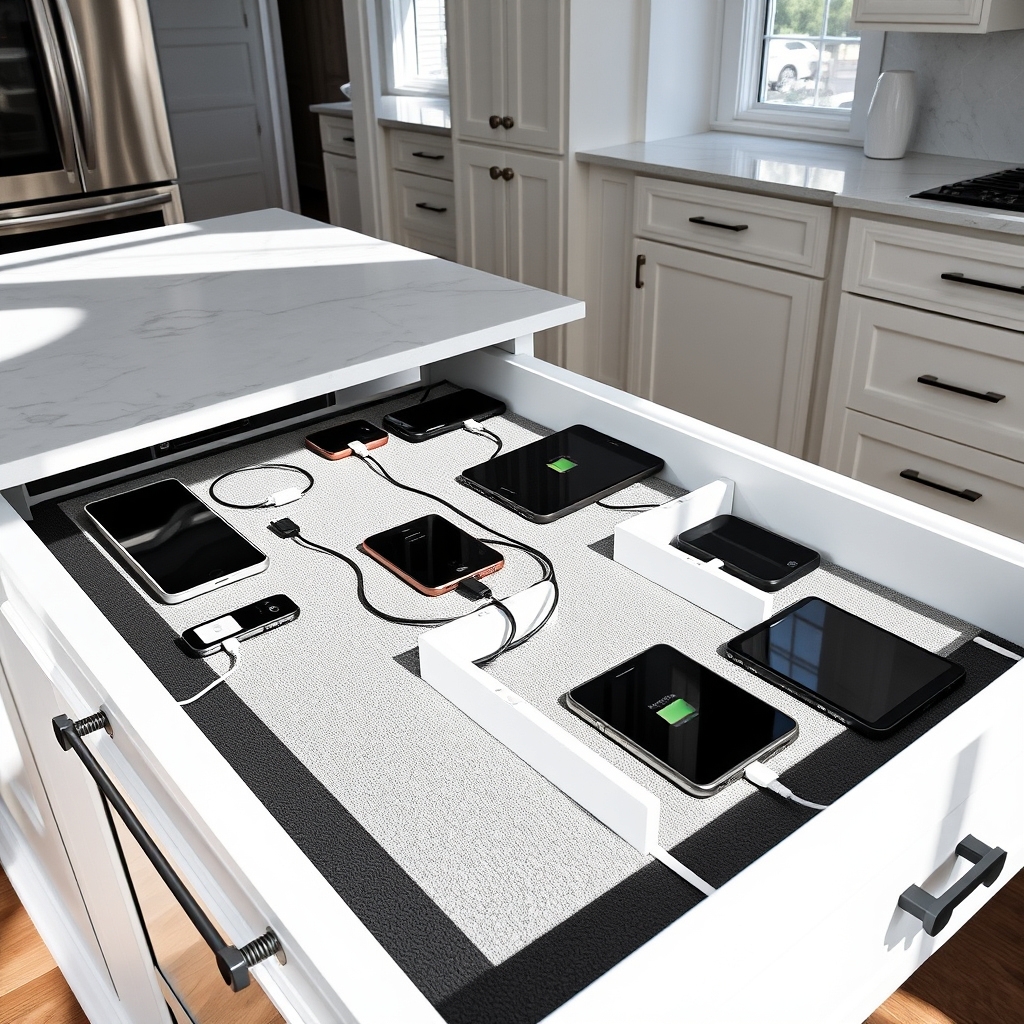
In today’s connected world, our kitchen islands have become more than just food prep stations – they’re often the hub for family devices and technology. Creating dedicated charging stations and tech storage within your kitchen island prevents counter clutter, keeps devices protected from food spills, and ensures everyone knows exactly where to find their devices when needed.
A well-organized tech station in your kitchen island transforms the space into a practical command center while maintaining the kitchen’s primary function. This organization system helps prevent the common problem of scattered cables, misplaced devices, and the constant search for charging ports, ultimately leading to a more streamlined and efficient kitchen workspace.
Required Items:
- Power strip with surge protection
- Cable management system
- Drawer organizers or dividers
- Charging cables (USB-C, Lightning, etc.)
- Drill and hole saw (if modifications needed)
- Cable grommets
- Drawer liner
- Cord clips or adhesive cable holders
- Device stands or holders
- Small storage bins or containers
Installing a built-in charging station starts with selecting an appropriate drawer or cabinet in your kitchen island. Create a dedicated power source by installing a surge-protected power strip, ensuring it’s properly secured and hidden from view.
Drill cable grommets through the drawer or cabinet back for clean cord management. Install drawer organizers or dividers to create specific sections for different devices and their corresponding charging cables.
Use cable clips or adhesive holders to secure charging cables along the interior walls, preventing tangling and keeping them easily accessible. Position device stands or holders strategically within the space, allowing multiple devices to charge simultaneously while maintaining organization.
Consider adding a drawer liner to prevent devices from sliding and protect them from scratches. For optimal results, label each charging cable and designated space to ensure family members return items to their proper locations.
Create a system where devices can charge while remaining hidden yet accessible, and establish clear guidelines for tech storage usage. Regular maintenance of cable management and periodic assessment of storage needs will help maintain the organization system’s effectiveness over time.
Design an Efficient Waste Management Center
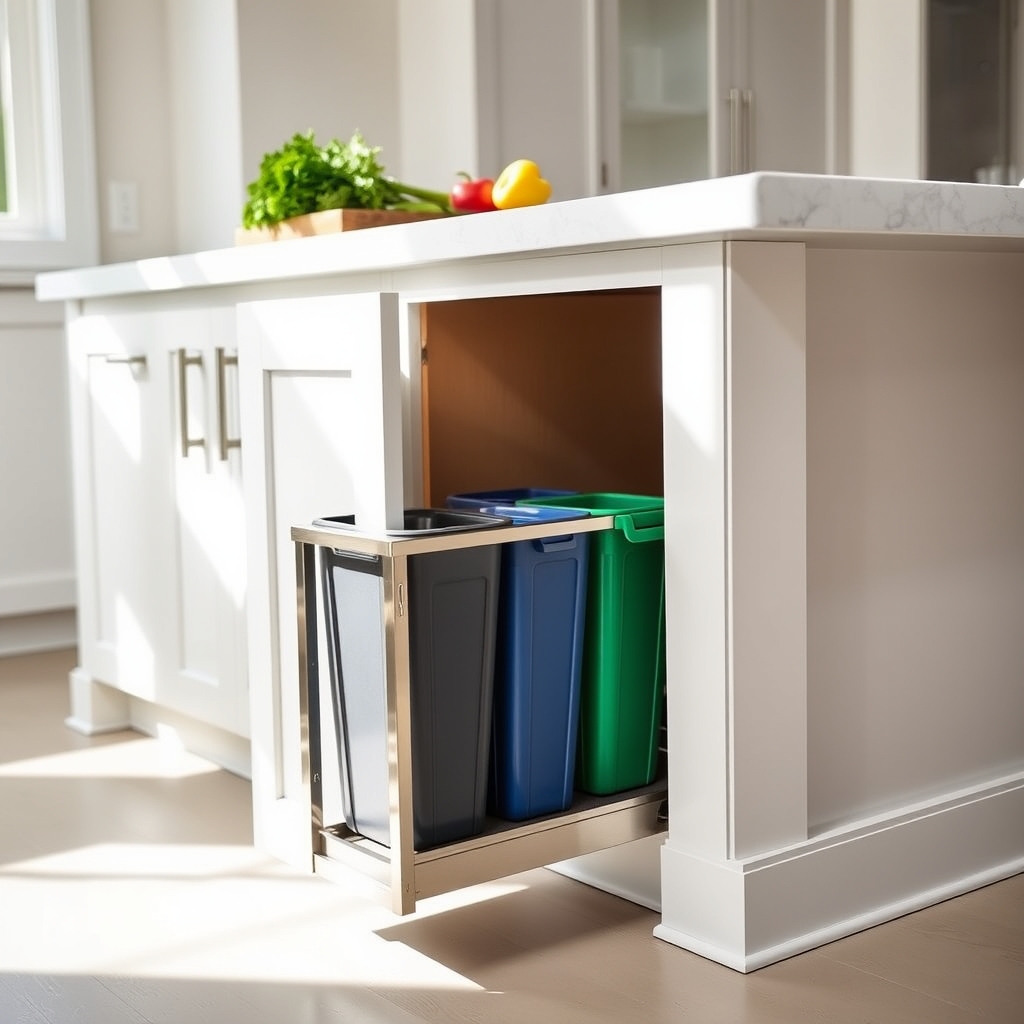
A well-organized waste management center in your kitchen island is crucial for maintaining a hygienic and efficient cooking space. By incorporating thoughtful waste sorting and disposal solutions, you can streamline your kitchen workflow and reduce the time spent handling garbage and recyclables.
Creating a designated waste management system within your kitchen island not only helps protect the environment through proper recycling but also keeps odors contained and maintains a cleaner cooking environment. An efficient setup allows for quick disposal during food prep and makes it easier to manage weekly trash removal.
Required Items:
- Pull-out trash bins
- Recycling containers
- Compost bin (optional)
- Bin liners
- Label maker
- Cleaning supplies
- Odor-absorbing pods
- Storage hooks
- Small dustpan and brush
- Sanitizing wipes
Start by measuring your kitchen island cabinet space and selecting appropriately sized pull-out waste bins. Install a dual or triple bin system, designating separate containers for trash, recycling, and compost if space allows.
Position the bins so they can be easily accessed while working at the island, typically placing them near the prep area.
Mount small hooks or holders inside the cabinet door for storing extra bin liners and cleaning supplies. Install a simple liner dispenser system to make bag replacement more convenient.
Consider adding a small sealed container for compostable materials if you participate in composting.
For optimal results, clean the bins regularly and use odor-absorbing products to maintain freshness. Label each bin clearly to prevent confusion among family members or guests, and consider creating a small guide showing which items go where.
Keep cleaning supplies nearby for quick spill management, and empty bins before they become overly full to prevent odors and maintain easy access to the waste management center.
Utilize Under-Counter Appliance Storage
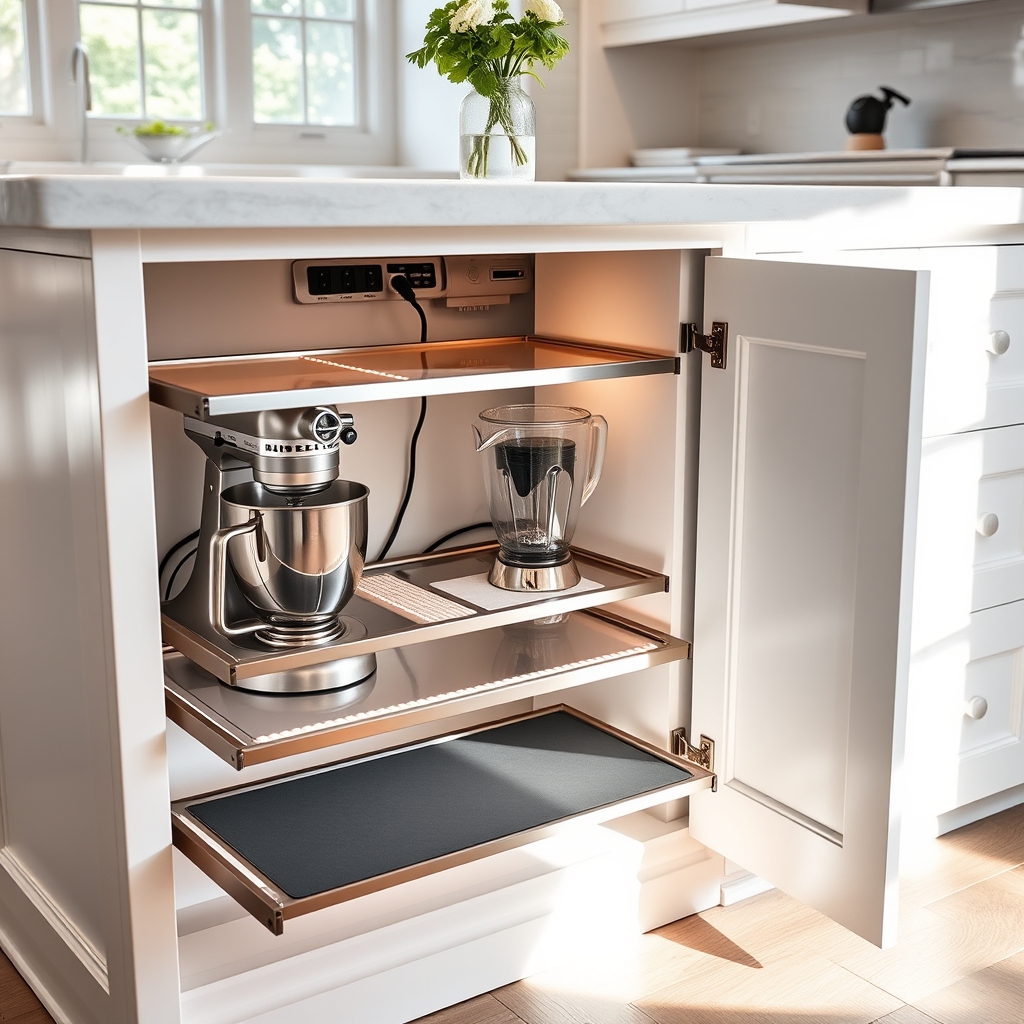
Under-counter appliance storage in kitchen islands represents one of the most valuable yet often underutilized spaces in modern kitchens. Proper organization of this area can transform a cluttered countertop into a clean, efficient workspace while keeping frequently used appliances easily accessible.
Strategic storage of appliances under your kitchen island not only maximizes space but also creates a more professional-looking kitchen environment. This organization method protects appliances from dust and grease while maintaining them within arm’s reach for daily use.
Required Items:
- Measuring tape
- Shelf liner
- Pull-out shelves or drawers
- Appliance height markers
- Cable management solutions
- Power strip or outlet system
- Cleaning supplies
- Labels
- Storage bins or dividers
Start by measuring your under-counter space and creating designated zones based on appliance sizes and frequency of use. Install pull-out shelves or drawers that can support the weight of your appliances, ensuring they’re mounted at appropriate heights for easy access.
Position frequently used items toward the front, while seasonal or occasional-use appliances can be stored deeper in the cabinet space. Create a proper electrical setup with easily accessible outlets or power strips to avoid cord tangles and ensure appliances can be used in place when needed.
Consider vertical space optimization by using adjustable shelving systems that can accommodate appliances of varying heights. Implement a labeling system to mark designated spots for each appliance, making it easier to maintain organization long-term.
Store user manuals and attachments in waterproof containers nearby, and use drawer liners to prevent appliances from sliding. To maintain this organization system, regularly assess which appliances truly need under-counter storage based on usage patterns.
Keep a cleaning schedule to prevent dust accumulation, and periodically check that all pull-out mechanisms and electrical connections are functioning properly. Consider installing motion-sensor lights or LED strips to illuminate the storage area, making it easier to locate and access appliances in low-light conditions.
Establish a Functional Meal Prep Station
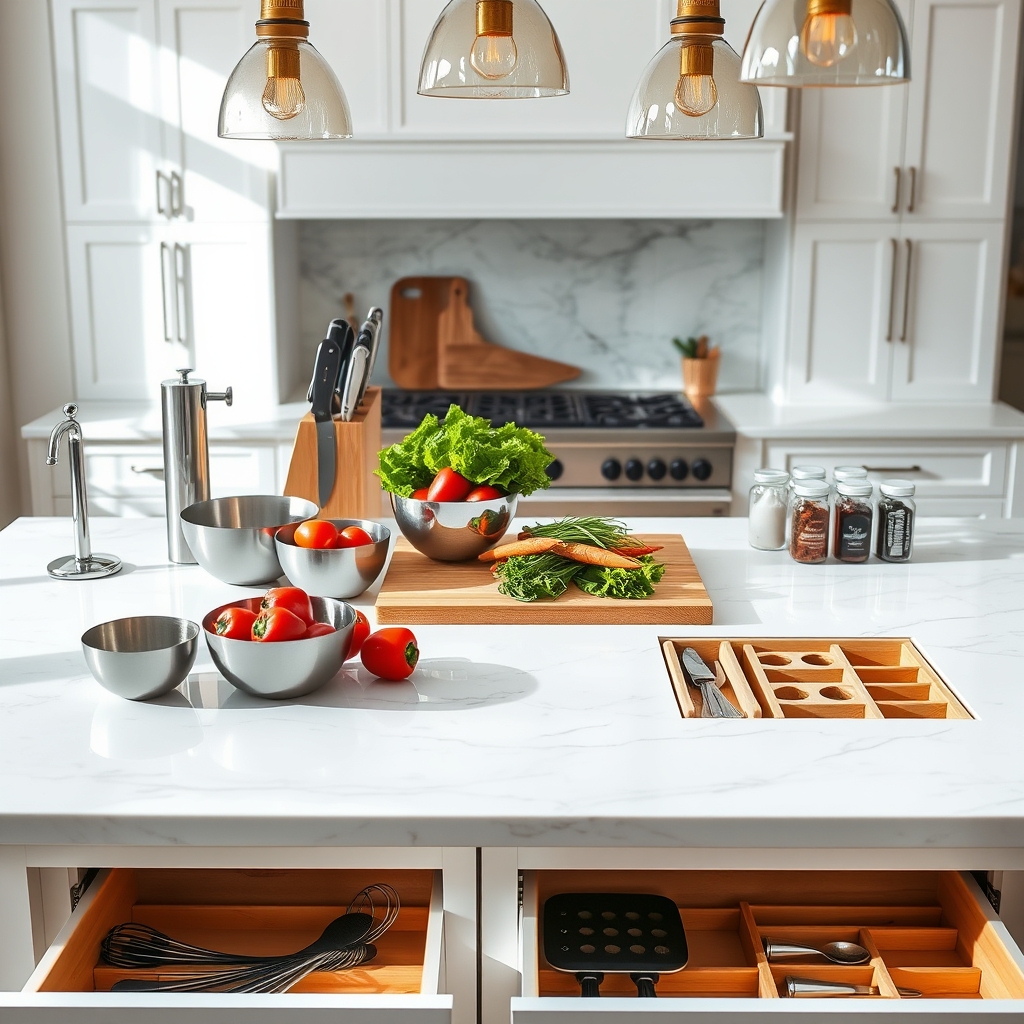
A well-organized meal prep station on your kitchen island can transform your cooking experience from chaotic to seamless. By dedicating specific zones and maintaining proper organization, you can significantly reduce preparation time and make cooking more enjoyable.
Creating an efficient meal prep station requires careful planning and consideration of workflow. The kitchen island offers prime real estate for food preparation, and when properly organized, it can serve as a central hub for chopping, mixing, and assembling ingredients while keeping everything within arm’s reach.
Required Items:
- Cutting boards (multiple sizes)
- Knife block or magnetic strip
- Small containers for prep bowls
- Drawer organizers
- Pull-out trash bin
- Paper towel holder
- Sanitizing supplies
- Storage containers
- Measuring tools
- Prep bowls
- Drawer liners
Start by clearing the island completely and designating specific zones: one for cutting and chopping, another for mixing and assembling, and a third for staging completed items.
Install a knife block or magnetic strip within easy reach of the cutting area. Arrange prep bowls and measuring tools in nearby drawers using organizers to keep them sorted by size and function. Position a pull-out trash bin or compost container on one end for easy disposal of food scraps during prep work. Keep frequently used spices and oils in a designated area within arm’s reach.
Additional Tips:
Install task lighting above the prep station to ensure proper visibility. Consider adding a built-in cutting board or creating a recessed area for a removable one to save counter space.
Keep sanitizing supplies nearby but separate from food items, and establish a cleaning routine after each use to maintain food safety standards. Use non-slip drawer liners to prevent tools from sliding around, and regularly assess and adjust the organization system based on your cooking habits and needs.
Set Up Strategic Seating and Storage Combinations
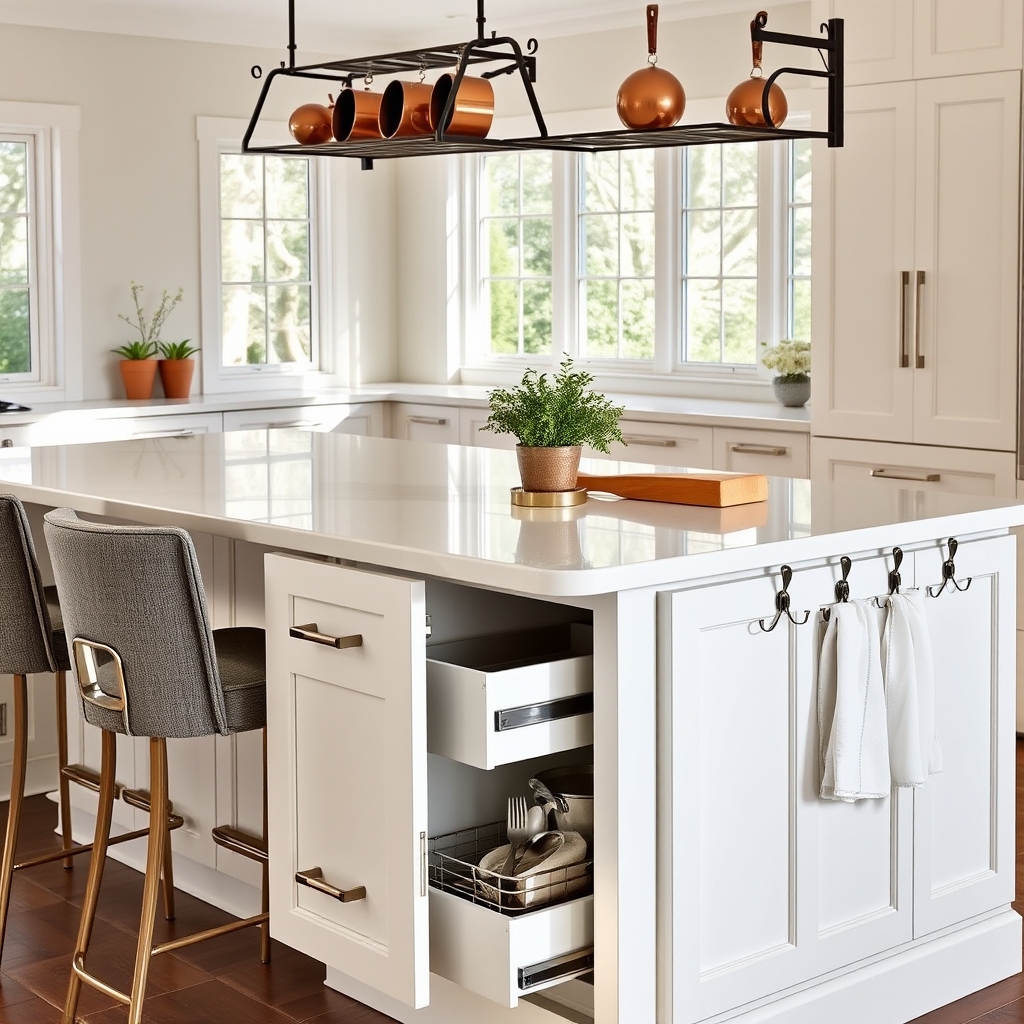
A well-organized kitchen island that combines seating and storage creates a multifunctional space that serves as both a gathering spot and an efficient work area. The right combination maximizes square footage while maintaining a welcoming atmosphere for family meals, casual dining, or socializing during meal preparation.
Strategic seating and storage integration helps maintain a clutter-free environment while ensuring everything remains within arm’s reach. This dual-purpose approach transforms your kitchen island from a simple counter space into a hub of activity that adapts to various needs throughout the day.
Required Items:
- Bar stools or chairs
- Under-counter storage baskets
- Drawer organizers
- Cabinet hardware
- Storage hooks
- Pull-out shelving systems
- Counter-height measurement tape
- Drawer dividers
- Cabinet door organizers
Position seating on one side of the island, typically the side facing away from the main cooking area, to create a natural dining zone. Install pull-out drawers or cabinets beneath the seating area for rarely-used items, ensuring they don’t interfere with leg space.
Incorporate drawer organizers and dividers in the cooking-side storage to keep utensils, cooking tools, and small appliances accessible yet organized. Add hooks or specialized hardware on the ends of the island for frequently used items like dish towels or cooking utensils.
For optimal organization, dedicate specific zones within the island storage based on function. Keep breakfast items and casual dining supplies in drawers near the seating area. Store cooking implements and prep tools in compartments closest to the working side. Install pull-out waste bins or recycling systems in a central location that’s accessible from both sides.
Additional Tip: Consider implementing a rotating organization system that adapts to seasonal needs – store summer entertaining supplies during winter months and vice versa. Use clear containers or labels to maintain order, and review the organization system quarterly to ensure it continues to meet your household’s changing needs.

