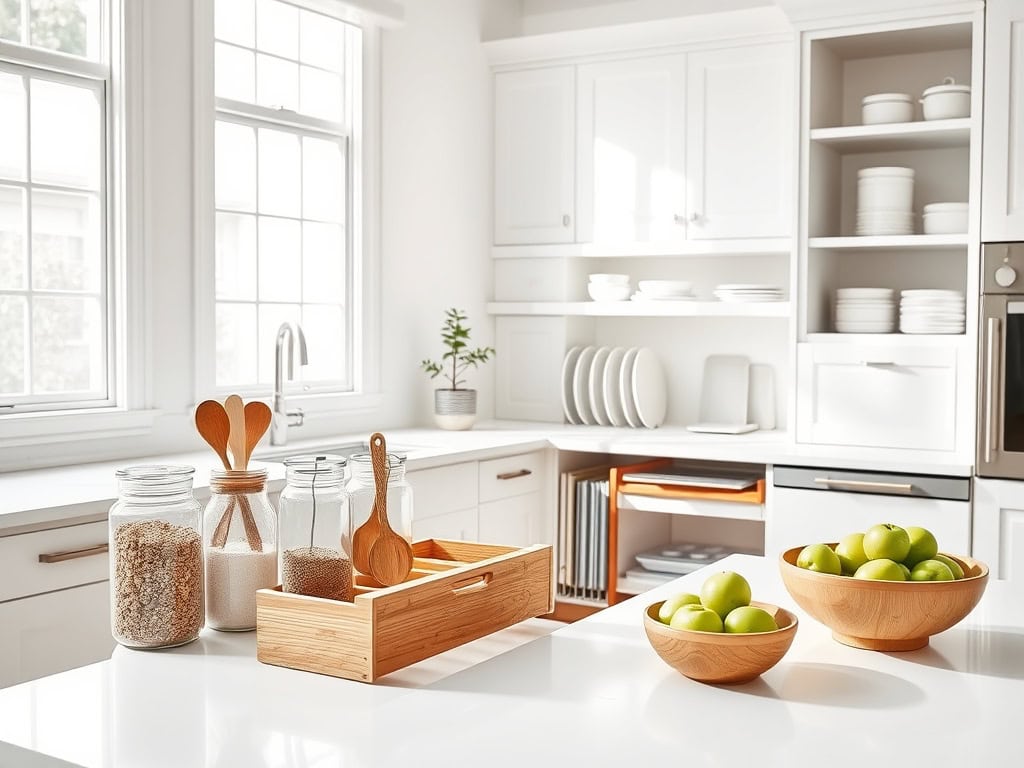
If you’re like most people, your kitchen probably looks like a small appliance store exploded in it! You’re not alone in the struggle to maintain a clutter-free cooking space. As someone who transformed my chaotic kitchen into a zen-like workspace, I can tell you that modern minimalist organization isn’t just about aesthetics—it’s about creating a space that actually makes cooking enjoyable. Let me share some game-changing ideas that’ll help you reclaim your countertops and find your kitchen bliss.
Clear Counter Strategies for a Clutter-Free Workspace
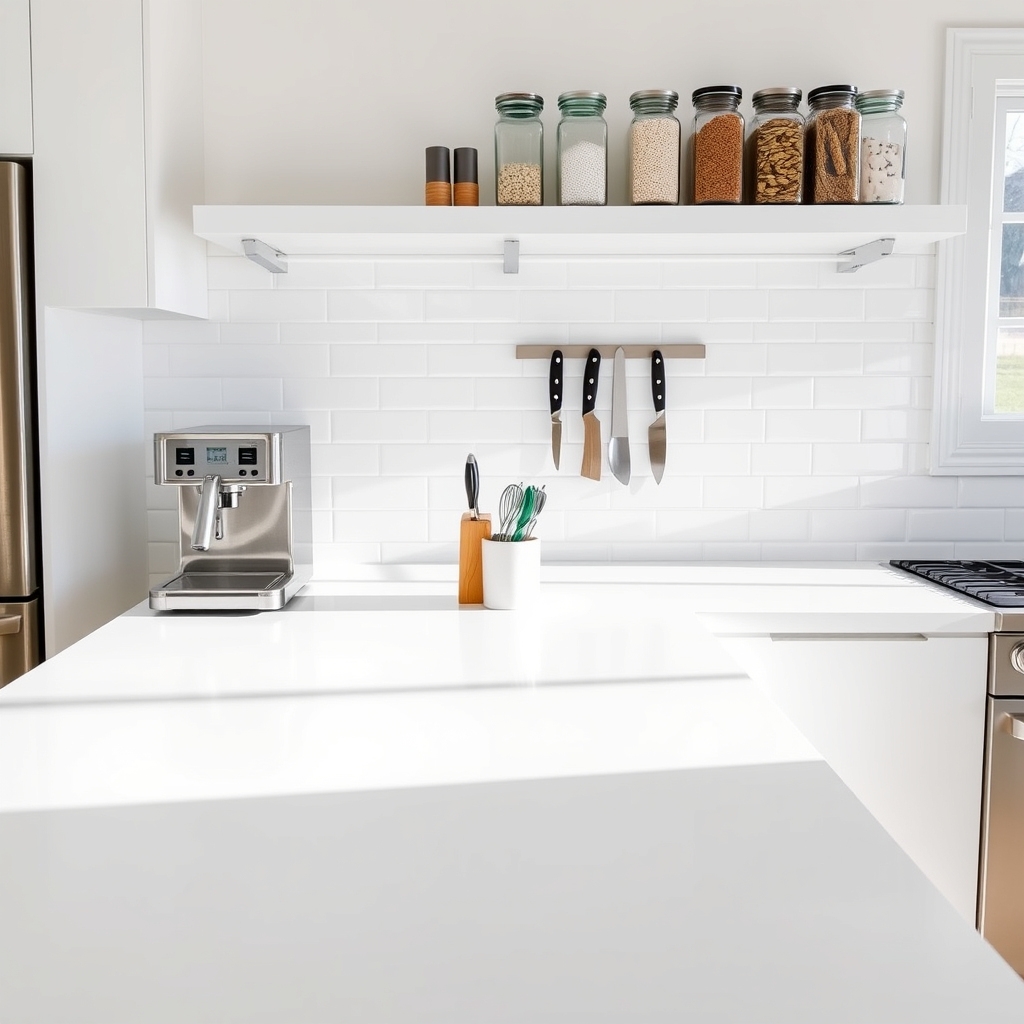
A clutter-free kitchen counter is the cornerstone of a functional minimalist kitchen. When countertops are clear and organized, meal preparation becomes more efficient, cleaning is faster, and the overall aesthetic of the kitchen improves dramatically. The workspace transforms from a catch-all surface into a purposeful area dedicated to cooking and food preparation.
Creating clear counters requires more than simply putting things away; it demands a systematic approach to determining what truly deserves precious counter space. This organizational system helps maintain the minimalist aesthetic while ensuring frequently used items remain accessible, striking the perfect balance between form and function.
Required Items:
- Storage containers
- Drawer organizers
- Cabinet shelf risers
- Command hooks
- Small appliance garage or cabinet
- Magnetic strips
- Under-cabinet mounting hardware
- Clear bins
- Label maker
- Cleaning supplies
Start by removing everything from the countertops and sorting items into three categories: daily use, occasional use, and rarely used items. Daily-use items should be limited to essential tools that are used multiple times per day.
Install magnetic strips or utilize wall-mounted solutions for frequently used utensils and tools, keeping them accessible but off the counter.
Create designated zones for small appliances, either by utilizing an appliance garage or dedicating specific cabinet space. Install under-cabinet mounting systems for items like paper towel holders and knife blocks.
For remaining essential items that must stay on the counter, group them thoughtfully in clear bins or on small trays to maintain organization and visual cohesion.
Consider implementing the “one in, one out” rule to maintain your newly organized counters: when acquiring new kitchen items, remove something else to prevent clutter from accumulating again.
Keep cleaning supplies easily accessible, and establish a daily five-minute counter reset routine to maintain the organized system long-term. Regular evaluation of what truly needs counter space will help preserve the minimalist aesthetic and functional workspace you’ve created.
Smart Cabinet Organization Systems
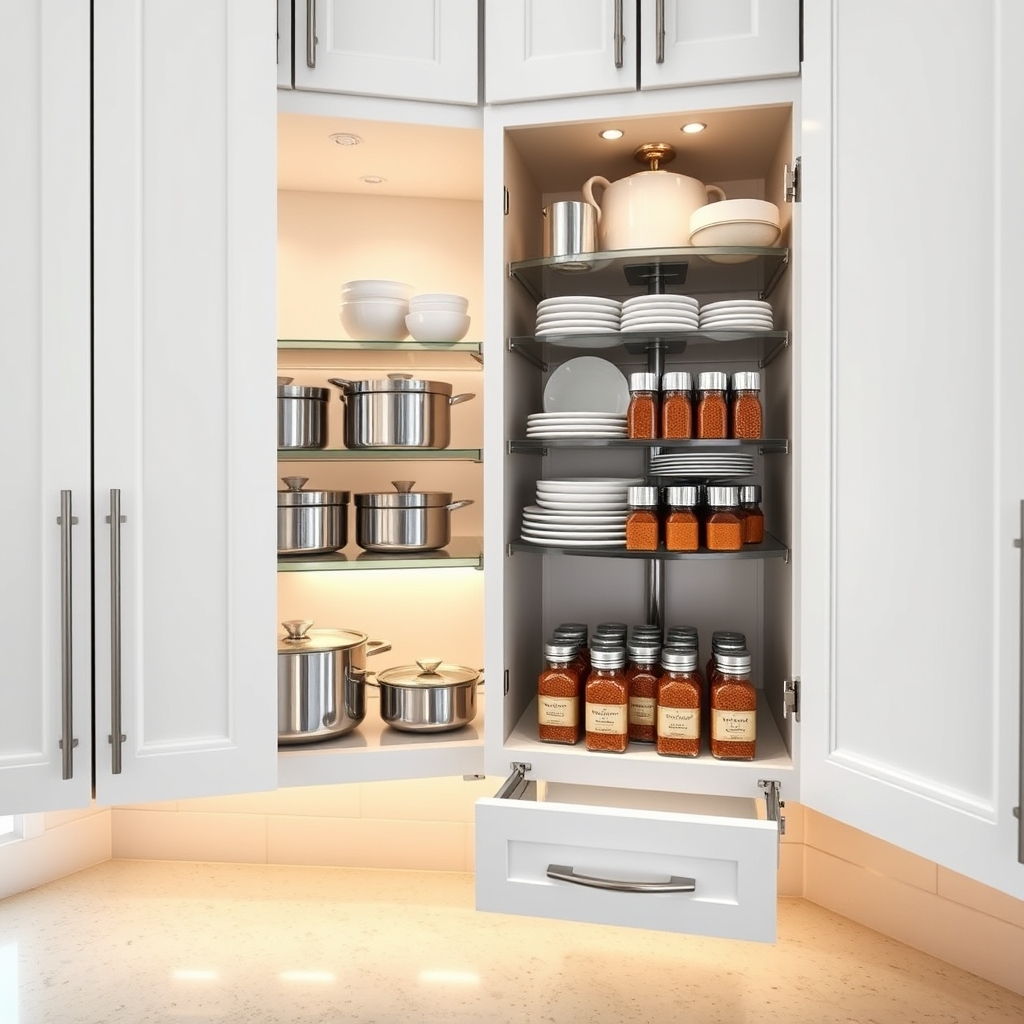
Well-organized kitchen cabinets serve as the foundation of a functional minimalist kitchen. When cabinets are thoughtfully arranged, cooking becomes more efficient, cleaning is simplified, and maintaining an organized space becomes second nature rather than a constant struggle.
Smart cabinet organization systems transform chaotic storage spaces into streamlined, accessible areas that maximize every inch of available space. These systems eliminate the frustration of searching for items buried in the back of cabinets and prevent the accumulation of unused or expired items that often plague kitchen storage.
Required Items:
- Pull-out drawer organizers
- Adjustable shelf risers
- Clear storage containers
- Label maker
- Measuring tape
- Cabinet door organizers
- Lazy Susan turntables
- Vertical dividers
- Under-shelf baskets
- Stack-able containers
Start by completely emptying all cabinets and measuring the interior dimensions. Group similar items together and assess which organizational tools will work best for each category.
Install pull-out drawers in lower cabinets to maximize accessibility, particularly for heavy items like pots and pans. Position frequently used items at eye level, and utilize vertical space with shelf risers and door-mounted organizers.
For upper cabinets, implement a zone-based system where items are stored near their point of use. Place cooking supplies near the stove, dishware near the dishwasher, and food storage containers near the refrigerator.
Install lazy Susan systems in corner cabinets to eliminate dead space, and use clear containers for dry goods to maintain visual clarity and track inventory levels.
Additional Tips: Review your cabinet organization every three months to maintain efficiency. Remove items that haven’t been used, adjust dividers and organizers as needed, and clean all organizational tools thoroughly.
Consider installing under-cabinet lighting to improve visibility and maintain the minimalist aesthetic while making items easier to locate in deep cabinets.
Drawer Dividers and Custom Storage Solutions
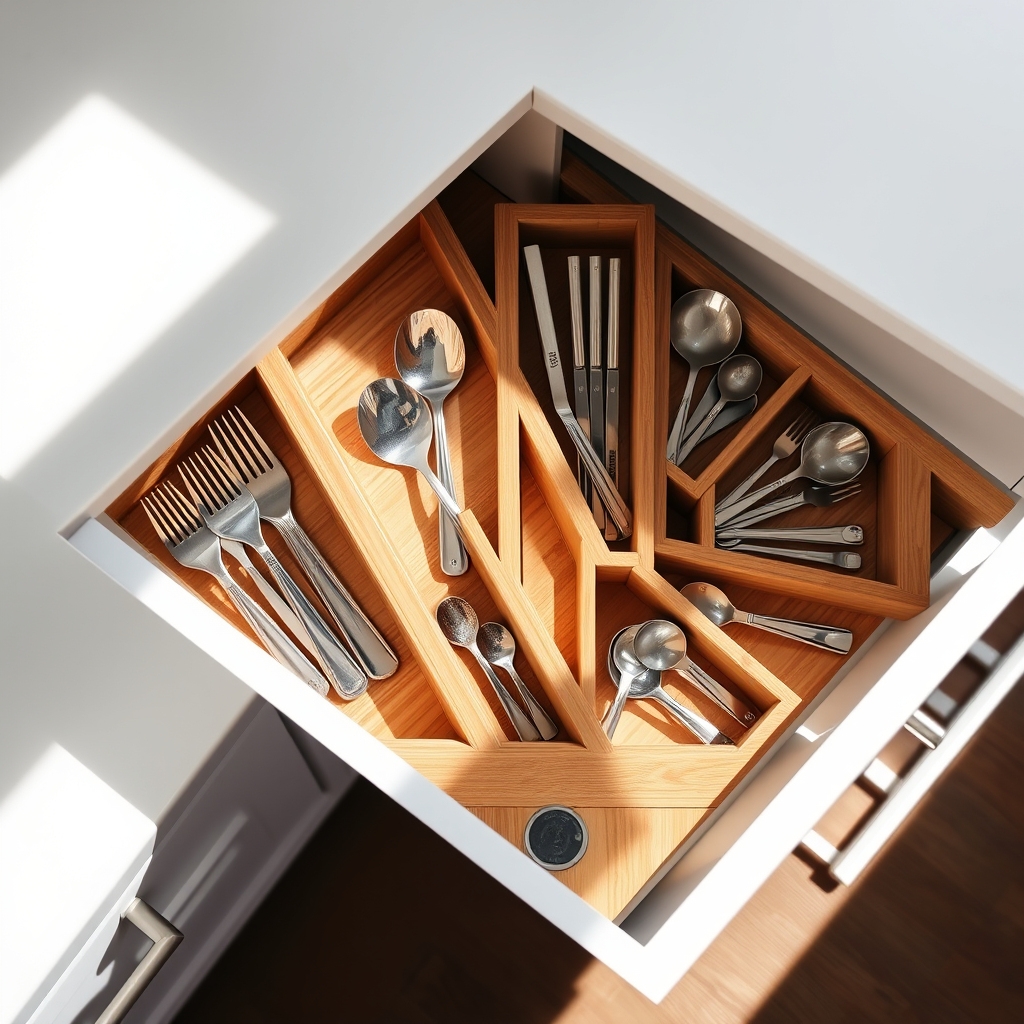
A well-organized drawer system serves as the foundation of a functional minimalist kitchen. When utensils, tools, and cooking essentials are properly categorized and separated, meal preparation becomes more efficient, and the clean aesthetic of a minimalist space is maintained even behind closed drawers.
Custom storage solutions and drawer dividers transform chaotic spaces into ordered systems that maximize every inch of available space. This targeted approach to organization eliminates the frustration of searching through jumbled drawers and ensures that items remain in their designated spots, reducing clutter and maintaining the streamlined appearance essential to minimalist design.
Required Items:
- Adjustable drawer dividers
- Custom drawer organizers
- Measuring tape
- Label maker
- Drawer liner material
- Small containers or bins
- Drawer space maximizers
- Container dividers
- Drawer depth extenders
- Cleaning supplies
Start by completely emptying each drawer and measuring the internal dimensions. Install appropriate drawer liners to protect the surface and prevent items from sliding.
Select adjustable dividers or custom organizers that fit your drawer dimensions and accommodate your specific items. Create designated zones within each drawer based on frequency of use and logical groupings (such as cooking utensils, baking tools, or cutlery).
Position the dividers to create compartments that efficiently house your items while maintaining clean lines and visual order. Place frequently used items in the most accessible areas, and arrange similar items together.
For deep drawers, consider implementing tiered organizers or drawer maximizers to utilize vertical space effectively.
For optimal results, regularly assess and adjust your organization system. Remove items that aren’t frequently used, and clean the dividers and drawer interiors monthly.
Consider using clear containers for smaller items and maintaining a consistent labeling system to ensure all household members can maintain the organizational structure.
Remember that the goal of minimalist drawer organization isn’t just aesthetic appeal but practical functionality that simplifies daily kitchen tasks.
Hidden Appliance Storage Solutions
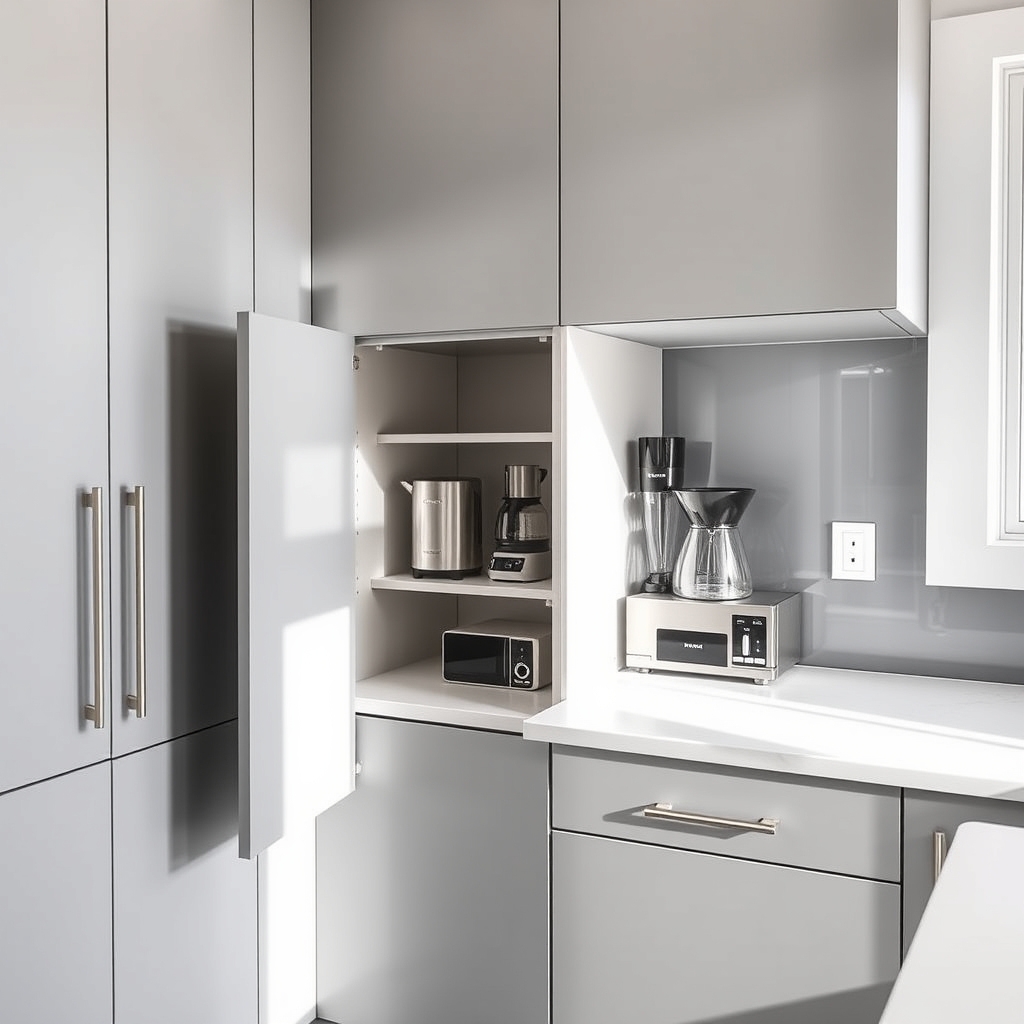
A well-organized system for storing kitchen appliances is essential for maintaining a clean, minimalist aesthetic while ensuring functionality. Hidden appliance storage prevents counter clutter, creates a seamless look, and makes the kitchen appear more spacious and professionally designed.
Efficient appliance storage not only enhances the visual appeal of your kitchen but also protects your investments from dust and damage. Strategic organization of these items allows for quick access when needed while keeping them concealed during non-use, perfectly aligning with modern minimalist principles.
Required Items:
- Adjustable cabinet shelves
- Appliance lift mechanism
- Pull-out drawer organizers
- Cabinet door mounting brackets
- Tension rods
- Clear bins or containers
- Label maker
- Measuring tape
- Power strip
- Cable ties
The organization process begins with assessing your appliances and their frequency of use. Install appliance lift mechanisms in lower cabinets for heavy items like stand mixers or food processors. These lifts allow easy access while keeping appliances hidden when not in use.
For medium-sized appliances, implement pull-out drawer systems with adjustable dividers to prevent items from shifting. Create designated zones within cabinets based on usage patterns. Install power strips in strategic locations to ensure appliances can be tested or used without removing them completely from storage.
Utilize vertical space by mounting lighter appliances on cabinet doors using specially designed brackets. Consider installing a specialty cabinet with a tambour door to create an “appliance garage” for frequently used items.
Additional Tips: Measure appliances before purchasing organization solutions to ensure proper fit. Keep instruction manuals in a labeled folder nearby for quick reference. Consider removing appliances you haven’t used in the past year to free up valuable storage space. Always leave enough clearance around stored appliances for proper ventilation and easy access to electrical outlets.
Vertical Storage Maximization
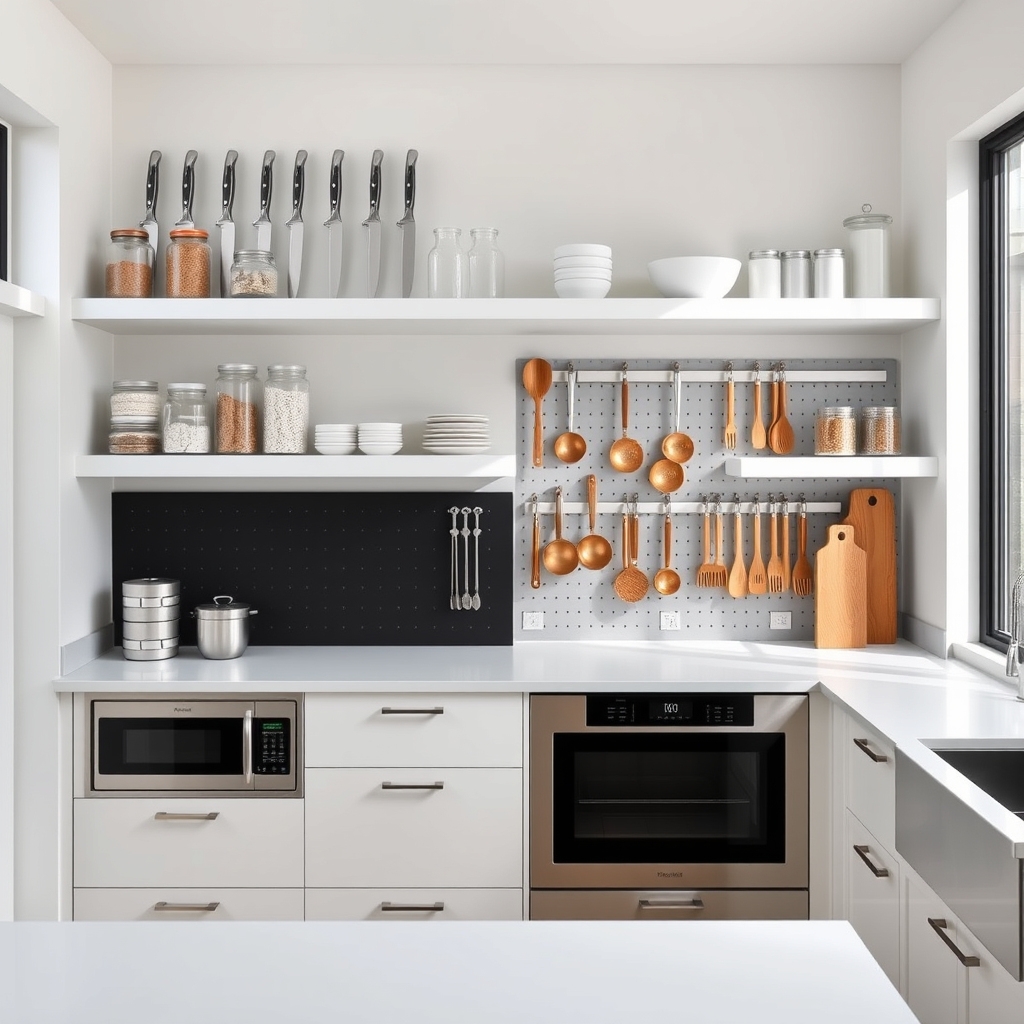
Vertical storage represents one of the most underutilized aspects of kitchen organization, particularly in modern minimalist spaces. By thinking upward instead of outward, homeowners can effectively double or triple their storage capacity without compromising the clean aesthetic that defines minimalist design.
Making the most of vertical space isn’t just about installing shelves – it’s about creating functional zones that maintain easy access while maximizing every inch of wall space. This approach proves especially valuable in urban environments where square footage comes at a premium, allowing for a clutter-free environment that aligns with minimalist principles.
Required Items:
- Wall-mounted shelving systems
- Magnetic knife strips
- Pegboards
- S-hooks and utility hooks
- Cabinet door organizers
- Tension rods
- Wall-mounted pot racks
- Command strips or mounting hardware
- Level
- Drill and screwdriver
- Measuring tape
- Pencil
Start by conducting a thorough assessment of your available wall space, measuring both the height and width of potential storage areas. Install wall-mounted shelving units at varying heights, keeping frequently used items at eye level and seasonal items higher up.
Mount magnetic knife strips at a comfortable reaching height, typically about 4-5 feet from the floor. Utilize the inside of cabinet doors by installing slim organizers for spices, cleaning supplies, or cooking utensils.
For maximum efficiency, group similar items together on your vertical storage solutions. Position everyday cookware on easily accessible pot racks, while reserving higher shelving for less frequently used items.
Install pegboards with a variety of hooks to create customizable storage that can evolve with your needs. Use tension rods vertically in narrow spaces to store baking sheets and cutting boards upright.
Additional Tips: Consider weight distribution when mounting items vertically, ensuring proper wall anchors for heavier items. Maintain visual harmony by choosing storage solutions in similar finishes or colors.
Leave some empty space between storage zones to prevent a cluttered appearance and allow for future adjustments. Regular reassessment of your vertical storage system ensures it continues to serve your needs effectively while maintaining the minimalist aesthetic.
Minimalist Pantry Organization Methods
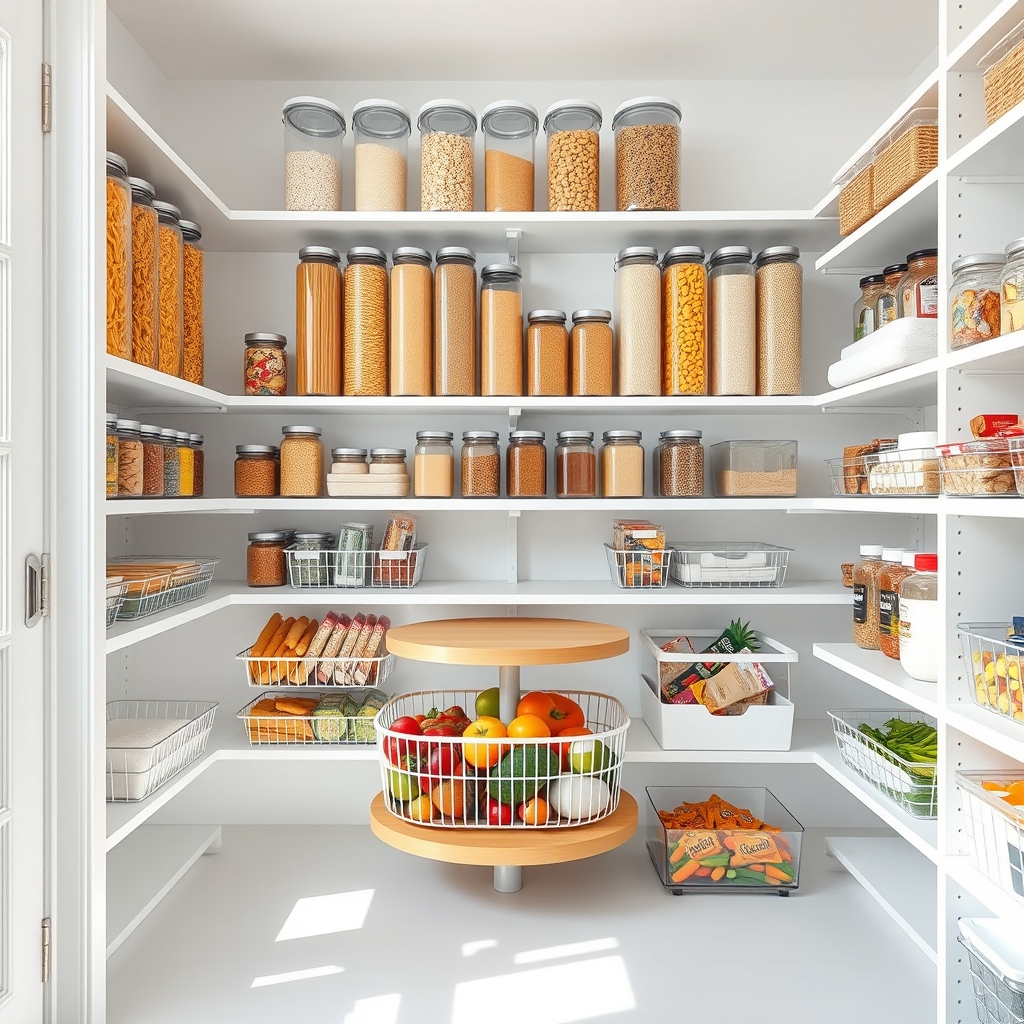
A well-organized minimalist pantry serves as the foundation for an efficient kitchen, reducing food waste and streamlining meal preparation. When pantry items are thoughtfully arranged and easily visible, cooking becomes more enjoyable, and maintaining a clutter-free space becomes second nature.
The minimalist approach to pantry organization focuses on keeping only essential items, storing them in clear containers, and creating intuitive systems that work for your specific needs. This method not only creates visual harmony but also makes it easier to track inventory and maintain a streamlined shopping routine.
Required Items:
- Clear storage containers (various sizes)
- Labels and label maker
- Measuring tape
- Shelf liner
- Clear bins or baskets
- Lazy Susans
- Airtight food storage containers
- Glass jars
- Container markers
- Shelf risers
Start by completely emptying your pantry and sorting items into categories like grains, snacks, canned goods, and baking supplies. Check expiration dates and discard any outdated items. Clean all surfaces thoroughly and install shelf liner if desired.
Measure your shelves and plan zones based on your family’s needs and cooking habits. Transfer dry goods into clear, airtight containers, ensuring all items are visible and accessible. Group similar items together and position frequently used items at eye level.
Use shelf risers to maximize vertical space and implement lazy Susans in corner areas. Label all containers with contents and expiration dates. Create designated zones within your pantry, keeping breakfast items together, baking supplies in one area, and snacks in another.
Use clear bins to contain smaller items and prevent them from getting lost. Maintain space between items to preserve the minimalist aesthetic and allow for easy access.
Additional Tips: Implement a regular maintenance schedule to prevent clutter from accumulating. Review pantry contents monthly, rotating older items to the front. Keep a running inventory list on your phone or inside the pantry door to streamline shopping.
Consider using uniform containers for a more cohesive look, and always store items in their most space-efficient orientation.
Clean-Line Open Shelving Arrangements
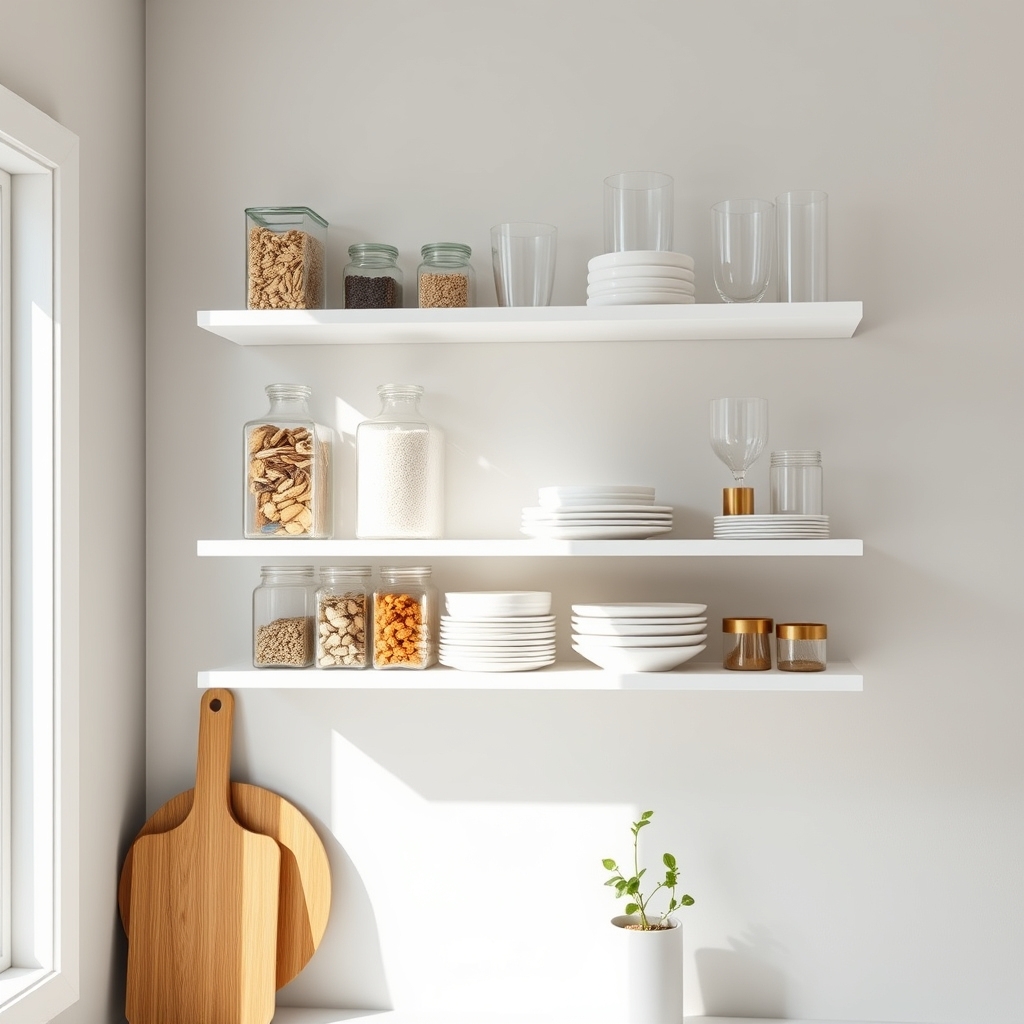
Clean-line open shelving represents the cornerstone of modern minimalist kitchen design, offering both functionality and aesthetic appeal. These exposed storage solutions demand thoughtful organization to maintain their sleek appearance while ensuring everyday items remain easily accessible.
When properly arranged, open shelving transforms kitchen spaces into efficient, visually appealing work areas that embody minimalist principles. The key lies in creating intentional arrangements that balance negative space with carefully curated items, preventing the cluttered look that can quickly overwhelm open storage systems.
Required Items:
- Clear glass containers with airtight lids
- Uniform storage baskets
- Shelf liner
- Label maker
- Measuring tape
- Microfiber cleaning cloths
- Storage risers
- Container organizers
- Natural wood or bamboo organizers
- Clear acrylic bins
Start by completely clearing the shelves and wiping them down thoroughly. Group items by both function and frequency of use, positioning everyday essentials at eye level and between waist and shoulder height. Arrange heavier items on lower shelves for stability and safety. Transfer dry goods into matching clear containers, ensuring all labels face forward for easy identification.
Create visual harmony by organizing items in groups of three or five, maintaining consistent spacing between objects. Use risers and organizers to create varying heights within each shelf, adding depth while maintaining clean lines. Keep color schemes neutral and coordinated, limiting decorative elements to one or two carefully chosen pieces per shelf.
Success Tips: Maintain the minimalist aesthetic by regularly auditing shelf contents, removing items that haven’t been used within three months. Establish a weekly cleaning routine to prevent dust accumulation, and rotate items seasonally to ensure the most-used pieces are always within easy reach.
Consider the negative space between items as important as the items themselves – this breathing room is essential for achieving the clean, uncluttered look characteristic of modern minimalist design.
Multi-Functional Kitchen Island Design
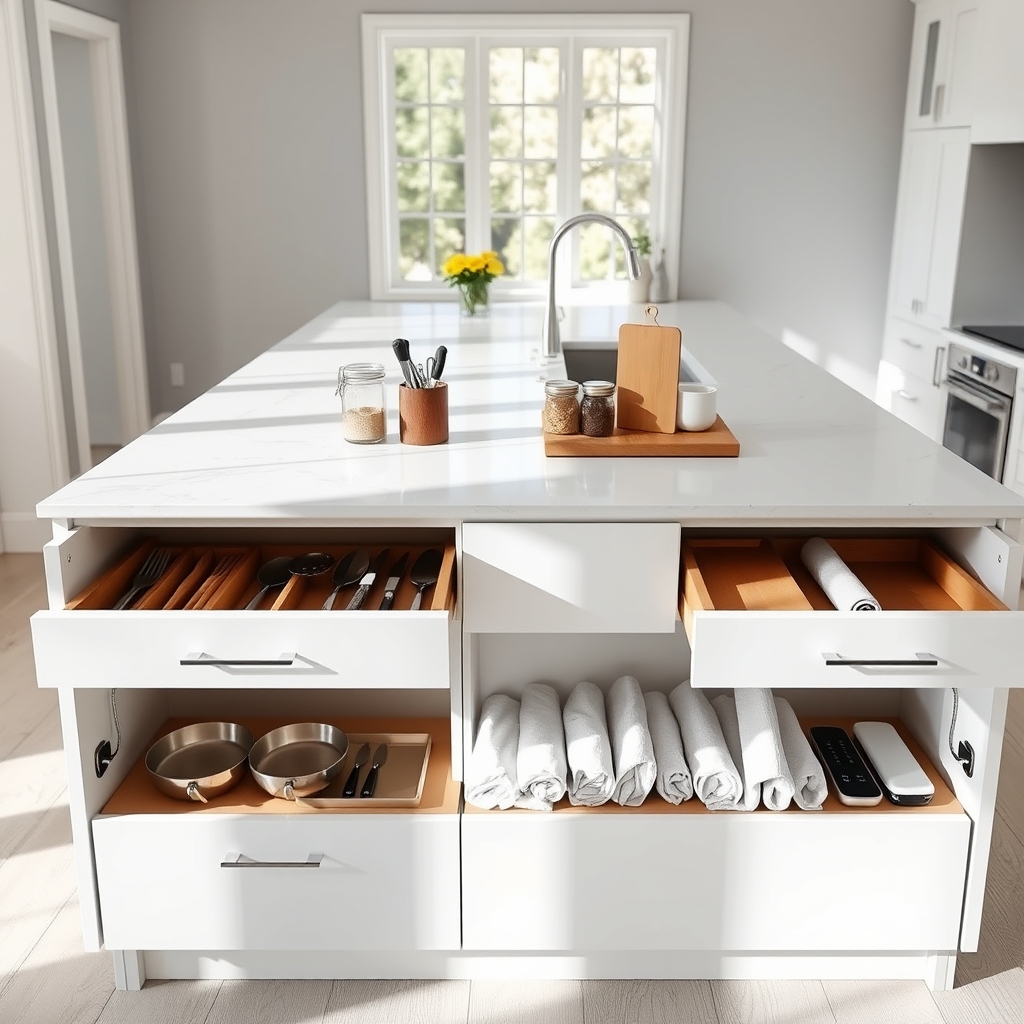
A well-organized kitchen island serves as the heart of modern kitchen functionality, combining storage, workspace, and often dining capabilities in one central location. The multi-functional nature of a kitchen island demands thoughtful organization to maintain its efficiency while preserving the clean, uncluttered aesthetic that defines minimalist design.
Proper organization of a kitchen island transforms it from a simple countertop into a powerhouse of productivity, allowing for seamless transitions between food preparation, casual dining, and storage. Strategic organization maximizes every inch of space while maintaining the minimalist principle that every item must serve a purpose.
Required Items:
- Drawer organizers
- Clear storage containers
- Under-counter baskets
- Cabinet dividers
- Magnetic knife strip
- Pull-out trash system
- Hook racks
- Label maker
- Shelf liner
- Drawer liners
- Storage canisters
- Cable management solutions
Start by categorizing the island’s zones based on function: food prep, cooking, storage, and dining. Install drawer organizers in the top drawers for frequently used utensils and tools, positioning them closest to their point of use.
Implement a vertical storage system for cutting boards and baking sheets using cabinet dividers. Convert lower cabinets into specialized storage areas with pull-out systems for trash, recycling, or appliance storage.
For the countertop, establish designated zones while maintaining clear space. Mount a magnetic knife strip on one end for essential knives, keeping them accessible yet safe. Install under-counter hooks for frequently used items like dish towels or oven mitts.
If the island includes electrical outlets, use cable management solutions to maintain a clean appearance. Maximize organization success by conducting regular audits of stored items, removing rarely used tools and maintaining only essential items in prime storage locations.
Consider implementing a rotation system for seasonal cooking tools, storing less frequently used items in other kitchen areas. Remember that in minimalist design, negative space is as important as storage space – resist the urge to fill every available area.
Sleek Container and Label Systems
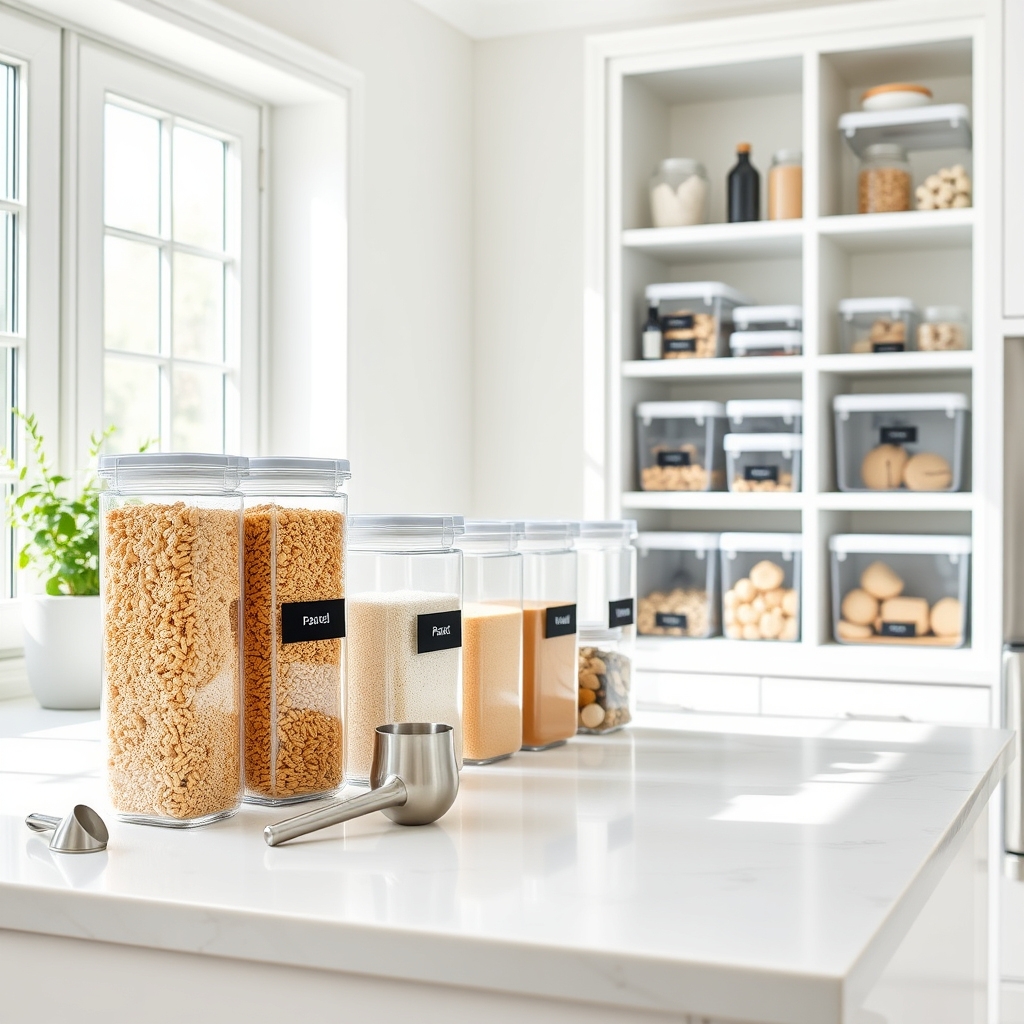
A well-organized container and label system forms the foundation of a truly minimalist kitchen. When dry goods, snacks, and pantry items are stored in matching containers with clear labeling, it eliminates visual clutter while making items instantly accessible and maintaining their freshness longer.
Implementing a cohesive storage system not only transforms the aesthetic of your kitchen but also streamlines meal preparation and grocery shopping. When you can see exactly what you have and where it belongs, you reduce food waste, save money, and maintain the clean lines essential to minimalist design.
Required Items:
- Clear airtight storage containers in various sizes
- Label maker or waterproof labels
- Measuring cups
- Funnel
- Container cleaning brush
- White marker or paint pen
- Clear bins for grouping items
- Shelf liner
- Microfiber cleaning cloths
- Food storage bag clips
Begin by removing all items from your pantry or cabinets and sorting them by category. Transfer dry goods into appropriately sized clear containers, leaving about 20% empty space for easy pouring. Measure each item’s typical volume to select the right container size.
Create uniform labels including the item name, purchase date, and expiration date if applicable. Position containers by frequency of use, with daily items at eye level.
Group smaller containers in clear bins by category – baking supplies together, breakfast items in another, snacks in a third. Stack containers vertically when possible to maximize space and maintain visual order. Always position labels facing forward for instant recognition.
For optimal results, establish a regular maintenance schedule to clean containers and update labels. Consider implementing a “first in, first out” rotation system, and keep a running inventory list on your phone or kitchen bulletin board.
When purchasing new containers, stick to one brand or style to maintain the cohesive, minimalist aesthetic essential to this organization system.
Mindful Kitchen Zone Planning
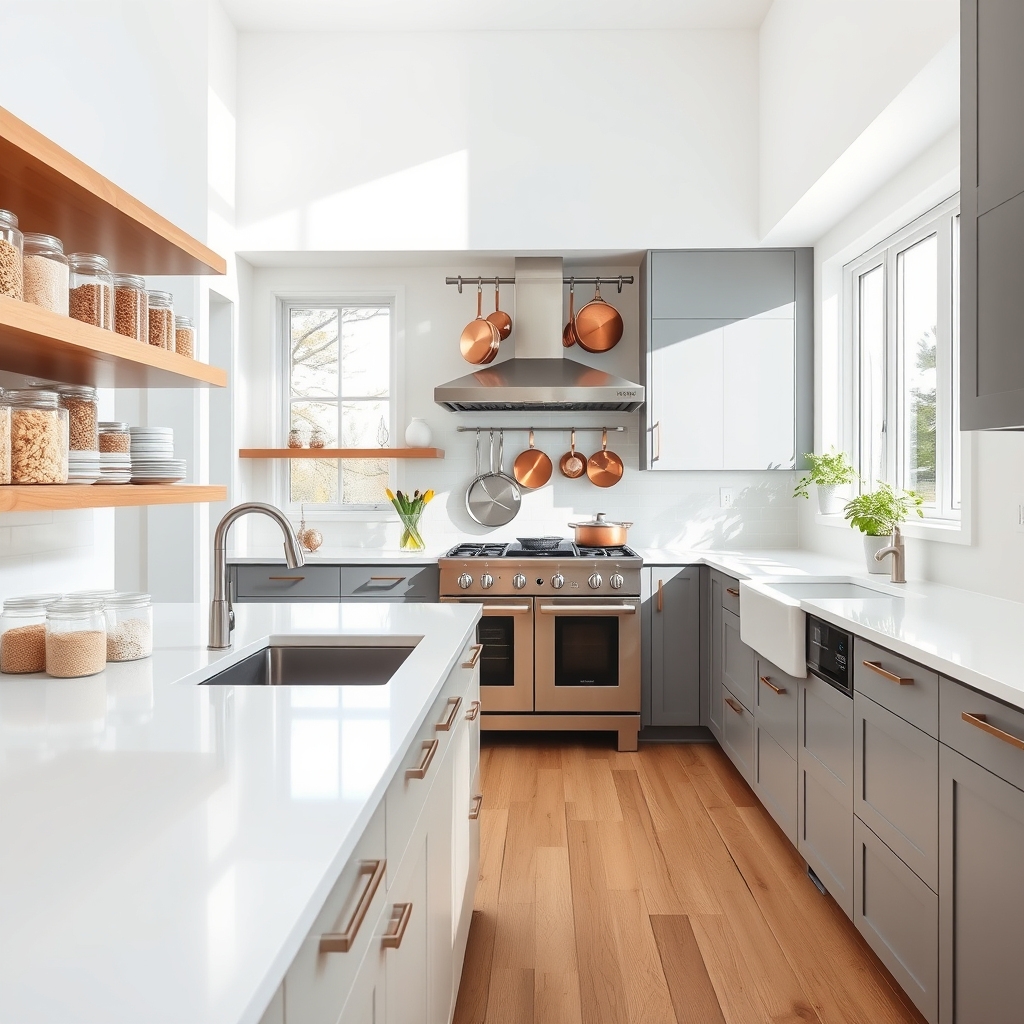
Creating intentional kitchen zones is fundamental to achieving a minimalist and highly functional cooking space. Well-planned zones reduce unnecessary movement, streamline meal preparation, and maintain the clean aesthetic that defines modern minimalist design.
Proper zone planning transforms your kitchen from a cluttered workspace into an efficient culinary command center. Each zone serves a specific purpose, ensuring that related items and activities are grouped logically together, minimizing wasted time and energy while maintaining the streamlined look of a minimalist kitchen.
Required Items:
- Paper and pen for mapping
- Measuring tape
- Sticky notes
- Storage containers
- Drawer organizers
- Clear bins
- Labels
- Shelf liners
- Cabinet organizers
- Drawer dividers
The process of establishing mindful kitchen zones starts with identifying five core areas: preparation, cooking, cleaning, storage, and serving. Map your kitchen’s layout, noting fixed elements like sink, stove, and refrigerator. Position the prep zone near the sink for easy access to water and between the refrigerator and stove for efficient workflow.
Create the cooking zone around the stove and oven, ensuring frequently used tools and spices are within arm’s reach. Establish the cleaning zone around the sink and dishwasher, with appropriate storage for cleaning supplies underneath.
The storage zone should include the pantry and refrigerator, with frequently used items at eye level and occasional-use items stored higher or lower. The serving zone typically includes cabinets for plates, glasses, and serving ware, ideally positioned near the dining area or dishwasher for easy table setting and cleanup.
Within each zone, arrange items by frequency of use, with daily items most accessible.
Additional Tips: Review and adjust your zones after two weeks of use, noting any friction points in your workflow. Consider using clear containers in each zone to maintain visual consistency and make items easily identifiable. Remove any duplicate items and keep only the essentials in each zone.
Install adequate lighting in each zone to ensure functionality, and maintain clear countertops by storing appliances in designated cabinets when not in use.

