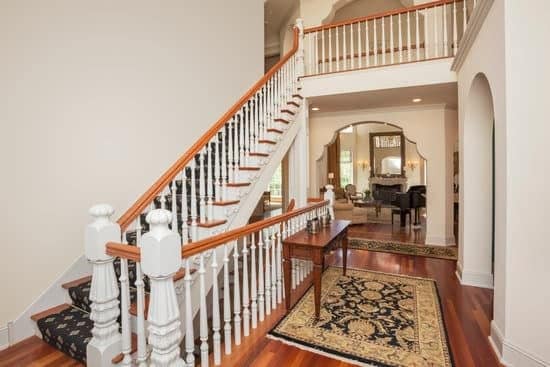
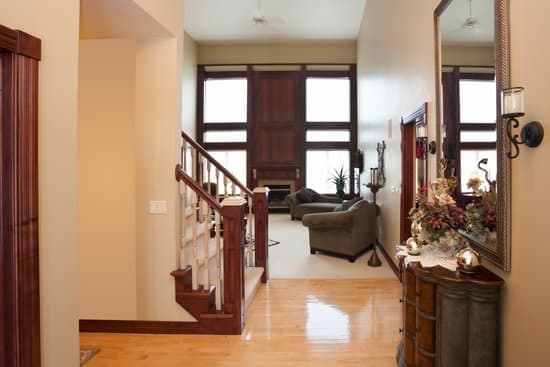
Are you struggling to create a welcoming entryway in your home, even though there isn’t a designated foyer? Don’t worry, we’ve got you covered! In this article, we’ll show you how to maximize wall space with hooks and shelves, create a visual divider using furniture or decor, and incorporate statement pieces or artwork to add personality. With clever storage solutions, proper lighting, and mirrors for an open feel, you can transform any area into a functional and safe entry point.
Utilizing Wall Space for Hooks and Shelves
You can maximize your wall space by adding hooks and shelves to create a functional foyer. Utilizing wall space for plants is a great way to bring life and freshness into your entryway. Hanging plants not only add a touch of nature but also improve air quality. You can choose low-maintenance plants like succulents or ferns that thrive in indoor environments. Incorporating a small seating area near the entrance allows you to comfortably put on or take off shoes, providing convenience and safety. A small bench or chair with storage underneath can serve as a place to sit while putting on shoes and also provide extra storage for items like umbrellas or bags. By utilizing your wall space effectively, you can transform any area into an organized and inviting foyer while incorporating elements that promote safety and comfort.
Creating a Visual Divider with Furniture or Decor
Using furniture or decor to create a visual divider can be an effective way to establish separate areas in a space. When it comes to making a foyer where there isn’t one, furniture arrangement plays a crucial role. Consider placing a console table against the wall, adorned with decorative items like vases or picture frames. This will give the illusion of an entryway and help define the space. Another option is to use decorative screens strategically placed near the entrance to visually separate the foyer area from the rest of the room. These screens not only add style but also provide privacy and safety by preventing direct access to other parts of your home. By carefully arranging furniture and utilizing decorative screens, you can create a distinct foyer even when there isn’t one.
Incorporating a Statement Piece or Artwork
To create a visually striking entrance, consider incorporating a statement piece or artwork that adds personality and sets the tone for the rest of your home. Choosing the right color palette for your statement piece is crucial. Opt for bold colors that can make a strong impact in a small space. Look for artwork that complements the overall color scheme of your foyer while also reflecting your personal style. If you have limited space, don’t be discouraged! You can still incorporate statement artwork into a small area by utilizing vertical space. Hang artwork on the walls or place it on floating shelves to maximize visual impact without taking up valuable floor space. Remember to secure any heavy pieces properly so they won’t pose a safety hazard, ensuring both style and peace of mind in your foyer design.
Maximizing Storage with Clever Solutions
Consider clever storage solutions to maximize the functionality of your entrance area. By incorporating hidden compartments and multi-functional furniture, you can create a foyer that not only looks stylish but also provides ample storage space for all your belongings. Here are four ideas to inspire you:
- Install a shoe rack with hidden compartments: Keep your shoes organized and out of sight by choosing a shoe rack with secret compartments. This will not only declutter your foyer but also ensure the safety of your footwear.
- Opt for a bench with built-in storage: A bench with hidden compartments is perfect for storing items like umbrellas, gloves, and scarves. It offers a convenient seating option while keeping your entrance area tidy.
- Hang a mirror with hidden shelves: Maximize wall space by installing a mirror with concealed shelves behind it. This clever solution allows you to store small essentials like keys, sunglasses, or even mail while adding an elegant touch to your foyer.
- Choose an entryway table with drawers: An entryway table with built-in drawers provides additional storage for items such as hats, gloves, or pet essentials. It keeps everything within reach while maintaining a clutter-free entrance area.
By embracing these clever storage solutions, you can transform any space into a functional and safe foyer without compromising on style or organization.
Adding Lighting and Mirrors for an Open and Spacious Feel
Adding lighting and mirrors can create an open and spacious feel in your entrance area. When it comes to choosing the right color scheme for a bright and airy foyer, opt for light and neutral colors like whites, creams, or pastels. These colors reflect more light, making the space appear larger and more inviting. Additionally, don’t underestimate the power of plants and greenery to bring life into your foyer. By adding potted plants or hanging baskets, you can create a refreshing atmosphere that not only looks great but also improves air quality. Make sure to choose low-maintenance plants that thrive in indoor environments with minimal sunlight. By incorporating these simple yet effective techniques, you can transform your lack of a formal foyer into a welcoming space that feels open and spacious while ensuring safety for all who enter.
Conclusion
So there you have it – creating a foyer when there isn’t one is totally possible! By utilizing wall space for hooks and shelves, creating a visual divider with furniture or decor, incorporating a statement piece or artwork, maximizing storage with clever solutions, and adding lighting and mirrors for an open and spacious feel, you can transform any space into a welcoming entryway. With a little creativity and some smart design choices, you’ll have your own stylish foyer in no time!


