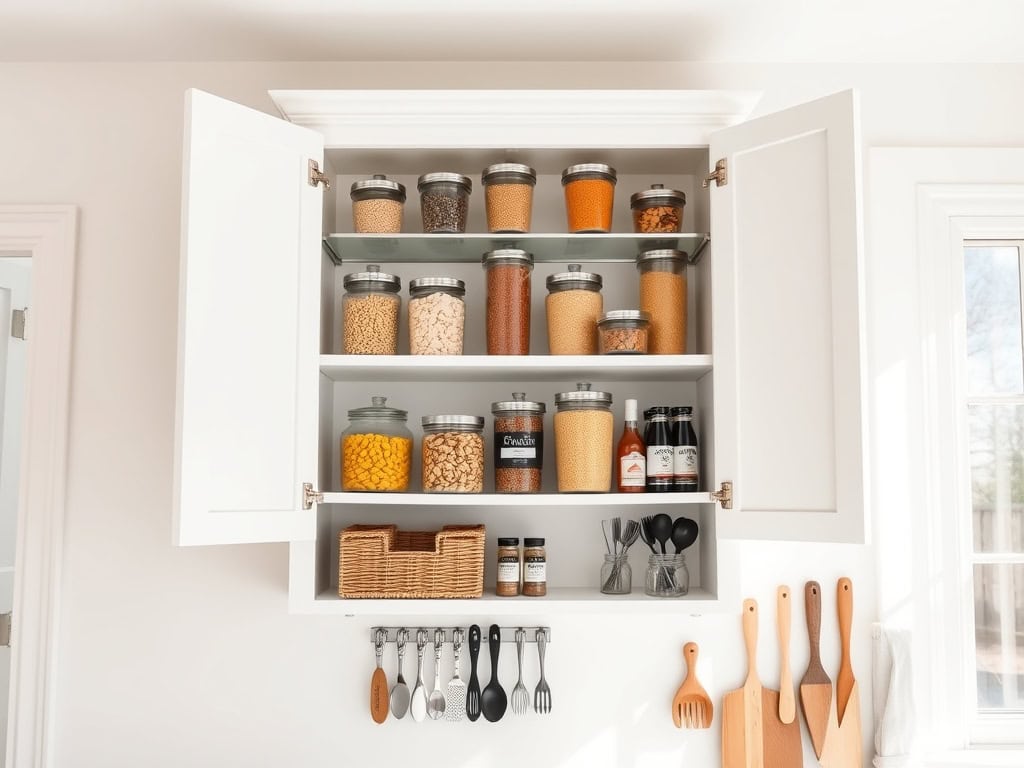
Last week, my neighbor Sarah transformed her chaotic kitchen cupboards into an Instagram-worthy storage system in just one weekend. You’d be amazed how a few smart organization tricks can turn a jumbled mess into a functional space that actually makes cooking enjoyable! If you’re tired of avalanches every time you reach for a pot or playing hide-and-seek with your spices, these genius cupboard solutions will revolutionize how you use your kitchen.
Install Pull-Out Drawer Systems
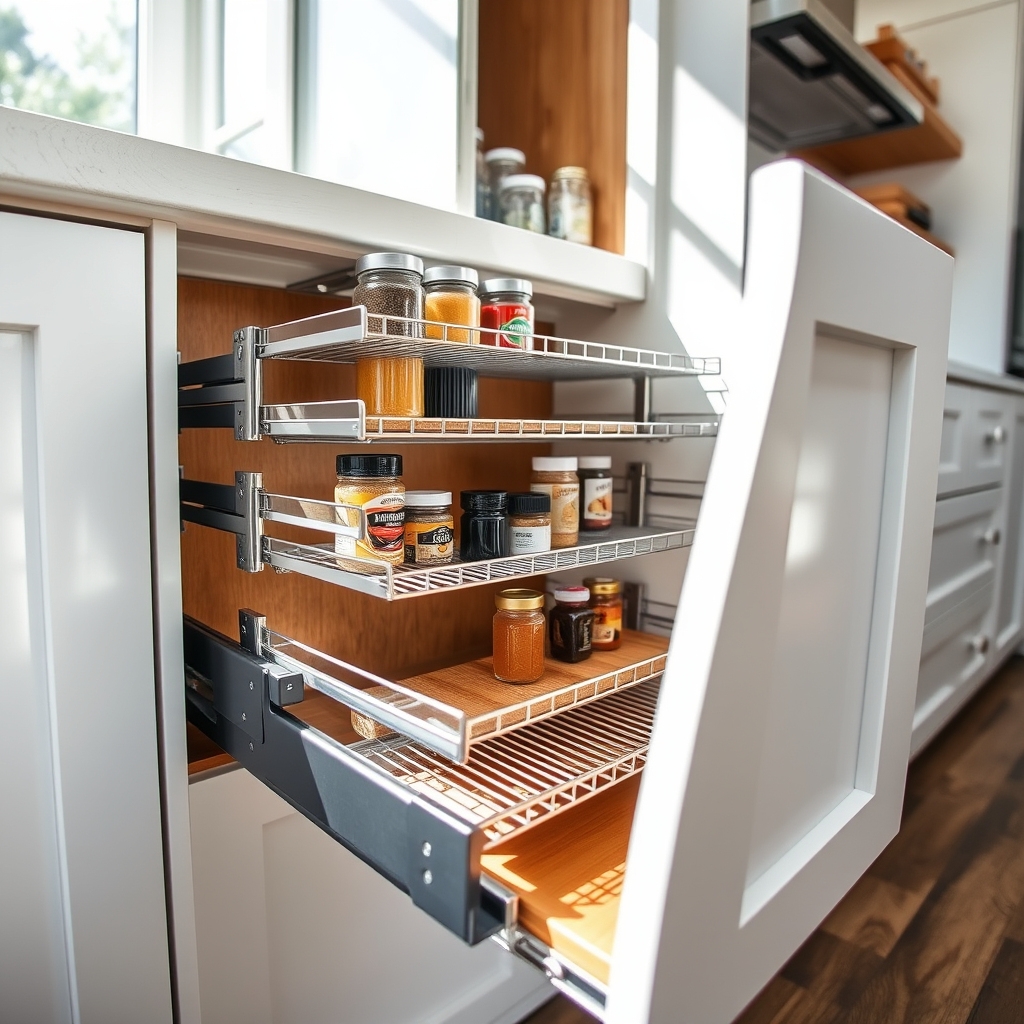
Installing pull-out drawer systems transforms ordinary cabinets into highly functional storage spaces that maximize accessibility and organization. These systems eliminate the frustration of reaching into deep cabinets or struggling to access items stored in the back, turning previously wasted space into efficient storage solutions.
Pull-out drawers revolutionize how you interact with your kitchen storage, making it easier to view and grab items without bending or stretching. This upgrade not only enhances the functionality of your kitchen but also increases the value of your home while reducing physical strain during cooking and cleaning activities.
Required Items:
- Pull-out drawer kit(s)
- Drill and drill bits
- Screwdriver
- Level
- Measuring tape
- Pencil
- Cabinet hardware template
- Wood screws
- Safety glasses
- Work gloves
- Drawer liner (optional)
Start by removing everything from the target cabinet and measuring the interior dimensions carefully, accounting for both width and depth. Purchase pull-out systems that fit your cabinet specifications with at least half an inch of clearance on all sides.
Install the drawer slides first, ensuring they’re level and properly aligned using the provided mounting brackets. Secure the slides firmly to the cabinet walls, testing the movement before attaching the drawer unit. Mount the drawer platform onto the slides, checking that it moves smoothly without catching or binding.
Once installed, organize items by category, placing frequently used items toward the front and heavier items on the bottom drawers if installing multiple levels. Consider using drawer dividers or bins to maintain organization and prevent items from shifting when the drawer moves.
Test the weight capacity of each drawer and ensure it doesn’t exceed manufacturer specifications.
Additional optimization: Label the front of each drawer with its contents, and maintain a quarterly maintenance schedule to check hardware tightness and smooth operation. Consider installing soft-close mechanisms if not included in your original kit, and use drawer liners to prevent items from sliding. Regular cleaning and inspection of the sliding mechanisms will ensure long-term functionality and prevent potential issues before they develop.
Group Items by Zones and Categories
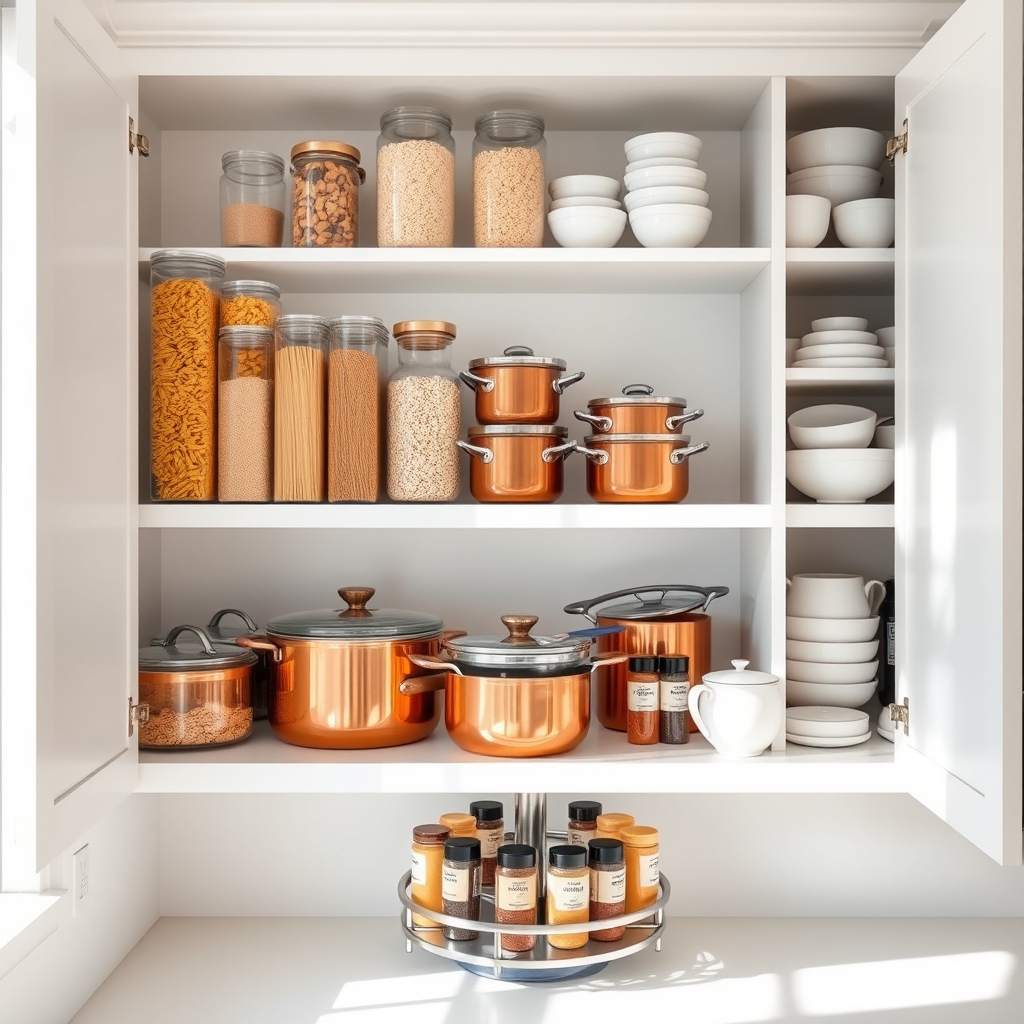
Organizing kitchen cupboards by zones and categories transforms a chaotic space into an efficient cooking environment. When items are grouped logically according to their use and frequency of access, it becomes easier to find what you need and maintain order in your kitchen space.
Creating designated zones based on your cooking habits and daily routines not only saves time but also reduces stress during meal preparation. This systematic approach ensures that items used together stay together, making cooking and cleanup more streamlined while maximizing available storage space.
Required Items:
- Clean cloths
- Labels and marker
- Measuring tape
- Storage containers
- Shelf liner (optional)
- Drawer organizers
- Lazy Susans
- Clear bins or baskets
- Notepad for planning
Start by removing everything from your cupboards and sorting items into broad categories: cooking, baking, food storage, entertaining, and everyday dishes. Create distinct zones based on your kitchen workflow – place frequently used items at eye level and within easy reach of their primary use area. For example, position cooking supplies near the stove, coffee supplies near the coffee maker, and food storage containers near the refrigerator.
Next, establish subcategories within each zone. In the cooking zone, separate pots and pans from cooking utensils and spices. In the baking zone, group measuring tools, mixing bowls, and baking sheets together. Place everyday dishes and glasses in easily accessible cupboards near the dishwasher or sink for efficient unloading.
Consider vertical space by using shelf risers, hooks, and door-mounted organizers to maximize storage capacity. Install lazy Susans in corner cupboards and deep storage areas to improve accessibility. Use clear containers or bins to keep smaller items contained and visible.
For optimal long-term success, implement a regular maintenance schedule to review and adjust your organization system. Label shelves or containers to help family members maintain the established order, and periodically assess whether the current arrangement still serves your needs.
Remove rarely used items to prevent clutter from accumulating, and adjust zones as your cooking habits evolve.
Maximize Vertical Space With Shelf Risers
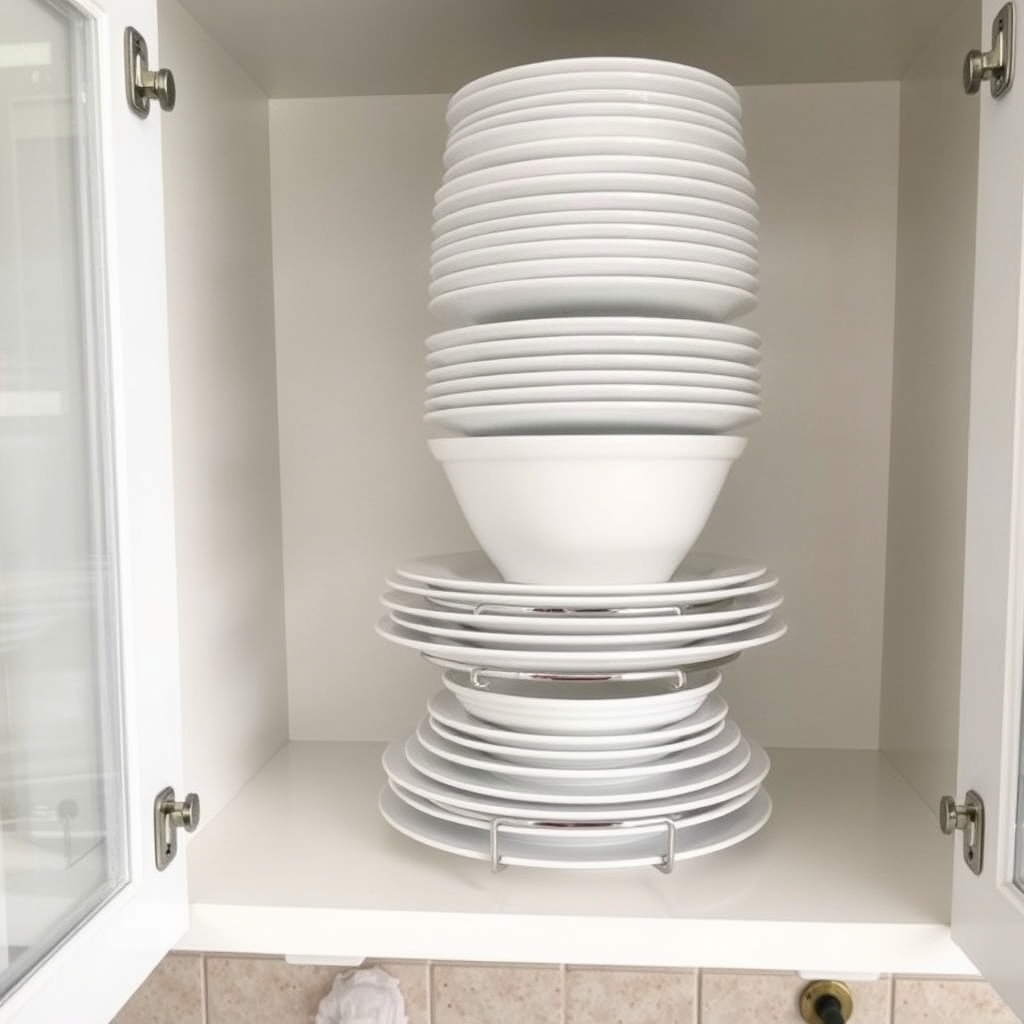
Vertical space in kitchen cupboards often goes underutilized, creating wasted storage potential that could be better employed to organize kitchen items. By implementing shelf risers, you can effectively double or triple your storage capacity while maintaining easy access to all your items. This simple solution transforms cluttered, inefficient cupboards into well-organized spaces that make cooking and kitchen tasks more enjoyable.
The proper use of shelf risers not only maximizes storage space but also helps prevent items from being forgotten at the back of cupboards. When everything is visible and accessible, you’re more likely to use all your kitchen items regularly and avoid buying duplicates unnecessarily. This organization method is particularly valuable in smaller kitchens where every inch of storage space counts.
Required Items:
- Shelf risers (various sizes)
- Measuring tape
- Notepad and pen
- Cleaning supplies
- Non-slip shelf liner
- Labels (optional)
- Storage containers (optional)
Start by removing all items from the target cupboard and measuring the available space, noting both height and width. Choose shelf risers that fit your cupboard dimensions, leaving enough clearance for items to be easily removed. Place non-slip liner underneath each riser to prevent shifting.
Position taller items on the bottom level and shorter items on the raised level, ensuring frequently used items remain easily accessible. For optimal organization, group similar items together, such as placing all drinking glasses on one level and mugs on another.
When arranging items, consider the height of both the lower and upper spaces created by the riser. Taller items should be positioned where they won’t interfere with the shelf above or prevent easy access to items on the riser. If storing plates or bowls, ensure the riser is sturdy enough to support their weight and consider using plate holders for added stability.
Additional Tip: Regularly reassess your shelf riser arrangement and adjust as needed based on your changing kitchen needs. Consider using clear storage containers on the risers to further organize smaller items and prevent them from toppling. Clean both the risers and the space underneath them monthly to prevent dust accumulation and maintain a hygienic kitchen environment.
Use Clear Containers for Pantry Storage
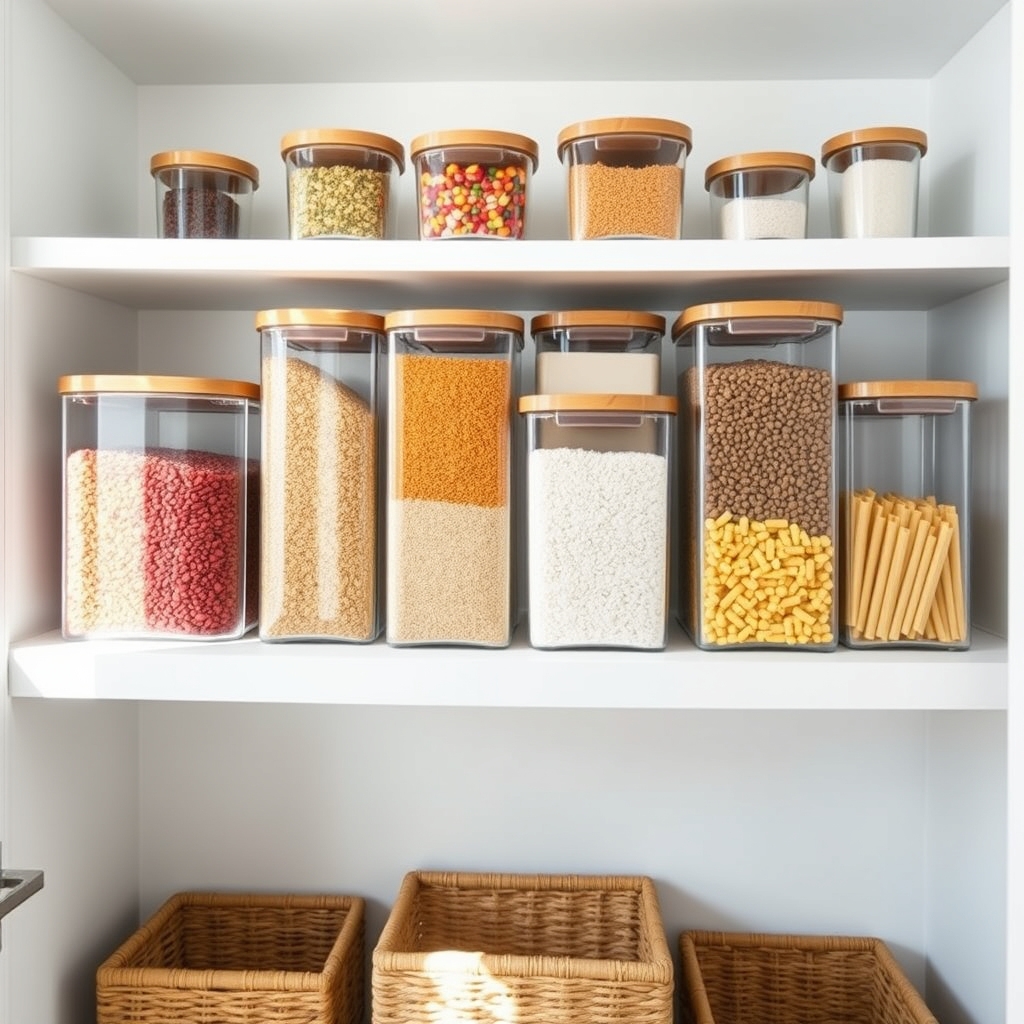
Clear containers in pantry storage revolutionize the way we interact with our kitchen ingredients. By transferring items from their original packaging into transparent containers, you can instantly see what’s available, how much remains, and when it’s time to restock. This visibility eliminates the frustration of discovering empty packages or expired items hidden at the back of shelves.
The transformation from a cluttered pantry to an organized system using clear containers not only creates an aesthetically pleasing space but also promotes better food management. When ingredients are visible and accessible, you’re more likely to use them before they expire, ultimately reducing food waste and saving money.
Required Items:
- Clear airtight containers in various sizes
- Labels and marker/label maker
- Measuring cups/scoops
- Funnel
- Clean cloth for wiping containers
- Storage bins for container lids
- Small vacuum cleaner or brush
- Kitchen scale (optional)
Start by removing all dry goods from their original packaging and sorting them by category (grains, snacks, baking supplies, etc.). Clean each container thoroughly with warm soapy water and dry completely. When transferring ingredients, use a funnel to prevent spills and ensure the container size matches the quantity of food. Label each container with the item name and expiration date. For frequently used items like flour or sugar, consider adding a small scoop or measuring cup.
Arrange containers by category on pantry shelves, placing frequently used items at eye level and heavier containers on lower shelves. Stack similar-sized containers together to maximize vertical space, but ensure all labels remain visible. Keep a few empty containers on hand for new purchases or bulk-buying opportunities.
For optimal organization maintenance, establish a regular schedule to check expiration dates and clean containers. Store instruction panels from original packaging in a designated folder or take photos for reference. Consider implementing a “first in, first out” rotation system by placing newer items behind older ones, and always refill containers completely before adding new product to ensure proper freshness cycles.
Add Door-Mounted Storage Solutions
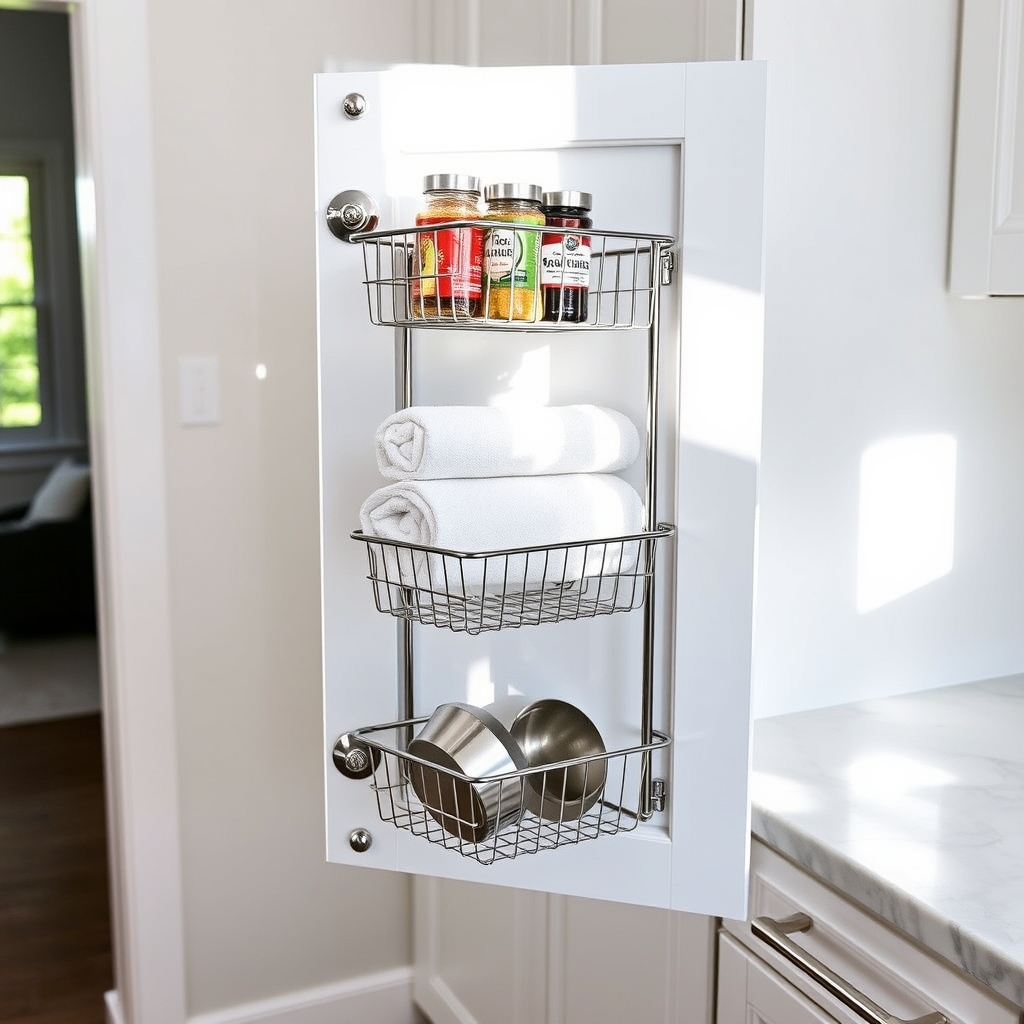
Making use of cabinet door space is one of the most overlooked opportunities in kitchen organization. These often-unused surfaces can effectively double your storage capacity while keeping frequently used items within immediate reach.
Door-mounted storage solutions transform dead space into functional storage areas that can dramatically improve kitchen workflow. Door-mounted organizers are particularly valuable for small kitchens where every inch counts. They create vertical storage opportunities that keep countertops clear and cabinet interiors less cluttered, allowing for better visibility and access to items stored deeper within the cupboards.
Required Items:
- Over-the-door hanging organizers
- Adhesive hooks
- Command strips
- Magnetic strips
- Door-mounted basket systems
- Measuring tape
- Pencil
- Screwdriver
- Wall anchors
- Level
Start by measuring both the interior and exterior dimensions of your cabinet doors, accounting for any shelving or items that might interfere with door-mounted storage. Choose appropriate organizers that fit within these measurements while allowing the door to close properly.
Install adhesive hooks or mounting brackets according to the manufacturer’s instructions, ensuring they’re level and secure. For heavier items, use screws and wall anchors to mount organizing systems directly into the door’s solid portions.
When mounting storage solutions, position frequently used items at eye level and group similar items together. Consider using clear organizers for better visibility or labeled baskets for organized categories. Ensure all mounted items clear cabinet frames and internal shelving when doors open and close.
To maintain the longevity of door-mounted storage, regularly check mounting hardware for security, avoid overloading organizers beyond their weight capacity, and periodically clean both the organizers and mounting areas.
Consider using rubber bumpers on contact points to prevent damage to cabinet doors and reduce noise when closing.
Create a Smart Corner Cabinet System
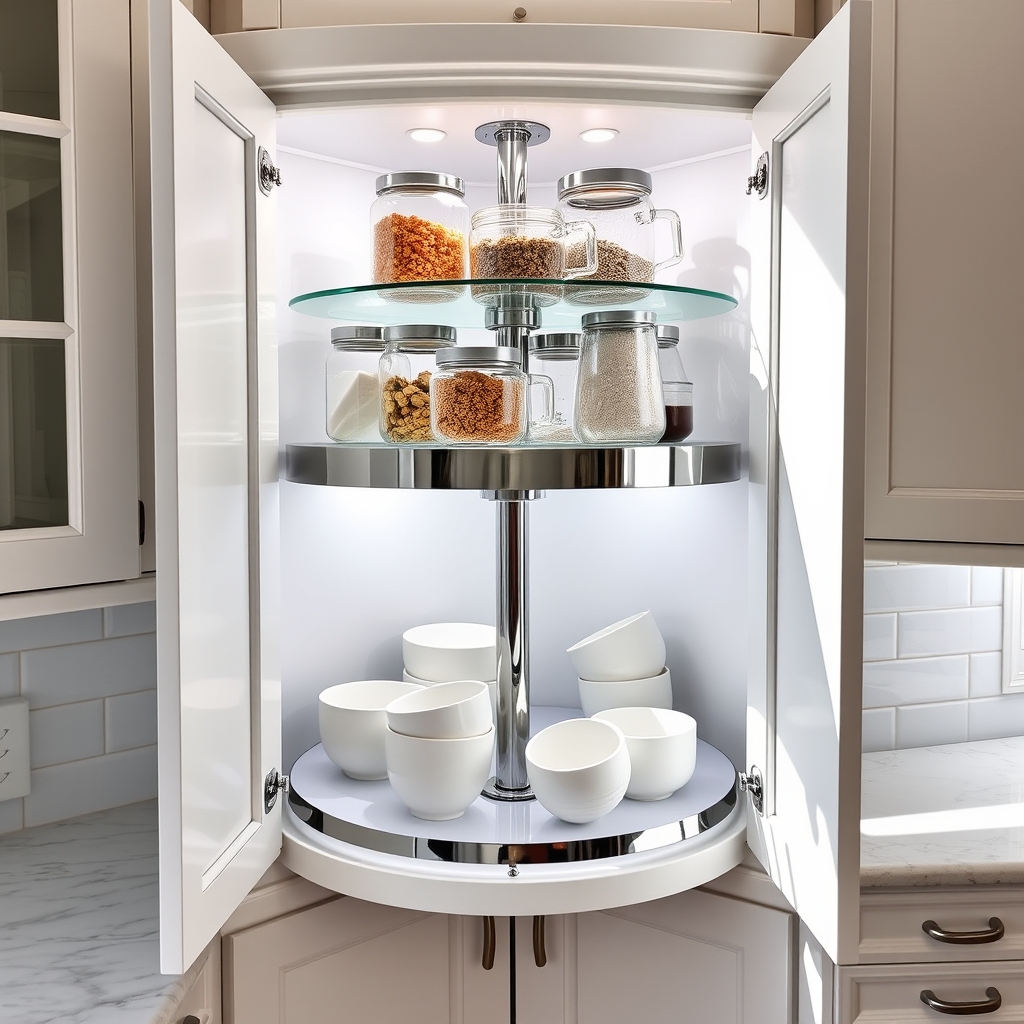
Corner cabinets are often the most challenging spaces to organize in any kitchen, frequently becoming black holes where items disappear into deep, hard-to-reach recesses.
These awkward spaces can account for up to 20% of your kitchen storage capacity, making it crucial to maximize their potential.
Transforming your corner cabinet from a cluttered catch-all to a functional storage space can dramatically improve your kitchen’s efficiency.
A well-organized corner system allows easy access to items, prevents forgotten purchases, and makes the most of every inch of available space.
Required Items:
- Lazy Susan (single or double-tier)
- Pull-out corner organizer
- Cabinet door-mounted storage racks
- Non-slip shelf liner
- Clear storage containers
- Label maker
- Measuring tape
- LED battery-operated lights
- Drawer organizers or bins
- Shelf risers
Start by completely emptying the corner cabinet and measuring the interior dimensions, including height, width, and depth.
Install your chosen organizing system – either a Lazy Susan for round storage or a pull-out mechanism for L-shaped access.
Ensure the system is properly secured and operates smoothly before proceeding.
Sort items by frequency of use and size, placing frequently accessed items at the front or on the top tier.
Group similar items together, such as baking supplies or serving pieces.
Use clear containers to store smaller items and prevent them from getting lost in the back of the cabinet.
Apply non-slip liner to prevent items from shifting when the storage system moves.
If using a multi-tier system, position heavier items on the bottom level for stability.
Install battery-operated LED lights to illuminate dark corners, making it easier to locate items.
Use door-mounted racks for additional storage of spices or small items, maximizing every available space.
Advanced Tips:
Consider implementing a quarterly rotation system where you review and reorganize the contents, ensuring nothing gets forgotten.
Create a map or inventory list of stored items and attach it to the inside of the cabinet door.
For items stored in the back, use light-colored or reflective containers to improve visibility.
Regular maintenance of any moving parts, such as lubricating lazy Susan bearings, will ensure long-term functionality of your corner cabinet system.
Implement a Label and Rotation Method
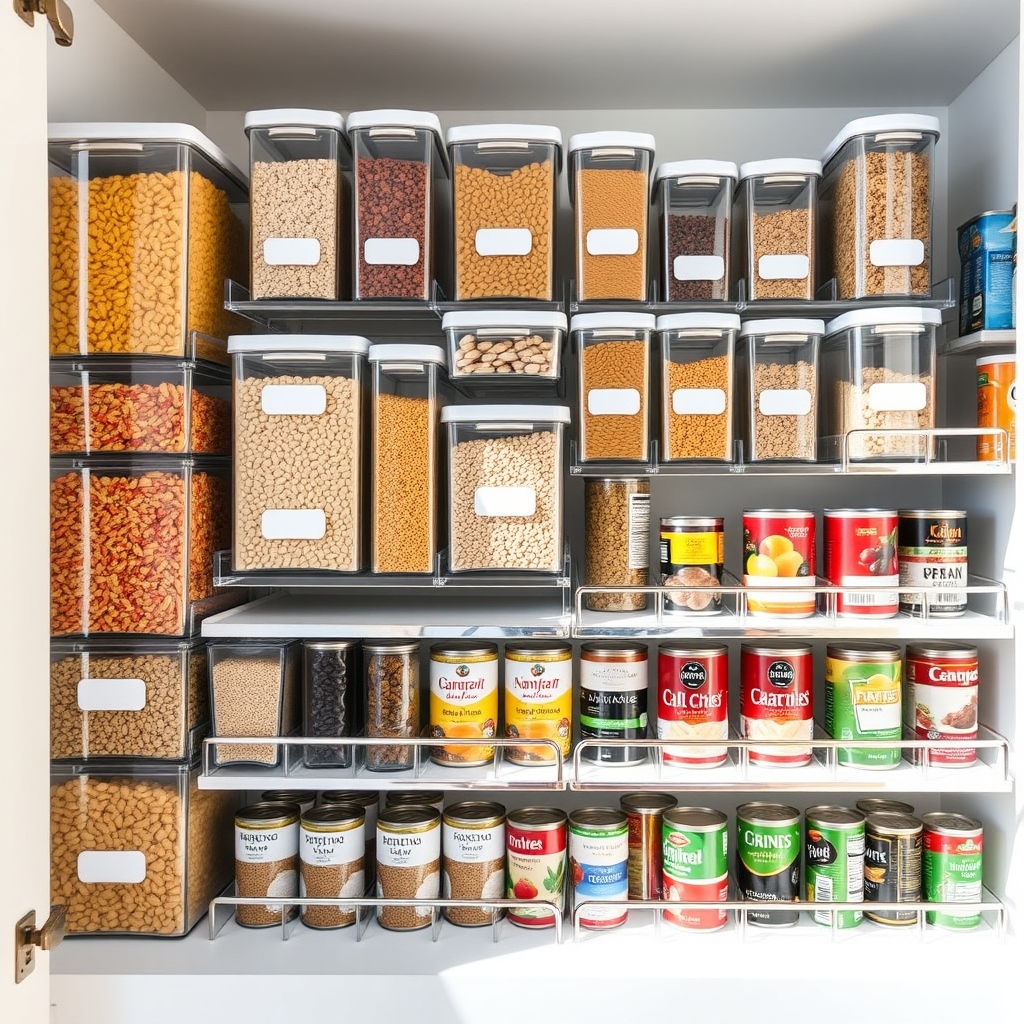
Maintaining an organized labeling and rotation system in kitchen cupboards is essential for efficient meal preparation and reduced food waste. A well-implemented system ensures you can quickly locate items and use products before they expire, saving both time and money in your daily cooking routine.
The rotation method, often called “First In, First Out” (FIFO), combined with clear labeling, transforms chaotic cupboards into a systematic storage space. This approach is particularly valuable for families managing multiple groceries and those who bulk buy, as it prevents items from being forgotten in the back of cupboards and eliminates the frustration of discovering expired products.
Required Items:
- Label maker or waterproof labels
- Permanent markers
- Clear storage containers
- Shelf liner
- Dry erase markers
- Small sticky notes
- Container erasable labels
- Clear drawer organizers
- Rotation risers or stepped shelves
Start by emptying each cupboard and sorting items by category. Transfer dry goods into clear, airtight containers, immediately labeling each with the product name and purchase date. Create a standardized labeling system – position labels consistently on the front of containers at eye level.
For canned goods and packaged items, use shelf risers to create tiers, placing newer items behind older ones. Implement zones within cupboards based on frequency of use and expiration dates. Place items with approaching expiration dates at the front.
When restocking groceries, move existing items forward and place new products at the back. Use dry erase markers on clear containers to note expiration dates, making them easily visible and updatable.
For optimal results, conduct monthly audits of your labeling and rotation system. Create a simple inventory sheet inside cupboard doors to track items and their expiration dates.
Consider using color-coded labels for different food categories or family members’ dietary needs, and always ensure labels are clear and legible from your typical viewing angle.
Declutter and Maintain Regular Updates
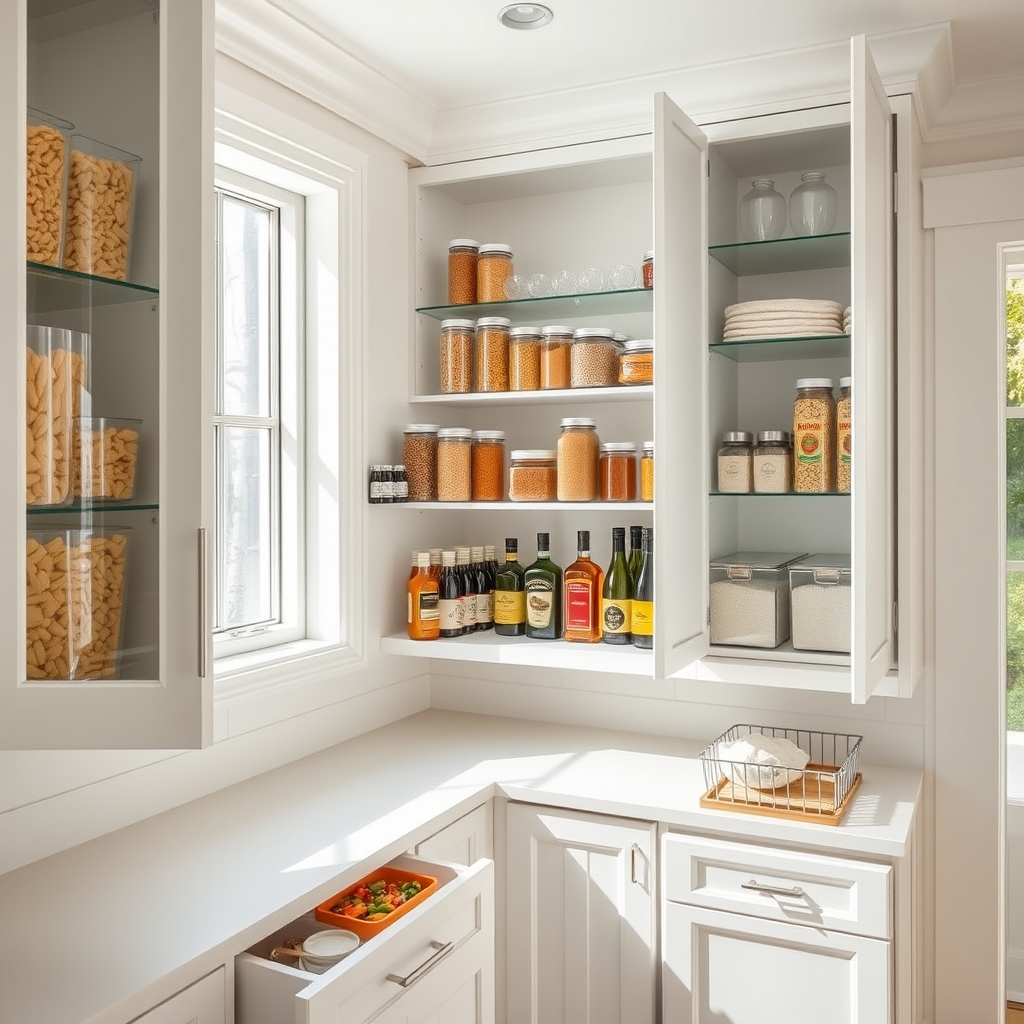
A well-maintained kitchen cupboard system is essential for efficient meal preparation and an enjoyable cooking experience. When cupboards become cluttered with expired items, unused gadgets, and disorganized supplies, it creates unnecessary stress and wastes valuable time searching for needed items.
Regular decluttering and updates of kitchen cupboards prevent the accumulation of unused items and ensure easy access to frequently used products. This systematic approach to cupboard maintenance not only maximizes storage space but also helps maintain inventory awareness, reducing food waste and duplicate purchases.
Required Items:
- Large sorting bins or boxes
- Cleaning supplies
- Labels and marker
- Storage containers
- Shelf liner
- Notebook and pen
- Timer
- Trash bags
- Donation box
Start by removing everything from the cupboards and sorting items into categories: keep, donate, dispose, and relocate. Check expiration dates on all food items and inspect containers for damage or wear.
Clean the empty cupboard surfaces thoroughly before returning items. Create designated zones within cupboards based on frequency of use and logical workflow – everyday items at eye level, seasonal or rarely used items in higher or lower spaces. Group similar items together and implement a labeling system for clear identification.
Establish a maintenance schedule by marking your calendar for quarterly cupboard reviews. During these sessions, check for expired items, assess the effectiveness of your organizational system, and make necessary adjustments.
Consider implementing a “one-in-one-out” rule to prevent future clutter. Document your organization system, including layout and categories, to help maintain consistency during future updates.
To ensure long-term success, conduct weekly mini-reviews of high-traffic cupboard areas and monthly checks of less-used spaces. Use clear containers to maintain visibility of contents, rotate items based on expiration dates, and keep an inventory list of seasonal or specialty items.
Consider installing additional organizational tools like lazy Susans or drawer dividers to maximize space efficiency and maintain order.

