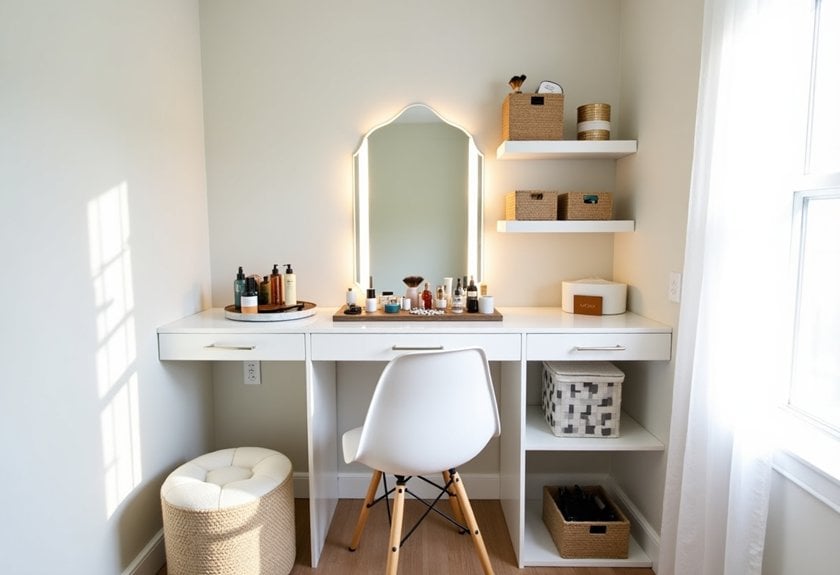
If your vanity area’s current state makes you want to close the door and pretend it doesn’t exist, you’re not alone! I’ve transformed countless chaotic vanities into Instagram-worthy spaces using practical organization solutions that actually stick. Whether you’re working with a compact corner or a sprawling setup, these 15 genius ideas will help you maximize every inch while keeping your daily essentials right at your fingertips. Let’s explore how you can turn your vanity from cluttered to curated with smart storage that works for real life.
Clear Acrylic Drawer Organizers for Makeup Storage

Organizing makeup collections in clear acrylic drawer organizers transforms a cluttered vanity into an efficient beauty station. The transparency of acrylic organizers allows immediate visibility of all products, eliminating time wasted searching for specific items and preventing duplicate purchases.
The systematic arrangement of cosmetics not only protects your investment but also extends product life by preventing damage and exposure to environmental factors. Clear acrylic organizers create a professional, boutique-like display while maximizing drawer space and maintaining cleanliness.
Required Items:
- Clear acrylic drawer organizers (various sizes)
- Measuring tape
- Drawer liner (non-slip)
- Clean microfiber cloth
- Labels (optional)
- Drawer dividers
- Small bins or cups for brushes
- Drawer depth extenders (if needed)
Start by measuring your drawer dimensions and planning compartment layouts before purchasing organizers. Remove all makeup items and sort them into categories: face products, eye products, lip products, and tools. Discard expired items and clean each piece before organizing.
Line drawers with non-slip material and position larger acrylic organizers first, followed by smaller compartments for precise items. Create designated zones within drawers based on frequency of use, placing daily items in easily accessible areas. Position taller items at the back of drawers and shorter items in front for optimal visibility. Arrange products vertically when possible to maximize space and prevent products from hiding beneath others.
For optimal organization maintenance, implement a quarterly review system to assess product expiration dates and reorganize as needed. Clean acrylic organizers monthly with a gentle soap solution and soft cloth to maintain clarity and prevent product residue buildup. Consider using clear labels on organizer sections for consistent placement and quick identification of product categories.
Magnetic Makeup Board Solutions

A magnetic makeup board transforms the way you store and access your cosmetics, turning them from cluttered drawer inhabitants into an organized, visible display. This wall-mounted solution not only saves precious counter and drawer space but also helps prevent makeup from getting lost or forgotten in the depths of traditional storage.
Converting your cosmetics into a magnetic system allows you to see everything at a glance, making morning routines more efficient and ensuring you use all your products before they expire. This organization method also adds a decorative element to your vanity area while keeping frequently used items within arm’s reach.
Required Materials:
- Magnetic board or sheet metal
- Strong magnets
- Hot glue gun and glue sticks
- Scissors
- Decorative paper or contact paper (optional)
- Command strips or wall mounting hardware
- Small magnetic containers
- Metal washers
- Ruler or measuring tape
Create your magnetic makeup board by first selecting an appropriately sized magnetic surface for your wall space. Mount the board securely using proper wall hardware or heavy-duty Command strips.
Attach strong magnets to the back of makeup items using hot glue, ensuring the magnetic force is strong enough to hold the weight of each product. For items that don’t attach well directly, use small magnetic containers or attach metal washers to create a magnetic surface.
Sort cosmetics by category (face products, eye makeup, lip products) and arrange them on the board in a logical order that matches your makeup routine. Leave space between items for easy removal and replacement.
Consider placing frequently used products at eye level and keeping heavier items toward the bottom of the board for better stability.
For optimal results, test the magnetic strength of each item before permanently mounting the board. Clean the surface of makeup products before attaching magnets to ensure proper adhesion.
Periodically check the magnetic attachments and replace any that show signs of weakening to prevent accidents or damage to your cosmetics.
Rotating Cosmetic Display Carousel
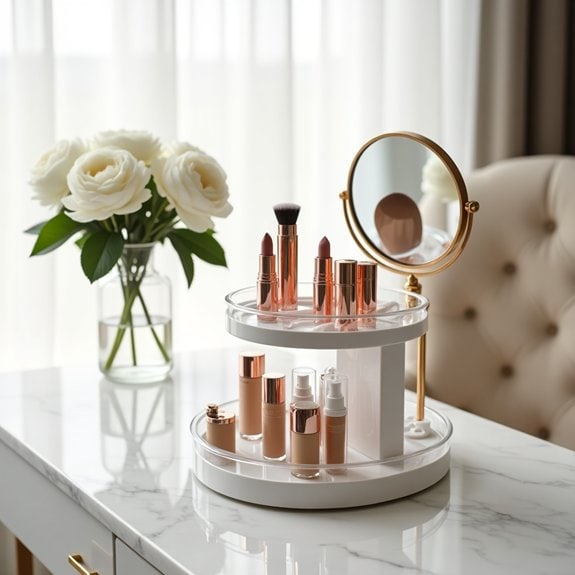
A rotating cosmetic display carousel transforms a cluttered vanity into an efficient, accessible beauty station. By utilizing vertical space and rotational functionality, these organizers maximize storage while keeping frequently used items within arm’s reach.
The carousel concept draws inspiration from professional makeup artists who need quick access to their tools and products. This organizational system not only streamlines morning routines but also helps preserve cosmetics by keeping them properly stored and easily visible, preventing forgotten products from expiring unused in drawers.
Required Items:
- Rotating makeup carousel organizer
- Measuring tape
- Cleaning cloth
- Small containers or dividers
- Label maker
- Drawer liner or non-slip mat
- Cotton swabs for cleaning products
- Storage bags for excess items
Place the carousel on a clean, level surface of your vanity, ensuring adequate space for rotation. Sort cosmetics into categories: face products, eye makeup, lip products, and brushes. Position frequently used items at eye level and heavier products on lower tiers for stability.
Arrange products with labels facing outward and group similar items together to create intuitive zones. Clean each item before placing it in its designated spot to maintain hygiene and assess product condition.
For optimal organization and longevity, regularly review the contents of your carousel every three months. Replace any broken or expired products, and adjust the arrangement based on seasonal needs or usage patterns.
Consider keeping backup products in separate storage and only displaying currently used items to prevent overcrowding. Position the carousel away from direct sunlight and heat sources to protect temperature-sensitive cosmetics.
Wall-Mounted Floating Shelves for Beauty Products

Wall-mounted floating shelves provide an elegant and space-saving solution for organizing beauty products in any bedroom. By lifting items off valuable counter space and displaying them at eye level, these shelves transform cluttered surfaces into an organized, easily accessible beauty station that maximizes vertical space utilization.
Creating an organized floating shelf system for beauty products not only enhances the room’s aesthetic appeal but also streamlines daily routines. When products are visible and properly categorized, it becomes easier to maintain inventory, track expiration dates, and access frequently used items without searching through drawers or containers.
Required Items:
- Floating shelves (various lengths)
- Level
- Drill and drill bits
- Wall anchors
- Screwdriver
- Measuring tape
- Pencil
- Clear acrylic organizers
- Small containers or baskets
- Labels or label maker
- Cleaning supplies
Start by measuring your wall space and planning shelf placement, ensuring adequate space between shelves for different product heights. Install the floating shelves according to manufacturer instructions, using wall anchors for stability.
Group beauty products by category (skincare, makeup, hair products) and assess which items need daily access versus occasional use. Place frequently used products on middle shelves at eye level, with lesser-used items on higher or lower shelves.
Maximize shelf organization by incorporating clear acrylic organizers or small baskets to contain similar items together. Position taller items toward the back of the shelves and shorter items in front for visibility. Use drawer organizers or small containers to prevent products from tipping over, and consider adding labels to maintain organization long-term.
To ensure long-lasting organization, implement a quarterly review system to check product expiration dates and refresh shelf arrangements. Consider installing LED strip lighting under shelves for better visibility, and maintain a “one-in-one-out” policy when purchasing new products to prevent overcrowding.
Regular dusting and wiping of shelves will keep the space looking pristine and protect product integrity.
Drawer Dividers and Custom Compartments
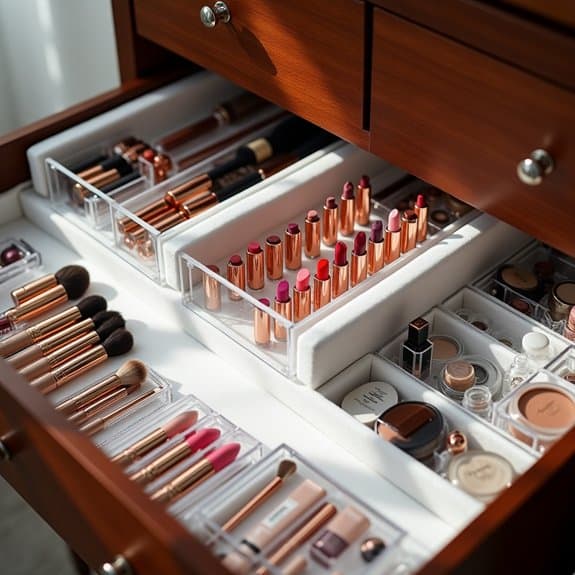
A well-organized vanity drawer system is essential for maintaining order in your daily beauty and grooming routine. When makeup, accessories, and personal care items are properly compartmentalized, you save valuable time searching for items and protect them from damage caused by shifting and jumbling together.
Custom drawer organization transforms chaotic spaces into efficient storage solutions that make the most of every inch. With properly divided spaces, you can categorize items by frequency of use, type, or size, creating a personalized system that maintains itself long-term and prevents the dreaded “junk drawer” syndrome.
Required Items:
- Drawer dividers (adjustable or fixed)
- Drawer liner material
- Measuring tape
- Scissors
- Clear plastic organizer bins
- Small containers or cups
- Labels or label maker
- Adhesive strips (if needed)
- Storage boxes in various sizes
Start by removing everything from the drawer and measuring the interior dimensions. Install drawer liner material to protect the surface and prevent items from sliding. Assess your items and group them by category (makeup, hair accessories, jewelry, etc.).
Select appropriate dividers or containers that fit your drawer dimensions and accommodate your grouped items. For custom compartments, position adjustable dividers to create sections based on your specific needs. Place frequently used items toward the front of the drawer and occasional-use items toward the back.
Use smaller containers within larger compartments to corral tiny items like hair pins or earrings. Consider stacking items vertically when possible to maximize space and visibility.
To maintain your newly organized system, implement a regular maintenance schedule and resist the urge to overfill compartments. Leave about 20% empty space in each section to allow for easy retrieval and prevent overflow.
Consider using clear containers to quickly identify contents, and label sections for shared spaces or complex organizational systems. Regularly assess and adjust the layout as your storage needs change.
Under-Vanity Storage Baskets and Bins
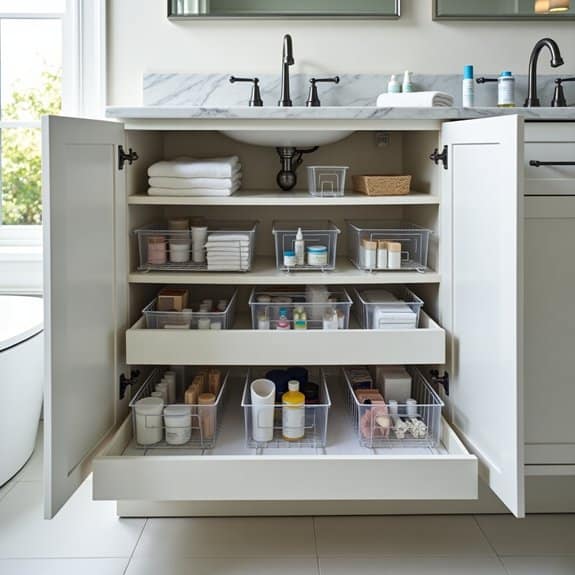
The space under your vanity represents valuable real estate that often goes underutilized or becomes a chaotic catch-all for beauty products, hair tools, and bathroom essentials. Properly organizing this area with storage baskets and bins creates an efficient system that maximizes space while keeping items easily accessible and protected from dust and moisture.
Strategic organization of under-vanity storage not only streamlines your daily routine but also extends the life of your products by preventing spills and maintaining proper storage conditions. Well-chosen baskets and bins can transform this often-neglected space into a functional storage solution that complements your bedroom’s aesthetic while maintaining order.
Required Items:
- Clear plastic storage bins
- Wire baskets
- Pull-out drawer organizers
- Label maker
- Measuring tape
- Shelf liner
- Drawer dividers
- Small plastic containers
- Container labels
- Cleaning supplies
First, measure the under-vanity space carefully, accounting for plumbing fixtures and any built-in structures. Sort items into categories based on frequency of use and type: daily essentials, backup supplies, seasonal items, and special occasion products.
Select appropriate-sized containers that maximize vertical space while allowing easy access to items stored in the back. Arrange the bins and baskets by placing frequently used items in front and occasional-use items toward the back. Install pull-out organizers where possible to eliminate the need to reach into deep spaces.
Use clear containers for easy identification and stack similar-sized bins to optimize vertical space. Label each container clearly to maintain the system long-term.
To maintain optimal organization, implement a quarterly review system to assess the effectiveness of your storage solution. Rotate seasonal items as needed, dispose of expired products, and adjust bin configurations based on changing needs.
Consider using drawer liner material under bins to prevent sliding and protect the cabinet surface from potential spills or moisture damage.
LED-Lit Mirror Storage Solutions
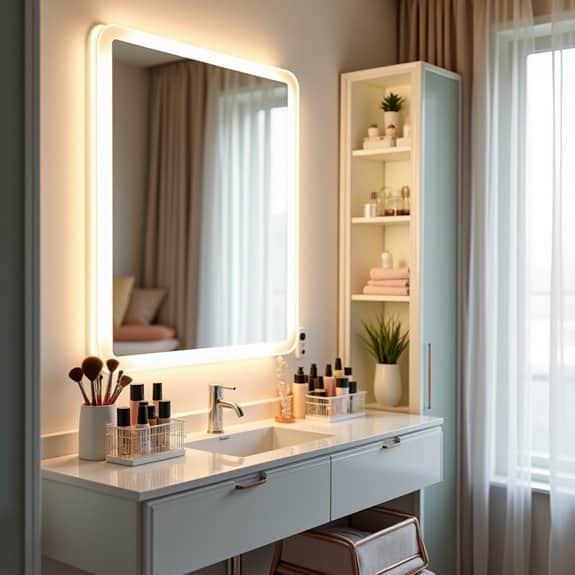
A well-organized LED-lit mirror storage system transforms a basic vanity space into an efficient, luxurious grooming station. Proper lighting combined with strategic storage not only enhances visibility for makeup application and skincare routines but also creates an organized environment that streamlines daily preparation.
The integration of LED lighting with storage solutions serves multiple purposes, from providing optimal illumination to creating an aesthetically pleasing atmosphere. When storage components work in harmony with lighting elements, the result is a clutter-free space that maintains functionality while adding a touch of modern sophistication to the bedroom.
Required Items:
- LED mirror with built-in storage
- Wire organizers or cable clips
- Clear acrylic containers
- Drawer dividers
- Adhesive mounting strips
- Small storage bins
- Power strip or extension cord
- Cleaning supplies
- Labels
- Measuring tape
The organization process begins with mounting the LED mirror at the appropriate height and ensuring proper electrical connections. Install wire organizers to manage cables neatly along the wall or behind furniture. Position clear acrylic containers within arm’s reach, organizing them by frequency of use.
Utilize drawer dividers to separate makeup, skincare products, and tools into distinct categories. Group items by function and create designated zones around the mirror. Store frequently used items at eye level, with less-used items in lower storage areas.
Ensure all LED strips or bulbs are properly secured and that storage solutions don’t interfere with the lighting distribution. Label containers clearly to maintain organization over time.
Additional Optimization: Incorporate motion-sensor lighting for hands-free operation, and consider installing USB ports for charging devices. Regular maintenance of both the lighting system and organization structure will extend their lifespan.
Clean mirror surfaces weekly and reassess storage needs quarterly to maintain an efficient, clutter-free vanity space that maximizes both form and function.
Minimalist Vanity Top Organization
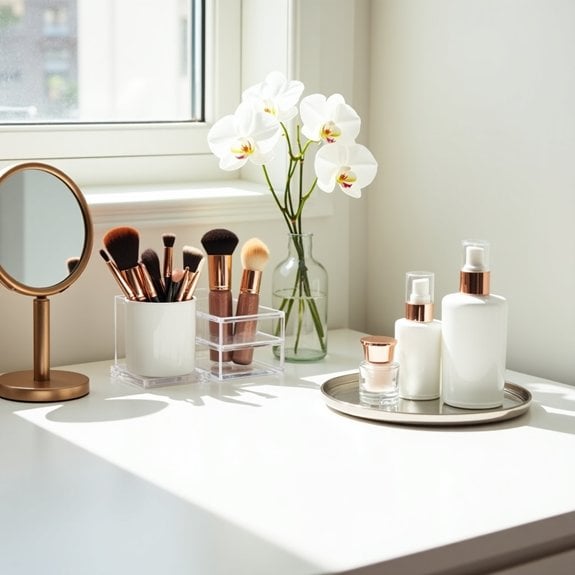
A well-organized vanity top is essential for maintaining a calm, clutter-free bedroom environment. When makeup, skincare products, and daily essentials are thoughtfully arranged, they not only create a visually appealing space but also streamline morning and evening routines.
The minimalist approach to vanity organization focuses on keeping only frequently used items within reach while storing rarely used products elsewhere. This method reduces visual noise, makes cleaning easier, and helps maintain a sense of order that can positively impact your daily self-care rituals.
Required Items:
- Clear acrylic organizers
- Small decorative trays
- Drawer dividers
- Glass jars or containers
- Labels
- Microfiber cleaning cloth
- Storage boxes
- Makeup brush holder
- Small bins or baskets
- Drawer liner
Start by removing everything from your vanity top and thoroughly cleaning the surface. Sort items into categories: daily essentials, occasional use, and rarely used items. Store rarely used items in drawers or separate storage containers.
Select key pieces that deserve prime vanity-top real estate – typically items used daily or those that are aesthetically pleasing. Arrange daily essentials in clear acrylic organizers or decorative trays, positioning them based on frequency of use.
Place makeup brushes in a dedicated holder, ideally with brushes pointing upward to maintain their shape and cleanliness. Group skincare products on a small tray, arranging them from tallest to shortest for visual appeal and easy access.
Keep perfumes, jewelry, and decorative items minimal, choosing only a few statement pieces that complement your space. Consider using vertical storage solutions for items that don’t require a flat surface, such as wall-mounted holders or tiered stands.
Additional Tips: Maintain your minimalist vanity top by implementing a weekly reset routine. Every seven days, quickly assess items that have migrated to the surface, remove anything that doesn’t belong, and wipe down containers and the vanity surface.
This regular maintenance prevents clutter from accumulating and ensures your organized system remains functional long-term.
Space-Saving Corner Vanity Arrangements
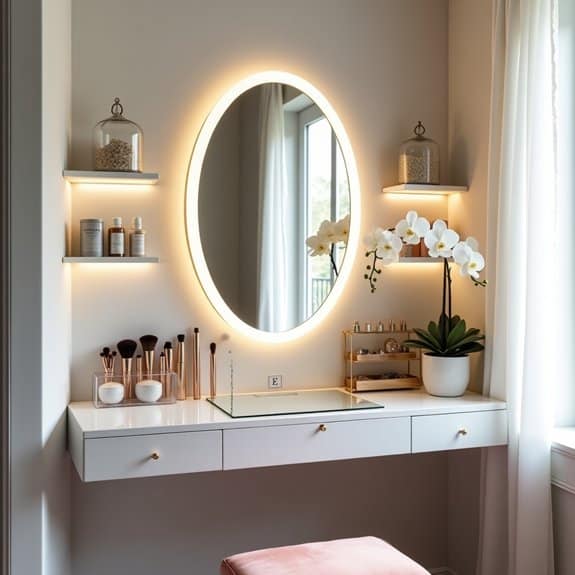
Making the most of corner spaces in bedrooms has become increasingly important as urban living spaces shrink. A well-organized corner vanity arrangement can transform an otherwise awkward or unused corner into a functional beauty station while maximizing your bedroom’s available space.
Corner vanities require strategic planning to maintain both functionality and style without creating cluttered corners. When properly organized, these spaces can store all essential beauty items, jewelry, and personal care products while maintaining a clean, aesthetic appeal that complements your bedroom’s design.
Required Items:
- Corner vanity table or floating shelf system
- Mirror with proper lighting
- Small storage containers or organizers
- Drawer dividers
- Clear acrylic organizers
- Makeup brush holders
- Jewelry stand or box
- Small bins or baskets
- Cable management solutions
- Drawer liner material
Position the vanity table or floating shelves at a 45-degree angle in the corner, ensuring adequate clearance for seating. Install proper lighting around or above the mirror to eliminate shadows. Divide the surface area into three zones: daily essentials, frequently used items, and occasional-use products.
Use drawer dividers to create designated spaces for different categories of items, and implement clear acrylic organizers for visibility and easy access to makeup and beauty products. For vertical storage, install small shelves or hanging organizers on either side of the mirror to maximize corner space utilization.
When dealing with electrical items like hair tools, create a dedicated power station within easy reach, using cord organizers to prevent cable clutter. Consider installing a pull-out drawer or shelf for additional storage if space permits.
Utilize the vertical space above the vanity by installing floating shelves in a stepped formation, keeping frequently used items at eye level and storing less-used items higher up.
Additional Tips: Incorporate a rotation system for seasonal items, storing off-season products in separate containers that can be easily swapped out. Use magnetic strips hidden behind the mirror for metal items like tweezers and scissors.
Consider installing a small LED strip under floating shelves for ambient lighting and better visibility in the corner space. Regular maintenance of this organization system, including weekly wipe-downs and monthly reorganization, will help maintain its efficiency and prevent clutter buildup.
Multi-Tiered Jewelry Display Systems
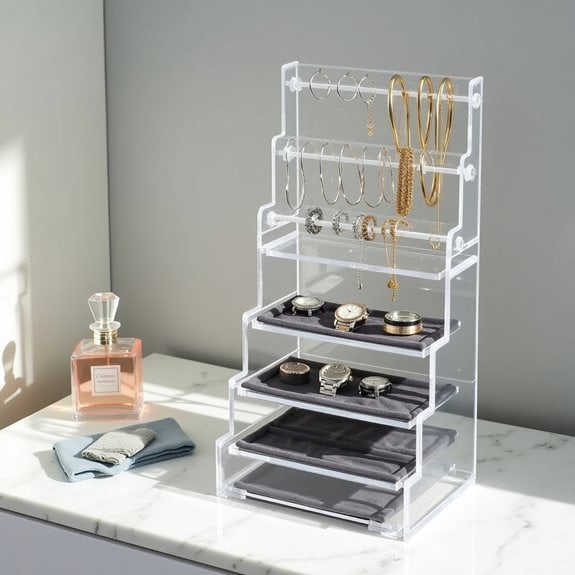
Organizing jewelry is essential not only for protecting valuable pieces but also for maintaining their condition and extending their lifespan. When accessories are tangled or thrown together, they can become damaged, tarnished, or lost, leading to frustration and unnecessary replacements.
A well-organized multi-tiered jewelry display system transforms chaos into order while creating an aesthetically pleasing arrangement that makes selecting daily accessories effortless. This system allows you to see all your pieces at once, preventing forgotten items from collecting dust and ensuring you make the most of your collection.
Required Items:
- Multi-tiered jewelry stand
- Soft fabric or felt lining
- Small hooks
- Ring bars
- Bracelet T-bars
- Storage compartments
- Jewelry cleaning cloth
- Clear dividers
- Small containers for tiny pieces
- Labels
Start by categorizing your jewelry into groups: necklaces, bracelets, rings, earrings, and watches. Clean each piece thoroughly before placing it on the display. Position the multi-tiered stand in a location away from direct sunlight and moisture to prevent tarnishing.
Install the longest necklaces on the highest tier to prevent tangling, and arrange shorter pieces on subsequent levels. Dedicate specific areas for different types of jewelry, using ring bars for rings, T-bars for bracelets, and hooks for necklaces. Place stud earrings in lined compartments and hanging earrings on designated hooks.
Utilize clear dividers to separate delicate pieces and prevent scratching. Consider frequency of use when positioning items, keeping everyday pieces easily accessible. To maintain optimal organization, conduct monthly assessments of your display system, checking for any needed adjustments or cleaning.
Consider rotating seasonal pieces to the front during appropriate times of year, and store special occasion jewelry in separate compartments to prevent overcrowding. Always handle pieces with clean hands and return them to their designated spots immediately after use to maintain the system’s effectiveness.
Hidden Cable Management Techniques
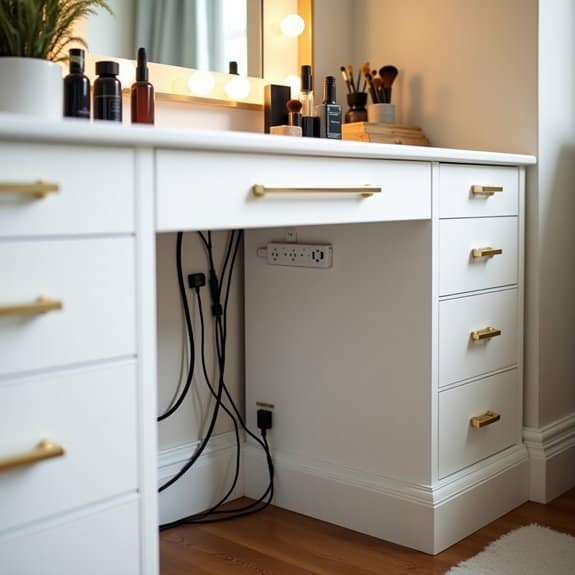
Cable clutter can quickly transform an elegant bedroom vanity area into an unsightly mess of tangled wires from hair tools, charging devices, and lighting fixtures.
Beyond aesthetics, disorganized cables create safety hazards and make it difficult to access and use electronic devices efficiently.
Proper cable management not only creates a cleaner, more sophisticated appearance but also extends the life of your electronics by preventing wire damage and reducing dust accumulation.
A well-organized cable system allows for quick access to frequently used items while maintaining the refined look of your vanity space.
Required Items:
- Cable clips or adhesive cable holders
- Cable ties or velcro straps
- Cable management box or sleeve
- Command hooks
- Wire labels
- Cord covers
- Power strip
- Double-sided tape
- Desk grommets
- Cable concealment raceway
Start by unplugging all devices and grouping cables by function (power cords, charging cables, beauty tool cords).
Install a power strip behind or under the vanity, securing it with command strips or mounting brackets.
Thread cables through desk grommets or pre-drilled holes in the vanity surface to keep them hidden from view.
Use adhesive cable clips along the back edge or underside of the vanity to create designated pathways for different cables.
Bundle related cords together using velcro straps or zip ties, maintaining enough slack for comfortable use while eliminating excess length.
For frequently moved items like hair tools, create a dedicated connection point that allows easy access without disturbing the entire system.
Store surplus cable length in a cable management box positioned discreetly under the vanity or mounted to its back panel.
Use cord covers or a raceway system to conceal cables running from the vanity to wall outlets, painting them to match your wall color if desired.
Additional Tips:
Label each cable at both ends to identify its purpose, making future changes or troubleshooting easier.
Consider investing in wireless charging pads or battery-operated beauty tools to reduce cable requirements.
Regular maintenance of your cable management system, including dusting and checking for wear, will ensure long-term organization success and prevent the gradual return of cable chaos.
Pull-Out Styling Tool Storage
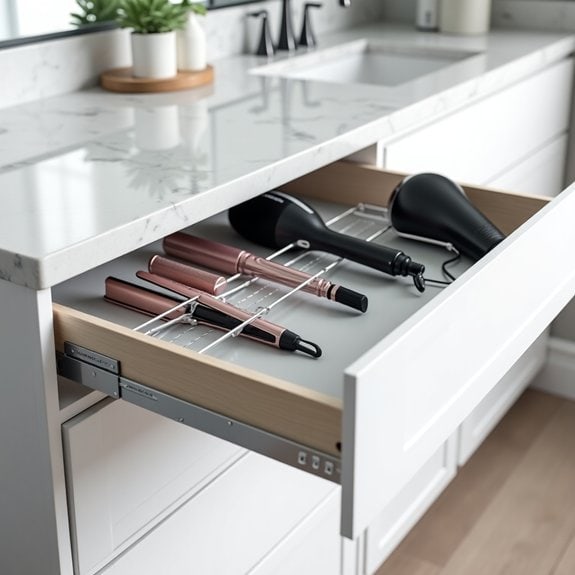
Organizing styling tools is crucial for maintaining an efficient morning routine and protecting expensive hair care equipment. Tangled cords, overheated tools, and cluttered counter space can transform a peaceful morning ritual into a frustrating experience, making proper storage solutions essential for both functionality and safety.
A pull-out styling tool storage system creates dedicated spaces for hot tools, preventing cord tangles and potential hazards while maximizing vertical space in vanity cabinets. This organization method allows tools to cool safely while keeping them easily accessible and protected from dust and damage.
Required Items:
- Heat-resistant mat or liner
- Pull-out cabinet organizer
- Wire cord organizers
- Cabinet hooks
- Labeled dividers
- Mounting hardware
- Measuring tape
- Screwdriver
- Drill (if needed)
- Safety equipment
Install the pull-out organizer by first measuring your cabinet interior dimensions and selecting an appropriately sized unit. Mount the sliding hardware according to manufacturer specifications, ensuring proper weight support for your tools.
Create designated sections using heat-resistant mats and dividers, positioning them to accommodate various tool sizes. Install hooks or cord wraps on the sides of the pull-out unit to manage power cords efficiently.
Place frequently used tools in the most accessible positions, with longer items like straighteners and curling wands stored vertically. Arrange smaller tools like mini straighteners and crimpers horizontally in dedicated compartments. Position heat-resistant mats beneath each tool’s resting place to protect the organizer’s surface.
Additional Success Tips: Consider installing a power strip directly inside the cabinet to eliminate cord management issues. Label each section clearly to maintain organization, and implement a “cool-down” routine where tools are returned to their designated spots after cooling completely.
Regular maintenance of the sliding mechanism will ensure smooth operation and longevity of your organization system.
Small-Space Vanity Optimization
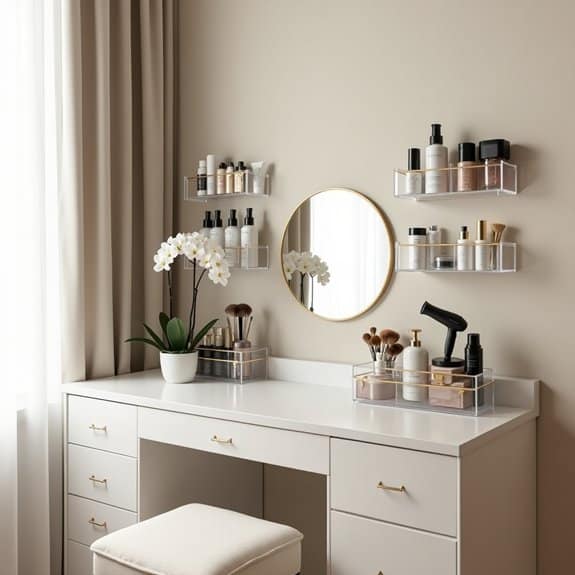
Making the most of a small vanity space is crucial for maintaining an organized and stress-free morning routine. A well-organized small vanity not only maximizes functionality but also creates a sense of calm and order in your bedroom, allowing you to start and end each day with clarity and purpose.
In compact spaces, every inch matters, and proper organization can transform a cramped vanity area into an efficient beauty and self-care station. Strategic organization prevents clutter accumulation, ensures essential items are readily accessible, and maintains the aesthetic appeal of your bedroom’s overall design.
Required Items:
- Clear acrylic organizers
- Drawer dividers
- Small storage containers
- Adhesive hooks
- Magnetic board
- Space-saving mirror
- Under-vanity storage bins
- Stackable containers
- Label maker
- Multi-tier organizer
Start by completely clearing the vanity surface and drawers, categorizing items by frequency of use and type. Install a space-saving mirror with built-in storage or add a magnetic board nearby for frequently used items. Utilize drawer dividers to create designated spaces for different categories of items, ensuring everything has a specific place.
Maximize vertical space by incorporating stackable containers and multi-tier organizers. Place daily-use items at eye level and store less frequently used products in lower drawers or under-vanity storage. Install adhesive hooks on the sides of the vanity for hanging tools or accessories, and use clear acrylic organizers on the surface for immediate access to essential items.
Consider implementing a rotation system for seasonal items, storing off-season products in separate containers under the vanity or in nearby storage. Regularly assess and declutter your vanity area, removing expired products and items you no longer use.
Maintain organization by following the “one-in-one-out” rule when acquiring new products, and always return items to their designated spots after use.
Eco-Friendly Storage Solutions
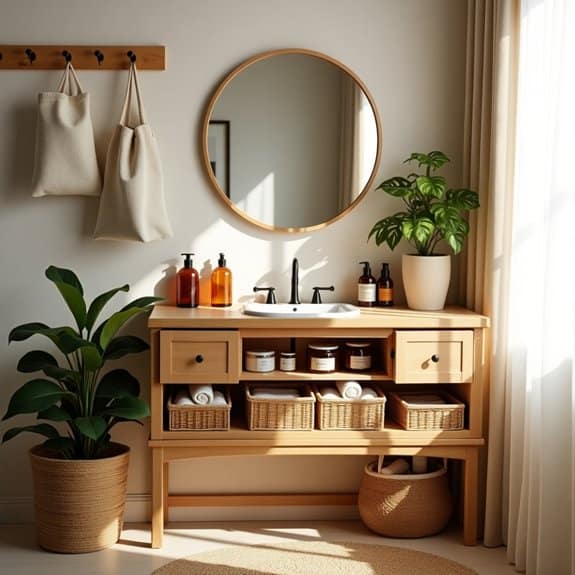
Creating an eco-friendly vanity storage system not only helps preserve the environment but also promotes a healthier living space. By choosing sustainable materials and repurposing existing items, we can reduce waste while maintaining an organized and aesthetically pleasing vanity area.
Making environmentally conscious choices in vanity organization demonstrates responsibility toward our planet while creating a mindful space for daily routines. Sustainable storage solutions often bring natural elements into the bedroom, promoting a sense of calm and connection to the environment.
Required Items:
- Bamboo or recycled wood organizers
- Glass jars (repurposed)
- Natural fiber baskets
- Recycled cardboard dividers
- Beeswax wraps
- Cotton or hemp storage bags
- Plant-based drawer liners
- Wooden hooks
- Biodegradable storage containers
- Recycled paper labels
Start by sorting vanity items into categories: daily essentials, occasional use items, and seasonal products. Place daily items in easily accessible bamboo organizers or repurposed glass jars at the front of drawers or on the vanity surface.
Utilize natural fiber baskets for larger items and cotton bags for storing occasional-use products. Install wooden hooks on the sides of the vanity for hanging reusable makeup removal cloths or hair accessories.
Create custom dividers from recycled cardboard to maximize drawer space, covering them with natural fabric for durability. Line drawers with plant-based liners to protect the surface and maintain cleanliness.
For makeup and skincare products, use glass containers with biodegradable labels to clearly identify contents and expiration dates.
Additional Tips: Regularly audit vanity contents to prevent product accumulation and waste. Consider implementing a one-in-one-out policy when purchasing new items. Clean storage containers with natural cleaning solutions and refresh organizational systems seasonally to maintain effectiveness.
Position items based on frequency of use, keeping daily essentials within arm’s reach while storing occasional items in deeper storage solutions.
Mobile Vanity Cart Organization
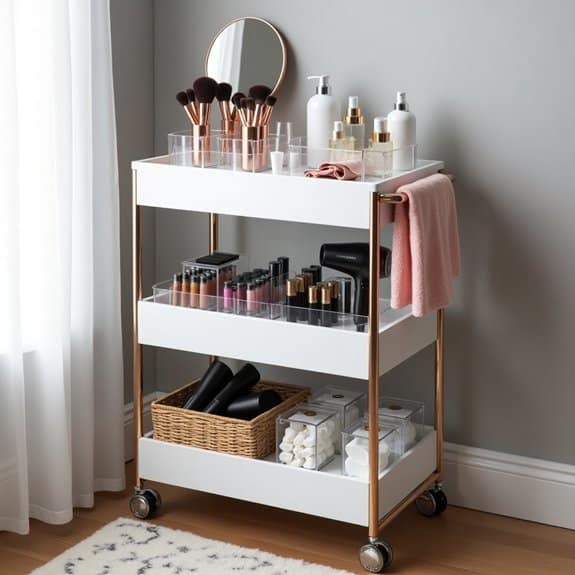
A mobile vanity cart serves as a versatile solution for those seeking flexibility in their beauty and grooming routines. Whether you’re working with limited space or prefer the convenience of moving your vanity setup between rooms, a well-organized mobile cart can transform your daily routine into an efficient, enjoyable experience.
The key to maximizing a mobile vanity cart lies in strategic organization that combines accessibility with stability. When products and tools are properly arranged, you’ll minimize the risk of items shifting during movement while maintaining easy access to everything you need, making your morning and evening routines seamless.
Required Items:
- Mobile cart with multiple tiers
- Clear acrylic organizers
- Small storage bins or baskets
- Drawer dividers
- Makeup brush holders
- Clear plastic containers
- Labels
- Non-slip liner
- Small storage jars
- Magnetic strips (if cart is metal)
Begin by applying non-slip liner to each tier of the cart to prevent items from sliding during movement. Arrange your most frequently used items on the top tier, including daily skincare products and go-to makeup items. The middle tier should house backup products, hair tools, and additional beauty supplies, while the bottom tier can store bulk items and less frequently used products.
For optimal organization, use clear acrylic organizers to separate different categories of items. Create designated spaces for makeup brushes, palettes, and skincare products. Utilize small containers or jars for items like cotton swabs, hair ties, and bobby pins. If your cart has metal surfaces, install magnetic strips to hold metal tools or create additional vertical storage.
Additional Tips: Consider implementing a rotating system where you review and reorganize cart contents monthly to prevent clutter accumulation. Keep a small cleaning cloth and sanitizing spray on the cart for quick maintenance, and use clear containers whenever possible to easily identify products.
When arranging items, place heavier products on lower tiers for better stability during movement, and maintain a designated “home position” for the cart where it can be safely stored when not in use.

