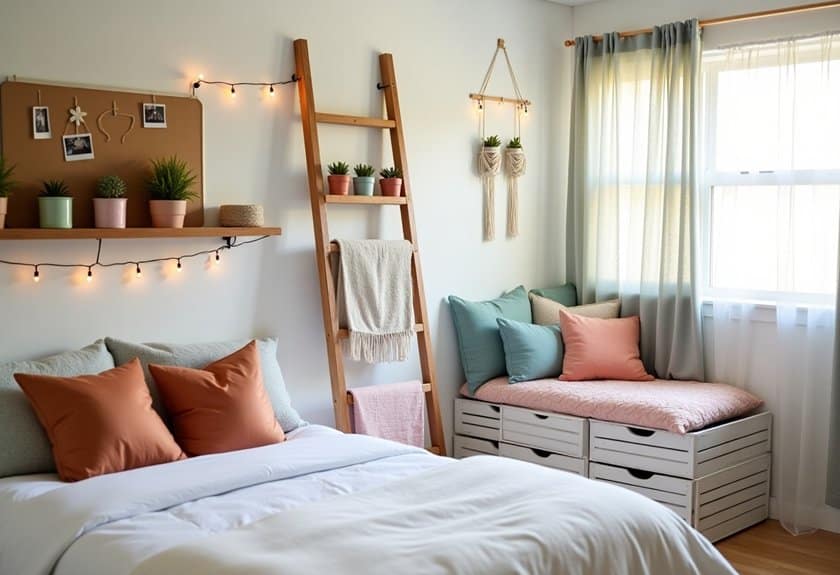
Just as a butterfly emerges from its chrysalis transformed, your bedroom can undergo an amazing metamorphosis with these budget-friendly DIY projects. You’ll love how these clever organization hacks can turn chaos into harmony without draining your wallet! From crafting hidden storage solutions to upcycling everyday items, I’ve tested each project in my own space and can’t wait to share the game-changing results. Ready to discover how a few simple materials and a weekend’s worth of creativity can revolutionize your room?
DIY Floating Nightstand With Hidden Storage
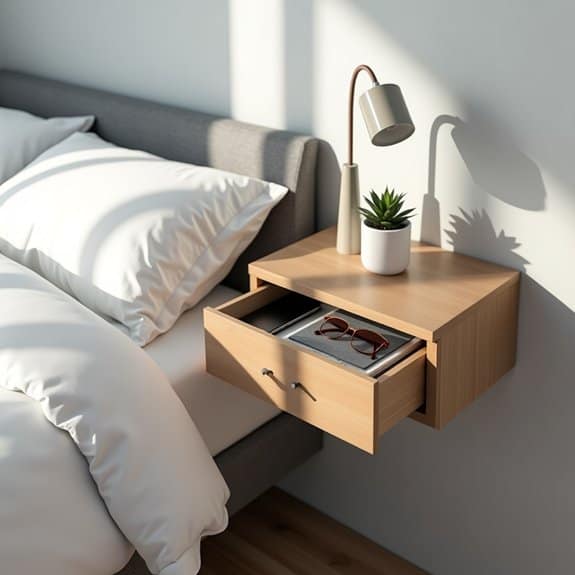
A floating nightstand with hidden storage serves as both a space-saving solution and a sleek design element in any bedroom. By eliminating the need for traditional bulky nightstands, this wall-mounted option creates an illusion of more floor space while providing essential storage for bedside necessities.
This project combines functionality with modern aesthetics, offering a concealed compartment for items you want to keep close but out of sight. The clean lines and minimalist design of a floating nightstand can transform your bedroom‘s appearance while maintaining practical storage solutions for books, devices, or personal items.
Required Materials:
- 3/4″ plywood or solid wood board
- Wall brackets or French cleats
- Wood screws
- Wall anchors
- Wood glue
- Hinges
- Magnetic catch
- Sandpaper (medium and fine grit)
- Wood finish or paint
- Level
- Drill and drill bits
- Screwdriver
- Measuring tape
- Pencil
- Safety goggles
- Dust mask
Cut the wood board to your desired dimensions, typically 16-24 inches wide and 12-14 inches deep. Create the hidden storage compartment by cutting a slightly smaller piece for the top that will serve as the lid. Install hinges to connect the lid to the base, ensuring smooth operation.
Mount the wall brackets or French cleats according to the manufacturer’s weight specifications, using wall anchors for additional support. Secure the nightstand to the wall, ensuring it’s level and at an appropriate height relative to your mattress. Install the magnetic catch to keep the lid closed securely.
Sand all surfaces thoroughly and apply your chosen finish or paint, allowing proper drying time between coats.
Additional Tips: Consider adding felt lining to the storage compartment to prevent items from sliding and reduce noise. Install a small LED strip inside the compartment for better visibility, and use rubber bumpers on the lid to prevent slamming. Test the weight capacity before storing items, and periodically check the wall mounting system to ensure continued stability.
Upcycled Ladder Shelving for Vertical Storage
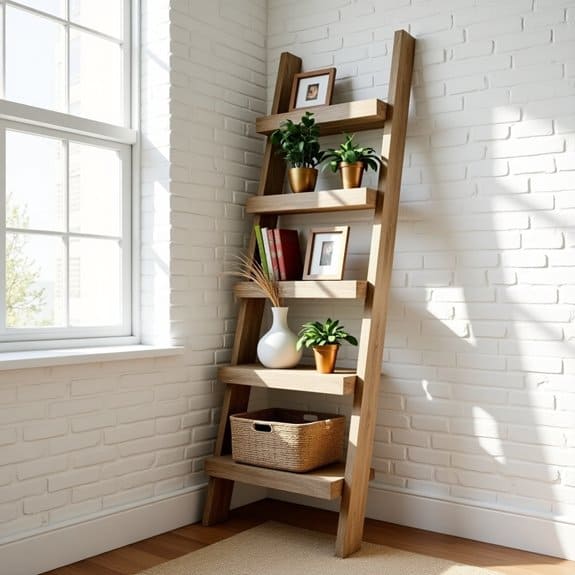
Vertical storage solutions have become increasingly vital in modern homes where floor space is at a premium. An upcycled ladder shelf system not only maximizes vertical space but also adds a rustic, industrial charm to any room while providing practical storage for books, plants, decorative items, or everyday essentials.
Converting an old wooden ladder into a functional shelving unit represents the perfect blend of sustainability and smart organization. This project transforms an otherwise discarded item into a conversation piece that can dramatically improve storage capacity while maintaining a clean, minimalist aesthetic.
Required Items:
- Wooden ladder (6-8 ft)
- Wood planks for shelves
- Sandpaper (medium and fine grit)
- Wood stain or paint
- Clear polyurethane
- Screws and anchors
- Power drill
- Level
- Measuring tape
- Safety goggles
- Work gloves
- Clean rags
- Wall brackets
- Wood cleaner
Begin by thoroughly cleaning the ladder and sanding all surfaces to remove any old paint, splinters, or rough areas. Apply wood cleaner to remove dirt and debris, then let it dry completely.
Once prepared, determine the ladder’s final position and mark the wall for mounting brackets. Secure the ladder to the wall using appropriate anchors and brackets, ensuring it’s completely level and stable.
Cut wooden planks to size for each shelf level, considering the ladder’s width and desired overhang. Sand the planks and stain or paint them to match or complement the ladder’s finish.
Once dry, apply polyurethane for protection. Position the planks on the ladder rungs, securing them with screws from underneath where necessary to prevent shifting.
For optimal organization and safety, place heavier items on lower shelves and lighter items toward the top. Consider adding small ledges or bookends to prevent items from sliding off, and rotate decorative elements seasonally to keep the display fresh and engaging.
Regular dusting and occasional tightening of hardware will ensure your upcycled ladder shelving remains both functional and visually appealing for years to come.
Under-Bed Rolling Storage Drawers
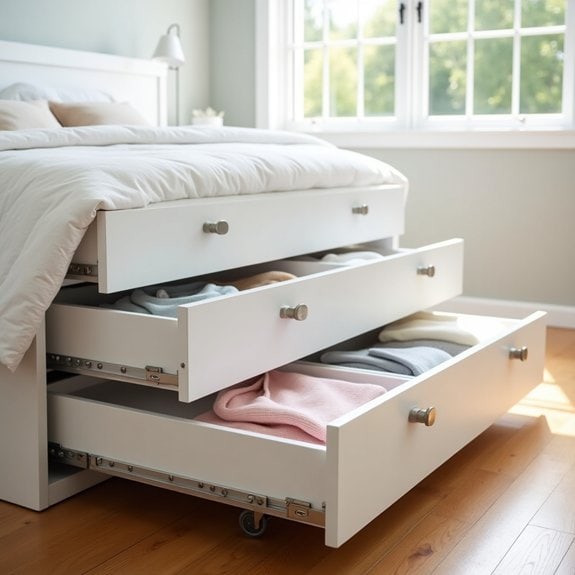
Making use of under-bed space is one of the most efficient ways to maximize storage in any bedroom. This often-overlooked area can provide substantial storage space for seasonal clothing, extra bedding, shoes, or other items that aren’t needed daily. Under-bed rolling storage drawers offer the perfect solution by keeping items dust-free while remaining easily accessible.
Creating organized under-bed storage not only helps declutter your visible living space but also protects stored items from damage and dust accumulation. Rolling drawers specifically allow for smooth access without the need to lift heavy containers or struggle to reach items pushed far beneath the bed.
Required Items:
- Wooden or plastic storage containers
- Caster wheels (4 per container)
- Screws or bolts
- Drill
- Measuring tape
- Pencil
- Dust cover or fabric
- Labels
- Drawer pulls or handles
- Level
Start by measuring the height between your floor and bed frame, ensuring at least two inches of clearance when adding wheels to your containers. Mount the caster wheels to the bottom corners of each container, ensuring they’re securely fastened and level. Test the rolling motion to confirm smooth movement before loading items.
Sort items into categories before placing them in the containers, using smaller boxes or dividers within each drawer to maintain organization. Install handles or pulls on the front of each container for easy access, and attach labels clearly indicating the contents. Consider using clear containers or taking photos of contents to easily identify items without pulling out each drawer.
Position frequently accessed items in drawers closer to the head of the bed for convenient reach. Use fabric dust covers that can be easily lifted when accessing the drawers to prevent dust accumulation.
Regular maintenance of the wheels and occasional tightening of screws will ensure long-lasting functionality of your under-bed rolling storage system.
Hanging Fabric Organizer From Old T-Shirts
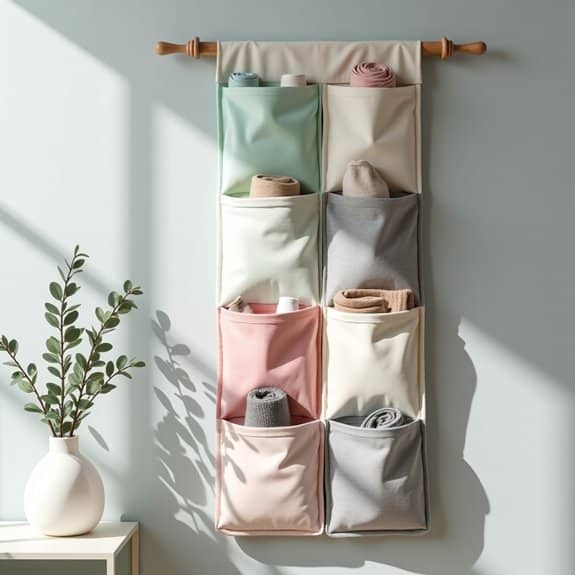
Repurposing old t-shirts into functional storage solutions not only helps reduce textile waste but also creates personalized organizing solutions for your space. These hanging organizers can transform cluttered areas into efficient storage systems, perfect for accessories, craft supplies, or small household items.
Converting unused clothing into practical storage solutions combines sustainability with organization, making it an eco-friendly approach to home organization. The flexible nature of t-shirt material makes it ideal for creating soft storage compartments that protect delicate items while keeping them easily accessible.
Required Materials:
- 4-6 old t-shirts
- Scissors
- Measuring tape
- Sewing machine or needle and thread
- Iron
- Straight pins
- Wooden dowel or sturdy hanger
- Fabric chalk or marker
- Ruler
- Heavy-duty hooks
Start by washing and ironing all t-shirts to ensure a clean working surface. Cut each t-shirt into equal-sized rectangles, removing sleeves and necklines. For a standard organizer, create rectangles measuring 15 inches wide by 12 inches high. Layer two pieces together for each pocket to ensure durability, then sew three sides, leaving the top open. Create as many pockets as desired, typically 4-6 work well for most spaces.
Arrange the pockets vertically, spacing them 2-3 inches apart. Sew them onto a larger backing piece created from another t-shirt, ensuring the top edge includes a channel for the hanging rod. Reinforce all seams with double stitching, particularly at stress points where items will be stored. Insert the wooden dowel or hanger through the top channel and secure the ends.
Additional Tips:
Use contrasting t-shirt colors to create visual interest, and consider adding labels to each pocket for better organization. Reinforce the bottom of each pocket with an extra layer of fabric if storing heavier items. Position the organizer where it won’t be exposed to direct sunlight to prevent fabric fading, and periodically check the hanging hardware to ensure it remains secure.
Mason Jar Wall Organizer for Small Items
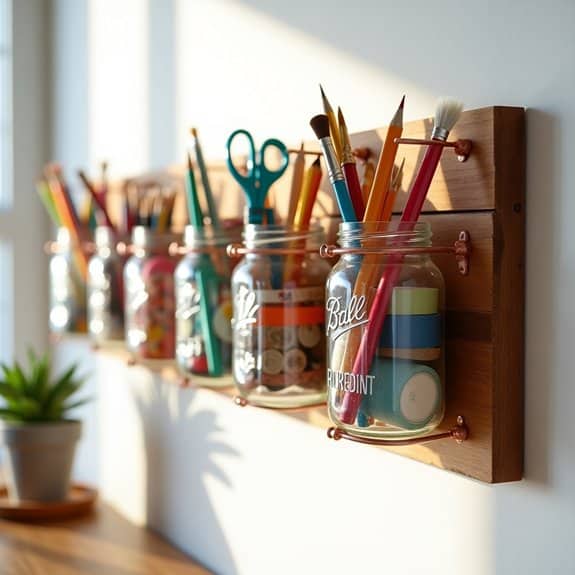
Organizing small items like office supplies, craft materials, or bathroom essentials can quickly become overwhelming, leading to cluttered drawers and misplaced items. A Mason jar wall organizer provides an elegant, practical solution that keeps small items visible and easily accessible while maximizing vertical space.
This rustic-industrial organization system not only serves a functional purpose but also adds a decorative element to any room. The clear glass allows for quick identification of contents, while the mounted design frees up valuable counter or drawer space, making it an ideal solution for small spaces or busy work areas.
Required Materials:
- Mason jars (various sizes)
- Wooden board or plank
- Metal pipe clamps or hose clamps
- Screws
- Wall anchors
- Power drill
- Screwdriver
- Level
- Pencil
- Measuring tape
- Sandpaper
- Wood stain or paint (optional)
Start by preparing your wooden board, sanding any rough edges and applying stain or paint if desired. Measure and mark spots for the pipe clamps, ensuring even spacing between each location where jars will hang. Attach the pipe clamps to the board using short screws, positioning them so they’ll grip the neck of each Mason jar securely.
Once the board is ready, use wall anchors and screws to mount it firmly on the wall, checking with a level to ensure it’s straight. After the board is mounted, simply slide the Mason jars into the pipe clamps, tightening them enough to hold the jars securely but not so tight that they crack the glass.
Organize your items by category in each jar, considering frequency of use when deciding placement. For smaller items that might get lost at the bottom of larger jars, use smaller Mason jars or add dividers inside.
Additional Tips: Consider adding labels to the jars for easy identification, and rotate items seasonally based on use. For moisture-prone areas like bathrooms, add silica gel packets to prevent condensation inside the jars. Install the organizer at a height that’s comfortable to reach, and leave some space between jars for easy removal and replacement. If storing heavy items, use additional support brackets beneath the jars for added security.
Pegboard Jewelry Display and Storage

A well-organized jewelry collection not only preserves your precious pieces but also transforms them into an artistic display that adds character to your space. When jewelry is properly organized, you can easily see and access each piece, preventing tangling and damage while reducing the morning stress of finding the perfect accessories for your outfit.
Creating a pegboard jewelry display combines functionality with style, utilizing vertical wall space efficiently while keeping your jewelry visible and protected. This customizable solution works for collections of any size and can be adapted as your jewelry collection grows or changes over time.
Required Materials:
- Pegboard (wooden or metal)
- Pegboard hooks in various sizes
- Wall anchors and screws
- Level
- Drill
- Pencil
- Measuring tape
- Small cups or containers for small items
- Pegboard accessories (shelves, baskets)
- Paint and paintbrush (optional)
- Decorative frame (optional)
Mount the pegboard by first locating wall studs and marking their positions. Install wall anchors if needed, then secure the pegboard to the wall, ensuring it’s level. Space the board about half an inch from the wall using spacers or furring strips to allow room for hooks.
Once mounted, arrange hooks in various configurations to accommodate different types of jewelry – longer hooks for necklaces, smaller ones for bracelets, and hook clusters for earrings. Add small containers or shelves for rings and other delicate pieces.
For optimal organization, group similar items together and consider frequency of use when determining placement. Position frequently worn pieces at eye level and special occasion items higher or lower. Leave space between items to prevent tangling and make each piece easily accessible.
Additional Tips: Consider lighting when choosing your pegboard location, as natural light can help you see your jewelry clearly while getting ready. Rotate your collection seasonally to keep frequently worn pieces accessible. Photograph your final arrangement before use, so you can easily restore the organization system if hooks get moved. For added protection in humid environments, add silica gel packets near your display to prevent tarnishing.
Repurposed Crate Bedside Storage
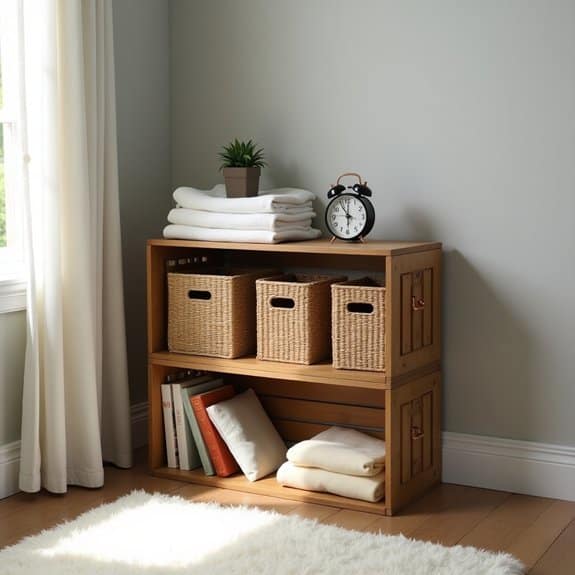
A well-organized bedside area is essential for creating a peaceful sleeping environment and maintaining an efficient morning routine. Having easy access to necessities while keeping clutter at bay can significantly impact both the functionality and aesthetics of your bedroom space.
Wooden crates offer an excellent opportunity to create customized bedside storage that combines rustic charm with practical organization. These versatile containers can be transformed into stylish storage solutions that keep books, electronics, medications, and personal items within arm’s reach while maintaining a tidy appearance.
Required Items:
- Wooden crates (2-3 depending on desired height)
- Sandpaper (medium and fine grit)
- Wood stain or paint
- Paintbrush or foam applicator
- Wood screws
- Screwdriver
- Wood glue
- Drawer pulls or handles (optional)
- Small storage baskets or bins
- Felt pads for bottom
- Level
Start by preparing the crates for use by sanding all surfaces smooth, paying special attention to rough edges and splinters. Apply wood stain or paint according to your room’s aesthetic, allowing proper drying time between coats.
Once dry, stack the crates horizontally or vertically, depending on your space requirements and desired configuration. Secure the crates together using wood glue and screws at connection points for stability. Install any chosen hardware, such as handles or drawer pulls, to enhance functionality and appearance.
For optimal organization, designate specific zones within the crates for different categories of items. The top crate might house frequently accessed items like reading materials and electronics, while lower crates can store extra linens or less commonly used items.
Consider using small baskets or bins within the crates to further compartmentalize items and maintain order.
Additional Tips: Maximize vertical space by utilizing stackable containers within the crates, and implement a regular cleaning schedule to prevent dust accumulation.
Consider adding battery-operated LED lights for improved visibility, and rotate items seasonally to ensure the most relevant items remain easily accessible. Label storage containers discretely to maintain both organization and aesthetic appeal.
Over-the-Door Shoe Organization System
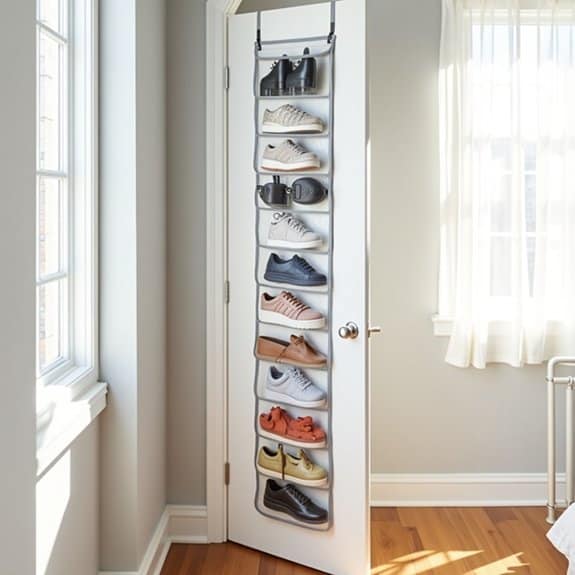
Proper shoe organization is essential for maintaining an orderly living space and protecting your footwear investment. A cluttered floor with scattered shoes not only creates visual chaos but also increases the likelihood of damaging your shoes and creates potential tripping hazards in your home.
An over-the-door shoe organization system maximizes vertical space utilization while keeping your shoes easily accessible and visible. This solution is particularly valuable for small spaces, rental properties, or rooms where floor space is at a premium, as it transforms unused door space into functional storage.
Required Items:
- Over-the-door shoe organizer (clear vinyl or fabric)
- Door hooks or mounting hardware
- Measuring tape
- Level
- Screwdriver
- Command strips (optional)
- Label maker (optional)
- Storage bins for seasonal shoes (optional)
Installation begins with measuring your door’s dimensions to ensure proper fit of the organizer. Position the door hooks or mounting hardware at the top of the door, ensuring they’re level and secure. Hang the shoe organizer, adjusting it to hang straight and checking that the door can still close properly.
Arrange shoes by category, placing frequently worn pairs at eye level and seasonal items in higher or lower pockets. For maximum stability, secure the bottom corners of the organizer to the door using command strips to prevent swinging.
For optimal organization success, implement a rotation system for your shoes based on season and frequency of use. Consider using the bottom pockets for children’s shoes or storing pairs of flip-flops together in one pocket to maximize space.
Label pockets for specific shoe types or family members to maintain organization, and periodically assess your collection to remove damaged or unworn pairs, keeping the system efficient and clutter-free.
Window Seat Storage Bench From Kitchen Cabinets
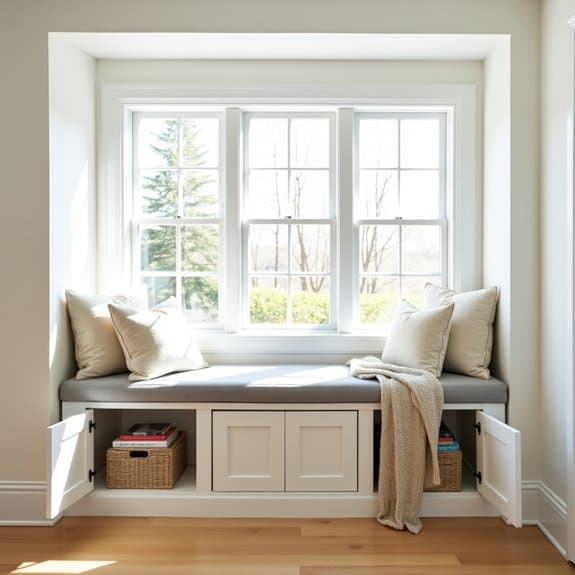
Creating a window seat storage bench from kitchen cabinets represents an innovative solution to maximize space while adding both functionality and charm to any room. This project transforms ordinary kitchen cabinets into a beautiful seating area that doubles as valuable storage space, perfect for stowing away seasonal items, books, or everyday essentials.
The window seat storage bench not only provides additional seating but also creates an architectural focal point that can increase your home’s value. By repurposing kitchen cabinets, you’re implementing a cost-effective solution that offers professional-looking results while maintaining durability and practical storage capabilities.
Required Materials:
- Base kitchen cabinets (sized to fit your window space)
- Plywood for the top
- 2×4 lumber for support
- Foam padding
- Upholstery fabric
- Heavy-duty hinges
- Wood screws
- Wood glue
- Paintable caulk
- Paint or stain
- Basic tools (drill, saw, level, measuring tape)
- Safety equipment (goggles, gloves)
Start by measuring your window space and selecting appropriately sized kitchen cabinets. Install a 2×4 frame against the wall for support, ensuring it’s level and securely anchored to wall studs.
Position the cabinets on the frame, connecting them together and securing them to both the wall and floor. Create the seat top using plywood cut to size, attached with heavy-duty hinges to allow access to the storage space below.
For finish work, add trim pieces around the edges and any exposed sides of the cabinets, caulk all seams, and paint or stain to match your room’s décor. Complete the project by adding foam padding and upholstery fabric to create a comfortable seating surface.
To ensure longevity and maximum functionality, select high-quality hinges rated for the weight of your seat top, and consider installing soft-close mechanisms to prevent slamming.
Choose stain-resistant, durable upholstery fabric, and add ventilation holes in inconspicuous places to prevent moisture buildup in the storage space. Regular maintenance of hinges and periodic cleaning of the upholstery will keep your window seat storage bench functional and attractive for years to come.
Magnetic Makeup Board From Picture Frame
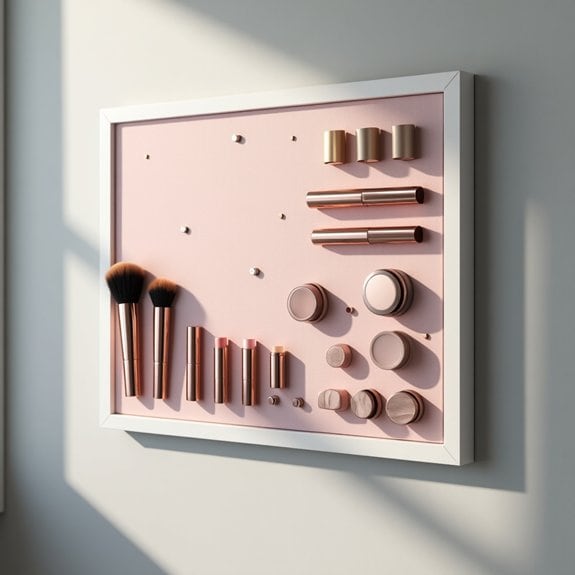
A cluttered makeup collection can lead to wasted time searching for products, expired items being overlooked, and valuable counter space being consumed. Creating a magnetic makeup board transforms vertical wall space into an organized, visible display of your cosmetics while keeping them easily accessible.
Converting a picture frame into a magnetic makeup organizer not only provides a practical storage solution but also creates an aesthetically pleasing display that can complement your room’s decor. This project allows you to customize the size, style, and color scheme to match your specific needs and preferences.
Required Materials:
- Picture frame with glass
- Sheet metal (cut to fit frame)
- Strong magnets
- Heavy-duty adhesive
- Decorative paper or fabric
- Scissors
- Screwdriver
- Wire hanging kit
- Magnetic strips (optional)
- Paint (optional)
Remove the glass and backing from your chosen picture frame. Cut the sheet metal to fit precisely within the frame’s dimensions. Place your selected decorative paper or fabric between the glass and metal sheet to create the desired background.
Secure the metal sheet to the frame’s backing using heavy-duty adhesive, ensuring it lies flat and even. Reassemble the frame, making sure all components are tightly secured. Attach magnets to the backs of makeup items that don’t naturally stick to the metal sheet.
Install the wire hanging kit and mount the board securely on the wall at eye level. For optimal organization, group similar items together on the board – face products in one section, eye products in another, and lip products in a designated area.
Consider using stronger magnets for heavier items and testing the magnetic hold before permanently mounting products. Clean the glass regularly to maintain visibility and prevent dust accumulation. Label sections using removable markers or small tags to maintain systematic organization.
Space-Saving Fold-Down Desk
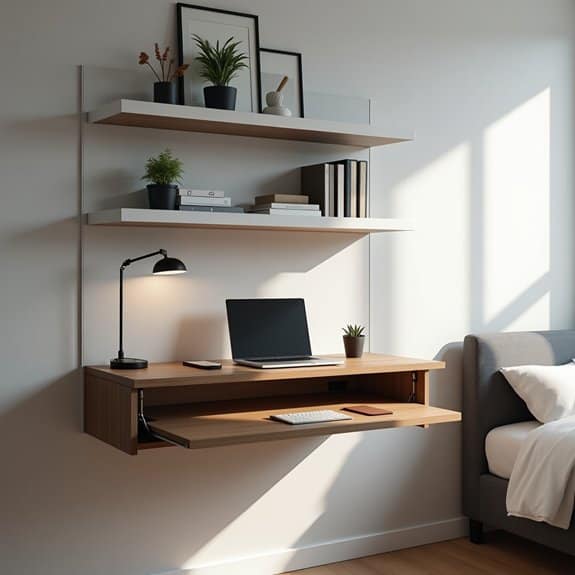
A fold-down desk is an ingenious solution for small spaces, offering a dedicated workspace that disappears when not in use. This versatile piece of furniture transforms any wall into a functional home office while maintaining valuable floor space for other activities, making it particularly valuable in studio apartments, bedrooms, or multipurpose rooms.
The key to a successful fold-down desk installation lies in proper planning and organization. A well-organized fold-down desk system includes not only the desk surface but also integrated storage solutions and cable management, ensuring that work materials remain accessible and neat even when the desk is folded away.
Required Items:
- Wall-mounted fold-down desk mechanism
- Power drill and drill bits
- Level
- Stud finder
- Screwdriver set
- Mounting screws and anchors
- Measuring tape
- Pencil
- Cable management solutions
- Storage containers or organizers
- Wall brackets
- Basic tool kit
The installation process begins with selecting an appropriate wall space and marking the desk height, typically 29-30 inches from the floor. Using a stud finder, locate and mark wall studs for secure mounting. Install the desk mechanism following manufacturer specifications, ensuring it’s perfectly level.
Create designated zones on the desk surface: a primary workspace in the center, a technology area for devices, and storage sections for frequently used items. Incorporate cable management solutions by drilling small holes for wires and installing cord organizers.
When organizing the desk components, implement a vertical storage system on the wall above or beside the desk area. Install floating shelves or wall-mounted organizers that complement the desk when folded down. Consider adding a magnetic strip or pegboard for frequently used items, ensuring they remain accessible without cluttering the main work surface.
Success Tips: Maintain a strict “clear desk” policy by storing items in designated containers that can be quickly stowed when folding up the desk. Use drawer organizers or small bins that can be easily removed and replaced. Regular maintenance of hinges and mechanisms ensures smooth operation, while periodic reorganization keeps the system functioning efficiently.
Consider adding task lighting that can be folded away with the desk for optimal workspace illumination.
Closet Rod Extender and Shelf Hack
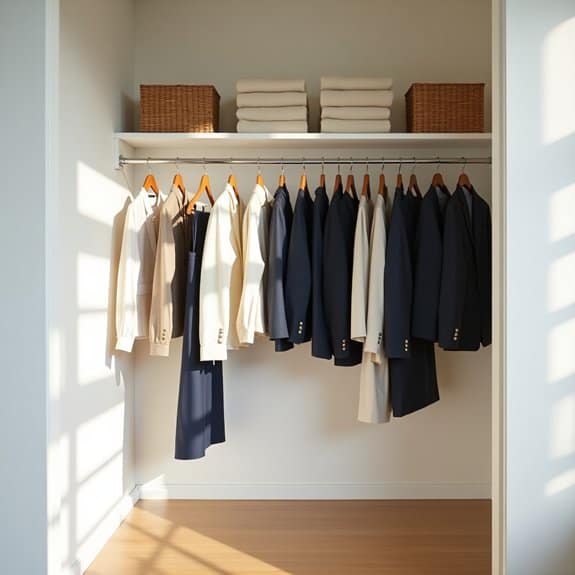
Maximizing closet space is crucial in modern homes where storage real estate comes at a premium. A closet rod extender and additional shelving can effectively double your hanging space while creating new areas for folded items, accessories, and shoes without major renovation or expense.
This practical hack transforms your existing closet setup into a more functional storage solution by adding a second hanging rod and incorporating an extra shelf. The modification works particularly well in standard-height closets with a single rod, allowing you to separate long-hanging garments from shirts and shorter items while maintaining easy access to all clothing.
Required Items:
- Tension rod or adjustable closet rod
- Mounting brackets
- Wood shelf (cut to size)
- Screws and wall anchors
- Level
- Measuring tape
- Pencil
- Drill
- Screwdriver
- Stud finder
Installation begins with measuring the space below your existing closet rod, ensuring enough clearance for shorter garments. Position the new rod approximately 40 inches below the original, marking bracket locations with a pencil after using a stud finder. Install wall anchors where needed, then secure the mounting brackets.
For the shelf addition, measure and mark the desired height above the original rod, install brackets ensuring they’re level, and secure the pre-cut shelf. When using a tension rod alternative, simply extend it to the proper width and twist to lock in place between closet walls.
A successful closet rod extender and shelf installation requires attention to weight capacity and proper spacing. Double-check all measurements before drilling, and leave adequate space between rods for hangers to move freely.
Consider dedicating the upper rod to shorter items like shirts and jackets, while using the lower rod for pants and skirts. The new shelf works best for folded sweaters, accessories, or storage boxes.

