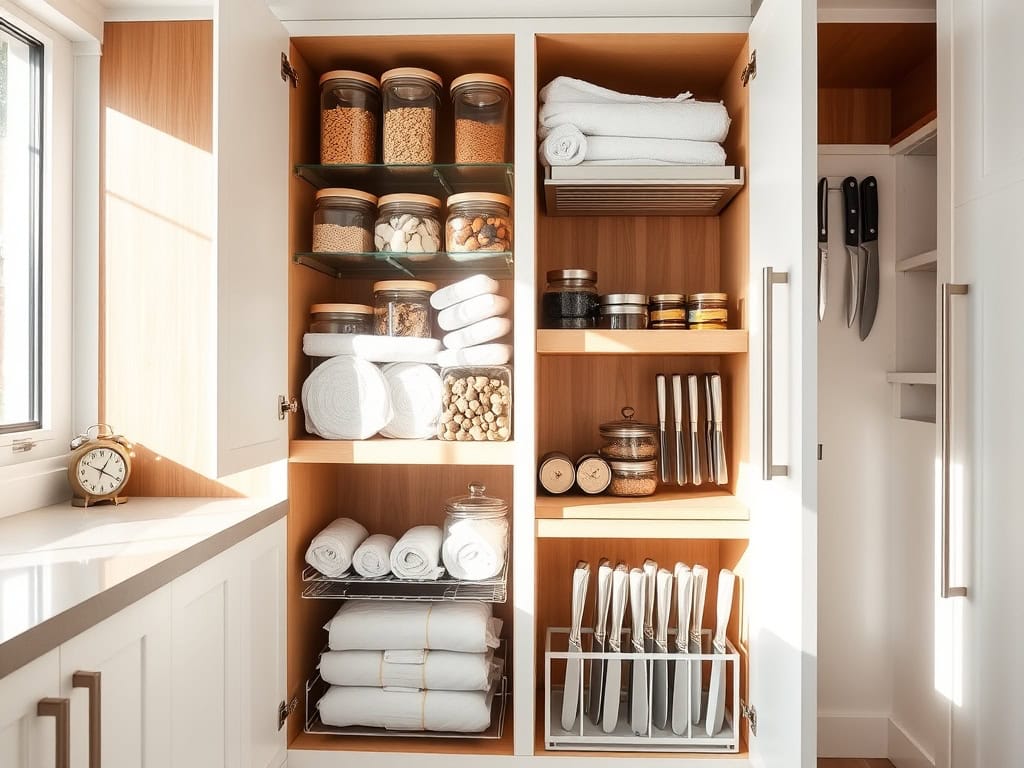
If you’ve ever felt frustrated trying to find that one spice jar hiding in your cramped kitchen cabinets, you’re not alone! I’ve been there too, and it’s what inspired me to transform my tiny cooking space into an organizational masterpiece. With just a few smart cabinet solutions, you can double your storage capacity and make every inch count. Let me share nine game-changing tips that’ll help you reclaim your kitchen sanity and create a space that actually works for you.
Install Pull-Out Cabinet Organizers
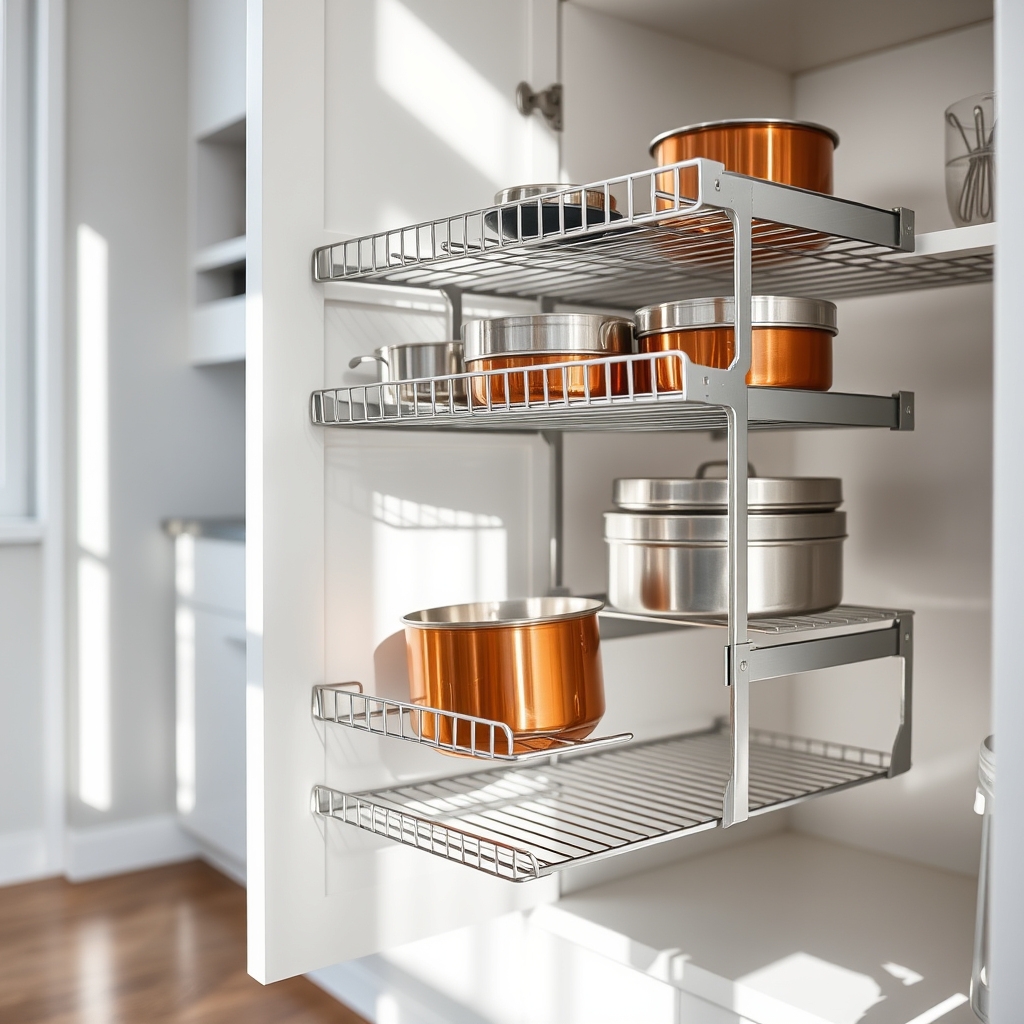
Maximizing space in a small kitchen requires innovative solutions, and pull-out cabinet organizers are among the most effective ways to transform cluttered cabinets into efficient storage spaces.
These sliding systems allow full access to the depths of your cabinets, eliminating the need to dig through stacks of items or struggle to reach items pushed to the back.
Pull-out organizers not only make your cabinets more accessible but also increase their storage capacity by utilizing vertical space more effectively. When properly installed, these systems can double your usable cabinet space and make kitchen workflow smoother by keeping everything visible and within easy reach.
Required Items:
- Pull-out cabinet organizer kit
- Drill and drill bits
- Screwdriver
- Measuring tape
- Pencil
- Level
- Wood screws
- Cabinet hardware mounting template
- Safety glasses
- Work gloves
Installing pull-out cabinet organizers starts with careful measurement of your cabinet interior dimensions, including width, depth, and height.
Remove all cabinet contents and existing shelves if necessary. Mark the mounting points for the slide hardware using your template, ensuring they’re level and properly aligned.
Drill pilot holes for the mounting brackets, then secure the slide mechanisms to both cabinet sides.
Attach the pull-out frame to the sliding mechanisms, testing the movement to ensure smooth operation before adding any weight.
If your organizer came with adjustable shelves or dividers, install these components according to your storage needs.
Make sure all screws are tight and the unit slides easily without catching.
For optimal organization, group similar items together and place frequently used items at eye level.
Consider adding non-slip liner to prevent items from shifting during drawer movement, and label sections if multiple organizers are installed.
Regular maintenance of the sliding mechanisms will ensure smooth operation and extend the life of your organizational system.
Maximize Vertical Space With Cabinet Door Racks
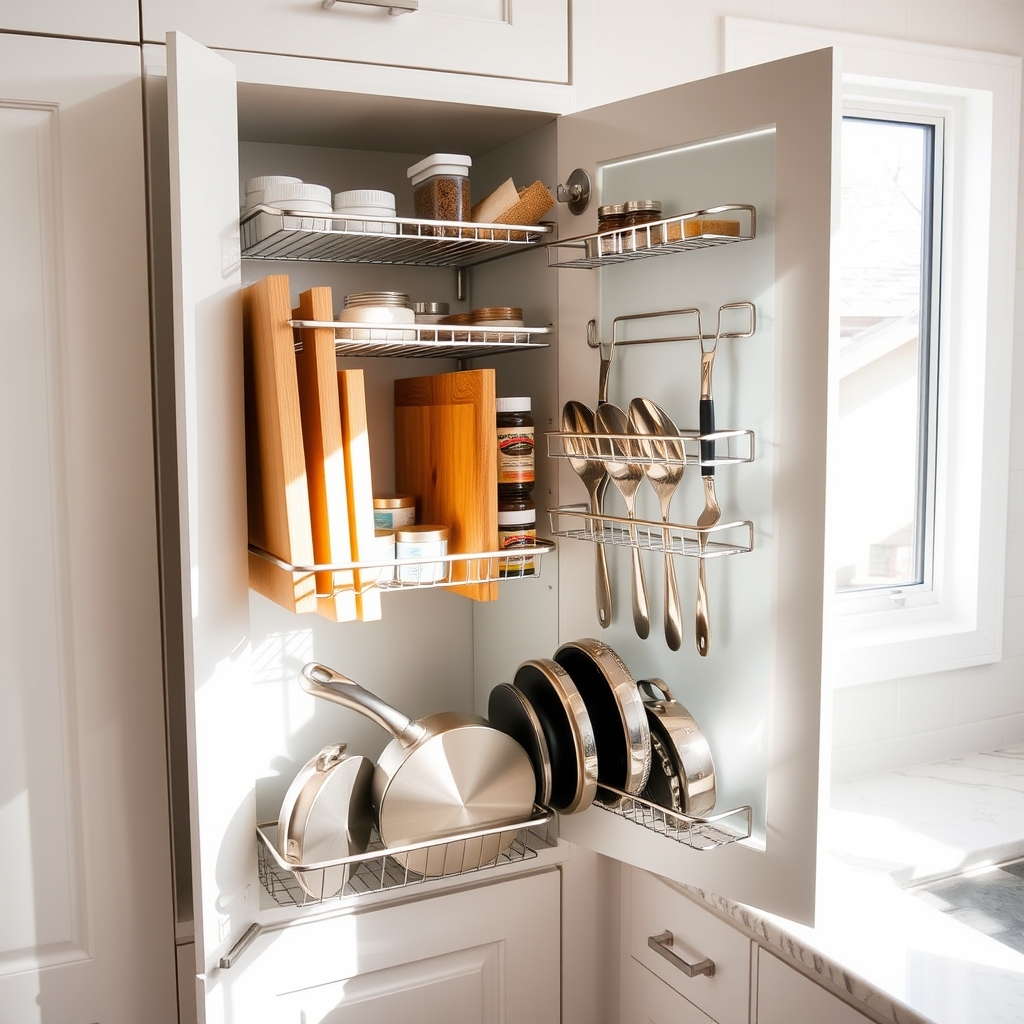
Cabinet doors represent valuable but often overlooked storage real estate in small kitchens. These vertical surfaces can be transformed into efficient organizing zones, effectively doubling your storage capacity without taking up additional floor space.
When properly utilized, cabinet door storage can keep frequently used items within easy reach while freeing up precious shelf space inside cabinets.
Installing cabinet door racks creates designated spots for items that typically create clutter on countertops or get lost in deep cabinets. This organization method is particularly effective for storing cutting boards, pot lids, cleaning supplies, spices, and wrap containers.
The key is to maximize every inch of available space while maintaining easy access to daily essentials.
Required Items:
- Over-the-door storage racks
- Measuring tape
- Screwdriver
- Cabinet door hooks
- Command strips or mounting hardware
- Level
- Pencil
- Storage bins (if needed)
- Door bumpers
First, measure the interior dimensions of your cabinet doors, including width and height, accounting for any shelving or hinges that might interfere with rack placement.
Select appropriate door racks that fit within these measurements while leaving enough clearance for the door to close properly. Install door bumpers if needed to prevent the racks from hitting interior shelves.
For installation, mark mounting points with a pencil and ensure they’re level. If using screws, pre-drill holes carefully to avoid splitting the door material.
For rental properties or those wanting to avoid permanent installation, heavy-duty Command strips can provide a secure, damage-free alternative. Test the weight capacity before fully loading the racks.
Additional Tips: Organize items on the racks by frequency of use, keeping daily items at eye level.
Consider using clear containers or labels to maintain organization. Regularly check mounting hardware for security, especially if storing heavier items.
Leave some space between stored items to prevent scratching or damaging the door when opening and closing. Remember to account for items on nearby shelves to ensure the door can close completely when the racks are fully loaded.
Utilize Corner Cabinet Solutions
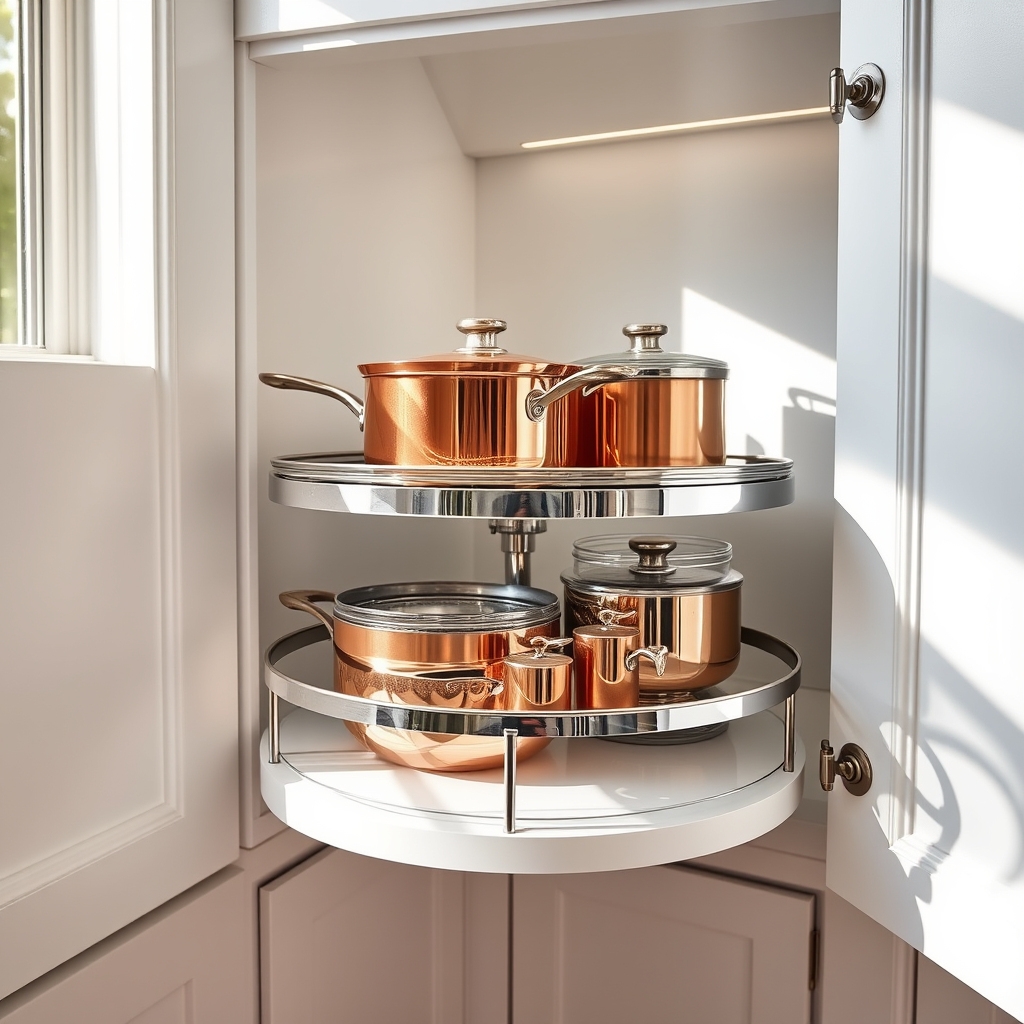
Corner cabinets are often the most underutilized spaces in kitchens, frequently becoming black holes where items disappear or remain forgotten. These awkward angles can actually become prime storage real estate when properly organized, potentially adding up to 50% more usable space to your kitchen storage capacity.
Maximizing corner cabinet space not only increases storage efficiency but also improves workflow in the kitchen. Well-organized corner cabinets can provide easy access to frequently used items and create designated spaces for specific categories of kitchenware, making cooking and cleanup more streamlined.
Required Items:
- Lazy Susan (single or double-tier)
- Corner cabinet pull-out system
- Measurement tape
- Cabinet organizer baskets
- Non-slip shelf liner
- Labels and label maker
- Storage containers
- LED cabinet lights (optional)
Start by completely emptying the corner cabinet and measuring the interior dimensions, including height, width, and depth. Install a lazy Susan or pull-out system according to manufacturer instructions, ensuring it’s level and properly secured.
For upper corner cabinets, consider a pie-cut lazy Susan, while lower cabinets may benefit from a kidney-shaped pull-out system. Once the hardware is installed, group similar items together before returning them to the cabinet.
Sort items by frequency of use, placing everyday items at easily accessible heights and locations. Store heavier items on the bottom shelf or tier, and lighter items above. Maximize vertical space by using stackable containers and organizer baskets. Ensure all items are visible and reachable without having to remove other items first.
Additional Success Tips: Implement a quarterly maintenance schedule to review and adjust your corner cabinet organization. Remove items that haven’t been used in six months, and regularly clean the lazy Susan or pull-out mechanism to ensure smooth operation.
Consider adding battery-operated LED lights to illuminate dark corners, making it easier to locate items quickly.
Implement Drawer Dividers and Organizers
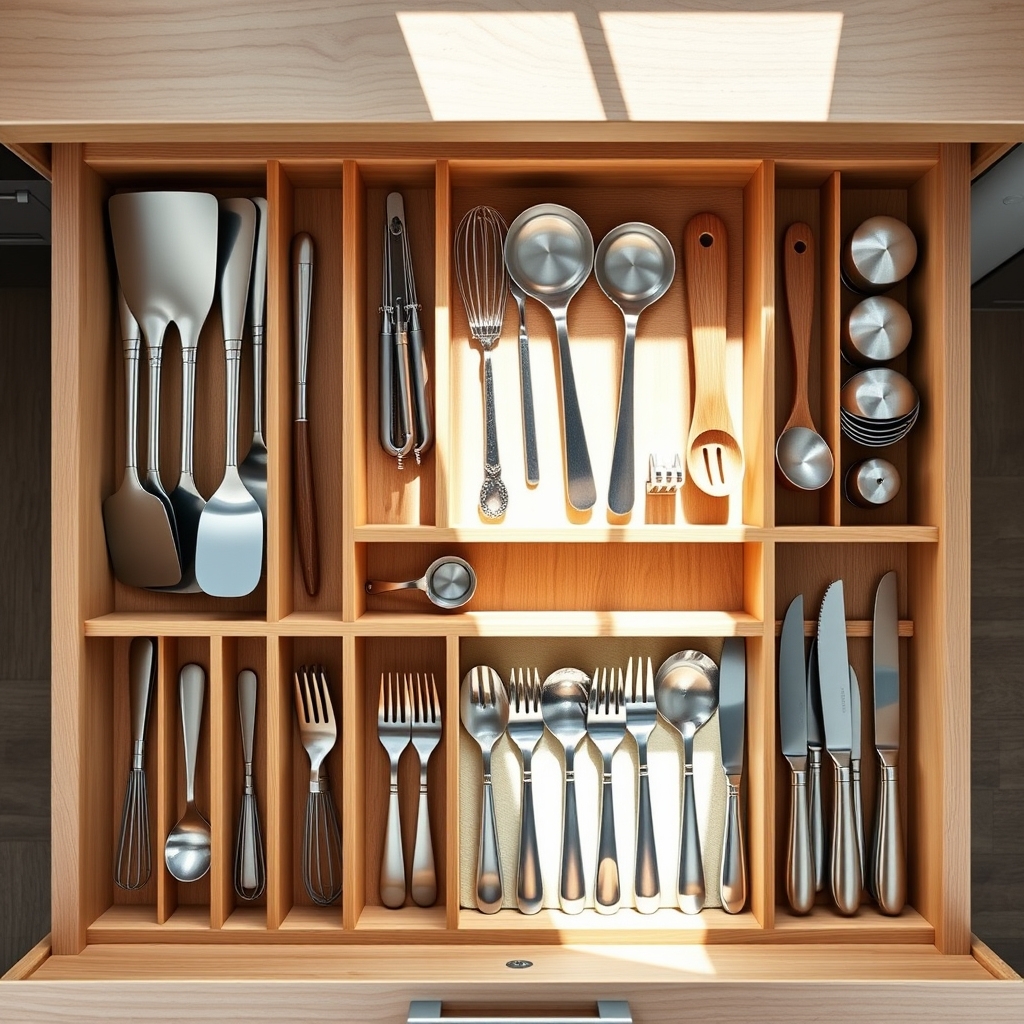
Kitchen drawers often become chaotic catch-alls for various utensils, tools, and gadgets, making it frustrating to find what you need when cooking. Without proper organization, valuable drawer space is wasted, and kitchen workflow becomes inefficient, leading to unnecessary stress during meal preparation.
Implementing drawer dividers and organizers transforms cluttered spaces into functional storage solutions. Well-organized drawers not only maximize space but also protect your utensils from damage and make it easier to maintain an orderly kitchen. This systematic approach to drawer organization can save time and reduce the frustration of searching for specific items.
Required Items:
- Drawer dividers (adjustable or fixed)
- Utensil organizers
- Measuring tape
- Drawer liner material
- Label maker
- Cleaning supplies
- Storage containers for excess items
- Small bins or containers
- Drawer stops (if needed)
Start by removing everything from the drawers and thoroughly cleaning them. Measure each drawer’s dimensions and plan the layout based on the items you use most frequently. Group similar items together: cooking utensils, measuring tools, cutlery, and specialty items.
Select appropriate dividers or organizers that fit your drawer dimensions and accommodate your grouped items. Install drawer liners to prevent items from sliding and protect the drawer bottom.
Place the dividers or organizers in the drawers, ensuring they fit snugly. Arrange items in the designated sections, positioning frequently used tools toward the front for easy access. For deep drawers, consider using stacking organizers to maximize vertical space. Create zones within each drawer based on function and usage frequency.
Additional Tips: Reassess your drawer organization every few months to maintain efficiency. Remove rarely used items to prevent overcrowding, and adjust dividers as needed.
Consider using drawer stops to prevent organizers from shifting, and implement a “one in, one out” rule when acquiring new kitchen tools to maintain organization. Label sections if multiple family members use the kitchen to ensure items return to their designated spots.
Add Under-Sink Storage Solutions
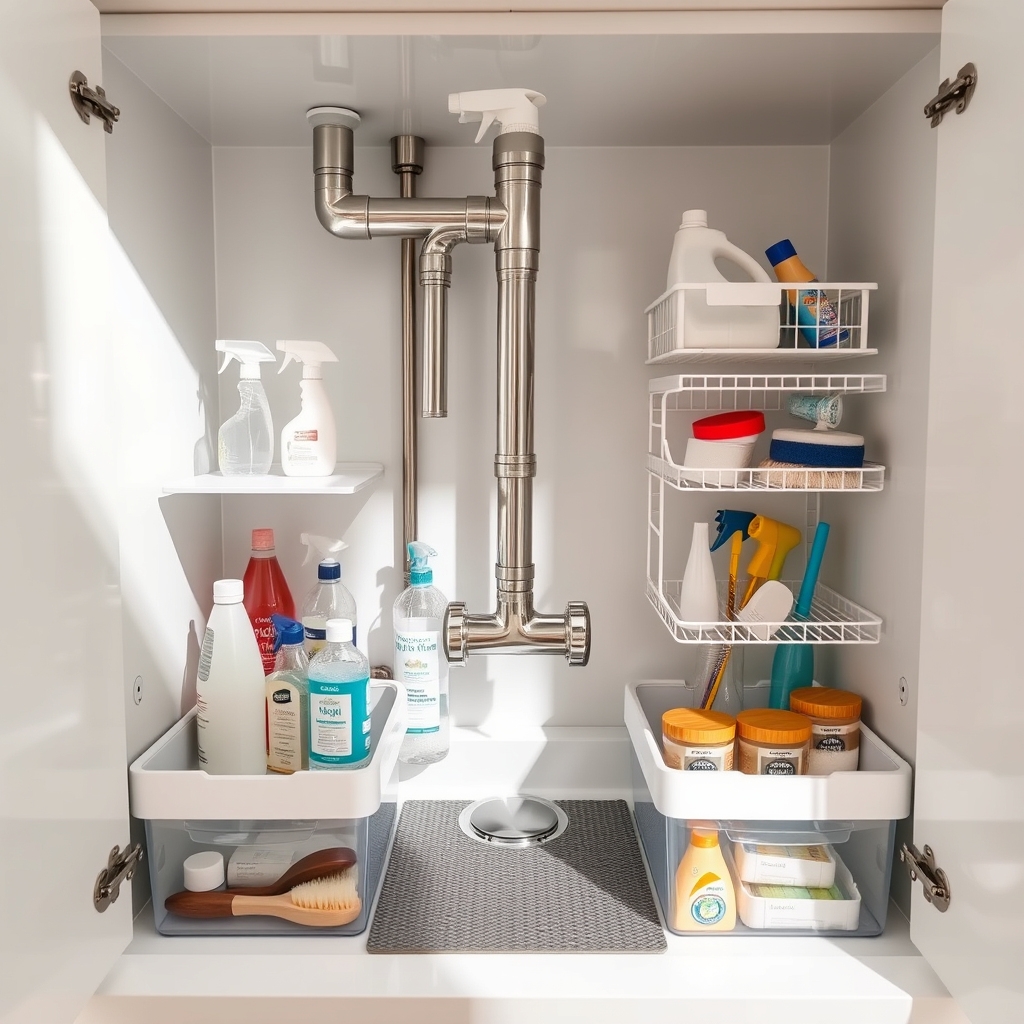
The area under the kitchen sink often becomes a chaotic catch-all for cleaning supplies, bags, and miscellaneous items. This valuable space, when properly organized, can store essential items while maintaining easy access to plumbing and frequently used products.
Maximizing this often-overlooked storage area can significantly improve your kitchen’s functionality and help maintain a clutter-free environment. Proper under-sink organization not only creates more storage space but also helps prevent water damage by making leaks more visible and keeping cleaning supplies properly contained.
An organized under-sink area allows you to quickly locate items, track inventory of cleaning supplies, and maintain a safer environment by properly storing potentially hazardous materials.
Required Items:
- Pull-out drawer organizers
- Over-cabinet door organizers
- Plastic bins or caddies
- Clear storage containers
- Label maker or labels
- Tension rods
- Non-slip shelf liner
- Small lazy Susan
- Command hooks
- Measuring tape
Start by removing everything from under the sink and thoroughly cleaning the area. Measure the available space, accounting for pipes and disposal units. Install a non-slip shelf liner to protect the cabinet bottom from leaks and spills.
Mount a tension rod high in the cabinet to hang spray bottles, leaving floor space for larger items. Create zones within the space: cleaning supplies, dish-washing items, and recycling materials. Use pull-out drawers or bins that can slide around plumbing fixtures.
Position frequently used items at the front for easy access. Install an over-cabinet door organizer for small items like sponges and scrubbers. Group similar items together in clear containers and label everything clearly.
Additional Tips: Regularly inspect items for leaks or damage, and place a moisture-absorbing product in the cabinet to prevent mildew. Consider using stackable containers to maximize vertical space, and maintain a regular inventory system to avoid overbuying supplies.
Keep a small flashlight in the area for easier inspection of plumbing and quick item location in the cabinet’s dark corners.
Create a Cabinet Command Center
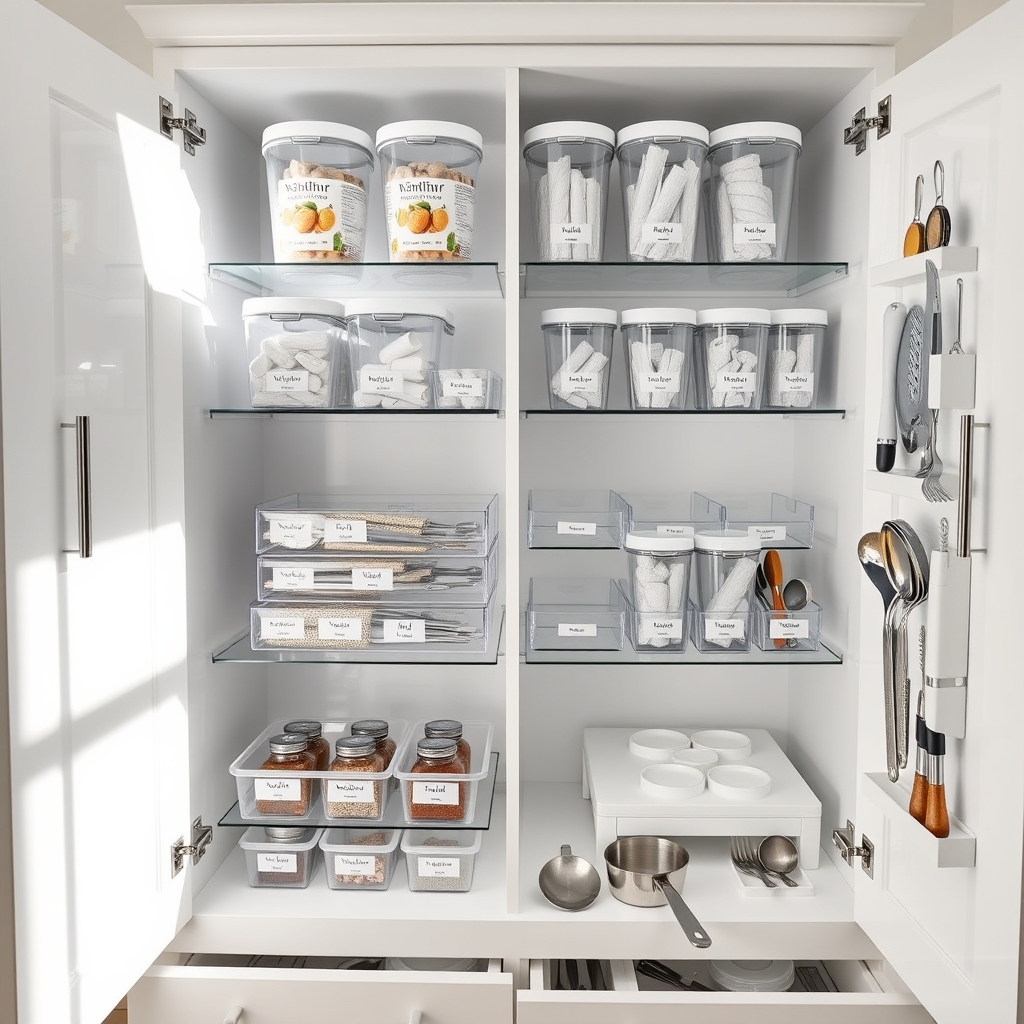
A well-organized cabinet command center serves as the heart of kitchen operations, streamlining daily activities and eliminating the frustration of searching for essential items. This dedicated space transforms an ordinary cabinet into a strategic storage solution that keeps frequently used items within easy reach while maximizing vertical space.
In today’s busy households, an efficient cabinet command center can save countless hours and reduce daily stress. By designating specific zones for different categories of items and implementing smart storage solutions, you can create a system that maintains order and makes cooking and cleaning tasks more efficient.
Required Items:
- Clear storage containers
- Label maker or labels
- Drawer organizers
- Command hooks
- Shelf risers
- Door-mounted organizers
- Clear bins
- Magazine holders
- Small tension rods
- Measuring tape
Start by completely emptying the chosen cabinet and measuring all dimensions. Group similar items together: cleaning supplies, food storage containers, cooking tools, and frequently used ingredients.
Install door-mounted organizers on the cabinet doors for frequently accessed items like cleaning supplies or plastic wrap. Position shelf risers to create additional vertical storage space, maximizing the cabinet’s height.
Arrange clear storage containers on the shelves, ensuring frequently used items are at eye level. Use drawer organizers to separate smaller items and prevent them from becoming disorganized.
Install command hooks on the sides of the cabinet for hanging lightweight tools or measuring cups. Label all containers and zones clearly to maintain the organization system.
Position items based on frequency of use, with daily items at arm’s reach and less frequently used items toward the back or top. Consider implementing a rotation system for pantry items to prevent expired products from being forgotten.
Regular maintenance of your cabinet command center, including weekly quick cleanups and monthly thorough reviews, will ensure the system continues to serve its purpose effectively.
Use Cabinet Shelf Risers and Expandable Shelves
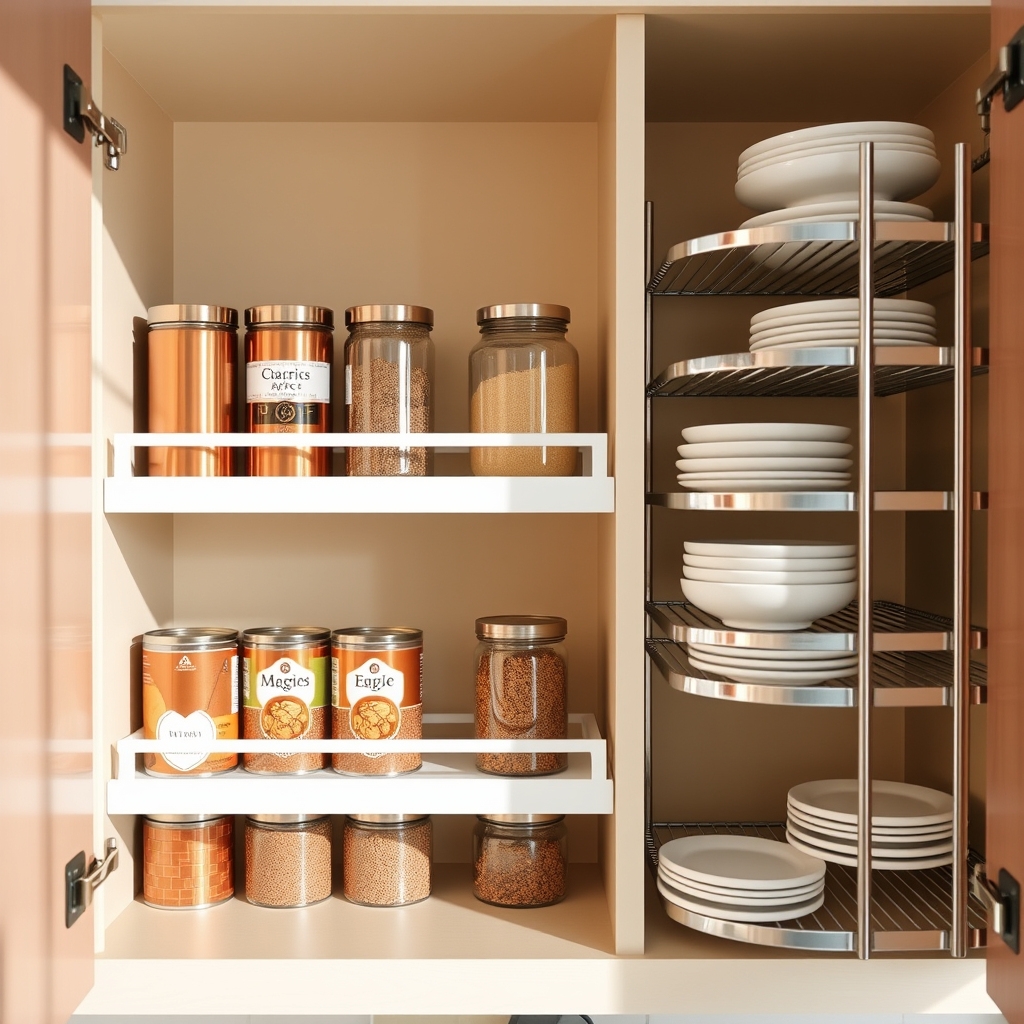
Maximizing vertical space in kitchen cabinets is crucial for small kitchen organization, and shelf risers are the perfect solution for this challenge. These simple yet effective tools can instantly double your storage capacity while keeping items visible and easily accessible.
Cabinet shelf risers and expandable shelves transform cluttered, cramped spaces into efficient storage areas by creating multiple levels within existing shelves. This organization method prevents stacking items on top of each other, reducing the frustration of having to move multiple items to reach what you need.
Required Items:
- Cabinet shelf risers
- Expandable shelves
- Measuring tape
- Cabinet liner (optional)
- Label maker (optional)
- Storage containers
- Cleaning supplies
Start by removing all items from your cabinet and measuring the available space, including height, width, and depth. Choose shelf risers that fit your cabinet dimensions, leaving enough clearance for items to be placed and removed easily.
Position the risers toward the back of the cabinet for taller items, and place shorter items in front for better visibility. For expandable shelves, adjust the width to fit snugly in your cabinet, ensuring stability.
When arranging items, place frequently used products on the lower levels and less-used items on the upper shelves. Group similar items together, such as canned goods, baking supplies, or spices. If using storage containers, ensure they’re appropriately sized for your shelf risers and expandable shelves.
For optimal organization, regularly assess and adjust your shelf arrangement based on changing needs. Consider using clear containers to easily identify contents, and implement a rotating system where newer items are placed at the back.
Clean shelves and risers periodically to prevent dust accumulation and maintain a fresh, organized space.
Transform Dead Space With Slim Rolling Carts
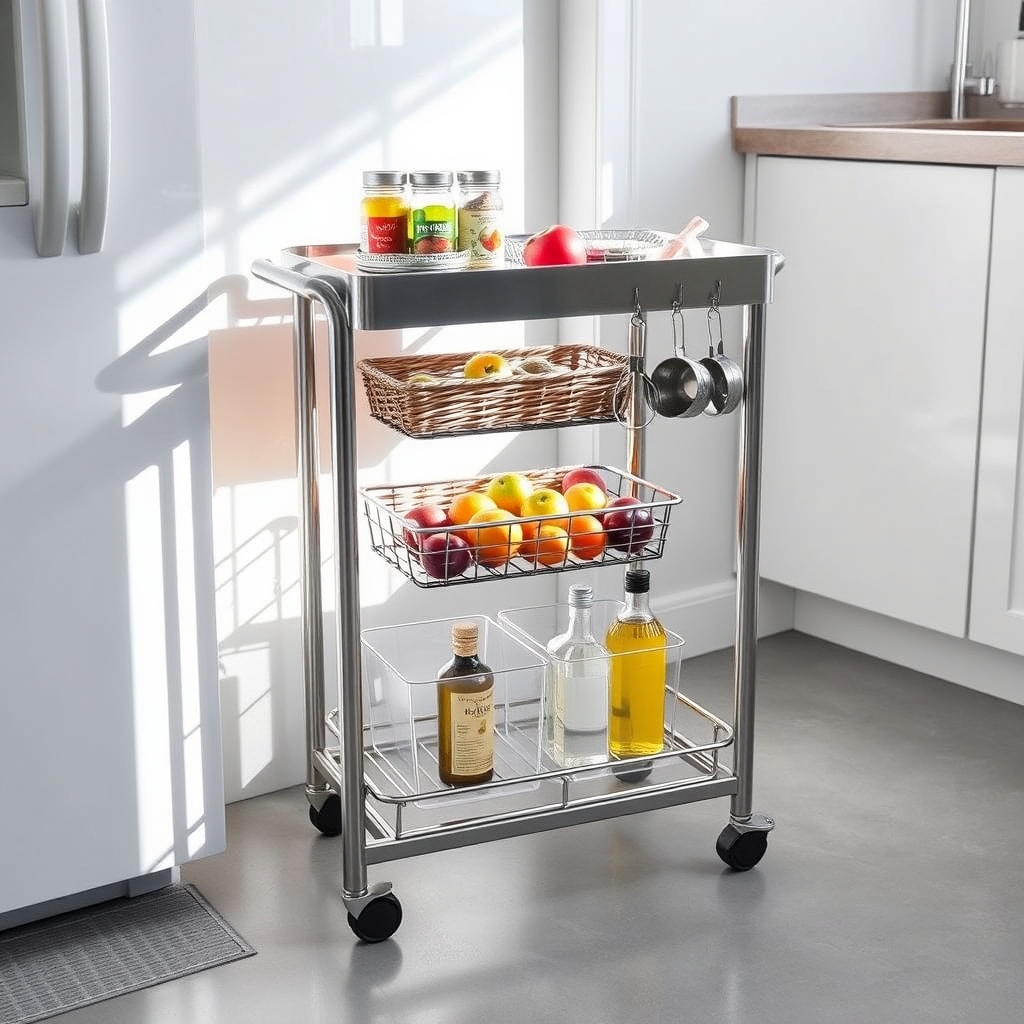
Narrow spaces between appliances or furniture often become wasted dead zones in small kitchens. These gaps, typically 4-8 inches wide, represent valuable storage potential that can be reclaimed with slim rolling carts. Converting these overlooked spaces into functional storage areas can dramatically increase your kitchen’s storage capacity while maintaining a clean, organized appearance.
Rolling carts designed for narrow spaces offer versatile storage solutions that can adapt to changing needs. These mobile units can hold anything from canned goods and spices to cooking utensils and cleaning supplies, effectively turning awkward gaps into productive storage zones that can be easily accessed and relocated as needed.
Required Items:
- Slim rolling cart (with appropriate width measurements)
- Measuring tape
- Level
- Non-slip mat or rubber stoppers
- Clear storage containers or bins
- Labels and label maker
- Drawer organizers or dividers
- Optional wheel locks
First, measure your target space carefully, accounting for any baseboards or uneven flooring. Select a rolling cart that’s at least 1/2 inch narrower than your available space to ensure smooth movement. Place a non-slip mat beneath the cart to prevent unwanted rolling and protect your flooring.
Organize your cart strategically by placing frequently used items at eye level and heavier items at the bottom for stability. Sort items by category and use clear containers to maximize visibility and maintain order. Consider installing small hooks on the sides for additional hanging storage.
If your cart has multiple tiers, designate each level for specific purposes – perhaps cleaning supplies on bottom, cooking essentials in the middle, and frequently used items on top.
Position your cart so it can be easily pulled out and accessed from both sides if possible. To maximize effectiveness, regularly reassess the items stored on your cart and rotate them based on seasonal needs or usage patterns.
Consider adding wheel locks if the floor is uneven or if you prefer the cart to remain stationary most of the time. Maintain clear pathways around the cart to ensure it can be fully utilized without creating obstacles in your kitchen workflow.
Optimize Upper Cabinet Storage With Clear Containers
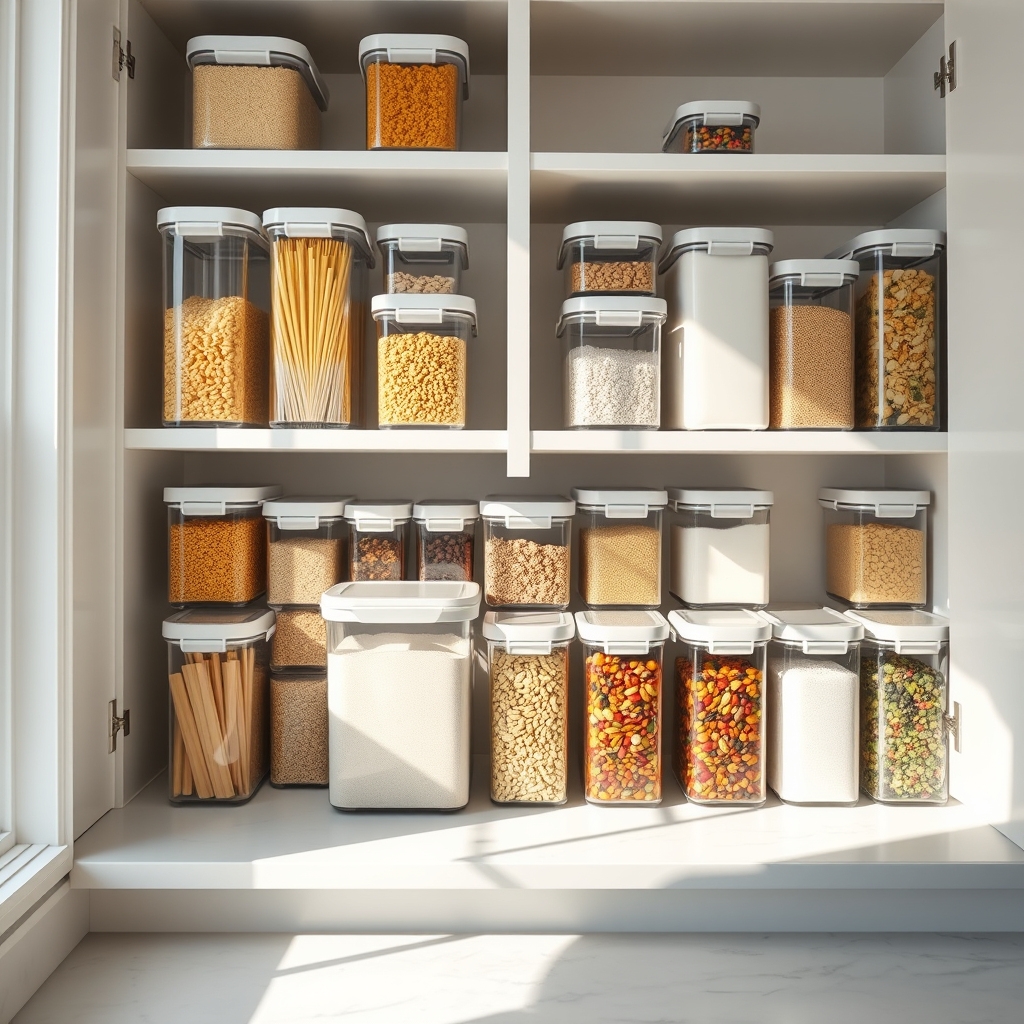
Upper cabinet storage often becomes a chaotic mess of half-empty packages, stale ingredients, and forgotten items pushed to the back. Clear containers transform this space from cluttered to coordinated, making it easy to see exactly what you have and how much remains. This visibility not only streamlines meal preparation but also prevents overbuying and reduces food waste.
Organizing upper cabinets with clear containers creates a system that works for everyone in the household. When items are visible and easily accessible, family members can quickly locate ingredients and maintain the organization system. This approach maximizes vertical space while creating an aesthetically pleasing storage solution that motivates better kitchen habits.
Required Items:
- Clear airtight containers in various sizes
- Label maker or waterproof labels
- Measuring tape
- Clean microfiber cloth
- Step stool
- Storage bins for backup items
- Food funnel
- Shelf liner (optional)
Start by completely emptying your upper cabinets and wiping them clean. Measure the space, accounting for shelf height and depth, to determine appropriate container sizes. Sort items by category (baking supplies, grains, snacks, etc.) and assess which foods are frequently used.
Choose containers that fit your space and volume needs, ensuring they’re airtight for optimal food preservation. Transfer dry goods into the containers, using a funnel to prevent spills. Label each container with the item name and expiration date.
Arrange containers by category, placing frequently used items at eye level and within easy reach. Stack containers efficiently, but avoid making them too deep to maintain easy access. Create zones within the cabinets based on meal types or cooking functions.
For ongoing success, establish a regular maintenance routine. Check containers monthly for expired items and wipe them down as needed. When purchasing refills, store excess in backup bins until needed.
Consider using drawer organizers or small lazy Susans for additional organization within the clear container system. Always transfer new items immediately into containers to maintain the system’s effectiveness and prevent packaging clutter.

