Is your pantry giving you anxiety every time you open the door? Trust me, I’ve been there – staring at a jumble of half-empty boxes and wondering where that can of tomatoes disappeared to. But here’s the good news: you don’t need a complete overhaul to transform your pantry chaos into an organized oasis. I’ve discovered some game-changing hacks that’ll make your space work smarter, not harder. Ready to turn your pantry from stressed to streamlined? Let’s start with my favorite trick that’ll instantly double your visibility.

Clear Containers Are Your Best Friend
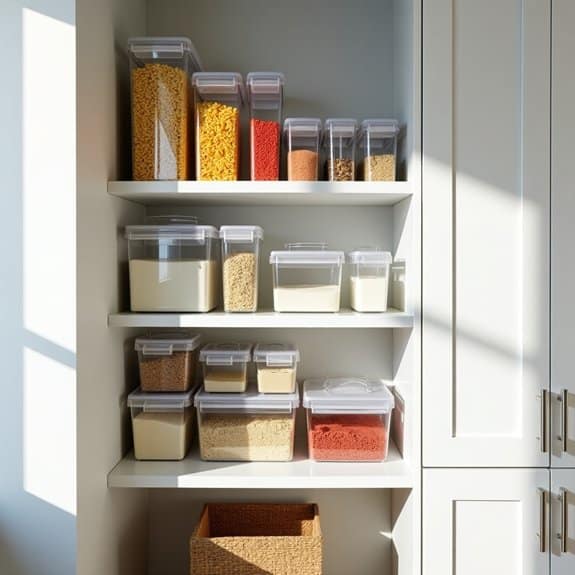
Clear containers revolutionize pantry organization by transforming cluttered shelves into a visually appealing and efficient storage system. When food items are visible at a glance, it becomes easier to track inventory, identify ingredients quickly, and maintain freshness through proper sealed storage.
Implementing clear containers in your pantry not only creates a cohesive aesthetic but also eliminates the frustration of searching through multiple boxes and bags. This system helps prevent food waste by keeping contents visible and making it simple to practice the “first in, first out” method of food rotation.
Required Items:
- Various sizes of airtight clear containers
- Label maker or waterproof labels
- Measuring cups
- Funnel
- Clean cloth or paper towels
- Container cleaning brush
- Storage basket for extra packaging
- Food storage guide
- Dry-erase marker
Start by emptying your pantry shelves and sorting similar items together. Measure the vertical space between shelves to determine appropriate container heights. Choose stackable containers with airtight seals that fit your space and accommodate the quantity of each item you typically store.
Transfer dry goods into containers, ensuring they’re completely clean and dry beforehand. Create a labeling system that includes the item name, expiration date, and any relevant cooking instructions from the original packaging. Position containers with frequently used items at eye level and arrange them by category: baking supplies, breakfast items, snacks, and cooking staples.
Stack containers efficiently, keeping similar heights together for stability. For optimal results, maintain a rotation system by adding new products to the back of container rows and using items from the front first. Clean containers thoroughly before refilling, and regularly check seals for proper function.
Consider keeping a small inventory list inside your pantry door to track when items need replenishing, ensuring your clear container system remains an effective tool for pantry management.
Zone System: Group Similar Items Together

Creating designated zones in your pantry is a fundamental organizing principle that transforms a chaotic space into an efficient, user-friendly storage system. When items are grouped logically, you can quickly locate what you need, make better shopping decisions, and prevent duplicate purchases that waste money and space.
The zone system works by creating intuitive categories that match your household’s cooking and eating habits. This method not only streamlines meal preparation but also helps maintain organization long-term, as family members naturally learn where items belong and can easily return them to their designated spots.
Required Items:
- Clear storage containers
- Label maker or labels
- Shelf liner
- Baskets or bins
- Measuring tape
- Clipboard and paper
- Cleaning supplies
- Step stool
Begin by removing everything from your pantry and sorting items into broad categories: baking supplies, breakfast items, canned goods, snacks, pasta and grains, and cooking oils/condiments. Within each category, create subcategories as needed – for example, separate sweet and savory snacks.
Measure your shelf space and assign specific zones based on the frequency of use and the volume of items in each category. Place frequently used items at eye level, heavy items on lower shelves, and lighter, less-used items up high.
Consider creating these specific zones: a breakfast station with cereals, coffee, and toast toppings; a baking zone with flour, sugar, and decorating supplies; a meal prep zone with canned goods, pasta, and cooking oils; and a snack zone easily accessible for children.
Use clear containers for bulk items and arrange canned goods with labels facing forward. Maximize zone effectiveness by installing proper lighting to illuminate all areas, using shelf risers or lazy Susans to increase visibility, and implementing a regular maintenance schedule.
Review zones quarterly to adjust based on changing needs and seasonal items, ensuring the system continues to serve your household efficiently.
Label Everything With Purpose
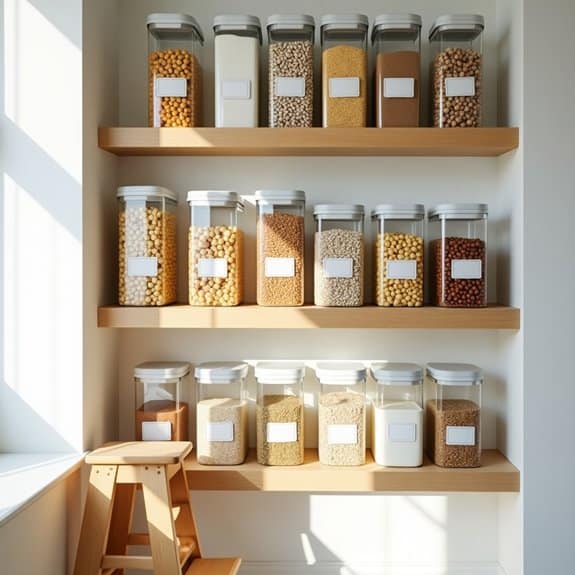
Proper labeling is the cornerstone of an organized pantry system, serving as a visual roadmap that guides everyone in the household to items quickly and efficiently. When items are clearly labeled, you eliminate the frustration of searching through containers, reduce food waste by keeping track of contents, and maintain order even when multiple family members access the pantry.
A well-executed labeling system does more than just identify contents – it creates a sustainable organization method that can be maintained long-term. By implementing purposeful labels, you establish a system that helps track expiration dates, categorize items logically, and ensure products return to their designated spots after use.
Required Items:
- Label maker or printer
- Clear adhesive labels
- Waterproof markers
- Measuring tape
- Container cleaning supplies
- Small notebook for inventory
- Clear storage containers
- Category dividers
- Erasable labels
- Label removal solution
Start by cleaning all containers and surfaces where labels will be applied. Group similar items together and determine your main categories (baking, snacks, grains, etc.). Create a standardized format for your labels, including the item name, purchase date, and expiration date when applicable.
Apply labels consistently – place them at eye level on containers and shelves, ensuring they’re visible from your typical viewing angle. For bulk items transferred to storage containers, include relevant cooking instructions or serving sizes on the labels.
Create a hierarchy system using different label sizes or colors for main categories versus subcategories. Consider using transparent labels for glass containers to maintain their aesthetic appeal while still providing necessary information.
Additional Tips: Implement a routine label check every three months to ensure all information remains current and legible. Use removable labels for items that rotate frequently, and maintain a master list of your labeling system for quick reference.
Consider incorporating QR codes on labels linking to recipes or nutritional information for frequently used ingredients.
Maximize Vertical Space With Shelf Risers
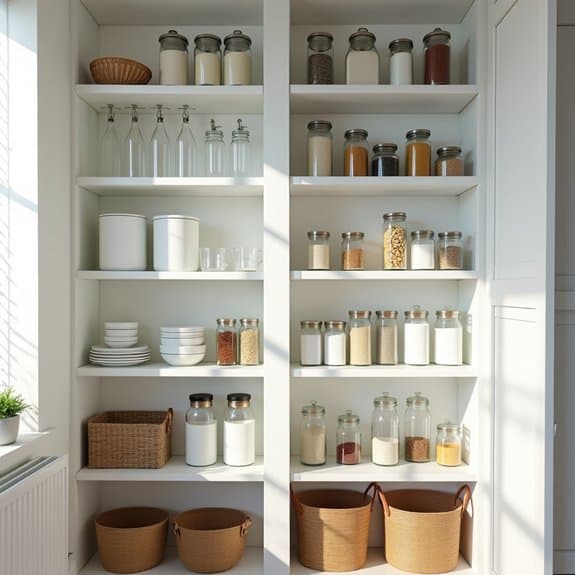
Making the most of vertical space in your pantry is crucial for maximizing storage capacity and maintaining organization. Traditional pantry shelves often leave significant unused space between levels, resulting in wasted areas that could otherwise store essential items. By implementing shelf risers, you can effectively double or triple your storage capacity without expanding your pantry’s footprint.
Shelf risers create additional layers within existing shelves, allowing for better visibility and easier access to items that might otherwise get lost in the back of deep shelves. This organization method is particularly effective for storing canned goods, spice containers, and small packaged items that can be neatly arranged at different heights.
Required Items:
- Adjustable shelf risers
- Measuring tape
- Labels
- Cleaning supplies
- Storage containers
- Non-slip shelf liner
- Level
- Pencil and paper for planning
Start by removing all items from the target shelves and thoroughly cleaning the surface. Measure the width and depth of your shelves to determine the appropriate size and number of risers needed. Place non-slip liner on the original shelf surface to prevent risers from sliding.
Position the shelf risers strategically, ensuring they’re level and stable. For maximum efficiency, place taller items on the base shelf and shorter items on the elevated platforms.
Group similar items together on each level, with frequently used products at easy-to-reach heights. Consider arranging items by category, size, or frequency of use. For example, place everyday cooking ingredients on the riser levels for quick visibility and access, while storing larger or less frequently used items underneath.
To maintain this organizational system long-term, regularly assess the arrangement and adjust riser heights as needed. Consider using clear containers on the risers to maintain visibility and prevent items from toppling.
Label the edges of each riser section to ensure family members maintain the designated organization system, and periodically check that risers remain stable and level to prevent any accidents or spills.
Door-Mounted Storage Solutions
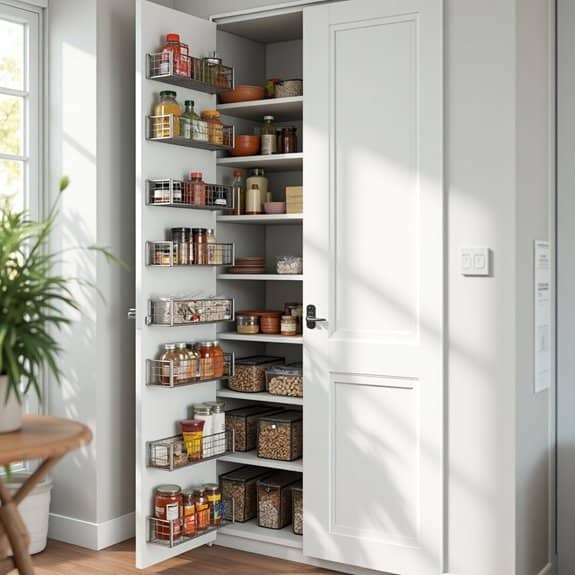
Making use of pantry door space represents one of the most overlooked opportunities for maximizing storage capacity in any kitchen. Door-mounted storage solutions can effectively double your pantry’s organizational potential by utilizing vertical space that typically goes unused.
Door-mounted organizers transform dead space into functional storage areas, perfect for storing frequently used items like spices, condiments, and small packaged goods. This organization method not only increases accessibility but also helps maintain clear sightlines to all your pantry items, reducing food waste and preventing duplicate purchases.
Required Items:
- Over-the-door hanging rack system
- Clear plastic storage pockets
- Command hooks or mounting hardware
- Measuring tape
- Level
- Pencil
- Drill and screws (if mounting permanently)
- Wire baskets
- Label maker
Start by measuring your door’s dimensions, including width and available hanging space, accounting for any door handles or locks. Install the primary hanging rack system, ensuring it’s level and secure. If using a permanent mount system, mark your drilling points and secure the rack using appropriate anchors and screws. For temporary solutions, heavy-duty over-the-door hooks work well when properly positioned.
Arrange your storage components logically, placing frequently used items at eye level. Install clear pockets or wire baskets at appropriate heights, considering the items they’ll hold. Group similar items together, such as baking supplies in one section and snacks in another. Ensure all mounted elements are securely fastened and can support their intended weight.
Additional Tip: Consider implementing a rotation system where newer items go to the back of door-mounted storage units while older items move forward. Label each pocket or basket clearly, and periodically review the weight distribution to prevent door strain. Leave some spaces empty for future additions and seasonal items, allowing flexibility in your organization system.
Create a First-In, First-Out Rotation System
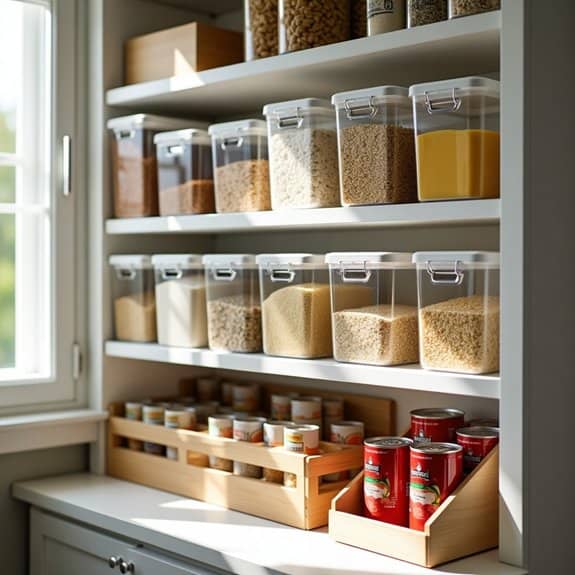
Implementing a first-in, first-out (FIFO) rotation system in your pantry is crucial for preventing food waste and ensuring you consume items before they expire. This systematic approach to pantry organization helps track inventory, maintain freshness, and save money by utilizing products in the correct order.
A well-executed FIFO system transforms your pantry from a chaotic storage space into an efficient, grocery store-style arrangement where older items are easily accessible and new purchases are properly integrated. This method is particularly valuable for families who bulk buy or anyone wanting to maintain better control over their food inventory.
Required Items:
- Clear storage containers
- Label maker or labels
- Marker
- Shelf risers
- Can organizers
- Basket or bins
- Shelf liner
- Clipboard
- Inventory sheet
To implement a FIFO rotation system, start by completely emptying your pantry and checking all expiration dates. Group similar items together and arrange them by expiration date, with the oldest items at the front.
Install shelf risers or can organizers to create tiered levels, allowing you to place newer items behind older ones while maintaining visibility of all products. Transfer applicable items to clear containers, always marking them with the original expiration date and purchase date.
When adding new groceries, resist the urge to place them at the front of shelves. Instead, remove existing items, place new products at the back, and return older items to the front. This creates a natural flow where products automatically move forward as items are used.
Maintain this system by regularly checking expiration dates and updating your inventory sheet to track what needs to be used first. For optimal results, conduct a monthly audit of your FIFO system to ensure proper rotation is being maintained.
Consider implementing a color-coding system for different food categories or expiration timeframes, and keep a running inventory list on your clipboard to note when items are running low or approaching their expiration date. Teaching all household members about the system ensures everyone participates in maintaining the organization.
Utilize Baskets and Bins Strategically
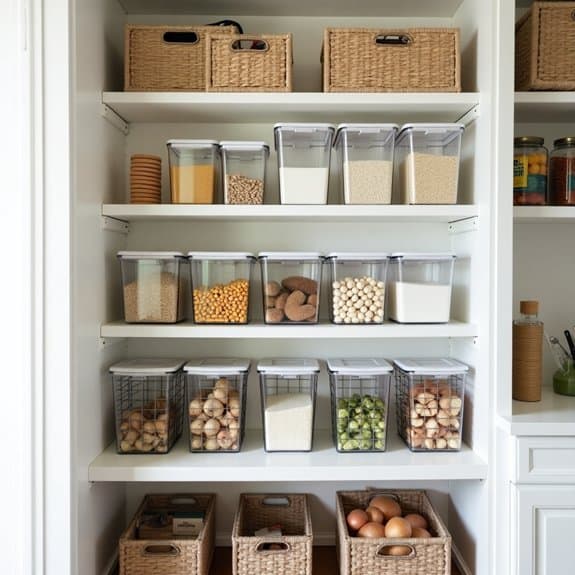
An organized pantry with strategically placed baskets and bins transforms a chaotic storage space into an efficient, accessible food management system. When items are properly contained and categorized, it becomes easier to track inventory, locate ingredients quickly, and maintain a clutter-free environment.
The strategic use of baskets and bins creates designated zones within your pantry, preventing items from becoming scattered or lost behind other products. This system not only maximizes vertical space but also protects products from spills and makes it simpler to maintain cleanliness while extending the shelf life of your groceries.
Required Items:
- Clear plastic bins
- Wire baskets
- Woven storage baskets
- Labels and label maker
- Measuring tape
- Shelf liner (optional)
- Container markers
- Cleaning supplies
- Storage containers for decanting
Start by measuring your pantry shelves and determining the appropriate container sizes. Group similar items together, such as baking supplies, snacks, or canned goods. Select containers that fit your shelf dimensions and accommodate the height of your items.
Place frequently used items in clear bins at eye level, while storing lesser-used items in decorative baskets on higher or lower shelves. Implement a zone system by designating specific baskets for different categories. Use deep bins for bulk items and smaller containers for individual snack packets.
Position wire baskets for produce that requires air circulation, and utilize clear containers for items that need to be easily visible. Stack matching containers to maximize vertical space while maintaining a cohesive look.
Additional Tips:
Choose stackable containers whenever possible to maximize vertical space. Label each container clearly on multiple sides for easy identification from different angles. Leave some empty space in each container to accommodate new purchases and maintain flexibility in your organization system.
Review and adjust your basket placement quarterly to ensure the system continues to meet your household’s changing needs.
Install Pull-Out Drawers for Deep Shelves
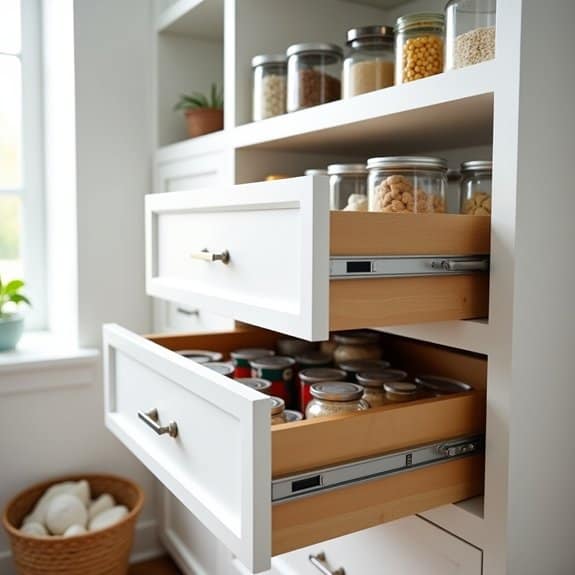
Deep pantry shelves often become black holes where items get lost and forgotten, leading to waste and frustration. Installing pull-out drawers transforms these problematic spaces into efficient storage solutions that maximize visibility and accessibility of all your pantry items.
Pull-out drawers eliminate the need to remove multiple items to reach things at the back of deep shelves. This system allows you to see everything at a glance and access items with a simple pull motion, making it easier to maintain organization and track inventory.
Required Items:
- Pull-out drawer slides
- Pre-made drawer units or wooden panels
- Measuring tape
- Pencil
- Level
- Power drill
- Screwdriver
- Mounting screws
- Wood glue (if building custom drawers)
- Safety glasses
- Work gloves
Installation begins with accurate measurements of your shelf depth and width to determine the appropriate size of pull-out drawers. Remove existing shelves if necessary.
Mount the drawer slides to the sides of the cabinet, ensuring they’re level and properly aligned. Attach the drawer units to the slides according to manufacturer specifications, testing the movement to ensure smooth operation.
For custom-built drawers, cut wooden panels to size and assemble them into drawer boxes. Install handles or pulls on the front of each drawer for easy access.
Consider adding drawer dividers or bins to further organize items within each pull-out unit. Label the front of each drawer to identify contents and maintain organization.
To maximize the effectiveness of pull-out drawers, group similar items together and assign specific drawers for different categories. Store heavier items in lower drawers and lighter items above.
Regular maintenance of the drawer slides, including occasional cleaning and lubrication, will ensure smooth operation and longevity of your organization system.
Decant Bulk Items for Easy Access
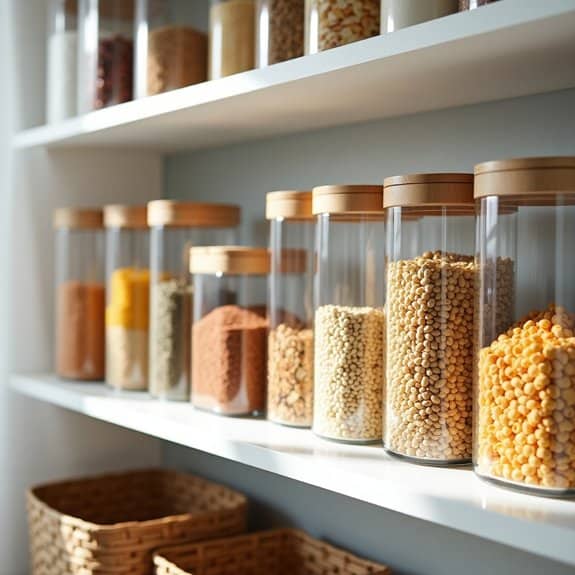
Decanting bulk items into clear containers transforms a cluttered pantry into an organized, visually appealing space that makes cooking and meal planning significantly easier. When ingredients are visible and accessible, you’re more likely to use them before they expire and can quickly assess inventory levels at a glance.
The process of decanting bulk items not only creates a more aesthetically pleasing pantry but also helps protect your food from moisture, pests, and staleness. Proper storage containers maintain freshness longer than original packaging and create a uniform look that maximizes space efficiency.
Required Items:
- Clear airtight storage containers (various sizes)
- Labels and marker or label maker
- Measuring cups or scoops
- Funnel
- Clean cloth or paper towels
- Storage container cleaning brush
- Original packaging for product information
- Small bins or baskets for backup items
Start by thoroughly cleaning and drying your storage containers. Pour the bulk items into appropriately sized containers using a funnel to prevent spills. Leave enough headspace at the top to allow for easy scooping. Before discarding original packaging, cut out or photograph cooking instructions and expiration dates for reference.
Apply clear labels to each container, including the item name and any crucial preparation information. For frequently used items like flour, sugar, or rice, consider selecting containers with wide mouths for easy scooping. Stack containers of similar heights together, and group items by category (baking supplies, grains, snacks) for optimal organization. Place backup items in separate bins until needed.
Additional Tips: Regularly audit your decanted items to ensure freshness and rotate stock by using older products first. Consider keeping a small notebook in the pantry to track expiration dates and shopping needs.
Choose containers with square or rectangular shapes rather than round ones to maximize shelf space, and invest in a set of matching containers to create a cohesive look that’s both functional and visually appealing.
Regular Inventory and Expiration Date Check

Maintaining a well-organized pantry inventory system is crucial for preventing food waste and ensuring food safety. Regular checks of expiration dates help households save money by using items before they spoil and prevent the consumption of potentially unsafe foods. This practice also streamlines meal planning and grocery shopping by providing a clear picture of available ingredients.
An organized inventory system transforms the way a household functions, eliminating the frustration of discovering expired items or buying duplicates unnecessarily. When implemented correctly, this system becomes a natural part of kitchen management, reducing stress and creating a more efficient cooking environment.
Required Items:
- Notebook or digital spreadsheet
- Sticky notes or labels
- Permanent marker
- Cleaning supplies
- Storage containers
- Calendar or reminder system
- Trash bag for expired items
- Phone or camera (for digital inventory)
Begin the organization process by removing all items from the pantry and grouping them by category. Check each item’s expiration date and create two piles: one for items expiring within the next month and another for longer-shelf-life products. Record all items in your chosen tracking system, noting product names, quantities, and expiration dates. Sort items back into the pantry with the nearest expiration dates at the front.
Create a maintenance schedule by setting aside time monthly to review inventory. During these checks, update your tracking system, remove expired items, and note products nearing their expiration date. Consider implementing a “first in, first out” (FIFO) rotation system, where newer items are placed behind older ones to ensure proper usage order.
Additional Tips: Consider using a digital inventory app that can send automatic reminders about approaching expiration dates. Color-code labels or sections based on expiration timeframes, making quick visual checks easier. Keep a running shopping list alongside your inventory to note items as they’re used, ensuring timely replacements. Remember to adjust your buying habits based on your inventory checks to prevent overbuying items that frequently expire before use.


