Just like a game of Tetris, mastering bedroom closet organization is all about making every piece fit perfectly. If you’re tired of wrestling with cramped spaces and cluttered corners, you’re not alone – the average person wastes 15 minutes daily searching for misplaced items. I’ve transformed countless chaotic closets into streamlined sanctuaries, and I’m excited to share my favorite space-maximizing tricks. Let’s turn your closet from a stress zone into a showcase that’ll make Marie Kondo proud!
Install a Double-Rod Hanging System
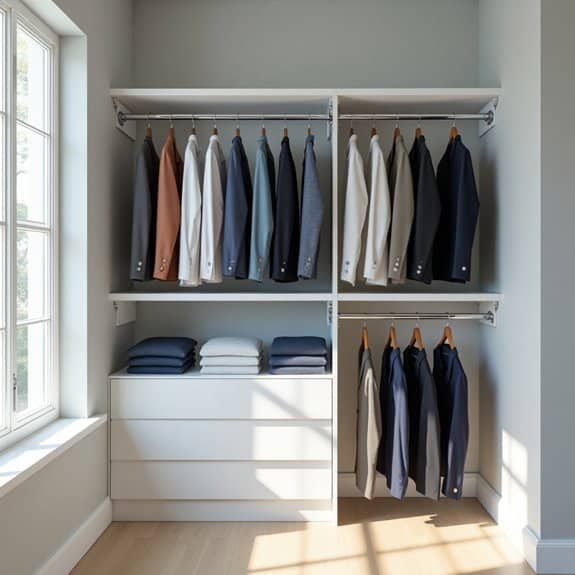
A double-rod hanging system is a game-changing solution for bedroom closets, effectively doubling your hanging space by utilizing vertical area more efficiently. This configuration allows you to separate clothing by length, with shorter items like shirts and folded pants on the top rod and longer items like dresses and coats on the bottom rod.
Installing a double-rod system transforms an inefficient single-rod closet into an organized powerhouse, typically increasing hanging capacity by 80-100%. This setup not only maximizes space but also makes clothes more visible and accessible, reducing the time spent searching for specific items and maintaining an organized wardrobe.
Required Items:
- Measuring tape
- Level
- Drill and drill bits
- Screwdriver
- Wall anchors
- Mounting brackets
- Support rod holders
- Closet rods (2)
- Screws
- Pencil
- Stud finder
Installation and Organization Process:
Start by removing all clothing and the existing rod from your closet. Using a stud finder, locate and mark wall studs. Measure and mark the desired height for your top rod (typically 80-84 inches from the floor) and bottom rod (approximately 40-42 inches from the floor).
Install mounting brackets into wall studs or using wall anchors, ensuring they’re level and properly secured. Place the rods into the brackets and test their stability. The top rod should be positioned about 84 inches high for shirts and jackets, while the bottom rod works best at around 42 inches for pants and shorter items.
Organization Tip:
For optimal functionality, organize clothing by category and length on each rod. Reserve the top rod for shirts, jackets, and shorter items, while utilizing the bottom rod for pants, skirts, and dresses.
Consider installing additional organizing accessories like shelf dividers or small drawers between the rods to maximize the space even further. Regularly assess and adjust the height of your rods based on your wardrobe needs and seasonal changes.
Utilize Clear Storage Boxes for Accessories
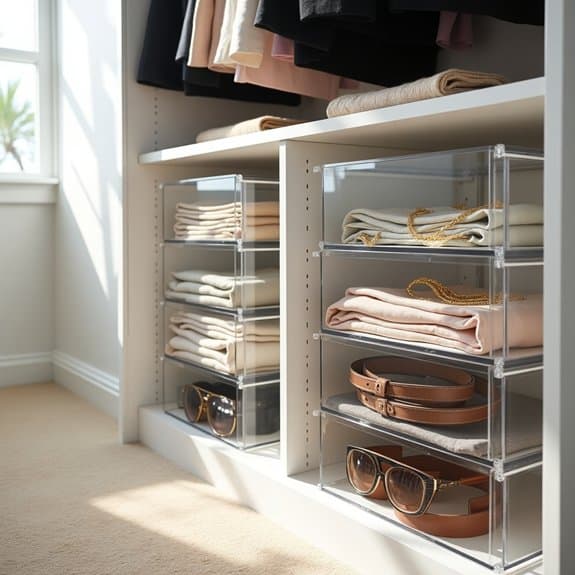
Organizing accessories in clear storage boxes transforms a cluttered closet into an efficient, boutique-like space. When accessories are visible and properly categorized, getting dressed becomes faster and more enjoyable, while protecting valuable items from dust and damage.
Clear storage containers create a systematic approach to organizing smaller items that often get lost or tangled. This method works particularly well for jewelry, scarves, belts, sunglasses, and other accessories that benefit from being both protected and visible at a glance.
Required Items:
- Clear plastic storage boxes in various sizes
- Drawer dividers or small compartment organizers
- Acid-free tissue paper
- Labels and label maker
- Soft microfiber cloths
- Silica gel packets
- Storage box stackers or shelving
- Anti-tarnish strips (for jewelry)
- Cotton bags (for delicate items)
Start by sorting accessories into categories (jewelry, scarves, belts, etc.). Select appropriately sized clear boxes for each category, ensuring they fit your closet space and shelving. For jewelry, use boxes with built-in compartments or add drawer organizers to prevent items from tangling.
Layer scarves and belts with tissue paper to prevent creasing and maintain shape. Place frequently used items in easily accessible containers at eye level.
For optimal preservation, add silica gel packets to prevent moisture damage, especially in boxes containing metal or leather items. Position anti-tarnish strips in jewelry containers to protect precious metals.
Label each box clearly on multiple sides for easy identification, and consider using a color-coding system for different categories.
To maintain this organization system, conduct monthly reviews to remove rarely used items and adjust categories as needed. Store seasonal accessories in separate boxes and rotate them as needed.
Clean boxes regularly with a microfiber cloth to maintain visibility, and replace any boxes that become cloudy or damaged over time.
Create Seasonal Rotation Zones

Organizing seasonal clothing through dedicated rotation zones is essential for maximizing closet space and maintaining an orderly wardrobe throughout the year. By separating clothes based on seasons, you eliminate the daily struggle of sifting through off-season items while accessing your current wardrobe needs.
Creating distinct seasonal zones not only protects out-of-season clothing from unnecessary wear but also helps preserve the quality of your garments through proper storage. This system allows you to quickly switch between seasons while maintaining a clear inventory of your clothing collection.
Required Items:
- Storage containers or boxes
- Garment bags
- Cedar blocks or lavender sachets
- Labels or tags
- Vacuum storage bags
- Clothing hangers
- Storage bench or under-bed containers
- Moisture absorbers
- Inventory checklist
- Dry cleaning bags
Start by completely emptying your closet and sorting clothes into four seasonal categories: spring, summer, fall, and winter. Once sorted, designate specific areas within your closet or storage space for each season, with the current season’s clothing receiving prime accessibility.
Store off-season items in protective containers or vacuum-sealed bags, clearly labeled with contents and season. Create a transition zone between seasons for items that overlap multiple seasons, such as light jackets or layering pieces.
Install adjustable rods or shelving to accommodate varying clothing lengths and bulk between seasons. Maintain approximately 70% of your closet space for the current season and 30% for transition pieces and the upcoming season’s preview items.
For optimal results, perform seasonal rotations two weeks before the weather changes. Inspect all garments for damage or needed repairs during rotation. Store delicate items in breathable garment bags and use cedar or lavender to protect against moths and maintain freshness.
Keep an inventory list of stored items to prevent unnecessary purchases and ensure nothing gets lost in the rotation process.
Maximize Vertical Space With Shelf Dividers
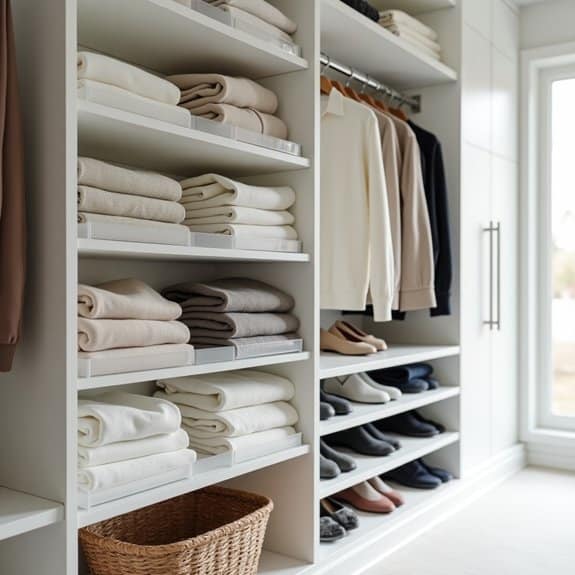
Making the most of vertical space in your closet is crucial for efficient storage and organization. Most closets have significant unused vertical space between shelves, leading to stacked items toppling over and becoming disorganized. Implementing shelf dividers transforms these challenging spaces into well-defined sections that keep items neat and easily accessible.
Proper shelf division can double or triple your storage capacity while maintaining order and visibility of your belongings. This organization method prevents clothes from slumping into each other and creates clear boundaries between different types of items, making it easier to maintain organization long-term.
Required Items:
- Shelf dividers (acrylic or wire)
- Measuring tape
- Pencil
- Level
- Cleaning supplies
- Labels or label maker
- Storage bins (optional)
- Shelf liner (optional)
Start by removing all items from your shelves and measuring the depth and thickness of each shelf to ensure compatible dividers. Install shelf dividers at strategic intervals – typically 12-15 inches apart for sweaters and pants, and 6-8 inches for smaller items like t-shirts or accessories.
Position dividers perpendicular to the shelf edge, ensuring they’re level and securely attached. Create sections based on clothing categories, such as sweaters, pants, or accessories, keeping similar items together.
For maximum effectiveness, arrange items vertically between dividers rather than stacking them horizontally. This method, known as file-folding, allows you to see all items at once and prevents items at the bottom from being forgotten or crushed. Consider using clear storage bins within divided sections for smaller items or accessories.
Additional Tip: Review your divided spaces every three months to adjust divider placement based on your changing storage needs and seasonal clothing rotation. Label each section clearly to maintain organization, and consider using shelf liner to prevent items from slipping between dividers.
When folding clothes, maintain consistent dimensions to ensure items fit properly within their designated spaces.
Add Door-Mounted Organizers
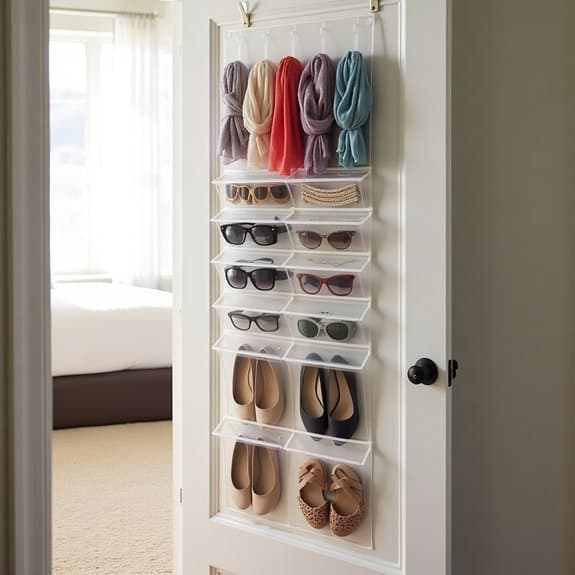
Door-mounted organizers transform unused vertical space into valuable storage real estate, maximizing every inch of your closet without taking up precious floor space.
These versatile organizing solutions can double or triple your storage capacity while keeping items visible and easily accessible.
Installing door-mounted organizers creates designated spaces for accessories, shoes, and small clothing items that might otherwise end up scattered throughout your closet.
This organization method is particularly beneficial for small closets or shared spaces where every square inch matters.
Required Items:
- Over-the-door hanging organizer
- Measuring tape
- Level
- Screwdriver
- Wall anchors (if mounting with screws)
- Command hooks or mounting hardware
- Door hooks
- Labels (optional)
- Storage bins or baskets (optional)
Select an over-the-door organizer that fits your door’s dimensions, measuring both height and width to ensure proper fit.
If using a screw-mounted system, mark mounting points and install anchors for additional stability.
For hook-based systems, position the hooks at the top of the door, ensuring they’re level and secure.
Arrange pockets or shelves according to the items you plan to store, grouping similar items together.
Consider weight distribution by placing heavier items in lower pockets or shelves to prevent sagging and maintain door function.
Keep frequently used items at eye level for easy access.
Position seasonal or less-used items in higher or lower compartments.
Sort items by category: shoes in bottom pockets, accessories in middle sections, and lightweight items like scarves or belts in upper compartments.
Label each section clearly if sharing the space with family members.
Additional Tips:
Regularly assess the weight load on your door-mounted organizer to prevent damage to your door.
Clean pockets or shelves periodically to prevent dust accumulation.
Consider using clear pockets or bins to easily identify contents.
Remove empty hangers or unused items promptly to maintain organization.
Review contents seasonally to ensure the organizer continues to meet your storage needs effectively.
Group Clothes by Color and Category
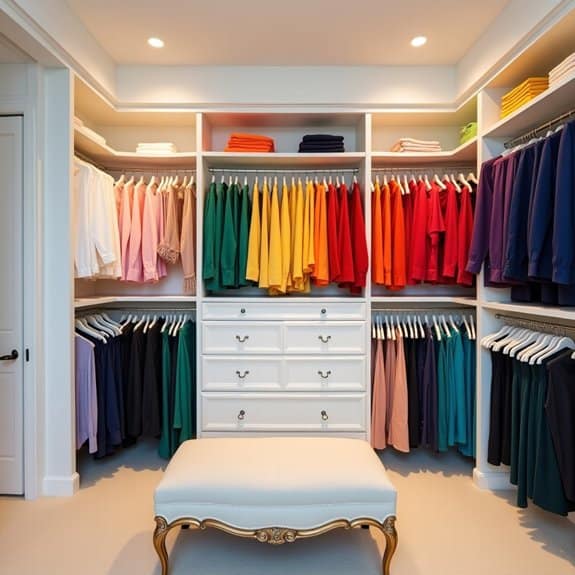
A well-organized closet sorted by both color and category transforms your daily routine from chaotic to seamless. When clothes are arranged systematically, you can quickly locate items, create outfits with ease, and maintain an organized space that reduces decision fatigue each morning.
Color coding combined with categorical organization creates a visually appealing and functional system that makes the most of your available closet space. This method not only streamlines your wardrobe but also helps you identify gaps in your clothing collection and prevents unnecessary duplicate purchases.
Tools Needed:
- Hangers (uniform style)
- Drawer dividers
- Storage bins
- Labels
- Measuring tape
- Garment rack (temporary)
- Notepad
- Clothing rod dividers
Start by removing all clothing items from your closet and sorting them into primary categories: pants, shirts, dresses, suits, and outerwear. Within each category, create subcategories such as formal wear, casual wear, and seasonal items.
Once categorized, arrange items by color following the rainbow spectrum (ROY G BIV): red, orange, yellow, green, blue, indigo, and violet. Place white items at the beginning and black items at the end of each category section.
For maximum visibility and accessibility, position frequently worn categories at eye level. Hang pants together, starting with formal wear and moving to casual items, maintaining the color progression within each subcategory. Apply the same principle to shirts, dresses, and other hanging items.
Use drawer dividers for folded items, maintaining both category and color organization.
Additional Organization Tips: Install LED strip lighting to distinguish colors accurately in dark closet corners. Use garment dividers or ribbons to separate different categories visually.
Maintain the system by returning items to their designated spots immediately after laundering, and conduct a quick reorganization every month to ensure the system stays intact. Consider photographing your organized sections to remember the proper arrangement when items return from the laundry.
Implement a Smart Shoe Storage Solution
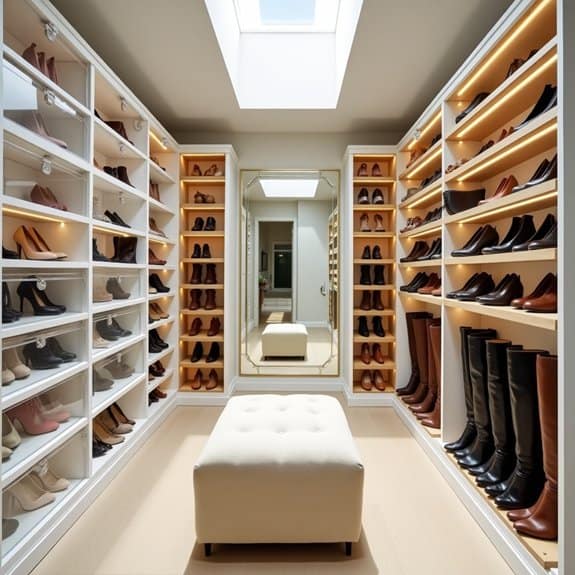
A well-organized shoe storage system serves as the foundation for an efficient closet space. Scattered shoes not only create visual clutter but also make it difficult to find the right pair when needed, leading to unnecessary stress and wasted time during daily routines.
Proper shoe organization maximizes vertical space, protects your footwear investment, and creates a boutique-like atmosphere in your closet. An organized shoe collection allows you to quickly assess your wardrobe options and maintain the quality of your shoes through proper storage methods.
Required Items:
- Shoe rack or shelving unit
- Clear plastic shoe boxes
- Label maker or labels
- Shoe organizer that hangs on door
- Dust bags for delicate shoes
- Shoe trees
- Measuring tape
- Cleaning supplies
- Storage bench (optional)
- Boot shapers (optional)
Start by removing all shoes from your closet and sorting them into categories: everyday wear, formal, seasonal, and rarely worn. Clean each pair thoroughly and assess for repairs or disposal.
Measure your available closet space, considering both floor space and vertical storage potential. Install your chosen storage solution, whether it’s a traditional shoe rack, over-door organizer, or built-in shelving. Place frequently worn shoes at eye level for easy access, while storing special occasion footwear in clear boxes on higher shelves.
For boots, use boot shapers to maintain their shape and store them upright or lay them flat if space is limited. Implement a system where formal shoes are stored in individual boxes with photos attached for easy identification.
Install hooks or specialized hangers for frequently worn shoes near the closet entrance for grab-and-go convenience. To maintain your newly organized shoe storage system, establish a one-in-one-out rule for new purchases, regularly clean and rotate seasonal footwear, and keep frequently worn shoes in easily accessible locations.
Consider installing motion-sensor lighting to illuminate dark corners, and place silica gel packets in stored shoes to prevent moisture damage. Review your collection quarterly to maintain organization and prevent clutter from returning.
Use Slim Velvet Hangers
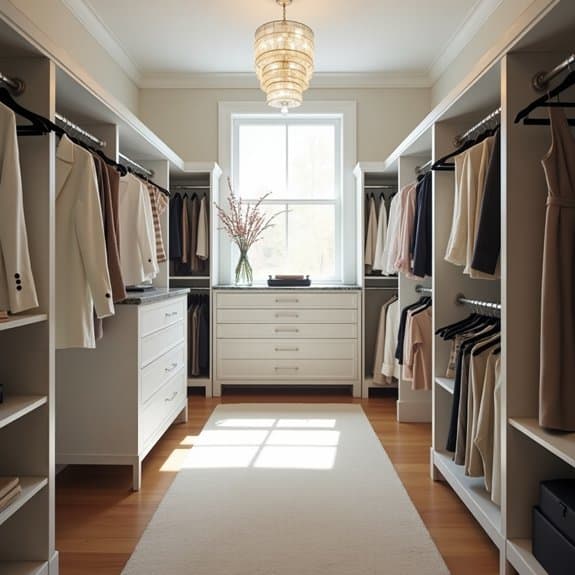
Upgrading to slim velvet hangers represents one of the most impactful changes you can make to transform your closet space. These modern hangers not only maximize vertical storage capacity by taking up significantly less space than traditional plastic or wooden hangers, but they also protect your clothing from damage and prevent items from sliding off.
The non-slip velvet surface and uniform appearance of these hangers create a sleek, boutique-worthy closet aesthetic while simultaneously increasing hanging space by up to 50%. This simple switch can dramatically improve your closet’s functionality and make your daily clothing selection process more efficient and enjoyable.
Required Items:
- Slim velvet hangers (calculate quantity based on wardrobe size)
- Large storage bin or box
- Donation bag
- Cleaning cloth
- Labels (optional)
- Garment sorting rack (optional)
Start by removing all hanging clothes from your closet and sorting them into categories (shirts, pants, dresses, etc.). Clean each hanger space thoroughly before beginning the transfer process.
Working with one category at a time, place each garment onto a new velvet hanger, ensuring the item is properly positioned and smoothed out. For heavier items like coats or suits, use specialized velvet hangers with extra support or reinforcement.
When hanging clothes back in the closet, maintain consistency by facing all hangers in the same direction. Group similar items together and consider color-coding within each category for optimal organization.
Take advantage of the space saved by the slim profile to create breathing room between garments, which helps prevent wrinkles and makes items easier to locate.
For maximum effectiveness, stick to one hanger style throughout your closet, and replace any damaged or worn hangers promptly. Consider using different colored velvet hangers to distinguish between seasons or family members sharing the same closet space.
Additionally, implement a reverse-hanger method by facing all hangers backward, then turning them the correct way only after wearing items – this helps identify rarely-worn pieces for future decluttering.
Install Pull-Out Belt and Tie Racks
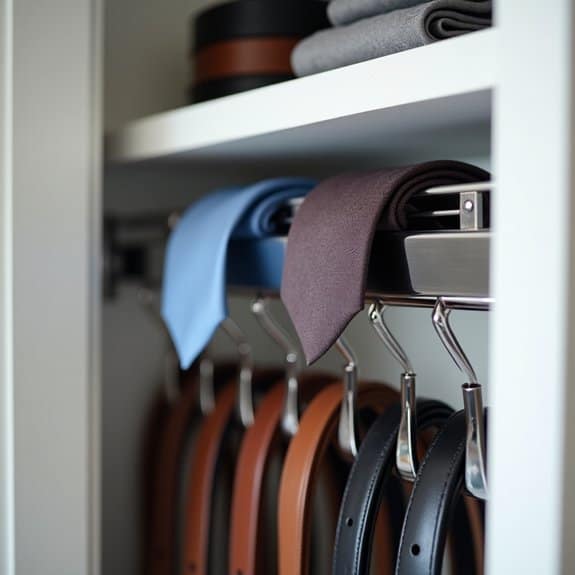
Organizing belts and ties is crucial for maintaining their shape and extending their lifespan. When accessories are tangled or crumpled, they can become damaged and wrinkled, making them less presentable and potentially requiring replacement. A well-organized belt and tie storage system not only preserves these accessories but also makes selecting and accessing them effortless.
Pull-out racks represent one of the most efficient solutions for organizing these accessories, as they maximize vertical space while keeping items visible and easily accessible. These racks slide smoothly in and out of the closet space, allowing you to view your entire collection at once while keeping everything neatly arranged and protected.
Required Items:
- Pull-out belt/tie rack mechanism
- Screwdriver
- Drill and drill bits
- Measuring tape
- Pencil
- Level
- Mounting screws
- Wall anchors
- Mounting brackets
- Installation template (if provided)
Installation and organization begins with measuring the intended mounting space, ensuring adequate clearance for the rack to extend fully. Mark the mounting points using a level to ensure proper alignment. Install wall anchors if mounting into drywall, or drill pilot holes if mounting directly into studs.
Attach the mounting brackets securely, then slide the rack mechanism into place. Once installed, arrange belts and ties by color, style, or frequency of use, spacing them evenly along the rack to prevent crowding. For belts, thread them through the designated loops, ensuring the buckles hang at the same height. Ties should be draped evenly over the bars, maintaining consistent spacing to prevent wrinkles.
To maximize the effectiveness of your pull-out rack system, consider implementing a one-in-one-out rule to prevent overcrowding. Regularly inspect the mounting hardware to ensure it remains secure, and periodically clean both the mechanism and the accessories to maintain their condition.
Position frequently used items in the most accessible spots, and consider adding small labels or dividers to create sections for different styles or occasions.
Add Motion-Sensor Lighting
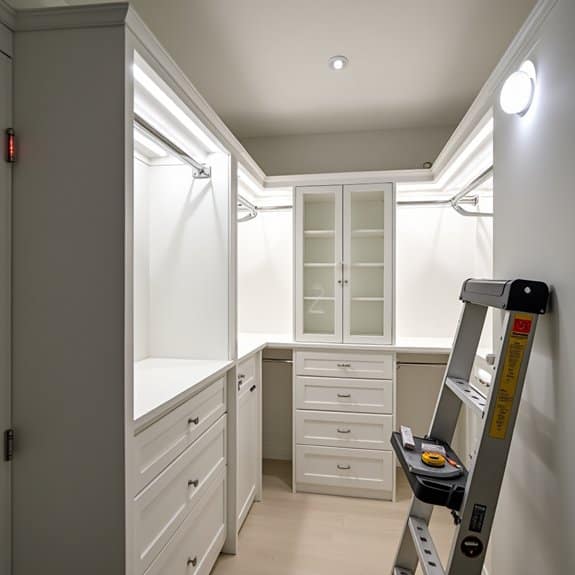
Proper lighting in closet spaces is essential for efficiently locating and organizing clothing, accessories, and personal items. Traditional closet lighting often requires manually switching lights on and off, which can be inconvenient when hands are full of clothes or when rushing to get ready in the morning.
Motion-sensor lighting provides an automated solution that enhances closet functionality while potentially reducing energy costs. These lights activate when movement is detected and automatically turn off after a period of inactivity, ensuring the closet is well-lit only when needed and preventing lights from being accidentally left on for extended periods.
Required Items:
- Battery-operated or hardwired motion sensor lights
- Mounting brackets or adhesive strips
- Screwdriver and screws (if mounting)
- Wire stripper (for hardwired installation)
- Electrical tape
- Level
- Measuring tape
- Pencil
- Ladder or step stool
Installation and organization begins with determining optimal light placement – typically near the closet entrance and in dark corners. For battery-operated sensors, attach mounting brackets or adhesive strips to chosen locations, ensuring proper alignment using the level. Position lights to provide maximum coverage of shelving and hanging areas.
For hardwired installations, turn off power at the circuit breaker before connecting wires according to manufacturer instructions, securing all connections with electrical tape and mounting hardware.
After installation, test the sensor‘s range of motion and adjust sensitivity settings if available. Configure the auto-shutoff timer to an appropriate duration – typically 1-3 minutes for closet spaces. Consider installing multiple units for larger closets to eliminate dark spots and ensure comprehensive coverage.
To maximize effectiveness, regularly dust sensor lenses and check battery levels every three months. Position frequently accessed items within the sensor’s primary detection zone to ensure reliable activation.
Keep boxes and hanging clothes from blocking the sensor’s field of view, and consider marking the sensor’s detection zone with subtle indicators to help maintain optimal functionality over time.
Create a Designated Folding Station
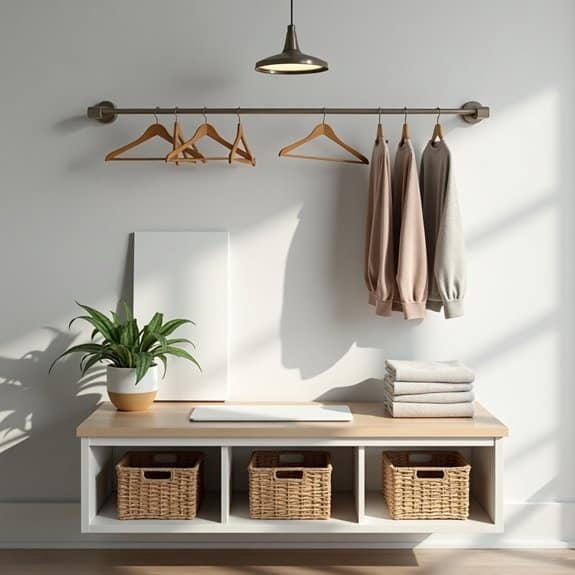
A dedicated folding station transforms the often tedious task of laundry management into a streamlined, efficient process. Having a designated space for folding clothes not only helps maintain organization but also ensures garments are properly cared for and stored, extending their lifespan and keeping them wrinkle-free.
Creating a folding station within or near your closet serves as a transitional space between laundry and storage, making it easier to maintain an organized wardrobe. This dedicated area becomes a crucial part of your clothing care routine, preventing the common habit of leaving clothes in laundry baskets or creating messy piles on furniture.
Required Items:
- Sturdy table or counter surface
- Non-slip mat
- Folding board
- Storage bins or baskets
- Hanging rod or hooks
- Good lighting
- Measuring tape
- Label maker
- Drawer dividers
- Small trash bin
Select a flat surface at a comfortable height, ideally between 36-38 inches, and ensure adequate lighting above the area. Install a hanging rod nearby for items that need immediate hanging. Place your folding board at the center of the surface and arrange storage bins within arm’s reach for sorted items.
Create designated zones on your folding surface: one for items to be folded, another for completed items, and a space for items requiring special care or repairs. Position your folding station near your closet’s main storage areas to minimize the distance between folding and putting away clothes.
Install hooks or a small rod above the folding station for hanging delicate items or pieces that need to air dry. Consider adding a small drawer or container beneath the surface for storing folding tools, lint rollers, and other clothing care items.
Additional Tips: Maximize efficiency by establishing a consistent folding routine and maintaining clear pathways between your folding station and storage areas. Add a full-length mirror nearby to quickly inspect garments, and consider installing task lighting to ensure proper visibility.
Keep a small notepad at the station to track items needing repairs or special care, and regularly clean and declutter the surface to maintain an efficient workspace.
Install Custom Drawer Organizers
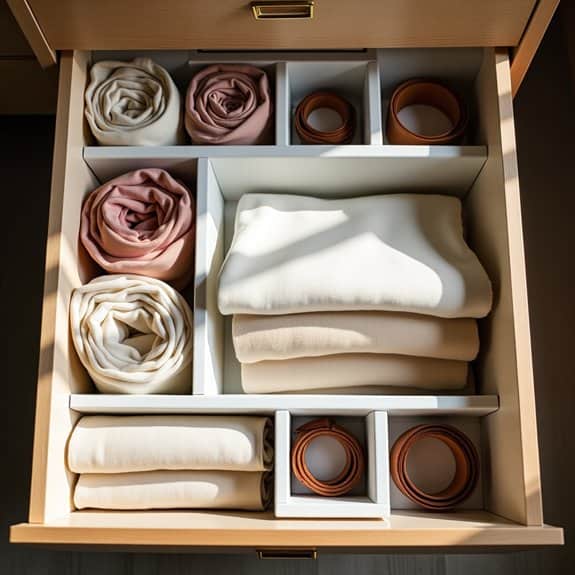
A well-organized drawer system transforms chaotic storage spaces into efficient, easy-to-navigate compartments that streamline your daily routine.
Custom drawer organizers allow you to maximize every inch of drawer space while keeping items sorted, visible, and easily accessible.
Custom drawer organizers are particularly valuable for storing smaller items like accessories, undergarments, and folded clothing that tend to become jumbled in standard drawers.
These organizational tools create designated spaces for specific items, preventing the frustrating cycle of drawer disorganization that often occurs with regular use.
Required Items:
- Measuring tape
- Custom drawer organizer inserts
- Drawer liner (non-slip)
- Scissors
- Pencil and paper
- Cleaning supplies
- Labels (optional)
- Small containers or bins (optional)
Begin by removing all items from the drawer and thoroughly cleaning the interior.
Measure the drawer’s dimensions, including depth, width, and height, accounting for any drawer slides or hardware that might affect the fit.
Select appropriate drawer organizers based on these measurements and the types of items you plan to store.
Consider expandable organizers or adjustable dividers for maximum flexibility.
Install the non-slip liner first, cutting it to fit precisely within the drawer bottom.
Position your chosen organizers, ensuring they fit snugly and create practical compartments for your items.
Sort belongings by category and assign specific sections for each group.
Place frequently used items in easily accessible spots near the front of the drawer.
Additional Tip: Review your drawer organization system every three months, adjusting compartment sizes and layouts based on changing needs and seasons.
Remove items that haven’t been used in six months to maintain optimal organization and prevent overcrowding.
Consider using clear containers within larger compartments to further separate smaller items and maintain order.
Use Space-Saving Vacuum Storage Bags
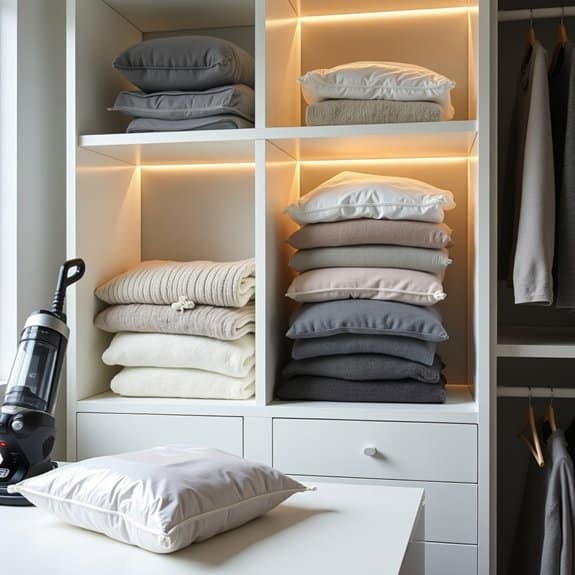
Space-saving vacuum storage bags represent one of the most efficient solutions for maximizing closet space while protecting seasonal clothing and bulky items.
These innovative storage solutions can reduce the volume of soft goods by up to 75%, creating valuable additional space in your bedroom closet while keeping items clean and protected from moisture, dust, and insects.
For anyone dealing with limited closet space, vacuum storage bags offer an ideal way to store out-of-season items like winter coats, heavy blankets, and extra bedding.
The vacuum-sealed environment not only compresses items to a fraction of their original size but also provides an airtight barrier that preserves fabrics and prevents odors from developing during long-term storage.
Required Items:
- Vacuum storage bags (various sizes)
- Vacuum cleaner with hose attachment
- Clean, dry items for storage
- Labels and marker
- Storage containers or boxes (optional)
- Dryer sheets (optional)
- Inventory list
Sort your items by category and season, ensuring everything is clean and completely dry before storage.
Place similar items together in appropriately sized bags, being careful not to overfill them.
Smooth out any wrinkles and arrange items as flat as possible within the bag.
Once filled, seal the bag’s zipper closure completely, attach your vacuum hose to the valve, and slowly remove the air until the bag is fully compressed.
Double-check the seal and store the compressed bags in your chosen location.
For optimal organization and ease of access, label each bag clearly with its contents and the date of storage.
Consider creating an inventory list to track what’s stored in each bag.
To prevent any potential moisture issues, store bags off the floor and away from external walls.
While vacuum bags are excellent for storing seasonal clothing and bedding, avoid using them for delicate items, leather, or fur, as these materials need to breathe and maintain their natural shape.
Add a Rolling Storage Cart
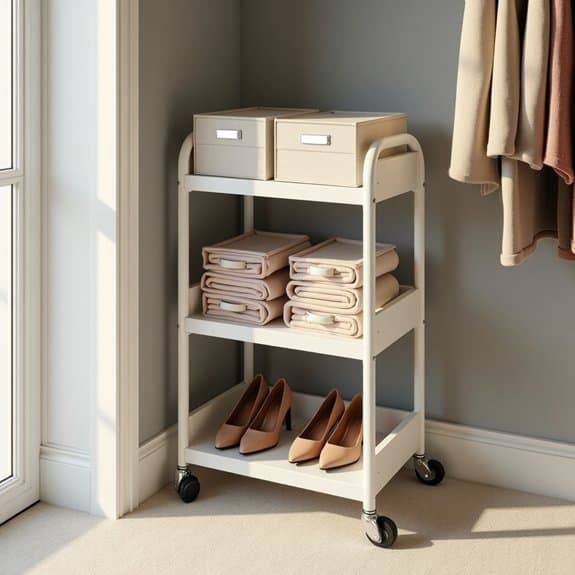
A rolling storage cart represents one of the most versatile and practical solutions for maximizing closet space while maintaining easy access to frequently used items. This mobile storage solution transforms unused floor space into functional storage, allowing you to efficiently organize everything from shoes and accessories to folded clothing and seasonal items.
The beauty of a rolling storage cart lies in its adaptability and convenience. Unlike fixed storage solutions, these carts can be easily moved when cleaning or reorganizing, and they can be repositioned to accommodate changing storage needs throughout the year. This flexibility makes them particularly valuable in smaller closets where space optimization is crucial.
Required Items:
- Rolling storage cart with multiple tiers
- Storage bins or baskets
- Labels or label maker
- Drawer liners (optional)
- Dividers (optional)
- Measuring tape
- Assembly tools (if cart requires assembly)
Select a rolling cart that fits your closet’s dimensions, leaving enough clearance for smooth movement. Assemble the cart according to manufacturer instructions, ensuring all wheels are properly attached and moving freely.
Before loading items, measure the space between shelves to determine optimal placement for different categories of items. Start loading from the bottom up, placing heavier items on lower shelves for stability.
Group similar items together and assign specific shelves or drawers for each category. Use storage bins or baskets to contain smaller items and prevent them from falling during cart movement. Label each container clearly to maintain organization.
Consider using drawer liners to prevent items from sliding and protect the cart’s surfaces. To maximize the effectiveness of your rolling storage cart, regularly assess and rotate items based on seasonal use. Position frequently accessed items at eye level and ensure the cart’s pathway remains clear for easy movement.
Clean the wheels periodically to maintain smooth operation, and adjust shelf heights as needed to accommodate changing storage requirements. Consider using the cart’s top surface as additional storage space or as a temporary staging area when organizing other parts of your closet.
Mount Hooks for Frequently Used Items
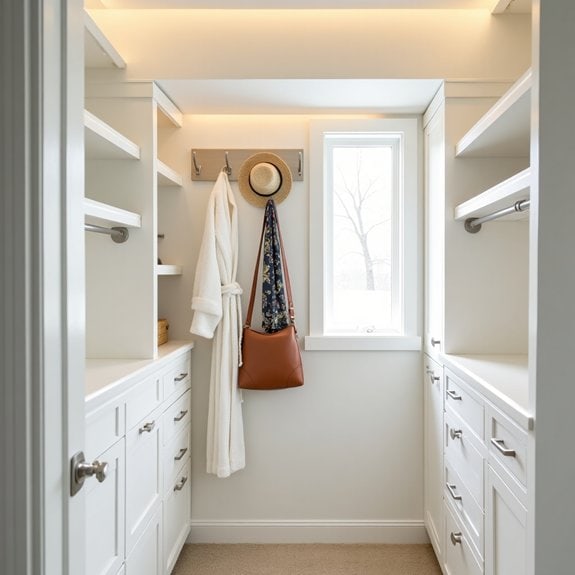
Mounting hooks in your closet creates an easily accessible storage solution for daily-use items, preventing clutter and saving valuable time during your daily routine. Instead of digging through drawers or searching for misplaced items, strategically placed hooks keep everything visible and within arm’s reach.
Proper hook installation transforms unused wall and door space into functional storage areas, perfect for hanging robes, towels, handbags, belts, and accessories. This organization method not only maximizes vertical space but also helps maintain the condition of your items by preventing wrinkles and maintaining their shape.
Required Items:
- Wall-mounted hooks or over-the-door hooks
- Drill and drill bits
- Screwdriver
- Wall anchors
- Level
- Measuring tape
- Pencil
- Stud finder
- Hammer
- Safety glasses
Select appropriate mounting locations by measuring the available wall space and door areas in your closet. For wall-mounted hooks, use a stud finder to locate stable mounting points, marking them with a pencil. Install wall anchors if mounting between studs. Space hooks at least 6-8 inches apart to prevent overcrowding.
For over-the-door hooks, measure the door thickness to ensure proper fit, and position them at convenient heights for easy access. Mount hooks securely using appropriate screws and anchors, ensuring they can support the weight of intended items.
Additional Tips: Categorize items by frequency of use, keeping the most-used items at eye level. Consider using hooks of different sizes and styles for various items – smaller hooks for lightweight accessories and heavy-duty hooks for coats or bags. Label hooks or zones to maintain organization and prevent confusion.
Regularly assess the functionality of your hook placement and adjust as needed to optimize your daily routine.

