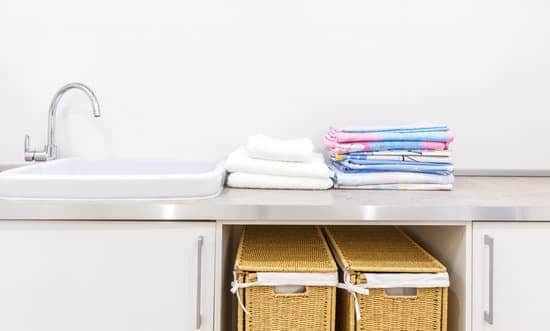
Are you looking to add some much-needed storage space to your laundry room? Installing wall cabinets is a practical and efficient solution. In this step-by-step guide, we will show you how to measure, plan, gather the necessary tools and materials, prepare your wall surface, and install the cabinets safely. By following these instructions, you’ll have a well-organized laundry room in no time. So let’s get started on transforming your space into a functional and tidy oasis!
Measuring and Planning for Your Wall Cabinets
You’ll need to measure the wall and plan out where you want to install your cabinets in the laundry room. Proper cabinet placement is important for both functionality and safety. Start by measuring the height of the room, taking into account any obstructions such as light fixtures or vents. Next, determine how much space you have available for your cabinets. Consider leaving at least 18 inches between the top of your countertop and the bottom of your wall cabinets for easy access. When choosing the right cabinet size, consider your storage needs and the dimensions of your laundry room. Remember to leave enough space around doorways and windows for proper clearance. Taking accurate measurements and planning ahead will ensure a successful installation that meets both your practical needs and safety requirements.
Gathering the Necessary Tools and Materials
To get started, make sure you have all the required tools and materials for the job. Here are a few items you’ll need:
- Power drill: This will be essential for drilling pilot holes and attaching the cabinets securely to the wall.
- Level: A level will help ensure that your cabinets are installed straight and level, preventing any issues down the line.
- Measuring tape: Accurate measurements are crucial when planning where to hang your cabinets, so a measuring tape is a must-have tool.
- Safety goggles: Protecting your eyes is important when working with power tools or handling materials.
When choosing the right cabinet style, consider both functionality and aesthetics. Look for cabinets that offer enough storage space for your laundry room needs while also complementing the overall design of the room. Additionally, choose hardware that is durable and easy to use. Opt for quality handles or knobs that match your cabinet style and provide a comfortable grip.
Preparing the Wall Surface for Installation
Before beginning the installation process, it’s important to ensure that the wall surface is properly prepared. This step is crucial for a safe and successful installation of your wall cabinets in the laundry room. Start by inspecting the wall for any cracks or holes. If you find any, make sure to patch them up using a suitable filler or spackling compound. Next, give the wall a thorough cleaning to remove any dirt or grease buildup that might interfere with adhesion. Once cleaned, allow the wall surface to dry completely before proceeding.
Another important consideration when preparing the wall surface is choosing the right paint color. While this may seem like an aesthetic choice, it’s actually essential for maintaining a cohesive look in your laundry room. Take into account factors such as lighting and existing colors in the space when selecting a paint color that complements your cabinets and enhances the overall ambiance of your laundry room. By properly preparing and choosing the right paint color for your wall surface, you’ll be one step closer to achieving a beautiful and functional laundry room with newly installed cabinets.
Installing the Wall Cabinets
Once the wall surface is properly prepared and the paint color is chosen, it’s time to begin installing the cabinets. Follow these steps for a safe and successful installation:
- Cabinet Placement: Measure and mark where you want your cabinets to be placed on the wall. Use a level to ensure they are straight.
- Cabinet Assembly: Start by assembling the cabinets according to the manufacturer’s instructions. Make sure all screws and hardware are secure.
- Mounting the Cabinets: Have someone assist you in lifting each cabinet onto its designated spot on the wall. Use sturdy screws or brackets to securely attach them to the studs behind the wall surface.
Remember, safety should always come first! Wear protective goggles when using power tools, and use caution when handling heavy materials. Double check that each cabinet is level before moving on to the next one. With careful attention to detail, you’ll have beautiful and functional wall cabinets in your laundry room in no time!
Finishing Touches and Organization Tips
Now that the cabinets are securely mounted, it’s time to add the finishing touches and get organized in your newly renovated space. Safety should always be a priority when working in your laundry room. When choosing the right paint color for your cabinets, opt for one that is low in volatile organic compounds (VOCs) to ensure good indoor air quality. Look for labels such as “low VOC” or “zero VOC” to make an eco-friendly choice. To maximize organization, utilize storage bins to keep items neatly sorted. Clear plastic bins work well as they allow you to easily see what’s inside. Label each bin with its contents for quick access and easy identification. Keep heavy items on lower shelves and lighter ones on higher shelves to prevent accidents. With these simple steps, you can create a safe and organized laundry room that meets all your needs.
Conclusion
Now that you have successfully installed your wall cabinets in the laundry room, it’s time to step back and admire your handy work. By following the steps outlined in this article, you were able to measure and plan, gather necessary tools, prepare the wall surface, and install the cabinets with ease. Don’t forget to add some finishing touches and use organization tips to make your laundry room functional and visually appealing. Sit back and enjoy the newfound convenience of having wall cabinets in your laundry room!

