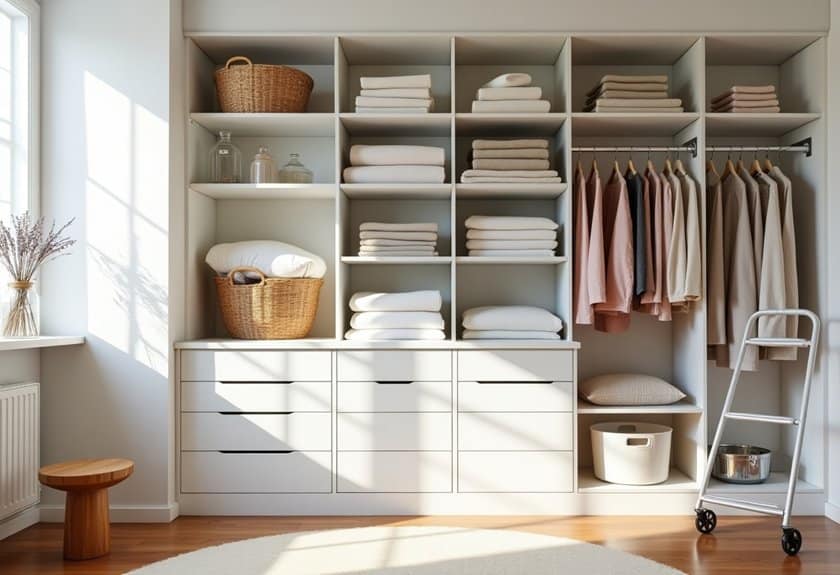
You’ve probably experienced that overwhelming feeling when you open your storage room door and face a mountain of clutter! As someone who’s transformed countless chaotic spaces into organized havens, I can tell you that tidying up doesn’t have to be a nightmare. Whether you’re dealing with seasonal clothing, holiday decorations, or those “just in case” items we all keep around, there’s a smart solution waiting to revolutionize your space. Let’s explore how you can turn your storage nightmare into an organizational dream.

Declutter and Sort Before Organizing
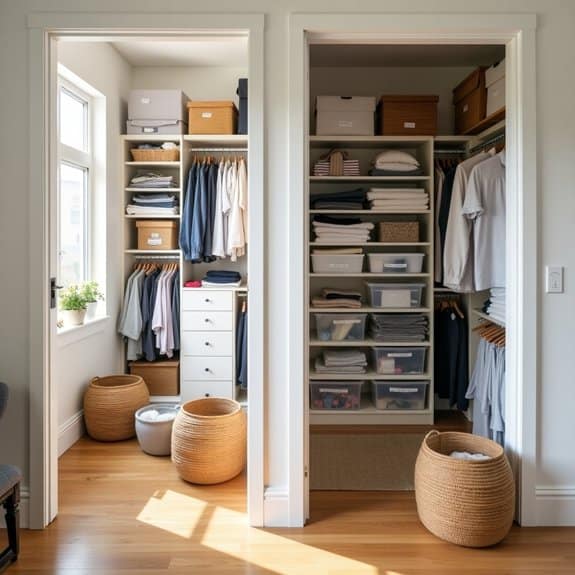
A cluttered storage room can quickly become an overwhelming maze of forgotten items and wasted space. The key to successful storage room organization lies in the initial phase of decluttering and sorting, which creates a clean slate for implementing an effective organizational system.
Taking the time to properly declutter and sort items before organizing saves considerable time and effort in the long run. This crucial first step prevents you from organizing items you don’t need and helps identify exactly what storage solutions will work best for your specific situation.
Required Items:
- Large boxes or bins for sorting
- Trash bags
- Labels or marker
- Cleaning supplies
- Notepad and pen
- Timer (optional)
- Gloves
- Storage containers
- Sorting bins
Start by removing everything from the storage room and creating four distinct sorting areas: keep, donate, sell, and trash. Work through items one by one, making quick but deliberate decisions about each piece.
Sort items in the “keep” pile into categories such as seasonal decorations, tools, sporting equipment, or paperwork. This categorization will help determine the type and size of storage solutions needed.
Once sorting is complete, thoroughly clean the empty storage room before returning any items. Review the “keep” items once more to ensure nothing unnecessary made it through the first round. Group similar items together and count them to determine exactly how many storage containers or shelving units you’ll need.
Additional Tips: Set a timer for each sorting session to maintain focus and prevent decision fatigue. Take photos of sentimental items you’re struggling to part with instead of keeping the physical objects.
Create an inventory list of kept items to prevent future duplicate purchases and maintain organization long-term. Consider implementing a “one-in-one-out” rule moving forward to prevent clutter from accumulating again.
Maximize Vertical Space With Adjustable Shelving
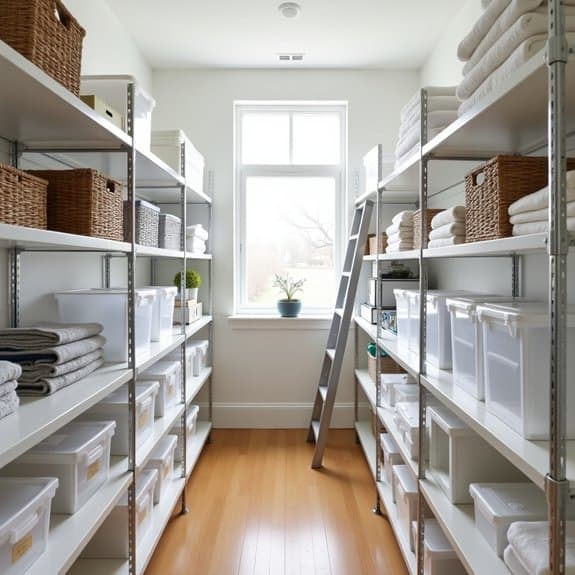
Making the most of vertical space in your storage room is crucial for maximizing storage capacity while maintaining an organized and accessible environment. Most storage rooms have untapped potential in their vertical space, with valuable square footage going unused from floor to ceiling.
Adjustable shelving systems provide the flexibility needed to accommodate items of various sizes while allowing for future modifications as storage needs change. This versatile solution can double or triple your storage capacity by utilizing wall space efficiently and creating customized storage zones for different categories of items.
Required Items:
- Adjustable shelving units
- Stud finder
- Level
- Drill and drill bits
- Wall anchors
- Screwdriver
- Measuring tape
- Pencil
- Safety goggles
- Work gloves
- Step ladder
Start by measuring your wall space and mapping out the placement of shelving units, ensuring they align with wall studs for maximum stability. Using a stud finder, mark stud locations and determine optimal shelf placement.
Install the vertical tracks first, securing them firmly to the wall studs with appropriate screws and anchors. Once tracks are installed, add horizontal shelf brackets at desired heights, ensuring they’re level before clicking them into place. Finally, place shelf platforms onto the brackets, confirming they’re fully seated and stable.
For maximum efficiency, position frequently accessed items between waist and shoulder height, with heavier items on lower shelves and lighter, less-used items on upper shelves. Create zones based on usage patterns, keeping similar items together and maintaining clear labels for easy identification.
Additional Tip: Consider installing secondary shelving units perpendicular to the main wall units in corners or along longer walls to create U-shaped storage configurations. This arrangement maximizes corner spaces and creates natural organization zones while maintaining easy access to stored items.
Leave adequate aisle space between shelving units for safe and comfortable navigation.
Implement a Color-Coding System
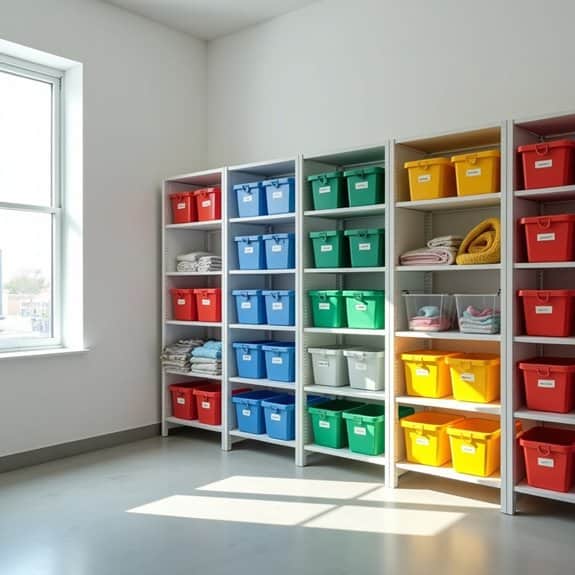
A well-organized storage room can save countless hours of searching and reduce frustration when trying to locate specific items. Color-coding stands out as one of the most effective methods for creating an intuitive organization system that anyone in the household can understand and maintain.
Color-coding transforms a chaotic storage space into a visually organized system where items can be quickly identified and retrieved. This method works particularly well for shared spaces, seasonal items, and multi-category storage, as colors create instant visual cues that transcend written labels and complex organizational schemes.
Required Items:
- Colored storage bins
- Colored labels or tape
- Color-coding chart
- Permanent markers
- Label maker
- Storage shelf dividers
- Color stickers
- Clear plastic bins (optional)
Choose 4-6 main colors and assign each to specific categories of items. For example, red for holiday decorations, blue for winter items, green for gardening supplies, and yellow for cleaning products. Apply colored labels or tape to existing storage containers, or transfer items into color-coordinated bins.
Create a master chart showing the color-coding system and mount it near the storage room entrance for quick reference.
For maximum effectiveness, maintain consistency throughout the entire space. Use the same shade of each color to avoid confusion, and apply color-coding to both the containers and the shelving areas where these items belong. Consider using clear bins with colored labels when you need to see the contents while maintaining the color system.
Additional Tips: Incorporate secondary colors for subcategories within main groups, such as light blue for winter clothing and dark blue for winter sports equipment. Regularly review and adjust the color system as storage needs change, and always keep spare colored labels on hand for new items.
Take photos of your color-coding system to help other household members learn and maintain the organization scheme.
Use Clear Storage Containers for Visibility
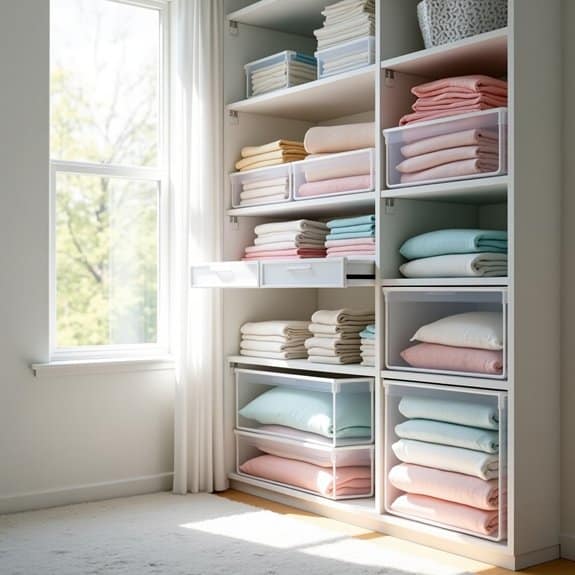
Implementing clear storage containers in your storage room is a fundamental step toward creating an organized and efficient space. The ability to see contents without opening containers saves valuable time and reduces the frustration of searching through multiple boxes to find specific items.
Clear containers revolutionize storage organization by eliminating the need for extensive labeling and allowing immediate visual identification of stored items. This visibility helps maintain organization long-term, as items are more likely to be returned to their designated containers when their contents are easily identifiable.
Required Items:
- Clear plastic storage containers (various sizes)
- Labels and marker
- Measuring tape
- Shelf liner (optional)
- Container dividers (optional)
- Level
- Inventory list template
- Cleaning supplies
Start by sorting items into categories and measuring your storage space to determine appropriate container sizes. Select clear containers that stack efficiently and fit your shelving units or floor space. Choose containers with secure, well-fitting lids to protect contents from dust and moisture.
When filling containers, place frequently used items toward the front and ensure similar items are grouped together. For optimal organization, position containers with labels facing forward and maintain appropriate spacing between them for easy access. Stack containers no more than three high for safety and accessibility.
Consider using drawer-style containers for smaller items and cube-shaped ones for maximum space efficiency on shelves.
Additional Tips: Incorporate silica gel packets in containers storing moisture-sensitive items, and periodically review container contents to prevent overcrowding. Consider taking photos of container contents and attaching them alongside labels for even quicker identification.
Clean containers regularly to maintain visibility, and replace any containers that become cloudy or damaged over time.
Install Door-Mounted Organizers

Door-mounted organizers transform unused door space into valuable storage real estate, maximizing every inch of your storage room. These versatile systems can hold a wide variety of items, from cleaning supplies to tools, while keeping them easily accessible and visible.
By utilizing door space, you free up valuable shelf and floor space while creating designated spots for smaller items that might otherwise get lost in the depths of your storage room. Door-mounted organizers also make it easier to maintain organization long-term, as items have a clear “home” and are simple to return to their proper place.
Required Items:
- Over-the-door organizer system
- Measuring tape
- Pencil
- Level
- Screwdriver
- Wall anchors
- Screws
- Drill (optional)
- Command strips (optional for non-permanent installation)
- Door bumpers or felt pads
Start by measuring your door’s dimensions, including width, height, and thickness, to ensure your chosen organizer will fit properly. Remove the door from its hinges if necessary, and clean the surface thoroughly. Mark the mounting points for your organizer, using a level to ensure straight alignment.
For screw-mounted systems, pre-drill holes if needed and insert wall anchors for added stability. Attach the mounting brackets according to the manufacturer’s instructions, typically starting at the top and working down. If using an over-the-door system, simply hang it on the door and adjust the height as needed.
Install door bumpers or felt pads where the organizer might contact the door frame to prevent damage.
To maximize the effectiveness of your door-mounted organizer, group similar items together and place frequently used items at eye level. Consider using clear pouches or bins within the organizer to contain smaller items, and label each section to maintain organization.
Regularly assess the weight distribution to prevent strain on the door and ensure the organizer remains securely mounted.
Create Designated Zones by Category
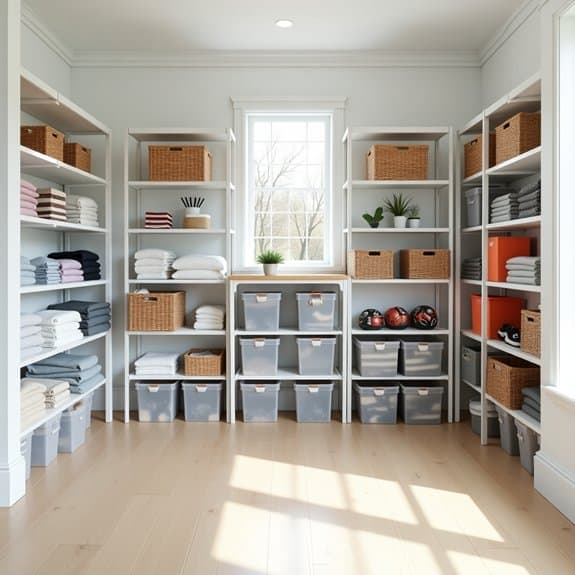
Organizing storage rooms by designated zones is a fundamental principle that transforms chaotic spaces into efficient, accessible areas. When items are grouped by category, finding and retrieving what you need becomes intuitive, saving countless hours of searching and preventing duplicate purchases.
Creating category-specific zones not only maximizes space utilization but also helps maintain organization long-term. This system makes it easier to track inventory, identify when items need replenishing, and quickly return things to their proper place after use.
Required Items:
- Labels or label maker
- Storage bins or containers
- Shelving units
- Measuring tape
- Notepad and pen
- Marker
- Clear plastic bags
- Dust cloths
- Basic cleaning supplies
Start by emptying the storage room completely and measuring the available space. Draw a rough floor plan, considering natural traffic flow and accessibility. Group similar items together in broad categories such as holiday decorations, sporting equipment, tools, household supplies, and seasonal items.
Assign specific zones based on how frequently items are accessed, keeping commonly used items at eye level and within easy reach. Create clear boundaries between zones using shelving units or floor markings. Position heavy items at waist height or lower to prevent strain, and store delicate or valuable items away from potential hazards like water pipes or direct sunlight.
Install appropriate storage solutions for each zone – pegboards for tools, airtight containers for fabric items, and sturdy shelves for boxes. For optimal organization maintenance, implement a labeling system that clearly identifies each zone and its contents.
Consider using color-coding or numbering systems for quick visual reference. Keep a master inventory list noting the location of items within each zone, and update it regularly as items are added or removed. This systematic approach ensures the designated zones remain functional and organized for the long term.
Utilize Under-Bed Storage Solutions
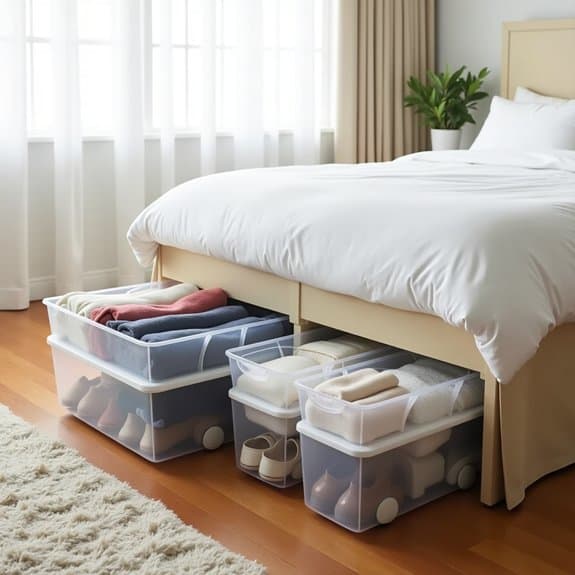
Under-bed storage represents one of the most underutilized spaces in most homes, offering valuable square footage for items that aren’t needed daily. This often-overlooked area can store seasonal clothing, extra bedding, shoes, and various other items while keeping them protected from dust and easily accessible when needed.
Making the most of under-bed space can significantly reduce clutter in closets and storage rooms, creating a more organized living environment. Proper utilization of this space can also help maintain better air circulation in main storage areas and make cleaning more manageable by keeping items off the floor in other areas of the home.
Required Items:
- Under-bed storage containers with wheels
- Storage bags with vacuum seal capability
- Bed risers (if needed)
- Measuring tape
- Labels and marker
- Dust cover or bed skirt
- Clear plastic bins
- Storage dividers
Start by measuring the available space under your bed, including height, width, and depth. Remove everything from under the bed and thoroughly clean the area. If needed, install bed risers to create additional height clearance. Select appropriate storage containers that maximize the available space while allowing easy access.
Sort items into categories based on frequency of use and season. Place frequently accessed items toward the front of the bed where they’re easier to reach. Use vacuum storage bags for soft items like clothing and bedding to maximize space. Label all containers clearly on multiple sides for easy identification.
Arrange containers methodically, creating clear paths for sliding them in and out. Consider using clear containers for better visibility or create a detailed inventory map of what’s stored where. Install a bed skirt or dust cover to maintain a neat appearance while protecting stored items from dust.
Additional Tips: Implement a rotation system for seasonal items, bringing them to the front when needed and storing off-season items at the back. Consider using container dividers to keep smaller items organized within larger bins. Review stored items every six months to ensure everything remains relevant and necessary, and maintain a clean, dust-free environment by regularly wiping down containers and vacuuming the space.
Invest in Space-Saving Hangers
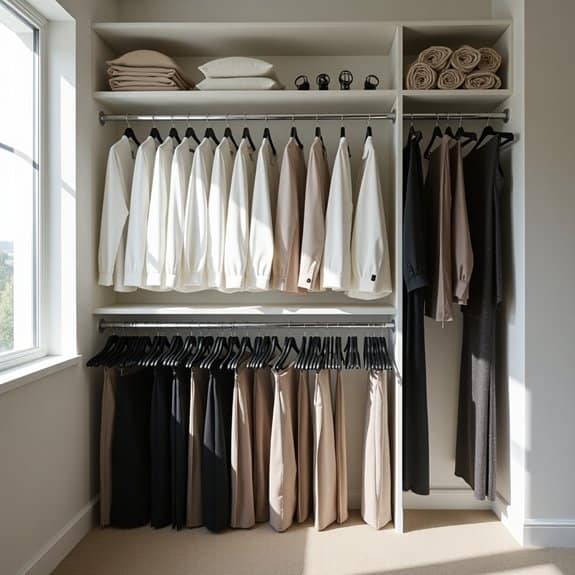
Maximizing storage space is crucial in any home, and one of the most effective ways to achieve this is through proper hanger organization. Traditional hangers can take up excessive space and lead to cluttered, inefficient closets and storage areas, making it difficult to find and access clothing and other hanging items.
Space-saving hangers represent a smart investment that can dramatically transform your storage capabilities. These innovative solutions can reduce hanging space by up to 50%, while also protecting your garments and maintaining their shape. By implementing a systematic approach to hanger organization, you can create a more functional and visually appealing storage space.
Required Items:
- Slim velvet hangers
- Cascading hanger hooks
- Multi-tiered pants hangers
- Vertical hanging organizers
- Storage boxes for old hangers
- Labels or markers
- Measuring tape
- Donation bag
Start by removing all items from their current hangers and sorting them by category (shirts, pants, dresses, etc.). Measure your hanging space to determine how many space-saving hangers you’ll need. Replace old hangers with slim velvet hangers, ensuring all hangers match for uniformity.
For pants and skirts, utilize multi-tiered hangers that can hold multiple items vertically. Install cascading hooks to create additional vertical storage opportunities, maximizing the use of available space.
Group similar items together on the new hangers, arranging them by category and color. This systematic approach not only saves space but also creates a visually organized appearance that makes items easier to locate. Consider using vertical hanging organizers for accessories or smaller items that would benefit from hanging storage.
To maintain the effectiveness of your space-saving hanger system, regularly assess and declutter hanging items. Remove any empty hangers immediately and store them in a designated box, or donate them if not needed.
Avoid overcrowding by maintaining a one-in-one-out policy for new clothing items, and periodically review your hanging system to ensure it continues to meet your storage needs efficiently.
Add Labels to Everything
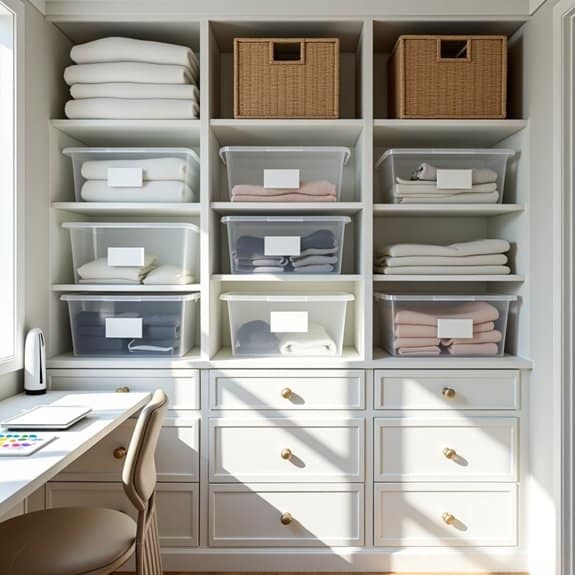
Labeling is the cornerstone of any well-organized storage space, serving as a visual roadmap that helps maintain order long after the initial organization is complete. Without proper labeling, even the most meticulously arranged storage room can quickly descend into chaos as items get misplaced and organizational systems break down.
By implementing a comprehensive labeling system, you create a foolproof method for identifying contents, locations, and categories at a glance. This not only saves time when searching for specific items but also makes it easier for other household members to maintain the organizational system you’ve established.
Required Items:
- Label maker
- Clear plastic label holders
- Adhesive labels
- Permanent markers
- Clear packing tape
- Card stock or paper
- Scissors
- Measuring tape
- Container tags
- Color-coding supplies
Start by determining your labeling categories and creating a consistent naming system. Group similar items together and decide on clear, specific names for each category. Use broad categories for larger sections (such as “Holiday Decorations” or “Camping Gear”) and more detailed labels for individual containers (like “Christmas Lights” or “Sleeping Bags”).
Apply labels to both the contents and their designated storage locations, ensuring they’re visible from multiple angles. For containers and shelves, attach labels at eye level whenever possible and use consistent placement throughout the space.
Create a labeling hierarchy: larger zones can use hanging signs or wall-mounted labels, while individual boxes and bins should have detailed content labels. Consider using color-coding to further organize categories, making it even easier to identify and maintain proper item placement.
To maximize the effectiveness of your labeling system, incorporate inventory lists for boxes containing multiple items, and include any relevant dates or maintenance information. Use clear, waterproof labels for items in potentially damp areas, and consider creating a master catalog of your storage room’s contents, complete with label locations and organization schemes, to maintain the system long-term.
Install Proper Lighting
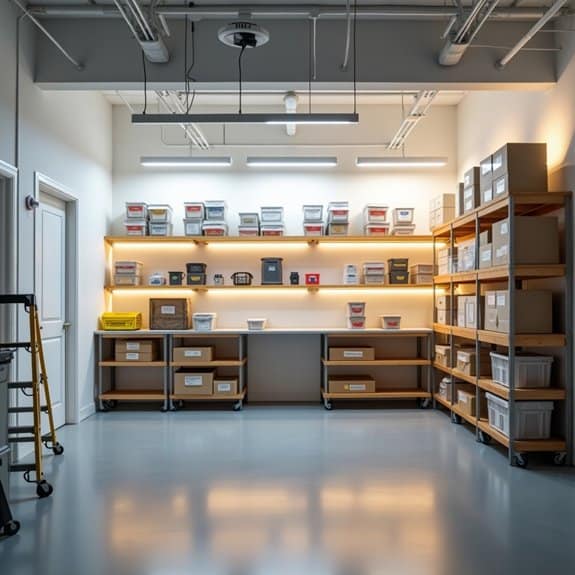
Proper lighting in a storage room is fundamental to creating a functional and efficient space. Poor lighting can lead to wasted time searching for items, potential accidents, and underutilization of storage areas. When you can clearly see all corners and spaces in your storage room, you’ll be better equipped to maintain organization and quickly locate items when needed.
Installing adequate lighting transforms a dark, intimidating storage space into an accessible and welcoming area. Well-planned lighting ensures safety while moving items, allows for proper identification of stored materials, and helps maintain a clean, organized environment by making dust and clutter immediately visible.
Required Items:
- LED ceiling lights or shop lights
- Motion sensors (optional)
- Extension cords
- Wire clips or mounting hardware
- Screwdriver
- Wire stripper
- Electrical tape
- Step ladder
- Voltage tester
- Battery-operated push lights (optional)
Begin by assessing your storage room’s current lighting situation and identifying dark zones that need illumination. Map out optimal placement for new lighting fixtures, ensuring coverage of all corners and shelving units. If possible, install overhead LED shop lights or ceiling fixtures, spacing them evenly throughout the room to eliminate shadows.
For areas without electrical access, consider battery-operated push lights or LED strips with adhesive backing. For maximum efficiency, connect motion sensors to your lighting system, allowing hands-free operation when entering with stored items. Mount lights slightly forward from shelving units to prevent shadows from blocking visibility to stored items.
Secure all wiring properly using wire clips and ensure all connections are properly insulated with electrical tape. Consider installing task lighting in specific zones where you frequently need enhanced visibility, such as workbenches or sorting areas. Use daylight-spectrum bulbs to improve color accuracy and reduce eye strain.
Regular maintenance of your lighting system, including dusting fixtures and promptly replacing burnt-out bulbs, will ensure continued effectiveness of your storage room organization.
Rotate Seasonal Items
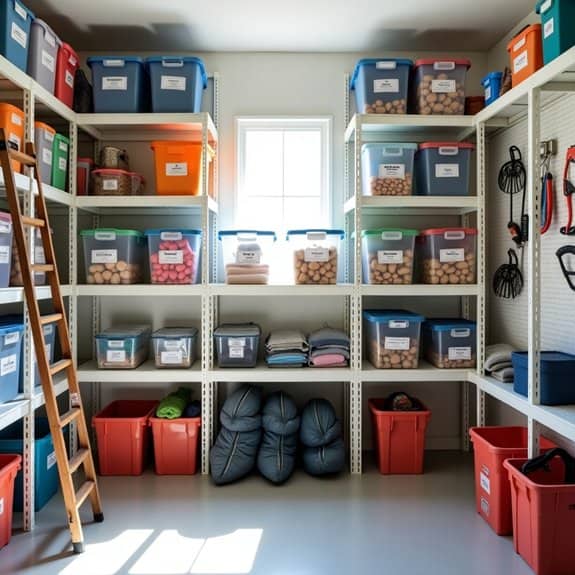
Seasonal item rotation is a crucial aspect of maintaining an organized and efficient storage space. By properly managing seasonal items, you can maximize available space and ensure easy access to items when they’re needed while keeping rarely-used items safely stored away.
Strategic rotation of seasonal items prevents clutter buildup and helps maintain a clear inventory of your belongings. This systematic approach not only saves time when searching for specific items but also protects your seasonal belongings from damage and deterioration during their off-season storage periods.
Required Items:
- Clear plastic storage bins
- Labels and marker
- Storage shelving units
- Vacuum storage bags
- Moisture absorbers
- Inventory checklist
- Plastic tarps
- Storage bags in various sizes
- Rope or bungee cords
- Step ladder
The rotation process begins with sorting items into distinct seasonal categories: spring/summer and fall/winter. Store currently needed items at eye level or in easily accessible locations, while moving off-season items to higher shelves or back areas. Use clear bins to store similar items together, such as holiday decorations, seasonal clothing, or outdoor equipment. Label each container clearly with contents and the season of use.
Before storing, clean all items thoroughly and ensure they’re completely dry to prevent mold growth. Implement a twice-yearly rotation schedule, typically in spring and fall, to swap seasonal items. During each rotation, inspect items for damage, dispose of broken or unused items, and update your inventory list. Position heavy items on lower shelves and lighter items up high.
Create a map or diagram of your storage area to track where specific seasonal items are located.
Additional Tips: Create zones within your storage area based on frequency of use, with a designated staging area for items transitioning between seasons. Use vertical space efficiently with hooks and pegboards for hanging items. Consider climate-controlled storage for sensitive materials, and maintain proper ventilation to prevent moisture buildup. Keep frequently used seasonal items near the front of the storage area for quick access during their respective seasons.
Use Vacuum Storage Bags
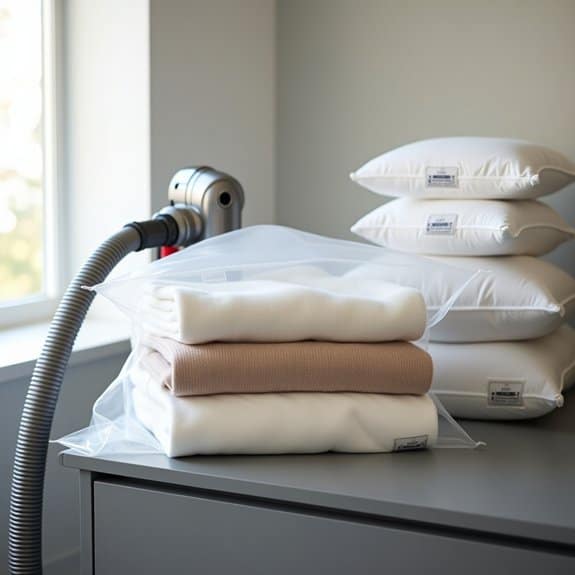
Vacuum storage bags represent a revolutionary solution for maximizing storage space while protecting valuable items from dust, moisture, and pests. These space-saving tools can reduce the volume of soft goods by up to 75%, transforming bulky seasonal items into compact, easily storable packages.
The efficient use of vacuum storage bags can transform a cluttered storage area into a well-organized space, making it easier to locate items when needed and preserve them in optimal condition. This method is particularly valuable for storing seasonal clothing, bedding, pillows, and other fabric-based items that typically consume significant space.
Required Items:
- Vacuum storage bags (various sizes)
- Vacuum cleaner with hose attachment
- Clean, dry items to be stored
- Labels and marker
- Clean, flat surface for packing
- Storage containers or shelving units
- Inventory list
Select items to be stored and ensure they’re completely clean and dry. Sort items by category and season, then fold them neatly to minimize wrinkles. Place items in appropriately sized vacuum bags, being careful not to overfill. Leave enough space at the top for proper sealing. Smooth out any wrinkles and distribute contents evenly within the bag.
Seal the bag according to manufacturer instructions, typically by pressing firmly along the closure strip. Connect your vacuum cleaner hose to the bag’s valve and activate the vacuum to remove air. As the bag compresses, smooth out any wrinkles that form. Once fully compressed, quickly remove the vacuum hose and seal the valve. Label each bag clearly with contents and date.
Additional Tips: Stack compressed bags in plastic bins or on shelves to maintain organization. Avoid storing vacuum-sealed bags directly on concrete floors or in areas prone to temperature fluctuations. Periodically check bags for proper seal maintenance and re-vacuum if necessary. Consider creating an inventory system to track stored items’ locations. For delicate fabrics, use compression bags that don’t require vacuum sealing to prevent damage.
Create a Maintenance Schedule

Maintaining an organized storage room requires more than just an initial cleanup – it demands consistent attention and regular upkeep to prevent chaos from creeping back in. A well-structured maintenance schedule acts as your roadmap to keeping the space functional and organized throughout the year, saving you time and frustration in the long run.
Creating and following a maintenance schedule transforms your storage room from a constantly cluttered space into a reliable, efficient area where items are easy to find and access. This systematic approach helps identify seasonal needs, track inventory, and ensure that stored items remain in good condition.
Required Items:
- Calendar or digital planning app
- Notebook and pen
- Cleaning supplies
- Label maker
- Storage bins
- Inventory tracking sheets
- Task checklist template
- Timer or clock
- Storage room layout diagram
Start by creating a master schedule that breaks down maintenance tasks into daily, weekly, monthly, and seasonal categories. Daily tasks might include returning items to their designated spots and basic tidying.
Weekly tasks should focus on inventory checks of frequently used items and quick cleaning. Monthly maintenance involves deeper cleaning, reorganizing specific zones, and updating inventory lists. Seasonal tasks include rotating stored items, checking for damage or wear, and conducting thorough cleanouts.
Implementation requires setting specific days and times for each task. Assign responsibilities if multiple people share the space, and create a sign-off system to track completion. Use your inventory tracking sheets to monitor supplies and seasonal items, noting when things need to be replaced or restocked.
Keep the maintenance schedule visible in the storage room and set up regular reminders for important tasks. Consider incorporating a quarterly review of your maintenance schedule to adjust tasks and timing based on changing needs.
Take photos of properly organized areas to serve as reference points, and maintain a log of common issues that arise so you can modify your schedule accordingly. Remember that flexibility is key – your maintenance schedule should evolve as your storage needs change over time.
Optimize Corner Spaces With Carousel Units
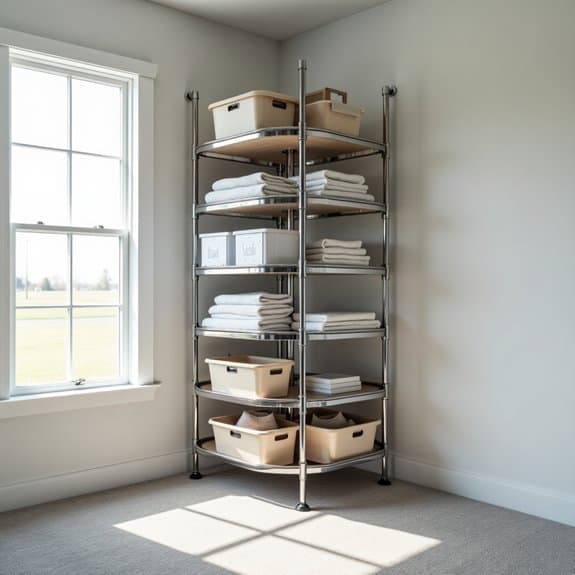
Corner spaces in storage rooms often become dead zones where items get lost or forgotten. Installing carousel units transforms these traditionally awkward areas into highly functional storage solutions that maximize every inch of available space.
These rotating systems allow easy access to items that would otherwise be difficult to reach, turning wasted corners into valuable storage real estate. Carousel units are particularly effective for storing smaller items, tools, or frequently used supplies that need to be readily accessible.
By utilizing vertical space and offering 360-degree rotation, these systems can triple or quadruple the usable storage capacity of a corner while maintaining organization and visibility of all items.
Required Items:
- Corner carousel unit
- Mounting hardware
- Power drill
- Level
- Measuring tape
- Screwdriver
- Pencil
- Wall anchors
- Storage bins or containers
- Labels
- Installation manual
Start by measuring your corner space carefully, ensuring you have adequate clearance for both the unit’s diameter and height. Install the mounting bracket according to manufacturer specifications, using wall anchors for additional support.
Once the main structure is secure, attach the rotating shelves or bins, making sure they’re properly balanced and can rotate smoothly without obstruction. Organize items on the carousel by frequency of use, with most-used items at eye level.
Group similar items together and use clear containers or labels to maintain organization. Test the rotation mechanism to ensure all items remain secure when the unit is in motion. Adjust the shelf heights if needed to accommodate taller items while maximizing vertical space.
For optimal results, maintain weight distribution evenly across the carousel to prevent strain on the rotating mechanism. Consider installing motion-sensor lighting around the unit to improve visibility, and keep a step stool nearby for accessing items on higher shelves.
Regular maintenance checks of the rotating mechanism will ensure long-term functionality and prevent potential issues before they arise.
Install Pull-Out Drawers and Baskets
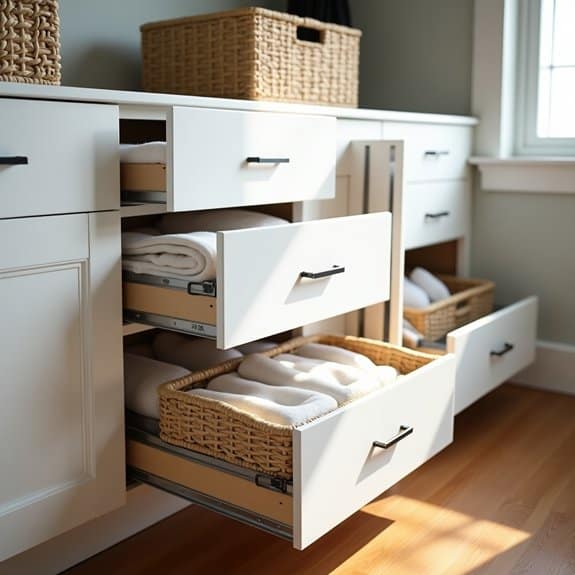
Installing pull-out drawers and baskets transforms a cluttered storage room into an efficient, accessible space. These sliding storage solutions eliminate the need to dig through deep shelves or move items out of the way to reach what’s needed, making it easier to maintain organization long-term.
When properly installed, pull-out storage maximizes vertical space while keeping items visible and within reach. This system works particularly well for storing tools, cleaning supplies, seasonal items, and other frequently accessed belongings that tend to get lost in traditional storage setups.
Required Items:
- Pull-out drawer units
- Sliding basket systems
- Mounting brackets
- Screws and anchors
- Power drill
- Level
- Measuring tape
- Pencil
- Screwdriver
- Wood glue (if needed)
- Safety glasses
- Work gloves
Start by measuring your storage space and planning the layout of your pull-out systems. Mark the installation points on the walls or existing shelving units, ensuring proper spacing between each drawer or basket.
Install mounting brackets according to manufacturer specifications, checking that they’re level and securely anchored to wall studs or solid shelving. Attach the drawer slides or basket tracks, testing the movement before fully securing them.
Once the framework is installed, sort items by category and frequency of use. Place frequently accessed items in upper drawers or baskets, with heavier items stored in lower units to maintain stability.
Consider using drawer dividers or smaller containers within the pull-out systems to further organize smaller items and prevent shifting during use.
For optimal organization success, label each drawer or basket clearly and maintain weight limits specified by manufacturers. Regularly check the mounting hardware and slides for proper function, tightening any loose components promptly.
Consider installing drawer stops to prevent accidental removal, and teach household members the proper way to operate the pull-out systems to ensure longevity.

