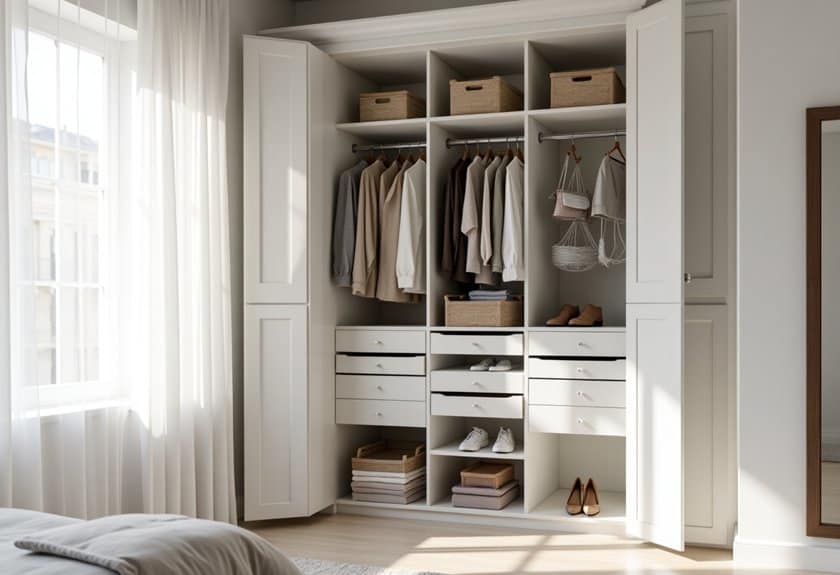
You might think a tiny closet means limited storage options, but I’ve discovered that’s far from true! After transforming countless cramped closets into organized sanctuaries, I can tell you that the secret lies in smart space utilization and creative thinking. Whether you’re dealing with a 3-foot alcove or a narrow wall closet, there’s always room for improvement. Let me show you how to triple your storage space with these game-changing organization hacks.
Maximize Vertical Space With Double-Hanging Rods
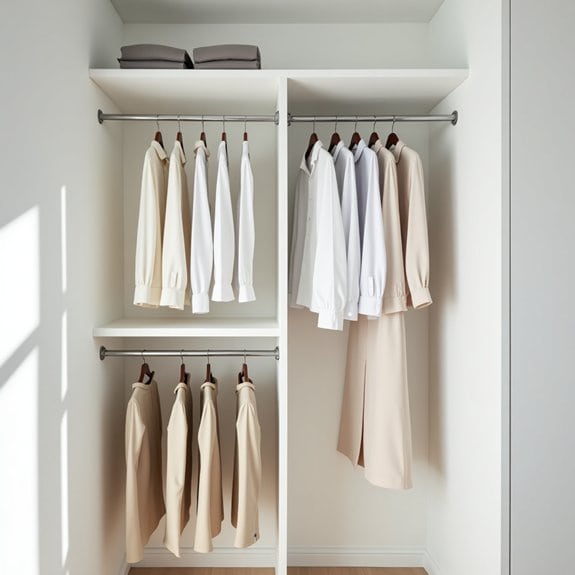
Making the most of vertical space in a small closet is crucial for maximizing storage capacity and keeping clothes organized. Double-hanging rods effectively double your hanging space, allowing you to store twice as many items in the same footprint, which is especially valuable in compact closets.
By implementing a double-rod system, you can separate clothing by length and type, creating distinct zones for shirts, pants, skirts, and other garments. This organization method not only increases storage capacity but also makes it easier to locate specific items quickly, streamlining your daily routine.
Required Items:
- Double-hanging rod kit
- Drill and drill bits
- Screwdriver
- Level
- Measuring tape
- Pencil
- Wall anchors
- Stud finder
- Step ladder
- Hammer
Install the first rod at standard height (around 80 inches from the floor) using wall anchors or by securing into wall studs. Measure and mark points for the lower rod, typically 40 inches below the upper rod, allowing adequate space for shorter items like shirts and folded pants. Ensure both rods are level and properly secured to support the weight of your clothing.
Group clothes by category, designating the upper rod for shorter items like shirts, jackets, and folded pants, while using the lower rod for longer items such as dresses and full-length garments. This arrangement creates a clear visual organization system and prevents longer items from dragging on the floor.
To maximize this setup, use slim hangers to reduce bulk and maintain consistent spacing between garments. Consider adding small hooks or clips to the rods for belts, scarves, or other accessories, and implement a seasonal rotation system to ensure frequently worn items remain easily accessible on the most convenient rod level.
Install Over-the-Door Storage Hooks and Pockets
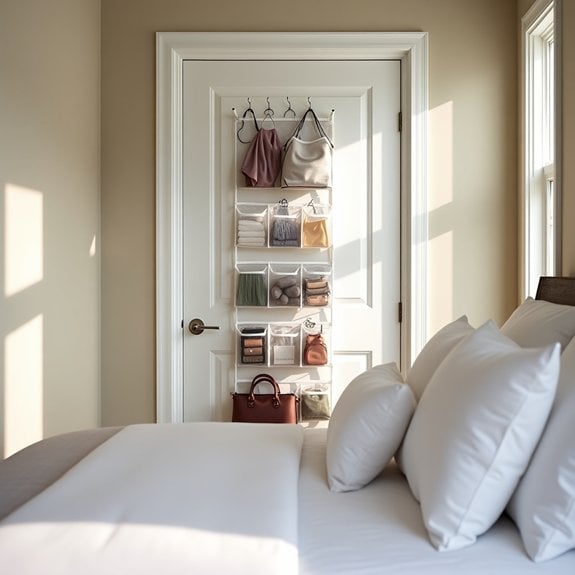
Making the most of vertical space is crucial when dealing with a tiny closet, and the often-overlooked door surface presents a valuable opportunity for additional storage. Over-the-door storage solutions can effectively double your storage capacity while keeping frequently used items easily accessible without taking up precious floor or hanging space.
Installing over-the-door storage hooks and pockets transforms dead space into a functional organization system. This solution is particularly valuable for storing accessories, shoes, cleaning supplies, or daily essentials that would otherwise clutter your limited closet space or compete for prime real estate on shelves and hanging rods.
Required Items:
- Over-the-door hooks or hanging rack
- Door-mounted pocket organizer
- Measuring tape
- Level
- Screwdriver (if mounting with screws)
- Command strips (optional)
- Storage bins or baskets (optional)
- Labels (optional)
Start by measuring your door’s dimensions and checking the clearance when closing to ensure your chosen storage solutions won’t interfere with door function.
Install the over-the-door hooks first, making sure they’re level and secure. If using a screw-mounted system, mark your drill points carefully and ensure the screws won’t damage the door’s opposite side.
Next, hang your pocket organizer, adjusting it so it hangs straight and doesn’t bunch up when the door moves. Sort items by category and assign specific pockets or hooks for different types of belongings, keeping frequently used items at eye level.
To maximize this organization system, consider using clear pocket organizers for better visibility of contents, or label each pocket for easy identification.
Rotate seasonal items to keep current necessities within easy reach. Regular maintenance of weight distribution will prevent sagging and ensure your over-the-door storage remains functional and attractive over time.
Utilize Slim Velvet Hangers for More Space
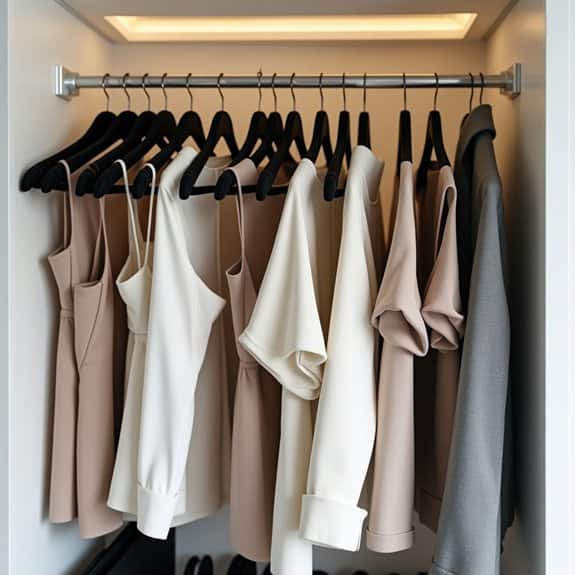
Making the switch to slim velvet hangers can transform a cramped closet into an organized, spacious storage solution. Traditional plastic and wire hangers waste precious space and can damage delicate garments, while their bulky design limits the number of items that can be stored in a small closet.
Slim velvet hangers not only maximize space by their compact design but also protect clothing with their non-slip surface. This practical upgrade can increase hanging capacity by up to 50% while maintaining a sleek, uniform appearance that makes any closet look more organized and professional.
Required Items:
- Slim velvet hangers
- Donation box
- Temporary clothing rack
- Storage container for old hangers
- Cleaning supplies
- Labels (optional)
- Measuring tape
Start by removing all clothing and existing hangers from the closet. Sort garments into categories: keep, donate, and seasonal storage. Count the items you plan to keep to determine how many slim velvet hangers you’ll need. Clean the closet thoroughly while it’s empty.
Begin hanging clothes back in the closet using the new velvet hangers, organizing by category and color. Place similar items together, such as work clothes, casual wear, and formal attire. Ensure all hangers face the same direction for consistency and easier access.
For optimal space savings, consider the “backwards hanger” method: place all hangers facing backward, then turn them the correct way only after wearing an item.
To maintain the effectiveness of slim velvet hangers, avoid overloading them with heavy items and regularly inspect for wear. Consider using hanger connectors for coordinating outfits, and implement a one-in-one-out rule to prevent overcrowding.
Store seasonal items elsewhere to maximize the space for current-season clothing, and periodically reassess your wardrobe to maintain the organized system.
Create Custom Shelf Dividers for Better Organization
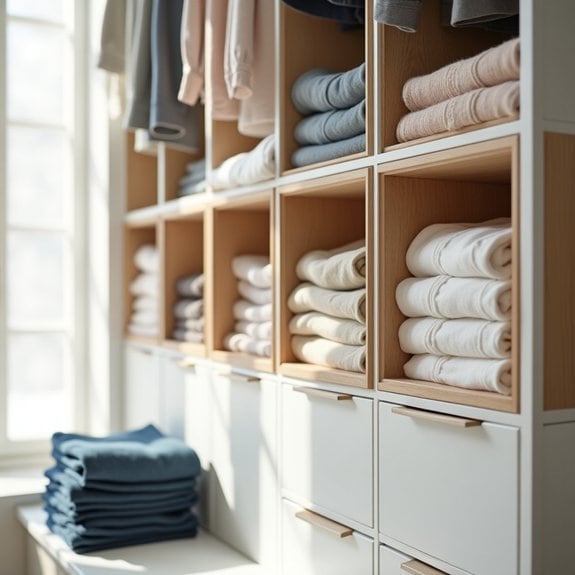
Custom shelf dividers are essential tools for maximizing vertical space in small closets, preventing stacked items from toppling over, and maintaining clearly defined sections for different categories of belongings. When properly implemented, these dividers transform cluttered shelves into efficient storage zones that keep items separated and easily accessible.
Creating custom shelf dividers allows you to tailor the organization system to your specific needs and shelf dimensions, unlike standard store-bought options that may not fit perfectly. This personalized approach ensures maximum space utilization while keeping your belongings neat and visible, making it easier to maintain order in your tiny closet over time.
Required Materials:
- Sturdy cardboard or 1/4-inch plywood
- Measuring tape
- Pencil
- Scissors or saw (depending on material choice)
- Ruler
- Contact paper or fabric (optional)
- Strong adhesive or shelf clips
- Sandpaper (if using plywood)
- Safety equipment (gloves, protective eyewear)
Start by measuring the depth and height of your shelves, adding an extra inch to the height measurement to ensure the dividers will stay firmly in place. Cut your chosen material to these specifications, creating rectangular pieces that will serve as your dividers.
If using plywood, sand the edges smooth to prevent snags on clothing or injury. For a more polished look, cover the dividers with contact paper or fabric, ensuring all edges are properly sealed.
Position the dividers on your shelves, spacing them according to the size of items you plan to store. For clothing, allow 12-14 inches between dividers; for accessories or smaller items, 6-8 inches may suffice. Secure the dividers using shelf clips or adhesive, ensuring they’re perfectly vertical and stable.
Test the stability by gently pressing against the dividers before placing items between them. For optimal results, consider installing dividers at slightly different intervals on each shelf to accommodate various item sizes.
Label each section clearly, and avoid overstuffing the spaces between dividers, which can cause warping or collapse. Periodically check the dividers’ stability and adjust their positioning as your storage needs change throughout the year.
Add Pull-Out Storage Bins Under Hanging Clothes
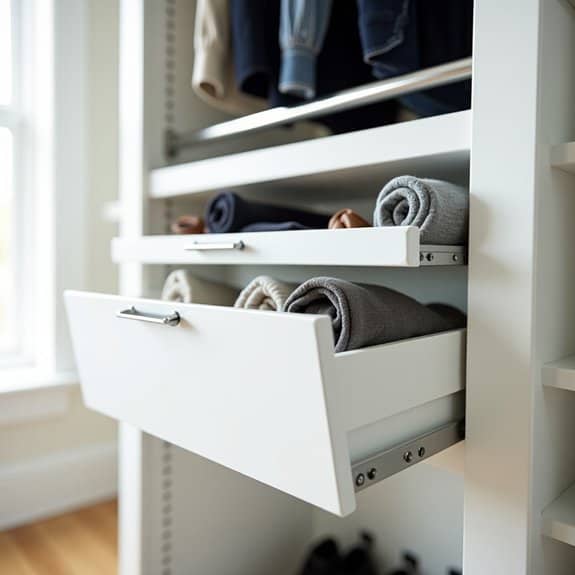
Making use of the often-overlooked space beneath hanging clothes is a game-changer for tiny closet organization. This valuable area frequently becomes a jumbled mess of shoes, storage boxes, or forgotten items, but with the right system of pull-out storage bins, it can transform into an efficient storage solution that maximizes every inch of available space.
Pull-out storage bins create an accessible drawer-like system that eliminates the need to dig through piles or reach into dark corners. This organization method not only keeps items dust-free but also allows you to categorize belongings while maintaining easy access to everything stored beneath your hanging garments.
Required Items:
- Measuring tape
- Pull-out bins or drawers
- Drawer slides
- Mounting brackets
- Screwdriver
- Level
- Pencil
- Wood screws
- Labels
- Drawer liner (optional)
Start by measuring the available space under your hanging clothes, accounting for both width and depth. Install drawer slides on both sides of the closet walls, ensuring they’re level and properly secured with mounting brackets and screws. The slides should be placed at heights that accommodate your chosen storage bins while leaving adequate clearance for items stored inside.
Once the sliding hardware is secure, attach your storage bins to the drawer slides according to the manufacturer’s instructions. Test each drawer to ensure smooth operation and proper alignment.
Organize items into categories within each bin, using smaller containers or dividers as needed to maintain order. For optimal organization, label each bin clearly and consider using clear containers to easily identify contents. Line the bottom of bins with non-slip material to prevent items from shifting when drawers are opened and closed.
Regularly assess the contents and adjust the organization system as needed, removing items that are no longer used to maintain an efficient storage solution.
Implement a Seasonal Rotation System
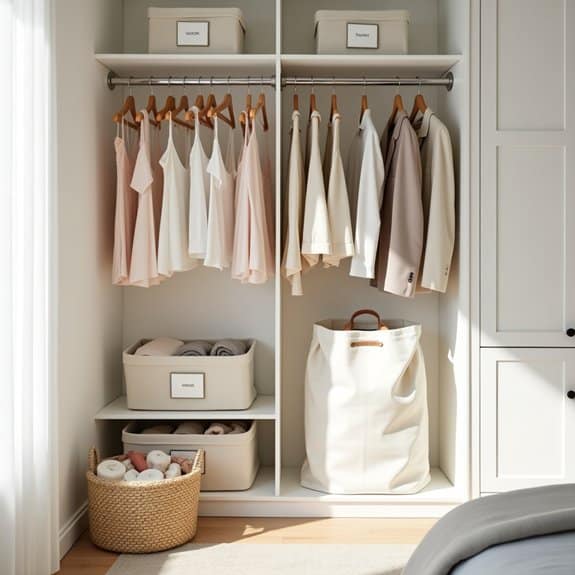
Seasonal rotation is a game-changing strategy for maximizing space in a tiny closet, allowing you to maintain an organized and functional wardrobe despite limited square footage. By storing off-season clothes elsewhere, you can create breathing room for current-season items, making it easier to see and access the clothes you actually need.
This system not only helps prevent overcrowding but also preserves the quality of your clothing by protecting off-season items from unnecessary wear and exposure. When implemented correctly, a seasonal rotation system can reduce daily stress, streamline your getting-ready routine, and help you maintain a better awareness of your wardrobe inventory.
Required Items:
- Storage containers with lids
- Vacuum storage bags
- Labels and marker
- Garment bags
- Cedar blocks or lavender sachets
- Storage bins
- Inventory list template
- Clean sheets or fabric for layering
The process begins with a thorough assessment of your wardrobe, separating items into distinct seasonal categories. Remove all clothing that won’t be worn for the next 3-6 months, including season-specific shoes and accessories.
Clean all items thoroughly before storage, ensuring there are no stains or soils that could set during the storage period. Pack away off-season items in appropriate storage containers, using vacuum bags for bulky items like sweaters and coats.
Label each container clearly with contents and season. Store these containers in a clean, dry location such as under the bed, in a guest room closet, or in a climate-controlled storage area. Maintain an inventory list of stored items to prevent unnecessary purchases and ensure nothing gets lost between rotations.
Additional Tips: Schedule your rotation dates on your calendar (typically spring and fall) and use this opportunity to evaluate each piece as you rotate.
Consider implementing a “one-in-one-out” rule during rotation periods to prevent accumulation. Keep a small section of your closet dedicated to year-round items and special occasion wear that shouldn’t be stored away.
Always ensure stored items are completely dry and clean to prevent mold and mildew, and include moisture absorbers in storage containers for extra protection.
Mount Shoe Organizers on Closet Walls
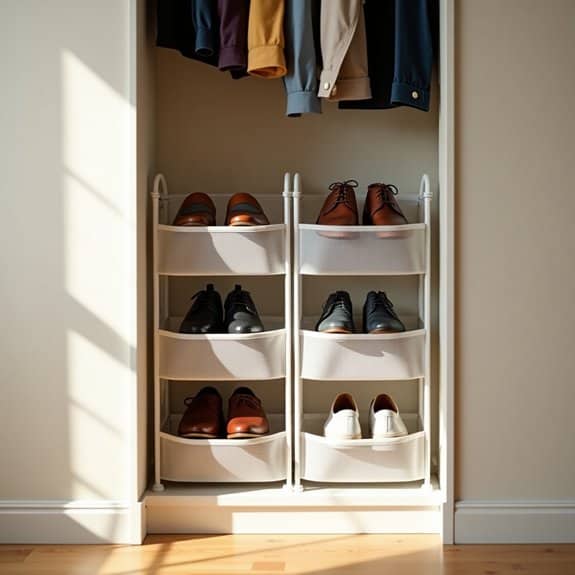
Maximizing vertical space in a tiny closet is crucial for maintaining order and accessibility. Wall-mounted shoe organizers not only help declutter your floor space but also transform unused wall areas into functional storage solutions that keep footwear visible and easily accessible.
By mounting shoe organizers on closet walls, you create a systematic approach to shoe storage that prevents pairs from getting lost, damaged, or forgotten. This organization method is particularly valuable in small spaces where every inch counts, and it helps maintain the shape and condition of your shoes while keeping them dust-free.
Required Items:
- Over-the-door or wall-mounted shoe organizer
- Measuring tape
- Pencil
- Level
- Wall anchors
- Screws
- Drill
- Screwdriver
- Stud finder
- Safety goggles
Start by measuring your closet wall space and determining the best location for your shoe organizer. Use a stud finder to locate wall studs, marking their positions with a pencil. If mounting between studs, install wall anchors for proper support.
Position the organizer at a comfortable height, ensuring it doesn’t interfere with hanging clothes or other storage solutions. For optimal installation, mark mounting points with a level to ensure the organizer hangs straight. Drill pilot holes for your screws or anchors, then secure the organizer to the wall.
If using multiple organizers, space them evenly and consider staggering heights to maximize storage capacity while maintaining easy access to all shoes.
Additional Tip: Consider organizing shoes by category (formal, casual, athletic) or frequency of use, placing everyday shoes at eye level and seasonal footwear in higher or lower pockets. For boots or tall shoes, you may need to skip a pocket to accommodate the height.
Regularly assess and rotate your shoe collection to maintain organization and prevent overcrowding in the mounted organizers.
Use Corner Spaces With Rotating Storage Units
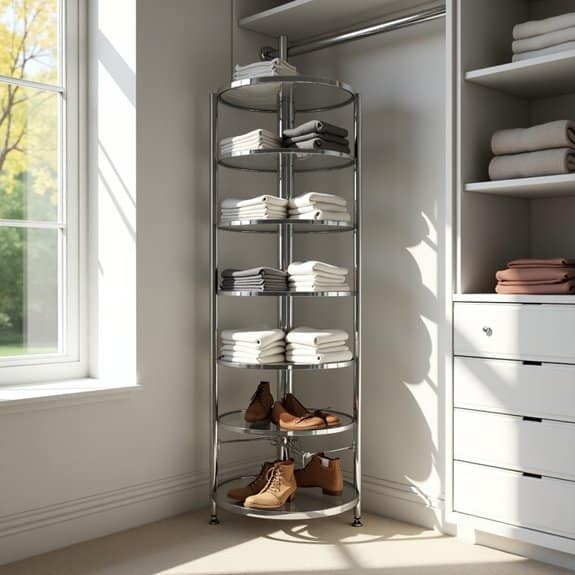
Corner spaces in closets often become dead zones where items get lost or forgotten. By implementing rotating storage units, these traditionally awkward spaces transform into valuable storage real estate, maximizing every inch of your closet. Proper utilization of corner spaces can increase your storage capacity by up to 50% while maintaining easy access to all items.
Rotating storage units, also known as lazy Susans or corner carousels, provide a practical solution for reaching items that would otherwise be difficult to access. These systems rotate smoothly, bringing items from the back of the corner directly to the front, eliminating the need to reach into dark, cramped spaces.
Required Items:
- Corner-mounted rotating storage unit
- Measuring tape
- Level
- Screwdriver or drill
- Wall anchors
- Mounting brackets
- Storage bins or containers
- Labels
- Installation manual
Installation and organization begins with accurate measurements of your corner space, ensuring the rotating unit fits properly. Mount the central pole or tracking system according to manufacturer specifications, using wall anchors for stability.
Once secured, attach the rotating shelves or baskets, ensuring they’re level and rotate freely without obstruction. Test the rotation mechanism before loading items.
Organize items by category on each shelf or tier, placing frequently used items at eye level and heavier items on lower shelves. Use clear storage containers to maximize visibility and maintain organization. Consider implementing a coding system with labels to track item locations as the unit rotates.
To maintain optimal functionality, regularly clean the rotating mechanism and check for loose screws or brackets. Avoid overloading shelves beyond their weight capacity, and establish a system where items return to their designated spots after use.
Consider adding battery-operated LED lights to illuminate darker corners, making it easier to locate items regardless of the unit’s position.
Install Motion-Sensor LED Lighting
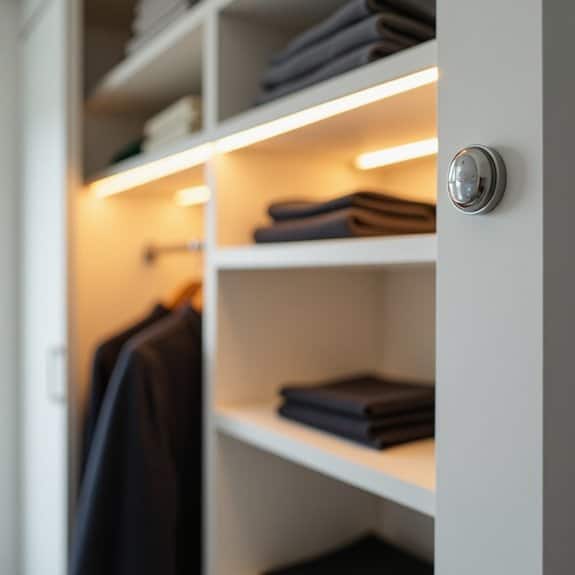
Proper lighting is essential for any functional closet space, but it becomes even more critical in tiny closets where every inch matters. Motion-sensor LED lighting eliminates the need for manual switches and ensures you can easily see all your belongings without fumbling in the dark.
Installing motion-sensor LED lighting transforms a cramped, dark closet into an efficient, welcoming space. This modern solution not only saves energy by automatically turning off when not in use but also frees up your hands when accessing the closet, making it easier to locate items quickly and maintain organization.
Required Items:
- Battery-operated motion sensor LED light strips
- Double-sided mounting tape
- Measuring tape
- Scissors
- Clean cloth
- Rubbing alcohol
- Pencil
- Level
- Wire clips (if needed)
- Batteries
Begin by thoroughly cleaning all surfaces where the LED strips will be mounted using rubbing alcohol and a clean cloth. Measure the areas where you plan to install the lighting, typically along the top of the closet rod, under shelves, or along the door frame.
Cut the LED strips to size if necessary, following the manufacturer’s marked cutting lines. Test the motion sensor and batteries before mounting to ensure proper function. Apply the mounting tape to the back of the LED strips and carefully position them, using a level to ensure straight placement. Press firmly along the entire length to secure.
Additional Tips: Position the motion sensor where it won’t be blocked by hanging clothes or storage boxes. Consider installing multiple strips at different heights for comprehensive coverage.
Replace batteries preventively every six months to maintain consistent function, and keep spare batteries nearby. For wire management, use small adhesive clips to keep any exposed wiring neat and secure against the wall or shelf surface.
Organize With Clear Storage Containers
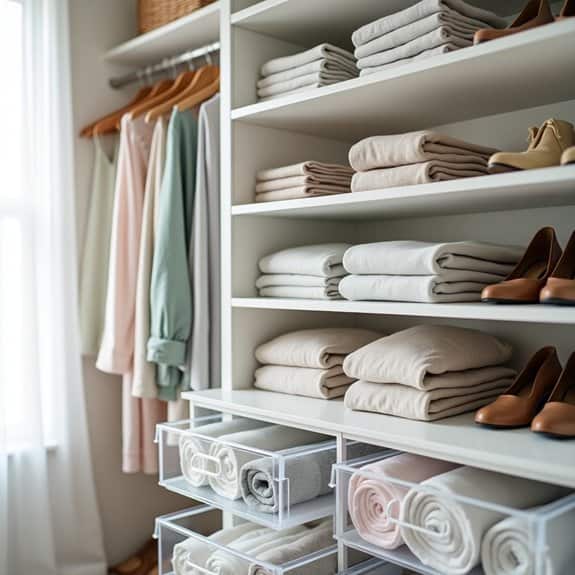
Maximizing space in a tiny closet requires strategic planning and the right tools. Clear storage containers serve as one of the most effective solutions for closet organization, allowing you to instantly identify contents while keeping items protected from dust and damage. The transparency eliminates the need for labels and reduces time spent searching for specific items.
Clear containers transform cluttered closet spaces into systematic storage solutions that maintain order long-term. When items are visible and properly contained, you’re more likely to maintain the organizational system and avoid the frustration of digging through opaque boxes or bags to find what you need.
Required Items:
- Various sizes of clear plastic containers with lids
- Drawer-style clear containers
- Clear shoe boxes
- Clear shelf dividers
- Measuring tape
- Label maker (optional)
- Drawer liner or fabric (optional)
- Stack-able clear bins
- Clear hanging organizers
Start by measuring your closet space and determining the types and sizes of clear containers that will fit your shelves and floor space. Sort items by category and frequency of use, keeping frequently accessed items at eye level.
Stack clear containers vertically when possible, ensuring the contents remain visible through the front panel. Position drawer-style containers on lower shelves for smaller items like accessories, undergarments, or folded t-shirts.
For optimal organization, place similar items together in appropriately sized containers. Use smaller clear boxes for accessories, medium-sized containers for folded clothes, and larger bins for seasonal items or bulky pieces.
Arrange shoes in clear shoe boxes, which can be stacked efficiently while protecting footwear from dust and damage. Install clear shelf dividers to prevent stacked containers from toppling and to maintain neat vertical separation.
To maximize the effectiveness of clear storage containers, regularly assess and adjust the system. Consider using container sizes that can be interchanged easily as your storage needs change.
Remove any items that haven’t been used in the past year to maintain organized spaces, and periodically clean the containers to maintain visibility. Adding drawer liners or small fabric squares between stacked containers can prevent sliding and protect delicate items.
Add Extra Rods for Accessories and Scarves
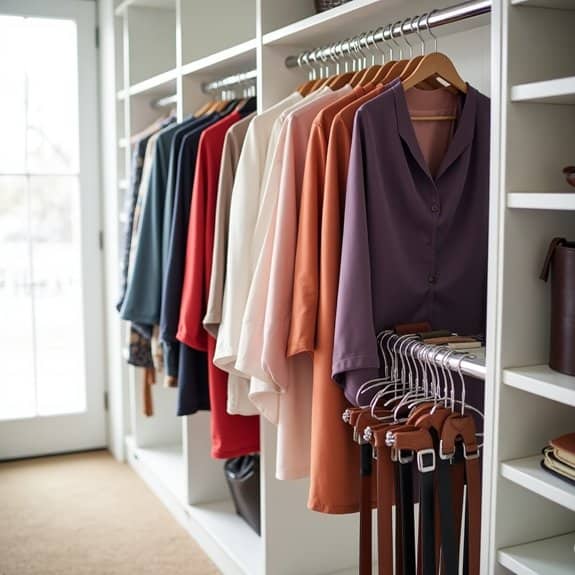
Making the most of vertical space in a tiny closet is crucial for maximizing storage capacity, and adding extra rods specifically for accessories and scarves can transform an overcrowded space into an organized haven. When accessories are properly displayed and easily accessible, you’re more likely to wear them and incorporate them into your daily outfits.
Scarves, belts, and other accessories often end up buried in drawers or tangled in corners when not properly organized. Installing dedicated rods creates a visible, easy-to-access system that prevents damage to delicate items while keeping them wrinkle-free and ready to wear.
Required Items:
- Tension rods or mounted closet rods
- Mounting brackets and screws
- Wall anchors
- Drill and drill bits
- Screwdriver
- Level
- Measuring tape
- Pencil
- S-hooks or shower curtain rings
- Command hooks (optional)
Select the most suitable location for your accessory rods, ideally at eye level or slightly below for easy access. For permanent installation, mark the bracket positions with a pencil, ensuring they’re level. Install wall anchors if needed, then secure the brackets and attach the rod.
For a temporary solution, adjust tension rods to fit securely between closet walls. Space multiple rods about 6-8 inches apart vertically to prevent items from tangling.
Once the rods are installed, organize accessories by category and color. Use S-hooks or shower curtain rings to hang scarves individually, preventing wrinkles and making each piece visible. For belts and other accessories, consider using specialized hangers or additional hooks to maintain organization and prevent items from sliding off the rods.
To maintain the system’s effectiveness, implement a one-in-one-out rule for accessories and regularly assess which items you actually use. Consider rotating seasonal accessories to the front of the rods and storing off-season items elsewhere.
Clean the rods periodically to prevent dust accumulation, and adjust the organization system as needed based on your changing collection and usage patterns.
Create a Clothing Classification System
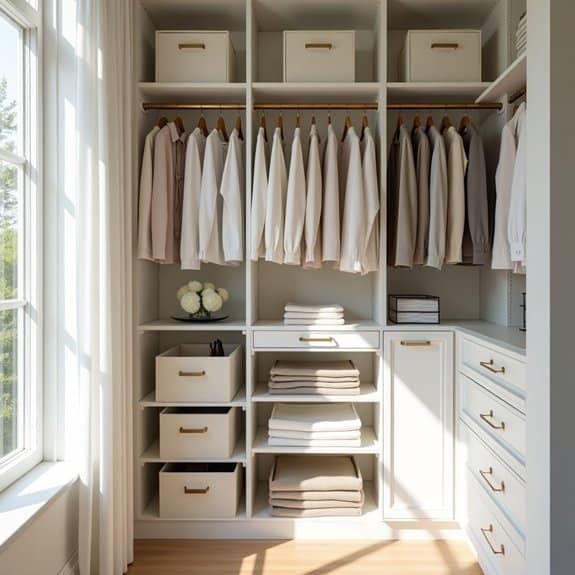
A well-organized clothing classification system serves as the foundation for maintaining an efficient and manageable tiny closet. When clothes are properly categorized and arranged, you eliminate the daily stress of searching for specific items and save valuable time during your morning routine.
Creating clear divisions between different types of clothing not only maximizes your limited space but also helps maintain order long-term. A systematic approach to clothing organization makes it easier to assess your wardrobe, identify gaps in your collection, and prevent unnecessary duplicate purchases.
Required Items:
- Hangers (uniform style)
- Closet dividers or labels
- Storage boxes
- Clothing rack
- Drawer organizers
- Clear bins
- Label maker
- Color-coded tags
- Measuring tape
- Notepad
Start by removing all clothing items and sorting them into primary categories: formal wear, workwear, casual clothes, seasonal items, and accessories. Within each category, create subcategories based on garment type (shirts, pants, dresses) and then by color or frequency of use.
Install closet dividers or labels to clearly mark each section. Position frequently worn items at eye level and within easy reach. Arrange clothes by length, with longer items like dresses and coats on one end, followed by shorter pieces like shirts and skirts.
Use the upper shelves for seasonal or occasional items stored in clearly labeled boxes. Implement a color-coding system using hangers or tags to further streamline your organization.
Additional organizational success depends on regular maintenance and a “one-in-one-out” rule. Review your classification system quarterly, adjusting categories as needed based on your lifestyle changes.
Consider implementing a rotation system for seasonal items and maintaining a small donation box for pieces that no longer fit your needs or style preferences.
Install Pull-Down Hanging Rods
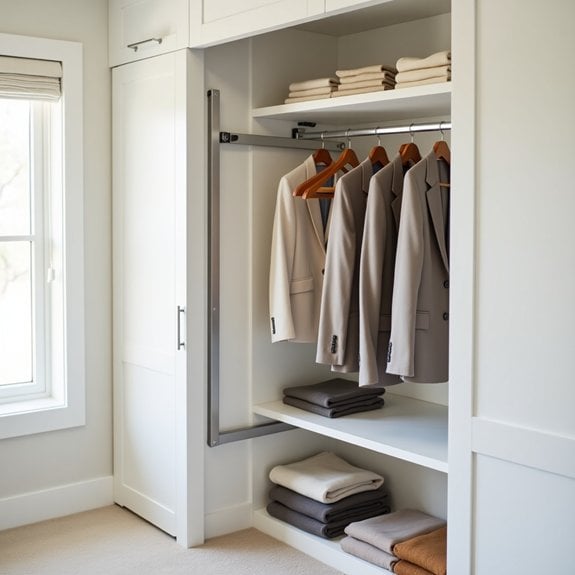
Maximizing vertical space in a tiny closet is crucial for creating additional storage capacity, and pull-down hanging rods offer an innovative solution to this common challenge. These mechanized rods effectively double your hanging space by utilizing the upper areas of your closet that typically go unused, while keeping clothes easily accessible.
Pull-down hanging rods are particularly valuable for those who want to maintain a well-organized wardrobe without sacrificing accessibility. The pull-down mechanism allows you to store seasonal or less frequently used items up high, then easily bring them down to eye level when needed, eliminating the need for step stools or reaching tools.
Required Items:
- Pull-down closet rod mechanism
- Power drill
- Screwdriver
- Level
- Measuring tape
- Pencil
- Wall anchors
- Mounting screws
- Stud finder
- Safety glasses
- Installation manual
Installation begins with measuring and marking the ideal location for your pull-down rod, typically 84 inches from the floor for optimal functionality. Using a stud finder, locate and mark wall studs – these will provide the most secure mounting points.
If studs aren’t available where needed, use appropriate wall anchors rated for the weight you plan to hang. Mount the bracket mechanism according to the manufacturer’s specifications, ensuring it’s perfectly level and secure. Test the mechanism several times without clothes to ensure smooth operation before loading it with garments.
When loading your new pull-down rod, distribute weight evenly across the bar to prevent strain on the mechanism. Organize clothes by category or season, keeping heavier items toward the ends where the support is strongest. Remember to stay within the manufacturer’s recommended weight limit – typically between 25-35 pounds, depending on the model.
Additional Tips: Consider installing multiple pull-down rods at different heights to create a customized storage system. Use matching hangers to maintain a uniform look and maximize space efficiency.
Regularly inspect the mechanism for smooth operation and tighten any loose screws every few months to ensure long-term reliability and safety.
Maximize Door Space With Mirror Storage
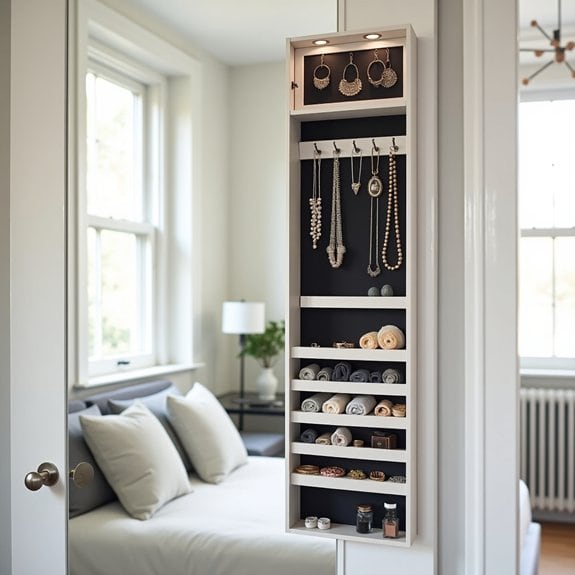
Making the most of every inch in a small closet is essential, and the door space often represents untapped potential. A mirror with storage capabilities serves double duty by providing a full-length reflection while creating valuable space for accessories, jewelry, or small personal items.
When properly utilized, door-mounted mirror storage can eliminate the need for additional furniture pieces in the bedroom while keeping frequently used items easily accessible. This organization method is particularly valuable for apartment dwellers or anyone working with limited square footage.
Required Items:
- Over-the-door mirror with built-in storage
- Door hooks or mounting hardware
- Level
- Drill and screws (if mounting permanently)
- Small organizing bins or compartments
- Command strips or adhesive mounting tape
- Measuring tape
Installing and organizing mirror storage requires careful planning and execution. First, determine whether you’ll use an over-the-door hanging system or permanently mount the unit. For hanging systems, ensure the door can still close properly with the unit in place.
If mounting permanently, mark the mounting points with a level, drill pilot holes, and secure the unit with appropriate anchors and screws. Once installed, organize items by category, placing frequently used pieces at eye level and lesser-used items toward the bottom.
Consider using small bins or organizers within the storage compartments to prevent items from becoming jumbled. To maintain organization and maximize the mirror storage system’s effectiveness, implement a regular cleaning and reorganization schedule. Dust both the mirror and storage areas weekly, and evaluate stored items monthly to remove those that aren’t being used.
Consider adding small LED lighting strips to illuminate the storage areas, making items easier to locate. Keep heavier items toward the bottom of the unit to maintain stability, and avoid overloading any single compartment, which could strain the mounting system or create an unbalanced appearance.
Use Vacuum Storage Bags for Bulky Items
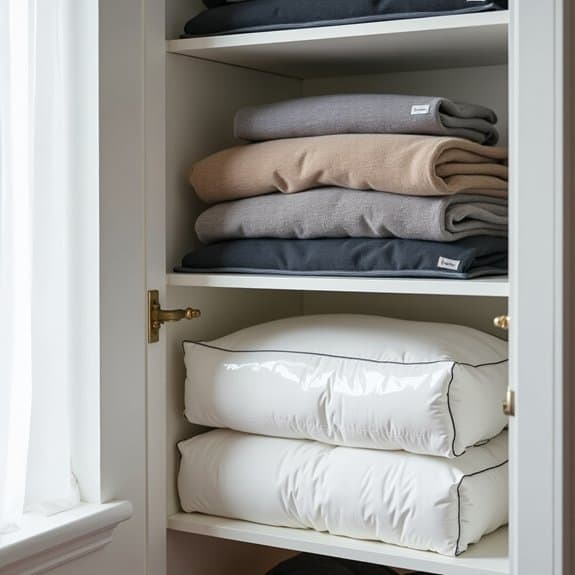
Maximizing space in a tiny closet requires smart storage solutions, and vacuum storage bags are a game-changer for managing bulky items like winter coats, heavy blankets, and seasonal clothing.
These innovative bags can reduce the volume of soft goods by up to 75%, creating valuable extra space in cramped closets. By compressing bulky items into compact, stackable packages, vacuum storage bags not only save space but also protect clothing and bedding from dust, moisture, and pests.
This organization method is particularly valuable for those living in small spaces or dealing with seasonal wardrobe transitions.
Required Items:
- Vacuum storage bags (various sizes)
- Vacuum cleaner with hose attachment
- Clean, dry items to store
- Labels and marker
- Storage container or shelf (optional)
- Dryer sheets (optional)
Start by sorting your bulky items into categories such as winter wear, bedding, or off-season clothing. Ensure all items are clean and completely dry before storing to prevent mold and mildew.
Fold each item neatly, smoothing out wrinkles, and place them into appropriately sized vacuum bags. Avoid overfilling bags, as this can prevent proper sealing and compression.
Once items are placed in the bags, zip them closed completely and ensure the valve is accessible. Insert your vacuum cleaner hose into the bag’s valve, creating a tight seal.
Turn on the vacuum and watch as the air is removed, compressing the contents. When all air is extracted, quickly remove the hose and seal the valve. Smooth out any wrinkles in the compressed bag to create a flat, stackable package.
To maximize the effectiveness of vacuum storage bags, store them in a cool, dry place within your closet, preferably on upper shelves or in dedicated storage containers.
Label each bag clearly with its contents and the date of storage. Consider placing dryer sheets inside bags before sealing to maintain freshness, and check bags periodically to ensure they maintain their seal.
If you notice any expansion, simply re-vacuum the bags to restore their compressed state.

