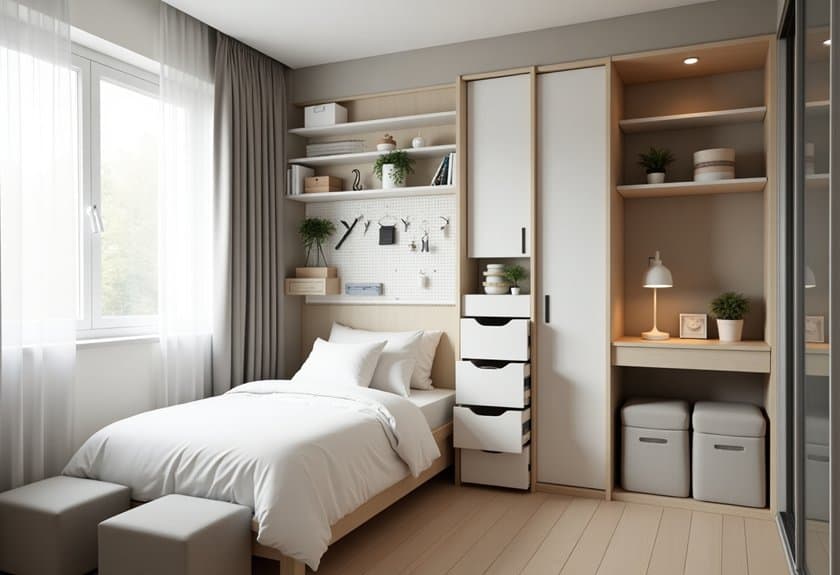
Like a puzzle master solving a complex challenge, you’re about to discover how to transform your cramped bedroom into a masterpiece of efficiency. I’ve spent years perfecting these organization hacks in my own tiny 8×10 space, and now I’m excited to share the secrets that’ll help you maximize every square inch of your room. From genius under-bed solutions to space-saving furniture tricks, these 15 game-changing tips will revolutionize how you think about small-space living.

Make Your Bed Work Harder With Under-Bed Storage
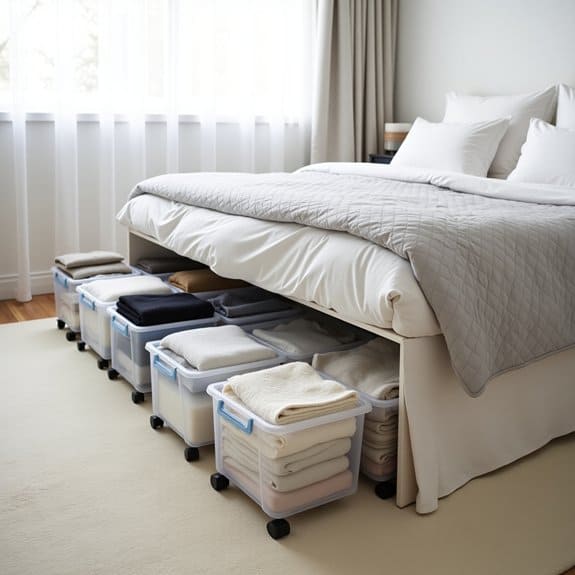
Under-bed storage represents one of the most underutilized spaces in a bedroom, offering valuable square footage for storing seasonal items, extra linens, and rarely-used possessions. When properly organized, this hidden space can dramatically reduce clutter while keeping necessary items easily accessible.
In small bedrooms, maximizing every inch of available space becomes crucial for maintaining an organized and peaceful environment. Under-bed storage solutions can effectively double your storage capacity without sacrificing precious floor space or requiring additional furniture.
Required Items:
- Bed risers or furniture lifts
- Under-bed storage containers with wheels
- Storage bags or vacuum-seal bags
- Labels and marker
- Measuring tape
- Dust ruffle or bed skirt
- Clear plastic bins
- Storage dividers or organizers
Start by measuring the available space under your bed, including height, width, and depth. If needed, install bed risers to create additional clearance. Clean the area thoroughly and consider laying down dust-protective liner paper.
Select appropriately sized storage containers that maximize the available space while allowing easy access. Group similar items together before storing them. Use vacuum-seal bags for soft items like extra bedding, seasonal clothing, or winter wear. For frequently accessed items, opt for rigid containers with wheels positioned nearest to the sides of the bed.
Create a layout map indicating where specific containers are located to avoid pulling everything out when searching for particular items. Label all containers clearly on multiple sides, including contents and season if applicable.
Consider using clear containers for better visibility, and maintain an inventory list of stored items. Regularly review stored items every six months to prevent under-bed storage from becoming a forgotten repository of unnecessary items. Keep frequently used items in easily accessible locations, and rotate seasonal items as needed.
Maximize Vertical Space With Floor-To-Ceiling Shelving
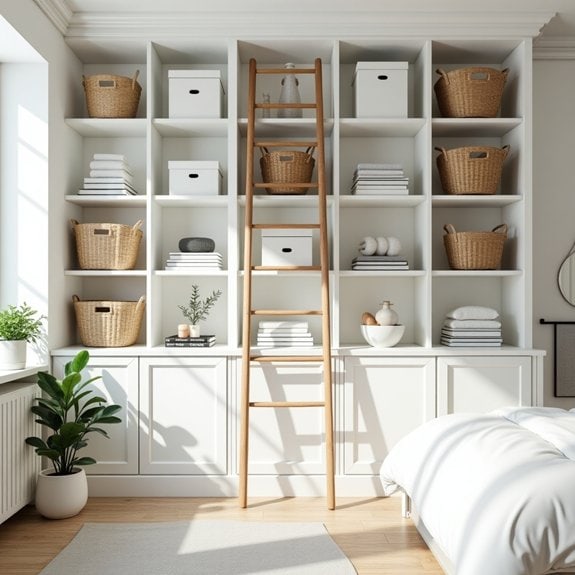
Making the most of vertical space in a tiny bedroom is crucial for creating additional storage without sacrificing precious floor area. Floor-to-ceiling shelving transforms unused wall space into valuable storage real estate, effectively doubling or tripling your storage capacity while maintaining a clean, organized appearance.
When properly implemented, vertical shelving creates a systematic storage solution that draws the eye upward, making your room appear taller while providing designated spaces for books, decorative items, clothing, and storage boxes. This organization method works particularly well in small bedrooms where traditional storage furniture might overwhelm the limited floor space.
Required Items:
- Mounting brackets
- Wall anchors
- Drill and drill bits
- Level
- Measuring tape
- Pencil
- Shelving units or boards
- Screwdriver
- Stud finder
- Storage boxes or baskets
- Step ladder or sturdy chair
- Safety goggles
Start by measuring your wall space and planning your shelf layout, ensuring adequate support for heavier items on lower shelves. Use a stud finder to locate wall studs and mark their positions. Install the mounting brackets, beginning with the lowest shelf position and working your way up, ensuring each bracket is level and properly anchored.
Space shelves approximately 12-15 inches apart for standard items, adjusting as needed for taller items or specific storage needs. Once brackets are secure, install the shelving units or boards, ensuring they’re firmly attached and level.
When arranging items on your new shelving system, position frequently used items at eye level or below for easy access. Store seasonal or rarely used items on upper shelves. Use matching storage boxes or baskets to maintain a cohesive look and conceal smaller items. Group similar items together and consider using shelf dividers to maintain organization.
Additional Tips: Label storage containers for easy identification and maintain accessibility by keeping a compact step ladder nearby. Regularly assess and rotate items based on seasonal needs. Install LED strip lighting under shelves to illuminate darker corners and create ambiance.
Consider adding adjustable brackets to modify shelf heights as storage needs change, and always leave some open space for visual breathing room to prevent a cluttered appearance.
Install Corner Shelves for Dead Space Solutions
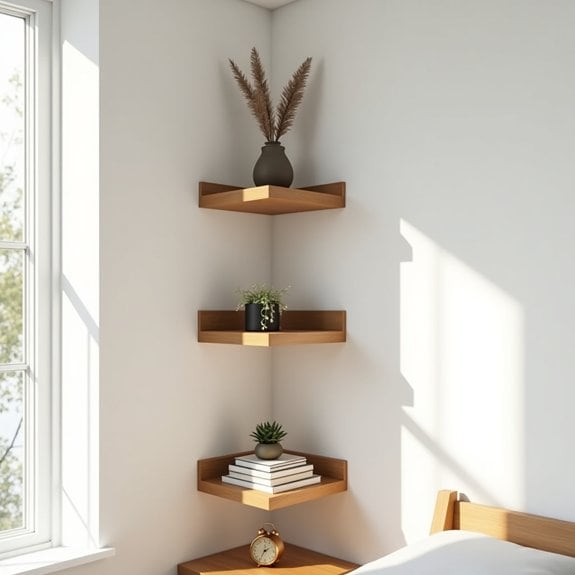
Corner spaces in bedrooms often become wasted dead zones, collecting dust or remaining completely unused. By installing corner shelves, you can transform these awkward angles into valuable storage and display areas, effectively maximizing every square inch of your compact bedroom.
Corner shelves provide vertical storage solutions that work particularly well in tiny bedrooms where floor space is at a premium. These installations can house books, decorative items, small plants, or essential belongings while creating visual interest and drawing the eye upward, making the room appear larger.
Required Items:
- Corner shelf brackets
- Corner shelves (pre-made or custom cut)
- Level
- Pencil
- Measuring tape
- Drill
- Wall anchors
- Screws
- Stud finder
- Screwdriver
- Safety goggles
- Dust mask
Start by determining the optimal height for your corner shelves using the measuring tape. Mark these points with a pencil and use a stud finder to locate wall studs. If you can’t find studs in the desired location, you’ll need to use wall anchors.
Install the brackets by drilling pilot holes, inserting wall anchors if necessary, and securing the brackets with screws. Ensure each bracket is level before final tightening.
Place the shelves onto the mounted brackets, ensuring they’re fully seated and level. If using custom-cut shelves, you may need to make minor adjustments to achieve a perfect fit. Once the shelves are properly positioned, secure them to the brackets using the provided hardware or additional screws as needed.
To maximize the functionality of your new corner shelves, consider implementing a zone system – designate specific shelves for different purposes, such as daily essentials on lower shelves and less frequently used items on higher ones.
Add small organizers or decorative boxes to contain smaller items, and regularly dust and reorganize to maintain an efficient and aesthetically pleasing corner storage solution.
Choose Multi-Functional Furniture Pieces

In small bedrooms, every square inch counts, making the selection of furniture crucial for maximizing space and functionality. Multi-functional furniture pieces serve as the cornerstone of smart bedroom organization, allowing you to maintain essential functions while minimizing the footprint of individual items.
The strategic implementation of dual-purpose furniture transforms a cramped bedroom into a versatile living space that can adapt to various needs throughout the day. From storage beds to fold-down desks, these pieces work overtime to provide solutions for storage, work, and relaxation without compromising valuable floor space.
Required Items:
- Measuring tape
- Floor plan or room dimensions
- Paper and pencil for planning
- Level tool
- Basic tools for assembly
- Storage bed or ottoman bed
- Fold-down desk or murphy bed
- Nesting tables
- Storage bench
- Convertible chair/bed
- Wall-mounted shelving system
Start by measuring your room’s dimensions and mapping out zones for sleeping, storage, and other activities. Select a bed with built-in storage drawers or an ottoman-style lifting mechanism as your primary piece. Position this against the longest wall to maximize floor space.
Next, identify wall space for mounting convertible furniture like fold-down desks or murphy beds, ensuring proper clearance when extended. Install nesting tables or convertible pieces that can be tucked away when not in use.
Focus on vertical storage solutions by incorporating tall, narrow dressers or armoires that offer maximum storage capacity with minimal floor coverage. Choose bedside tables with drawers or shelving, and consider wall-mounted options that can fold flat when not needed.
For seating, opt for storage benches that can house extra bedding or seasonal items while providing a comfortable place to sit.
Additional Tips: Regularly assess the functionality of each piece and be prepared to adjust their positioning based on your evolving needs. Consider furniture with wheels for easy reconfiguration, and always test the mechanical components of convertible pieces before purchasing.
Keep instruction manuals accessible for maintenance, and establish a routine for transitioning pieces between their various functions to ensure smooth operation and longevity.
Utilize Door-Mounted Organizers
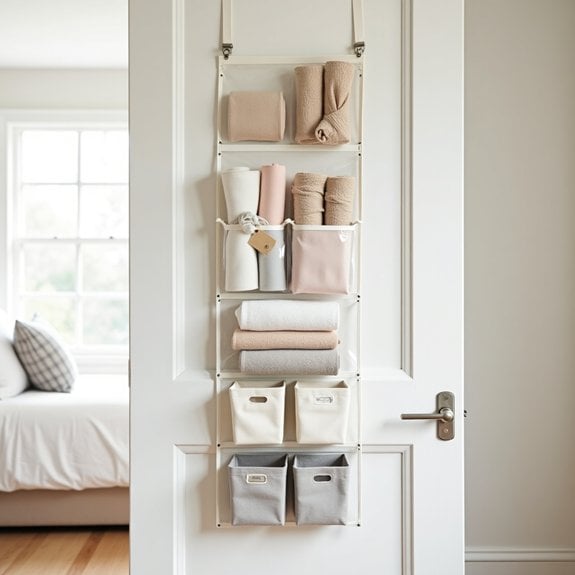
Door space represents one of the most underutilized storage areas in small bedrooms. By taking advantage of this vertical real estate, you can free up valuable floor and closet space while keeping essential items easily accessible.
Door-mounted organizers provide a practical solution for storing everything from shoes and accessories to toiletries and daily necessities. Door-mounted storage systems are particularly effective because they make use of otherwise wasted space without creating visual clutter in the room.
These organizers can transform a plain door into a functional storage zone while maintaining easy access to frequently used items, making them perfect for small bedroom organization.
Required Items:
- Over-the-door hanging organizer (fabric or plastic)
- Command hooks or mounting brackets
- Measuring tape
- Level
- Screwdriver (if using brackets)
- Door bumpers or felt pads
- Storage bins or baskets (optional)
- Label maker or tags (optional)
Start by measuring your door’s dimensions, including width and available hanging space, ensuring your chosen organizer will fit properly. Clean the door surface thoroughly and install door bumpers or felt pads where the organizer might contact the door to prevent scratching.
If using an over-the-door model, simply hang it over the top of the door, adjusting it to sit level. For mounted organizers, mark your mounting points using a level, then secure brackets or Command hooks according to the product instructions.
Once mounted, organize items by category and frequency of use. Place frequently accessed items at eye level, with heavier items toward the bottom for stability.
Consider using clear storage bins or labeled containers within the organizer pockets to keep smaller items contained and easily identifiable. To maximize the effectiveness of your door-mounted organization system, regularly assess and rotate items based on seasonal needs.
Avoid overloading pockets, which can strain the mounting system and create a cluttered appearance. Implement a one-in-one-out rule to prevent accumulation of unnecessary items, and periodically clean both the organizer and the door surface to maintain a neat, fresh appearance.
Create a Closet Command Center
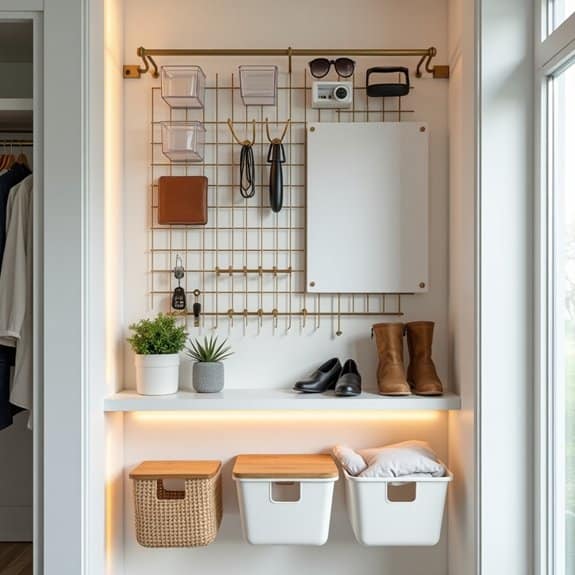
A well-organized closet command center serves as the control hub for your daily routine, turning a standard closet door or wall into a strategic planning space. In a tiny bedroom, every square inch matters, and utilizing vertical space on or inside your closet can transform how you manage your schedule, accessories, and daily essentials.
Converting your closet into a command center eliminates the need for additional furniture while creating a dedicated space for planning, storing frequently used items, and maintaining daily organization. This solution particularly benefits those with limited floor space, combining functionality with space efficiency.
Required Items:
- Over-the-door organizer
- Clear adhesive hooks
- Bulletin board or whiteboard
- Small containers or baskets
- Calendar or planner
- Mesh pockets
- Command strips
- Wire organizing grid
- Labels
- Storage bins
- LED battery-operated lights
Start by clearing and cleaning the designated closet area, whether it’s the interior door, side wall, or back wall. Mount the wire organizing grid at eye level using command strips or appropriate hardware. Install the over-the-door organizer if using the door space, ensuring it’s secure and doesn’t interfere with the door’s function.
Arrange the bulletin board or whiteboard next to or below the grid system. Create designated zones within your command center: one for planning (calendar, notes, and to-do lists), another for frequently accessed items (keys, sunglasses, face masks), and a third for seasonal accessories.
Install clear hooks and small containers strategically within these zones. Use mesh pockets for storing flat items like mail or papers, and position storage bins at the bottom for bulkier items.
Additional Success Tips: Label everything clearly and implement a regular maintenance schedule, perhaps weekly, to prevent clutter accumulation. Position frequently used items at eye level, and less-used items higher or lower.
Consider adding battery-operated LED lights to illuminate the command center if natural light is limited. Review and adjust the organization system after a month of use to optimize it for your specific needs and habits.
Implement Floating Nightstands
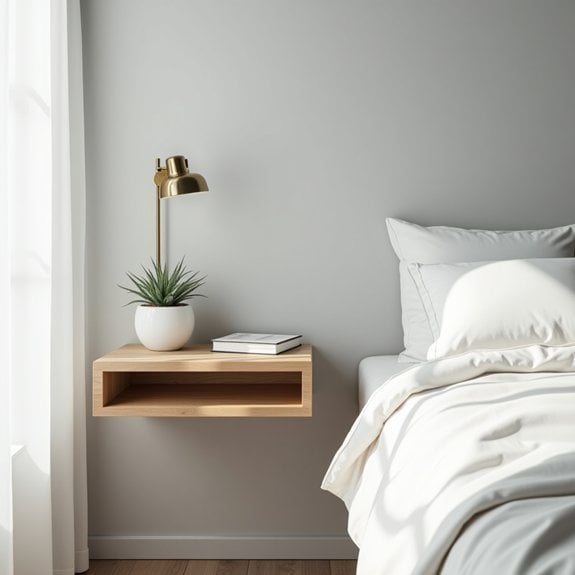
Floating nightstands represent an innovative solution for maximizing space in small bedrooms, eliminating the bulk of traditional bedside tables while maintaining essential functionality. These wall-mounted alternatives free up valuable floor space, creating an airier atmosphere and making cleaning underneath easier.
By implementing floating nightstands, you create dedicated spaces for bedtime essentials without compromising precious square footage. This modern approach to bedroom organization not only serves practical purposes but also adds a contemporary aesthetic touch that can make your tiny bedroom appear more spacious and organized.
Required Items:
- Wall brackets or floating shelf hardware
- Wall anchors and screws
- Level
- Drill and drill bits
- Pencil
- Measuring tape
- Stud finder
- Screwdriver
- Floating shelf or custom-cut wood piece
- Sandpaper (if using custom wood)
- Wall patch kit (if needed)
Installing floating nightstands begins with selecting the ideal height, typically 2-4 inches above your mattress top. Using a stud finder, locate and mark wall studs for secure mounting. Measure and mark your desired shelf positions, ensuring they’re level and at equal heights on both sides of the bed.
Install wall brackets or mounting hardware according to manufacturer specifications, using wall anchors in areas without studs. Secure the floating shelves to the mounted hardware, double-checking for stability before placing any items on them.
For optimal organization on your floating nightstands, consider implementing zones: designate one area for essential items like reading glasses or medication, another for decorative elements like a small plant or photo frame, and maintain a clear space for a water glass or book.
Choose lightweight items to prevent strain on the mounting hardware, and avoid overcrowding the surface to maintain a clean, minimalist appearance. Regular dusting and periodic hardware checks will ensure your floating nightstands remain both functional and secure for years to come.
Use Vacuum Storage Bags for Seasonal Items
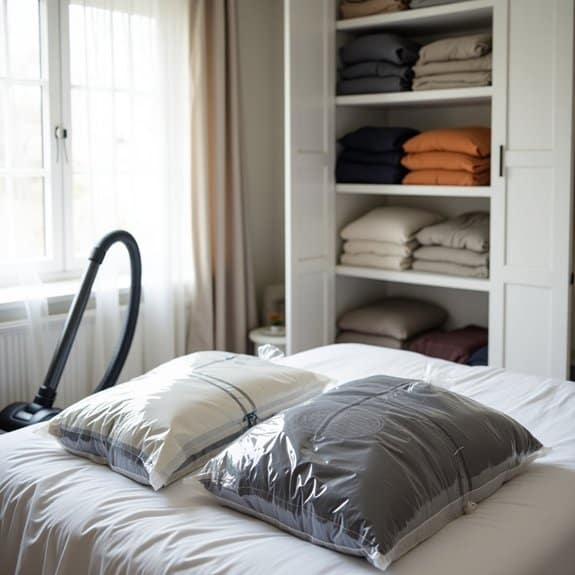
Organizing seasonal clothing and items in a tiny bedroom presents a significant challenge, particularly when storage space is at a premium. Vacuum storage bags offer an innovative solution by compressing bulky items like winter coats, heavy blankets, and seasonal clothing to a fraction of their original size, creating valuable extra space in closets and under beds.
The vacuum storage method not only saves space but also protects items from dust, moisture, and pests during their off-season storage. This systematic approach to seasonal storage allows you to maintain a clutter-free environment while ensuring your seasonal items remain in excellent condition until needed.
Required Items:
- Vacuum storage bags (various sizes)
- Vacuum cleaner with hose attachment
- Labels and marker
- Cleaning supplies
- Laundry detergent
- Storage container or box (optional)
- Inventory list
- Clean, dry surface for sorting
Sort all seasonal items by category and ensure they’re clean and completely dry before storage. Remove items from hangers and fold them neatly, placing similar items together in appropriately sized vacuum bags. Fill bags to about 80% capacity, leaving room for proper sealing.
Seal the bag according to manufacturer instructions, then use your vacuum cleaner’s hose attachment to remove air through the valve. As the air evacuates, smooth out any wrinkles to ensure maximum compression. Once compressed, double-check the seal and store bags in your chosen location.
For optimal organization, create a detailed inventory of stored items and attach labels to each bag indicating contents and season. Stack compressed bags in clean, dry areas such as under the bed, on high closet shelves, or in storage containers. Consider using clear bags or taking photos of contents before storage for easy identification.
Additional Tips: Rotate seasonal items twice yearly, timing switches with spring and fall cleaning. When removing items from vacuum storage, allow them to air out for 24 hours before use. Keep bags away from sharp objects that could puncture them, and store them in temperature-controlled environments to prevent moisture buildup.
Consider using cedar blocks or lavender sachets inside bags for natural moth protection and freshness.
Mount Lighting to Free Up Surface Space
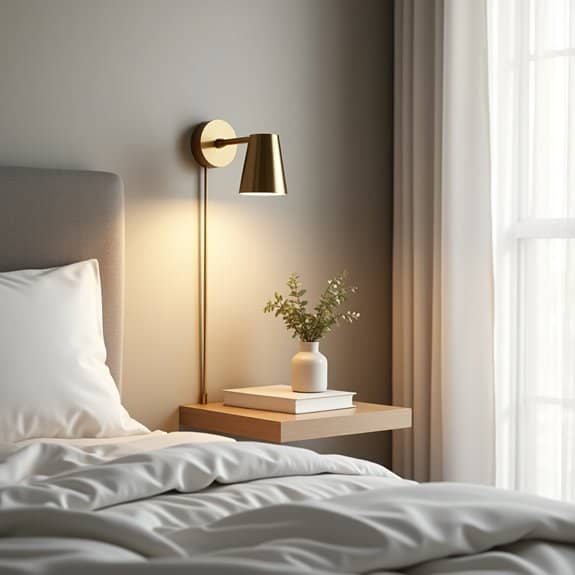
In small bedrooms, every inch of surface space counts. Traditional table lamps can consume precious nightstand real estate that could be better utilized for essential items or decorative pieces. Mounting lighting fixtures to walls or ceilings creates an immediate expansion of usable surface area while maintaining necessary illumination for reading, working, or creating ambiance.
Wall-mounted and ceiling-mounted lighting solutions not only save space but also add a sophisticated, custom look to your bedroom design. These fixtures can be adjusted to provide targeted lighting exactly where needed, eliminating shadows and dark corners while keeping surfaces clear for other purposes.
Required Items:
- Wall-mounted light fixtures or sconces
- Ceiling-mounted pendant lights or flush mounts
- Wire cutters and strippers
- Electrical tester
- Mounting brackets
- Wall anchors and screws
- Power drill
- Level
- Measuring tape
- Wire nuts
- Electrical tape
- Junction box (if not already installed)
Begin by turning off power at the circuit breaker and testing the wires to ensure they’re dead. Install mounting brackets according to manufacturer specifications, ensuring they’re level and properly anchored into wall studs or ceiling joists.
If working with existing wiring, connect the fixture’s wires to the house wiring using wire nuts, matching black to black (hot) and white to white (neutral) wires, and connect the ground wire. Secure the fixture to the mounting bracket and install any decorative covers or shades.
For maximum effectiveness, install lights at proper heights and positions relative to your bed or work area. Wall sconces should typically be mounted 60-72 inches from the floor and 6-12 inches out from the edge of the bed.
Consider installing dimmer switches for versatility in lighting levels. Multiple light sources at different heights create layers of illumination while maintaining valuable surface space throughout the room.
Bonus Tip: When selecting mounted fixtures, choose adjustable arms or swivel heads that can be repositioned as needed. LED fixtures reduce heat output and require less frequent bulb changes, making them ideal for hard-to-reach mounted positions.
Consider installing cord covers or having wiring run inside walls for a cleaner appearance and safer installation.
Transform Window Sills Into Storage Areas
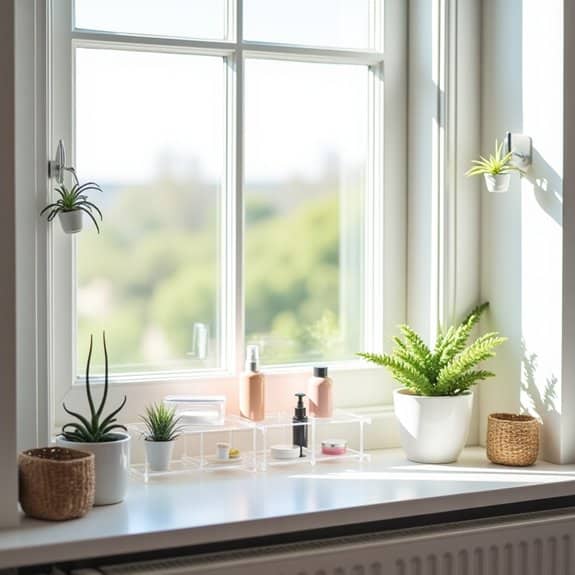
Window sills represent valuable but often overlooked real estate in small bedrooms. These built-in ledges can serve multiple purposes beyond their basic function, offering additional storage space without consuming precious floor area or requiring installation of new furniture pieces.
Making use of window sills as storage areas is particularly beneficial in compact living spaces where every inch counts. When properly organized, these spaces can house everything from books and plants to daily essentials, while maintaining a clean, intentional aesthetic that enhances rather than clutters the room’s appearance.
Required Items:
- Clear acrylic risers or shelf organizers
- Non-slip shelf liner
- Small decorative baskets or containers
- Command hooks or adhesive strips
- Window-safe plant holders
- Clear storage containers
- Measuring tape
- Cleaning supplies
Start by thoroughly cleaning the window sill and measuring its dimensions to determine the maximum storage capacity. Install non-slip liner along the entire length of the sill to protect the surface and prevent items from sliding.
Place acrylic risers at varying heights to create levels of storage, maximizing vertical space while maintaining visibility of items. For frequently accessed items, position small baskets or containers at the ends of the window sill where they’re easily reachable.
Utilize clear storage containers in the middle section for items that need protection from dust but should remain visible. If the window frame allows, install command hooks on either side to hang lightweight items or small plants.
Consider seasonal adjustments when organizing window sill storage. During winter months, leave space between items to prevent condensation buildup, and avoid placing moisture-sensitive items directly against the window.
Use weatherproof containers in areas prone to temperature fluctuations, and regularly rotate items to prevent sun damage to delicate materials or colors. Always ensure that window mechanisms remain fully operational and that storage items don’t interfere with opening or closing the window.
Invest in Bed Risers for Extra Height
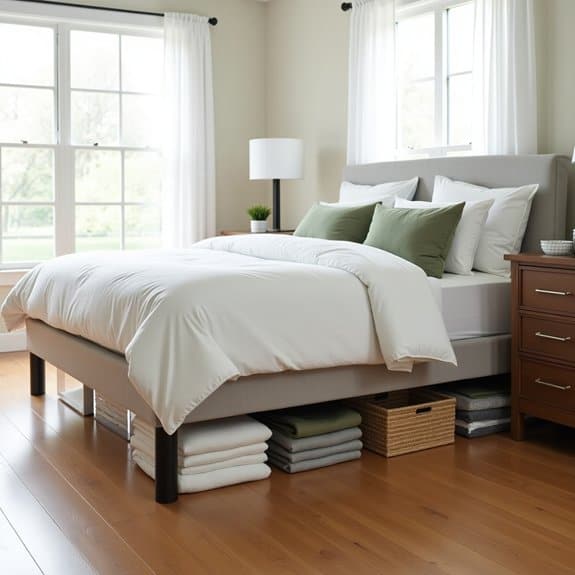
Maximizing storage space in a tiny bedroom requires creative solutions, and one of the most overlooked opportunities lies right under your bed. By elevating your bed with risers, you can instantly create valuable storage real estate in an otherwise unused space, effectively doubling your storage capacity without sacrificing precious floor space.
Bed risers not only provide additional storage but also transform your bedroom‘s functionality. The added height makes it easier to access items stored underneath and can even make your room appear more spacious. This simple modification can create enough space to store seasonal clothing, extra bedding, shoes, or rarely used items that would otherwise clutter your living space.
Required Items:
- Set of 4-8 bed risers (depending on bed frame type)
- Measuring tape
- Storage containers that fit under bed dimensions
- Non-slip pads
- Dust covers or storage bags
- Label maker or labels
- Furniture sliders (optional)
Start by measuring the legs of your bed frame to ensure compatibility with your chosen risers. Remove any existing items from under the bed and clean the area thoroughly.
With assistance, lift one corner of the bed at a time and place a riser under each leg, ensuring they’re properly seated and level. For additional stability, place non-slip pads between the bed legs and risers.
Once the bed is elevated, measure the new clearance height and width to determine appropriate storage container sizes. Select containers that maximize the available space while allowing easy sliding in and out.
Organize items into categories and pack them into containers, making sure to label everything clearly for easy identification. To maintain organization and protect stored items, use dust covers or storage bags for seasonal clothing and bedding.
Consider installing wheel-mounted storage boxes for easier access, and maintain a detailed inventory of stored items. Remember to periodically check and rotate stored items to prevent moisture buildup and ensure nothing becomes forgotten in this newly created storage space.
Add Over-the-Door Hooks and Racks
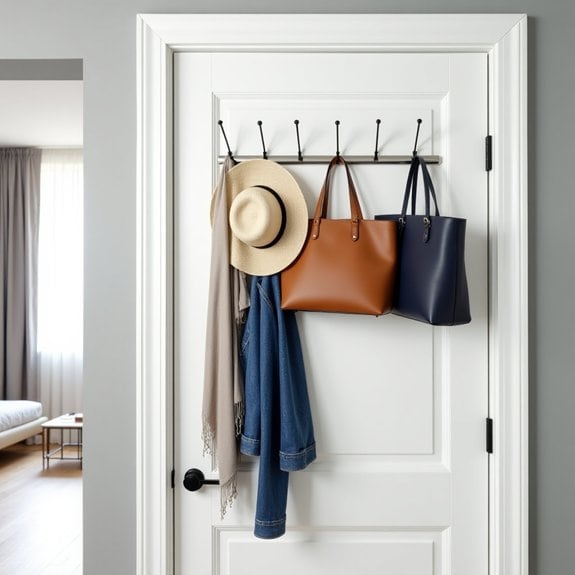
Maximizing vertical space becomes crucial when dealing with a small bedroom, and the often-overlooked door surface presents a golden opportunity for additional storage. Over-the-door hooks and racks transform dead space into functional storage areas, perfect for hanging clothes, accessories, and everyday items that would otherwise clutter your limited floor or drawer space.
Installing over-the-door storage solutions can instantly add several square feet of organizing potential without any permanent modifications to your room. This method is particularly valuable for renters or those who prefer non-permanent storage solutions, as these systems can be easily installed and removed without causing damage.
Required Items:
- Over-the-door hooks (single or multiple hook designs)
- Over-the-door rack system
- Door-mounted organizer with pockets
- Measuring tape
- Level
- Rubber door protectors
- Command strips (optional)
- Tension rods (optional)
Start by measuring your door’s width and thickness to ensure proper fit of your chosen organizing systems. Install rubber door protectors at contact points to prevent damage to the door.
Position the main over-the-door rack first, ensuring it’s level and secure. Add single hooks or additional racks strategically, considering the length of items to be hung and ensuring door movement isn’t impeded. For maximum stability, consider using command strips at the bottom of organizing systems to prevent swinging.
Create designated zones on your over-door storage: assign specific areas for different categories like accessories, outerwear, or bags. Position frequently used items at eye level for easy access, while seasonal items can go higher or lower. Ensure all items hung on the door don’t exceed the weight capacity of your organizing systems.
To maintain organization and prevent wear on your door, regularly check that hooks and racks remain secure, adjust rubber protectors as needed, and avoid overloading any single hook or section.
Consider using clear pocket organizers for smaller items, and label sections to maintain organization long-term. Remember to periodically assess and rotate items based on seasonal needs and frequency of use.
Organize With Clear Storage Containers
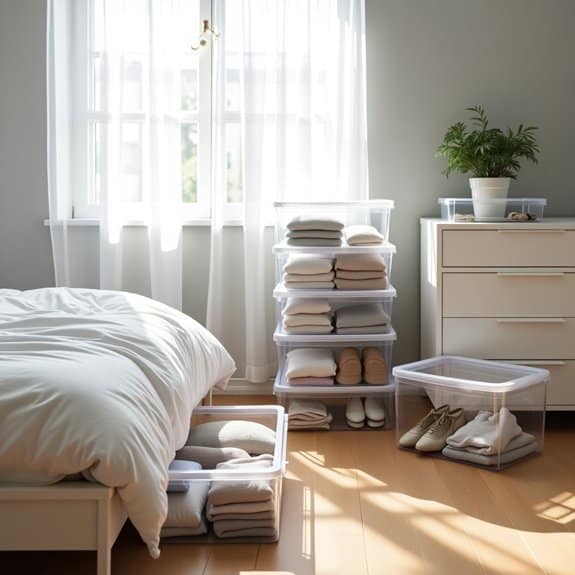
Clear storage containers are essential tools for maximizing space in a tiny bedroom while maintaining visual order. When items are visible through transparent containers, you can quickly locate what you need without rummaging through multiple boxes or forgetting about stored possessions.
Implementing a clear container storage system transforms cluttered spaces into organized zones, making the most of limited storage areas under beds, in closets, or on shelves. This system works particularly well for seasonal clothing, accessories, and small items that might otherwise become lost or disorganized.
Required Items:
- Various sizes of clear plastic containers
- Labels and marker
- Measuring tape
- Drawer dividers
- Clear shoe boxes
- Vacuum storage bags
- Container lid organizer
- Moisture-absorbing packets
- Level
- Clear stackable bins
Start by measuring your available storage spaces, including under-bed clearance, closet shelves, and any nooks that could accommodate containers. Sort items into categories such as seasonal wear, accessories, shoes, and miscellaneous items. Select appropriately sized containers for each category, ensuring they fit your designated spaces.
Remove items from existing storage, clean the spaces thoroughly, and begin placing sorted items into their designated clear containers. The next phase involves strategic placement of your filled containers. Position frequently used items in easily accessible locations, while seasonal or rarely used items can go in harder-to-reach spots.
Stack containers efficiently, but avoid making stacks too tall, which could become unstable. Label each container clearly on multiple sides for easy identification, even when stacked.
Additional Tips: Incorporate silica gel packets in containers storing fabric items to prevent moisture damage, and periodically audit container contents to maintain organization. Use drawer dividers inside larger clear containers to create compartments for smaller items, and consider installing motion-sensor lights in dark storage areas to maximize visibility through the clear containers.
Review and adjust your organization system every few months to ensure it continues meeting your needs effectively.
Install a Murphy Bed for Flexible Space
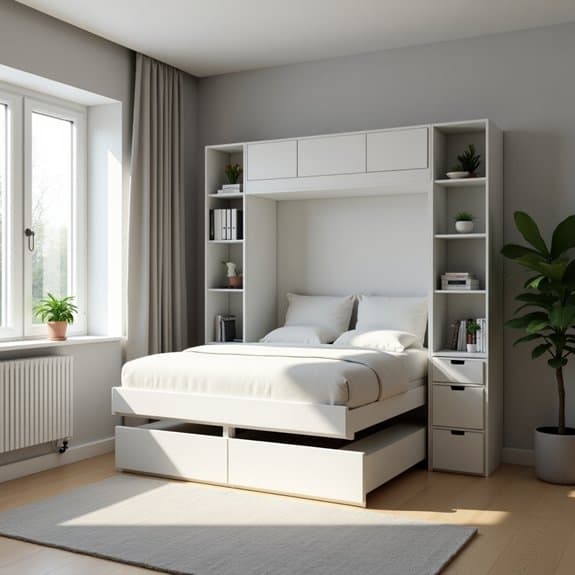
In small bedrooms, every square foot matters, and a Murphy bed represents one of the most transformative solutions for maximizing limited space. By installing a wall-mounted bed that folds up when not in use, you can instantly convert your sleeping area into a functional living space, home office, or exercise room during daytime hours.
The success of a Murphy bed installation hinges on proper planning and precise execution. This dual-purpose furniture solution not only saves space but also adds value to your home by creating a versatile room that adapts to your changing needs throughout the day. With careful consideration of placement and materials, a Murphy bed can become the centerpiece of your small bedroom organization strategy.
Required Items:
- Murphy bed kit or custom-built system
- Power drill and drill bits
- Level
- Stud finder
- Measuring tape
- Screwdriver set
- Wall anchors
- Wood screws
- Helper/assistant
- Safety glasses
- Work gloves
- Drop cloth
The installation process begins with selecting the ideal wall location, ensuring it’s properly reinforced to support the bed’s weight. Using a stud finder, mark all wall studs and verify the wall can accommodate the bed’s dimensions when both folded and extended.
Next, assemble the bed frame according to the manufacturer’s instructions, typically starting with the wall-mounting bracket. Once the mounting hardware is secure, attach the bed cabinet to the wall, ensuring it’s perfectly level and plumb. Install the bed mechanism, springs, and mattress platform, testing the operation several times without the mattress to ensure smooth movement.
To maximize the Murphy bed’s functionality, consider incorporating built-in storage solutions on either side of the unit. Install cabinets, shelves, or a desk that complements the bed when folded up. Additionally, ensure proper clearance for furniture pieces that will remain in the room when the bed is lowered, and mark the floor space needed for the bed in its extended position.
For optimal results, invest in a high-quality mattress that’s specifically designed for Murphy beds (typically lighter and thinner than standard mattresses), and use appropriate bedding that can be easily tucked in to prevent it from falling out when the bed is raised.
Consider adding LED lighting to the bed cabinet for improved visibility and ambiance, and regularly maintain all moving parts by lubricating hinges and checking hardware tightness every few months.
Use Magnetic Storage Solutions on Metal Surfaces

In small bedrooms, every inch of vertical space counts, and metal surfaces offer untapped potential for storage solutions. From radiators to metal bed frames, these surfaces can transform into valuable organizational real estate when paired with magnetic storage accessories.
Magnetic storage solutions provide quick access to frequently used items while keeping them off valuable counter and floor space. This organization method is particularly effective for storing makeup, office supplies, tools, and other metallic items that themselves can become part of the magnetic storage system.
Required Items:
- Strong magnetic hooks
- Magnetic storage containers
- Magnetic strips or bars
- Metal-friendly adhesive strips
- Small magnetic organizers
- Magnetic spice containers
- Magnetic bulletin board
- Label maker
- Cleaning supplies
- Metal sheet (if creating new magnetic surfaces)
Start by thoroughly cleaning all metal surfaces to ensure proper magnetic adhesion. Install magnetic strips or bars vertically on available metal surfaces, maintaining equal spacing for a clean appearance. Attach magnetic containers at eye level for frequently accessed items, and position heavier items lower for stability.
Group similar items together using magnetic organizers, and implement a color-coding system if desired. For areas lacking metal surfaces, mount metal sheets using appropriate wall anchors to create new magnetic zones. Consider installing a magnetic strip behind doors or in unused corner spaces.
When arranging items, maintain a logical flow by keeping daily-use items within easy reach and storing seasonal or less-used items in higher or lower positions. For optimal organization maintenance, regularly assess the weight capacity of magnetic items and adjust as needed.
Avoid overloading magnetic holders, and periodically check that all magnets maintain their strength. Consider rotating items seasonally to prevent cluttered areas and ensure the system continues to serve your specific needs effectively. Label all containers clearly to maintain organization and make items easy to locate.

