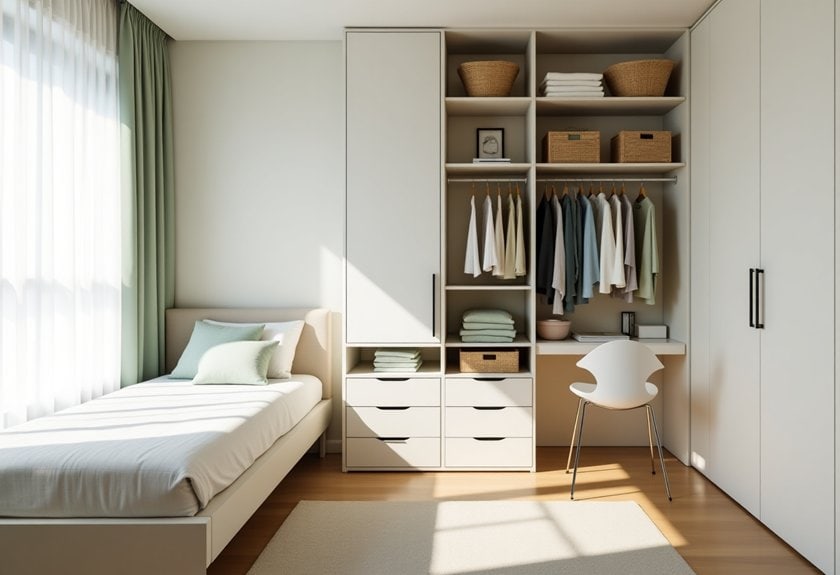
If your bedroom’s dimensions are feeling a bit… cozy, you’re not alone! I’ve spent years mastering the art of maximizing small spaces, and I’ve discovered that even the tiniest rooms can become functional sanctuaries with the right layout strategy. Whether you’re working with a shoebox-sized studio or a snug spare room, these 12 game-changing organization ideas will transform your space from cramped to comfortable. Let me show you how to make every square inch count.
Utilize Vertical Space With Floor-To-Ceiling Storage
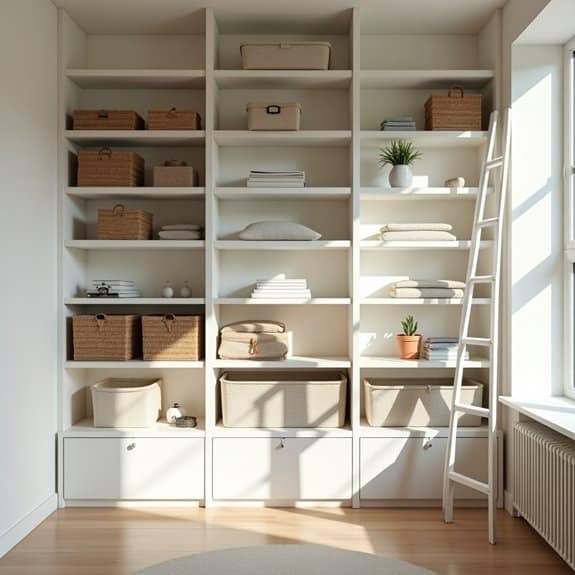
Making the most of vertical space in a small room is essential for maximizing storage capacity while maintaining a clutter-free environment. Floor-to-ceiling storage solutions can effectively triple your storage space by taking advantage of often-overlooked wall real estate, transforming dead space into functional storage areas.
Implementing vertical storage systems not only helps organize belongings but also draws the eye upward, creating the illusion of higher ceilings and a more spacious room. This approach to organization combines practical storage solutions with smart design principles, making your small space both functional and visually appealing.
Required Items:
- Measuring tape
- Level
- Drill and drill bits
- Wall anchors
- Screwdriver
- Pencil
- Adjustable shelving units or brackets
- Storage containers or baskets
- Step ladder or sturdy stool
- Shelf supports
- Wall-mounted storage systems
- Cable ties or cord organizers
Start by measuring your wall space from floor to ceiling and mapping out zones for different storage needs. Install the main support system, whether it’s adjustable track systems, floating shelves, or modular units, ensuring proper anchoring to wall studs for maximum stability.
Position frequently used items at eye level, with seasonal or rarely accessed items stored in higher spaces. Create designated zones for specific categories of items, such as books, decorative pieces, or storage boxes.
Work from bottom to top when arranging items, placing heavier objects on lower shelves and lighter items above. Incorporate a mix of open shelving and closed storage solutions to maintain visual interest while hiding clutter. Use matching containers or baskets to create a cohesive look and maximize vertical space efficiency.
Additional Tips: Consider installing lights beneath upper shelves to illuminate lower spaces and create ambiance. Use clear containers for items stored in higher spaces to easily identify contents from below.
Maintain adequate walking space by keeping floor-level storage slightly recessed, and regularly assess stored items to prevent accumulation of unnecessary belongings that could overwhelm the system.
Choose Multi-Purpose Furniture Solutions

Living in a small space requires strategic thinking and creative solutions. Multi-purpose furniture serves as the cornerstone of efficient small-room organization, allowing you to maximize every square foot while maintaining functionality and style. These versatile pieces can transform your space from cluttered to streamlined, offering multiple uses without sacrificing precious floor space.
The key to successful multi-purpose furniture implementation lies in careful selection and thoughtful placement. Each piece should serve at least two distinct functions while complementing your existing décor and meeting your daily needs. This approach not only saves space but also reduces the total number of furniture pieces needed, creating a more open and manageable environment.
Required Items:
- Measuring tape
- Floor plan or room dimensions
- List of daily activities performed in the space
- Budget worksheet
- Furniture catalog or online resources
- Space-planning app (optional)
- Storage containers
- Furniture sliders
- Level tool
To effectively organize your space with multi-purpose furniture, start by assessing your room’s dimensions and primary functions. Map out zones for different activities and identify opportunities where furniture can serve multiple purposes. Select pieces such as ottoman storage benches, Murphy beds with built-in desks, or expandable dining tables that can double as workstations.
Position these items strategically against walls or in corners to maximize open floor space, ensuring each piece can be easily accessed and transformed as needed. Consider vertical space utilization by incorporating wall-mounted, foldable furniture or modular systems that can be reconfigured based on immediate needs.
Install furniture that can be nested or stacked when not in use, such as nesting tables or stackable chairs. Ensure all chosen pieces maintain proper circulation paths and don’t overwhelm the room’s proportions.
Additional Tips: Prioritize furniture with built-in storage compartments to eliminate the need for separate storage solutions. Opt for pieces with wheels or lightweight construction for easy reconfiguration, and choose neutral colors or complementary finishes to create visual cohesion.
Regularly evaluate the functionality of your multi-purpose furniture arrangements and adjust as your needs change to maintain optimal space efficiency.
Create a Smart Layout With Corner Beds
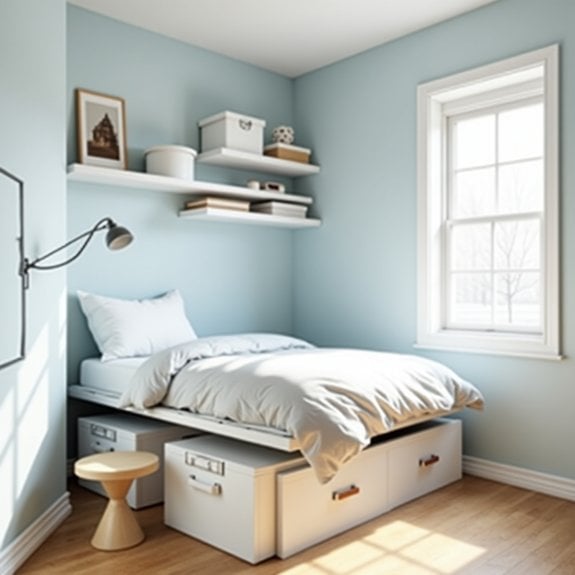
Making the most of limited space in a small bedroom starts with strategic furniture placement, and corner beds offer an excellent solution for maximizing floor space. By positioning the bed in a corner, you create a cozy sleeping nook while opening up valuable square footage for other essential items and activities.
Corner bed arrangements work particularly well in small rooms because they utilize often-underused corner spaces and create natural zones for different activities. This layout can transform an awkward room into a highly functional space that feels larger and more organized than traditional bed placements allow.
Required Items:
- Measuring tape
- Paper and pencil for planning
- Twin or full-size bed frame
- Corner-friendly headboard (optional)
- Corner shelving units
- Wall anchors
- Basic tools (screwdriver, level, drill)
- Storage containers that fit under the bed
- Corner-appropriate bedside table
Position the bed with the long side against one wall and the head against the adjacent wall, ensuring enough clearance for making the bed and changing sheets. Install wall-mounted lighting or sconces above the bed to eliminate the need for table lamps.
Maximize the corner space by adding floating shelves or a corner storage unit that follows the angle of the walls, creating a built-in look that doesn’t waste space.
Consider installing storage solutions underneath the bed to maximize the space efficiency. Use bed risers if needed to create additional storage height, and organize under-bed items in labeled containers that slide easily in and out.
The exposed side of the bed can be used to create a natural pathway through the room, leading to a desk, dresser, or seating area.
To enhance the corner bed layout, use light colors on the walls and bedding to create an open feel, and consider adding mirrors to reflect light and create the illusion of more space.
Utilize vertical storage solutions on the walls above and around the bed to keep floor space clear while maintaining easy access to frequently used items. Remember to leave enough space between the bed and any overhead storage to prevent a cramped feeling when sitting up in bed.
Maximize Under-Bed Storage Potential
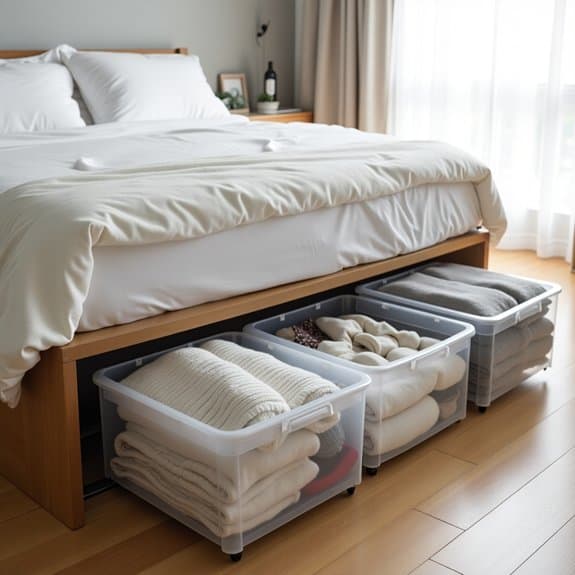
Under-bed storage represents one of the most underutilized spaces in any bedroom. This often-neglected area can provide substantial storage capacity, equivalent to several dresser drawers or a small closet, without consuming any additional floor space in a cramped room.
Making the most of under-bed storage not only helps declutter your living space but also creates a systematic approach to storing seasonal items, extra bedding, clothing, or rarely used possessions. When properly organized, this space becomes an essential part of your room’s storage solution, keeping items dust-free and easily accessible.
Required Items:
- Under-bed storage containers or drawers
- Bed risers (if needed)
- Measuring tape
- Labels and marker
- Vacuum storage bags
- Anti-dust covers
- Clear plastic bins
- Drawer dividers
- Caster wheels (optional)
- Dust ruffle or bed skirt
Start by measuring the available space under your bed, including height, width, and depth. If the clearance is insufficient, install bed risers to create additional space.
Select storage containers that maximize the full dimensions of the under-bed area, preferably clear ones for easy identification of contents. Sort items into categories: seasonal clothing, extra bedding, shoes, or memorabilia.
Place frequently accessed items toward the bed’s foot or sides for easier retrieval. Use vacuum storage bags for soft items like blankets and clothing to maximize space and protect against moisture and insects.
Install drawer dividers within larger containers to maintain organization and prevent items from shifting. For optimal organization, create a detailed inventory of stored items and their locations.
Consider adding caster wheels to heavier containers for easier access, and use a bed skirt to conceal storage while maintaining a neat appearance. Regular maintenance, including seasonal rotation of items and periodic cleaning, will help maintain an efficient under-bed storage system that serves your needs year-round.
Install Space-Saving Wall-Mounted Fixtures
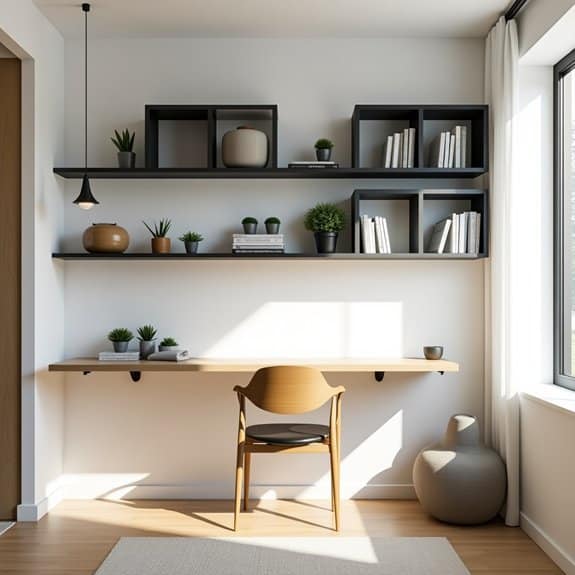
Wall-mounted fixtures are game-changers in small spaces, transforming vertical surfaces into functional storage areas while keeping valuable floor space clear. By utilizing wall space effectively, you can create additional storage without the room feeling cluttered or cramped, making it easier to move around and maintain a clean, organized environment.
Installing wall-mounted fixtures requires careful planning and consideration of your space’s specific needs. These solutions can include everything from floating shelves and cabinets to fold-down desks and hanging organizers, each serving multiple purposes while maintaining a streamlined appearance.
Required Items:
- Stud finder
- Level
- Drill and drill bits
- Screwdriver
- Wall anchors
- Mounting brackets
- Measuring tape
- Pencil
- Wall-mounted fixtures of choice
- Safety goggles
- Work gloves
Start by assessing your wall space and marking potential mounting locations, using a stud finder to locate secure attachment points. Measure and mark precise locations for your fixtures, ensuring they’re at appropriate heights for easy access while maintaining visual balance in the room. Use a level to draw guidelines for accurate installation.
For each fixture, begin by installing mounting brackets or hardware according to manufacturer specifications. If you can’t locate a stud, use appropriate wall anchors rated for the weight of your items. Always pre-drill holes to prevent wall damage and ensure secure mounting. Install fixtures one at a time, checking stability and level as you go.
Additional Tip: Before mounting any fixtures permanently, consider creating paper templates of each piece and taping them to the wall to visualize the final layout. This allows you to adjust positioning and spacing before making any holes, ensuring optimal placement and preventing costly mistakes.
Remember to factor in clearance space for doors, windows, and furniture when planning your layout.
Incorporate Built-In Storage Solutions
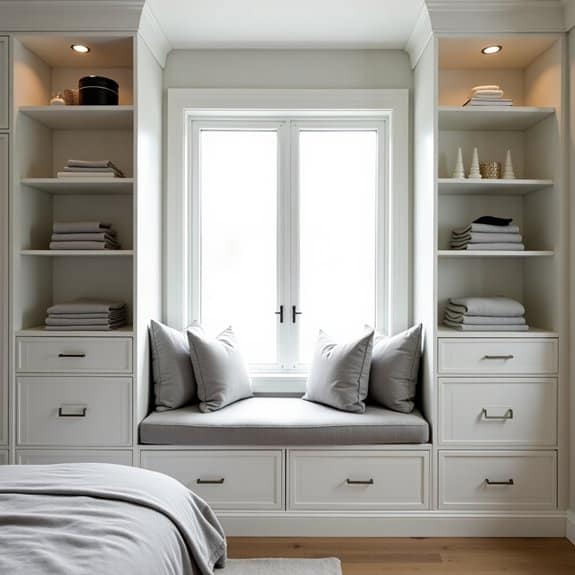
Built-in storage solutions represent one of the most efficient ways to maximize space in small rooms, turning otherwise unused areas into functional storage spaces. These permanent fixtures become part of the room’s architecture, creating seamless organization while maintaining visual harmony and reducing clutter.
Unlike freestanding furniture, built-in storage takes advantage of every inch of available space, from floor to ceiling and wall to wall. This approach not only optimizes storage capacity but also adds value to your property while providing customized solutions that perfectly fit your specific needs and room dimensions.
Required Items:
- Measuring tape
- Level
- Pencil and paper for planning
- Power drill
- Screwdriver set
- Wall anchors
- Screws and brackets
- Storage materials (shelving, cabinets, drawers)
- Wood or building materials
- Paint or finish materials
- Construction adhesive
- Safety equipment (goggles, gloves)
Start by thoroughly measuring your space and identifying potential areas for built-in storage, such as alcoves, under windows, or along entire walls. Create a detailed plan that accounts for both your storage needs and the room’s existing features, including electrical outlets and heating vents.
Consider incorporating various storage types: open shelving for frequently accessed items, closed cabinets for visual clarity, and drawers for smaller items.
Begin installation by preparing the space, removing baseboards if necessary and ensuring walls are sturdy enough to support the storage system. Install vertical support pieces first, followed by horizontal elements, making sure everything is level and secure.
Add structural elements progressively, checking stability at each step. Finally, incorporate organizational features like adjustable shelves, drawer dividers, or pull-out systems to maximize functionality.
Additional Tips:
Consider lighting options within built-ins to illuminate dark corners, use door-mounted organizers to maximize cabinet space, and incorporate versatile solutions like pull-out work surfaces or fold-down tables.
Always leave some open space in your design to prevent a cramped feeling and maintain room for future organizational adjustments as your needs change.
Design an Efficient Closet Organization System
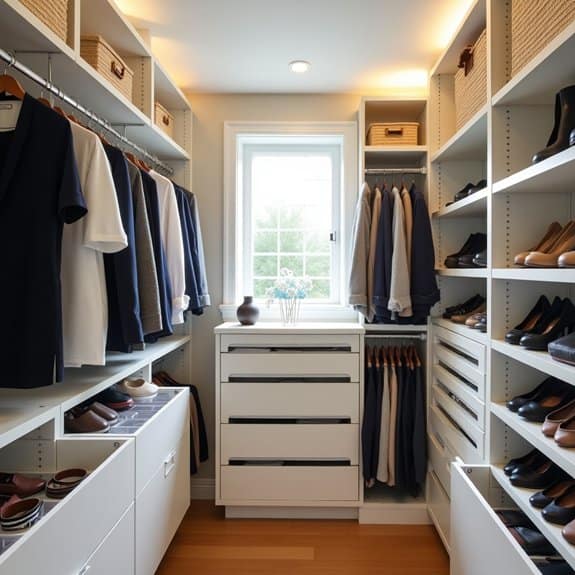
A well-organized closet serves as the foundation for an efficient small room, transforming a potentially chaotic space into a functional storage solution. When every item has its designated place, getting dressed becomes easier, maintaining order becomes natural, and the overall room feels more spacious and organized.
Maximizing vertical space and implementing smart storage solutions can double or even triple your closet’s capacity. An efficient closet system not only helps you locate items quickly but also protects your clothing and accessories while making the most of limited space.
Required Items:
- Clothing rod(s)
- Hanging organizers
- Storage bins
- Shelf dividers
- Clear containers
- Labels
- Drawer organizers
- Slim hangers
- Over-the-door hooks
- Belt/scarf organizers
- Shoe racks
Start by removing everything from your closet and sorting items into categories: keep, donate, and discard. Install a dual-rod system if possible, with one rod at standard height for longer items and another below it for shorter pieces.
Position frequently used items at eye level, seasonal items higher up, and less-used pieces in harder-to-reach spaces. Group similar items together and assign specific zones within the closet. Implement a combination of hanging space, shelving, and drawers based on your clothing types.
Use clear containers for accessories and stack them with labels facing outward. Install shelf dividers to keep folded items from tumbling into each other, and utilize door space for additional storage.
For optimal maintenance, consider implementing a one-in-one-out rule and conduct seasonal reviews of your closet contents. Use slim, uniform hangers to maximize space and maintain clothing shape, and add battery-operated lighting to dark corners for better visibility.
Store frequently used items in easily accessible locations, and consider vacuum storage bags for off-season items to maximize vertical space.
Implement Strategic Lighting Placement
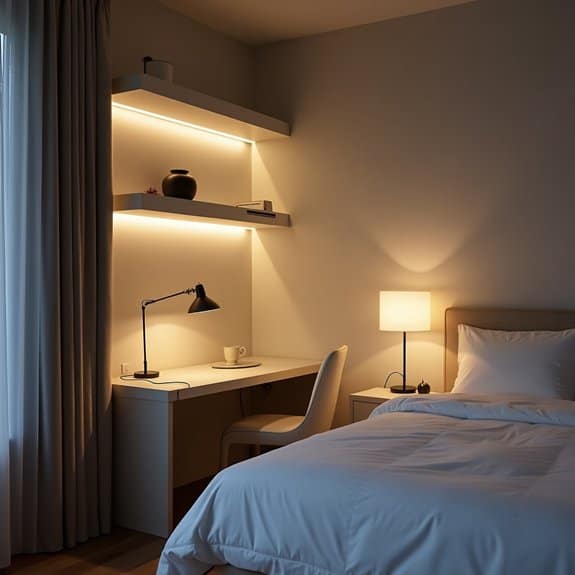
Proper lighting placement in a small room is crucial for creating the illusion of space while maintaining functionality. Strategic lighting can transform a cramped area into a well-defined, multi-purpose space that feels larger and more inviting. When light is properly distributed, it eliminates dark corners that make rooms feel smaller and creates layers of illumination that add depth to your space.
Effective lighting organization isn’t just about brightness; it’s about creating zones within your room and highlighting specific areas for different activities. A well-planned lighting scheme can make a small room more versatile, allowing it to serve multiple purposes throughout the day while maintaining a clutter-free appearance.
Required Items:
- LED strip lights
- Task lamps
- Floor lamps
- Wall sconces
- Dimmer switches
- Cable management clips
- Extension cords
- Light bulbs (various wattages)
- Mounting hardware
- Measuring tape
Start by mapping out your room’s lighting needs based on activity zones. Position task lighting in work areas such as desks or reading nooks, ensuring the light source is at the appropriate height to prevent glare. Install wall sconces at eye level to free up floor space, and place them strategically to eliminate shadows in corners.
Layer your lighting by combining ambient ceiling lights with accent lighting along walls or under furniture. For maximum space efficiency, use multi-directional fixtures that can be adjusted to illuminate different areas as needed. Thread power cords along baseboards or behind furniture using cable management solutions to maintain a clean appearance.
Position floor lamps in corners where they can provide broad illumination without creating obstacles in high-traffic areas.
Additional Tips:
Use light fixtures with metallic or reflective surfaces to bounce light around the room. Opt for LED bulbs with color temperature controls to adjust the atmosphere throughout the day. Consider installing motion-sensor lights in closets or storage areas to eliminate the need for switches in tight spaces.
Always maintain a clear path to light controls and keep spare bulbs organized in an easily accessible location for quick replacements.
Use Door Space for Additional Storage
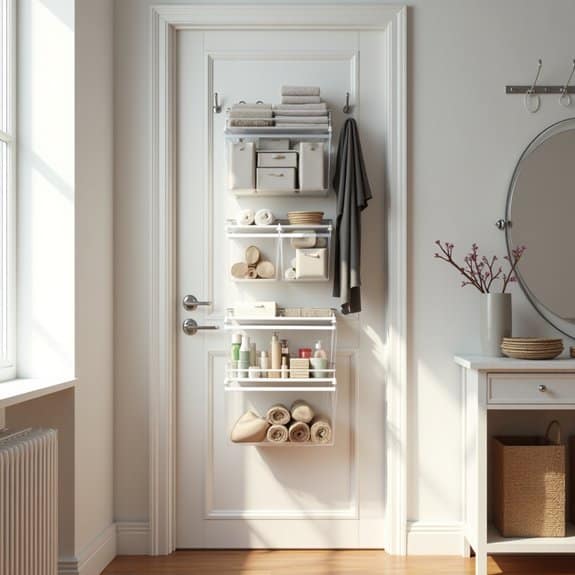
Making the most of every square inch is crucial when organizing a small room, and doors represent an often-overlooked opportunity for valuable storage space. Door-mounted storage solutions can effectively double your storage capacity without taking up any floor space, making them ideal for bedrooms, bathrooms, closets, and home offices.
Door storage is particularly effective because it keeps frequently used items easily accessible while maintaining a clutter-free environment. This vertical storage approach allows you to store everything from shoes and accessories to office supplies and cleaning products, depending on the room’s purpose.
Required Items:
- Over-the-door hooks
- Over-the-door shoe organizer
- Door-mounted rack system
- Command strips or hooks
- Measuring tape
- Level
- Screwdriver
- Wall anchors (if needed)
- Storage baskets or pouches
- Door-mounted mirror with storage
The organization process starts with measuring your door’s dimensions and clearance space. Ensure the door can fully open and close with any storage solutions installed.
Install an over-the-door rack system at the top of the door, making sure it’s level and secure. For additional storage, mount hooks or organizational units at different heights, considering the items you’ll be storing. Clear shoe organizers can be repurposed for various items beyond footwear – try using the pockets for cleaning supplies, craft materials, or bathroom essentials.
Position heavier items at eye level or below to maintain door stability. Group similar items together in designated sections, using clear containers or labeled pouches for smaller items.
Consider installing a door-mounted mirror with hidden storage to maximize functionality while maintaining a clean appearance.
To maintain an organized door storage system, regularly assess the weight distribution and secure any loose fixtures. Avoid overloading the door with heavy items that could strain hinges or cause the door to swing improperly.
Rotate items seasonally and keep frequently used items at easy-to-reach heights. Consider using clear storage solutions to easily identify contents and maintain a visually organized space.
Select Scale-Appropriate Furniture Pieces
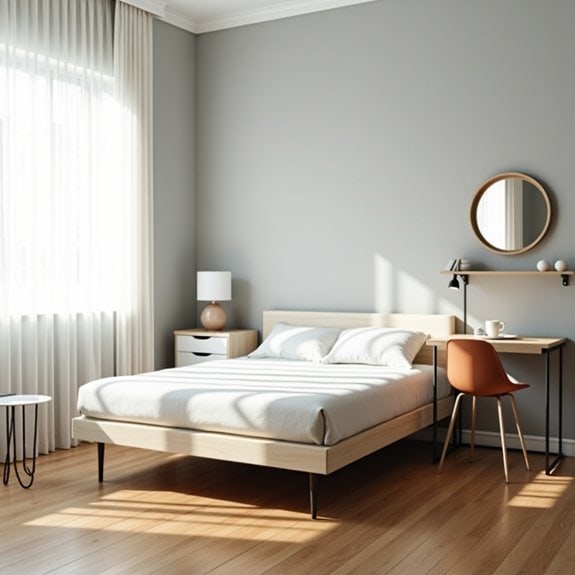
Choosing the right-sized furniture for a small room is crucial for maintaining both functionality and visual harmony. Oversized pieces can quickly overwhelm a compact space, making it feel cramped and cluttered, while reducing your ability to move freely and utilize the room effectively.
Scale-appropriate furniture selection directly impacts the room’s flow, storage capacity, and overall aesthetic appeal. By carefully considering each piece’s dimensions and proportion to the room size, you can create a space that feels open, organized, and purposeful while maximizing every square foot available.
Required Items:
- Measuring tape
- Room dimensions documentation
- Furniture dimension guidelines
- Graph paper
- Pencil and eraser
- Furniture template cutouts
- Digital room planning app (optional)
- Level
- Furniture sliders
Start by measuring your room’s exact dimensions, including doorways, windows, and any architectural features. Create a scaled floor plan on graph paper or using a digital planning tool. For each furniture piece you plan to include, follow the “rule of thirds” – furniture should typically occupy no more than one-third of the available floor space in any given area.
When selecting individual pieces, prioritize furniture that serves multiple purposes, such as storage ottomans or beds with built-in drawers. Choose pieces with legs rather than solid bases to create visual space underneath, and opt for furniture that can be easily moved or reconfigured. Consider vertical storage solutions to maximize wall space while minimizing floor coverage.
For optimal results, maintain at least 30 inches of walking space between furniture pieces, and ensure that doors and drawers can open fully without obstruction. Select furniture with clean lines and simple designs, as ornate pieces can appear bulky in small spaces. Consider using transparent or reflective materials for certain pieces to create the illusion of more space while maintaining functionality.
Additional Tips:
Before making any purchases, create paper templates of potential furniture pieces and place them on the floor to visualize their impact on the space. Test different arrangements and always account for traffic patterns. Remember that negative space is essential in small rooms – resist the urge to fill every available area with furniture, as this can make the room feel overwhelming and disorganized.
Arrange Furniture to Create Clear Pathways
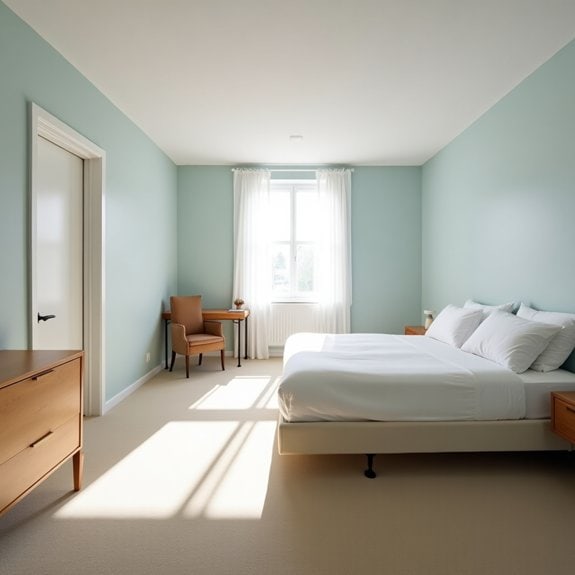
Creating clear pathways in a small room is essential for both functionality and visual appeal. When furniture blocks natural movement patterns, it creates stress and inefficiency in daily activities, making the space feel more cramped than it actually is. The way you arrange your furniture can either maximize or minimize your available space, affecting everything from traffic flow to the room’s perceived size.
Proper furniture arrangement with clear pathways not only makes navigation easier but also contributes to a safer living environment, especially important in small spaces where every inch counts. Strategic placement can create distinct zones while maintaining an open feel, allowing for multiple activities within the same compact area.
Required Items:
- Measuring tape
- Graph paper
- Pencil and eraser
- Furniture sliders
- Level
- Masking tape
- Floor plan template (optional)
- Furniture templates (optional)
Start by measuring your room’s dimensions and creating a basic floor plan on graph paper. Mark all windows, doors, electrical outlets, and architectural features. Determine the main traffic patterns – typically from the doorway to windows, closets, or connecting rooms.
Position larger pieces like beds, sofas, or desks first, placing them against walls when possible to maximize floor space. Create a primary pathway at least 30 inches wide for general traffic flow, with secondary pathways of 24 inches. Angle furniture when appropriate to avoid sharp corners in traffic areas.
Keep furniture proportional to room size, removing pieces that overwhelm the space. Ensure that doors can fully open and that window access remains unobstructed.
Additional Tips: Test your arrangement by walking through the space at different times of day to ensure functionality. Consider multi-functional furniture pieces that can be moved easily when needed. Keep frequently used pathways completely clear and avoid temporary storage that might create obstacles.
Remember that negative space around furniture pieces helps create visual breathing room, making pathways feel more open and intentional.
Add Floating Shelves and Wall Storage
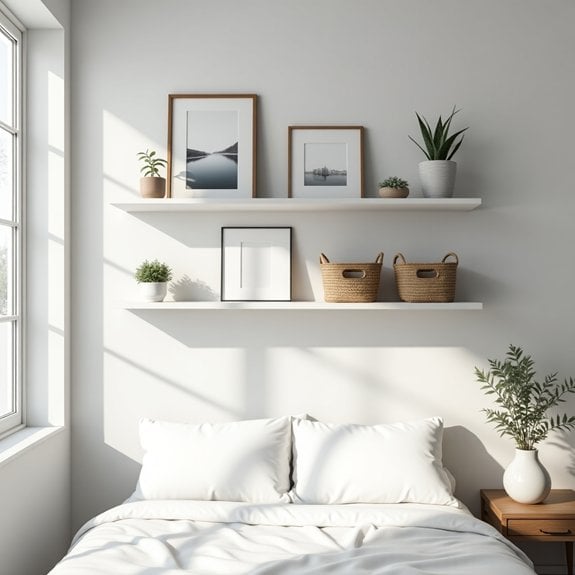
Maximizing vertical space through floating shelves and wall storage is crucial in small rooms where floor space is limited. By moving storage upward, you create additional room for movement while maintaining easy access to your belongings. This smart storage solution not only serves a practical purpose but also adds visual interest to your walls.
Wall-mounted storage solutions offer flexibility and customization options that traditional furniture can’t match. From displaying decorative items to storing everyday essentials, floating shelves and wall organizers can transform an underutilized wall into a functional storage area while maintaining a clean, clutter-free appearance.
Required Items:
- Floating shelves
- Wall anchors and screws
- Level
- Drill
- Pencil
- Measuring tape
- Stud finder
- Wall-mounted organizers
- Hooks
- Screwdriver
- Wall brackets
- Command strips (optional)
Start by planning your wall storage layout using a pencil to mark potential shelf locations. Use a stud finder to locate wall studs for secure mounting points. Install the heaviest shelves first, ensuring they’re level and properly anchored. Space shelves according to the height of items you plan to store, considering both practical access and visual balance. For areas between studs, use appropriate wall anchors to support the weight of your shelves and stored items.
Once shelves are mounted, organize items by frequency of use, placing frequently accessed items at eye level. Group similar items together and consider using decorative boxes or baskets on shelves to contain smaller items. Install additional wall-mounted organizers, such as hooks or pegboards, in strategic locations to maximize storage capacity.
To maintain an organized and aesthetically pleasing wall storage system, regularly assess the weight distribution on shelves and ensure items are secure. Consider using shelf dividers or bookends to keep items upright, and rotate displayed items seasonally to prevent dust accumulation.
Remember to leave some empty space between items to maintain a clean, uncluttered look while allowing for future storage needs.

