You’ve probably experienced that overwhelming feeling when walking into a disorganized bedroom – clothes scattered everywhere, tangled charging cables, and precious space going to waste. Trust me, I’ve been there! Whether you’re dealing with a tiny apartment bedroom or a spacious master suite, smart organization isn’t just about tidiness – it’s about creating a peaceful sanctuary where you can truly relax. Let me share some game-changing solutions that’ll transform your bedroom from chaotic to calm.
Maximize Vertical Space With Over-Door Organizers
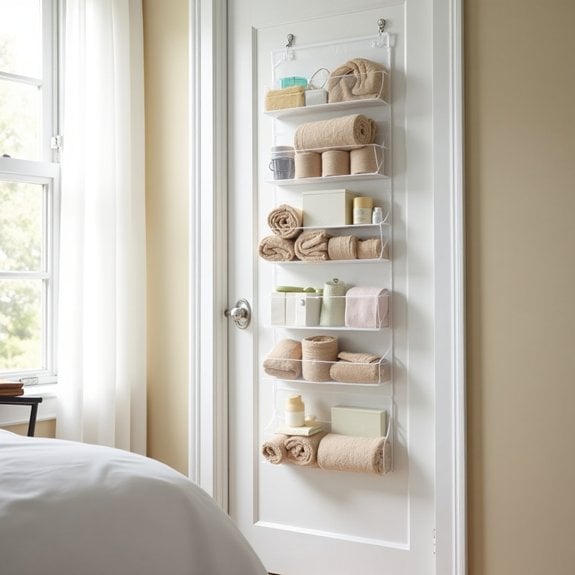
Making the most of vertical space in bedrooms is essential, especially in smaller living spaces where every inch counts. Over-door organizers provide an often-overlooked storage solution that can dramatically increase your storage capacity without taking up valuable floor space.
These versatile organizing tools transform dead space behind doors into functional storage areas for everything from shoes and accessories to cleaning supplies and toiletries. By utilizing over-door organizers effectively, you can declutter your bedroom while keeping frequently used items easily accessible.
Required Items:
- Over-door organizer (mesh, clear plastic, or fabric)
- Door hooks or hanging brackets
- Level
- Measuring tape
- Command strips (optional)
- Storage bins or baskets (optional)
- Labels
- Rubber door bumpers
Choose an over-door organizer that fits your door’s dimensions, ensuring it doesn’t interfere with door closure. Install door hooks or brackets at the top of the door, making sure they’re level and secure. If using command strips for additional stability, apply them to the bottom corners of the organizer.
Sort items by category and assign specific pockets or compartments for each group. Place frequently used items at eye level and lesser-used items in higher or lower pockets. Consider using small bins or baskets within larger pockets to contain smaller items.
For optimal organization, maintain a consistent system by labeling each pocket clearly. Install rubber door bumpers to prevent damage to walls from organizer movement. Regularly assess the contents and rotate items based on seasonal needs or usage patterns. Don’t exceed the weight capacity of the organizer, and distribute weight evenly to prevent sagging or damage to the door.
Install Under-Bed Storage Solutions
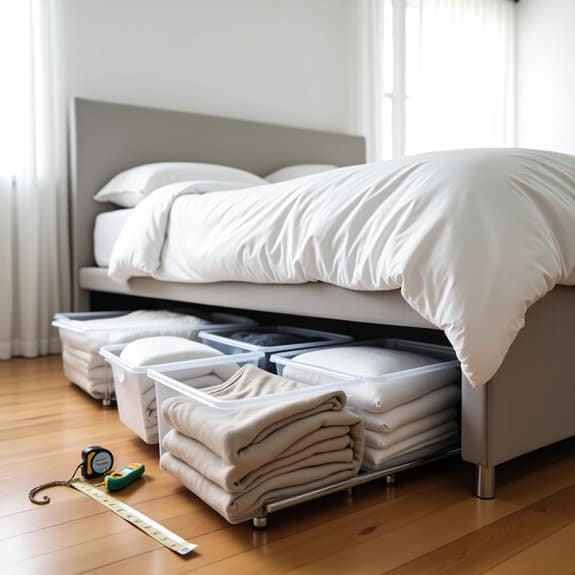
Under-bed storage represents one of the most underutilized spaces in the bedroom, offering valuable real estate for storing seasonal items, extra bedding, and clothing. This often-overlooked area can provide substantial storage capacity without taking up additional floor space or compromising the room’s aesthetic appeal.
Making the most of under-bed storage not only helps declutter your living space but also protects items from dust and creates a more organized bedroom environment. With proper planning and the right storage solutions, this space can become an efficient extension of your closet or dresser.
Required Items:
- Under-bed storage containers or drawers
- Bed risers (if needed)
- Measuring tape
- Labels and marker
- Vacuum storage bags
- Anti-dust covers
- Clear plastic bins
- Drawer dividers
- Furniture sliders
- Dust brush or vacuum attachment
Start by measuring the available space under your bed, including height, width, and depth. Clear out the area completely and vacuum thoroughly. If needed, install bed risers to create additional clearance.
Select storage containers that maximize the available space while allowing easy access – wheeled containers work especially well for heavier items. Sort items by category (seasonal clothing, extra bedding, shoes) and use vacuum storage bags for soft items to maximize space.
Place frequently accessed items toward the outer edges for convenient retrieval. Install clear containers when possible to easily identify contents, and always label each container clearly with its contents.
For optimal organization, consider creating a storage map noting the location of different categories of items. Use drawer dividers within larger containers to prevent items from shifting, and ensure all containers have secure lids to protect against dust.
Regularly assess stored items every six months to maintain organization and remove unnecessary items.
Implement a Seasonal Clothing Rotation System
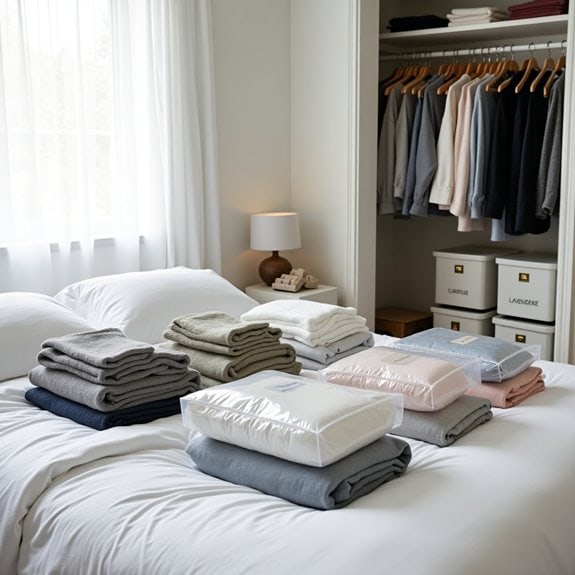
Managing seasonal clothing can be one of the biggest challenges in maintaining an organized bedroom. When all four seasons’ worth of clothing occupies your closet simultaneously, it creates unnecessary clutter and makes it difficult to find what you actually need for the current season. A well-implemented seasonal rotation system can reduce closet congestion by up to 50% while protecting off-season items from wear and damage.
Rotating your wardrobe between seasons not only maximizes your available space but also provides an opportunity to regularly assess your clothing collection. This process allows you to evaluate what you truly wear, what needs repair, and what should be donated, leading to a more curated and functional wardrobe that serves your current lifestyle needs.
Required Items:
- Storage containers with secure lids
- Vacuum storage bags
- Cedar blocks or lavender sachets
- Labels and marker
- Garment cleaning supplies
- Inventory list template
- Clean sheets or fabric for layering
- Clothing rack (temporary)
- Storage bins for shoes
Begin by thoroughly assessing your current wardrobe and separating items into distinct seasonal categories. Remove all clothing from your closet and sort into piles: current season, next season, off-season, and year-round basics.
Clean all items before storage, ensuring they’re completely dry to prevent mold and mildew. Pay special attention to delicate materials that may require professional cleaning.
Pack off-season clothing in vacuum storage bags or containers, grouping similar items together. Label each container clearly with contents and season. Store heavy winter items like sweaters flat to maintain their shape, and use acid-free tissue paper for delicate pieces.
Position containers in a cool, dry space away from direct sunlight, such as under the bed, in high closet shelves, or in a separate storage area.
Additional Tips: Create a digital inventory of stored items with photos and locations to easily locate specific pieces when needed. Consider implementing a “one-in-one-out” rule when purchasing new seasonal items to maintain organization.
Schedule your rotation dates on your calendar, typically during the transitional months of March/April and September/October, ensuring you’re prepared for seasonal changes before they arrive.
Create a Designated Charging Station
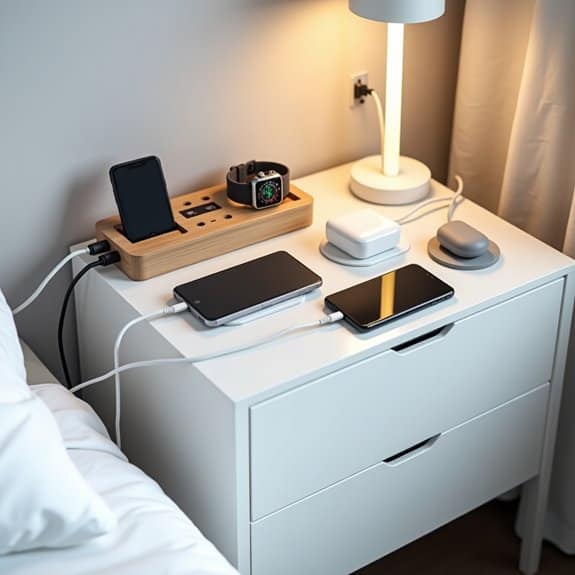
In today’s digital age, most people have multiple devices that require regular charging, from smartphones and tablets to smartwatches and wireless earbuds. A cluttered charging setup not only looks messy but can also lead to misplaced devices, tangled cords, and inefficient use of space in your bedroom.
Creating a designated charging station helps streamline your daily routine, ensures devices are always ready when needed, and eliminates the common frustration of searching for cables or available outlets. A well-organized charging area can also protect your devices from damage and extend the life of your charging cables.
Required Items:
- Multi-port USB charging hub
- Cable management box or organizer
- Cable clips or ties
- Surge protector
- Small shelf or bedside table
- Label maker
- Drawer organizer or small tray
- Drill and mounting hardware (if installing shelf)
Select an accessible location near an outlet, ideally on a nightstand or small shelf. Install the surge protector and secure it to prevent sliding. Place the charging hub in the cable management box, threading the cables through designated holes.
Use cable clips to secure cords along the wall or furniture edges, maintaining a clean appearance. Arrange devices on the shelf or tray, ensuring each has its dedicated space and cable. Label each cable near the connection point for easy identification.
To maximize charging station efficiency, establish a nightly routine of returning devices to their designated spots. Regularly inspect cables for wear and tear, replacing damaged ones promptly.
Consider adding small rubber grips or stands to prevent devices from sliding, and use drawer organizers or small trays to contain spare cables and adapters. Keep a few extra charging cables in reserve for guests or emergencies.
Use Drawer Dividers for Small Items
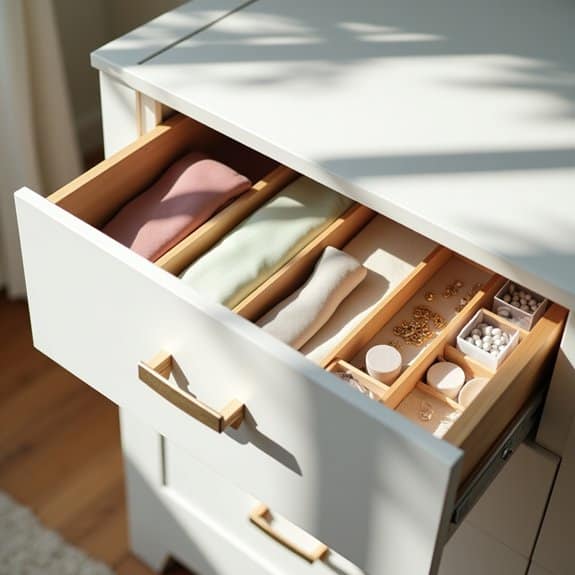
Small items in bedroom drawers often create chaos and frustration when left unorganized. Socks, underwear, accessories, and other small belongings can quickly turn into a jumbled mess, making it difficult to find what you need when you need it. Drawer dividers provide a simple yet effective solution to this common problem.
Implementing a drawer organization system with dividers not only maximizes space but also creates designated spots for different categories of items. This systematic approach reduces time spent searching for belongings and helps maintain order long-term, ultimately contributing to a more peaceful bedroom environment.
Required Items:
- Drawer dividers (adjustable or fixed)
- Measuring tape
- Drawer liner (non-slip)
- Labels (optional)
- Storage boxes or small containers
- Cleaning supplies
- Notepad for categorizing items
Start by removing everything from the drawer and cleaning it thoroughly. Measure the drawer’s dimensions and plan your division layout based on the types and quantities of items you need to store.
Install non-slip liner at the bottom of the drawer to prevent dividers from sliding. Place drawer dividers according to your planned layout, ensuring they fit snugly and create appropriately sized compartments for your items.
Sort items into categories (such as socks, underwear, accessories, etc.) and assign specific sections for each category. Place items in their designated spaces, storing them in a way that makes them easily visible and accessible. For smaller items like jewelry or hair accessories, consider using small containers within the divided spaces to prevent items from mixing.
Additional Tip: Review and adjust your drawer organization system every few months. Remove items that are no longer used or needed, and reassess whether the current layout still serves your needs effectively.
Consider using clear dividers to maintain visibility of all items, and implement a folding method like file-folding to maximize vertical space within each compartment.
Optimize Your Closet With Double Hanging Rods
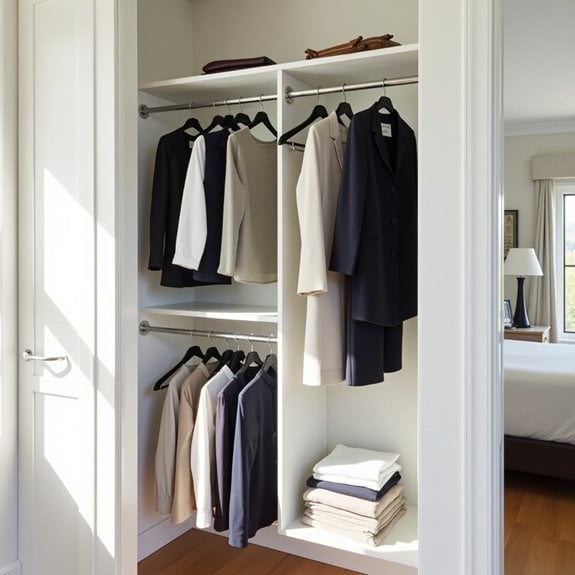
Double hanging rods are a game-changing solution for maximizing vertical space in any closet, effectively doubling your hanging storage capacity. By installing a second rod below your existing one, you can transform an inefficient single-rod closet into a well-organized storage system that accommodates twice as many clothes while maintaining easy accessibility.
This organizational upgrade is particularly valuable for smaller closets or shared spaces where every inch counts. Double hanging rods allow you to separate clothing by category, length, or season, making it easier to locate specific items and maintain an organized system long-term.
Required Items:
- Double hanging rod kit
- Drill and drill bits
- Screwdriver
- Level
- Measuring tape
- Pencil
- Stud finder
- Wall anchors
- Step ladder
- Rubber mallet (optional)
The installation process begins with measuring your closet space and determining the optimal height for both rods. The upper rod should be positioned at approximately 80 inches from the floor, while the lower rod typically sits 40 inches below it.
Use a stud finder to locate wall supports and mark your installation points. Install the brackets according to the manufacturer’s instructions, ensuring they’re level and properly anchored. Once the support system is secure, attach the rods and test their stability before hanging any clothing.
Start organizing by removing all items from your closet and sorting them by length. Longer items like dresses and coats should be hung on the upper rod, while shorter items such as shirts, blouses, and folded pants can be placed on the lower rod. This arrangement prevents longer garments from overlapping shorter ones and maintains proper spacing between clothing items.
For optimal results, use matching slim hangers to maximize space and create a uniform appearance. Consider installing additional organizational elements such as shelf dividers or small bins between the rods for accessories.
Regularly assess your clothing arrangement and adjust the system as needed based on your wardrobe changes and seasonal rotations.
Add Corner Shelving Units for Dead Space
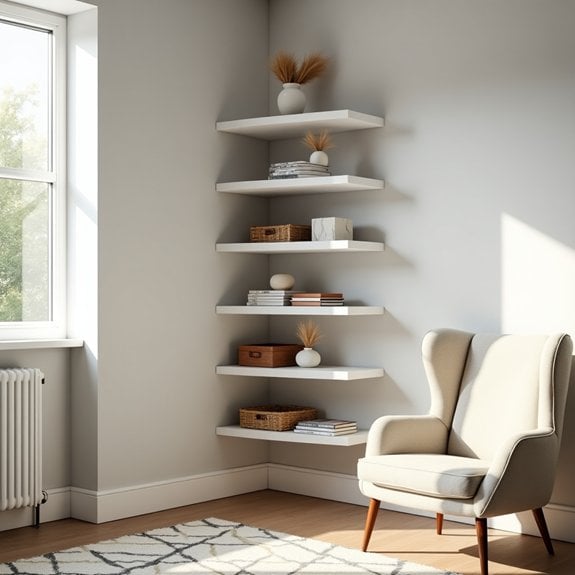
Corner spaces in bedrooms often become neglected dead zones where dust collects and valuable storage potential goes unused. These awkward angles can actually be transformed into functional storage areas that add both style and practicality to your bedroom setup.
Corner shelving units maximize vertical space while creating an attractive display area for books, decorative items, or essential storage. This organization solution is particularly valuable in smaller bedrooms where every square inch counts, and it helps maintain a cleaner, more organized appearance by keeping items off the floor and other surfaces.
Required Items:
- Corner shelving unit
- Measuring tape
- Level
- Pencil
- Wall anchors
- Screws
- Power drill
- Stud finder
- Brackets (if needed)
- Cleaning supplies
Installing and organizing corner shelving begins with measuring your corner space carefully, ensuring you have adequate clearance for both walls. Once measurements are confirmed, locate wall studs and mark mounting points. Install wall anchors where studs aren’t available, then secure the shelving unit according to manufacturer instructions.
When the unit is firmly mounted, clean all surfaces thoroughly before organizing items. Start organizing from the bottom shelf up, placing heavier items on lower shelves for stability. Create zones for different categories – perhaps books on lower shelves, decorative items at eye level, and less-frequently used items on top shelves.
Consider using bookends or small containers to keep items neat and prevent them from toppling. For optimal organization maintenance, implement a rotation system where seasonal items move to different shelf positions based on current needs. Use attractive boxes or baskets to conceal smaller items, and maintain visual balance by varying heights and depths of displayed objects.
Regularly dust and reorganize shelves to prevent cluttered accumulation and maintain the organized appearance of your corner space.
Declutter Your Nightstand With Smart Storage
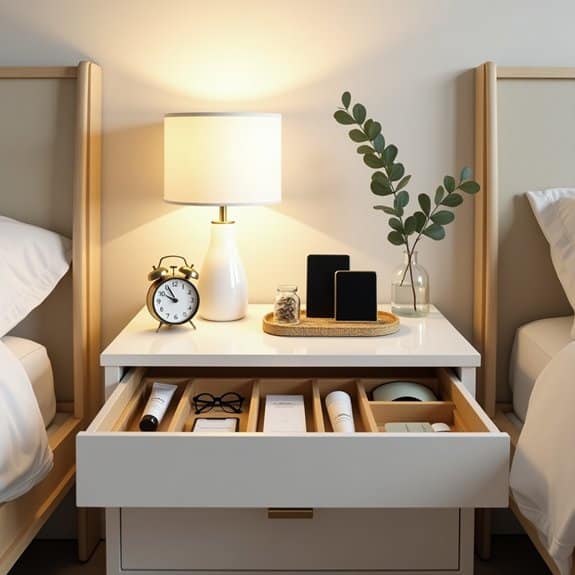
A well-organized nightstand is essential for creating a peaceful bedroom environment and ensuring easy access to nighttime necessities. When your bedside table is cluttered with unnecessary items, it can contribute to visual chaos and make it difficult to find what you need, especially in the dark.
An organized nightstand not only improves functionality but also promotes better sleep habits by reducing stress and maintaining a calm atmosphere. The key is to implement smart storage solutions that maximize the available space while keeping essential items within arm’s reach.
Required Items:
- Small drawer organizers or dividers
- Desktop organizer or small tray
- Cord management clips or ties
- Small storage boxes or containers
- Drawer liner (non-slip)
- Cleaning supplies
- Storage basket (if needed)
- Label maker (optional)
Start by removing everything from your nightstand and sorting items into three categories: essential daily items, occasionally needed items, and items that belong elsewhere. Clean all surfaces thoroughly.
Place a non-slip liner in drawers to prevent items from sliding around. Install drawer organizers or small containers to create designated spaces for different categories of items.
For the nightstand surface, maintain a minimalist approach by limiting items to absolute essentials like a lamp, clock, current book, and perhaps a small tray for jewelry or glasses. Use cord management solutions to keep charging cables tidy and easily accessible.
If your nightstand has multiple drawers, organize them by frequency of use, keeping daily items in the top drawer and less frequently used items below.
To maintain organization long-term, implement a weekly cleaning routine and regularly assess items to prevent clutter accumulation. Consider using vertical space by adding a small shelf above the nightstand or utilizing wall-mounted solutions for additional storage.
Remember to adjust your organization system as needed based on changing habits and seasonal items.
Utilize Space-Saving Hangers and Folding Methods

Making the most of closet space through efficient hanging and folding methods is crucial for maintaining an organized bedroom. When clothes are properly stored, not only do they remain wrinkle-free and easily accessible, but you can also fit significantly more items in the same amount of space.
Implementing space-saving hangers and proper folding techniques can transform a cramped, chaotic closet into a well-organized storage system. These methods can reduce the volume of clothing by up to 50%, creating additional space while making it easier to see and access your wardrobe.
Required Items:
- Slim velvet hangers
- Cascading hooks or multi-tiered hangers
- Drawer dividers
- Shelf dividers
- Storage boxes
- Closet rod organizers
- Folding board (optional)
- Labels
- Measuring tape
The organization process starts with removing all clothing items and sorting them by category. Install slim velvet hangers for everyday clothing, ensuring items don’t slip off. Use cascading hooks for pants and skirts, hanging multiple items vertically.
For sweaters and delicate items, implement the KonMari folding method by folding items into rectangles that can stand upright in drawers. Create designated zones within your closet, using shelf dividers to maintain separate spaces for different clothing categories.
For maximum efficiency, arrange clothes by type and color, keeping frequently worn items at eye level. Utilize multi-tiered hangers for scarves, belts, and accessories. Store seasonal items in clearly labeled storage boxes on upper shelves. Implement the file-folding method for t-shirts and workout clothes in drawers, making each item visible and accessible.
Additional Tips: Regularly assess your hanging and folding systems, adjusting as needed based on seasonal changes and wear patterns. Consider installing a small LED light strip to illuminate dark corners, making it easier to maintain organization.
Review your clothing collection every three months, removing items that no longer fit or serve a purpose, ensuring your space-saving methods continue to work effectively.
Mount Floating Shelves for Display and Storage
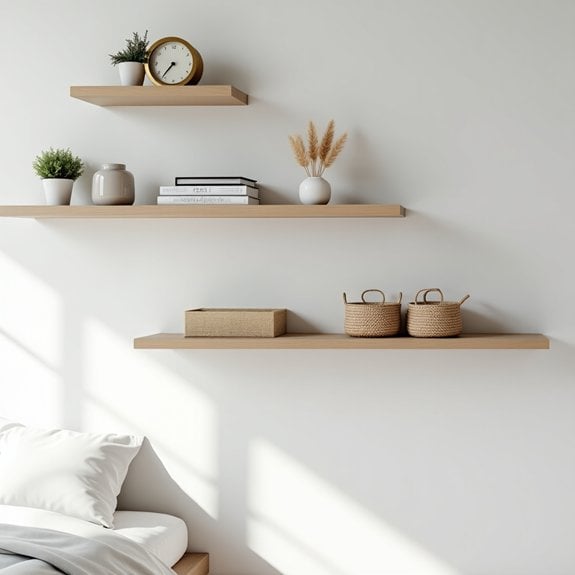
Floating shelves represent one of the most versatile and space-efficient storage solutions for any bedroom. These wall-mounted units create additional storage space without consuming valuable floor area, making them particularly valuable in smaller rooms or areas where traditional furniture might feel cumbersome.
By installing floating shelves strategically, you can transform bare walls into functional display areas while maintaining a clean, modern aesthetic. These shelves provide perfect platforms for books, decorative items, plants, and daily essentials, effectively utilizing vertical space that often goes unused in bedrooms.
Required Items:
- Floating shelves
- Stud finder
- Level
- Drill and drill bits
- Screwdriver
- Wall anchors
- Measuring tape
- Pencil
- Wall mounting brackets
- Safety goggles
- Dust sheet
The installation and organization process begins with careful planning. Using the stud finder, locate and mark wall studs for secure mounting. Measure and mark the desired height and spacing of shelves, ensuring they’re level.
Install mounting brackets according to manufacturer specifications, typically drilling pilot holes and securing them with appropriate anchors or screws. Once shelves are mounted, arrange items by weight, placing heavier objects closer to brackets and lighter items toward shelf edges.
Group similar items together and maintain visual balance by varying heights and sizes of displayed objects. For optimal organization and longevity, avoid overloading shelves beyond their weight capacity, and periodically check mounting hardware for security.
Create visual interest by alternating between practical storage and decorative displays. Consider using bookends, small boxes, or baskets to keep items contained and neat. Maintain approximately 30% empty space on each shelf to prevent a cluttered appearance and allow for future additions or rearrangement of items.
Design a Functional Dresser Organization System
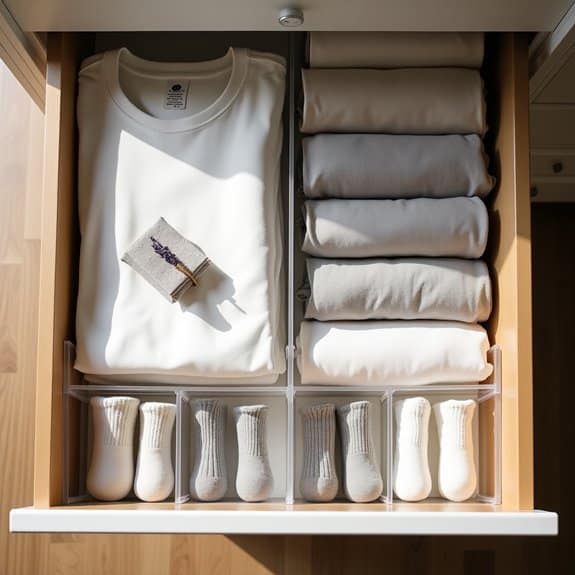
A well-organized dresser serves as the foundation for an efficient morning routine and a clutter-free bedroom. When drawers are properly organized, finding and accessing clothing becomes effortless, reducing stress and saving valuable time during daily preparations.
Creating a systematic approach to dresser organization not only maximizes storage space but also helps maintain the condition of your clothing. Properly folded and arranged items last longer, require less ironing, and allow you to quickly inventory your wardrobe, making it easier to plan outfits and identify when items need replacement.
Required Items:
- Drawer dividers
- Folding board
- Storage boxes or bins
- Labels
- Drawer liner paper
- Measuring tape
- Decluttering bins (donate/discard)
- Fabric sachets or deodorizers
Begin by removing everything from the dresser drawers and sorting items by category (undergarments, t-shirts, pants, etc.). Measure each drawer and install appropriate drawer liners to protect clothing and prevent sliding.
Create a logical arrangement by designating specific drawers for different clothing categories, keeping frequently used items in the most accessible drawers. Implement the file folding method for maximum visibility and space efficiency. Fold clothes into uniform rectangles and place them vertically rather than stacked.
Install drawer dividers to maintain separate sections for different items within the same category. For smaller items like socks and accessories, use small boxes or organizers to prevent items from becoming tangled or lost. Position delicate items in upper drawers to prevent crushing, and heavier items in bottom drawers for stability.
Create clear zones within each drawer using dividers, and maintain organization by immediately returning items to their designated spots after laundering.
Additional Tips: Perform a quarterly review of your dresser organization system, adjusting as needed based on seasonal changes and usage patterns. Consider implementing a one-in-one-out rule to prevent overcrowding, and use fabric sachets to keep clothing fresh.
Label drawer sections initially until the system becomes habit, and leave about 10% empty space in each drawer to prevent overstuffing and maintain organization.
Set Up a Daily Decluttering Routine
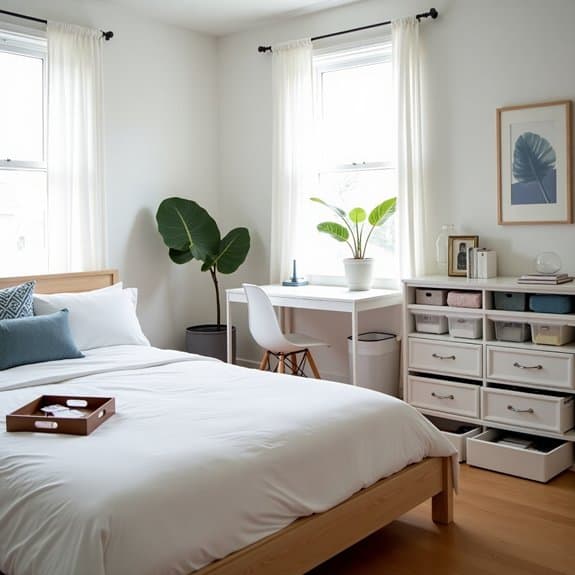
A daily decluttering routine is essential for maintaining an organized and peaceful bedroom environment. When clutter accumulates, it can create stress, make it difficult to find important items, and diminish the restful atmosphere that a bedroom should provide. Regular decluttering prevents the overwhelming build-up of items that often leads to major cleaning sessions.
Establishing a consistent decluttering routine transforms your bedroom from a catch-all space into a serene sanctuary. Just 10-15 minutes of daily maintenance can preserve order and create lasting habits that make bedroom organization second nature. This systematic approach ensures your space remains functional and aesthetically pleasing throughout the week.
Required Items:
- Laundry basket
- Storage bins
- Trash bin
- Donation box
- Cleaning cloth
- Storage containers
- Label maker
- Room organizers
- Small desk organizer
- Calendar or habit tracker
The daily decluttering process should follow a systematic approach. Start by making your bed immediately upon waking, as this creates an organized foundation for the day. Next, collect any clothes from the floor, chairs, or other surfaces, sorting them into your laundry basket or returning clean items to their proper storage locations.
Then, clear all flat surfaces of unnecessary items, putting away anything that doesn’t belong in the bedroom and organizing essential items in their designated spots. Focus on one zone each day while maintaining the overall tidiness. Monday might be dedicated to the nightstand, Tuesday to the dresser top, Wednesday to the desk area, and so on. This rotation ensures thorough attention to each area while preventing the task from becoming overwhelming.
Always complete the routine at the same time each day, either morning or evening, to establish a consistent habit.
Additional Success Tips: Keep a decluttering checklist visible in your room and track your progress. Consider implementing the “one-in-one-out” rule for new purchases to maintain the organization system. Use drawer dividers and small containers to prevent smaller items from becoming disorganized, and regularly reassess your storage solutions to ensure they continue meeting your needs efficiently.

