You’re about to discover how to transform your bedroom from a cluttered stress zone into an organized sanctuary – and it’s easier than you’d think! After helping countless friends revamp their spaces (including a tiny 8×10 room that now feels like a mini palace), I’ve compiled the most practical organization solutions that work for any size bedroom. From clever vertical storage tricks to smart closet systems, these ideas will help you maximize every square inch while maintaining style and function.
Maximize Vertical Space With Wall-Mounted Storage
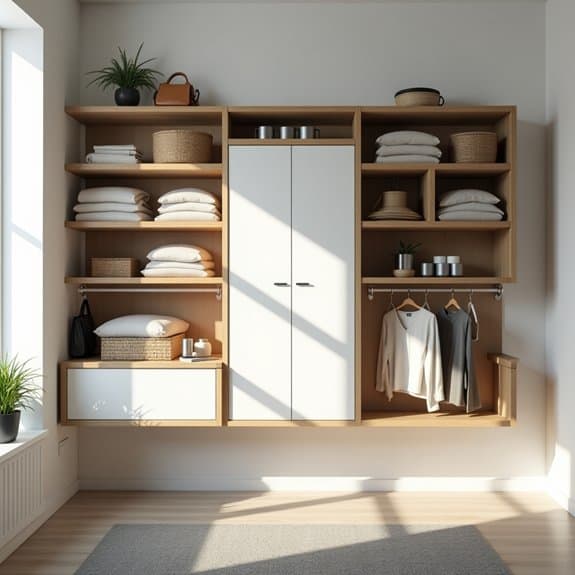
Making the most of vertical space is crucial in modern living, where square footage comes at a premium. Wall-mounted storage solutions transform unused wall space into functional storage areas, effectively doubling or tripling your room’s storage capacity without consuming valuable floor space.
By utilizing vertical space with wall-mounted storage, you create a more organized and visually appealing environment while maintaining an open, uncluttered floor plan. This approach is particularly valuable in small apartments, home offices, or any room where maximizing space efficiency is essential.
Required Items:
- Wall anchors and screws
- Stud finder
- Level
- Drill and drill bits
- Measuring tape
- Pencil
- Wall-mounted shelves
- Floating cabinets
- Hook systems
- Storage baskets
- Cable management solutions
- Basic tool kit
Start by conducting a thorough wall assessment using a stud finder to locate suitable mounting points. Measure and mark your desired installation locations, ensuring proper spacing between storage elements.
When installing multiple shelves or units, work from bottom to top, maintaining consistent levels and proper weight distribution. For optimal organization, group similar items together and assign specific zones for different categories.
Install adjustable shelving systems that can be modified as your storage needs change. Consider incorporating a mix of open shelving for frequently accessed items and closed storage for less attractive essentials.
Create a clear labeling system and establish zones based on usage frequency, with regularly used items at eye level and seasonal or rarely used items stored higher up. Remember to leave some open wall space to prevent a cluttered appearance and maintain visual balance in the room.
Additional Tips: Regularly assess the weight capacity of your wall-mounted storage and perform periodic maintenance checks on anchors and mounting hardware.
Consider using clear containers on higher shelves to easily identify contents from below, and implement a rotation system for seasonal items. Always keep a step stool nearby for safe access to higher storage areas.
Create a Smart Closet System With Zone Planning
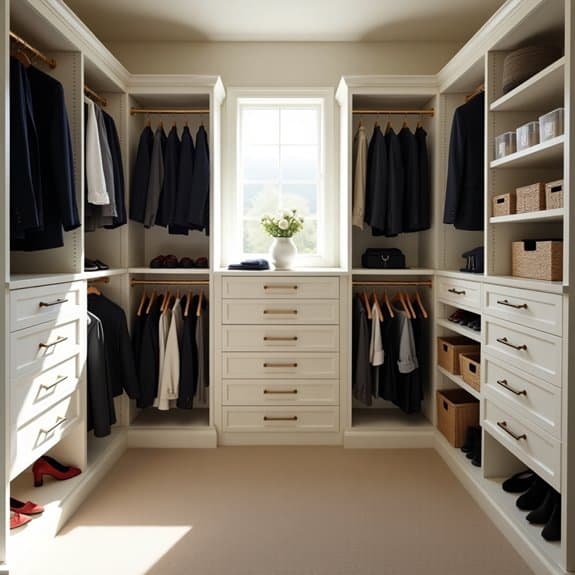
A well-organized closet system serves as the foundation for an efficient daily routine, reducing stress and saving valuable time during busy mornings. Rather than struggling through a cluttered space, a properly zoned closet allows you to quickly locate items and maintain organization long-term.
Zone planning transforms a standard closet into a functional storage system by designating specific areas for different types of clothing and accessories. This methodical approach not only maximizes available space but also creates intuitive categories that match your lifestyle and daily habits, making it easier to maintain order throughout the year.
Required Items:
- Measuring tape
- Closet rod dividers
- Storage bins
- Shelf organizers
- Labels
- Hanging organizers
- Drawer organizers
- Clear containers
- Hooks
- Storage boxes
Start by emptying your closet completely and measuring the available space. Divide your closet into distinct zones based on your lifestyle needs: work clothes, casual wear, formal attire, seasonal items, and accessories.
Install appropriate storage solutions for each zone, such as double hanging rods for shirts and pants, shelf dividers for folded items, and specialized organizers for accessories. Position frequently used items at eye level and within easy reach.
Create a designated space for shoes at the bottom of the closet, using shoe racks or clear boxes. Install hooks or specialized organizers on empty wall space or the back of the door for belts, scarves, and jewelry. Implement drawer organizers for smaller items and underwear to prevent them from becoming jumbled.
For optimal results, reassess your zones every season and adjust as needed. Store off-season items in labeled containers on high shelves or under-bed storage.
Consider implementing a rotation system for frequently worn items versus special occasion pieces, and always maintain a small percentage of empty space in each zone to accommodate new purchases without disrupting the organization system.
Utilize Under-Bed Storage Solutions
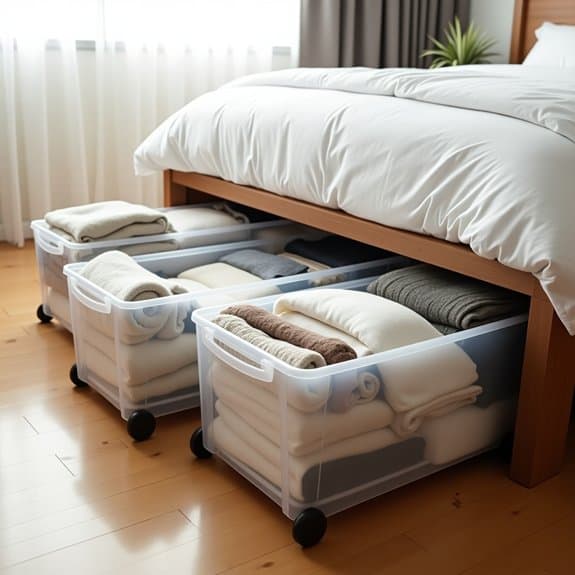
Under-bed storage represents one of the most underutilized spaces in any bedroom, offering valuable square footage for storing seasonal items, extra bedding, or clothing. This often-overlooked area can provide significant storage capacity without taking up any additional floor space, making it particularly valuable in smaller rooms or apartments.
Maximizing under-bed storage not only helps declutter your living space but also protects items from dust while keeping them easily accessible. When properly organized, this space can store the equivalent of several dresser drawers worth of items, effectively doubling your storage capacity without compromising your room’s aesthetic appeal.
Required Items:
- Under-bed storage containers or bins
- Storage bags with handles
- Bed risers (optional)
- Measuring tape
- Labels and marker
- Vacuum storage bags
- Rolling carts or containers
- Dust-proof covers
- Drawer dividers or organizers
Start by measuring the height, width, and depth of your under-bed space to determine the appropriate storage container sizes. Clear the area beneath your bed completely and vacuum thoroughly. If needed, install bed risers to create additional clearance.
Select storage containers that maximize the available space while allowing easy access – wheeled containers are particularly effective for heavier items. Sort items into categories before storing them, using vacuum storage bags for bulky textiles like winter clothing or extra bedding.
Position frequently accessed items toward the foot or sides of the bed for easier reach. Arrange containers systematically, with clear labels facing outward for quick identification. To maintain organization and protect stored items, use dust-proof covers or containers with sealed lids.
Create a storage map noting where specific items are located, and consider implementing a seasonal rotation system. Regular maintenance checks every few months will help prevent the space from becoming a forgotten storage void and ensure items remain in good condition.
Implement the One-In-One-Out Rule
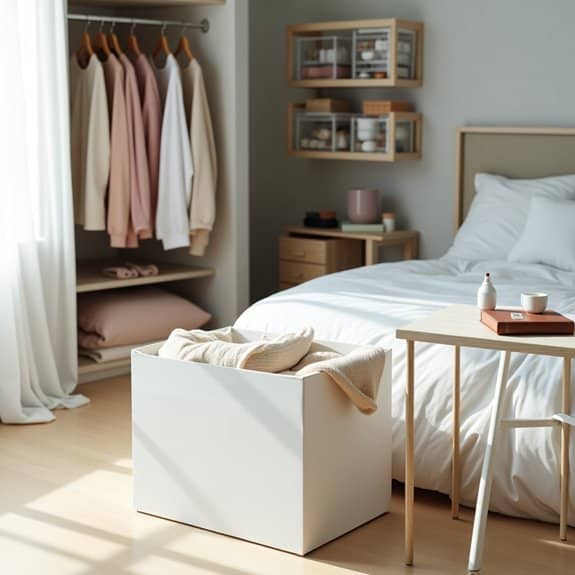
The One-In-One-Out Rule stands as one of the most effective methods for maintaining an organized living space and preventing clutter from accumulating over time. This simple yet powerful principle helps create a sustainable system for managing possessions, ensuring that your space remains functional and clutter-free throughout the year.
By establishing this rule as a household standard, you create a natural boundary that prevents overcrowding while simultaneously encouraging mindful consumption. The practice helps develop better decision-making skills when acquiring new items and forces regular evaluation of existing possessions, leading to a more intentional and organized living environment.
Required Items:
- Donation box or bag
- Recycling bin
- Trash bags
- Storage containers
- Label maker or markers
- Notebook for inventory (optional)
- Digital spreadsheet (optional)
To implement the One-In-One-Out Rule effectively, start by conducting an initial inventory of your belongings in each category (clothing, books, electronics, etc.). When purchasing a new item, immediately identify a similar item to remove from your collection. Remove the old item through donation, selling, or disposal before integrating the new item into your space.
Create designated zones for outgoing items, such as a donation box in your closet or garage, making it easier to maintain the system. The rule applies most effectively when implemented systematically across all categories of items. For clothing, remove an old shirt before hanging a new one. For books, donate one before adding another to your shelf. For kitchen gadgets, sell or give away an underused appliance before bringing in a new one.
This systematic approach ensures balance in your space while preventing category overflow. To maximize success with the One-In-One-Out Rule, maintain a digital or physical inventory of frequently purchased items. Set regular monthly review dates to assess your adherence to the rule and adjust as needed.
Consider implementing a waiting period before new purchases to ensure thoughtful decision-making and prevent impulse buys that might disrupt your organization system. Remember that exceptions can be made for essential items or replacements of broken necessities, but the general principle should guide most acquisition decisions.
Design a Functional Nightstand Setup
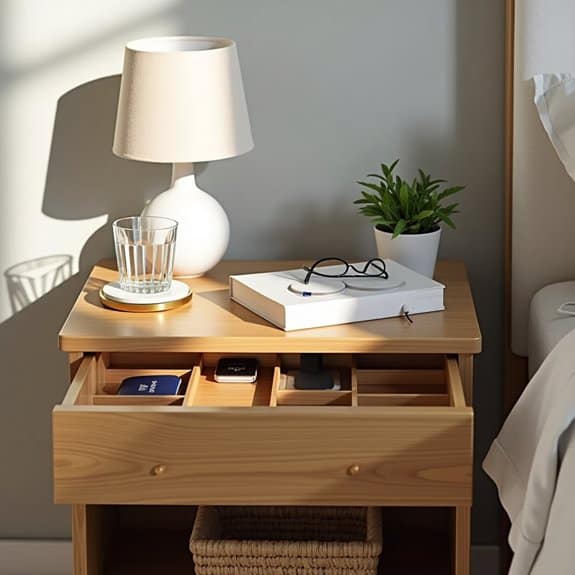
A well-organized nightstand is essential for creating a peaceful bedroom environment and ensuring all your nighttime necessities are within easy reach. This small but crucial space serves as command central for everything you might need before sleep or upon waking, making it one of the most frequently used areas in any bedroom.
An efficient nightstand setup can significantly improve your bedtime routine and morning workflow, eliminating the need to search for important items in the dark or disrupt your sleep schedule. When properly organized, this space can reduce stress and contribute to better sleep habits while maintaining the aesthetic appeal of your bedroom.
Required Items:
- Drawer organizers or small bins
- Desktop organizer or tray
- Small catch-all dish
- Reading lamp
- Charging station or cord organizer
- Tissue box holder
- Small waste basket
- Coasters
- Drawer liners (optional)
- Storage boxes (if applicable)
Start by completely clearing the nightstand surface and drawers, wiping everything clean. Sort items into categories: daily essentials (glasses, water bottle, medications), entertainment (books, devices), and occasional use items.
Install a charging station at the back of the nightstand to manage electronic devices efficiently. Place frequently used items toward the front of the surface for easy access.
For drawer organization, use small bins or organizers to create designated spaces for different categories. The top drawer should contain items needed most often, while lower drawers can store backup supplies or less frequently used items. Consider using drawer liners to protect the surface and prevent items from sliding around.
Additional Tips: Consider implementing a regular maintenance schedule, such as weekly decluttering and monthly deep cleaning. Keep only the current book you’re reading on the nightstand rather than a stack.
Use vertical space by adding a small shelf above the nightstand if more storage is needed, and maintain a “one in, one out” policy to prevent accumulation of unnecessary items.
Organize Drawers With Custom Dividers
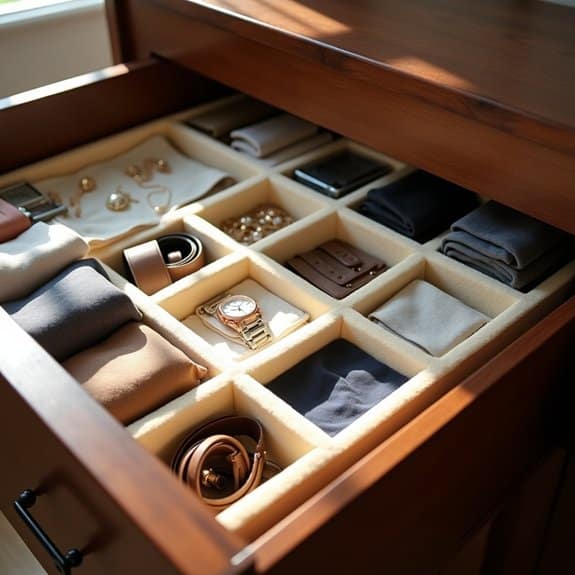
A well-organized drawer system is essential for maintaining order and efficiency in any room. Custom dividers transform chaotic, jumbled drawers into structured spaces where every item has its designated place, making it easier to find what you need quickly and maintain organization long-term.
Whether in kitchen, bedroom, or office drawers, custom dividers create a personalized storage solution that maximizes space and accommodates items of various sizes. This organization method prevents items from shifting around, reduces clutter, and transforms formerly frustrating storage spaces into functional, aesthetically pleasing areas.
Required Items:
- Measuring tape
- Scissors
- Cardboard or foam board
- Adhesive-backed felt or drawer liner
- Box cutter or craft knife
- Ruler
- Pencil
- Double-sided tape
- Pre-made drawer dividers (optional)
- Clear plastic sheets (optional)
Start by emptying the drawer completely and measuring its internal dimensions. Create a layout plan on paper, considering the sizes of items you need to store and optimal compartment dimensions. Cut your chosen material (cardboard, foam board, or plastic) to size, ensuring the height of dividers is slightly lower than the drawer sides.
Create interlocking slots in pieces that need to intersect, typically cutting halfway up from the bottom of one piece and halfway down from the top of the other. Cover the edges with felt or liner for a polished look and to prevent snagging.
Test the configuration before securing dividers permanently. Once satisfied, use double-sided tape to anchor the dividers to the drawer bottom and sides. For additional stability, create corner braces where dividers meet. Install the items in their designated spaces, organizing them by category, size, or frequency of use.
To maintain the organization system, periodically review and adjust the layout as needs change. Consider using clear containers within larger compartments for smaller items, and label sections if necessary. Regular maintenance checks will help ensure the dividers remain secure and continue serving their purpose effectively.
For drawers that see frequent use, reinforce the dividers with additional support points to prevent shifting or damage over time.
Install Multi-Purpose Furniture Pieces

Living in modern homes often means dealing with limited space, making it crucial to maximize every square foot available. Multi-purpose furniture pieces serve as the perfect solution, offering functionality while maintaining style and reducing clutter in any room.
The strategic installation of dual-function furniture can transform a cramped space into an efficient, organized environment. These versatile pieces not only save space but also eliminate the need for additional furniture items, creating a cleaner, more streamlined look while providing multiple storage options and uses.
Required Items:
- Measuring tape
- Level
- Basic tools (screwdriver, drill, hammer)
- Pencil and paper
- Storage ottomans
- Fold-down tables
- Murphy beds
- Convertible sofas
- Nesting tables
- Storage benches
- Extension tables
Start by measuring your room carefully and creating a floor plan that identifies prime locations for multi-purpose furniture. Focus on high-traffic areas and corners that could benefit from dual-functionality.
When selecting pieces, prioritize items that serve your most frequent needs – for example, a storage ottoman that works as both seating and storage, or a murphy bed that transforms into a desk during the day.
Install larger pieces first, such as murphy beds or convertible sofas, ensuring they’re properly secured to walls or floors as needed. Position transformable furniture near power sources if they require electrical connections.
Arrange smaller multi-purpose items, like nesting tables or storage benches, in ways that allow easy access to both their primary and secondary functions.
Additional Tips: Regularly assess how each piece is being used and adjust their placement accordingly. Keep instruction manuals handy for complex convertible furniture, and ensure all family members know how to properly operate each piece.
Consider installing furniture with wheels or lightweight options for easier rearrangement, and always leave enough clearance space for furniture that needs to transform or extend.
Declutter Seasonal Clothing and Accessories

Managing seasonal clothing and accessories is essential for maintaining an organized, clutter-free closet space. When items from multiple seasons compete for space, it becomes difficult to find what you need and properly care for your belongings. A well-organized seasonal wardrobe system not only maximizes storage space but also preserves the quality of your clothing and accessories.
Seasonal organization creates a practical rotation system that keeps your current-season items easily accessible while protecting off-season pieces from damage, dust, and unnecessary wear. This systematic approach reduces morning stress, saves time when getting dressed, and helps you maintain a better inventory of your wardrobe investments.
Required Items:
- Storage bins or boxes
- Vacuum storage bags
- Garment bags
- Cedar blocks or lavender sachets
- Labels and markers
- Clothing hangers
- Moisture absorbers
- Clean sheets or fabric for layering
- Inventory checklist
- Cleaning supplies
Start by completely emptying your closet and sorting items into three categories: current season, off-season, and items to donate/discard. Clean each piece before storing, ensuring there are no stains or damage that could worsen over time. Fold heavy knits and delicate items with tissue paper to prevent creasing, and use vacuum bags for bulky items like winter coats and sweaters.
Place accessories in clear, labeled containers, keeping sets together when possible. Store off-season items in a cool, dry place away from direct sunlight. Use cedar blocks or lavender sachets to repel moths and maintain freshness. Maintain an inventory list of stored items, including their location and condition, to prevent unnecessary purchases and make seasonal transitions smoother.
For items remaining in your closet, organize by category and color, keeping frequently used pieces at eye level.
Additional Success Tips: Perform a thorough evaluation of each item during seasonal transitions, removing anything that hasn’t been worn in the past year. Take photos of complete outfits before storing them to remember successful combinations.
Consider implementing a one-in-one-out rule to maintain your organized system and prevent future clutter. Schedule regular maintenance checks of stored items to ensure proper condition and storage integrity.
Set Up a Daily Organization Station
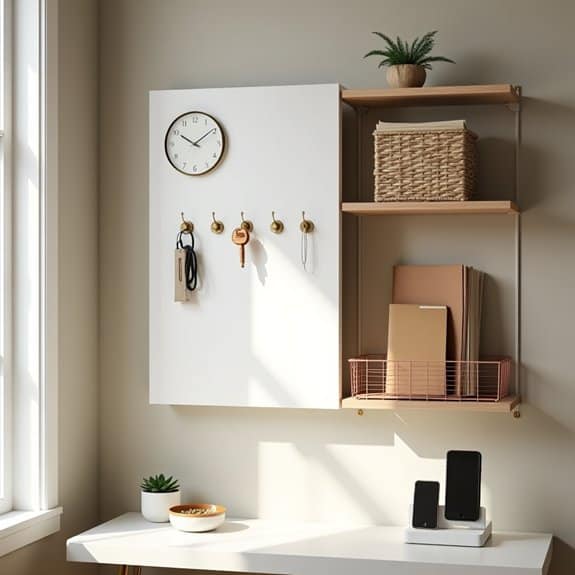
A daily organization station serves as the command center of your home, bringing structure and efficiency to your everyday routines. This dedicated space helps prevent scattered items, missed appointments, and forgotten tasks by centralizing all essential daily items and information in one accessible location.
Creating this organization hub drastically reduces morning chaos and evening confusion by providing a systematic approach to managing daily essentials. From keys and mail to schedules and charging devices, a well-planned organization station ensures everything has its place and important items are always within reach.
Required Items:
- Wall-mounted key hooks
- Mail sorter or letter tray
- Bulletin board or whiteboard
- Calendar
- Small storage containers
- Device charging station
- Writing supplies
- Small basket for loose items
- Labels or label maker
- Clock
- Task pad or notebook
Select a high-traffic area of your home, such as near the entryway or kitchen, to establish your organization station. Mount the key hooks at eye level, followed by the bulletin board or whiteboard positioned slightly higher. Install the mail sorter within easy reach, creating designated sections for incoming and outgoing mail, bills, and important documents.
Position the calendar prominently and establish a charging station with clearly labeled spots for each family member’s devices. Create zones within your station: communication (calendar, message board), action items (mail, to-do lists), storage (keys, devices), and reference materials (important numbers, schedules).
Label each area clearly and maintain consistent locations for all items. Consider adding small containers or folders for each family member to store their personal items or paperwork requiring immediate attention.
To maintain the effectiveness of your organization station, establish a daily routine of checking and updating it. Clear out dated materials weekly, process mail daily, and regularly update the calendar and task lists.
Consider implementing a color-coding system for different family members or types of activities, and teach all household members to use the station consistently for maximum organizational benefit.
Use Door-Mounted Storage Options
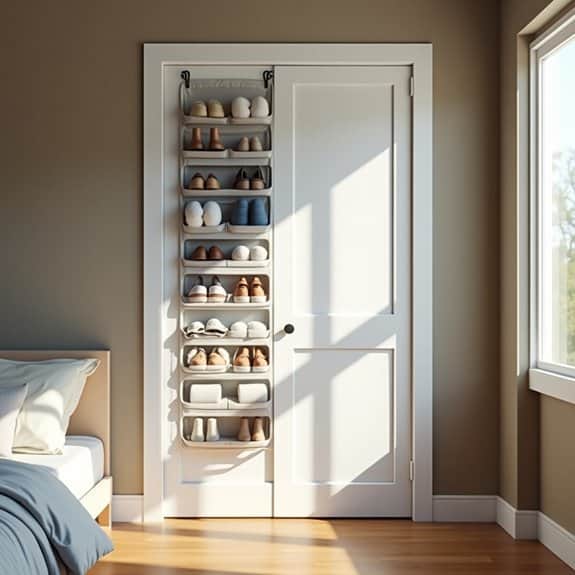
Door space is often one of the most underutilized areas in any room, yet it offers valuable vertical storage potential without taking up precious floor space. By effectively using door-mounted storage solutions, you can maximize storage capacity while keeping frequently used items easily accessible and organized.
Door-mounted storage systems are particularly valuable in small spaces like apartments, dorms, or rooms with limited closet space. These systems can transform a plain door into a functional storage area for anything from shoes and accessories to cleaning supplies and office materials.
Required Items:
- Over-the-door hooks or hangers
- Door-mounted shoe organizer
- Door-mounted basket system
- Measuring tape
- Screwdriver
- Wall anchors (if needed)
- Command strips or mounting hardware
- Level
- Cleaning supplies
Start by measuring your door’s dimensions, including width, height, and thickness, to ensure proper fit of storage solutions. Remove the door from its hinges if necessary when installing more complex systems.
For basic over-the-door organizers, simply hang them over the top of the door, ensuring they don’t interfere with door closure. For mounted systems, mark mounting points with a level, install any necessary hardware, and secure the system firmly to the door.
When organizing items, place frequently used objects at eye level and distribute weight evenly across the storage system. Group similar items together and consider using clear pockets or labeled containers for easy identification. Ensure the door can still open and close smoothly without items falling or shifting.
To maintain the effectiveness of door-mounted storage, regularly check hardware tightness and weight distribution. Consider using rubber bumpers or felt pads where the organizer touches the door to prevent scratches, and periodically review stored items to remove those that are no longer needed or used infrequently.
Establish Clear Surfaces With Hidden Storage
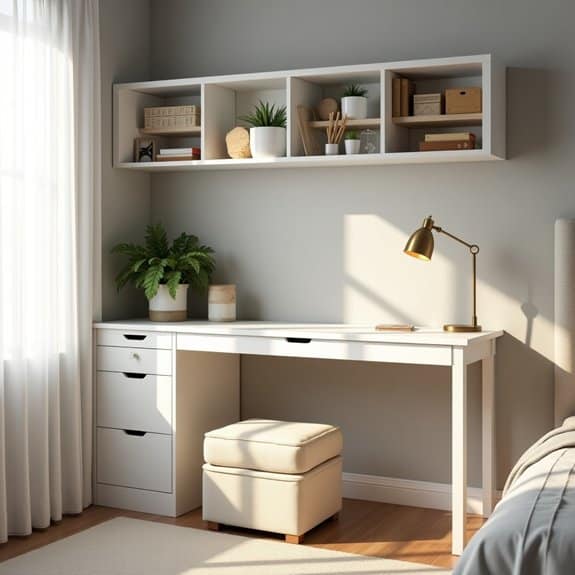
A clutter-free surface is essential for both productivity and mental clarity. When tabletops, counters, and other flat surfaces become catch-all spaces for daily items, they create visual chaos that can impact our ability to focus and function efficiently in our spaces. Creating clear surfaces while maintaining easy access to necessary items strikes the perfect balance between functionality and aesthetics.
Hidden storage solutions allow us to maintain the minimalist appeal of clear surfaces while keeping essential items within reach. This approach not only creates a more sophisticated and organized appearance but also makes cleaning and maintaining surfaces significantly easier. The key lies in creating designated spaces for items that typically accumulate on visible surfaces.
Required Items:
- Drawer organizers
- Under-desk storage solutions
- Floating shelves
- Hidden storage furniture
- Cable management systems
- Decorative boxes or baskets
- Drawer dividers
- Adhesive hooks
- Storage ottomans
- Behind-door organizers
Start by assessing all flat surfaces and identifying items that regularly accumulate there. Create categories for these items and determine appropriate hidden storage solutions for each category. Install drawer organizers or purchase furniture with built-in storage compartments to accommodate these categories.
Utilize vertical space by mounting floating shelves with hidden compartments or installing cabinet systems that close to conceal contents. For desktop and counter spaces, implement a “daily reset” system where items are returned to their designated hidden storage locations at the end of each day.
Use furniture pieces that serve dual purposes, such as storage ottomans or beds with under-bed storage compartments. Install cable management systems to keep electronic cords organized and out of sight.
To maintain this organization system, establish a “one-touch rule” where items are immediately placed in their designated storage spots rather than being set down on clear surfaces temporarily. Regular maintenance checks every few weeks will help identify any areas where the system needs adjustment or where new storage solutions might be necessary.
Consider seasonal rotation of stored items to maximize space efficiency and ensure frequently used items remain easily accessible.
Maintain Order With Labeled Storage Bins
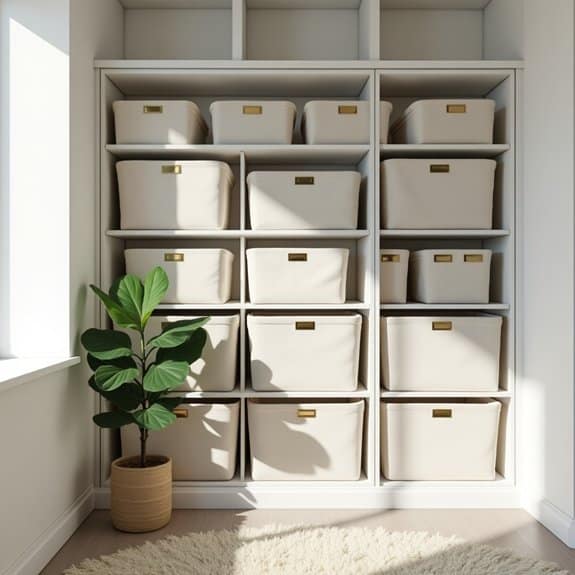
An organized space with labeled storage bins forms the foundation of an efficient home management system. When items have designated places and clear labels, finding and returning things becomes second nature, reducing daily stress and saving valuable time. This simple yet effective organization method prevents the chaos of misplaced items and eliminates the frustration of searching through unmarked containers.
Labeled storage bins transform cluttered spaces into functional areas while maintaining a cohesive aesthetic. Whether organizing a closet, garage, or playroom, this system adapts to various needs and spaces while providing visual clarity for all household members, making it easier to maintain order long-term.
Required Items:
- Storage bins (various sizes)
- Label maker or permanent marker
- Clear adhesive label holders
- Category dividers
- Measuring tape
- Inventory list template
- Storage bin lid organizers
- Bin stackers or shelving units
Select appropriately sized bins for your items and space, then sort belongings into broad categories like seasonal, daily use, or storage. Before placing items in bins, assess each category to ensure everything deserves space in your organized system.
Create clear, readable labels that specify the contents and attach them consistently on each bin’s front face. Position frequently accessed items in easily reachable locations and store seasonal or rarely used items in higher or deeper storage spaces.
Group similar items together and consider using subcategories within larger bins by implementing smaller containers or dividers. Maintain a master inventory list documenting bin contents and locations, updating it as items are added or removed. This system works best when you establish a logical flow for item retrieval and return, placing bins in intuitive locations based on use frequency and related activities.
For optimal results, review and adjust bin contents quarterly, removing outdated items and reorganizing as needed. Consider using clear bins for frequently accessed items and implement a color-coding system for different categories or family members.
Always leave some empty space in each bin for future additions, and regularly clean bins to maintain a fresh, organized environment.


