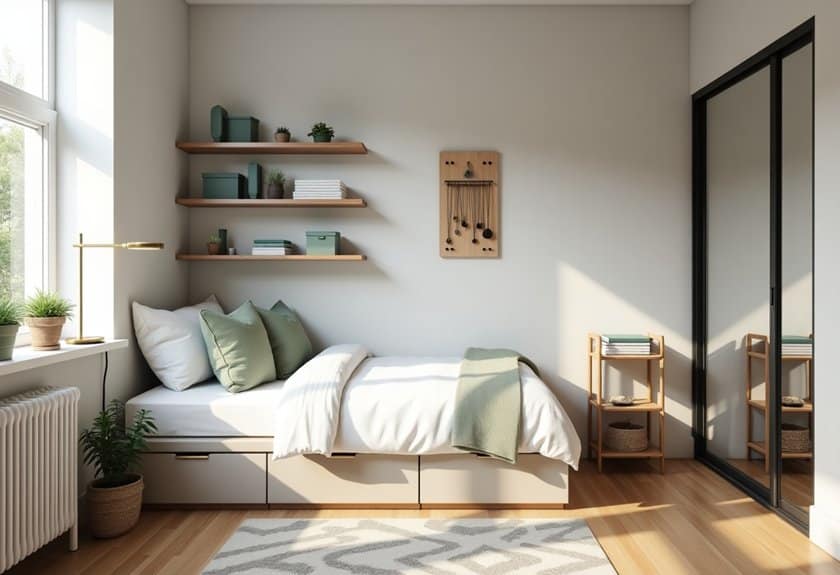
Whether you’re downsizing to a cozy studio or maximizing your current bedroom space, smart organization can transform even the tiniest room into a serene sanctuary. I’ve spent years helping clients tackle their small-space challenges, and I’ve discovered that the secret lies in thinking both vertically and creatively. From floating nightstands that seem to defy gravity to hidden storage that’ll make you feel like a magician, these 12 genius solutions will help you reclaim every precious inch of your compact retreat.
Utilize Vertical Space With Wall-Mounted Storage
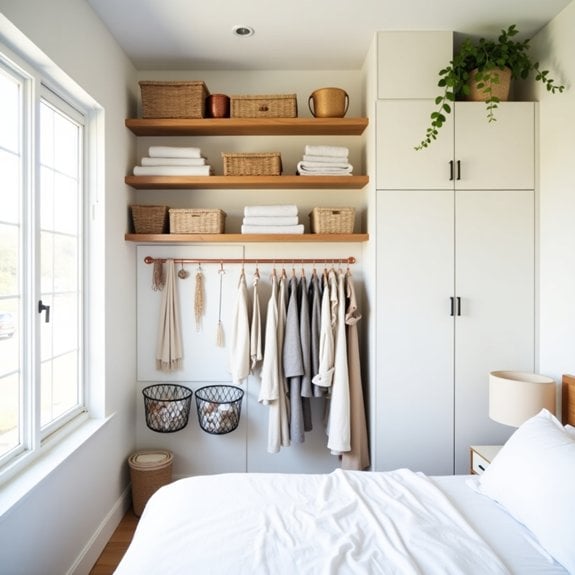
Making the most of vertical space in a small bedroom is crucial for maximizing storage capacity while maintaining floor space. Wall-mounted storage solutions can transform previously unused wall areas into functional storage zones, creating a more organized and spacious-feeling environment.
When properly executed, vertical storage not only provides practical solutions but also adds visual interest to your room. By lifting items off the floor and utilizing wall space strategically, you can create a more streamlined look while keeping essential items easily accessible.
Required Items:
- Stud finder
- Power drill and drill bits
- Level
- Measuring tape
- Pencil
- Wall anchors
- Screwdriver
- Floating shelves
- Wall-mounted hooks
- Pegboard and accessories
- Wire baskets or organizers
- Basic tool kit
- Step ladder
Start by identifying suitable wall spaces for mounting storage solutions, using a stud finder to locate secure mounting points. Measure and mark your intended installation areas, ensuring proper spacing between items and considering the height of stored objects.
Install the larger items first, such as floating shelves or pegboards, making sure to use appropriate wall anchors for items not mounted directly into studs. Layer your storage solutions vertically, placing frequently used items at eye level and less-used items higher up.
Install hooks between shelves for hanging items like bags, scarves, or jewelry. For pegboards, create zones for different categories of items, using various attachments like hooks, baskets, and shelving to maximize versatility.
Create a layout that maintains visual balance while providing practical access to stored items. Consider grouping similar items together and using coordinated storage containers or baskets to maintain a cohesive look. Leave some open wall space to prevent a cluttered appearance, and ensure adequate clearance around furniture and doorways.
Additional Tips: Rotate stored items seasonally to maintain organization and accessibility. Use clear containers or labels to easily identify contents of higher storage areas. Consider installing adjustable systems that can be reconfigured as your storage needs change. Regularly assess the weight capacity of your wall-mounted storage to prevent overloading and potential damage.
Invest in Multi-Functional Furniture Pieces
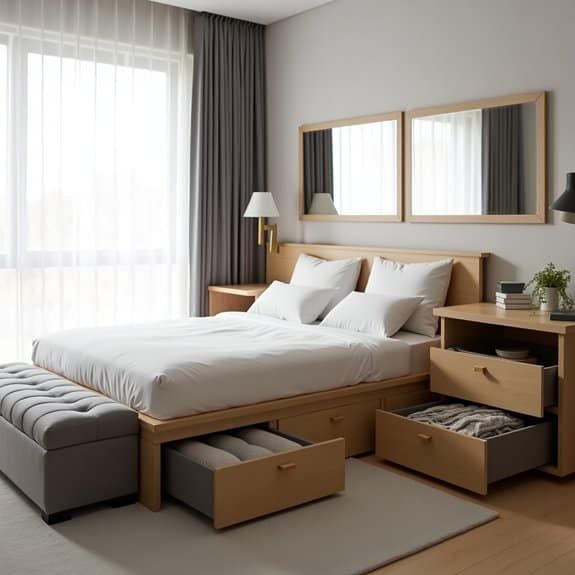
A well-organized small bedroom starts with smart furniture choices that serve multiple purposes. Multi-functional furniture pieces are essential space-saving solutions that can transform a cramped bedroom into an efficient, livable space while maintaining style and comfort.
By investing in furniture that performs double or even triple duty, you can maximize every square foot of your bedroom without sacrificing functionality. These versatile pieces eliminate the need for multiple furniture items, creating more floor space and reducing visual clutter, which is crucial in maintaining a peaceful sleeping environment.
Required Items:
- Measuring tape
- Floor plan or room sketch
- Budget worksheet
- Furniture catalog or website access
- Room layout app (optional)
- List of storage needs
- Current furniture inventory
- Camera for room documentation
Select multi-functional pieces strategically by first measuring your available space and identifying your primary needs. Start with a bed frame that includes built-in storage drawers or lifting mechanisms for under-bed storage.
Consider a desk that can fold into the wall or transform into a vanity, and opt for an ottoman that opens for storage and serves as extra seating. Position these pieces against walls to maximize floor space, ensuring that transformable features have adequate clearance to function properly.
When selecting pieces, prioritize items that match your most frequent activities in the room.
Additional Tips: Maintain functionality by regularly testing moving parts and mechanisms of your multi-functional furniture. Keep transformation instructions easily accessible, and establish a routine for transitioning pieces between their various functions.
Consider the weight and durability of items when selecting pieces, and choose options with smooth, quiet operations if you share living space. Always leave enough clearance around transformable furniture to prevent damage to walls or other pieces when in use.
Maximize Under-Bed Storage Solutions
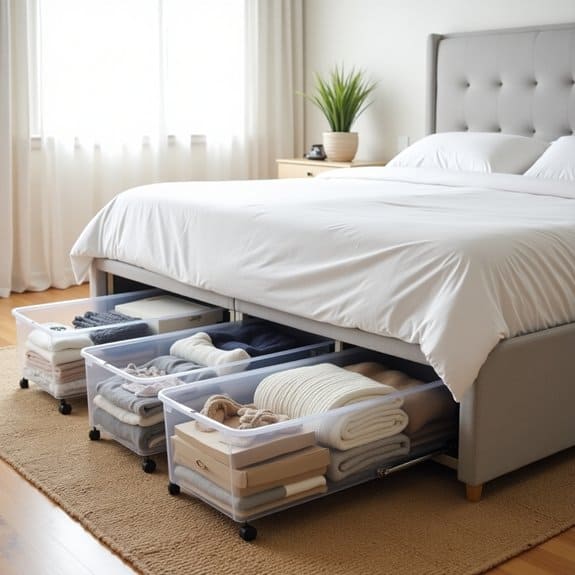
Under-bed storage represents one of the most underutilized spaces in a bedroom, offering valuable square footage for items that aren’t needed daily. This often-overlooked area can store seasonal clothing, extra bedding, shoes, and other essentials without creating visual clutter in your living space.
Making the most of under-bed storage not only helps maintain a clutter-free room but also protects stored items from dust and damage. With proper organization and the right storage solutions, this space can effectively double your storage capacity while maintaining a clean, minimalist appearance in your bedroom.
Required Items:
- Under-bed storage containers or bins
- Bed risers (if needed)
- Storage bags or vacuum-seal bags
- Labels and marker
- Measuring tape
- Anti-dust covers
- Drawer dividers
- Wheels or casters (optional)
- Clear plastic bins (optional)
Start by measuring the available space under your bed, including height, width, and depth. If needed, install bed risers to create additional clearance. Select storage containers that maximize the available space while allowing easy access.
Sort items into categories: seasonal clothing, shoes, extra bedding, and memorabilia. Use vacuum-seal bags for soft items to reduce bulk and protect against moisture.
Arrange containers by frequency of use, with frequently accessed items positioned near the foot or sides of the bed for easy access. Install wheels on storage containers if your floor surface allows for smooth sliding.
Create a storage map noting the location of different categories, and attach labels to containers for quick identification. To maintain organization and protect stored items, use dust covers over containers, conduct seasonal rotations of stored items, and perform regular cleaning underneath the bed.
Consider using clear containers for better visibility, and maintain a detailed inventory list of stored items to avoid unnecessary purchases and ensure efficient use of the space.
Create a Floating Nightstand System
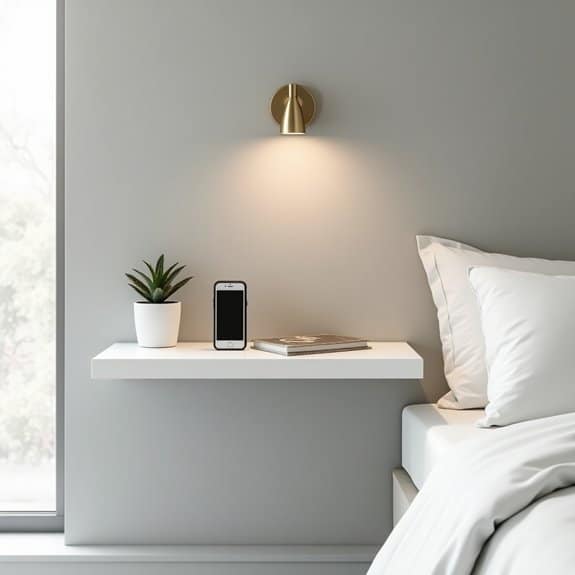
A floating nightstand system is a game-changer for small bedrooms, offering the functionality of traditional bedside storage without consuming valuable floor space. By mounting storage solutions directly to the wall, you create an airier atmosphere while maintaining easy access to essential items like phones, books, and water glasses.
The floating design not only maximizes space but also allows for easier cleaning underneath and provides flexibility in height adjustment to suit individual needs. This modern approach to bedroom organization can be customized to match any décor style while providing practical storage solutions that keep bedside essentials within arm’s reach.
Required Items:
- Wall brackets or floating shelf hardware
- Wall anchors and screws
- Level
- Drill and drill bits
- Measuring tape
- Pencil
- Floating shelves or mounted boxes
- Cable management clips
- Stud finder
- Screwdriver
Select your preferred mounting location by measuring the desired height from your mattress (typically 2-4 inches above). Use a stud finder to locate wall studs and mark their positions. Install wall brackets or mounting hardware according to manufacturer specifications, ensuring they’re level and secure. If mounting between studs, use appropriate wall anchors rated for the weight of your items.
For a complete system, consider installing multiple components at varying heights – perhaps a wider shelf for books and decorative items, with a smaller shelf or mounted box closer to bed level for immediate necessities. Include integrated cable management solutions for charging devices, either through pre-drilled holes or adhesive cable clips.
To maximize the effectiveness of your floating nightstand system, incorporate lighting solutions such as wall-mounted sconces or clip-on lights that don’t require additional surface space. Use small containers or dividers within the shelving to maintain organization and prevent items from sliding. Consider adding a small hook underneath for hanging items like headphones or sleep masks, further utilizing vertical space while keeping the design clean and minimal.
Install Space-Saving Door Organizers
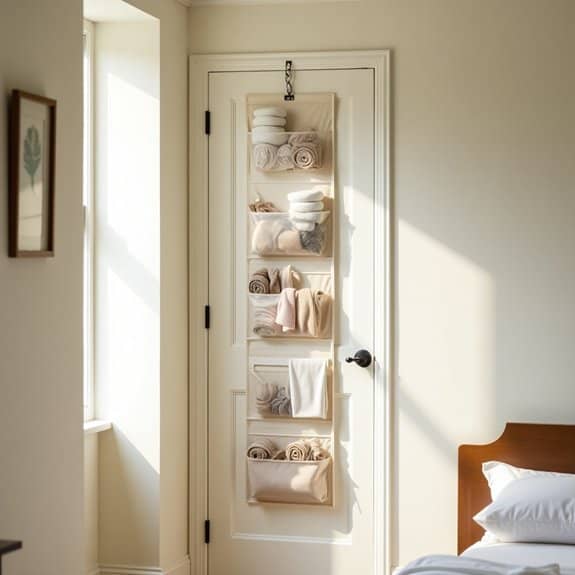
Making the most of vertical space is crucial in small bedrooms, and doors represent prime real estate for additional storage. Door organizers transform previously unused surfaces into functional storage areas, maximizing every square inch of available space while keeping items easily accessible.
Door organizers are particularly effective for storing shoes, accessories, cleaning supplies, or daily essentials that would otherwise clutter valuable drawer or closet space. This organization method keeps items visible and within reach while maintaining a clean, organized appearance in the main bedroom area.
Required Items:
- Over-the-door organizer (mesh, clear plastic, or fabric)
- Measuring tape
- Level
- Screwdriver
- Door hooks or mounting brackets
- Command strips (optional)
- Anchors (if mounting to door)
- Storage bins or baskets (optional)
Start by measuring your door’s dimensions, including width and height, to ensure proper fit of the organizer. If using an over-the-door model, simply hang it on sturdy door hooks. For mounted organizers, mark mounting points with a level, then secure brackets or anchors according to manufacturer instructions.
Test the door’s movement to ensure the organizer doesn’t interfere with closing or create unwanted noise.
Once installed, organize items by category and frequency of use. Place frequently accessed items at eye level, with heavier items toward the bottom for stability. Consider using clear storage bins within the organizer pockets to contain smaller items and maintain a neat appearance.
To maximize longevity and effectiveness, periodically check mounting hardware for security and avoid overloading individual pockets. Use door bumpers or felt pads to prevent damage to the door or wall, and consider labeling pockets to maintain organization systems long-term.
For shared spaces, assign specific sections to different family members to prevent confusion and maintain order.
Implement Closet Zone Organization
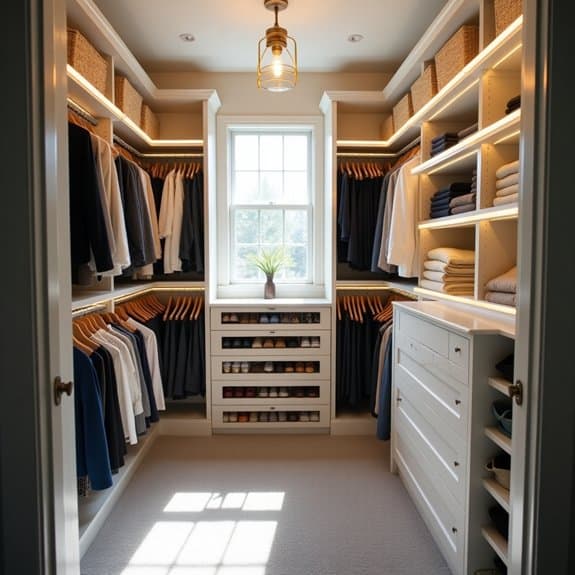
A well-organized closet is essential for maximizing space in a small bedroom, turning chaos into a functional storage system that makes daily routines smoother and more efficient. When clothes and accessories are properly organized into distinct zones, you can easily locate items, maintain order, and make the most of limited closet space.
Creating designated zones within your closet transforms it from a cramped storage space into an organized system that functions like a mini boutique. This approach not only saves time during your daily routine but also helps protect your clothing investments and reduces the stress of dealing with cluttered spaces.
Required Items:
- Clothing rod dividers
- Storage bins or boxes
- Drawer organizers
- Label maker
- Matching hangers
- Shelf dividers
- Clear storage containers
- Space-saving hooks
- Storage baskets
- Measuring tape
Start by completely emptying your closet and measuring the available space. Divide your closet into distinct zones based on clothing types and usage frequency: everyday wear, formal attire, seasonal items, accessories, and shoes.
Install a double-hanging rod system if possible, using the upper rod for shirts and jackets and the lower rod for pants and skirts.
Create specific zones for different categories: designate the most accessible areas for frequently worn items, install hooks or specialized organizers for accessories, and utilize upper shelves for seasonal or rarely used items.
Implement drawer organizers for smaller items like undergarments and socks, and use clear containers for items that need protection from dust.
To maintain your newly organized closet zones, regularly assess your clothing inventory, rotate seasonal items, and maintain a “one-in-one-out” policy when adding new pieces.
Consider installing motion-sensor lights or battery-operated LED strips to illuminate dark corners, making it easier to locate items in all zones of your organized closet space.
Add Corner Shelving Units
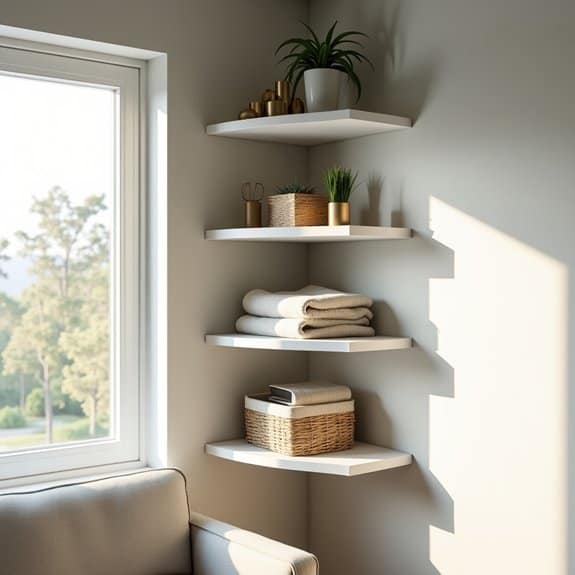
Corner spaces in small bedrooms often go unused, representing valuable storage potential in rooms where every inch counts. By installing corner shelving units, you can transform these awkward angles into functional storage areas that draw the eye upward and create visual interest while maximizing your room’s storage capacity.
Corner shelves provide an elegant solution for displaying books, decorative items, and essential belongings without consuming precious floor space. These units work particularly well in small bedrooms because they take advantage of typically wasted space while creating a cohesive look that can make your room appear larger and more organized.
Required Items:
- Corner shelf unit
- Stud finder
- Level
- Drill and drill bits
- Screwdriver
- Wall anchors
- Mounting brackets
- Measuring tape
- Pencil
- Safety glasses
- Dust mask
Start by selecting the perfect corner for your shelving unit and use a stud finder to locate wall studs. Measure and mark the desired height for each shelf bracket, ensuring they’re level. When installing floating shelves or bracket-mounted units, drill pilot holes into the studs or insert wall anchors in locations without studs. Secure the brackets firmly to the wall, double-checking that they’re level before attaching the shelves.
For pre-assembled corner units that sit on the floor, ensure the corner is clean and the floor is level. If needed, use shims to stabilize the unit. Position the unit snugly in the corner and secure it to the wall using L-brackets at the top for safety, especially in areas prone to earthquakes or with small children present.
Additional Tips: Consider incorporating different shelf depths, with deeper shelves at the bottom for larger items and shallower ones at the top for smaller decorative pieces. Use shelf dividers or small containers to segment the space and prevent items from falling between shelves.
Paint or finish the shelving unit in a color similar to your walls to create a built-in look that makes the room appear more spacious.
Design a Minimalist Clothing System

A minimalist clothing system is essential for maintaining order in a small bedroom, where space is at a premium. By streamlining your wardrobe to only the most necessary and beloved items, you create breathing room in your closet and reduce the daily stress of choosing what to wear.
Creating a capsule wardrobe and implementing smart storage solutions not only maximizes your available space but also promotes mindful consumption habits. This systematic approach to clothing organization can transform a cramped, chaotic bedroom into a peaceful sanctuary where everything has its place.
Required Items:
- Clothing rack or rod
- Matching hangers
- Drawer organizers or dividers
- Storage boxes
- Clothing labels
- Vacuum storage bags
- Basic folding board
- Donation bags
- Storage bins
- Drawer liners
Begin by removing all clothing items from your closet and drawers. Sort everything into three categories: keep, donate, and discard. For items you’re keeping, create a capsule wardrobe by selecting versatile pieces that can be mixed and matched. Aim for a collection of 30-40 items per season, including shoes and accessories.
Organize clothes by category and color, hanging delicate items and folding sturdy fabrics using the file folding method for drawer storage. Store off-season clothing in vacuum-sealed bags under the bed or in high storage spaces. Install a double-rod system in your closet to maximize vertical space, with longer items on top and shorter pieces below.
Use slim, matching hangers to maintain uniformity and prevent clothing damage. Implement the one-in-one-out rule: when adding a new item, remove an old one to maintain the minimalist system.
For optimal maintenance of your minimalist clothing system, conduct a wardrobe audit every three months. This regular assessment helps identify unused items, maintain organization, and prevent unnecessary accumulation. Store frequently worn items at eye level and implement a rotation system to ensure even wear of your clothing.
Consider documenting successful outfit combinations to streamline future decision-making and maintain the efficiency of your minimalist wardrobe.
Incorporate Hidden Storage Solutions
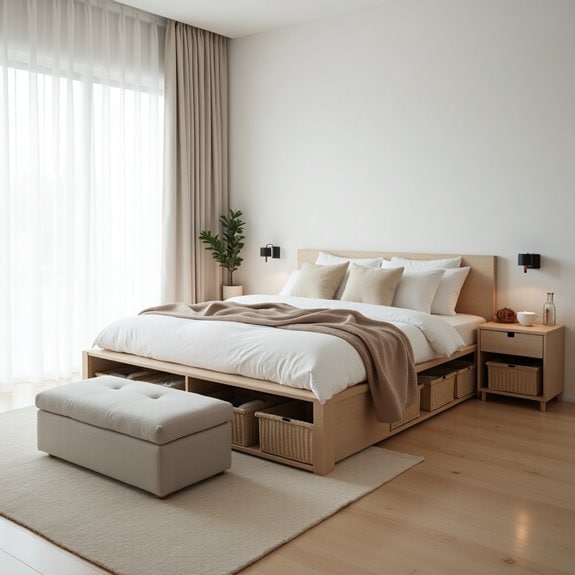
Making the most of hidden storage in a small bedroom is crucial for maintaining a clutter-free and peaceful environment. Every inch of space counts, and implementing clever storage solutions can effectively double your room’s storage capacity while maintaining a clean, minimalist appearance.
Hidden storage solutions work by utilizing often-overlooked spaces such as under-bed areas, hollow furniture pieces, and vertical wall spaces. These discrete storage options allow you to keep necessary items close at hand while preventing visual clutter that can make a small bedroom feel cramped and chaotic.
Required Items:
- Under-bed storage containers
- Bed risers
- Ottoman with storage compartment
- Over-door organizers
- Hollow bedside tables
- Drawer organizers
- Command hooks
- Storage bench
- Double-duty furniture pieces
- Space bags
Start by evaluating your bed setup, as it typically offers the most hidden storage potential. Install bed risers to create additional under-bed space, then utilize flat storage containers designed specifically for under-bed use.
Select furniture pieces that serve multiple purposes, such as a storage ottoman that can function as both seating and storage, or a hollow bedside table with concealed compartments.
Next, maximize vertical space by installing floating shelves with hidden compartments or using over-door organizers on closet and bedroom doors. Replace traditional furniture with storage-focused alternatives, such as a bed frame with built-in drawers or a window seat that opens to reveal storage space.
Ensure all new storage solutions maintain clean lines and blend seamlessly with your room’s décor.
For optimal results, regularly assess and rotate items stored in hidden compartments based on seasonal needs. Label contents of storage containers clearly but discretely, and maintain an inventory of stored items to prevent forgotten belongings.
Consider using vacuum storage bags for bulky items like extra bedding or off-season clothing to maximize space efficiency within hidden storage areas.
Optimize Drawer Space With Dividers
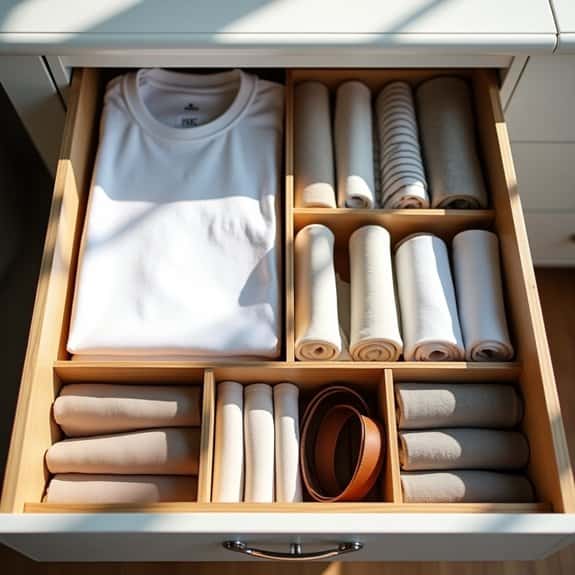
Well-organized drawers are essential in a small bedroom where every inch of storage space counts. When drawers become cluttered and disorganized, valuable space is wasted, and finding specific items becomes a frustrating task that wastes time and creates unnecessary stress.
Drawer dividers transform chaotic storage spaces into efficient, compartmentalized zones that keep items separated, visible, and easily accessible. This organization system prevents clothes and accessories from becoming tangled or lost, while maximizing the vertical space within each drawer.
Required Items:
- Drawer dividers (adjustable or fixed)
- Measuring tape
- Drawer liner (non-slip)
- Storage boxes or containers (optional)
- Labels or label maker
- Clean cloth for wiping drawers
- Scissors
Start by removing everything from the drawer and measuring its internal dimensions. Clean the drawer thoroughly and install non-slip liner material. Select dividers that fit your drawer measurements and arrange them to create appropriately sized compartments for different categories of items.
For clothing drawers, consider sections for socks, undergarments, accessories, or folded items. For utility drawers, create zones based on frequency of use and item type.
When installing the dividers, ensure they’re secure and properly aligned. Group similar items together in each compartment, using the Marie Kondo folding method to maximize vertical space. If using storage boxes within the compartments, choose ones that fit snugly and make the most of the available height.
Label each section clearly if needed, especially for drawers containing numerous small items.
Additional Tips: Consider using clear dividers to maintain visual flow and make items easier to locate. Regularly assess the effectiveness of your compartment sizes and adjust as needed.
Remember to leave about 10% of each compartment empty to prevent overcrowding and maintain organization long-term. For seasonal items, rotate contents accordingly while maintaining the organizational system.
Use Vacuum Storage Bags for Seasonal Items

Storing seasonal clothing and bedding can be one of the biggest challenges in a small bedroom. Without proper storage solutions, these items can consume valuable closet and drawer space year-round, even when they’re not in use. Vacuum storage bags offer an efficient solution to this common problem, reducing the volume of stored items by up to 75%.
Vacuum storage bags are particularly valuable for bulky items like winter coats, heavy blankets, and seasonal clothing. By removing air from these items and creating airtight compression, you can protect them from moisture, dust, and insects while significantly reducing their storage footprint. This system allows you to maximize vertical storage space under beds or on high closet shelves.
Required Items:
- Vacuum storage bags in various sizes
- Vacuum cleaner with hose attachment
- Labels and marker
- Clean, dry items to be stored
- Storage containers or boxes (optional)
- Fabric softener sheets (optional)
- Inventory list
Sort your seasonal items by category and ensure they’re completely clean and dry. Place similar items together in appropriately sized vacuum bags, being careful not to overfill them. Leave enough space at the top for proper sealing.
Close the bag’s zipper seal completely, then insert your vacuum’s hose into the valve and turn it on. As the air is removed, smooth out any wrinkles to ensure maximum compression. Once fully compressed, cap the valve and check the seal.
For optimal organization, label each bag clearly with its contents and the season. Consider creating categorical zones in your storage area – under-bed space for current season items, high shelves for off-season items. Stack compressed bags in plastic containers or storage boxes if storing in areas where they might collect dust.
Additional Tips: Rotate your seasonal items twice a year during season changes, using this opportunity to inspect items for damage and assess what you actually use.
Add fabric softener sheets to bags to maintain freshness, and keep an inventory list of stored items to avoid purchasing duplicates. Consider storing bags in areas with consistent temperature and away from direct sunlight to prevent potential damage to the items inside.
Mount Bedside Lighting to Save Space
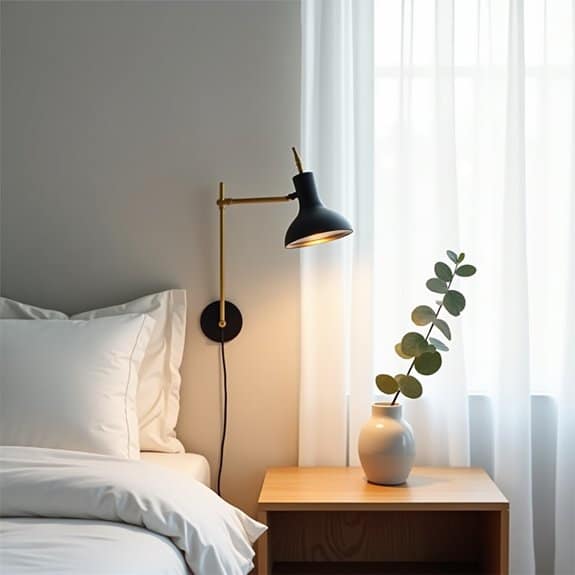
Wall-mounted lighting solutions are essential for maximizing space in small bedrooms, where every inch of surface area counts. By removing traditional table lamps from nightstands, valuable space becomes available for other necessities while maintaining proper illumination for reading, working, or creating ambiance.
Mounting bedside lights not only frees up precious real estate but also creates a cleaner, more streamlined aesthetic. This modern approach to bedroom lighting can make the room appear larger and more organized while providing adjustable, targeted light exactly where needed.
Required Items:
- Wall-mounted light fixtures
- Electrical junction box
- Wire nuts and electrical tape
- Mounting screws and wall anchors
- Wire stripper
- Screwdriver
- Level
- Pencil
- Measuring tape
- Stud finder
- Drill and drill bits
Start by determining the optimal height and position for your wall-mounted lights, typically 20-30 inches above the mattress and 6-12 inches from the edge of the headboard. Use a stud finder to locate wall studs, marking their positions with a pencil. If mounting into drywall, install appropriate anchors to ensure stability.
When working with electrical components, turn off power at the circuit breaker and verify all connections are properly insulated. For hardwired fixtures, install junction boxes and run appropriate wiring through the wall, following local electrical codes. Connect the fixture’s wires to the house wiring using wire nuts, ensuring proper ground connection.
Secure the mounting bracket to the wall, attach the fixture, and restore power to test the installation.
Additional Tips: Consider installing dimmer switches for versatility and choose fixtures with adjustable arms or swing-out designs for maximum flexibility. LED bulbs provide energy efficiency and generate less heat, making them ideal for confined spaces. If hardwiring isn’t possible, explore plug-in wall sconces with cord concealment solutions to maintain a clean appearance.

