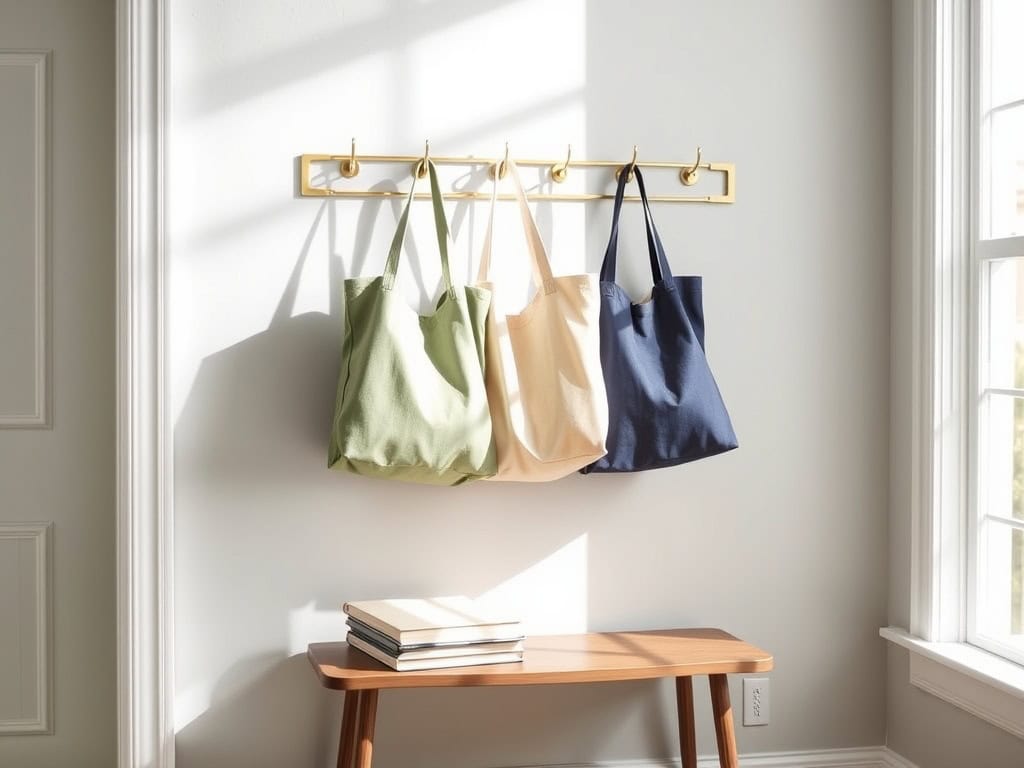
Just last week, my daughter’s backpack joined the growing pile by our front door, and I knew it was time for a storage intervention! If you’re tired of tripping over book bags or searching for homework in the morning chaos, you’re not alone. I’ve discovered eight clever storage solutions that’ll transform your entryway from cluttered mess to organized success. These practical ideas don’t just look great – they’ll actually make your life easier and your mornings smoother.
Over-the-Door Hook Systems
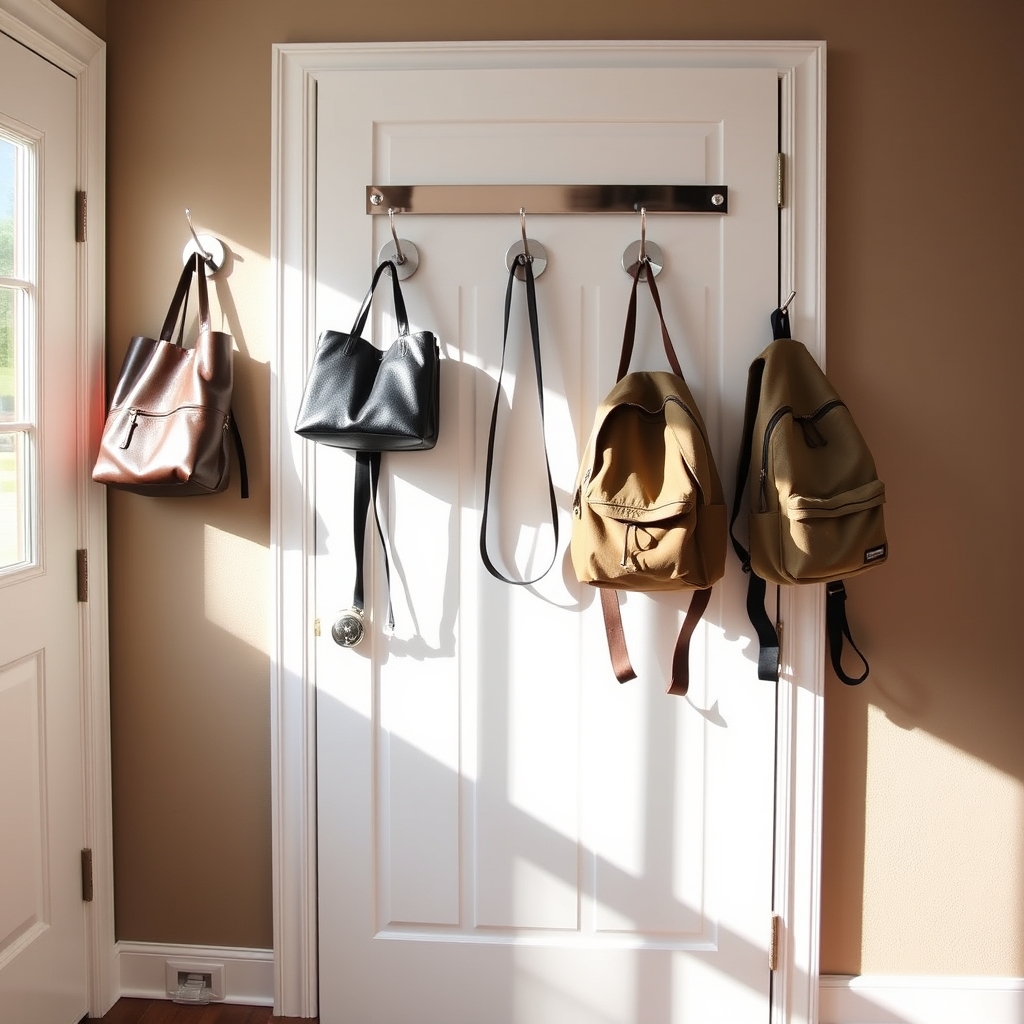
Organizing book bags with over-the-door hook systems provides an immediate solution to cluttered entryways and bedroom floors. These vertical storage solutions maximize space utilization while keeping bags easily accessible, preventing the common frustration of searching for the right bag during busy mornings.
Installing an over-the-door hook system transforms unused door space into a functional storage area, protecting bags from damage while maintaining their shape and extending their lifespan. This organization method is particularly valuable in small spaces, dorm rooms, or homes with multiple family members carrying different bags for various activities.
Required Items:
- Over-the-door hook rack
- Measuring tape
- Level
- Door bumpers or protective pads
- Bag tags or labels (optional)
- Command strips (optional)
- Rubber door stoppers
Install the over-the-door hook system by first measuring the door’s width and selecting an appropriately sized rack. Place protective pads on the back of the hooks where they contact the door to prevent scratching. Hang the system over the door, ensuring it’s level and secure. For additional stability, especially with heavier bags, consider using command strips at the bottom corners of the rack.
Arrange hooks at different heights to accommodate various bag sizes and prevent them from bumping into each other. If multiple family members share the system, designate specific hooks for each person’s bags. Consider arranging bags by frequency of use, placing daily-use items at eye level and occasional-use bags higher or lower.
To prevent door damage, install rubber door stoppers to keep the door from hitting the wall when opened with loaded hooks.
Additional Tips: Label hooks or create a color-coding system to maintain organization when multiple people use the same door. Regularly assess the weight distribution on the hooks to prevent overloading, and periodically check that the system remains securely mounted.
Consider installing a small shelf above the hooks for additional storage of smaller items like keys or sunglasses that typically accompany bags.
Custom Mudroom Cubbies
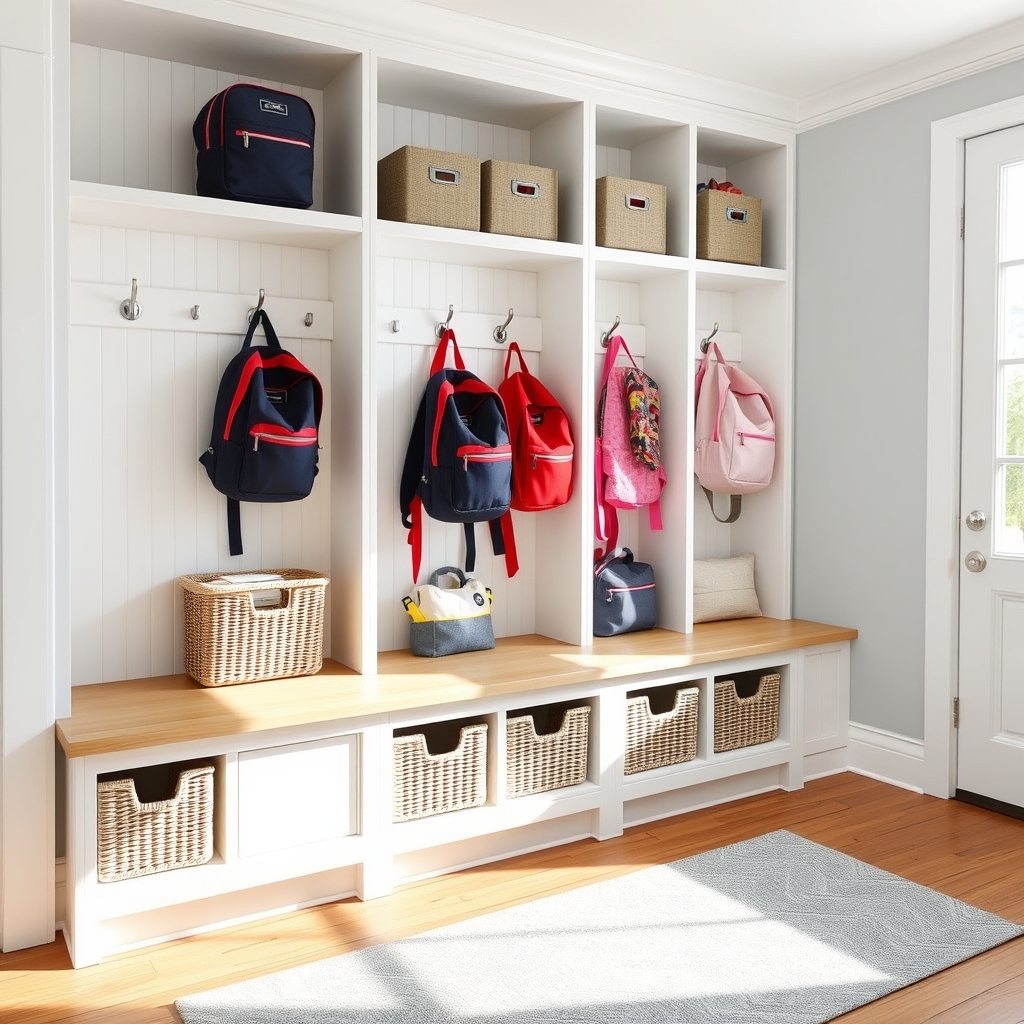
A well-organized mudroom with custom cubbies serves as the first line of defense against household clutter, especially when it comes to book bags and school supplies. This dedicated space acts as a transition zone between the outside world and your home’s interior, preventing bags, books, and accessories from spreading throughout the house.
Custom mudroom cubbies provide personalized storage solutions that cater to each family member’s specific needs. When properly designed and organized, these spaces eliminate morning chaos, reduce stress during busy schedules, and create an efficient system for managing daily essentials.
Required Items:
- Measuring tape
- Level
- Pencil
- Wood boards or pre-made cubby units
- Hooks
- Name labels
- Storage bins or baskets
- Shelf liner
- Basic tools (screwdriver, drill, hammer)
- Wall anchors
- Cleaning supplies
Start by measuring your mudroom space and planning individual cubby dimensions based on family members’ needs. Install the main cubby structure, ensuring it’s properly anchored to the wall and level.
Divide the space vertically to create separate sections for each person, with sufficient width to accommodate backpacks and additional storage bins. Position hooks at appropriate heights for different family members, typically allowing 12-15 inches between hooks for adequate spacing.
Add horizontal shelving above the hooks for additional storage of seasonal items or extra supplies. Install baskets or bins below the hanging area for shoes, sports equipment, or other loose items. Label each cubby clearly with family members’ names to establish ownership and accountability.
For maximum organizational success, implement a weekly maintenance routine to prevent clutter accumulation. Consider adding moisture-resistant materials or treatments to protect against wet items, and incorporate additional features like a small bench or charging station to enhance functionality.
Regularly assess and adjust the layout to accommodate changing needs as children grow or storage requirements evolve.
Repurposed Vintage Ladder Storage
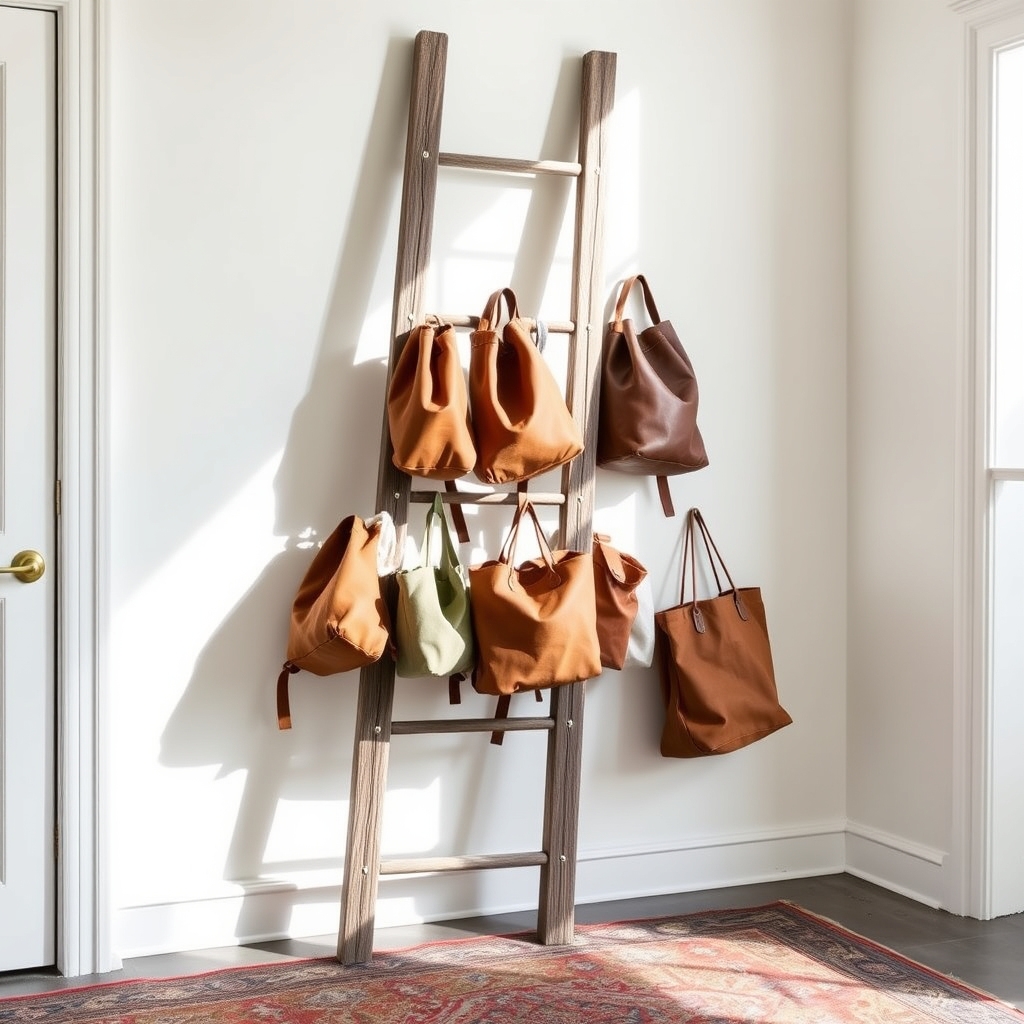
Transforming a vintage ladder into a book bag storage solution combines functionality with rustic charm, creating an eye-catching organizational piece that maximizes vertical space. This innovative approach to storage not only preserves the character of a cherished vintage item but also provides a practical solution for keeping book bags organized and easily accessible.
The ladder storage method works particularly well in entryways, mudrooms, or children’s rooms, offering multiple rungs for hanging various sizes of book bags while maintaining an open, airy feel. This organization system prevents bags from cluttering the floor and creates designated spots for each family member’s belongings.
Required Items:
- Vintage wooden ladder
- Sandpaper (medium and fine grit)
- Wood cleaner
- Wood sealant or paint
- Wall anchors
- Heavy-duty mounting brackets
- Level
- Drill and drill bits
- Measuring tape
- Pencil
- Sturdy hooks (optional)
- Safety gear (gloves, protective eyewear)
Clean and prepare the ladder by thoroughly sanding any rough spots and wiping away dust and debris. Apply wood cleaner to remove accumulated grime, allowing it to dry completely. Once clean, apply wood sealant or paint according to your preference, ensuring all surfaces are properly protected.
Determine the ideal mounting location, using a level to mark bracket positions on the wall. Install wall anchors and secure the mounting brackets, ensuring they can support the ladder’s weight plus loaded book bags.
Position the ladder against the wall at approximately a 70-degree angle for optimal stability and accessibility. Secure the ladder to the mounting brackets using appropriate hardware. If desired, install additional hooks on individual rungs to increase hanging capacity. Test the stability of the mounted ladder before adding book bags.
For maximum effectiveness, assign specific rungs to different family members or bag types, and consider adding labels for easy identification. Place frequently used bags on middle rungs for easy access, while seasonal or less-used items can go on higher rungs.
Regularly inspect the mounting hardware and ladder condition to ensure continued safety and stability of your storage solution.
Wall-Mounted Storage Bench Solutions
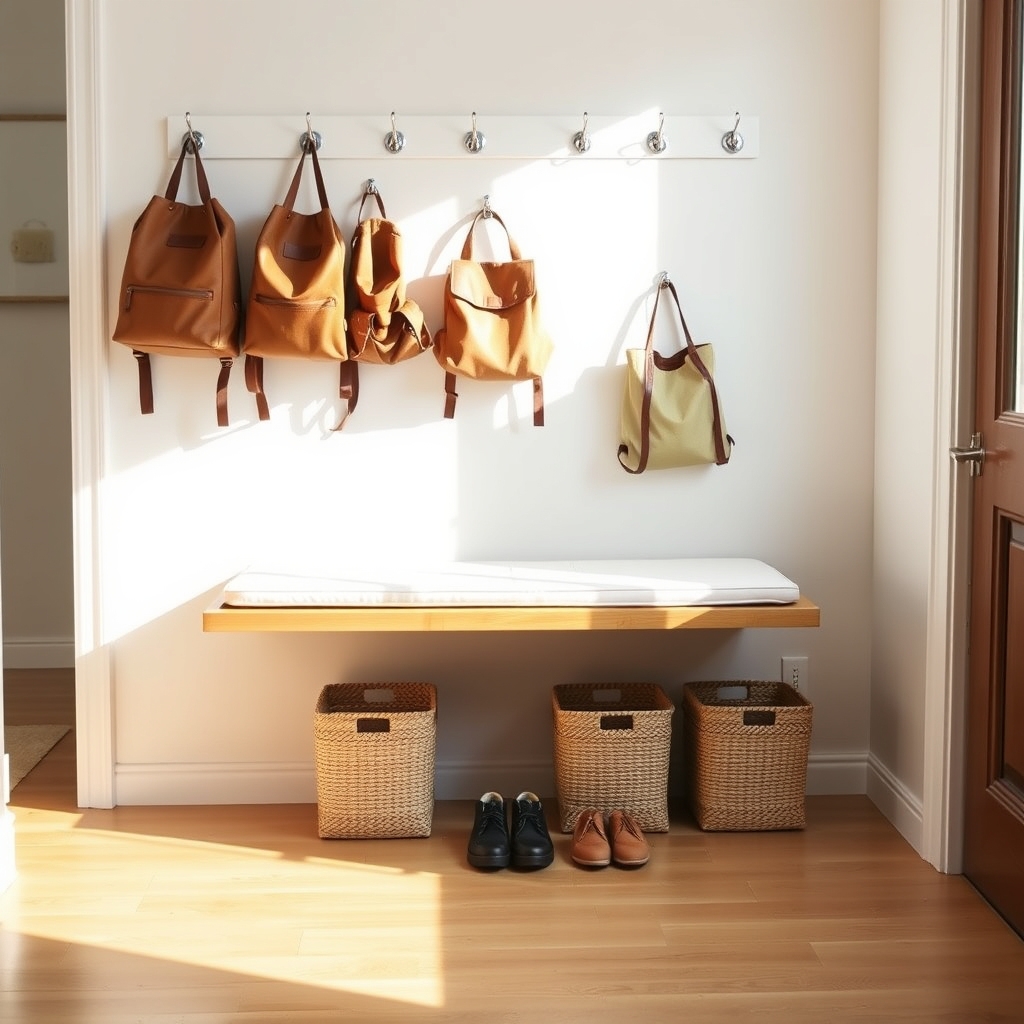
A well-organized wall-mounted storage bench system creates a dedicated space for book bags while maximizing vertical space and maintaining floor clearance.
This dual-purpose solution combines seating functionality with storage efficiency, making it particularly valuable in entryways, mudrooms, or children’s rooms where space optimization is crucial.
The wall-mounted approach prevents book bags from cluttering floors and creates a systematic approach to storage that encourages consistent organization habits.
When properly installed, these units can handle significant weight while providing easy access to daily essentials and maintaining a clutter-free environment.
Required Items:
- Wall-mounted storage bench
- Heavy-duty wall anchors
- Drill and drill bits
- Level
- Measuring tape
- Pencil
- Screwdriver
- Storage hooks or pegs
- Baskets or bins
- Labels
- Stud finder
Begin by selecting a suitable wall space and using a stud finder to locate wall studs.
Mark the mounting points at your desired height, ensuring the bench will be at a comfortable seating level, typically 17-19 inches from the floor.
Install heavy-duty wall anchors at marked points, then secure the bench base to the wall following manufacturer specifications.
Add hooks or pegs above the bench at appropriate intervals for hanging book bags, maintaining at least 12 inches of space between each hook to prevent overcrowding.
Install additional organizational elements such as shelving or cubbies above or below the bench area as needed.
Consider incorporating baskets or bins beneath the bench for smaller items or seasonal accessories.
Label each storage space clearly to maintain organization and establish designated spots for specific items.
For optimal longevity and functionality, regularly check the wall anchors and mounting hardware for security, clean the bench surface weekly, and establish a rotation system for seasonal items.
Consider implementing a “one in, one out” rule to prevent overcrowding and maintain the organized system.
Weather-proof bags can be stored on outer hooks, while delicate items should be placed in enclosed storage spaces to protect from dust and damage.
Hidden Closet Organizers
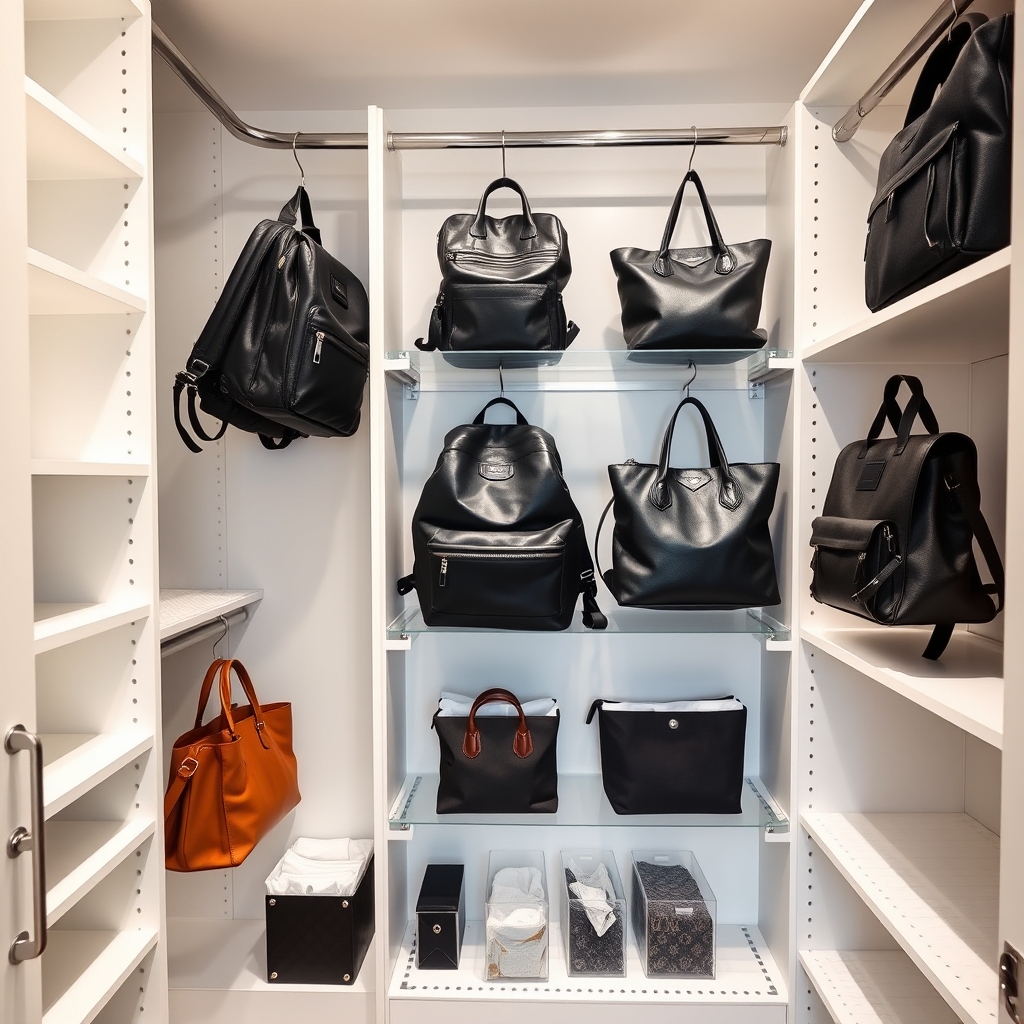
Organizing book bags in hidden closet spaces maximizes storage potential while maintaining a clean, clutter-free environment. A well-organized closet system specifically designed for book bags prevents damage to expensive bags, keeps them easily accessible, and extends their lifespan through proper storage methods.
Hidden closet organizers transform unused or awkward closet spaces into efficient storage solutions, making it possible to store multiple book bags without creating visual chaos in your living space. This organization method is particularly valuable for students, professionals, or families managing multiple bags simultaneously.
Required Items:
- Over-the-door hooks
- Hanging closet organizer
- Clear storage bins
- Label maker
- Command hooks
- Tension rods
- Storage shelf dividers
- Storage baskets
- Dust bags
- Measuring tape
Start by emptying the designated closet space and measuring all dimensions. Install an over-the-door hook system on the interior of the closet door for frequently used bags. Mount Command hooks at varying heights on the back wall to accommodate different bag sizes.
Position a hanging closet organizer with multiple compartments on the closet rod, designating specific sections for different types of book bags. For deeper closets, install tension rods to create additional hanging space for bags with longer straps. Place clear storage bins on upper shelves for seasonal or less frequently used bags, ensuring each bin is properly labeled.
Use shelf dividers to prevent bags from falling over and maintain organized sections. To maximize organization success, rotate bags seasonally and store them stuffed with tissue paper to maintain shape. Use dust bags for expensive items, and implement a one-in-one-out policy to prevent overcrowding.
Regular maintenance of the organization system ensures long-term efficiency and prevents the closet from reverting to a cluttered state.
Rolling Cart Command Centers
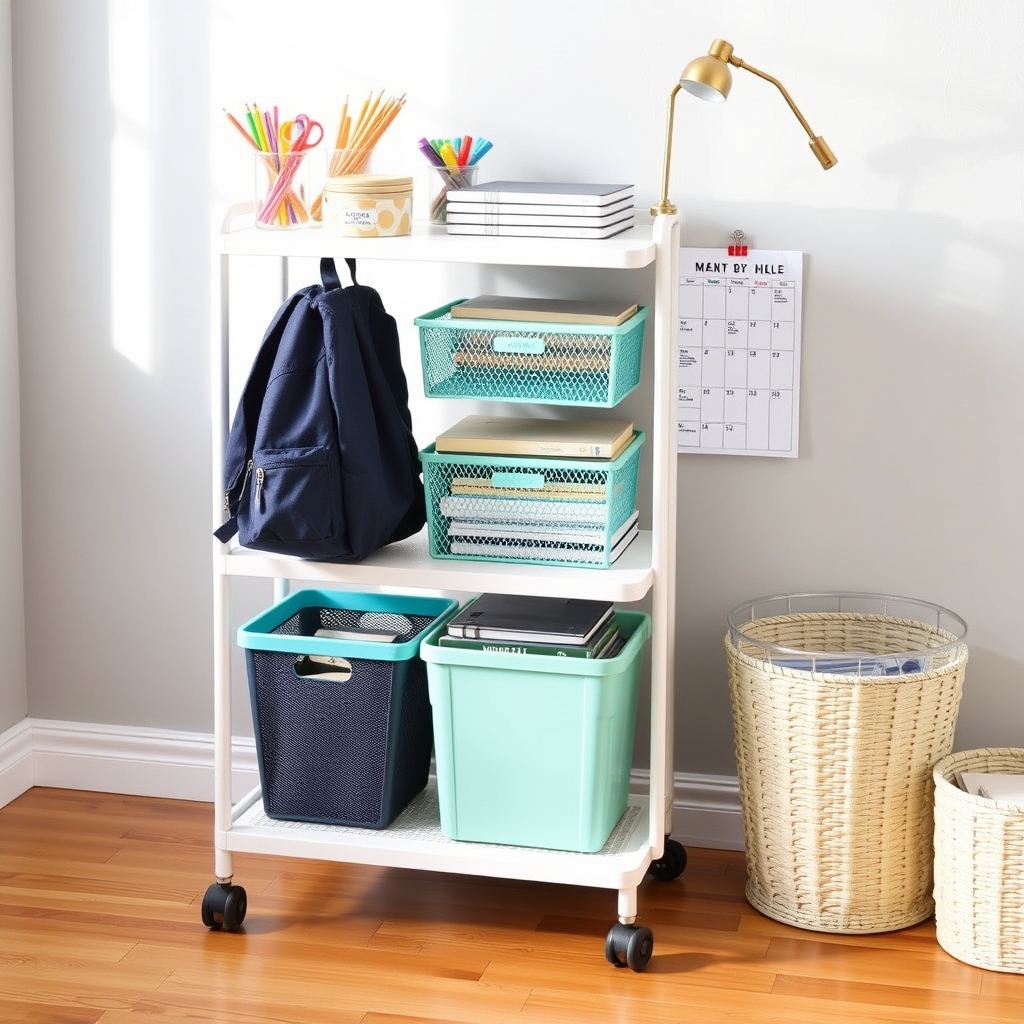
A well-organized rolling cart command center transforms the chaotic flow of book bags and school materials into a streamlined system that keeps everything accessible and orderly.
These mobile organization stations prevent the daily scramble for school supplies while maintaining a clutter-free environment in your home.
Rolling cart command centers are particularly effective because they can be moved to different locations as needed, whether it’s closer to the door during rush hour mornings or tucked away in a corner during weekends.
This flexibility, combined with their multiple storage levels, makes them ideal for managing book bags and related materials for one or multiple students.
Required Items:
- 3-tier rolling cart
- Clear storage containers
- Label maker or labels
- Hanging hooks
- File folders
- Supply organizers
- Mesh baskets
- Clip-on lights
- Binder clips
- Command hooks
Set up the rolling cart by designating each tier for specific purposes.
The top tier should hold daily essentials like homework folders, permission slips, and frequently used supplies.
The middle tier works best for subject-specific materials, organized in labeled containers.
The bottom tier can store backup supplies and seasonal items.
Install hanging hooks on the sides of the cart for book bags and lunch boxes.
Additional organization requires placing mesh baskets on the top tier for sorting incoming and outgoing papers.
Use binder clips to attach schedules or important notices to the cart’s side.
Position the cart near an electrical outlet if adding a clip-on light for homework sessions, and secure items with command hooks as needed.
Success tip: Establish a weekly maintenance routine to prevent clutter accumulation.
Every Friday, remove unnecessary papers, restock supplies, and wipe down the cart.
Consider using color-coding for multiple children and implementing a morning checkpoint system where students verify they’ve everything needed for the day before leaving the cart area.
DIY Pegboard Storage Walls
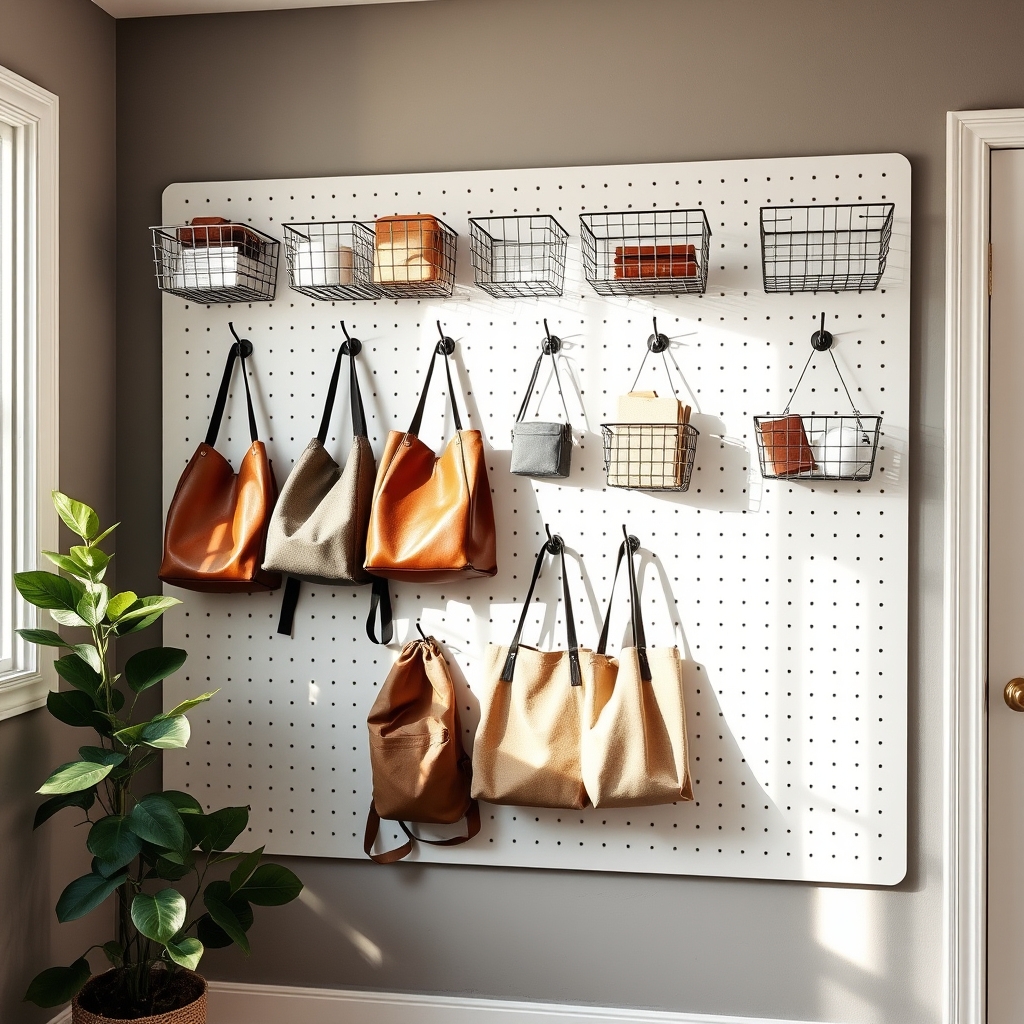
A well-organized pegboard storage wall system provides an efficient solution for managing book bags and school accessories while maximizing vertical space. This versatile storage option transforms unused wall space into a functional organization center, making it easier to keep track of multiple bags, accessories, and school supplies in one designated area.
Installing a pegboard storage wall not only creates an easily accessible storage solution but also adds a modern, customizable element to any room. The flexibility of pegboard systems allows for frequent reorganization as needs change throughout the school year, while keeping bags off the floor and preventing damage from improper storage.
Required Materials:
- Pegboard panels
- Wall anchors and screws
- Pegboard hooks (various sizes)
- Spacers or furring strips
- Level
- Drill
- Pencil
- Measuring tape
- Stud finder
- Heavy-duty hooks
- Storage baskets (pegboard compatible)
Start by locating wall studs and marking their positions. Install furring strips horizontally across the wall area, ensuring they’re properly anchored into the studs. Mount the pegboard panels onto the furring strips, using appropriate screws and ensuring proper spacing between the wall and pegboard for hook insertion. The spacing created by furring strips is crucial for hook mobility and stability.
Once the pegboard is secured, plan your hook layout based on the size and weight of your book bags. Install heavy-duty hooks at appropriate heights for different bag sizes, and add supplementary hooks and baskets for smaller items like lunch boxes, water bottles, or school supplies. Consider creating designated zones for each family member or different types of bags.
Additional Tips: Paint your pegboard to match your decor or use color-coding for different storage zones. Install the system at a height accessible to all family members who’ll use it. Regularly check hook stability and tighten any loose components. Consider adding labels or a small shelf below the pegboard for items that don’t hang well. Keep frequently used items at eye level and less-used items higher or lower on the board.
Entryway Cabinet Solutions
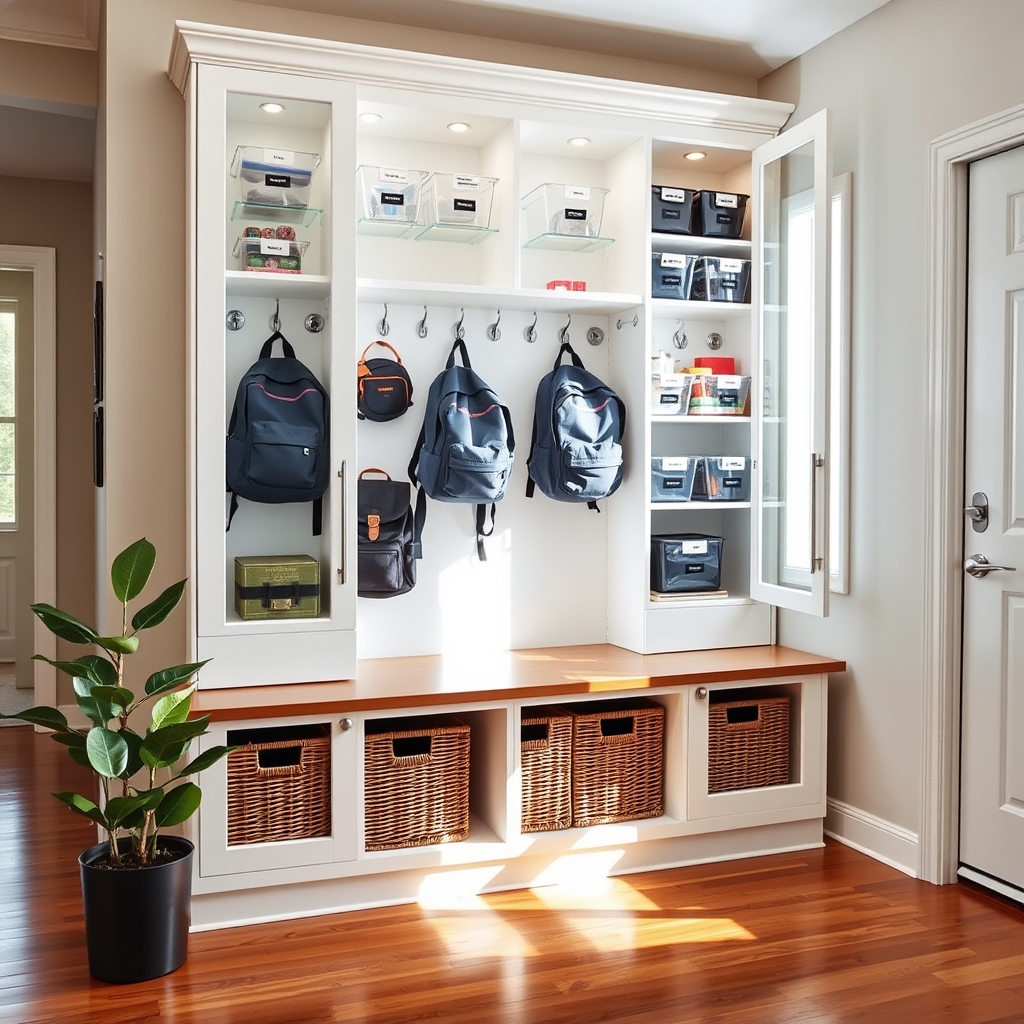
A well-organized entryway cabinet system serves as the first line of defense against book bag clutter and morning chaos. When properly arranged, these storage solutions create a streamlined space that makes grabbing school supplies and heading out the door effortless and stress-free.
Transforming your entryway cabinet into an efficient book bag storage zone not only keeps your space tidy but also teaches children responsibility and organization skills. A designated storage area helps establish routines and ensures that important items are always where they need to be.
Required Items:
- Entryway cabinet or storage unit
- Cabinet hooks or mounting hardware
- Label maker or labels
- Storage bins or baskets
- Shelf dividers
- Door-mounted organizers
- Storage bench (optional)
- Drawer organizers
- Command hooks
- Cleaning supplies
Start by emptying the entire cabinet and cleaning all surfaces thoroughly. Install hooks on the interior of cabinet doors or along the sides for hanging book bags.
Divide the cabinet into zones: upper shelves for less frequently used items, middle shelves for daily essentials, and lower areas for shoes or heavy items. If using drawers, implement organizers to separate supplies and create designated spaces for smaller items like calculators, pencil cases, or lunch containers.
For maximum efficiency, assign each family member their own section within the cabinet. Install adjustable shelving to accommodate different bag sizes and seasonal changes in storage needs. Use clear bins or labeled containers to organize loose items and prevent them from becoming scattered throughout the cabinet.
Additional Success Tips: Establish a weekly maintenance routine to prevent clutter buildup. Remove outdated papers and clean out book bags every Friday.
Consider installing motion-sensor lighting inside the cabinet for early morning accessibility, and keep frequently used items at eye level for easy access. Regularly assess the organization system and adjust it based on changing needs throughout the school year.

