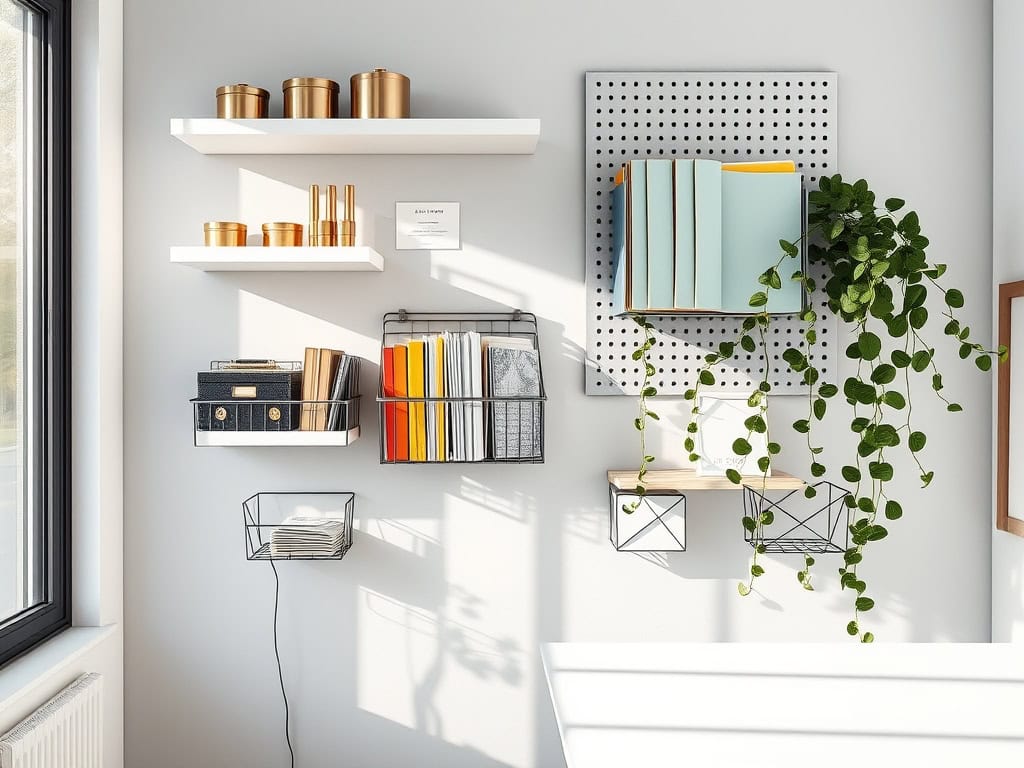
You’re about to discover eight genius ways to turn those blank office walls into organization powerhouses! As someone who transformed my tiny home workspace from chaos to calm, I can tell you that wall storage is your secret weapon for maximizing every square inch. Whether you’re dealing with a cramped corner or a full room, these practical hacks will help you reclaim your desk space and create a workflow that actually works. Let’s explore how to make those vertical surfaces work harder for you.
Floating Shelves: The Ultimate Space-Saving Solution
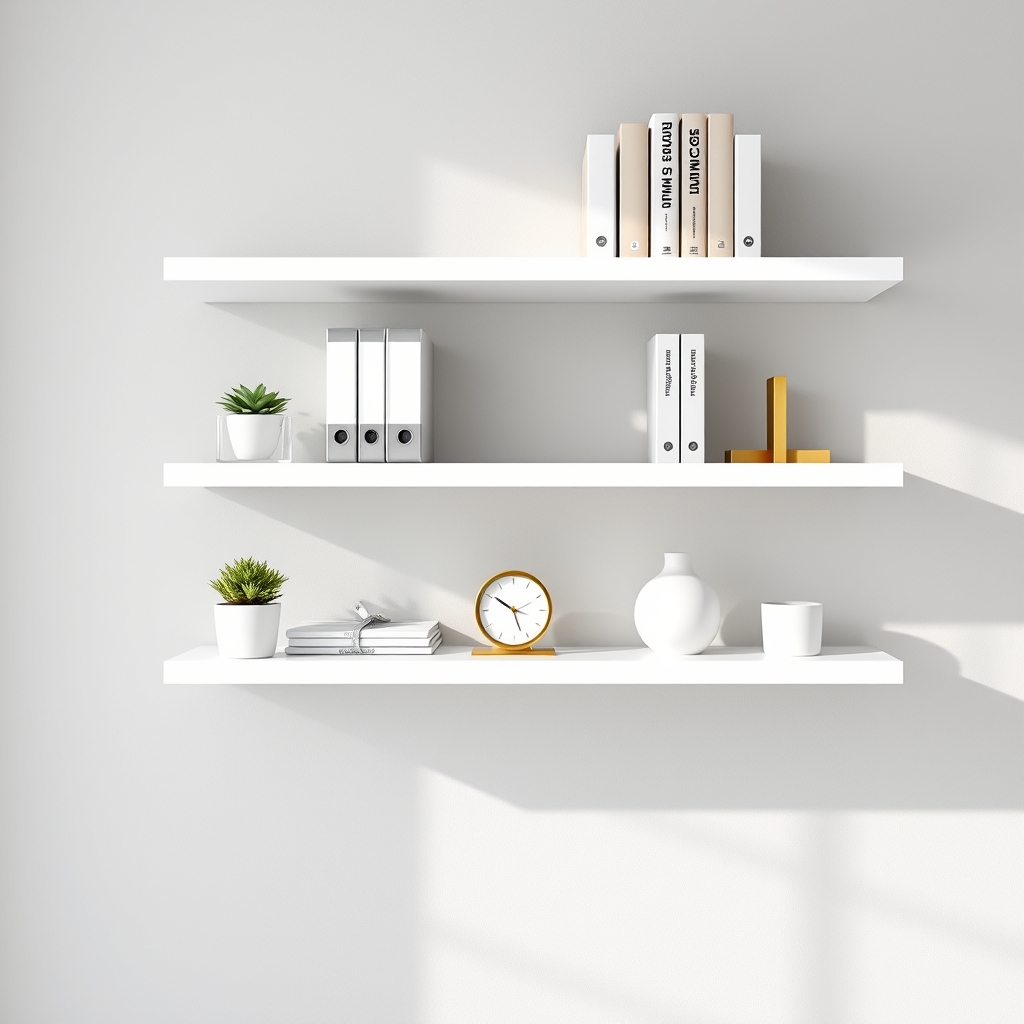
Floating shelves represent a revolutionary approach to home office organization, combining aesthetics with functionality while maintaining valuable floor space. These sleek installations create an illusion of levitation while providing essential storage solutions for work materials, decorative items, and frequently accessed resources.
Making the most of vertical wall space through floating shelves transforms a cluttered office into an efficient workspace while maintaining a professional appearance. Strategic shelf placement and thoughtful organization can significantly improve workflow, reduce desk congestion, and create an inspiring environment that promotes productivity.
Required Items:
- Floating shelves (various sizes)
- Level
- Measuring tape
- Pencil
- Wall anchors
- Screwdriver
- Drill
- Bookends
- Storage bins or baskets
- Labels
- Cable management clips
- Decorative containers
Start by mapping out your shelf arrangement on the wall using a pencil and level, ensuring proper spacing between shelves and adequate support for intended items. Install the shelves according to manufacturer specifications, using appropriate wall anchors for your wall type.
Begin organizing from top to bottom, placing less frequently used items on higher shelves and daily essentials at eye level. Group similar items together and use attractive containers or baskets to corral smaller objects.
Maintain a balance between practical storage and aesthetic appeal by incorporating decorative elements among functional items. Consider designating specific shelves for different categories: reference materials, current projects, supplies, and personal items.
For optimal organization maintenance, regularly assess shelf contents and adjust placement as needed. Implement a labeling system for containers and establish a “one in, one out” rule to prevent clutter accumulation.
Consider incorporating plants or art pieces to add visual interest while maintaining the functional aspect of your floating shelf system.
Pegboard Organization Systems for Ultimate Customization
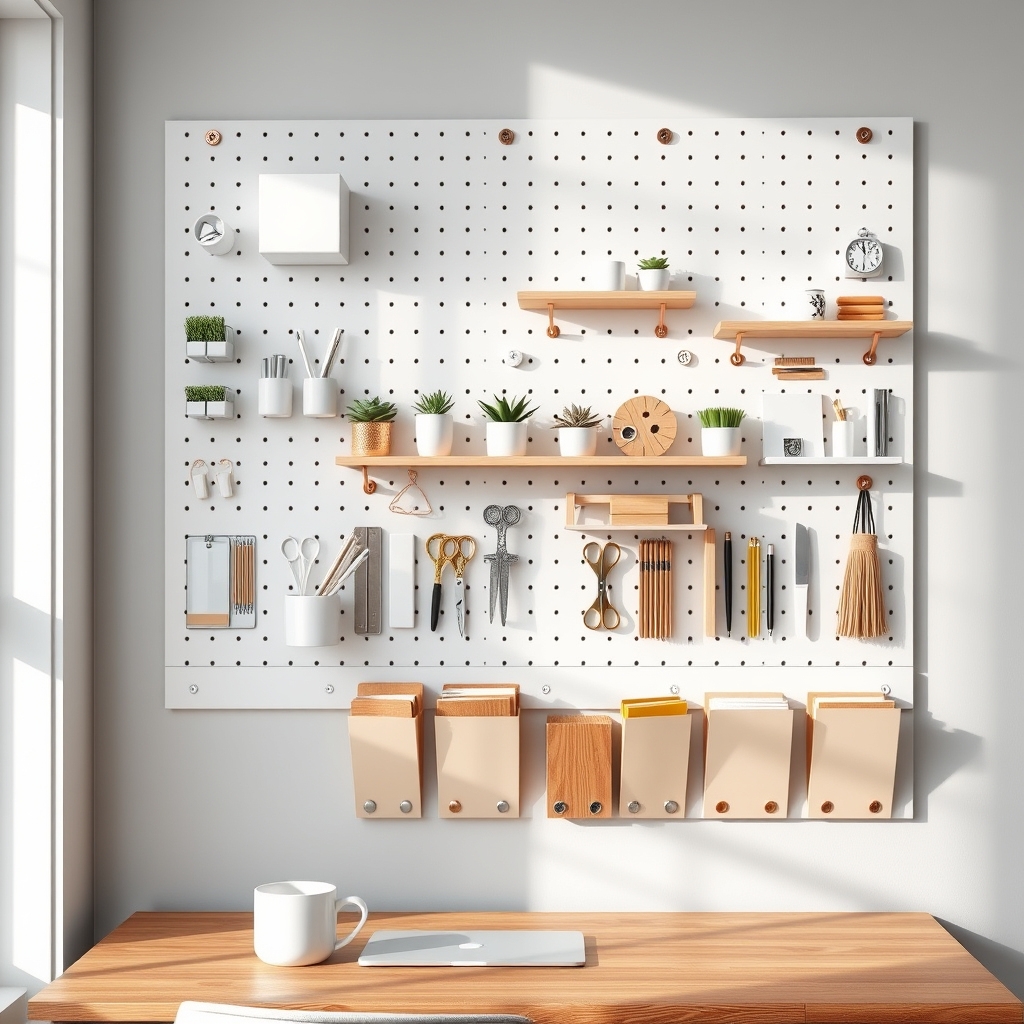
A well-organized pegboard system transforms any home office wall into a highly functional workspace that adapts to changing needs. By utilizing vertical space effectively, pegboards eliminate desktop clutter while keeping frequently used items within arm’s reach, ultimately boosting productivity and workflow efficiency.
Pegboards offer unparalleled flexibility in storage solutions, allowing users to customize their setup based on specific requirements. Whether storing office supplies, tech accessories, or creative tools, the ability to easily reconfigure hooks, shelves, and holders makes pegboard systems an ideal choice for dynamic work environments.
Required Items:
- Pegboard panels
- Wall mounting hardware
- Pegboard hooks (various sizes)
- Pegboard baskets
- Shelf brackets
- Tool holders
- Cable organizers
- Small bins
- Label maker
- Measuring tape
- Level
- Power drill
- Screwdriver
Start by measuring your wall space and mounting the pegboard securely, ensuring it’s level and properly anchored to wall studs. Create zones on your pegboard by grouping similar items together – for example, designate areas for writing tools, technology accessories, and frequently accessed documents.
Install larger hooks and brackets first to accommodate heavier items and storage containers. Position frequently used items at eye level and within easy reach of your primary workspace. Arrange tools and supplies vertically when possible to maximize space efficiency.
Incorporate a mix of hooks, shelves, and containers to accommodate different types of items, and ensure proper weight distribution across the board.
Additional Tips: Consider using color-coded hooks or zones to further organize different categories of items. Leave some empty spaces for future additions or temporary storage needs. Regularly assess your organization system and adjust the layout based on changing work patterns. Clean and inspect hooks periodically to ensure they remain secure and safe for storing items.
Wire Grid Panels That Maximize Vertical Space
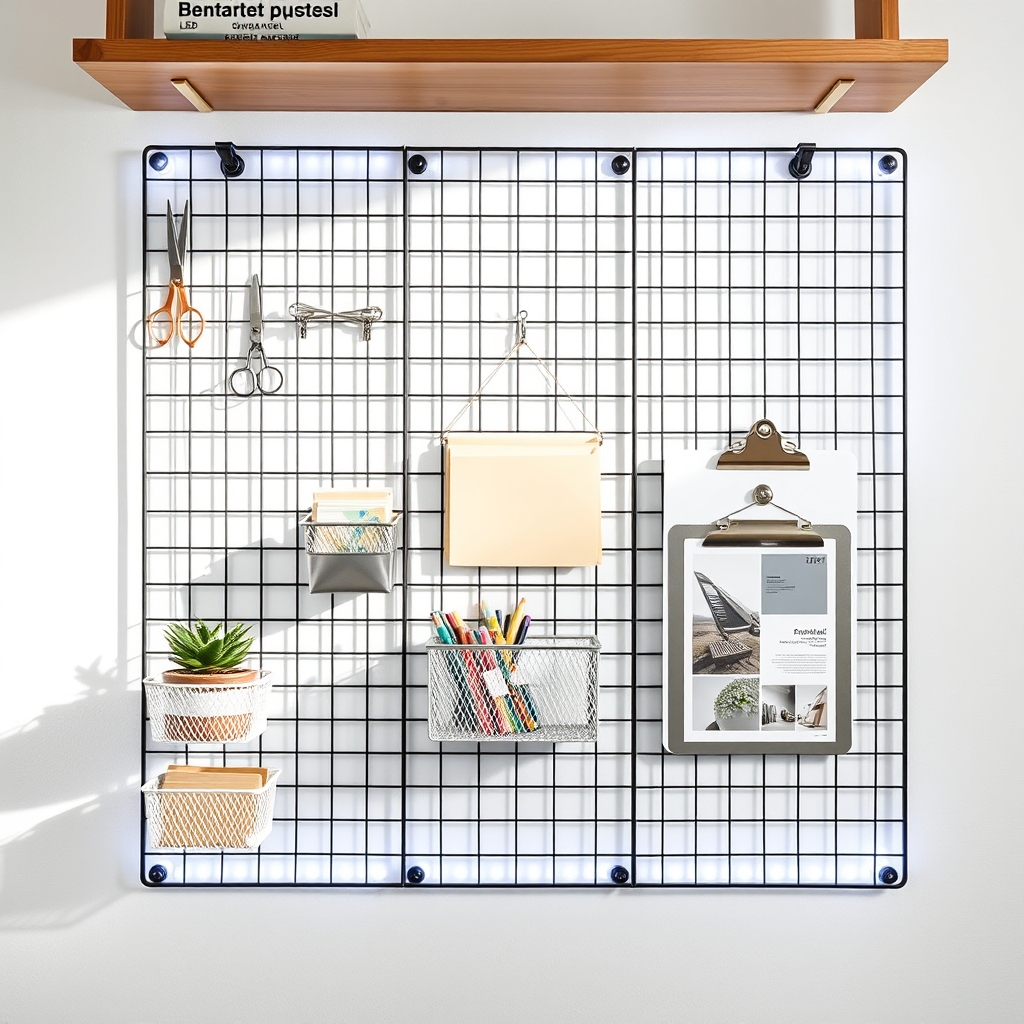
Vertical storage solutions have become increasingly crucial in modern home offices where square footage is often limited. Wire grid panels offer a versatile and aesthetically pleasing way to utilize wall space effectively, transforming otherwise unused vertical areas into functional storage zones.
Wire grid panels provide unmatched flexibility in organizing office supplies, documents, and decorative elements while keeping everything visible and easily accessible. This system allows for quick reconfigurations as needs change and maintains a clean, professional appearance that enhances workspace productivity.
Required Items:
- Wire grid panels
- Wall anchors and screws
- Level
- Drill
- Measuring tape
- Pencil
- S-hooks
- Clips
- Baskets
- Mounting brackets
- Storage containers
- Wire cutters (optional)
Installation and organization begin with careful measurement and planning of your wall space. Mark the desired location for your grid panels, ensuring they’re positioned at a comfortable height for frequent access. Mount the panels securely using appropriate wall anchors and brackets, checking for level alignment throughout the process.
Once mounted, arrange your storage accessories – hooks, baskets, and clips – in logical zones based on frequency of use and item categories. For optimal organization, create designated areas within your grid system: frequently used supplies at eye level, reference materials slightly lower, and occasional-use items higher up.
Utilize various attachments to create custom storage solutions: S-hooks for hanging scissors and tools, baskets for bulkier items, and clips for important documents or inspiration boards.
Additional Tips:
Use clear containers and labels to maintain visual organization, and regularly reassess your arrangement to ensure it continues meeting your needs. Consider adding small LED strips behind the grid for enhanced visibility and ambiance. Leave some empty space for future additions and maintain flexibility in your design to accommodate changing work patterns and storage requirements.
Magnetic Wall Strips for Metal Accessories
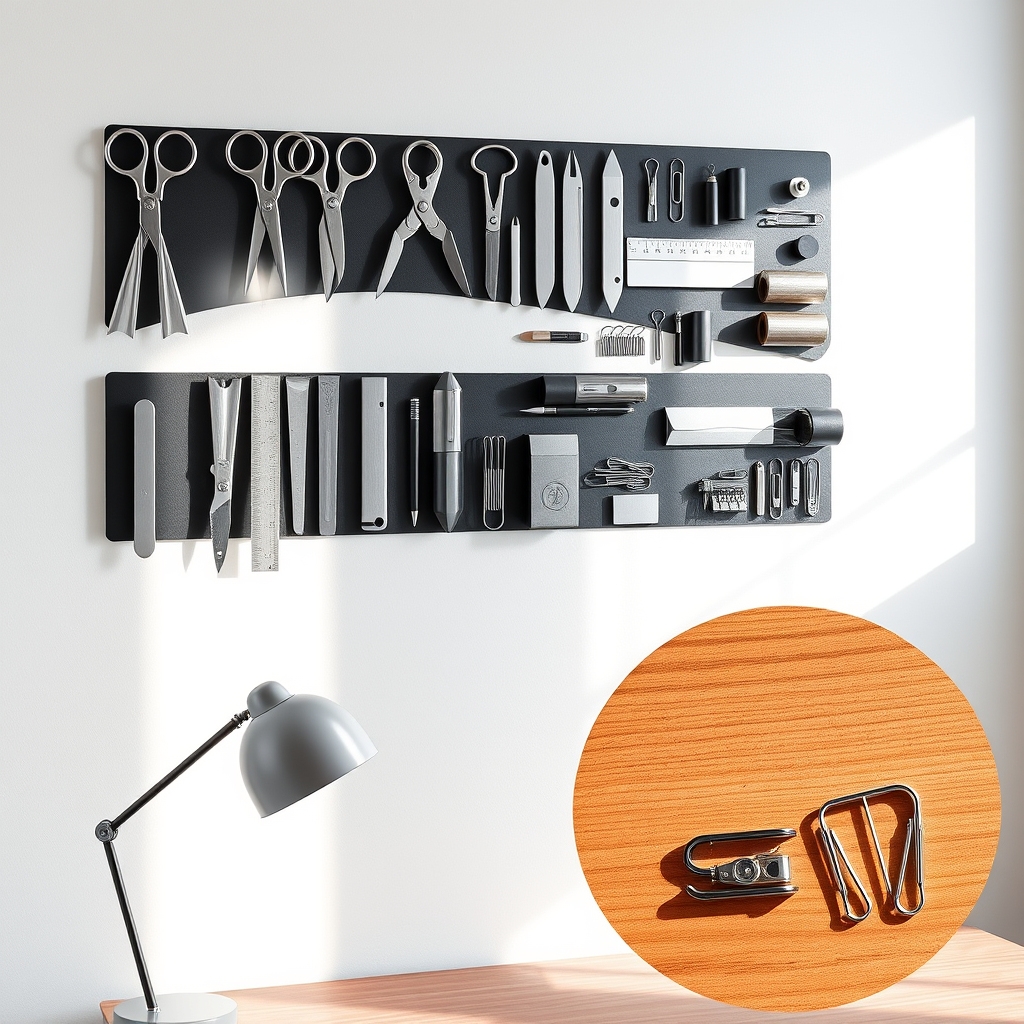
A well-organized home office is essential for productivity, and magnetic wall strips offer an innovative solution for keeping metal accessories easily accessible while maximizing vertical space. Rather than cluttering desk drawers or creating messy piles, magnetic strips transform blank wall space into functional storage areas that keep items visible and within arm’s reach.
Magnetic wall strips are particularly effective for organizing frequently used metal items like scissors, paper clips, and small tools. This system not only creates a clean, professional appearance but also helps reduce time spent searching for supplies and maintains a clutter-free workspace that promotes focus and efficiency.
Required Items:
- Heavy-duty magnetic strips
- Mounting hardware (screws and wall anchors)
- Level
- Pencil
- Drill
- Screwdriver
- Measuring tape
- Metal office supplies and accessories
- Cleaning supplies
Installation and Organization Process:
First, identify the ideal wall location for your magnetic strips, ensuring they’re at a comfortable height and within easy reach of your workspace. Measure and mark the placement, using a level to ensure straight alignment.
Install the magnetic strips according to manufacturer instructions, typically using screws and wall anchors for secure mounting. Before placing items, clean both the magnetic strip and metal accessories to ensure proper adherence.
Arrange items by frequency of use, with the most commonly used items positioned at eye level and within easy reach. Group similar items together, such as keeping all writing implements in one section and paper-securing items in another.
Success Tips:
To maintain the effectiveness of your magnetic wall storage system, regularly clean both the strips and accessories to prevent dust buildup that could weaken magnetic hold.
Consider rotating items seasonally based on project needs, and periodically assess whether the current arrangement supports your workflow. Avoid overloading the strips with too many items, as this can create visual clutter and potentially exceed the magnetic strip’s weight capacity.
Wall-Mounted File Holders and Magazine Racks
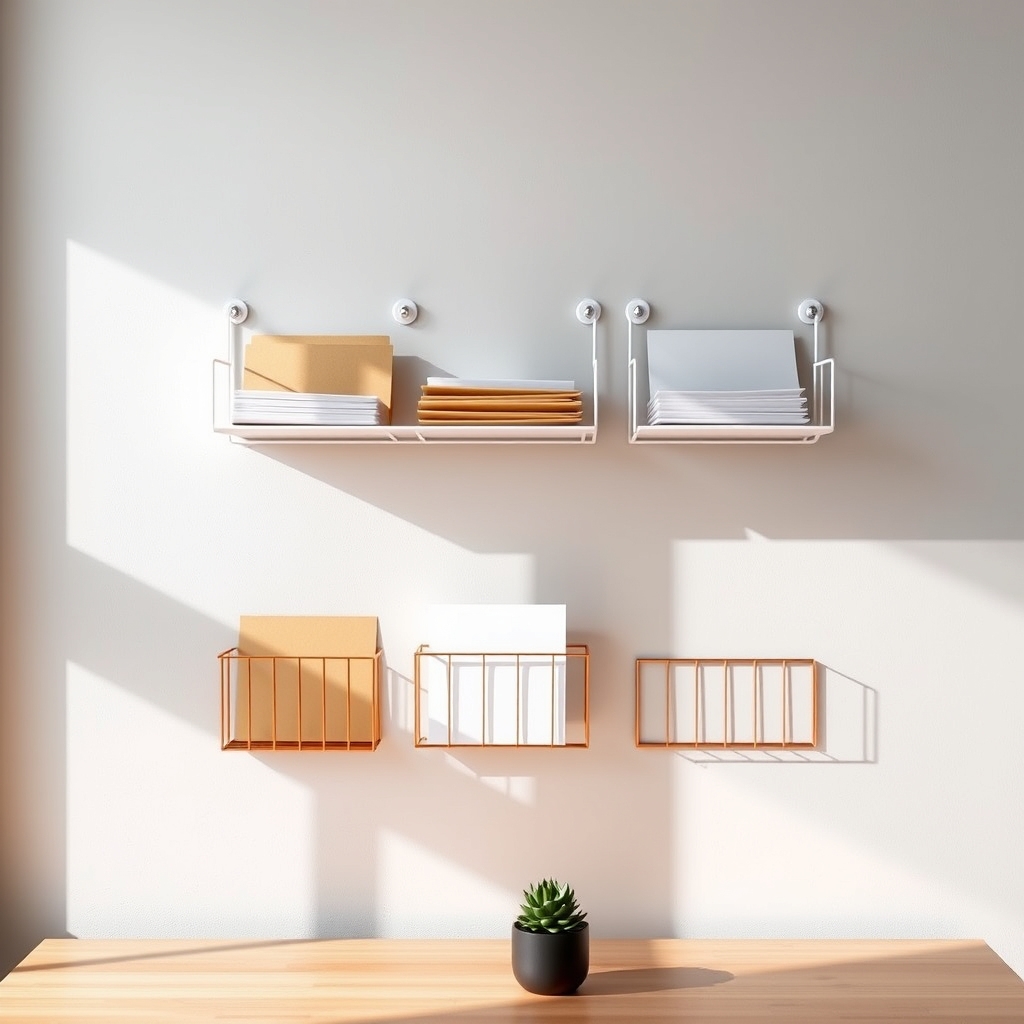
Organizing wall-mounted file holders and magazine racks is a crucial step in creating an efficient home office space. When papers and documents pile up on desks and surfaces, productivity suffers and important items can get lost in the chaos. Wall-mounted storage solutions free up valuable desk space while keeping essential documents within arm’s reach.
Vertical storage utilizing wall space transforms document management from a cluttered mess into a streamlined system. Wall-mounted file holders and magazine racks not only organize papers but also create visual order, reducing stress and making it easier to locate important documents when needed. This organization method works particularly well in small home offices where space optimization is essential.
Required Items:
- Wall-mounted file holders
- Magazine racks
- Wall anchors and screws
- Level
- Pencil
- Drill
- Measuring tape
- Labels or label maker
- File folders
- Document organizers
Start by assessing your wall space and measuring the area where you’ll mount the storage solutions. Position the file holders at eye level or slightly below for easy access, marking mounting points with a pencil and checking they’re level. Install wall anchors if not mounting directly into studs, then secure the file holders firmly to the wall.
Arrange magazine racks below or beside file holders, maintaining enough space between them for easy access. For optimal organization, establish a clear system for your documents. Designate specific holders for different categories such as “Action Items,” “Reference Materials,” and “Archive Documents.” Use color-coding or clear labels to make identification quick and intuitive.
Consider the natural workflow of your space when deciding placement – frequently accessed items should be most accessible.
Additional Tips: Implement a regular maintenance schedule to prevent overflow and maintain organization. Review contents monthly, removing outdated materials and relocating less-used items to long-term storage. Position holders to account for document size variations and consider using clear front holders for frequently referenced materials. Remember to leave room for future expansion as your storage needs grow.
Repurposed Kitchen Rails for Office Supplies
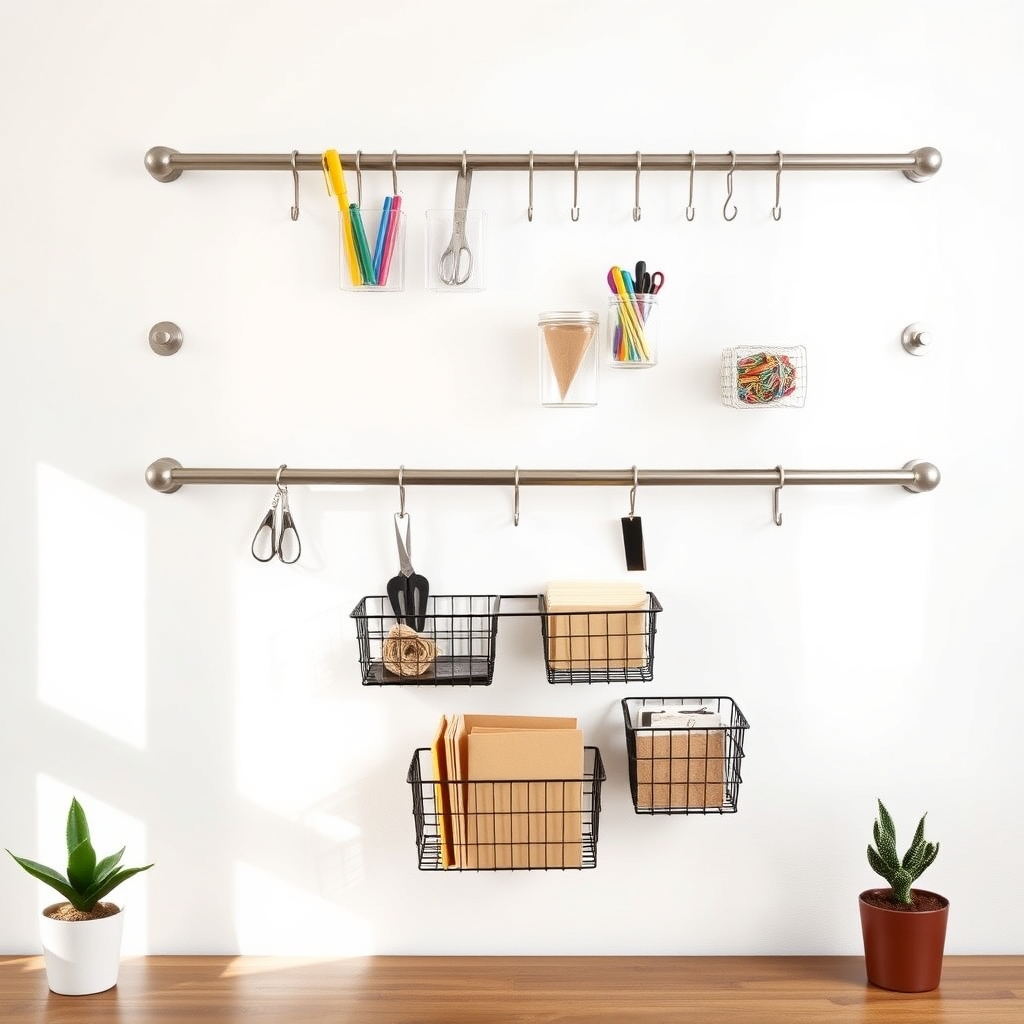
Maximizing vertical wall space in a home office is crucial for maintaining an organized and efficient workspace. Kitchen rails, originally designed for hanging utensils and cookware, can be brilliantly repurposed to create a versatile storage system for office supplies that keeps everything visible and within arm’s reach.
By utilizing kitchen rails in your office space, you can free up valuable desk space while creating an aesthetically pleasing and functional organization system. This approach is particularly effective for smaller home offices where every square inch counts, and it allows for easy customization as your storage needs change.
Required Items:
- Kitchen rail systems (IKEA GRUNDTAL or similar)
- Wall anchors and screws
- Power drill
- Level
- Pencil
- S-hooks
- Small containers or cups that can hang
- Wire baskets (optional)
- Cable ties
- Measuring tape
- Screwdriver
Mount the rails horizontally on your wall at eye level or slightly below, ensuring they’re properly anchored into wall studs or using appropriate wall anchors. Space multiple rails about 12 inches apart vertically if using more than one.
Attach S-hooks at regular intervals along the rails to hang various office supplies. Add hanging containers or cups for smaller items like pens, scissors, and paper clips. Wire baskets can be hung from the rails using S-hooks to hold larger items such as notebooks or files.
Consider positioning frequently used items in the most accessible spots.
Additional Tip: Label each section or container to maintain organization long-term, and periodically assess your setup to ensure it continues to meet your needs. Rotate supplies seasonally, keeping currently needed items within easy reach while storing less-used supplies in the higher sections.
Consider adding a small dry-erase board or cork strip below the lowest rail for temporary notes or reminders.
Corner Shelf Units That Transform Dead Space
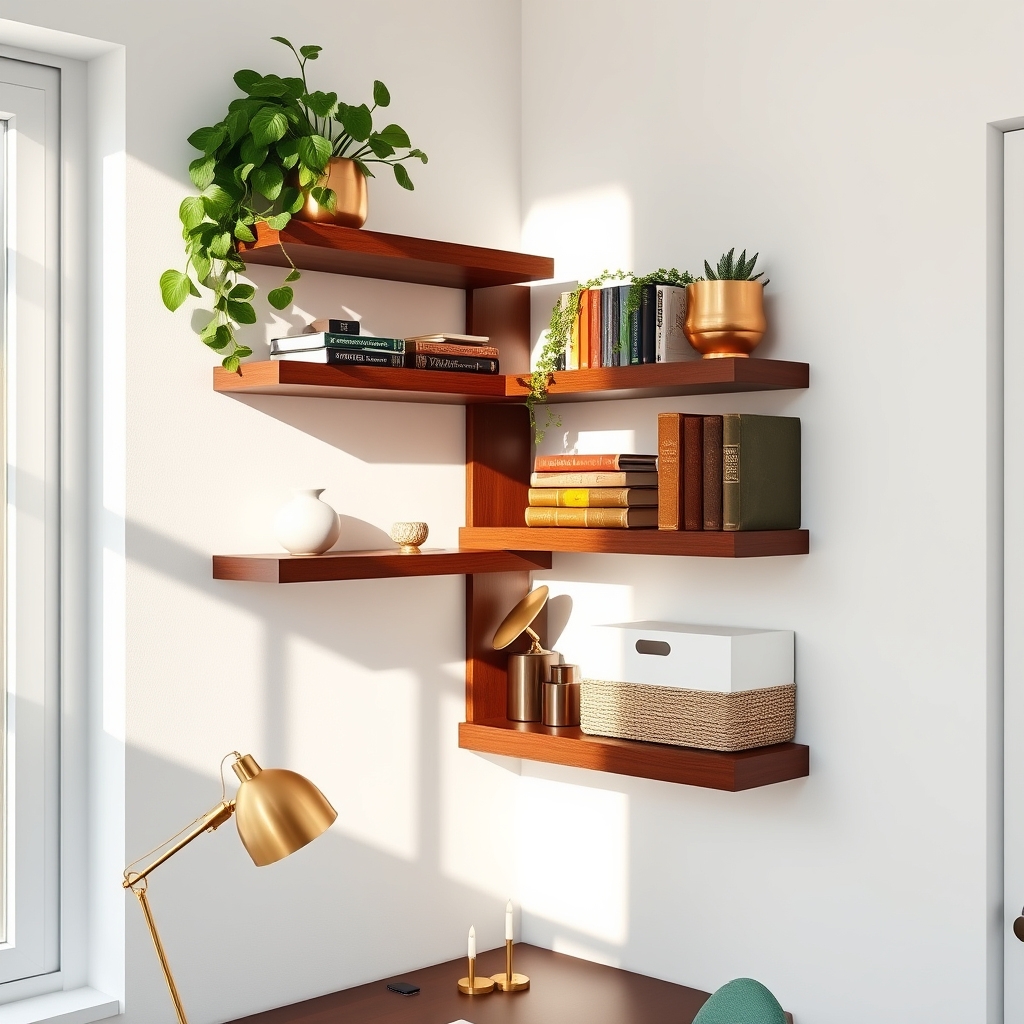
Corner spaces in home offices often become neglected dead zones, collecting dust or remaining completely unused. These awkward angles actually represent valuable real estate that, when properly utilized, can significantly expand your storage capacity and workspace efficiency.
Converting corner spaces into functional storage areas through strategic shelf placement not only maximizes square footage but also creates visual interest while maintaining a professional atmosphere. Corner shelf units provide multiple tiers of storage opportunities for books, supplies, decorative items, and essential office equipment.
Required Items:
- Corner shelf unit (floating or standing)
- Level
- Measuring tape
- Pencil
- Stud finder
- Drill and drill bits
- Wall anchors
- Screws
- Screwdriver
- Cleaning supplies
- Storage containers or baskets
The organization process begins with thoroughly cleaning the corner space and measuring both wall sections where the shelving will be installed. Using a stud finder, locate and mark wall studs for secure mounting.
Install the corner unit starting from the bottom bracket, ensuring perfect level alignment before securing additional tiers. For floating shelves, maintain consistent spacing between levels to create a balanced appearance and functional access. When mounting standing corner units, adjust the feet to ensure stability and proper alignment with both walls.
Place heavier items on lower shelves for stability, and arrange items by frequency of use – keeping commonly accessed materials at arm’s reach. Group similar items together using coordinated containers or baskets to maintain visual cohesion.
Consider using the uppermost shelves for seasonal or rarely-used items, while keeping frequently accessed supplies at eye level or below.
For optimal organization maintenance, implement a quarterly review system to assess item placement and usage patterns. Label storage containers clearly and consider using adjustable shelf heights to accommodate changing storage needs.
To prevent dust accumulation in corner spaces, incorporate regular cleaning into your office maintenance routine and use drawer liners or small trays to keep loose items contained and easily relocatable.
Over-the-Door Storage Solutions for Small Offices
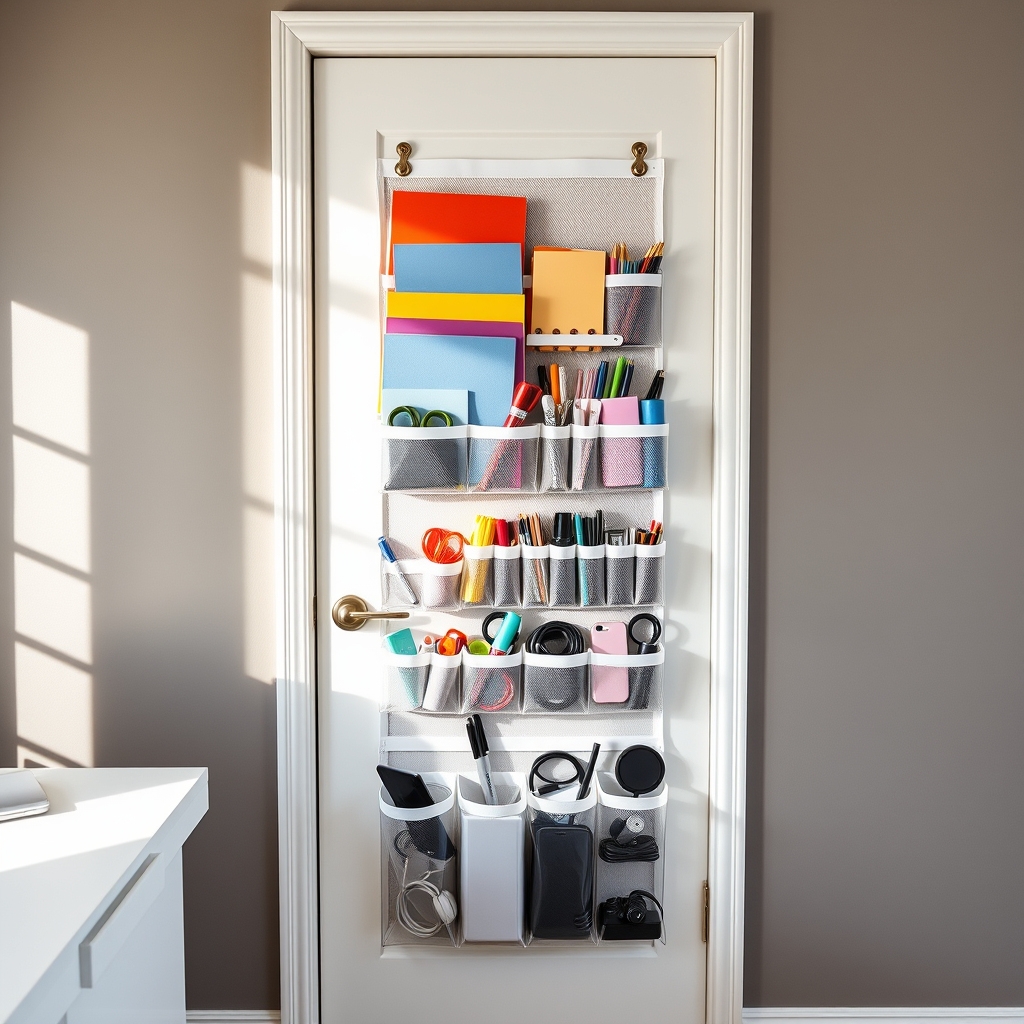
Making the most of vertical space becomes crucial when working with limited office square footage. Over-the-door storage offers an often overlooked opportunity to maximize storage capacity without sacrificing valuable floor or desk space in a home office setting.
This storage solution proves particularly valuable for frequently used items that need to remain easily accessible while keeping the workspace clean and organized. Over-the-door systems can effectively store everything from office supplies and documents to tech accessories and personal items, transforming dead space into functional storage.
Required Items:
- Over-the-door organizer (mesh, clear plastic, or fabric)
- Over-the-door hooks
- Command strips or mounting hardware
- Storage bins or baskets
- Label maker or labels
- Measuring tape
- Level
- Door anchors (if needed)
Start by measuring your door’s dimensions and selecting an appropriate over-the-door organizer that fits within these measurements. Install the organizer following the manufacturer’s instructions, ensuring it’s properly secured and doesn’t interfere with door closure.
Sort office supplies and materials into categories before placing them in the organizer’s pockets or compartments. Create designated zones within the organizer – top pockets for frequently accessed items, middle section for regularly used supplies, and bottom pockets for less-used materials. Use clear containers or labeled bins within larger pockets to further organize smaller items.
Ensure the weight is evenly distributed to prevent the organizer from becoming lopsided or unstable. For optimal organization maintenance, regularly audit stored items and adjust the system as needed. Consider using clear pockets or containers to easily identify contents, and implement a one-in-one-out rule to prevent overflow.
Position items based on frequency of use, keeping daily essentials at eye level and occasional-use items in lower pockets. Remember to periodically check the mounting hardware or hooks to ensure they remain secure and stable.

