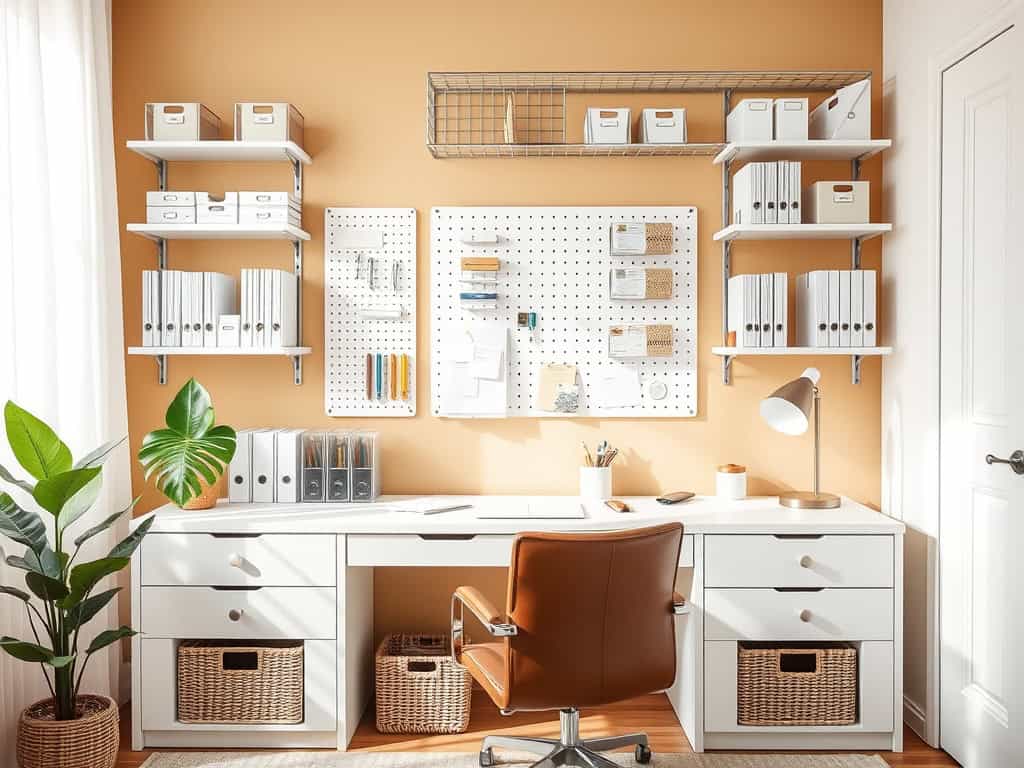
Did you know that the average office worker spends 76 hours per year looking for misplaced items? That’s nearly two full work weeks lost to disorganization! As someone who transformed my chaotic home office into a productivity sanctuary, I can tell you that smart storage solutions make all the difference. You’re about to discover eight game-changing hacks that’ll help you reclaim those lost hours and turn your workspace into an efficiency machine. Let me show you how to make every square inch count.
Leverage Vertical Space With Wall-Mounted Organizers
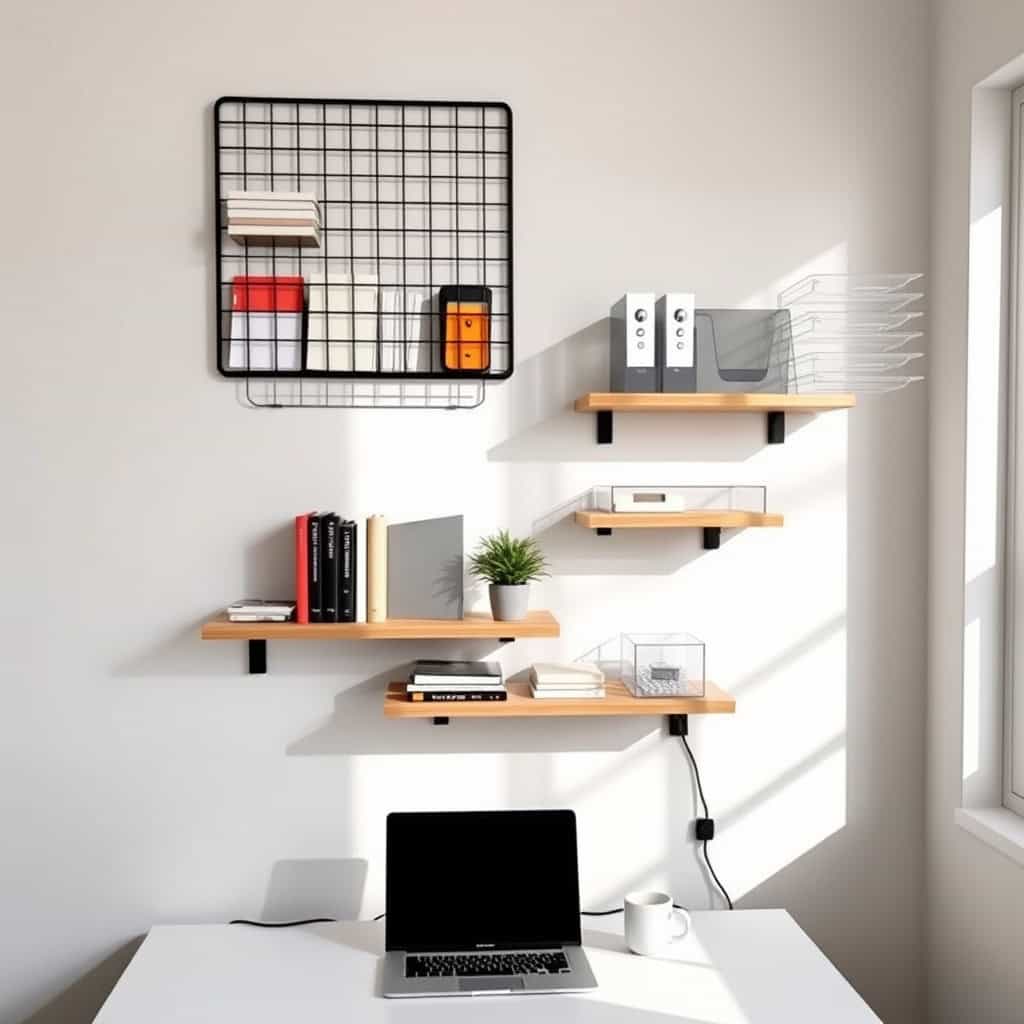
Making the most of vertical wall space is crucial in any home office, particularly when floor space is limited. Wall-mounted organizers provide an efficient solution to keep essential items within reach while maintaining a clutter-free desk surface and maximizing your workspace.
Vertical organization not only creates additional storage but also helps establish a more organized workflow by keeping frequently used items visible and accessible. Well-planned wall storage can transform a cramped office into an efficient command center while adding visual interest to your workspace.
Required Items:
- Wall studs finder
- Level
- Drill and drill bits
- Screwdriver
- Wall anchors
- Mounting screws
- Wall-mounted file holders
- Wire mesh organizers
- Floating shelves
- Cable management strips
- Measuring tape
- Pencil
- Paper organizers
- Bulletin board or whiteboard
Start by mapping out your wall space, using a pencil to mark where you’ll install various organizers. Locate wall studs using a stud finder and mark their positions. Install the largest items first, such as floating shelves or bulletin boards, ensuring they’re level and securely anchored.
Mount file holders and wire mesh organizers at eye level for frequently accessed items, while placing less-used storage solutions higher up. Consider creating zones for different activities – a communication center with a bulletin board, a reference area with floating shelves for books and binders, and an action center with file holders for current projects.
Install cable management strips to keep power cords and cables organized and prevent them from dangling.
Additional Tips:
Before mounting any organizers, arrange items in groups based on frequency of use and function. Use clear containers or labels to maintain organization, and leave some wall space empty for future needs or temporary displays.
Regularly reassess your storage system and adjust the layout as your work habits and storage needs evolve. Remember to keep heavier items on lower shelves and lighter items higher up for both safety and practicality.
Transform Dead Corner Space Into Storage Gold
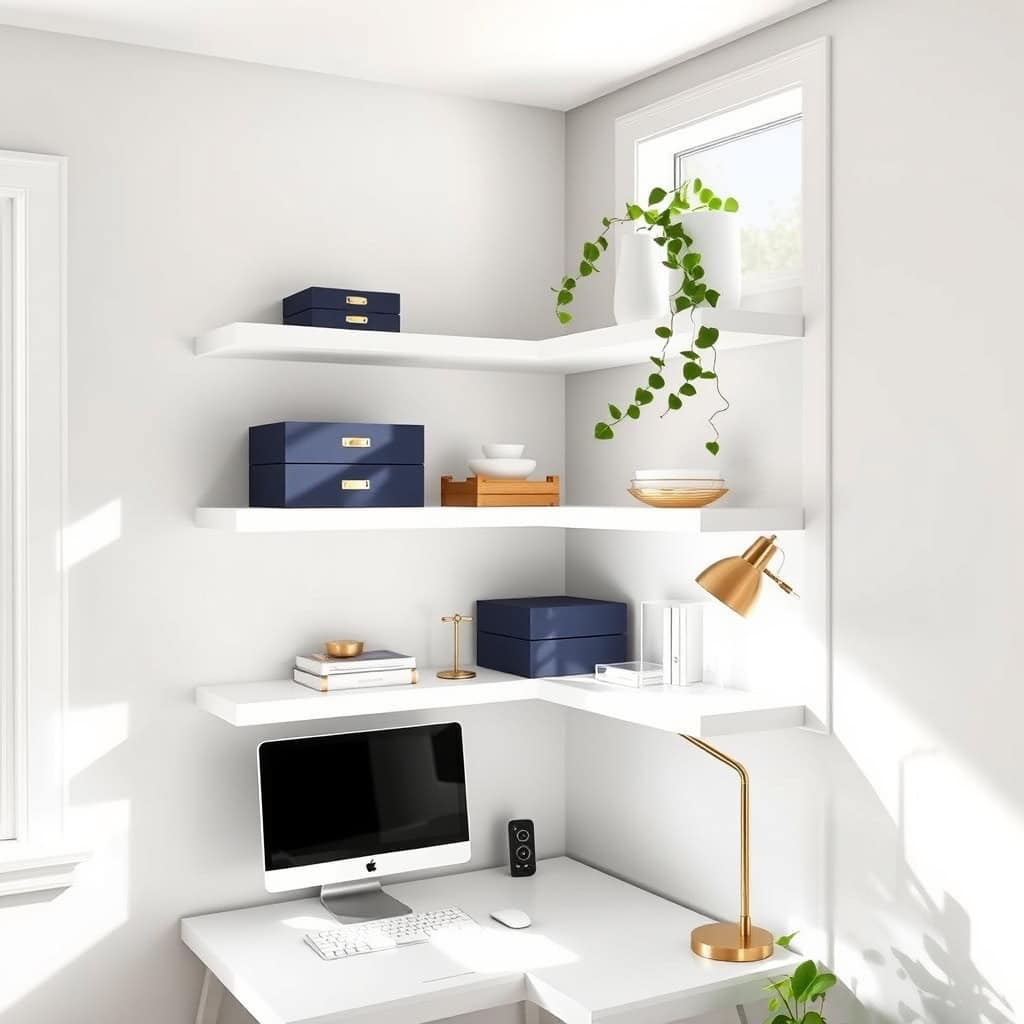
Corner spaces in home offices often become neglected dead zones, collecting dust and wasting valuable square footage that could be put to better use. These awkward angles typically challenge traditional storage solutions, leading many to simply ignore their potential.
However, when properly utilized, corners can provide surprisingly abundant storage opportunities while maintaining a clean, professional aesthetic. By reimagining corner spaces as prime real estate for storage solutions, you can significantly expand your office’s organizational capacity without sacrificing precious floor space elsewhere.
Strategic corner organization can create efficient workflows, reduce clutter, and maximize every inch of your home office footprint.
Required Items:
- Corner floating shelves
- Corner desk unit (optional)
- Rotating corner organizer
- L-shaped brackets
- Wall anchors
- Level
- Drill
- Measuring tape
- Pencil
- Storage bins or baskets
- Cable management solutions
- Corner cabinet (optional)
Begin by thoroughly clearing the corner space and measuring both walls and height from floor to ceiling. Install floating corner shelves at varying heights, starting approximately 48 inches from the floor and spacing them 12-15 inches apart vertically.
If opting for a corner desk solution, position it first and build storage solutions above it. Utilize rotating corner organizers on the desk surface or shelves to maximize accessibility to frequently used items. Install L-shaped brackets securely into wall studs or use appropriate wall anchors to ensure stability.
For lower corners, consider adding a corner cabinet or series of stacked storage cubes that can house larger items or files. Implement a cable management system to keep wires organized and prevent them from cluttering the corner space.
Use coordinating storage bins or baskets on shelves to maintain visual consistency and hide smaller items from view. To maintain organization long-term, implement a zone system where each corner shelf or area serves a specific purpose.
Keep frequently accessed items at arm’s reach and less-used materials on higher shelves. Consider adding task lighting to illuminate dark corners and make stored items more visible. Regularly review and adjust your corner storage system to ensure it continues to meet your evolving needs and maintain maximum efficiency.
Master Cable Management With Hidden Solutions
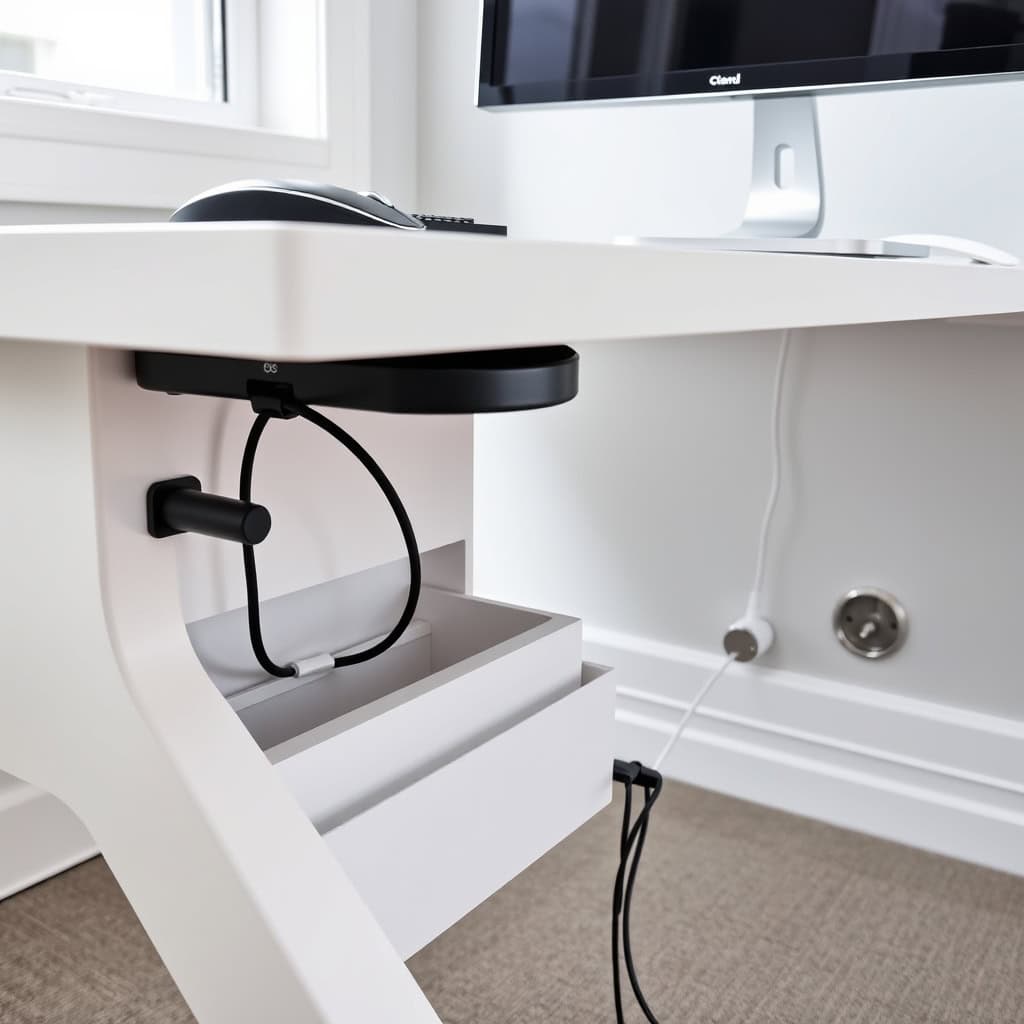
A cluttered workspace with tangled cables not only looks unsightly but can significantly impact productivity and create potential safety hazards. Loose wires trailing across desks and floors can catch on chairs, risk damage to expensive electronics, and make routine cleaning more challenging than necessary.
Professional cable management transforms a chaotic desk setup into a streamlined workspace while protecting valuable equipment and maintaining easy access for updates or changes. Hidden cable solutions create a more organized environment that reduces visual stress and allows for better focus on work tasks.
Required Items:
- Cable ties or velcro straps
- Cable clips or adhesive cable holders
- Cable management box or sleeve
- Cable identification labels
- Desk grommets
- Wire loom or spiral cable wrap
- Command hooks
- Cable concealer raceway
- Surge protector or power strip
- Cable zip ties
Begin by unplugging all devices and separating cables by type and function. Group power cables, data cables, and peripheral connections separately. Install a cable management box near your power outlet to house excess cord length and power strips.
Mount adhesive cable clips along the back edge of your desk, creating a designated path for frequently used cables. Thread cables through desk grommets or along the underside of your desk using cable clips. Bundle similar cables together using velcro straps or spiral wrap, maintaining enough slack for movement but eliminating excess length.
Position cables along natural furniture lines and corners where they’ll be least visible. For cables that must cross open spaces, use cable concealer raceways that can be painted to match your wall color.
Use printed or color-coded labels to identify each cable at both ends, making future changes or troubleshooting easier. Consider creating a simple diagram of your cable setup for reference. Always leave a small amount of slack near connection points to prevent strain on ports and allow for occasional desk movement without disconnecting devices.
Additional Tips: Position your desk near power outlets to minimize cable lengths needed. Incorporate regular maintenance checks every few months to ensure cables haven’t worked loose and to remove any unnecessary connections.
Consider wireless alternatives for peripherals when possible to reduce cable clutter further. Keep spare cable management supplies on hand for when new devices are added to your setup.
Create a Mobile Command Center Under Your Desk
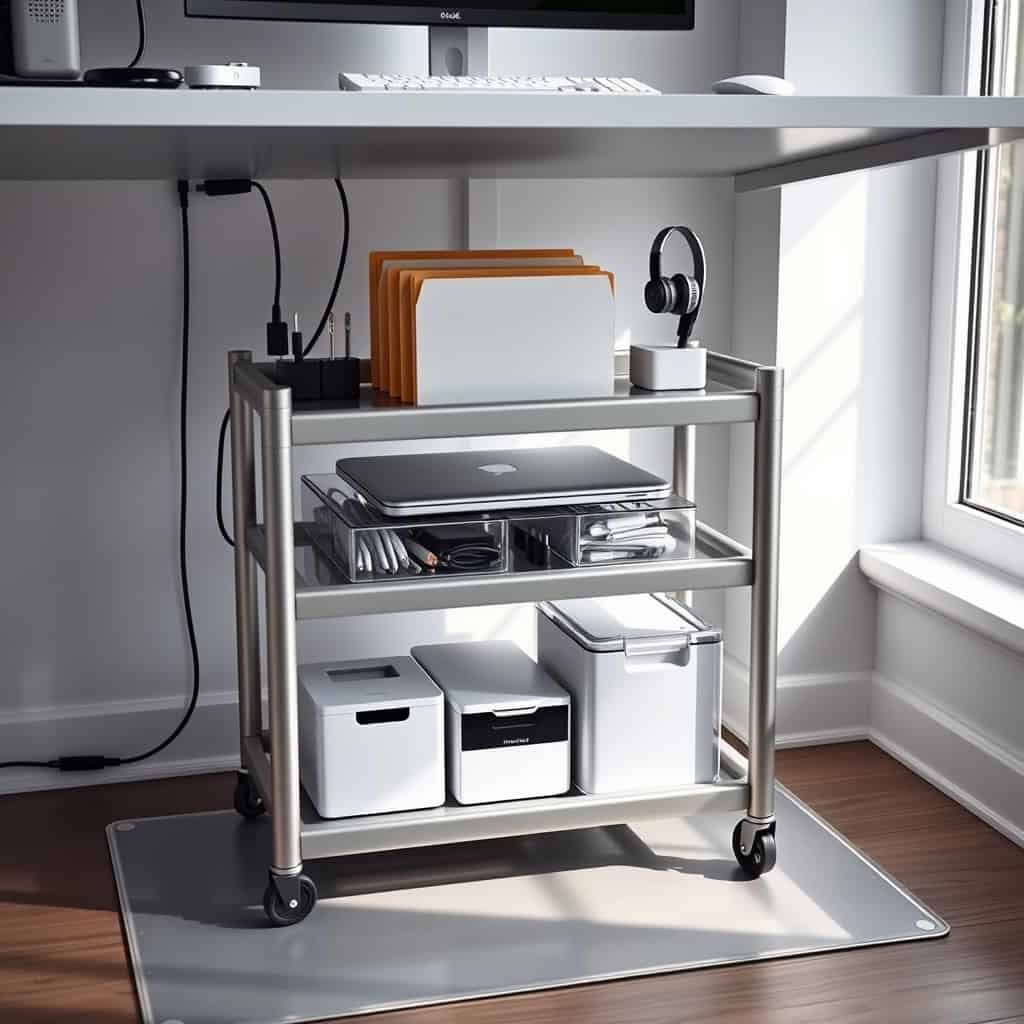
The space beneath your desk represents prime real estate for creating an efficient, organized command center that moves with you. By maximizing this often-overlooked area, you can keep essential work items within arm’s reach while maintaining a clutter-free desktop environment.
A mobile command center under your desk serves as a central hub for frequently used supplies, technology, and documents. This solution is particularly valuable for those who need flexibility in their workspace or want to maintain a minimalist aesthetic while having all necessary tools readily accessible.
Required Items:
- Rolling cart with multiple tiers
- Cable management clips or ties
- File organizers
- Small containers or drawer organizers
- Label maker
- Power strip
- USB hub
- Drawer liner or non-slip mat
- Small trash bin
- File folders
Position the rolling cart beneath your desk, ensuring it doesn’t interfere with leg movement. Install the power strip at the back of the cart, securing it with cable management clips. Organize the cart’s tiers by frequency of use, with most-needed items on top.
Create designated zones for different categories: technology accessories on one level, paper supplies on another, and file storage at the bottom. Use small containers within each tier to prevent items from shifting when the cart moves.
The top tier should house immediate-use items like chargers, USB hubs, and writing tools. The middle tier works well for paper supplies, notebooks, and current project materials. Reserve the bottom tier for archive files and less frequently accessed items.
Thread cables through the cable management system, creating a clean path from your devices to the power source. For optimal functionality, maintain clear pathways for the cart to move, regularly audit contents to prevent accumulation of unnecessary items, and consider adding a small LED light strip to illuminate the space.
Keep frequently used items toward the front of each tier, and implement a regular cleaning schedule to prevent dust buildup in this enclosed space.
Maximize Drawer Space With Custom Dividers
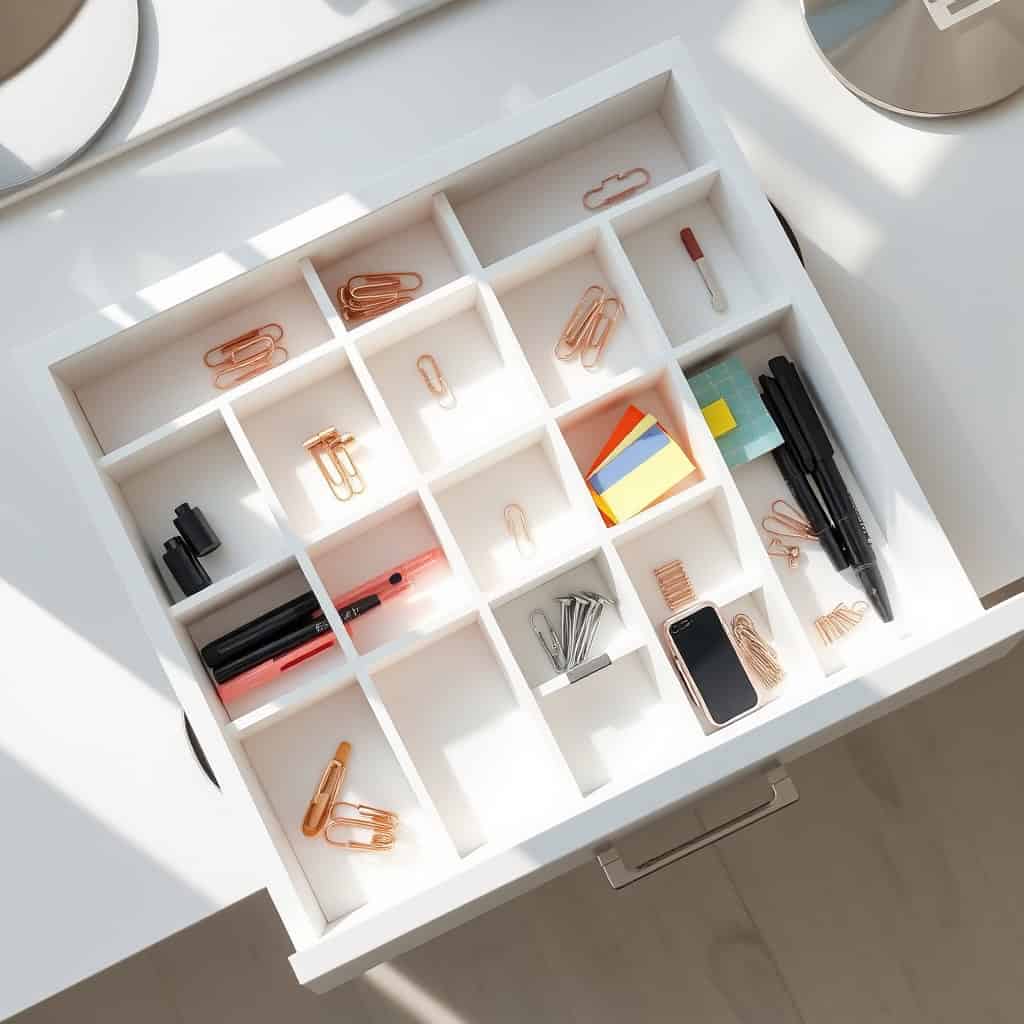
A well-organized drawer system serves as the foundation for an efficient home office, allowing quick access to supplies while maintaining a clutter-free workspace. When items are properly compartmentalized, you eliminate the frustration of digging through jumbled supplies and save valuable time during your workday.
Custom drawer dividers transform chaotic storage spaces into systematic organizational zones, each tailored to your specific needs. Unlike one-size-fits-all solutions, custom dividers maximize every inch of drawer space while accommodating the exact items you use most frequently in your home office.
Required Items:
- Measuring tape
- Cardboard or foam board
- Scissors
- Box cutter
- Ruler
- Pencil
- Double-sided tape
- Self-adhesive felt strips
- Clear contact paper (optional)
- Hot glue gun (optional)
Start by completely emptying the drawer and measuring its interior dimensions, including depth. Group similar items together and measure the space needed for each category. Cut your chosen material (cardboard or foam board) to create dividers that fit the drawer’s depth, making sure to account for any drawer slides or mechanisms.
Create a grid system by making both vertical and horizontal dividers, securing them with double-sided tape or hot glue at intersection points. Line the bottom edges of dividers with felt strips to prevent sliding.
Place items back into the newly divided spaces according to frequency of use, keeping the most-accessed items toward the front. Consider creating designated zones for different categories: writing implements, technology accessories, paper clips and fasteners, and note-taking supplies.
Test the configuration by opening and closing the drawer several times to ensure dividers remain secure. For long-term durability, wrap dividers in clear contact paper before installation to protect against moisture and wear.
Consider leaving one slightly larger compartment for future additions to your office supplies, and label each section discretely on the divider edges for quick identification. Review and adjust the layout after two weeks of use to optimize the arrangement based on your actual working patterns.
Implement the Power of Pegboard Organization
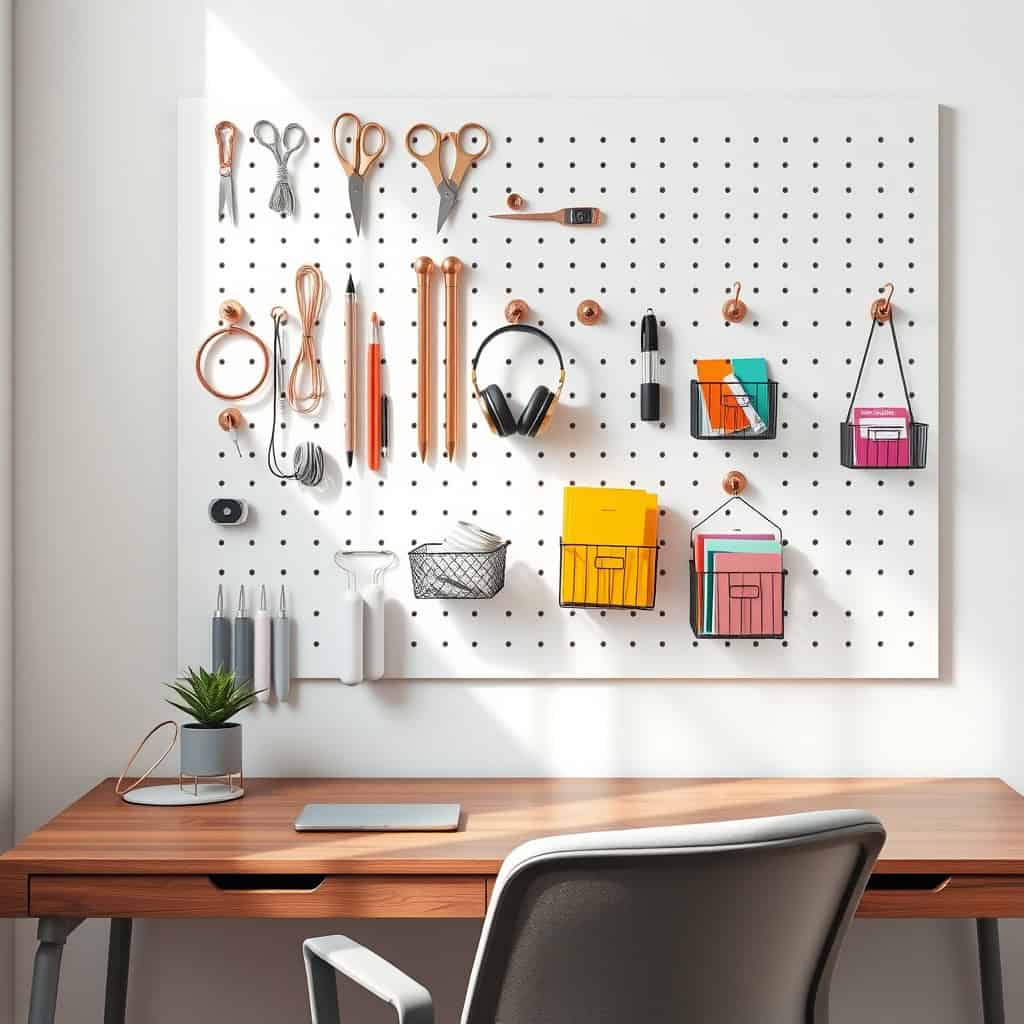
Pegboard organization has become a game-changing solution for home office storage, offering unparalleled flexibility and accessibility for frequently used items. This versatile system transforms vertical wall space into a customizable storage solution that keeps essential tools and supplies within arm’s reach while maintaining a clean, professional appearance.
By implementing pegboard organization in your home office, you create a dynamic storage system that can evolve with your changing needs. Unlike fixed shelving or traditional storage solutions, pegboard systems can be easily reconfigured, allowing you to optimize your workspace as your requirements shift and adapt to new equipment or supplies.
Required Items:
- Pegboard panels
- Wall anchors and screws
- Spacers or furring strips
- Pegboard hooks (various sizes)
- Pegboard baskets and holders
- Tool holders and accessories
- Level
- Drill
- Measuring tape
- Pencil
- Hammer
- Wire cutters
Start by measuring your wall space and cutting the pegboard to size if necessary. Install furring strips on the wall first, creating a gap between the wall and pegboard for hook insertion. Mount the pegboard securely using wall anchors and screws, ensuring it’s level.
Before adding accessories, plan your layout by sketching where different items will go, considering frequency of use and logical groupings. Begin installing hooks and accessories, starting with larger items first and working down to smaller ones. Group similar items together and position frequently used tools at eye level.
Consider using a combination of hooks, baskets, and specialized holders to accommodate different types of office supplies and equipment.
Additional Tips:
Take photos of your optimal arrangement once established, making it easier to maintain organization over time. Label hook positions on the back of the board for quick reference when reorganizing, and keep extra hooks on hand for future adjustments. Consider adding a small pegboard strip above your desk for frequently accessed items, and use color-coded accessories to create visual organization systems that enhance efficiency.
Design a Floating Supply Station Above Your Workspace
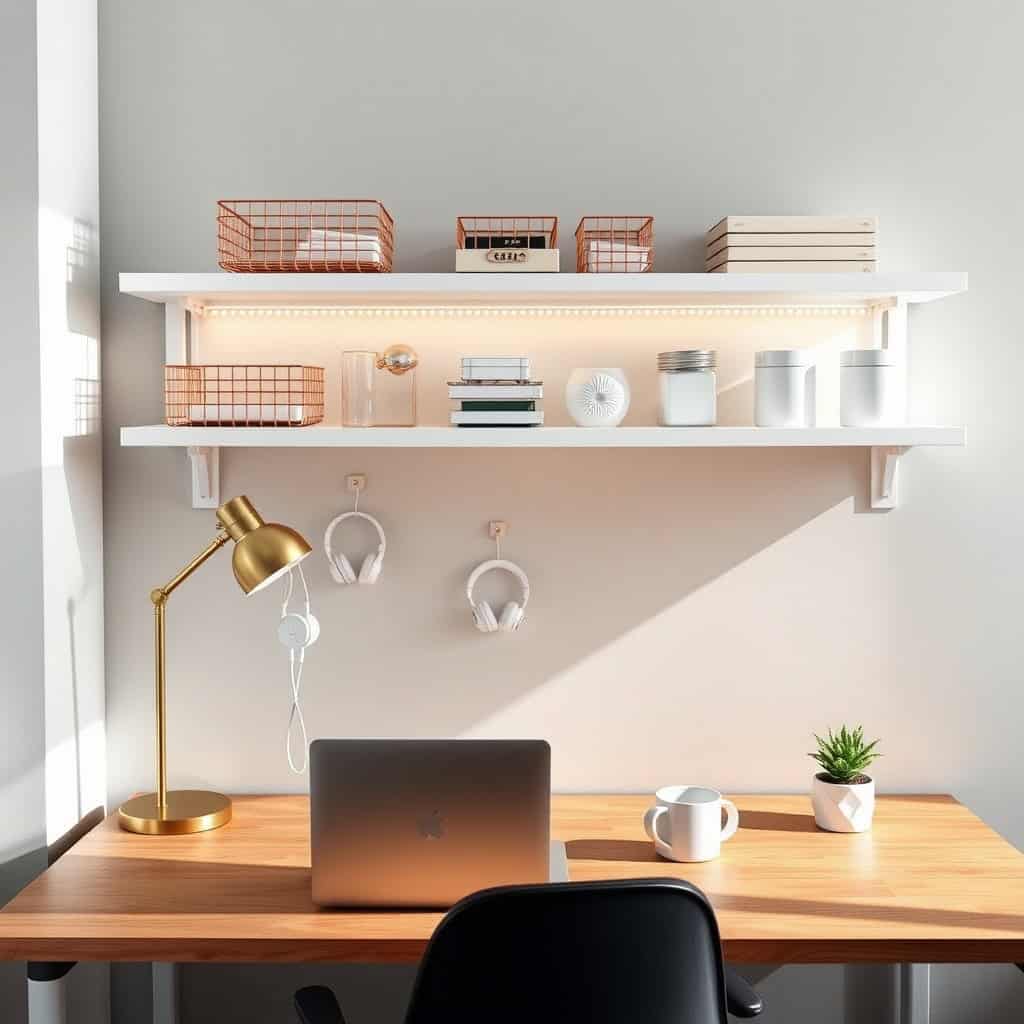
A floating supply station above your workspace represents a game-changing solution for home office organization, maximizing vertical space while keeping essential items within arm’s reach. This approach not only frees up valuable desk space but also creates a visually appealing and professional atmosphere in your work area.
By elevating your supplies off the desk surface, you create a more streamlined workflow and reduce the time spent searching for frequently used items. A well-designed floating supply station can become both a functional storage solution and an aesthetic element that enhances your office’s overall design.
Required Items:
- Wall-mounted shelves or floating shelves
- Wall anchors and screws
- Level
- Drill
- Pencil
- Measuring tape
- Storage containers or organizers
- Command hooks or small hooks
- Cable management clips
- Storage baskets or bins
- Clear containers for small items
Installation and Organization Process:
Start by measuring the wall space above your desk and marking the ideal height for your floating shelves, typically 15-20 inches above the desk surface. Install the shelves according to manufacturer specifications, ensuring they’re level and properly anchored to support your supplies.
Arrange your most frequently used items on the lower shelf for easy access, and less-used items on upper shelves if using multiple levels. Group similar items together using clear containers or designated zones on the shelves. Incorporate small hooks beneath the shelves for items like headphones or charging cables, and use cable management clips to keep cords tidy and organized.
Additional Tips:
Consider implementing a color-coding system or labels for different categories of supplies, and rotate items seasonally based on usage patterns. Maintain the organization by conducting weekly quick cleanups and monthly thorough reviews of the items stored.
Remember to leave some empty space for future additions and to prevent the station from appearing cluttered. Position lighting underneath the shelves if needed to illuminate your workspace properly.
Utilize Door-Mounted Storage Systems
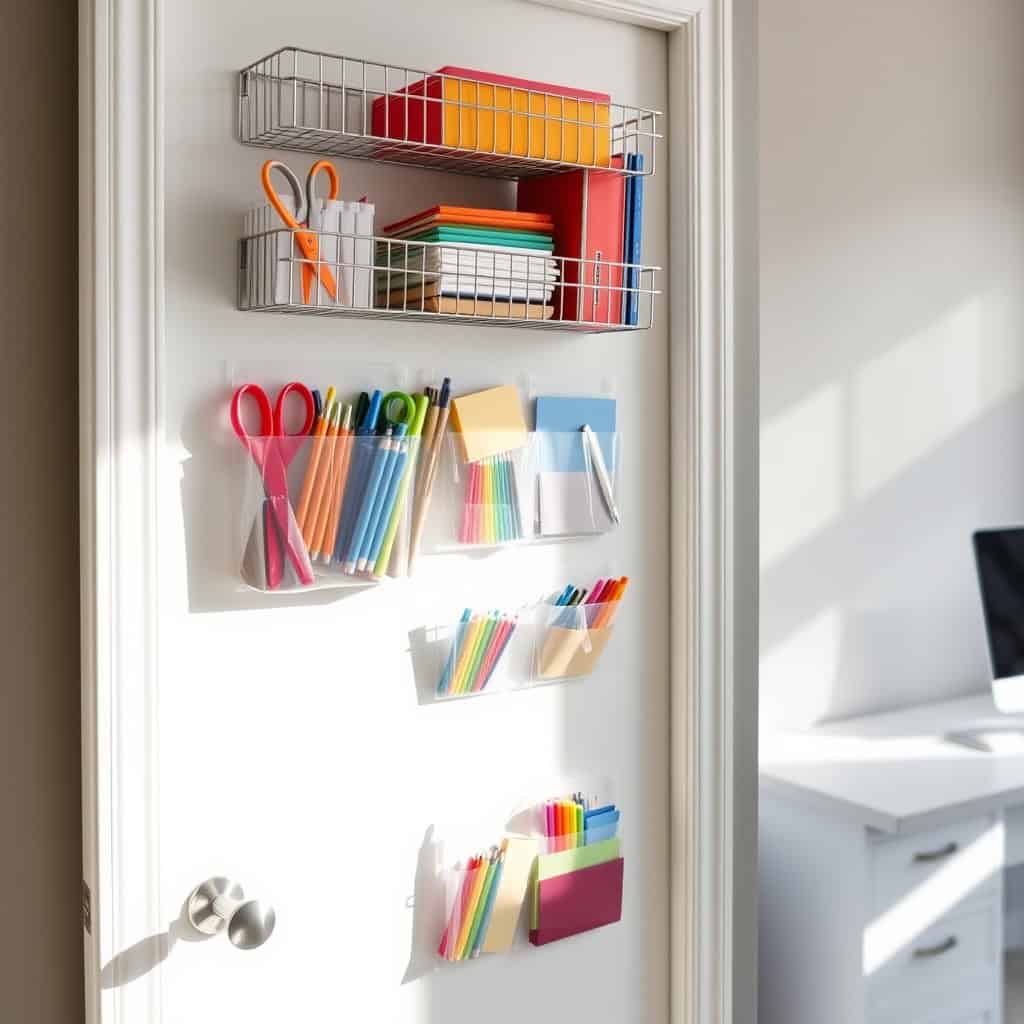
Making the most of vertical space is crucial in any home office, and doors represent a largely untapped storage opportunity. Door-mounted storage systems can transform an otherwise unused surface into valuable organizational real estate, perfect for storing office supplies, documents, and frequently accessed items.
These systems are particularly effective for small home offices where square footage is limited. By moving storage off your desk and onto the door, you create a cleaner workspace while keeping essential items within arm’s reach, ultimately improving productivity and reducing clutter.
Required Items:
- Over-the-door organizer with clear pockets
- Command hooks or mounting brackets
- Measuring tape
- Level
- Screwdriver
- Wall anchors (if needed)
- Door-mounted wire baskets
- Label maker or labels
- Storage containers that fit the pockets
Installation and Organization Process:
Begin by measuring your door’s dimensions and selecting an appropriately sized organizational system. Clean the door surface thoroughly and mark the mounting points using a level to ensure straight installation.
If using an over-the-door organizer, simply hang it over the top of the door, adjusting the hooks for a secure fit. For mounted systems, install brackets or hooks according to the manufacturer’s instructions, using wall anchors if necessary for added stability.
Sort office supplies and materials into categories before placing them in the storage system. Arrange frequently used items at eye level, with less-used items stored in lower pockets. Use clear containers within the pockets to prevent small items from getting lost and maintain organization.
Label each pocket or section clearly to establish a system that’s easy to maintain.
Additional Tips:
Consider using multiple organizational systems on the same door for maximum efficiency – combine an over-the-door organizer with mounted baskets or hooks for varied storage options.
Weight distribution is important, so avoid overloading any single area of the door. Regularly review and adjust the system to ensure it continues to meet your evolving storage needs, and remove any items that haven’t been used in the past three months to prevent clutter accumulation.

