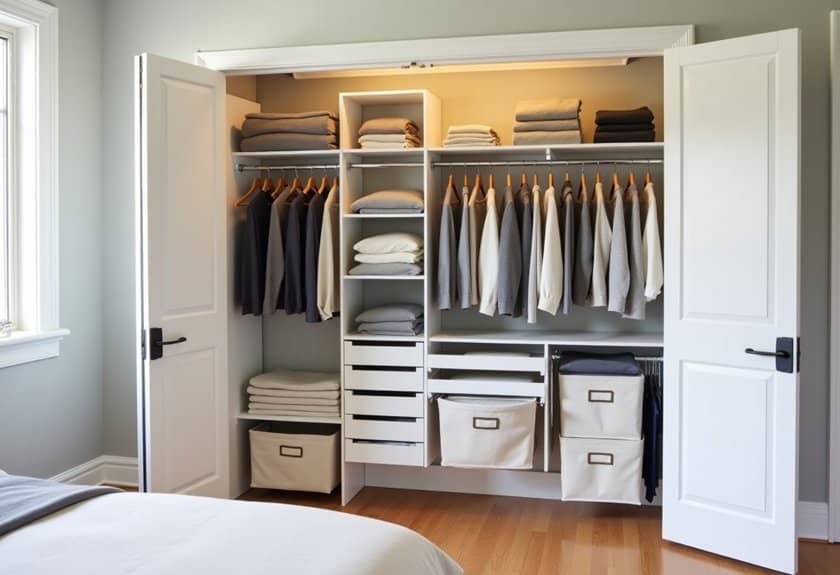
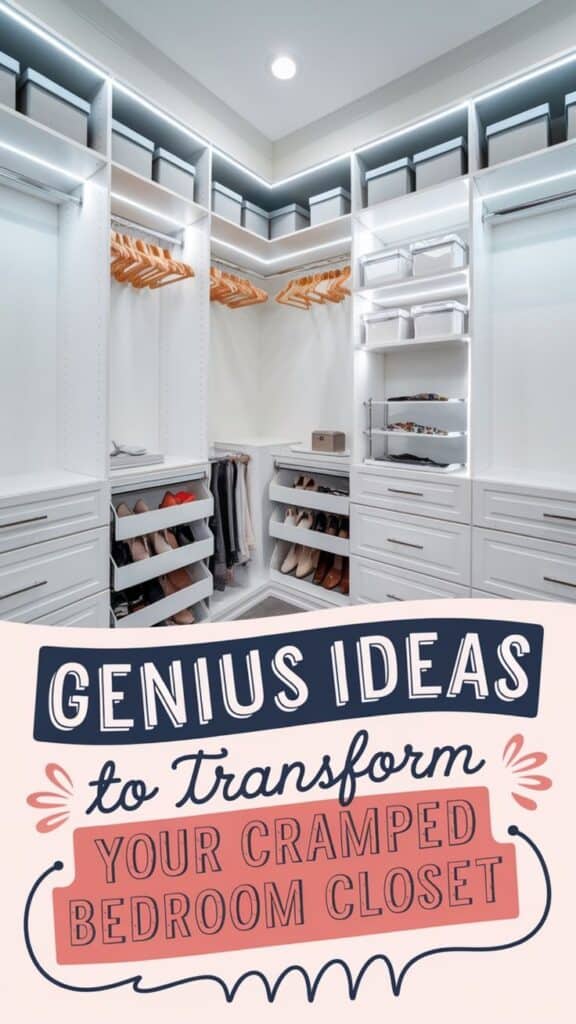
Ever feel like your tiny closet is staging a rebellion against your wardrobe? You’re not alone! I’ve spent years mastering the art of maximizing small spaces, and I’ve discovered that transforming a cramped closet into an organized oasis isn’t just possible – it’s surprisingly simple. Whether you’re dealing with a compact walk-in or a modest reach-in closet, these genius organization solutions will help you double your storage space and finally bring peace to your bedroom’s most chaotic corner.
Install Multi-Level Hanging Rods
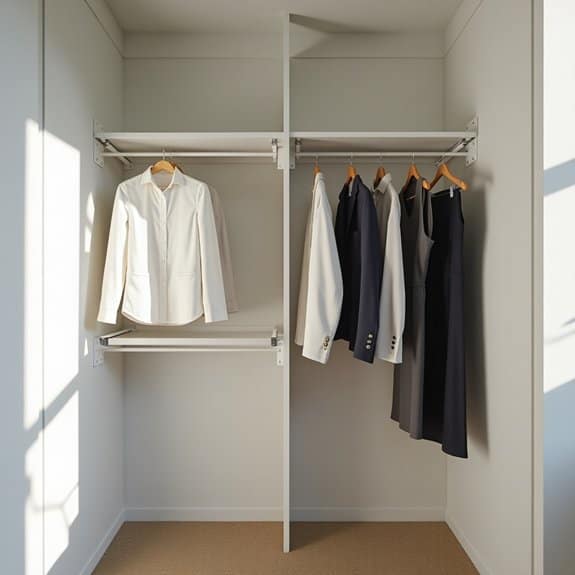
Maximizing vertical space in your closet is essential for creating an efficient storage solution, and installing multi-level hanging rods is one of the most effective ways to double or even triple your hanging capacity. By utilizing multiple rod levels, you can transform a cluttered, single-rod closet into an organized space that accommodates different garment lengths while making everything easily accessible.
Multi-level hanging rods are particularly valuable for organizing clothes by category and length, allowing you to separate shirts and jackets on one level while keeping longer items like dresses and pants on another. This systematic approach not only maximizes space but also creates a more visually appealing and functional closet that simplifies your daily routine.
Required Tools and Materials:
- Measuring tape
- Pencil
- Level
- Drill and drill bits
- Screwdriver
- Wall anchors
- Mounting brackets
- Closet rods (adjustable or fixed)
- Screws
- Rod supports
- Stud finder
Start by measuring your closet’s width and height, marking the desired positions for your new rods. The top rod should be installed at approximately 80-84 inches from the floor, while the lower rod can be positioned 40-42 inches below it. Use a stud finder to locate wall studs and mark their positions.
Install mounting brackets into the studs using appropriate screws, or use wall anchors if studs aren’t available. Ensure all brackets are level before securing the rods in place. For wider closets, install center supports every 4 feet to prevent sagging.
When configuring your multi-level setup, consider designating the upper rod for shorter items like shirts, jackets, and folded pants, while using the lower rod for longer garments such as dresses and full-length coats. If space allows, you might even add a third rod at medium height for items like skirts or cropped jackets.
For optimal organization, consider installing the rods in sections, creating zones for different types of clothing. Keep frequently worn items at eye level and seasonal or special occasion pieces in less accessible areas.
Additionally, use slim hangers to maximize rod space and maintain consistent spacing between garments to prevent crowding and wrinkles. Remember to periodically check the stability of your rods and tighten any loose brackets to ensure long-lasting functionality.
Maximize Door Space With Over-The-Door Organizers
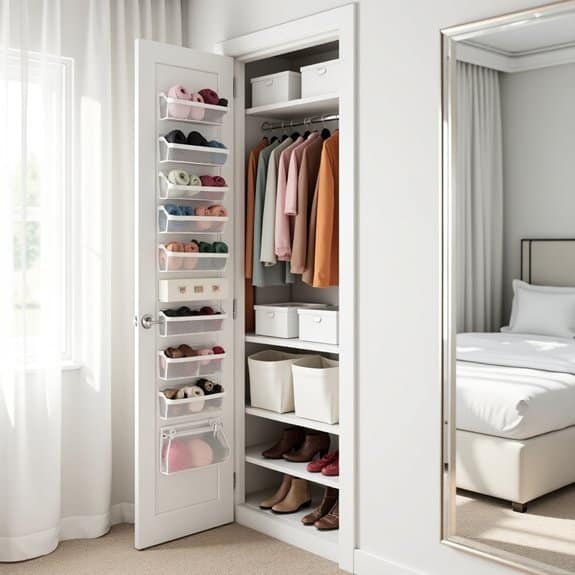
Making the most of every inch of storage space is crucial in today’s homes, and closet doors represent a largely untapped organizational goldmine. Over-the-door organizers transform this vertical space into valuable storage real estate, effectively doubling your closet’s functional area without requiring any permanent modifications or construction.
The back of your closet door can accommodate everything from shoes and accessories to cleaning supplies and toiletries, depending on your needs. This organization method is particularly valuable for small spaces, rental properties, or when you want to keep items easily accessible without cluttering your main closet space.
Required Items:
- Over-the-door hanging rack or organizer
- Door hooks or brackets
- Measuring tape
- Level
- Storage bins or baskets (optional)
- Label maker (optional)
- Door bumpers or protective pads
- Screwdriver
- Installation hardware (if required)
Installation and organization begins with measuring your door’s dimensions to ensure proper fit of your chosen organizer. Install door bumpers first to prevent damage to the door and wall.
Hang the over-the-door organizer, ensuring it’s level and secure. If using a screw-mounted system, mark your drilling points carefully and install according to manufacturer specifications.
Organize items by category, placing frequently used items at eye level and heavier items toward the bottom for stability. Consider using clear storage bins or baskets within the organizer to contain smaller items and maintain tidiness.
Additional Tip: To prevent wear and tear on your door, periodically check and tighten all hardware, and avoid overloading the organizer beyond its weight capacity.
Consider using felt strips along the hanging brackets to prevent metal-on-metal contact and reduce noise when opening and closing the door. Rotate items seasonally to maintain organization and ensure you’re maximizing the space for current needs.
Use Slim Velvet Hangers to Double Capacity
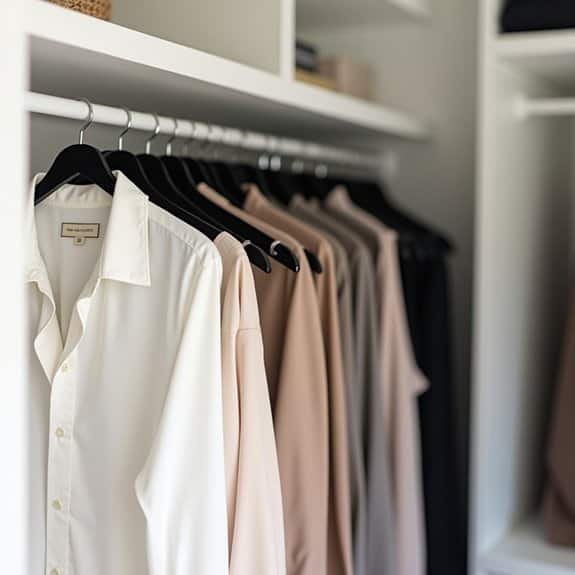
Maximizing closet space is essential for maintaining an organized and stress-free wardrobe. Traditional plastic and wire hangers not only take up unnecessary space but can also damage delicate clothing items and create a cluttered, chaotic appearance in your closet.
Switching to slim velvet hangers represents one of the most impactful changes you can make to instantly double your closet’s hanging capacity. These space-saving hangers feature a thin profile while providing a non-slip surface that prevents clothes from falling to the closet floor. Their uniform appearance also creates a visually appealing, boutique-style organization system.
Required Items:
- Slim velvet hangers (calculate 50-100 for an average closet)
- Storage container for old hangers
- Donation bag
- Sorting bins
- Labels
- Measuring tape
Start by removing all clothing items from your current hangers and sorting them into categories (tops, pants, dresses, etc.). Measure your closet rod to determine exactly how many slim hangers will fit.
Replace old hangers with new velvet ones, working one category at a time. When hanging clothes, ensure all hangers face the same direction and maintain consistent spacing between items. Group similar items together, arranging them by color or sleeve length for optimal organization.
For maximum efficiency, hang pants and skirts using the folding method over the velvet hanger’s crossbar. Utilize the non-slip surface to hang delicate items like silk blouses or dresses with thin straps. The slim profile allows you to adjust spacing between hangers as needed, typically fitting 2-3 times more items than traditional hangers in the same space.
Additional Tip: To maintain the effectiveness of velvet hangers, avoid overloading them with heavy items or multiple pieces of clothing. Clean the hangers periodically with a lint roller to maintain their grip, and replace any that show signs of wear.
Consider keeping a few extra hangers on hand for new purchases, and always remove empty hangers to maintain an organized appearance.
Create Seasonal Storage With Vacuum-Sealed Bags
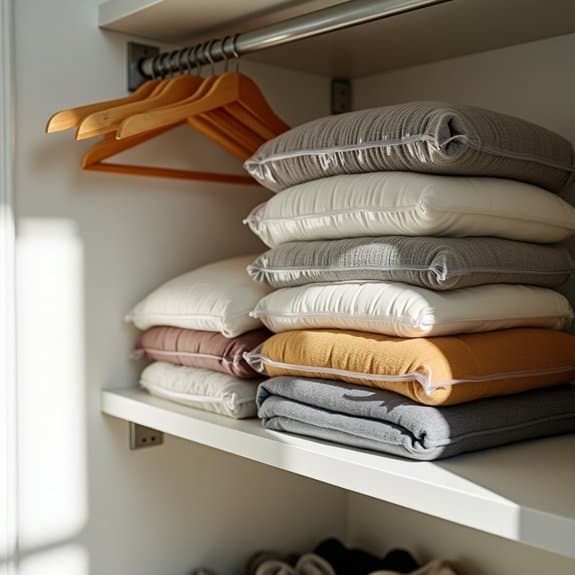
Vacuum-sealed storage bags represent a revolutionary solution for managing seasonal clothing and bedding in limited closet space. These specialized bags can reduce bulky items to a fraction of their original size, allowing homeowners to store winter coats, heavy blankets, and other seasonal items efficiently without sacrificing valuable closet real estate.
The compression technology not only saves space but also protects stored items from dust, moisture, and insects. This method of storage is particularly valuable for those living in areas with distinct seasons or those with limited storage space, as it allows for seamless rotation of seasonal wardrobes while keeping items in pristine condition.
Required Items:
- Vacuum-sealed storage bags (various sizes)
- Vacuum cleaner with hose attachment
- Clothing labels or markers
- Clean, dry seasonal items
- Storage containers or boxes
- Dryer sheets (optional)
- Inventory list
- Storage location labels
Sort your seasonal items by category and ensure they’re completely clean and dry before storage. Place similar items together in appropriately sized vacuum bags, being careful not to overfill. Leave enough space at the top for proper sealing. Insert a dryer sheet if desired for freshness, then seal the bag according to manufacturer instructions.
Using your vacuum’s hose attachment, remove the air through the bag’s valve until the contents are fully compressed. Once compressed, store the bags flat in plastic bins or on closet shelves.
When stacking compressed bags, place heavier items at the bottom and lighter ones on top. Create an inventory list of the contents of each bag and attach labels with clear descriptions and the storage date. Consider using clear bags or taking photos of the contents before sealing to easily identify items later.
Store bags in a cool, dry place away from direct sunlight to prevent potential damage to the stored items.
Pro Tip: To maintain the effectiveness of vacuum-sealed storage, check the bags every few months for any loss of compression. If a bag has expanded, simply re-vacuum it to restore the space-saving benefits. Consider using cedar blocks or mothballs in your storage area for additional protection against pests, and always ensure items are completely dry to prevent mildew growth during long-term storage.
Implement a Smart Drawer System
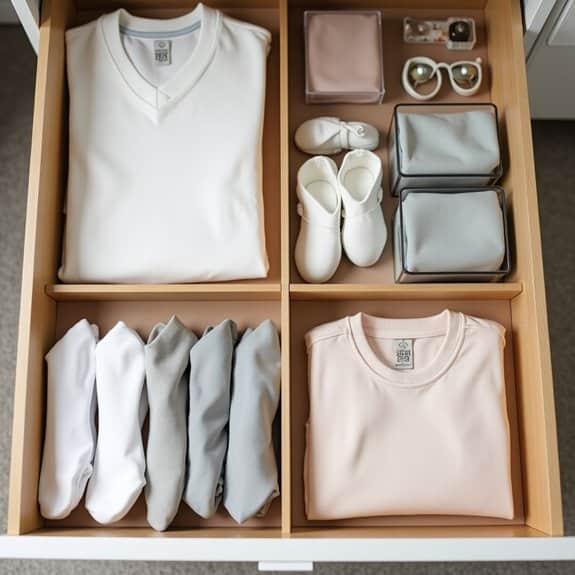
A well-organized drawer system transforms chaotic storage spaces into efficient, easy-to-navigate zones that streamline daily routines. When drawers are properly organized, finding specific items becomes effortless, saving precious minutes during busy mornings and reducing the frustration of searching through jumbled contents.
Smart drawer systems utilize the principles of categorization and space optimization to maximize storage capacity while maintaining accessibility. This systematic approach not only keeps belongings neat but also helps maintain organization long-term by creating designated spaces for specific items, making it easier to return things to their proper place.
Required Items:
- Drawer dividers
- Drawer organizer boxes
- Measuring tape
- Labels or label maker
- Drawer liner (non-slip)
- Storage bins (various sizes)
- Folding board
- Small containers for accessories
- Clear plastic bags
Empty all drawers completely and clean them thoroughly. Measure the interior dimensions of each drawer and plan your organization system accordingly. Group similar items together: undergarments in one section, socks in another, accessories in their designated space.
Install drawer dividers to create distinct compartments, ensuring they fit snugly to prevent shifting. Place frequently used items in the most accessible areas of the drawer, and use clear organizer boxes for smaller items like jewelry or accessories. Implement the file-folding method for clothing to maximize visibility and space utilization.
For optimal results, maintain a consistent folding technique for all garments and use drawer dividers that can be adjusted as needs change. Consider incorporating a color-coding system for easy identification, and leave about 10% of drawer space empty to prevent overcrowding.
Regular maintenance of your drawer system, including monthly reviews and adjustments, will ensure long-term organization success.
Add Corner Shelves for Unused Angles
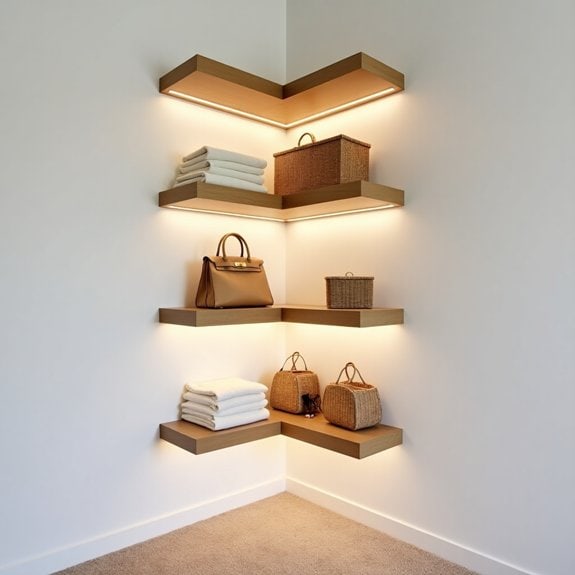
Corner spaces in closets often become dead zones where items get lost or forgotten. These awkward angles can actually be transformed into valuable storage real estate with the strategic addition of corner shelves. Proper utilization of corner spaces can increase your closet’s storage capacity by up to 25%, making it a worthwhile investment for any organization project.
By installing corner shelves, you create designated spaces for items that might otherwise end up scattered or stuffed into already-crowded areas. These shelves are particularly effective for storing shoes, folded sweaters, accessories, or decorative storage boxes, turning previously wasted space into functional storage solutions.
Required Items:
- Corner shelf units
- Measuring tape
- Level
- Pencil
- Drill
- Wall anchors
- Screws
- Screwdriver
- Stud finder
- Safety goggles
- Dust mask
Start by measuring your corner space carefully, noting both the width and height available. Use a stud finder to locate wall studs and mark their positions with a pencil. If using floating shelves, ensure they’re rated for the weight you plan to store.
Install the first shelf at eye level, working your way up or down depending on your storage needs. Secure each shelf using wall anchors in areas without studs, and drill directly into studs when possible for maximum stability. Space shelves approximately 12-15 inches apart to accommodate various item heights.
For maximum organization effectiveness, consider grouping similar items together on each shelf and using the height spacing strategically – heavier items should be stored on lower shelves for stability and easier access. Clear plastic bins or decorative boxes can help contain smaller items and maintain a neat appearance while maximizing corner shelf space.
Additional Tip: To optimize your corner shelf organization, install small LED strip lights under each shelf to illuminate dark corners and make items more visible. Consider using shelf dividers or small containers to prevent items from sliding into the corner void, and regularly rotate seasonal items to maintain organization and prevent cluttered corners from returning.
Utilize Clear Storage Bins for Accessories
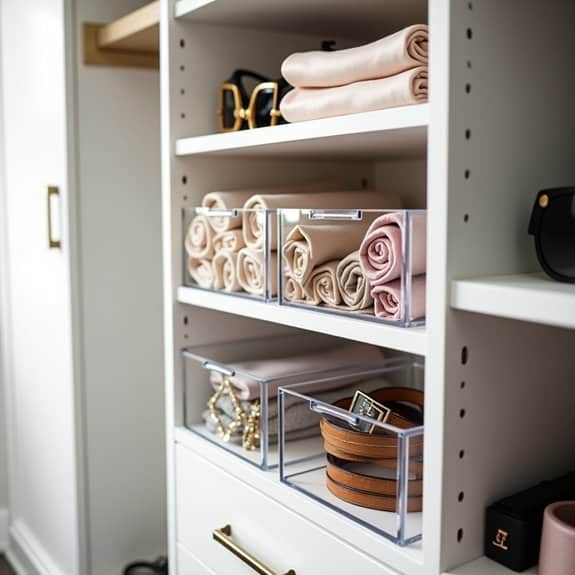
Organizing accessories with clear storage bins brings order to the often chaotic world of belts, scarves, jewelry, and small fashion items. When accessories are properly sorted and visible, getting dressed becomes more efficient, and you’re more likely to make use of your entire collection rather than repeatedly reaching for the same few pieces.
Clear storage bins revolutionize accessory organization by allowing you to see exactly what you have without opening multiple containers. This visibility not only saves time but also prevents duplicate purchases and helps maintain a clutter-free environment while protecting delicate items from dust and damage.
Required Items:
- Clear plastic storage bins (various sizes)
- Label maker or labels
- Drawer liner or felt padding
- Dividers or small containers
- Measuring tape
- Anti-tarnish strips (for jewelry)
- Hooks or mounting hardware
- Cleaning cloth
Start by sorting accessories into categories: jewelry, scarves, belts, sunglasses, and small leather goods. Measure your closet space and select appropriately sized clear bins that fit your storage area. Line the bottom of bins with felt or drawer liner to prevent scratches and sliding.
Install the bins either on shelves or mount them on walls using proper hardware, ensuring they’re at eye level for easy access. Create sections within larger bins using dividers or smaller containers to keep items separated and prevent tangling.
For jewelry, consider using multiple smaller clear containers within a larger bin, creating dedicated spaces for necklaces, bracelets, and rings. Scarves can be rolled or folded uniformly and placed vertically in medium-sized bins for easy viewing. Belts should be coiled neatly or hung on specialized hangers before placing them in deeper bins.
Sunglasses and small leather goods can be arranged in shallow bins with individual compartments.
Additional Tip: Implement a quarterly rotation system where you review and reorganize your accessories, moving frequently used items to the front and relocating seasonal pieces accordingly. Keep silica gel packets in the bins to absorb moisture, and periodically clean both the bins and accessories to maintain their condition and appearance.
Install Pull-Out Belt and Scarf Racks
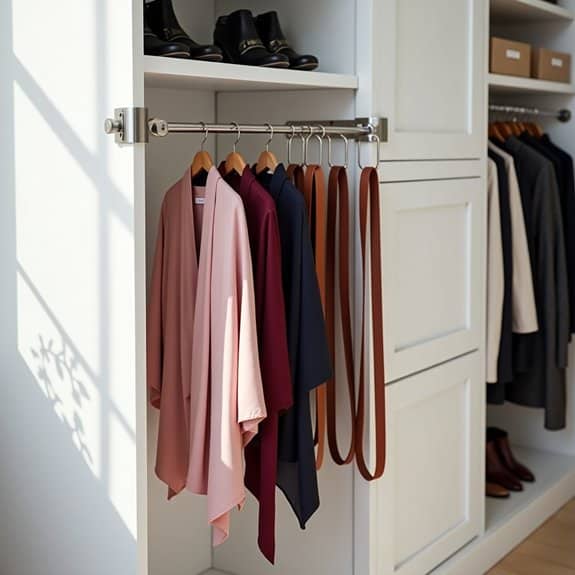
Organizing belts and scarves is crucial for maintaining their quality and extending their lifespan. When these accessories are crumpled or tangled, they can become damaged, wrinkled, or stretched out of shape.
Additionally, disorganized accessories often lead to frustration when trying to find the right piece to complete an outfit, potentially causing unnecessary morning stress.
A pull-out belt and scarf rack system provides an elegant solution to this common storage challenge. These racks maximize vertical space while keeping accessories visible, accessible, and wrinkle-free. The sliding mechanism allows easy access to items at the back of the closet, eliminating the need to dig through piles of tangled accessories.
Required Items:
- Pull-out rack system with mounting hardware
- Power drill
- Screwdriver
- Level
- Measuring tape
- Pencil
- Wall anchors
- Stud finder
- Safety glasses
- Dust mask
Installation begins with selecting the optimal location within your closet, ideally at a comfortable reaching height. Use the stud finder to locate wall studs and mark their positions. Measure and mark the mounting bracket locations, ensuring the rack will be level.
If mounting directly to studs isn’t possible, install wall anchors at the marked points. Attach the mounting brackets securely using the provided hardware, then slide the rack mechanism into place. Test the sliding action to ensure smooth operation before hanging accessories.
For optimal organization, sort accessories by type, color, or frequency of use before placing them on the rack. Maintain even spacing between items to prevent tangling and ensure the rack moves freely.
To protect delicate items, consider using fabric or foam covers for the hooks or bars. Regular maintenance of the sliding mechanism will ensure continued smooth operation and prevent wear on your accessories.
Create Vertical Folding Systems
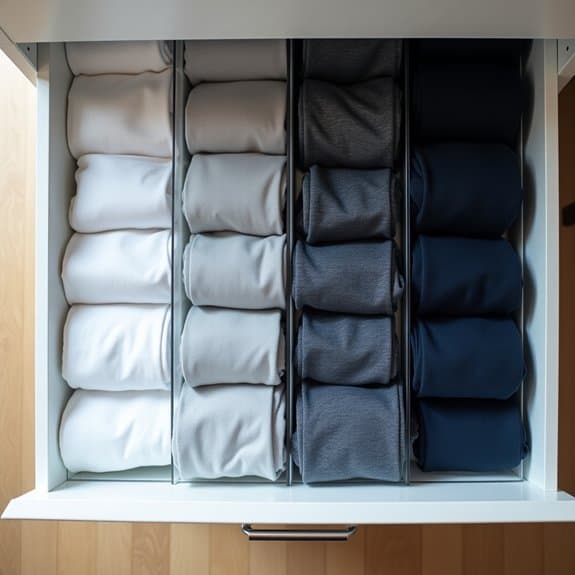
Vertical folding systems have revolutionized the way we store and access clothing in our closets. By storing items vertically rather than in traditional stacked piles, we can instantly see every piece of clothing and easily maintain organization without disturbing other items. This method, popularized by organizing consultant Marie Kondo, maximizes space while minimizing the frustration of searching through piles of clothes.
The vertical folding approach transforms drawers and shelves from chaotic catch-alls into efficient storage solutions. When clothes are stored vertically, they take up less space and remain wrinkle-free. This system works particularly well for t-shirts, sweaters, pants, and even underwear, allowing you to store 20-30% more items in the same space.
Required Items:
- Drawer dividers or organizers
- Small boxes or containers
- Measuring tape
- Labels
- Folding board (optional)
- Clear drawer inserts
- Storage bins
- Shelf dividers
To implement a vertical folding system, start by removing all items from your drawers or shelves. Fold each piece of clothing into a compact rectangle, making sure the final fold creates a stable base that allows the item to stand upright. For t-shirts, fold in the sides, then sleeves, and fold up from the bottom twice or three times until you have a rectangle that can stand independently. For pants, fold in half lengthwise, then fold from the bottom up until you achieve a similar standing rectangle. Place these folded items vertically in your drawer, lining them up like files in a filing cabinet.
Once you’ve mastered the folding technique, organize items by category and color within each drawer. Use drawer dividers to create sections that keep clothes from falling over. Start with items you wear most frequently at the front of the drawer, working backward with less-used pieces. This arrangement ensures that frequently worn items remain easily accessible while maintaining the system’s overall organization.
For optimal results, maintain the system by folding and putting away clothes immediately after laundry. Consider using slim, clear containers to separate different categories within drawers, and label sections to help maintain organization.
Remember to periodically assess and adjust the system, removing items that no longer fit or aren’t worn to preserve the efficiency of your vertical folding setup. This ongoing maintenance ensures your organized space continues to function effectively long-term.
Mount LED Motion Sensor Lights
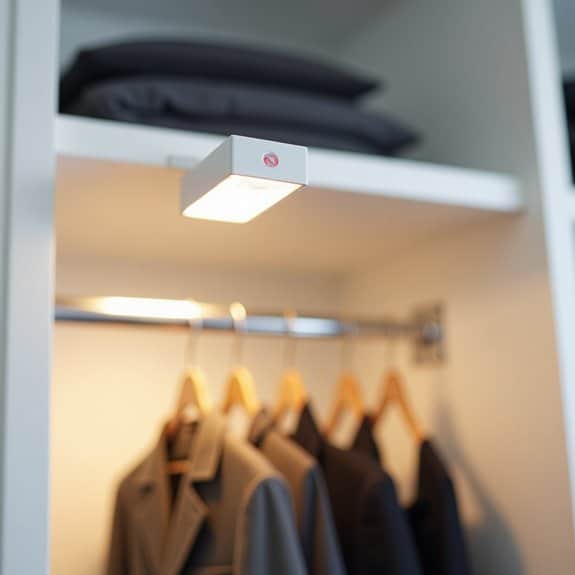
Proper lighting in a closet is essential for efficiently locating items and creating a more functional storage space. Traditional closet lighting often requires manual switches and can be inconvenient when your hands are full or when navigating through hanging clothes and stored items. Motion sensor LED lights offer a modern solution that automatically illuminates your closet space when needed.
LED motion sensor lights not only provide hands-free convenience but also contribute to energy efficiency by automatically turning off when the closet isn’t in use. These lights can be strategically placed to eliminate dark corners and shadows, making it easier to distinguish between similar-colored garments and locate small items that might otherwise be overlooked.
Required Items:
- LED motion sensor light fixtures
- Mounting brackets
- Screwdriver
- Drill and drill bits
- Measuring tape
- Pencil
- Level
- Batteries or power adapter
- Wire clips (if using corded lights)
- Anchors and screws
- Safety glasses
Installation begins with determining optimal placement for maximum coverage. Measure and mark mounting locations, ensuring lights are positioned to illuminate the entire closet space without being blocked by hanging clothes or shelving.
For battery-operated units, drill pilot holes and secure mounting brackets using appropriate anchors. For hardwired versions, ensure power is disconnected before connecting to existing electrical lines. Install the light fixtures according to manufacturer specifications, making sure they’re level and firmly attached.
Additional Tips: Test motion sensors at different times of day to ensure proper sensitivity settings. Consider installing multiple smaller units rather than one large light for better coverage.
For battery-operated lights, keep replacement batteries on hand and set calendar reminders for regular battery checks. Position sensors where they won’t be triggered by movement outside the closet, and adjust the auto-shutoff timing to balance convenience with energy efficiency.
Incorporate Space-Saving Shoe Solutions
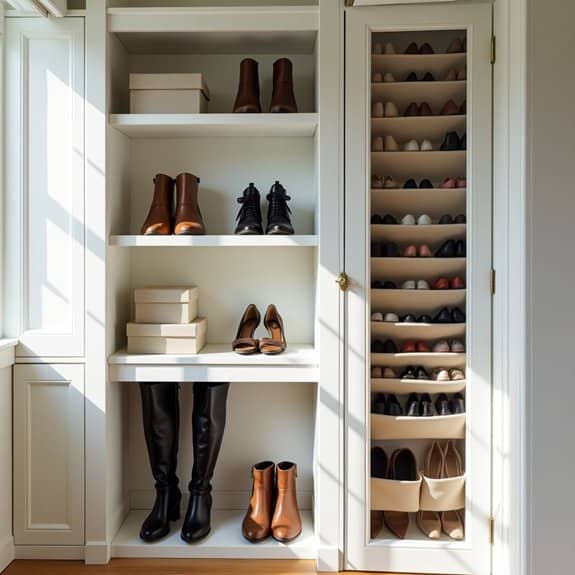
Proper shoe organization is essential for maintaining an orderly closet and protecting your footwear investment. Shoes left scattered on the floor not only create visual chaos but can also lead to damaged pairs, lost mates, and unnecessary purchases of duplicate styles when you can’t find what you need.
Maximizing vertical space and implementing smart storage solutions can transform a cluttered shoe collection into an efficiently organized system. Whether you have a small reach-in closet or a spacious walk-in, proper shoe organization can double your storage capacity while making each pair easily accessible.
Required Items:
- Shoe rack or shelving unit
- Over-the-door shoe organizer
- Clear shoe boxes
- Label maker
- Dust bags for delicate shoes
- Shoe trees
- Measuring tape
- Shelf liner
- Storage bench (optional)
- Boot shapers/stands
Start by removing all shoes from your closet and sorting them into categories: everyday wear, special occasions, seasonal, and athletic. Measure your available space and select appropriate storage solutions that maximize vertical space.
Install a combination of shelving units for frequently worn shoes and clear boxes for special occasion footwear. Position everyday shoes at eye level, with less-used pairs stored higher up or lower down.
For boots, use boot shapers to maintain their shape and store them upright on the floor or in specialized boot storage. Utilize over-the-door organizers for flat shoes and sandals, ensuring proper weight distribution.
Install shelf liner to protect both the shelving and your shoes from dust and wear. Consider implementing a rotation system where you move seasonal shoes to more accessible locations based on the time of year.
Store special occasion shoes in clear boxes with photos attached for easy identification, and use shoe trees for valuable leather footwear to maintain shape and extend longevity.
Evaluate your collection every six months, removing damaged pairs and those you no longer wear to maintain an organized system.
Design a Customized Small-Space Closet Layout
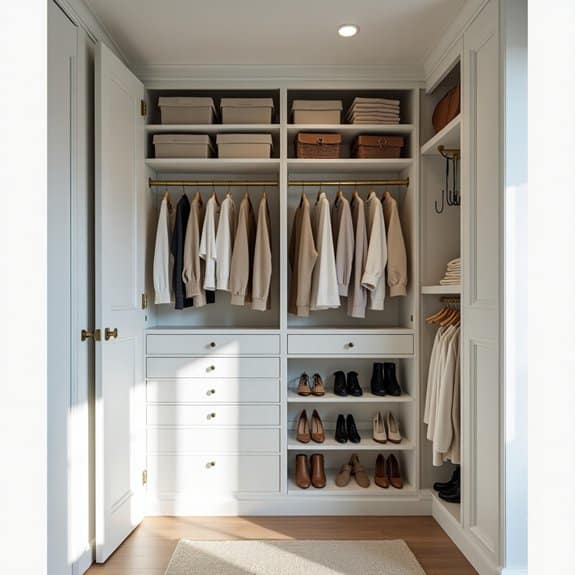
A well-designed small closet layout can transform a cramped, chaotic space into an efficient storage solution that maximizes every square inch. When space is limited, thoughtful organization becomes crucial for maintaining order and ensuring easy access to your belongings.
Strategic closet design in small spaces requires careful planning and consideration of your specific needs and lifestyle. The right layout can double your usable space while keeping frequently-used items accessible and protecting seasonal or special-occasion pieces.
Required Items:
- Measuring tape
- Graph paper
- Pencil
- Level
- Adjustable closet rods
- Shelf brackets
- Wall anchors
- Storage containers
- Drawer units
- Hanging organizers
- Clear storage bins
- Rod dividers
- Label maker
Start by emptying the closet completely and measuring the space, including height, width, and depth. Draw a scale diagram on graph paper, marking doors, walls, and any existing fixtures.
Divide the closet into zones based on your needs: hanging space for long and short items, shelving for folded clothes, and storage for shoes and accessories. Install adjustable rods at different heights to maximize vertical space, with higher rods for seasonal or less-used items and lower rods for everyday clothing.
Create designated areas within the closet by installing shelving units or drawer systems along one wall for folded items. Utilize the back of the door with over-door organizers for accessories, shoes, or additional storage.
Consider installing a second rod below the main hanging rod to double hanging space for shorter items like shirts and folded pants.
Additional Tips:
Use slim hangers to maximize rod space, incorporate clear storage containers for visibility, and implement a labeling system for boxed items.
Consider installing motion-sensor lighting to improve visibility in dark corners, and periodically reassess your layout to ensure it continues meeting your needs as seasons and wardrobe requirements change.

