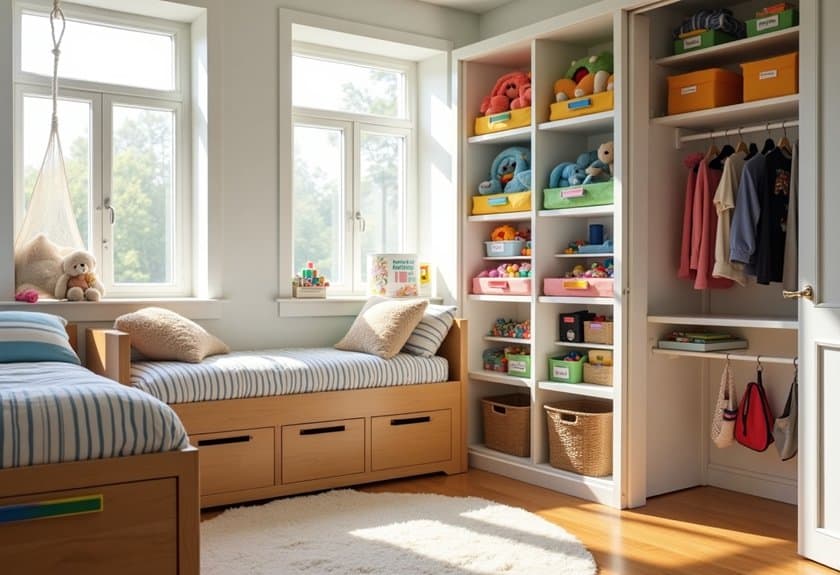
Let’s face it – your little angel’s bedroom might look like a tiny tornado swept through! But don’t worry, I’ve discovered some seriously fun ways to transform that chaos into calm. As a mom who’s survived the toy explosion phase, I know firsthand how challenging it can be to keep kids’ spaces tidy. You’ll love these creative organization ideas that not only make cleanup a breeze but actually get your children excited about maintaining order – yes, it’s possible! Want to know my secret weapons?
Color-Coded Storage Bins and Labels
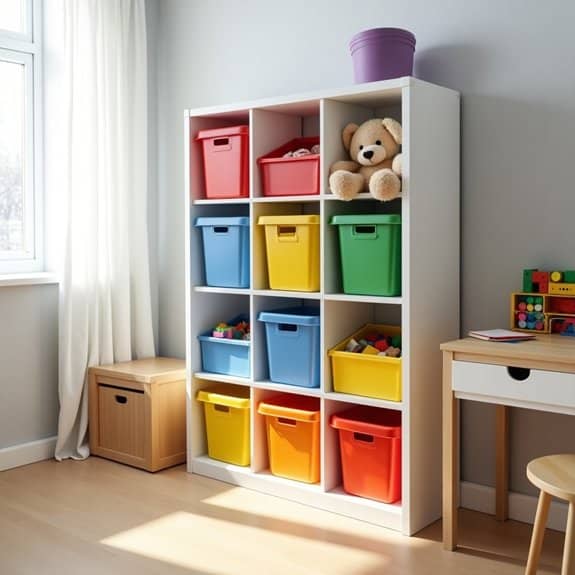
Color-coded storage systems are fundamental to creating an organized and functional kids’ bedroom. By assigning specific colors to different categories of items, children can easily identify where things belong and develop independence in maintaining their space. This system not only simplifies cleanup but also teaches valuable organizational skills that will benefit them throughout their lives.
The visual nature of color coding makes it particularly effective for children of all ages, from toddlers to teenagers. When each type of toy, clothing, or supply has its designated color, children can quickly learn the system and participate in keeping their room tidy. This approach reduces frustration during cleanup time and encourages regular maintenance of an organized space.
Required Items:
- Storage bins in multiple colors
- Label maker or permanent markers
- Clear label protectors
- Color-coding stickers
- Measuring tape
- Storage bin size guide
- Category list
- Shelf or storage unit
- Adhesive hooks
- Clear plastic pouches
Start by categorizing items into distinct groups such as toys, books, art supplies, clothing, and sports equipment. Assign a specific color to each category, ensuring the colors are noticeably different from each other. Purchase storage bins in corresponding colors and sizes appropriate for each category. Measure your space carefully to ensure bins will fit properly on shelves or under furniture.
Apply clear, readable labels to each bin using a label maker or permanent marker. Include both words and pictures on labels for younger children who can’t yet read. Position bins at child-height levels so they can easily access and return items. Create a color-coding chart to display on the wall as a reference guide for the system.
For maximum effectiveness, regularly review and adjust the system as needed. Consider rotating seasonal items to prevent overcrowding and maintain separate bins for items that are currently in use versus those in storage. Implement a quarterly check of the system to ensure labels remain clear and visible, bins are in good condition, and the color coding still meets your child’s current needs and activities.
Under-Bed Rolling Storage Solutions
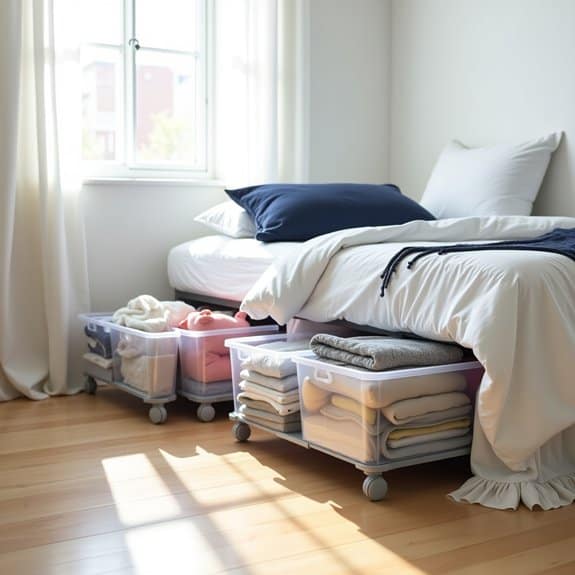
Making the most of under-bed space is crucial in children’s bedrooms, where floor space is often limited and storage needs are constantly growing. This often-overlooked area can provide extensive storage capacity for seasonal clothing, toys, books, and other items that aren’t needed daily.
Under-bed rolling storage offers the perfect combination of accessibility and organization, allowing children to easily retrieve and store their belongings while keeping the room tidy. The mobility of rolling containers makes cleaning underneath the bed simple, and the low profile ensures items stay dust-free while remaining within reach.
Required Items:
- Measuring tape
- Rolling storage containers or bins
- Bed risers (if needed)
- Labels or label maker
- Drawer dividers or small organizing boxes
- Clear plastic bags for grouping items
- Dust cover or bed skirt
- Furniture sliders (optional)
Start by measuring the available space under the bed, including height, width, and depth. If necessary, install bed risers to create additional clearance. Select rolling storage containers that maximize the available space while leaving enough room for smooth movement.
Sort items into categories before placing them in containers, using clear plastic bags to group similar items together. Create designated zones within the rolling storage system – one container for seasonal clothing, another for toys, and perhaps another for craft supplies or books.
Install drawer dividers or small organizing boxes within the containers to prevent items from shifting during movement. Label each container clearly on both the front and top edges to ensure easy identification without pulling everything out.
Position frequently accessed items toward the foot or sides of the bed for easier reach. Consider installing a bed skirt or dust cover that can be easily lifted to access the storage while maintaining a neat appearance.
Regular maintenance is key – schedule quarterly reviews of stored items to remove outgrown clothing, forgotten toys, or unnecessary items, ensuring the space remains organized and functional year-round.
Wall-Mounted Book Display Systems
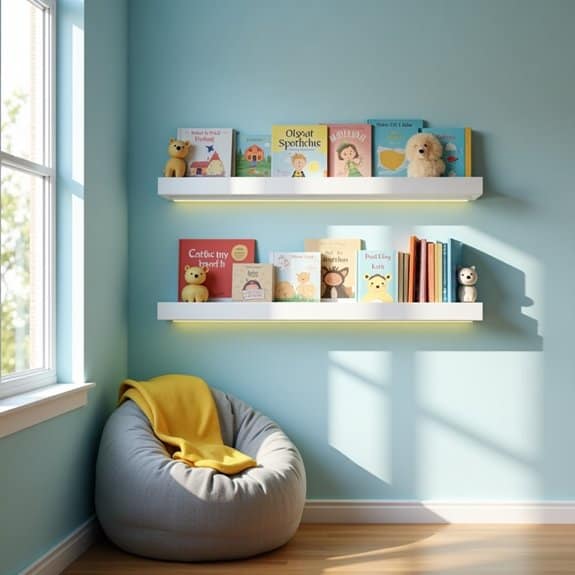
Creating an organized wall-mounted book display system transforms a child’s bedroom into an inviting reading space while maximizing floor area. When books are displayed with covers facing forward, children are more likely to engage with reading materials, making literature more accessible and appealing.
Wall-mounted book displays not only create an attractive focal point but also serve as a practical storage solution that grows with your child. These systems can be adjusted and reconfigured as your child’s reading collection expands, ensuring books remain organized and within easy reach while keeping them off the floor and protected from damage.
Required Items:
- Wall-mounted book ledges or floating shelves
- Stud finder
- Level
- Drill and drill bits
- Screwdriver
- Wall anchors
- Measuring tape
- Pencil
- Book ends
- Wall cleaner
- Microfiber cloth
Start by determining the ideal height for your child’s reach and measuring the available wall space. Use a stud finder to locate wall studs and mark their positions. Clean the wall surface thoroughly and let it dry. Measure and mark the positions for your book ledges, ensuring they’re level. If mounting multiple shelves, maintain consistent spacing between them.
Install wall anchors where needed, then secure the book ledges to the wall, ensuring they’re firmly attached. Begin organizing books by size, reading level, or subject matter. Position frequently read books at eye level for easy access. Consider using bookends to keep books upright when shelves aren’t completely full.
For optimal organization maintenance, implement a color-coding system or labels to help children return books to their designated spots. Rotate displayed books periodically to maintain interest, and leave some space on each shelf for new additions. Consider adding small LED strip lights above the shelves to create an attractive reading nook that encourages regular use of the display system.
Toy Rotation Station
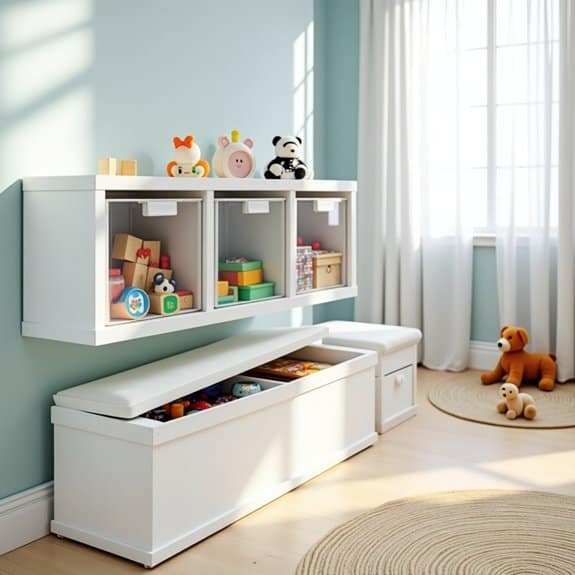
A toy rotation station is a game-changing organization system that prevents toy overwhelm while maintaining children’s interest in their playthings. By limiting access to certain toys while storing others away, children are less likely to feel overwhelmed by choices and more likely to engage meaningfully with the toys available to them.
This system not only reduces clutter in the bedroom but also creates a sense of novelty when toys are rotated back into play. Children rediscover their toys with renewed enthusiasm, leading to more focused and imaginative play sessions. Additionally, rotating toys makes cleaning and organizing much more manageable for both parents and children.
Required Items:
- Clear storage bins with lids
- Labels or label maker
- Storage shelves or closet space
- Sorting containers
- Calendar or schedule planner
- Inventory list
- Storage bench or ottoman (optional)
- Plastic bags for small parts
- Marker or pen
- Cleaning supplies
The toy rotation process starts with a thorough sorting of all toys into categories (building blocks, pretend play, arts and crafts, etc.). Divide these categories into separate bins, ensuring each contains a good mix of toys that work well together.
Create 3-4 different rotation sets, each stored in its own clearly labeled bin. Keep one set out for active play while storing the others in an accessible but out-of-sight location. Every 2-4 weeks, rotate the bins by putting away the current set and bringing out a new one. Before storing toys, ensure all pieces are accounted for and clean.
Success Tips: Maintain a master inventory list of which toys are in each rotation bin to prevent duplicate items and ensure even distribution. Consider seasonal and developmental appropriateness when creating rotation sets.
Keep a few beloved toys as “constants” that don’t get rotated. Document which toy combinations generate the most engagement and adjust future rotations accordingly. Clean and inspect toys during each rotation to maintain safety and organization.
Creative Dress-Up Corner Organization
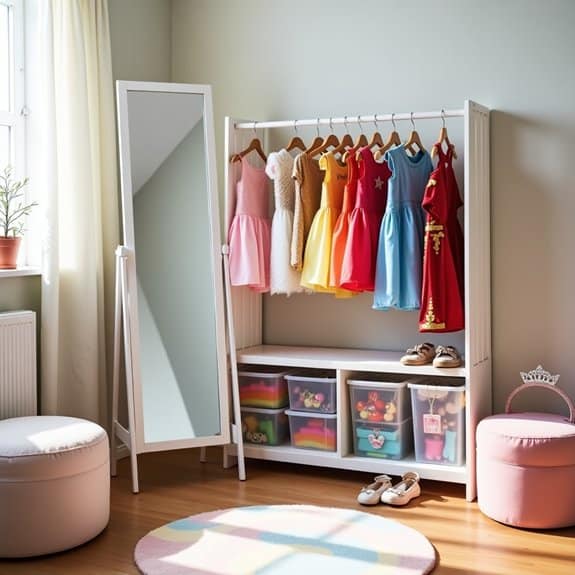
A well-organized dress-up corner transforms imaginative play into an accessible, enjoyable experience for children while maintaining room tidiness. When costume pieces and accessories are properly arranged, children can easily select, wear, and return items independently, fostering both creativity and responsibility.
Creating a dedicated dress-up space prevents costumes from being scattered throughout the house and protects special pieces from damage. An organized dress-up corner also makes cleanup faster and encourages regular use of dress-up items, maximizing the value of these imaginative play materials.
Required Items:
- Clothing rack or sturdy hooks
- Clear storage bins
- Label maker or labels
- Hanging garment organizers
- Storage ottoman or trunk
- Mirror
- Small dresser or shelving unit
- Mesh bags or bins
- Hangers (child-sized)
- Clear shoe organizers
Start by sorting all dress-up items into categories: costumes, accessories, shoes, and props. Install a child-height clothing rack or hooks along one wall, ensuring it’s securely mounted. Hang complete costumes on child-sized hangers, grouping similar items together.
Place a clear shoe organizer on the back of the door or nearby wall for smaller accessories like crowns, wands, and jewelry. For bulkier items and props, utilize clear storage bins labeled with pictures and words, allowing children to identify contents easily. Position these bins on low shelves or in a storage ottoman for easy access.
Install a shatterproof mirror at child height to complete the space. To maintain organization long-term, implement a “one-in, one-out” rule for new dress-up items, regularly inspect for damaged pieces, and schedule monthly reorganizing sessions with your child.
Consider rotating costumes seasonally to maintain excitement and prevent overcrowding, and keep a small laundry basket nearby for items that need cleaning or repair.
Multi-Purpose Furniture With Hidden Storage
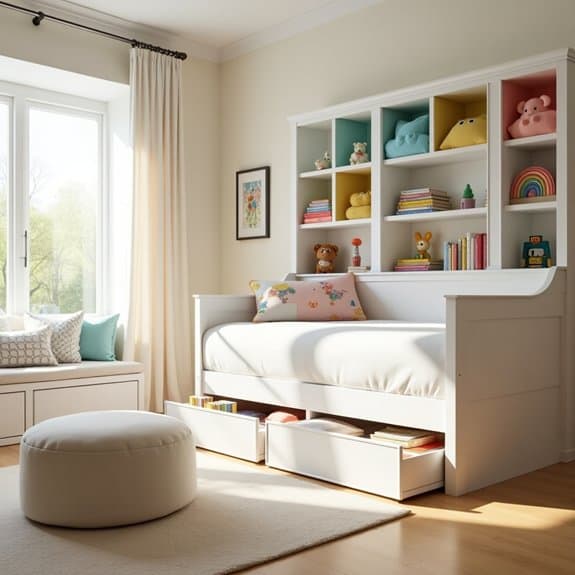
Maximizing space in children’s bedrooms is crucial, especially when dealing with limited square footage and growing collections of toys, books, and clothes. Multi-purpose furniture with hidden storage offers an elegant solution to clutter while maintaining a clean, organized appearance that helps children develop good organizational habits.
Strategic use of dual-function furniture pieces not only creates additional storage space but also teaches children the value of utilizing vertical space and maintaining order in their environment. When every furniture piece serves multiple purposes, rooms become more functional and adaptable to changing needs as children grow.
Required Items:
- Ottoman with storage compartment
- Bed with built-in drawers
- Window seat with storage bench
- Bookshelf headboard
- Hollow storage cubes
- Storage bins and baskets
- Labels or tag markers
- Drawer organizers
- Measuring tape
- Furniture sliders
Start by assessing the room’s layout and identifying prime locations for multi-purpose furniture pieces. Place the bed with built-in drawers against a wall, ensuring adequate space to access the drawers.
Install a bookshelf headboard, organizing books and decorative items on visible shelves while utilizing hidden compartments for less frequently used items. Position storage ottomans at the foot of the bed or in reading corners, storing seasonal items or extra bedding inside.
Install window seats with built-in storage compartments, using them for toys or study materials. Arrange hollow storage cubes along walls, creating modular storage that can serve as both display space and seating.
For optimal organization success, regularly review stored items with your child, rotating seasonal items and decluttering as needed. Use clear labels on storage compartments to help maintain organization systems, and consider implementing a “one-in-one-out” rule to prevent accumulation of excess items.
Remember to leave some empty storage space for future needs and teach children to return items to their designated spots after use.
Art Supply Command Center
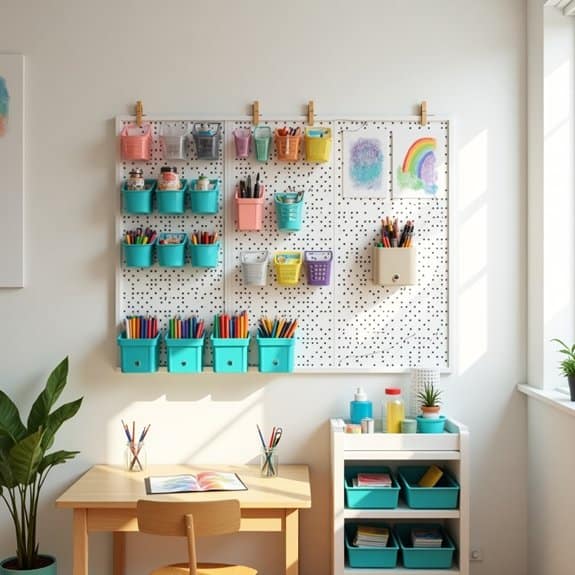
A well-organized art supply command center is essential for nurturing children’s creativity while maintaining order in their bedroom. When art supplies are properly organized, children can easily access their materials, work independently, and develop responsibility for maintaining their creative space.
Creating a dedicated art zone prevents supplies from spreading throughout the house and encourages regular creative expression. This organization system also teaches children valuable habits about keeping their materials in good condition and returning items to their designated spots after use.
Required Items:
- Wall-mounted pegboard or bulletin board
- Clear storage containers
- Label maker
- Storage cart with wheels
- Mason jars or cup holders
- Magnetic strip
- Hanging organizers
- Paper sorter
- Plastic bins
- Command hooks
- Storage baskets
- Desk or table surface
Mount the pegboard at child height and install various holders and containers for frequently used items. Sort supplies by category: drawing materials, painting supplies, crafting items, and paper products. Use clear containers to make contents visible and label everything clearly.
Position a rolling cart nearby for larger items and less-frequently used supplies. Create zones within the command center – a wet area for paints and markers, a dry area for papers and coloring books, and a workspace for actual creating.
Place frequently used items at eye level for easy access. Store messy materials like glue and paint in spill-proof containers on lower shelves. Implement a color-coding system to help younger children identify where items belong. Install a clothesline or wire with clips to display finished artwork, providing both decoration and motivation.
Additional Success Tips: Establish a weekly maintenance routine to restock supplies, clean containers, and dispose of dried-out markers or broken crayons. Consider rotating seasonal or special occasion craft supplies to prevent overcrowding.
Make cleanup part of the creative process by teaching children to return items to their designated spots before starting new projects. This habit formation will ensure the command center remains functional and organized long-term.
Magnetic Board for Small Items
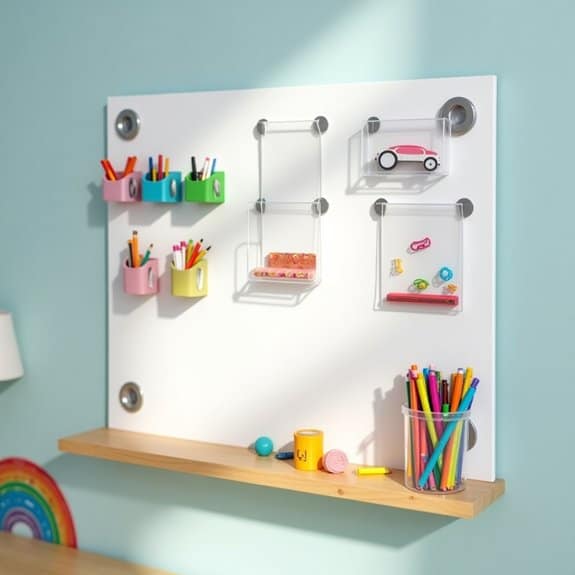
A magnetic board system offers an innovative solution for organizing small items that often end up scattered across a child’s bedroom. From hair accessories and toy cars to art supplies and small collectibles, these easily misplaced items can create constant clutter and frustration when trying to maintain an organized space.
Creating a magnetic organization zone not only keeps small items visible and accessible but also turns organization into an engaging activity for children. The visual nature of a magnetic board makes it easy for kids to maintain their own organization system, fostering independence and responsibility while keeping their belongings in order.
Required Items:
- Large magnetic board or sheet metal
- Magnetic containers or bins
- Strong magnets
- Labels or label maker
- Mounting hardware
- Small magnetic hooks
- Clear magnetic pouches
- Metal ruler
- Level
- Pencil
- Drill and screws
Select a wall space that’s easily accessible to your child and mount the magnetic board at their height level. Install the board securely using appropriate wall anchors and screws, ensuring it’s perfectly level.
Arrange magnetic containers and pouches on the board, grouping similar items together. Create designated zones for different categories such as school supplies, accessories, or collectibles. Attach labels to each container or section to clearly identify contents and help maintain organization.
Additional Tips: Rotate items seasonally to keep the system relevant and prevent overcrowding. Consider using color-coded containers for different categories, making it easier for children to maintain the system.
Periodically review and declutter the items on the board with your child, ensuring that everything displayed still serves a purpose. Install a small shelf beneath the magnetic board to catch any items that may become detached, preventing loss or creating hazards on the floor.
Door-Hanging Organizers and Pocket Systems
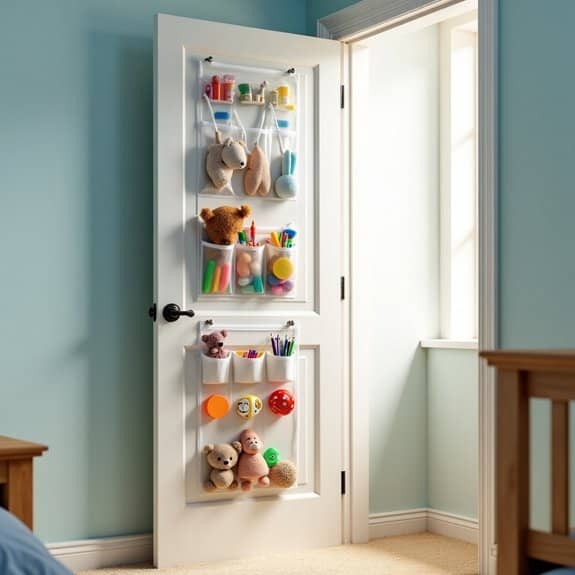
Door-hanging organizers and pocket systems represent one of the most space-efficient solutions for children’s bedrooms, utilizing vertical space that often goes unused. These systems transform an ordinary door into a valuable storage area, perfect for keeping toys, school supplies, accessories, and daily essentials within easy reach.
The versatility of door organizers makes them particularly effective for children’s rooms, where floor space is often limited and accessibility is crucial. By implementing a well-planned door organization system, children can maintain their independence in finding and putting away items, while parents can ensure everything has a designated spot.
Required Items:
- Over-the-door hanging organizer
- Clear pocket organizers
- Command hooks or mounting hardware
- Label maker or labels
- Measuring tape
- Storage bins or baskets (if needed)
- Door hooks (if not included with organizer)
- Small containers for compartmentalizing
Start by measuring your door’s dimensions and selecting an appropriately sized organizer that won’t interfere with door closure. Install the door hooks or mounting hardware according to the manufacturer’s instructions, ensuring they’re secure and level.
Sort items into categories based on frequency of use and size before placing them in the pockets or compartments. Arrange frequently used items at child height for easy access, while keeping less-used or parent-supervised items in higher pockets.
For optimal organization, implement a clear labeling system using pictures for younger children or text for older ones. Consider using clear pockets for better visibility of contents, and group similar items together.
Maintain the system by regularly reviewing and adjusting the organization as your child’s needs change. To maximize the effectiveness of your door organization system, establish a daily routine for returning items to their designated spots.
Regularly assess the contents and remove outgrown or unused items. Consider rotating seasonal items to maintain relevance and prevent overcrowding. Teaching children to maintain this system themselves will help develop important organizational skills while keeping their space tidy and functional.
Build-Your-Own Storage Challenge Games
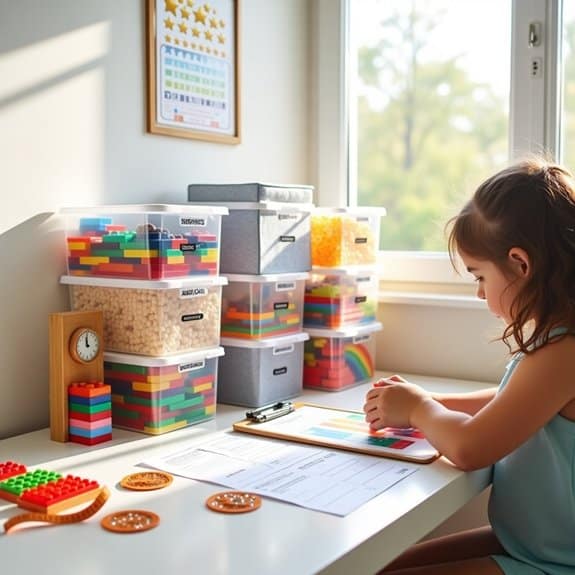
Making organization fun and engaging for children is essential for developing lifelong habits of tidiness and responsibility. When children view organization as a game rather than a chore, they’re more likely to maintain their spaces and take pride in their organizational achievements.
Build-Your-Own Storage Challenge Games transform the tedious task of organizing into an exciting activity that sparks creativity and problem-solving skills. These challenges encourage children to think critically about their space while developing organizational systems that make sense to them, leading to better long-term maintenance of their organized spaces.
Required Items:
- Timer or stopwatch
- Storage containers of various sizes
- Labels or label maker
- Colorful markers or stickers
- Reward chart
- Measuring tape
- Storage bins
- Clipboard
- Achievement badges or stickers
- Storage challenge cards
Create a series of age-appropriate challenges that combine organization with fun activities. Start by establishing “missions” where children must sort items by category within a specific time frame. Follow this with creative challenges like “Design Your Dream Storage Space,” where kids sketch their ideal organization system and implement achievable elements. Set up point systems or rewards for completed challenges, maintaining organized spaces, and creating innovative storage solutions.
For younger children, focus on simple sorting games like “Color Match Storage” or “Same Shape Storage.” Older kids can tackle more complex challenges such as “Storage Tetris,” where they must efficiently arrange storage containers, or “Organization Scavenger Hunt,” where they search for items that need organizing while following specific criteria.
For maximum success, rotate challenges weekly to maintain interest, and involve children in creating new organization games. Consider establishing a “Master Organizer” certification program where children earn badges for mastering different organizational skills. Always celebrate their achievements and improvements, no matter how small, to reinforce positive organizing habits.

