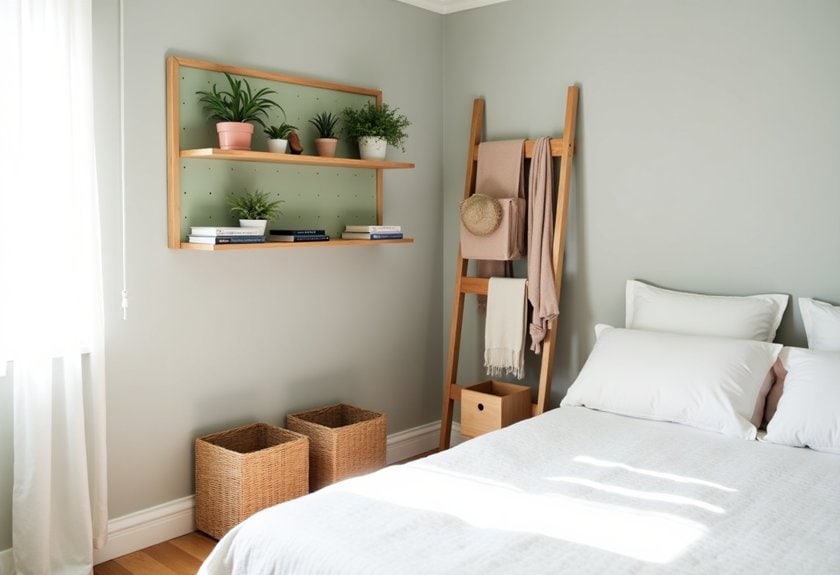
You’re about to discover 10 game-changing DIY bedroom organization projects that’ll transform your space from chaotic to calm. As someone who’s tackled these projects in my own cramped bedroom, I can tell you they’re not just practical – they’re actually fun to build! From a sleek floating nightstand that hides your secrets to a magnetic makeup board that’ll make your morning routine a breeze, these projects combine style with smart storage. Let’s explore how you can create an organized oasis without breaking the bank.
Custom Floating Nightstand With Hidden Storage
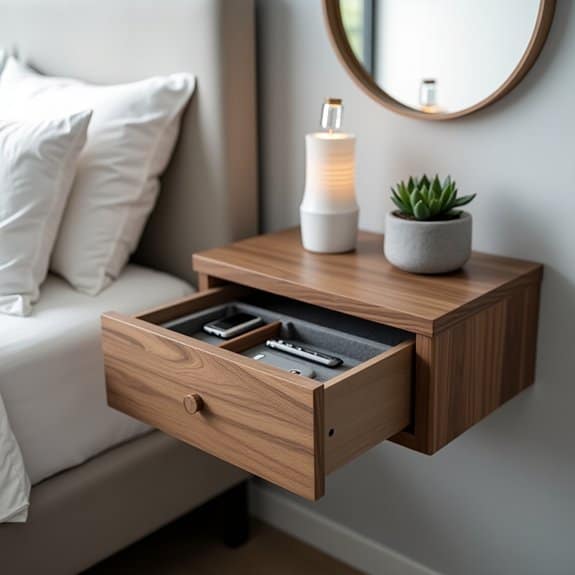
A well-designed floating nightstand with hidden storage serves as both a space-saving solution and a stylish bedroom addition. By eliminating bulky traditional nightstands, floating designs create an illusion of more floor space while providing essential storage for bedside necessities.
Custom floating nightstands with concealed compartments allow for a clutter-free bedroom environment while keeping important items within arm’s reach. This organization solution is particularly valuable for small bedrooms or minimalist designs, offering functionality without sacrificing style.
Required Materials:
- Wooden board (18″ x 14″ minimum)
- Wall brackets
- Screws and wall anchors
- Power drill
- Level
- Measuring tape
- Pencil
- Hidden hinge system
- Small handle or push-latch mechanism
- Wood finish or paint
- Sandpaper
- Storage containers or dividers
Mount the main floating shelf first by locating wall studs and marking their positions. Install heavy-duty brackets according to the manufacturer’s weight specifications, ensuring they’re perfectly level. Attach the wooden board to the brackets, creating the base structure of your nightstand.
For the hidden storage component, install a drop-down or side-opening mechanism using concealed hinges. Create a false front panel that matches the aesthetic of your nightstand, attaching it to the hinges. Include internal organizers or small containers to maximize the hidden storage space and keep items sorted.
To enhance organization efficiency, consider adding felt-lined compartments for jewelry, a charging station for electronics, or small hooks for hanging items inside the hidden storage area.
Regular maintenance of the hinges and periodic reorganization of stored items will ensure smooth operation and continued functionality of your custom floating nightstand.
Rolling Under-Bed Storage Drawers
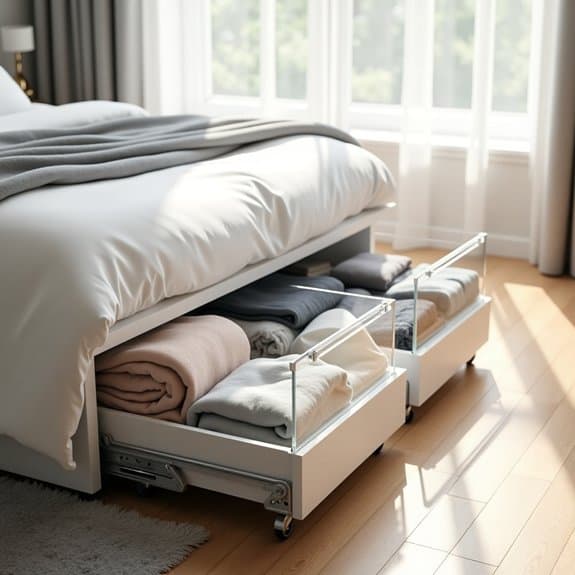
Maximizing bedroom storage space often requires thinking beyond traditional closets and dressers. The space under your bed represents valuable real estate that’s frequently underutilized, yet it offers an ideal solution for storing seasonal clothing, extra bedding, or rarely-used items.
Rolling under-bed storage drawers provide an efficient and accessible way to organize items while keeping them protected from dust and debris. These mobile storage solutions can be pulled out easily when needed and tucked away discreetly, maintaining a clean, clutter-free bedroom appearance.
Required Items:
- Storage containers with wheels
- Measuring tape
- Labels or label maker
- Drawer dividers or organizers
- Dust-proof cover or lid
- Clear plastic bags or compression bags
- Anti-slip rubber pads
- Bed risers (optional)
Start by measuring the available space under your bed, accounting for height, width, and depth. Select storage containers that maximize the space while allowing enough clearance for smooth rolling.
Sort items into categories – seasonal clothing, extra bedding, shoes, or accessories. Use compression bags for soft items to maximize space and protect against moisture.
Position the containers systematically, placing frequently accessed items toward the front and seasonal items toward the back. Install drawer dividers to create designated spaces within each container, preventing items from shifting during movement.
Ensure wheels are properly aligned and moving smoothly on your floor surface. For optimal organization and maintenance, label each container clearly, create an inventory list of stored items, and periodically rotate seasonal items.
Consider using bed risers to create additional height if needed, and place anti-slip pads under the wheels when the drawers are in their stored position to prevent unwanted movement.
Space-Saving Pegboard Jewelry Display
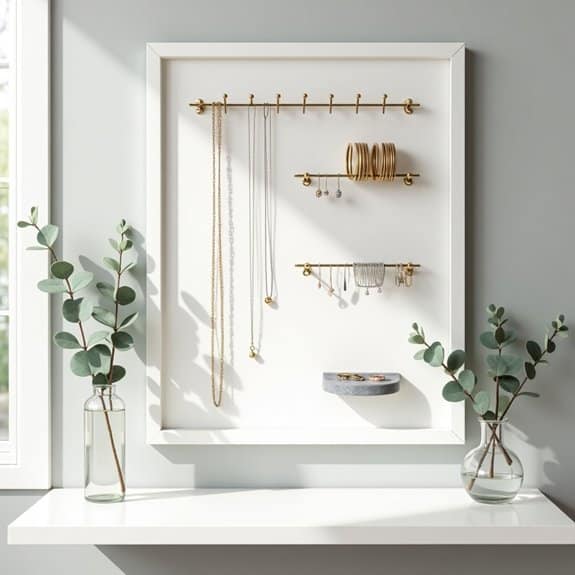
A well-organized jewelry collection not only preserves your precious accessories but also transforms them into an attractive wall display. When jewelry is tangled or hidden in boxes, it often goes unworn and can become damaged over time. A pegboard jewelry display solution maximizes vertical space while keeping necklaces, bracelets, and earrings visible and easily accessible.
A pegboard system brings functionality and style to any bedroom, turning jewelry organization into an art form. This space-saving solution prevents common jewelry storage problems like tangled chains and lost earrings while adding a decorative element to your wall space. The versatility of pegboard allows for continuous reorganization as your collection grows or changes.
Required Materials:
- Pegboard (sized to your space)
- Pegboard hooks in various sizes
- Wall anchors and screws
- Hammer
- Level
- Pencil
- Measuring tape
- Power drill
- Small pegs or dowels
- Paint (optional)
- Decorative frame (optional)
Start by measuring your wall space and cutting the pegboard to size if necessary. Mount the pegboard securely to the wall using appropriate anchors and screws, ensuring it’s level. If desired, paint the pegboard to match your room’s decor or frame it for a more polished look.
Insert hooks at various heights and spacing to accommodate different types of jewelry. Position longer hooks for necklaces at the top, medium-length hooks for bracelets in the middle, and short pegs for earrings at the bottom. Create specific zones for different types of jewelry to maintain organization.
For maximum effectiveness, arrange your jewelry by category, color, or frequency of use. Thread necklaces through individual hooks to prevent tangling, and use small pegs in pairs to hold earrings securely. Consider installing a few horizontal dowels for hanging multiple items together or using them as bracelet bars. Leave some empty hooks for future additions to your collection.
Additional Tips: Rotate your jewelry seasonally to keep the display fresh and relevant. Install the pegboard at eye level for easy access, and consider adding small containers or dishes attached to the board for storing tiny items like rings or loose earring backs. Clean your jewelry before displaying it, and periodically dust the pegboard to maintain its appearance. For valuable pieces, consider keeping them in a secure jewelry box and using the pegboard display for everyday items.
DIY Closet Organization System
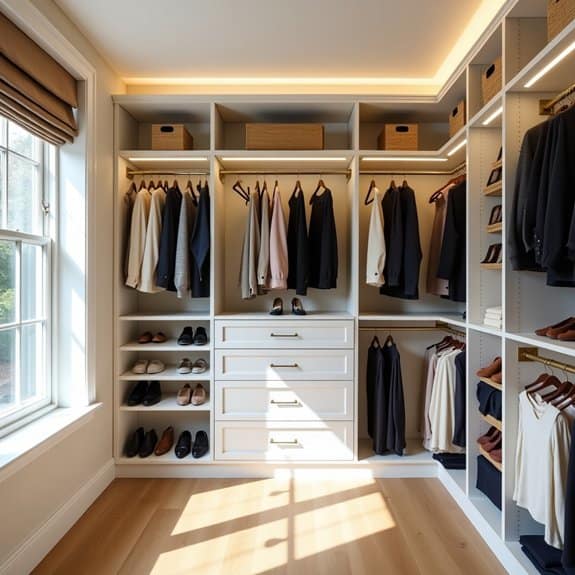
A well-organized closet serves as the foundation for an efficient morning routine and a clutter-free bedroom. When clothes, accessories, and shoes each have their designated space, getting dressed becomes seamless, and maintaining order becomes second nature rather than a constant struggle.
Creating a custom DIY closet organization system not only maximizes available space but also adapts to your specific needs and lifestyle. Unlike pre-made solutions, a DIY approach allows you to accommodate your unique collection of clothing and accessories while working within your existing closet dimensions.
Required Items:
- Measuring tape
- Level
- Drill and screws
- Closet rods
- Shelf brackets
- Wood shelving
- Storage bins or baskets
- Hanging organizers
- Label maker
- Wire shelf dividers
- Storage hooks
- Clear plastic containers
- Clothing hangers (uniform style)
Start by removing everything from your closet and measuring the space thoroughly, including height, width, and depth. Sketch a plan that incorporates different zones: hanging space for long and short items, shelving for folded clothes, and designated areas for shoes and accessories.
Install the main components in order: mount support brackets for shelving, secure closet rods at appropriate heights, and add vertical dividers where needed. Create distinct sections within your closet by category: everyday wear, seasonal items, special occasion pieces, and accessories.
Install double hanging rods where possible to maximize vertical space for shirts and shorter items. Position shelves at strategic heights to accommodate folded sweaters, pants, and storage bins. Incorporate hooks on empty wall space for belts, scarves, or bags.
Additional organization success depends on implementing a maintenance system. Rotate seasonal clothing to the front when appropriate, use slim velvet hangers to prevent clothing slip, and maintain a one-in-one-out policy when acquiring new items.
Consider installing battery-operated LED lights in dark corners to ensure all spaces remain visible and usable, preventing the likelihood of forgotten items and clutter accumulation.
Wall-Mounted Shoe Storage Solution
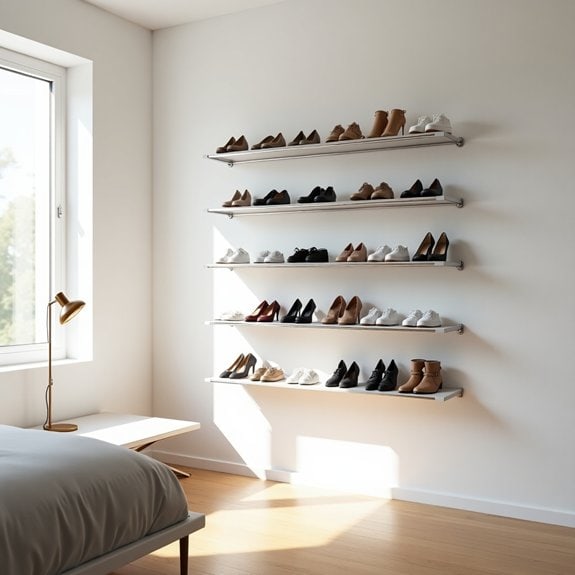
Proper shoe storage is essential for maintaining an organized and clutter-free bedroom. Shoes scattered across the floor not only create visual chaos but also take up valuable floor space that could be better utilized. Wall-mounted shoe storage offers a practical solution that maximizes vertical space while keeping footwear easily accessible.
A well-designed wall-mounted shoe storage system can transform an unused wall into a functional storage area, protecting shoes from dust and damage while creating an attractive display. This organization method is particularly beneficial for smaller bedrooms where floor space is limited, and it helps maintain a minimalist aesthetic.
Required Materials:
- Wall-mounted shoe racks or rails
- Wall anchors
- Screws
- Power drill
- Level
- Measuring tape
- Pencil
- Stud finder
- Screwdriver
- Wall brackets (if needed)
- Drywall anchors (if needed)
Installation and organization process starts with measuring the wall space and marking the desired height for the shoe storage system. Use a stud finder to locate wall studs for secure mounting. Install wall anchors where studs aren’t available, ensuring the system can support the weight of multiple shoes.
Mount the racks or rails according to manufacturer specifications, maintaining even spacing between each level. When securing multiple racks, work from the bottom up, using a level to ensure straight alignment.
For optimal organization, arrange shoes by category and frequency of use. Place everyday shoes at eye level for easy access, with seasonal or special occasion footwear stored on higher or lower racks. Consider installing the system at least 6 inches above the floor to allow for easy cleaning underneath.
Additional Tips: Incorporate clear shoe boxes or dust covers for expensive or delicate footwear to provide extra protection while maintaining visibility. Install a small ledge or shelf above the shoe storage for additional items like shoe care products or accessories.
Regularly rotate shoes based on seasonal needs and reassess the organization system every few months to ensure it continues to meet your storage requirements.
Multi-Purpose Ottoman Storage Bench
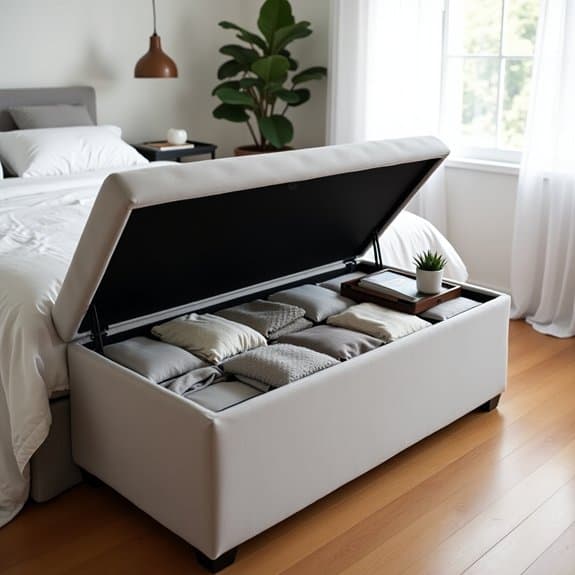
A multi-purpose ottoman storage bench serves as both a functional seating area and a clever storage solution for bedrooms of any size. By maximizing vertical space and providing hidden storage, this versatile piece helps maintain a clutter-free environment while adding aesthetic value to your bedroom decor.
Organizing your ottoman storage bench effectively can transform it into a powerhouse of organization, storing everything from extra bedding and seasonal clothing to books and accessories. A well-organized ottoman bench also makes it easier to locate items quickly and maintains the longevity of stored belongings.
Required Items:
- Storage bins or fabric boxes
- Drawer organizers or dividers
- Labels and label maker
- Clear storage bags
- Vacuum storage bags (for bulky items)
- Moisture absorbers
- Fabric freshener
- Cleaning supplies
- Measuring tape
The organization process starts with emptying the ottoman completely and cleaning the interior thoroughly. Measure the internal dimensions and divide the space into zones based on the items you plan to store. Use drawer organizers or smaller bins to create compartments for different categories of items.
Place frequently used items toward the front for easy access, while seasonal items can go toward the back. For soft goods like blankets or clothing, vacuum storage bags can compress them to save space while protecting from dust and moisture.
Consider implementing a rotation system for seasonal items, keeping current-season items more accessible. Store delicate items in protective bags or containers, and use moisture absorbers to prevent mustiness. Label everything clearly to maintain organization long-term.
Additional Tips: Consider using clear containers to easily identify contents, and maintain a regular schedule for reviewing and rotating stored items. Keep a small inventory list inside the ottoman lid to track what’s stored where.
To prevent musty odors, leave the ottoman open periodically to air out, and include fabric freshener sheets between stored textiles. When organizing, remember to leave some space for air circulation to prevent moisture buildup.
Bedside Book and Magazine Rack
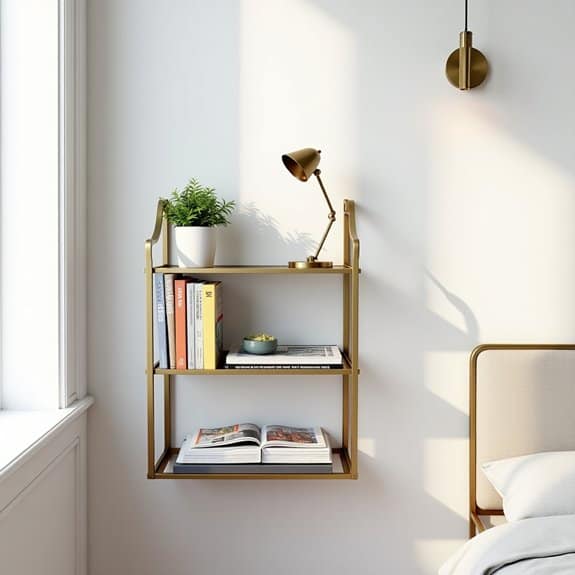
A well-organized bedside book and magazine rack is essential for maintaining a clutter-free bedroom while keeping reading materials easily accessible. When books and magazines pile up on nightstands or the floor, they not only create visual chaos but also gather dust and make it difficult to find specific titles when wanted.
Creating a dedicated storage solution for reading materials helps establish a relaxing bedtime routine and encourages regular reading habits. An organized rack system also protects books from damage and extends their lifespan while adding a decorative element to your bedroom space.
Required Items:
- Wall-mounted or standing magazine rack
- Bookends
- Label maker or tags
- Storage bins or baskets
- Basic tools (screwdriver, level, measuring tape)
- Wall anchors (if mounting)
- Sorting containers
- Dust cloth
Begin by sorting all reading materials into categories: current magazines, archived magazines, books currently being read, and books for future reading. Remove any outdated magazines or books you no longer want, donating them or recycling as appropriate.
Clean the designated area thoroughly and install your chosen rack system, ensuring it’s secure and level if wall-mounted. Arrange current reading materials at eye level or within easy reach of your bed. Place frequently accessed books and magazines in the most accessible spots.
Use bookends to keep books upright and organized, and consider using storage bins for magazines to prevent them from becoming bent or damaged. Position books with their spines facing outward for easy identification, and implement a system to rotate magazines, removing older issues as new ones arrive.
If using a multi-tiered system, place heavier books on lower shelves for stability.
Additional Tips: Consider implementing a “one in, one out” rule to maintain organization long-term. Use labeled dividers to separate different genres or reading priorities, and establish a monthly maintenance routine to dust and reorganize the rack.
Keep a small reading light nearby to create a complete reading station, and maintain a running list of books to read next to help manage your collection’s growth.
Hanging Dresser Drawer Organizers
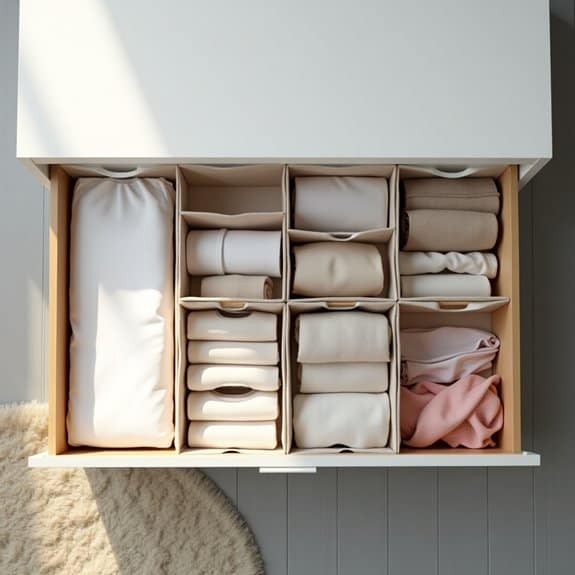
An organized dresser drawer system is essential for maintaining a clutter-free bedroom and streamlining your daily routine. When clothes and accessories are properly sorted and visible, you save valuable time getting dressed and maintain the quality of your garments by preventing wrinkles and damage.
Hanging dresser drawer organizers take organization to the next level by maximizing vertical space and creating designated compartments for different types of clothing and accessories. These versatile tools transform chaotic drawers into well-ordered spaces, making it easier to find and access your belongings while protecting delicate items.
Required Items:
- Hanging drawer organizers (fabric or canvas)
- Measuring tape
- Scissors
- Command hooks or over-door hangers
- Labels (optional)
- Storage boxes or bins (optional)
- Drawer liner (optional)
Start by measuring your drawer dimensions to select appropriately sized hanging organizers. Remove all items from the drawer and clean thoroughly.
Install the hanging system by either attaching command hooks to the inside of the drawer or using over-door hangers that rest on the drawer’s edge. Position the organizer, ensuring it hangs straight and doesn’t interfere with the drawer’s closing mechanism.
Sort your items by category (undergarments, socks, accessories, etc.) and assign specific compartments for each group. Roll items like socks and workout clothes to maximize space and maintain visibility. For delicate items, consider using smaller boxes or bins within the compartments to provide additional protection and organization.
To maintain your newly organized system, regularly assess and declutter items, adjust compartment assignments as needed, and consider using labels for quick identification. Adding drawer liners can prevent items from sliding and protect the drawer’s surface while providing a clean, polished look to your organization system.
Corner Shelf Storage Tower
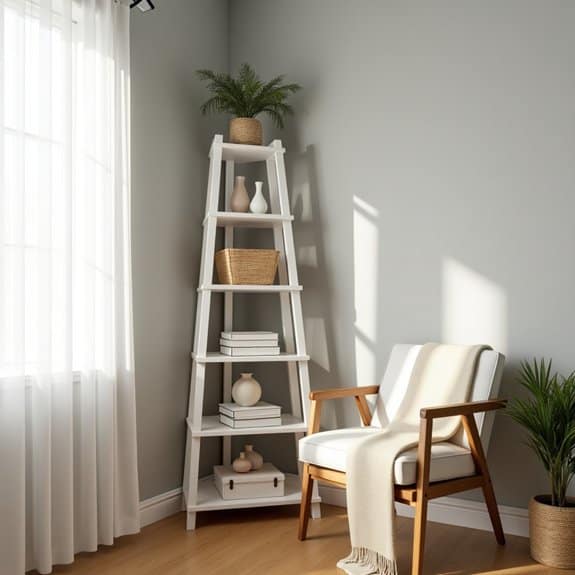
Corner spaces in bedrooms often become wasted or cluttered areas, making a corner shelf storage tower an ideal solution for maximizing vertical space while maintaining a clean, organized look.
These towers can transform an underutilized corner into a functional storage area that adds both style and practicality to your bedroom setup. A well-designed corner shelf tower creates designated spaces for books, decorative items, small storage boxes, and personal belongings while taking advantage of often-neglected vertical space.
This organization solution is particularly valuable in smaller bedrooms where floor space is limited and efficient storage solutions are essential.
Required Items:
- Corner shelf unit (pre-made or DIY materials)
- Storage baskets or boxes
- Label maker or tags
- Measuring tape
- Level
- Wall anchors and screws
- Drill
- Dust cloth
- Storage containers in various sizes
Start by thoroughly cleaning the corner area and measuring the available space from floor to ceiling and along both walls.
Install the corner shelf unit according to manufacturer instructions, ensuring it’s properly anchored to the wall for stability. If building custom shelves, secure each level carefully, checking with a level tool to maintain even surfaces.
Organize items by category, placing frequently used items at eye level and storing less-used items on higher or lower shelves. Incorporate baskets or boxes for smaller items, keeping similar items together.
Label containers clearly to maintain organization long-term. Consider using coordinating storage containers to create a cohesive look while maximizing the functionality of each shelf level.
Additional Tips: Maintain visual balance by alternating between open display areas and concealed storage. Use the top shelves for seasonal items or rarely-used belongings, keeping daily essentials within easy reach.
Regularly assess and adjust the organization system, removing items that are no longer needed and reorganizing spaces that become cluttered over time. Consider adding LED strip lighting to illuminate darker corners and create ambiance while making items easier to locate.
Magnetic Makeup Organization Board
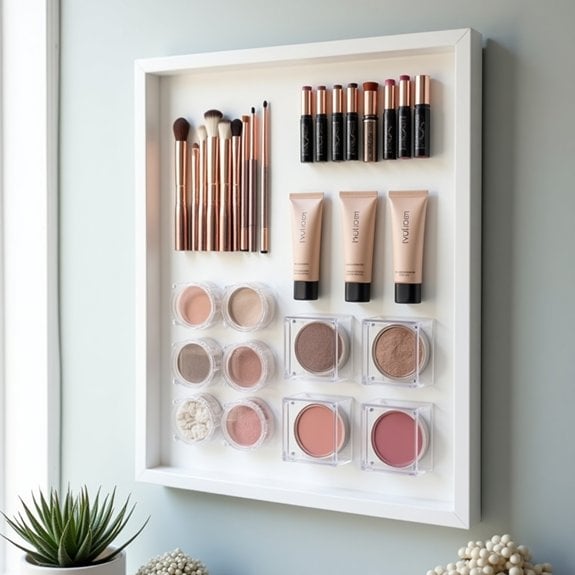
A well-organized makeup collection is essential for maintaining a clutter-free bedroom and streamlining your daily beauty routine. When cosmetics are scattered across drawers and countertops, products often get lost, expired, or damaged, leading to unnecessary replacements and wasted money.
A magnetic makeup organization board transforms your cosmetics into an accessible, visible display while maximizing vertical space on your wall. This solution keeps your everyday products within arm’s reach while protecting them from bathroom moisture and creating an aesthetically pleasing arrangement that doubles as functional wall art.
Required Materials:
- Large magnetic board or sheet metal (16″x20″ recommended)
- Strong magnets (various sizes)
- Industrial-strength adhesive
- Scissors
- Ruler
- Level
- Wall mounting hardware
- Small magnetic containers
- Metal picture frame (optional)
- Spray paint (optional)
Start by preparing your magnetic board by cleaning it thoroughly and painting it if desired. Mount the board securely to your wall using appropriate hardware, ensuring it’s level and at a comfortable height for daily access.
Attach strong magnets to the back of your makeup products using industrial-strength adhesive, being careful to position them so the products hang straight when mounted. For loose items like brushes and smaller products, use magnetic containers or create custom holders using stronger magnets.
Group similar items together, placing frequently used products at eye level and organizing by category (face products, eye makeup, lips) for intuitive access. Consider arranging your products by frequency of use, with daily essentials at the center and occasional items toward the edges.
Leave some empty space for future additions, and regularly assess your collection to remove expired products. For optimal organization, label magnetic containers and rotate seasonal items as needed. Protection from direct sunlight will help preserve your products and maintain their quality longer.

