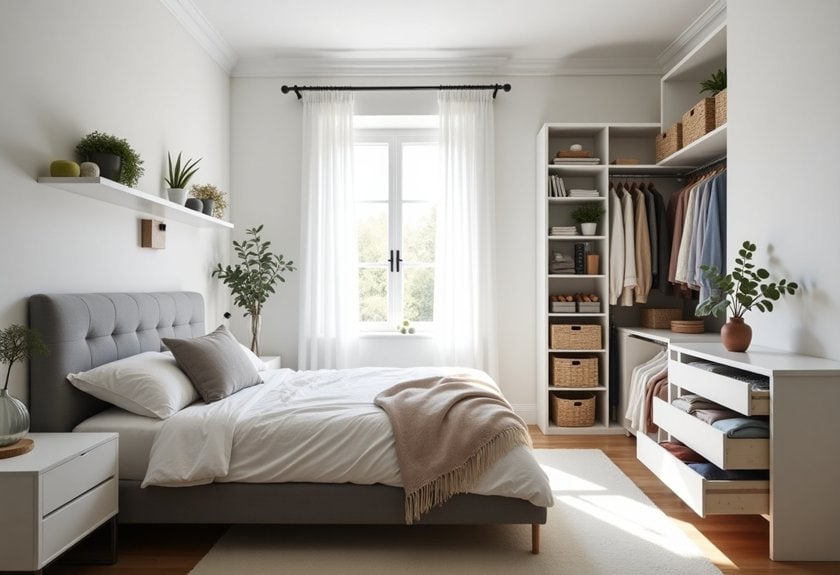
Your bedroom should be a sanctuary, not a stress zone cluttered with yesterday’s laundry and scattered accessories. I’ve spent years testing different organization methods, and I’ve discovered that transforming your space doesn’t require a complete renovation or expensive storage systems. From maximizing those forgotten vertical spaces to creating clever command centers that’ll make mornings smoother, these 10 bedroom hacks will help you reclaim your room’s potential. Let’s explore how you can turn chaos into calm!
Maximize Vertical Space With Behind-The-Door Storage
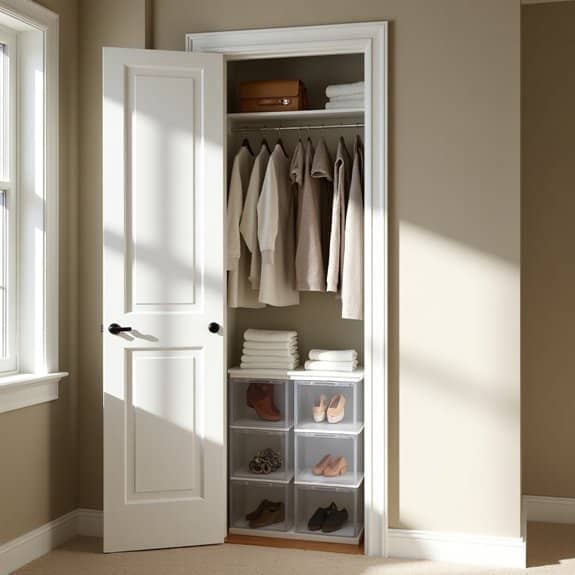
Making use of vertical space is crucial in any bedroom organization strategy, and the often-overlooked area behind doors represents prime real estate for storage solutions. Behind-the-door storage systems can effectively double your storage capacity while keeping items easily accessible and out of sight when the door is closed.
This storage method proves particularly valuable for apartments, dorm rooms, or small bedrooms where every inch of space counts. By utilizing the full height of your door, you can store everything from shoes and accessories to cleaning supplies and toiletries without sacrificing valuable floor or drawer space.
Required Items:
- Over-the-door hanging organizer
- Door hooks or brackets
- Measuring tape
- Level
- Screwdriver
- Wall anchors (if needed)
- Storage bins or baskets
- Command strips or mounting hardware
- Door bumpers
Installation and Organization Process:
Start by measuring your door’s dimensions, including width and available hanging space, ensuring enough clearance for the door to close properly with the organizer installed. Choose an over-the-door system that fits these measurements and install door bumpers to prevent damage to walls.
For heavier items, consider using screws and brackets rather than over-the-door hooks for added stability. Sort items by category and frequency of use, placing frequently accessed items at eye level. Utilize clear storage containers or label opaque ones for easy identification.
Consider using multiple organizing systems simultaneously – combining a shoe organizer with hooks for robes or towels maximizes efficiency.
Additional Tips:
To maintain organization and prevent overloading, establish weight limits for each pocket or hook, and regularly assess stored items for relevance. Use tension rods within larger pockets to create additional divisions, and consider seasonal rotation of items to keep the system functional year-round.
Remember to periodically check hardware and tighten any loose components to ensure long-term durability and safety.
Create a Bedside Command Center
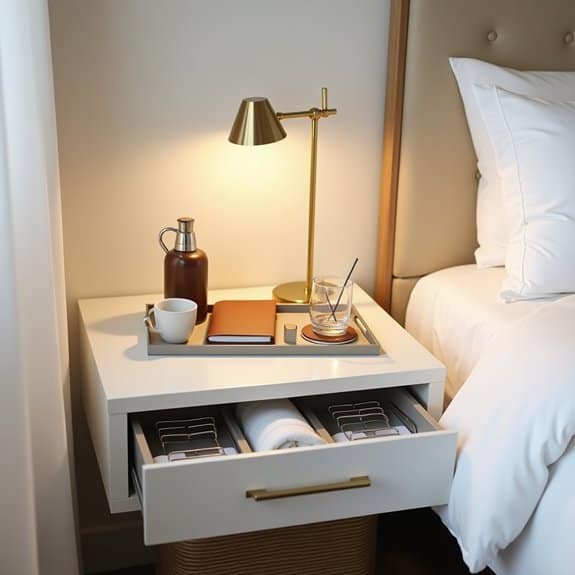
A well-organized bedside command center serves as the gateway between your busy day and restful night. This dedicated space keeps essential items within arm’s reach while maintaining a clutter-free environment that promotes relaxation and peace of mind.
Creating an efficient bedside command center eliminates the frustration of searching for items in the dark or disrupting your sleep routine to retrieve forgotten necessities. When properly organized, this space can streamline your evening routine, morning wake-up, and help maintain overall bedroom organization.
Required Items:
- Bedside table or floating shelf
- Small drawer organizers or dividers
- Charging station or cord management system
- Table lamp
- Small storage containers
- Notebook and pen
- Clock or phone dock
- Small trash bin
- Coasters
- Storage basket (if space permits)
Start by clearing everything from your current bedside area and wiping down all surfaces. Install a charging station at the back of the table, threading cords through a management system to prevent tangling. Position your lamp in the back corner for optimal lighting while maintaining easy access.
Divide drawer space using organizers, designating specific sections for electronics, reading materials, and personal items. Create zones on the table surface: immediate-access items like water and medications in front, ambiance items like candles in the middle, and less frequently used items toward the back. If using a basket underneath, reserve it for larger items like books or extra blankets. Ensure all containers and organizers match your bedroom’s aesthetic to maintain a cohesive look.
To maintain your bedside command center, implement a weekly reset routine where you remove unnecessary items, wipe down surfaces, and reorganize any displaced items. Consider seasonal adjustments to your organization system, switching out items based on changing needs throughout the year, and regularly evaluate whether stored items truly deserve their designated space.
Transform Dead Corner Spaces Into Storage Nooks
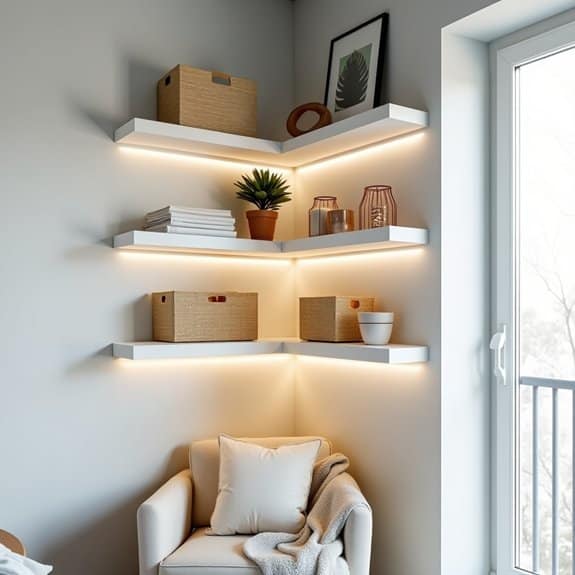
Corner spaces in bedrooms often become neglected dead zones where dust collects and valuable square footage goes to waste. These awkward angles can actually become prime real estate for smart storage solutions, helping to maximize every inch of your bedroom while maintaining a clean, organized aesthetic.
Converting corner spaces into functional storage nooks not only utilizes previously wasted space but also adds character to your room. These transformed corners can house everything from reading nooks to vanity stations, or even become designated spaces for hobbies and collections, making your bedroom more efficient and personalized.
Required Items:
- Corner shelving units
- Floating corner shelves
- L-shaped brackets
- Wall anchors
- Drill and screws
- Level
- Measuring tape
- Corner desk (optional)
- Storage baskets or bins
- LED strip lighting
- Command hooks or hanging hardware
Start by thoroughly cleaning the corner space and measuring both vertically and horizontally to determine the maximum space available. Install corner shelving units starting from the bottom up, ensuring each shelf is properly anchored to wall studs for stability.
If using floating shelves, maintain consistent spacing between each level to create a visually appealing display while maximizing storage capacity. For deeper corners, consider installing an L-shaped desk or storage bench that fits snugly against both walls.
Add storage solutions above the workspace using a combination of floating shelves and wall-mounted organizers. Incorporate baskets or bins on lower shelves to hide clutter while keeping items easily accessible.
To enhance your corner storage nook’s functionality, install LED strip lighting under shelves for better visibility and ambiance. Consider using clear containers for frequently accessed items and labeled boxes for seasonal storage.
Rotate items seasonally and reassess the space’s organization every few months to ensure it continues to serve your needs effectively.
Utilize Under-Bed Rolling Storage Solutions
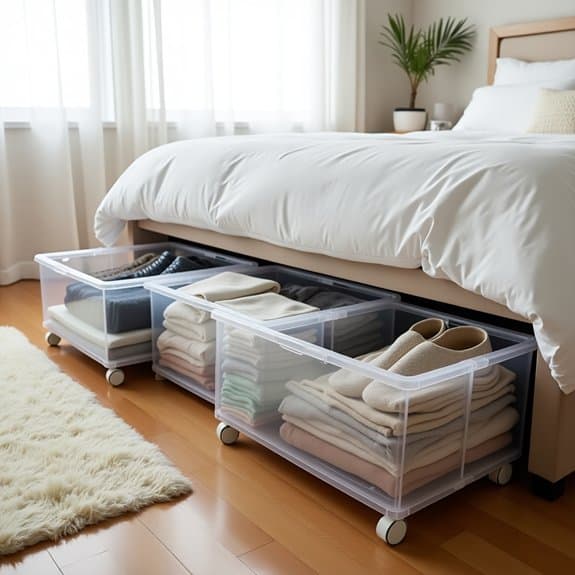
Making use of under-bed space represents one of the most underutilized storage opportunities in the bedroom. This often-forgotten area can provide substantial storage capacity, equivalent to an extra closet, while keeping items dust-free and easily accessible. Proper under-bed organization can significantly reduce clutter in other areas of your bedroom and maximize your available space.
Rolling storage solutions specifically designed for under-bed use offer a practical and efficient way to store seasonal clothing, extra bedding, shoes, and other items that aren’t needed daily. The mobility of these units allows for quick access without the need to lift the bed or struggle to reach items pushed against the wall, making it an ideal storage solution for those with limited closet space.
Required Items:
- Under-bed storage containers with wheels
- Measuring tape
- Labels and marker
- Drawer dividers or organizers
- Vacuum storage bags (optional)
- Bed risers (if needed)
- Anti-dust covers or lids
- Clear plastic bins (preferably shallow)
Start by measuring the available space under your bed, including height, width, and depth. Select appropriate rolling containers that maximize the space while allowing enough clearance for smooth movement.
Before placing items in storage, sort them into categories such as seasonal clothing, shoes, or extra bedding. Use vacuum storage bags for soft items to maximize space and protect against moisture and dust. Position frequently accessed items toward the foot or sides of the bed for easier reach, while seasonal or rarely used items can be stored toward the head of the bed or corners.
For optimal organization, install drawer dividers or use smaller containers within the larger rolling units to prevent items from shifting. Label each container clearly on multiple sides to easily identify contents without pulling out the entire unit. Consider using clear containers to provide visual access to stored items, reducing the need to open multiple containers when searching for specific items.
Additional Tip: Create a detailed inventory list of stored items and their locations, updating it seasonally. This practice prevents forgotten items and helps maintain organization long-term.
Consider placing cedar blocks or lavender sachets in containers storing clothing to maintain freshness and deter pests. Clean the under-bed area regularly and inspect stored items quarterly to prevent dust accumulation and ensure everything remains in good condition.
Install Floating Shelves for Display and Organization
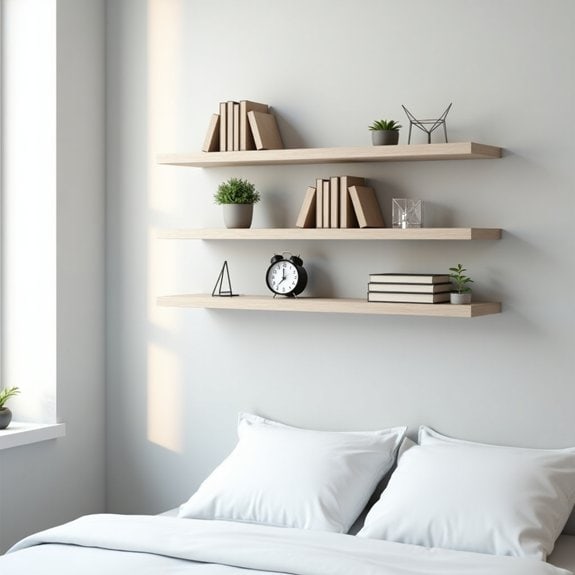
Floating shelves represent a perfect solution for maximizing vertical wall space while creating an aesthetically pleasing storage solution in any bedroom. These versatile fixtures provide dedicated space for books, decorative items, and daily essentials without taking up valuable floor space, making them particularly valuable in smaller bedrooms.
The key to successful floating shelf installation lies in proper planning and placement. Strategic positioning of these shelves can create visual interest while serving practical storage needs, effectively turning wall space into functional storage areas that complement your bedroom’s design and help maintain a clutter-free environment.
Required Items:
- Floating shelves
- Stud finder
- Level
- Pencil
- Measuring tape
- Drill
- Wall anchors
- Screwdriver
- Wall brackets
- Safety goggles
- Dust mask
Installation and organization starts with determining optimal shelf placement. Use a stud finder to locate wall studs and mark them clearly with a pencil. Measure and mark the desired height for each shelf, using a level to ensure straight lines. Install wall brackets according to manufacturer specifications, ensuring they’re securely anchored into studs or using appropriate wall anchors.
Mount shelves onto the brackets, double-checking that they’re level before final tightening. Once installed, organize items by category and frequency of use. Place frequently accessed items at eye level, with heavier items closer to the brackets for better weight distribution.
Create visual balance by alternating between functional storage and decorative elements, using bookends or small containers to keep items organized and prevent sliding. For optimal shelf maintenance and longevity, regularly dust shelves and avoid exceeding their weight capacity.
Consider using clear acrylic risers or small organizing boxes to maximize vertical space on each shelf. Periodically rotate displayed items to prevent dust accumulation and maintain fresh, interesting displays while keeping essential items easily accessible.
Design a Closet Zone System
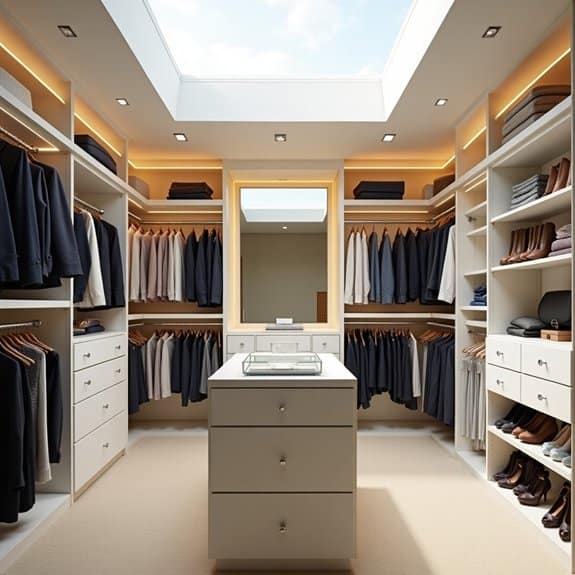
A well-organized closet with designated zones transforms a chaotic storage space into an efficient, easy-to-navigate wardrobe management system. By creating distinct areas for different types of clothing and accessories, you can streamline your daily routine and maintain order long-term.
Implementing a zone system eliminates the frustration of searching for specific items and prevents clothes from becoming wrinkled or damaged due to improper storage. This systematic approach also makes it easier to assess your wardrobe, identify gaps in your clothing collection, and maintain a clutter-free space.
Required Items:
- Measuring tape
- Closet rod dividers
- Storage bins or boxes
- Shelf dividers
- Labels or label maker
- Hanging organizers
- Storage baskets
- Clear containers
- Drawer organizers
- Hooks
Start by completely emptying your closet and measuring the available space. Divide your closet into distinct zones based on clothing categories: everyday wear, formal attire, seasonal items, accessories, and shoes.
Install double hanging rods where possible to maximize vertical space, with frequently worn items at eye level and seasonal or occasional pieces stored higher or lower.
Create specific zones for different clothing types: tops, bottoms, dresses, and outerwear. Designate separate areas for accessories using drawer organizers, clear containers, or specialized hanging storage.
Install hooks or specialized organizers for belts, scarves, and jewelry. Use shelf dividers to maintain neat stacks of folded items and prevent them from toppling over.
For optimal organization maintenance, implement a one-in-one-out rule when adding new items to your wardrobe. Regularly assess each zone’s functionality and adjust the layout as needed based on seasonal changes or lifestyle modifications.
Consider using color-coding or labels to maintain the system, and leave some empty space in each zone to accommodate future purchases without disrupting the organization.
Repurpose Everyday Items as Storage Solutions
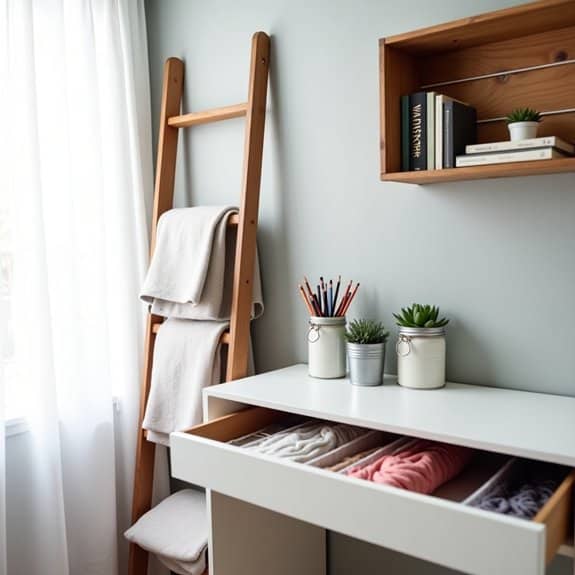
Getting creative with everyday items can transform your bedroom storage without spending a fortune on specialized organizers. Rather than letting unused items collect dust or end up in the trash, reimagining their purpose can solve storage challenges while promoting sustainability and smart resource management.
Repurposing common household items for storage not only saves money but also adds character to your space. These practical solutions can work better than store-bought alternatives, as they can be customized to your specific needs and space constraints.
Required Items:
- Empty glass jars
- Wine boxes or crates
- Old ladder
- Tension rods
- Empty tin cans
- Shoe boxes
- Belt hangers
- Over-door hooks
- Command strips
- Basic tools (screwdriver, hammer)
Transform glass jars into stylish holders for makeup brushes, hair accessories, or office supplies by cleaning them thoroughly and adding decorative elements if desired.
Mount wine crates on walls as floating shelves for books or display items, ensuring proper anchoring.
Position an old ladder against the wall as a vertical storage solution for blankets, scarves, or magazines.
Install tension rods in drawers to create vertical dividers for clutch purses or to separate clothing items.
Clean and paint tin cans for organizing desk supplies or creating a vertical garden for small plants.
Convert shoe boxes into drawer organizers by cutting them to size and arranging them to fit your drawer dimensions.
Use belt hangers to organize scarves, necklaces, or belts on the back of doors or inside closets.
Maximize vertical space by installing over-door hooks for robes, towels, or bags.
Command strips can secure lightweight storage solutions without damaging walls, making them perfect for renters.
For optimal results, assess each item’s sturdiness before repurposing it for storage.
Test weight limits before storing heavy items on repurposed solutions.
Regularly evaluate the effectiveness of your DIY storage solutions and adjust as needed.
Consider rotating seasonal items to prevent overcrowding and maintain organization throughout the year.
Implement the Marie Kondo Folding Method
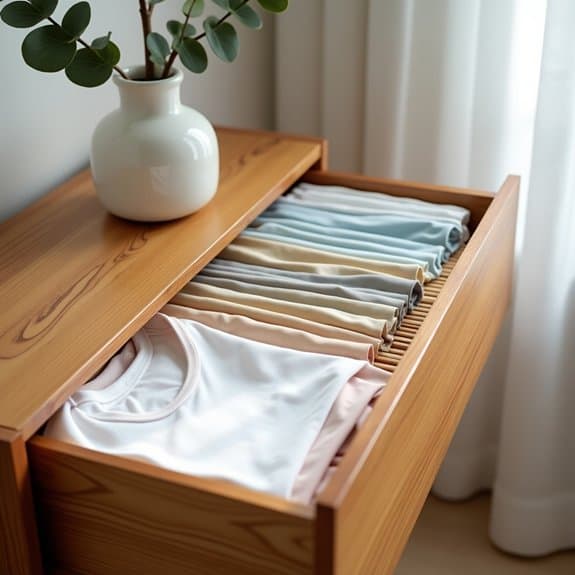
The Marie Kondo folding method has revolutionized the way people organize their clothing, transforming cluttered drawers into neat, accessible spaces. This vertical folding technique allows you to see every item at a glance, preventing clothes from being forgotten at the bottom of drawers and reducing the need to dig through piles to find specific items.
When implemented correctly, this method can reduce the space needed for clothing storage by up to 50%, while also keeping clothes wrinkle-free and in better condition. The vertical storage system makes it easier to maintain organization long-term, as items can be removed and replaced without disturbing the rest of the drawer’s contents.
Required Items:
- Flat surface for folding
- Clean clothes
- Drawer dividers or boxes
- Measuring tape
- Labels (optional)
- Storage bins (optional)
The Marie Kondo folding method follows a specific sequence. Start by laying the garment flat and smoothing out any wrinkles. For shirts, fold both sides toward the center, creating a rectangle. Then fold the sleeves in, maintaining the rectangular shape. Finally, fold the rectangle into thirds or quarters (depending on drawer height), ensuring the final fold allows the item to stand upright. For pants, fold them in half lengthwise, then fold from the bottom up into thirds or quarters.
Once mastered, apply this technique to different clothing categories: underwear should be folded into small triangles, socks should be rolled and stored vertically, and sweaters should be folded similarly to shirts but with extra care to maintain their shape.
Arrange the folded items in your drawers by category, with frequently used items at the front and seasonal items toward the back.
To maintain the system effectively, periodically review your folded items and refold any that have become disheveled. Consider using drawer dividers to keep categories separate and prevent items from falling over.
When adding new clothes to your drawers, take the time to fold them properly before storing, as this small investment of time will maintain the organization system’s integrity and make your daily routine more efficient.
Use Vacuum Storage Bags for Seasonal Items
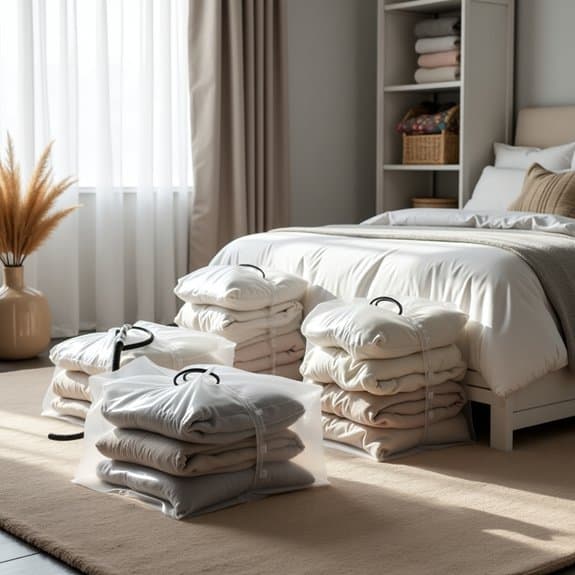
Organizing seasonal clothing and bedding can be a constant challenge, especially in homes with limited storage space. Vacuum storage bags offer a revolutionary solution by compressing bulky items into compact, stackable packages that protect contents from dust, moisture, and pests.
The efficient use of vacuum storage bags can reduce storage space by up to 75%, allowing you to maximize closet space and keep seasonal items in pristine condition until needed. This system creates an organized rotation of seasonal items while ensuring everything remains clean and easily accessible when the weather changes.
Required Items:
- Vacuum storage bags (various sizes)
- Vacuum cleaner with hose attachment
- Labels and marker
- Cleaning supplies
- Laundry detergent
- Storage containers or boxes
- Clean, dry items to be stored
Sort all seasonal items by category and ensure they’re completely clean and dry before storage. Place similar items together in appropriately sized vacuum bags, being careful not to overfill. Fold items neatly and layer them flat in the bag, keeping heavier items at the bottom. Seal the bag according to manufacturer instructions, then use your vacuum cleaner’s hose attachment to remove all air through the valve.
Once compressed, check the seal and edges for any air leaks. Label each bag clearly with contents and season. Store the compressed bags in clean, dry storage containers or stack them directly in closets or under beds. For optimal organization, keep an inventory list of stored items and their locations.
Consider adding silica gel packets to each bag for extra moisture protection, and store bags away from direct sunlight or heat sources. Check bags every few months to ensure the seal remains intact, and reinforce any bags showing signs of wear with tape.
When retrieving items for the new season, allow them to air out and wrinkles to release naturally before use.
Master the Art of Drawer Dividers
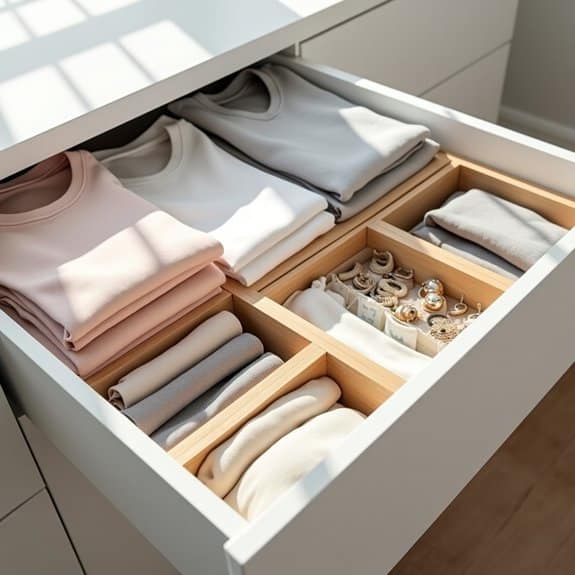
Well-organized drawers serve as the foundation of an efficient bedroom storage system. When drawers become cluttered and disorganized, finding specific items becomes frustrating and time-consuming, leading to unnecessary stress during daily routines.
Drawer dividers transform chaotic spaces into orderly compartments, making it easy to categorize and access everything from socks to accessories. This systematic approach not only maximizes storage space but also helps maintain organization long-term, ensuring items stay in their designated spots.
Required Items:
- Drawer dividers (adjustable or fixed)
- Measuring tape
- Drawer liner (non-slip)
- Labels or label maker
- Empty boxes or small containers
- Clean cloth
- Storage bins (various sizes)
Start by removing everything from the drawer and cleaning the interior thoroughly. Measure the drawer’s dimensions and plan your division strategy based on the items you need to store.
Install adjustable drawer dividers by sliding them into place, ensuring they fit snugly against the drawer walls. For fixed dividers, arrange them in a grid pattern that accommodates your storage needs.
Sort items by category and assign specific sections for each group. Common arrangements include dedicating larger compartments to folded clothing and smaller sections to accessories, undergarments, or specialty items. Place frequently used items in easily accessible areas near the front of the drawer.
Consider implementing a vertical folding method for clothing to maximize visibility and prevent items from becoming buried beneath others. This technique, combined with properly positioned dividers, creates an efficient system where everything remains visible and accessible.
Additional Tips: Reassess your drawer organization every few months and adjust divider placement as needed. Use clear containers within divided sections for smaller items, and implement a one-in-one-out rule to prevent overflow.
Choose drawer dividers with non-slip features or add rubber grip pads to prevent shifting, ensuring your organized system stays intact during daily use.

