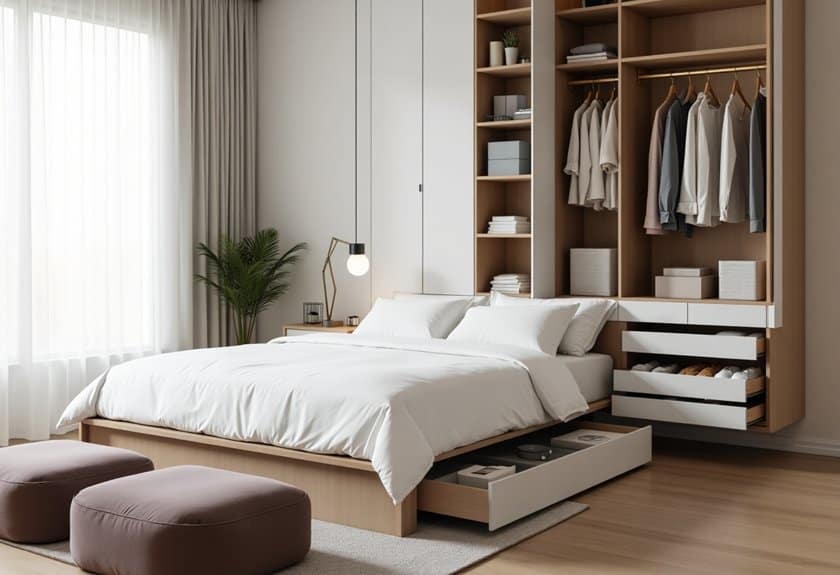
Did you know that the average person spends nearly 4,000 hours per year in their bedroom, yet 65% of us admit our sleeping space is cluttered? If you’re nodding your head right now, you’re not alone! I’ve been there – drowning in clothes, struggling to find matching socks, and wondering how my sanctuary turned into a storage unit. But here’s the good news: transforming your bedroom from chaos to calm isn’t just possible – it’s surprisingly simple with the right tricks up your sleeve.
Maximize Under-Bed Storage With Rolling Containers
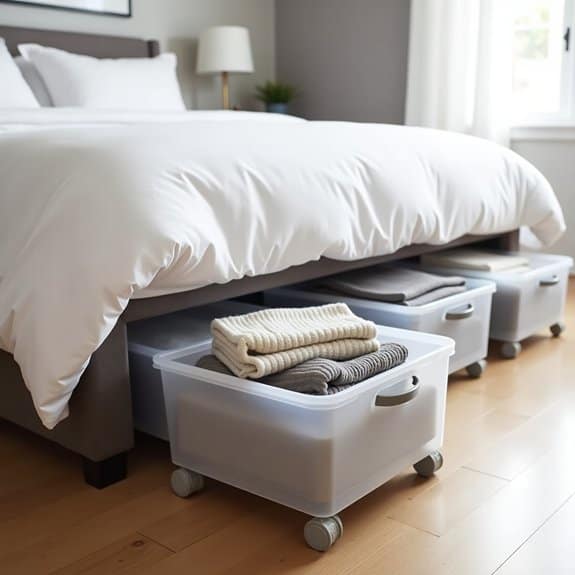
Making use of under-bed space is one of the most effective ways to expand your bedroom’s storage capacity without sacrificing precious floor space. This often-overlooked area can store seasonal clothing, extra bedding, shoes, and other items that aren’t needed daily, helping to keep your primary closet and dresser organized and clutter-free.
Rolling containers specifically designed for under-bed storage offer superior accessibility and protection compared to traditional storage boxes. The wheels allow you to easily pull out and push in heavy items without straining, while sealed lids protect contents from dust and pests. This solution transforms dead space into valuable, easily accessible storage real estate.
Required Items:
- Measuring tape
- Under-bed storage containers with wheels
- Labels and marker
- Vacuum storage bags (optional)
- Drawer dividers or small organizers (optional)
- Dust ruffle or bed skirt (optional)
- Cleaning supplies
First, measure the available space under your bed, noting both the height clearance and the width between bed legs or support beams. Select appropriately sized rolling containers that maximize the space while allowing easy movement.
Before placing containers, thoroughly clean the under-bed area to remove dust and debris.
Sort items into categories based on season, frequency of use, or type. Pack items into the containers efficiently, using vacuum storage bags for soft items like blankets or winter clothes to maximize space. Position frequently accessed items in containers near the foot or sides of the bed for easier reach.
Label each container clearly on both the lid and sides for quick identification.
Additional Tips: Consider raising your bed with risers to accommodate larger containers if needed. Install drawer stops or catches to prevent containers from rolling out unexpectedly. Use clear containers to easily identify contents, or maintain an inventory list taped inside the lid of each container. Place scented sachets or cedar blocks in containers storing clothing to maintain freshness and deter pests.
Install a Bedside Hanging Organizer
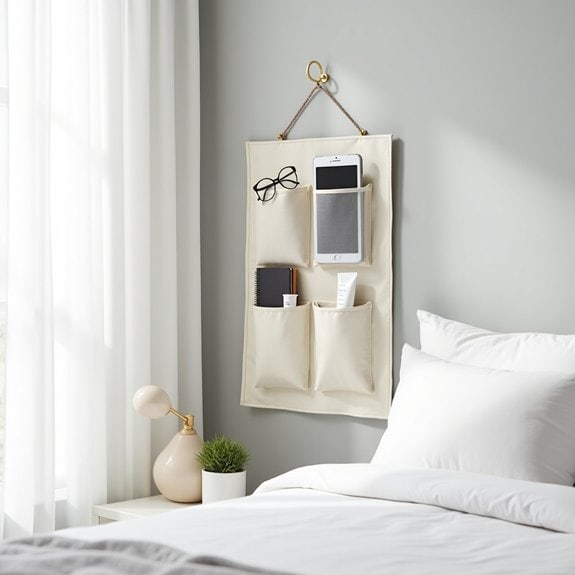
A well-organized bedside area is essential for maintaining a clutter-free and functional bedroom space. With limited surface area on most nightstands, a hanging organizer can effectively multiply your storage capacity while keeping frequently used items within arm’s reach.
Installing a bedside hanging organizer transforms wasted vertical space into a practical storage solution. This organization method prevents nightstand clutter, reduces morning stress by having everything easily accessible, and creates a more streamlined bedroom aesthetic without sacrificing convenience.
Required Items:
- Bedside hanging organizer (fabric or mesh)
- Measuring tape
- Pencil
- Command hooks or mounting hardware
- Level
- Scissors (if customization needed)
- Drill and screws (if mounting to wall)
Select an appropriate location beside your bed, ideally within easy reach while lying down. Measure the space to ensure proper fit, considering both width and height of the organizer. If using Command hooks, clean the mounting surface thoroughly and mark placement points.
For permanent installation, use appropriate wall anchors and screws. Once mounted, organize items by frequency of use, placing most-needed items at eye level. Sort items into categories: electronics, reading materials, medications, and personal items.
For maximum effectiveness, establish zones within the organizer’s pockets. Consider clear pockets for visibility or labeled sections for better organization. Remove items that haven’t been used within a month to prevent clutter accumulation.
Clean the organizer regularly to maintain its appearance and functionality, and periodically reassess the items stored to ensure they still serve a purpose in your bedside area.
Create a Seasonal Clothing Rotation System

Managing seasonal clothing can significantly reduce closet clutter and make your daily dressing routine more efficient. By rotating your wardrobe according to the seasons, you’ll free up valuable storage space and ensure that your current-season clothes are easily accessible when you need them.
A well-organized seasonal rotation system prevents damage to off-season clothing while keeping your closet functional and manageable. This systematic approach eliminates the frustration of sifting through heavy winter coats during summer or trying to locate your favorite sundress buried behind fall sweaters.
Required Items:
- Storage containers or vacuum-seal bags
- Labels and marker
- Garment cleaning supplies
- Storage boxes or bins
- Cedar blocks or mothballs
- Clothing rack
- Clean sheets or garment bags
- Inventory list template
Start by removing all clothing items from your closet and sorting them into seasonal categories. Clean each garment thoroughly before storage, checking for any repairs needed. For off-season storage, use airtight containers or vacuum-seal bags to protect against moisture, dust, and insects. Label each container clearly with the season and contents.
Create zones in your closet or storage area for the current season’s clothing, arranging items by category (tops, bottoms, dresses). Store off-season items in a dry, temperature-controlled space like under-bed storage, attic, or spare closet. Maintain an inventory list of stored items to track what you have and prevent unnecessary purchases.
To maximize your seasonal rotation system, schedule your switches during transitional weather periods, typically spring and fall. Consider creating a “transition zone” for items that work across multiple seasons, such as light jackets or layering pieces.
Regularly assess your clothing during rotations, donating items you haven’t worn in the past year and noting any gaps in your wardrobe that need filling.
Use Vertical Space With Over-Door Hooks
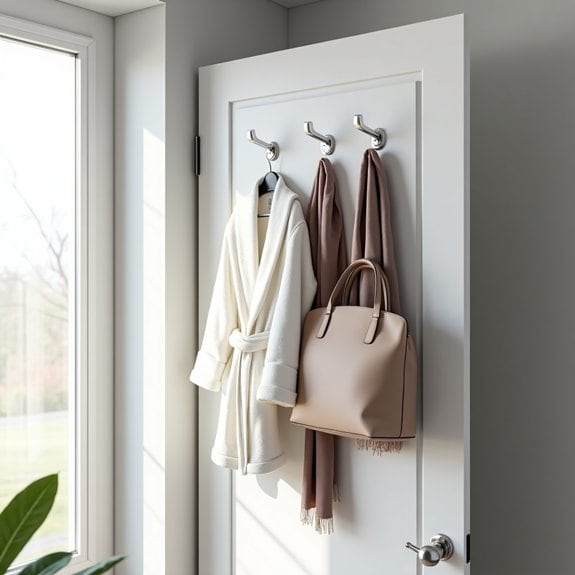
Making the most of vertical space in a bedroom is crucial for maximizing storage capacity, especially in smaller rooms where floor space is limited. Over-door hooks provide an often-overlooked opportunity to create additional storage without taking up valuable floor or wall space.
Over-door hooks transform the dead space behind doors into functional storage areas for everything from robes and towels to bags and accessories. This organization method not only keeps items easily accessible but also prevents clutter from accumulating on floors or furniture, creating a more streamlined and organized bedroom environment.
Required Items:
- Over-door hooks (single or multiple hook systems)
- Measuring tape
- Door stopper (optional)
- Command strips (optional)
- Level (optional)
- Rubber door protectors
Installation and organization begins with measuring your door’s thickness to ensure proper fit of the over-door hooks. Position the hooks at the top of the door, ensuring they’re centered and level. If using multiple hook systems, space them evenly across the door’s width.
For doors that open against walls, install door stoppers to prevent wall damage. Consider using rubber protectors where the hooks make contact with the door to prevent scratches.
Once installed, organize items by category and frequency of use. Hang frequently used items at eye level, with less-used items positioned higher or lower. Distribute weight evenly across multiple hooks to prevent door strain.
For aesthetic purposes, arrange items by length, with longer pieces toward the edges and shorter items in the middle.
To maintain organization and prevent hook damage, avoid overloading individual hooks, regularly check for secure mounting, and periodically rotate items to prevent permanent door indentations.
Consider using clear command strips for additional stability on heavily used hooks, and implement a one-in-one-out rule to prevent overcrowding.
Implement the KonMari Folding Method
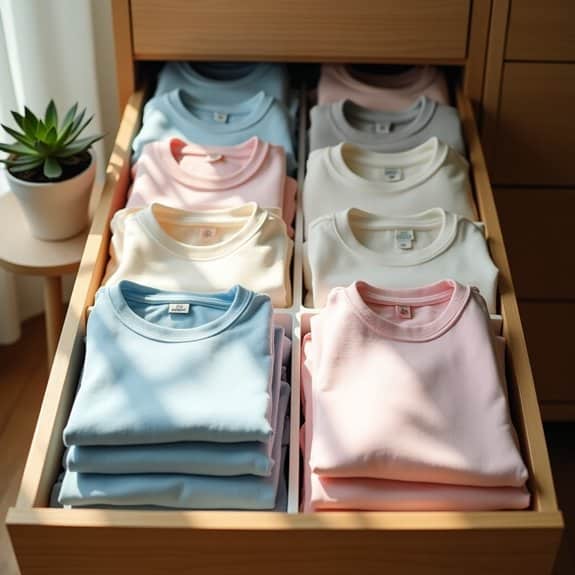
The KonMari folding method revolutionizes the way we store clothes by transforming them into compact, self-standing units that can be easily seen and accessed. This technique, developed by Marie Kondo, not only maximizes drawer space but also helps preserve the quality of garments by reducing wrinkles and making each item immediately visible.
When clothes are folded properly and stored vertically, drawers become organized spaces where you can instantly spot any item you need. This method eliminates the frustrating habit of digging through stacks of clothes, which often leads to mess and disorganization. The vertical storage approach can triple your storage space while keeping clothes in better condition.
Required Items:
- Clean, flat surface
- Empty drawers
- Drawer dividers or boxes (optional)
- Clothes sorted by category
- Lint roller
- Measuring tape
- Storage boxes for seasonal items
The KonMari folding process starts with laying the garment flat and smoothing out any wrinkles. For shirts, fold both sides toward the center, creating a rectangle. Then, fold the sleeves in, keeping the shape rectangular. Finally, fold the rectangle into thirds or quarters, depending on drawer height, ensuring it can stand upright when placed vertically.
For pants, fold them in half lengthwise, then fold from the bottom up in thirds, creating a sturdy rectangle that stands independently.
Once mastered, this technique should be applied systematically to different clothing categories: start with tops, then bottoms, undergarments, and finally socks. Place the folded items vertically in drawers, using dividers if needed to maintain organization. Always fold items with the same category together, and arrange them from dark to light colors for visual harmony.
To maintain the system‘s effectiveness, fold clothes immediately after laundering and resist the urge to stack items horizontally. Regularly assess drawer contents and remove items that no longer fit or serve a purpose. Consider using drawer dividers for smaller items, and adjust fold sizes based on drawer dimensions to ensure all items stand properly without being compressed.
Add Drawer Dividers for Smaller Items
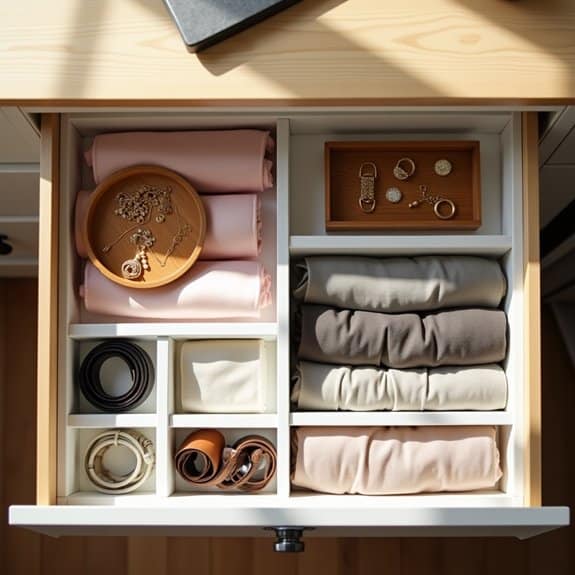
Organizing smaller items within drawers is crucial for maintaining order and preventing the frustrating “junk drawer” syndrome that plagues many bedrooms. Without proper compartmentalization, small items like accessories, undergarments, and personal effects quickly become tangled and disorganized, making it difficult to find what you need when you need it.
Drawer dividers transform chaotic spaces into efficient storage systems, creating designated spots for each category of items. This organization method not only saves time during daily routines but also maximizes drawer space by utilizing vertical space and preventing items from sliding around when drawers are opened and closed.
Required Items:
- Drawer dividers (adjustable or fixed)
- Measuring tape
- Drawer liner (non-slip)
- Small containers or boxes
- Labels
- Cleaning supplies
- Storage bags for excess items
Start by removing everything from the drawer and cleaning it thoroughly. Measure the drawer’s dimensions to determine the appropriate size and number of dividers needed. Install non-slip liner at the bottom of the drawer to prevent dividers from shifting.
Place dividers to create compartments based on item categories and sizes – larger sections for folded items and smaller ones for accessories. Sort items by category (jewelry, socks, undergarments, etc.) and assign each category to a specific compartment. Position frequently used items toward the front of the drawer for easy access.
For very small items, use small containers within the divided sections to prevent them from getting lost or mixed up. To maintain the organization system long-term, periodically reassess the arrangement of dividers based on changing needs and seasons.
Consider using clear dividers to easily spot items, and label compartments if necessary. Remove items that haven’t been used in six months to prevent overcrowding, and adjust divider placement as needed to accommodate new items or changing storage requirements.
Mount Floating Shelves for Display and Storage
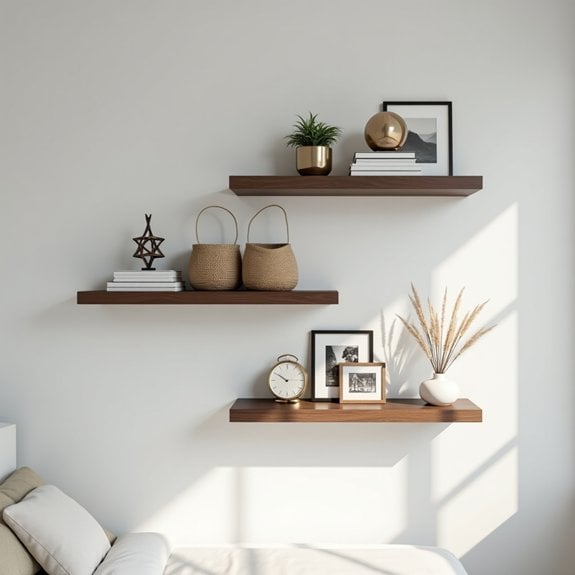
Floating shelves represent one of the most versatile and space-efficient storage solutions for any bedroom. These sleek, contemporary fixtures create the illusion of more space while providing practical storage areas for books, decorative items, and everyday essentials. When properly installed, they transform empty wall space into functional storage without the bulkiness of traditional furniture.
The key to successful floating shelf organization lies in strategic placement and thoughtful arrangement of items. Well-organized floating shelves not only maximize vertical storage space but also serve as an opportunity to showcase personal items and create visual interest in your bedroom, effectively combining both form and function.
Required Items:
- Floating shelves
- Wall anchors
- Level
- Drill
- Pencil
- Measuring tape
- Stud finder
- Screwdriver
- Wall brackets
- Storage bins or baskets
- Decorative objects
- Cleaning supplies
Start by determining the optimal location for your floating shelves, using a stud finder to locate wall supports. Mark the desired positions with a pencil, ensuring proper spacing between shelves and considering the height of items you plan to display.
Install wall brackets according to manufacturer specifications, using appropriate anchors for your wall type. Once mounted, clean the shelves thoroughly before arranging items.
For effective organization, place heavier items closer to the brackets for stability. Create designated zones on your shelves – one for practical storage using decorative bins or baskets, another for frequently accessed items, and a third for purely decorative displays.
Maintain visual balance by varying heights and depths of objects, and consider using bookends or small organizers to keep items neat and upright.
Additional tip: Regularly reassess and rotate items on your floating shelves to prevent dust accumulation and maintain fresh displays. Keep frequently used items at eye level and consider adding small LED strip lighting under shelves to create ambiance and improve visibility.
Remember to periodically check the shelf brackets for stability and tighten any loose screws to ensure long-term safety and functionality.
Organize Accessories With Clear Containers
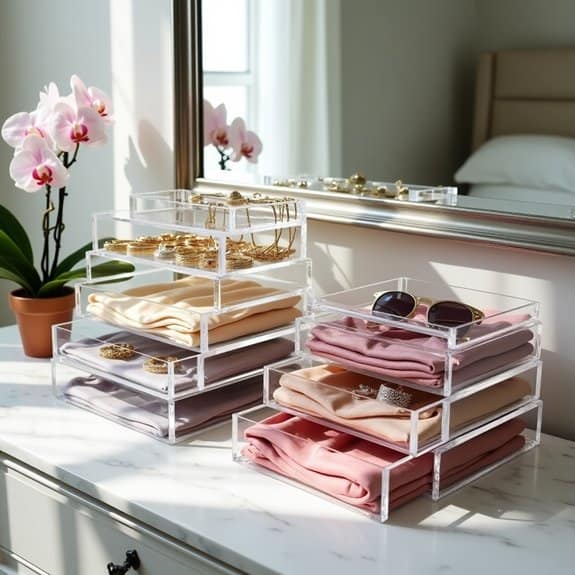
Keeping accessories organized is essential for maintaining a clutter-free bedroom and ensuring you can easily find what you need when getting dressed. When accessories are scattered or stored haphazardly, they can become tangled, damaged, or forgotten, leading to unnecessary purchases and daily frustration.
Clear containers provide an ideal solution for accessory organization, as they allow you to see all your items at a glance while protecting them from dust and damage. This visibility helps maintain organization long-term and makes it easier to coordinate accessories with your outfits quickly.
Required Items:
- Assorted clear storage containers
- Drawer dividers
- Clear jewelry boxes
- Stackable bins
- Labels
- Measuring tape
- Cleaning cloth
- Small hooks
- Shelf liner
Start by sorting accessories into categories such as jewelry, scarves, belts, and hair accessories. Select appropriately sized clear containers for each category, ensuring they fit your storage space. For jewelry, use containers with compartments to prevent tangling and scratching.
Position frequently used items at eye level or in easily accessible drawers. Stack larger accessories like scarves and handbags in clear bins with proper support to maintain their shape.
For efficient drawer organization, install clear dividers to create designated spaces for different accessories. Use smaller clear containers within drawers to separate delicate items. Label each container clearly, even if transparent, to maintain organization when rushing.
Consider using clear hanging organizers with pockets for items that benefit from vertical storage, such as belts or long necklaces.
Additional Tips: Regularly assess and declutter your accessories, removing items you no longer use. Clean containers monthly to maintain visibility and prevent dust buildup.
Consider using silica gel packets in jewelry storage to prevent tarnishing, and line containers with soft material to protect delicate items. Rotate seasonal accessories to front positions during relevant months for easier access.
Create a Designated Drop Zone
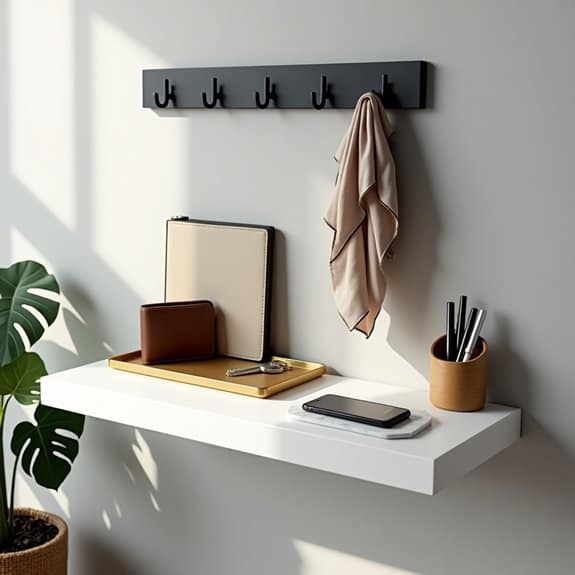
A designated drop zone in your bedroom serves as a crucial landing spot for daily essentials, preventing clutter from spreading across surfaces and creating visual chaos. This dedicated space acts as a control center for items you use frequently, ensuring you always know where to find your keys, wallet, phone, or jewelry when heading out the door.
Creating an organized drop zone transforms your bedroom from a scattered mess into a structured environment where everything has its place. This system not only saves precious morning minutes typically spent searching for essentials but also reduces stress and maintains the overall tidiness of your bedroom space.
Required Items:
- Small table, shelf, or floating desk
- Decorative tray or dish
- Small boxes or containers
- Hooks or pegs
- Cable organizer
- Small drawer organizer
- Labels
- Wall-mounted key holder (optional)
- Small catch-all basket
- Charging station
Select a convenient location near your bedroom entrance or dresser for your drop zone. Install a small shelf or place a narrow table against the wall, ensuring it doesn’t obstruct movement.
Arrange containers and organizers strategically: place a decorative tray for jewelry and watches, position a small dish for coins and keys, and set up a charging station for electronic devices. Install hooks or pegs above or beside the surface for hanging lightweight bags or tomorrow’s outfit.
Create specific zones within your drop zone by using small containers or drawer organizers to separate items by category. Designate spaces for everyday essentials versus items needed only occasionally.
Ensure proper cable management for any charging devices, keeping wires neat and accessible without creating visual clutter.
For optimal organization, establish a daily habit of emptying pockets and placing items in their designated spots immediately upon entering the bedroom.
Consider implementing a seasonal clean-out schedule to prevent accumulation of unnecessary items, and adjust the layout of your drop zone based on changing needs and usage patterns.
Utilize Corner Spaces With Ladder Shelving
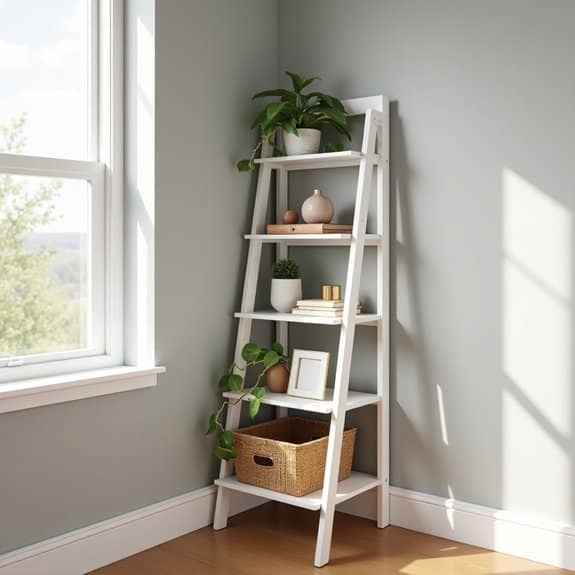
Corner spaces in bedrooms often become dead zones or catch-alls for clutter, wasting valuable square footage in your living space.
Ladder shelving provides an elegant solution to maximize these overlooked areas while creating a visually appealing display that draws the eye upward, making your room appear larger and more organized.
Installing ladder shelving in corners transforms awkward angles into functional storage space, perfect for books, decorative items, plants, and everyday essentials.
This vertical organization method helps maintain a clean floor space while providing multiple levels of storage that can be easily accessed and rearranged as needed.
Required Items:
- Ladder shelf unit (corner-specific or convertible)
- Level
- Measuring tape
- Pencil
- Wall anchors
- Screwdriver
- Cleaning supplies
- Storage baskets or containers
- Safety equipment (gloves, protective eyewear)
Start by thoroughly cleaning the corner space and measuring both wall sections to ensure proper fit.
Position the ladder shelf unit at a 45-degree angle if using a standard ladder shelf, or align it precisely if using a corner-specific unit.
Secure the shelf to the wall using appropriate anchors, ensuring each level is perfectly horizontal with your level tool.
Work from bottom to top, testing the stability of each shelf before proceeding to the next.
Once installed, organize items by weight, placing heavier objects on lower shelves and lighter items toward the top.
Create visual balance by alternating between practical storage and decorative elements.
Use coordinating storage containers or baskets to conceal smaller items while maintaining a cohesive look.
For optimal organization, rotate items seasonally and regularly assess the functionality of your arrangement.
Consider using the bottom shelves for frequently accessed items and upper shelves for seasonal or decorative pieces.
Label storage containers clearly and maintain a consistent color scheme or style to keep the corner looking intentional and polished rather than cluttered.
Set Up a Clothing Drawer System
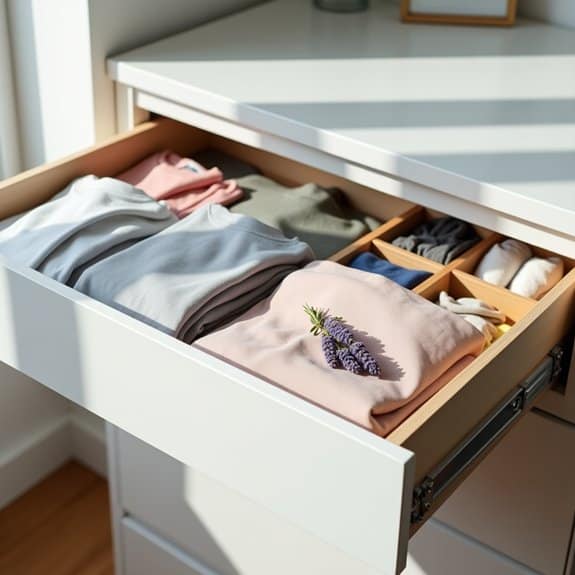
A well-organized clothing drawer system serves as the foundation for an efficient morning routine and a more streamlined lifestyle. When clothes are properly arranged and easily visible, getting dressed becomes less stressful, and maintaining tidiness becomes second nature rather than a constant struggle.
The key to a successful drawer organization system lies in creating designated spaces for different clothing categories while maximizing the available space. This approach not only protects your clothes from unnecessary wrinkles but also helps you keep track of your wardrobe and makes it easier to find specific items when needed.
Required Items:
- Drawer dividers or organizers
- Storage boxes or containers
- Drawer liner paper
- Labels or label maker
- Measuring tape
- Folding board (optional)
- Clear storage bins
- Drawer sachets or fresheners
Start by removing all items from your drawers and sorting them into categories such as undergarments, socks, t-shirts, and accessories. Measure your drawers and select appropriate organizers or dividers that fit the dimensions.
Install drawer liners to protect clothing and keep the space fresh. Implement the file folding method for clothes, storing them vertically rather than stacked, which allows you to see all items at once. Arrange similar items together, using dividers to maintain separate sections. Position frequently worn items in easily accessible areas.
Additional tips for maintaining your drawer system: Rotate seasonal clothing to prevent overcrowding, conduct monthly quick-sorts to remove damaged or unwanted items, and consider using vacuum storage bags for off-season pieces.
Keep drawer sachets fresh by replacing them every three months, and reassess your organization system quarterly to ensure it continues to meet your needs effectively.
Install Multi-Tiered Hangers in the Closet
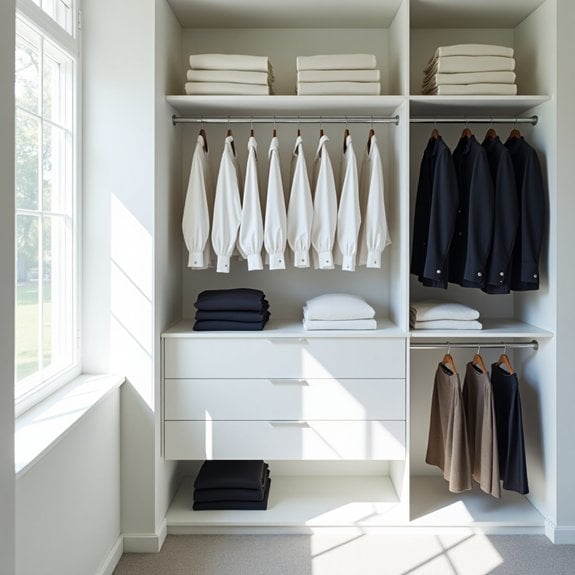
Maximizing closet space has become essential in modern homes where storage is often limited. Multi-tiered hangers offer an ingenious solution by utilizing vertical space efficiently, potentially multiplying your hanging capacity by 2-5 times without requiring additional closet width.
Installing multi-tiered hangers transforms a cluttered, cramped closet into an organized, accessible space where clothes remain visible and wrinkle-free. This system works particularly well for similar items like pants, skirts, or shirts, allowing you to group clothing by category while maintaining easy access to each piece.
Required Items:
- Multi-tiered hangers (cascade or vertical style)
- Measuring tape
- Level
- Closet rod weight capacity specifications
- Clothing sorting bins
- Labels
- Step stool or ladder
The installation process begins with measuring your closet rod height and ensuring it can support the additional weight of multi-tiered hangers. Remove all clothing and sort items by category (pants, shirts, skirts).
Starting from one end of the closet rod, place multi-tiered hangers approximately 4-6 inches apart to prevent crowding. Distribute weight evenly by hanging heavier items on the top tier and lighter pieces on lower tiers. When loading clothing, ensure each piece hangs freely without touching other garments.
For optimal long-term use, regularly inspect the hanging mechanism on multi-tiered hangers for signs of wear. Avoid overloading individual hangers beyond their stated capacity, typically 5-8 items depending on the model.
Consider rotating seasonal clothing to prevent rod strain and maintain organization. Installing these hangers by clothing category (all pants together, all shirts together) will create a boutique-style organization system that simplifies daily dressing routines.

