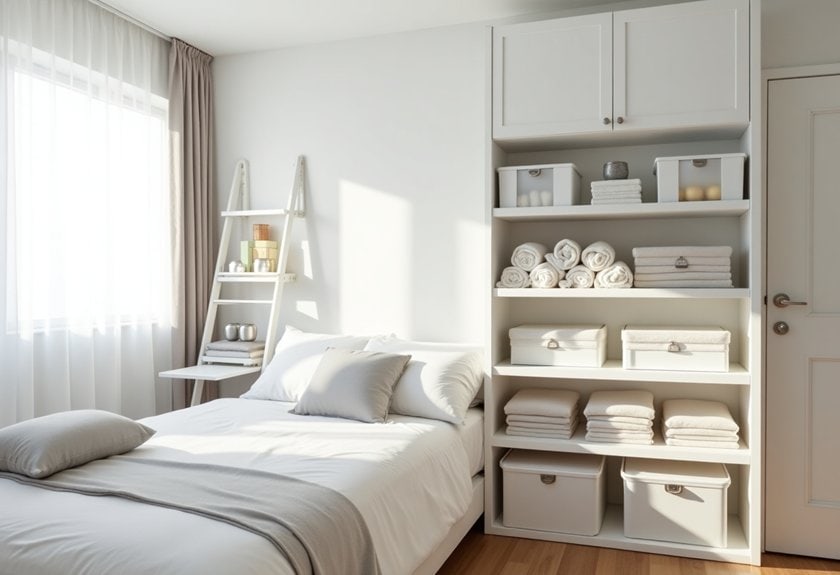
Just like Marie Kondo sparked joy with her organizing revolution, you’re about to discover how to transform your cramped bedroom into an organizational masterpiece. When you’re working with a small space, every square inch matters – and I’ve learned this firsthand in my tiny NYC apartment. I’ve gathered 12 game-changing ideas that’ll help you maximize your space without sacrificing style. Ready to turn your cluttered quarters into a serene sanctuary? Let’s start with my favorite space-saving secret.
Maximize Vertical Space With Over-Door Organizers
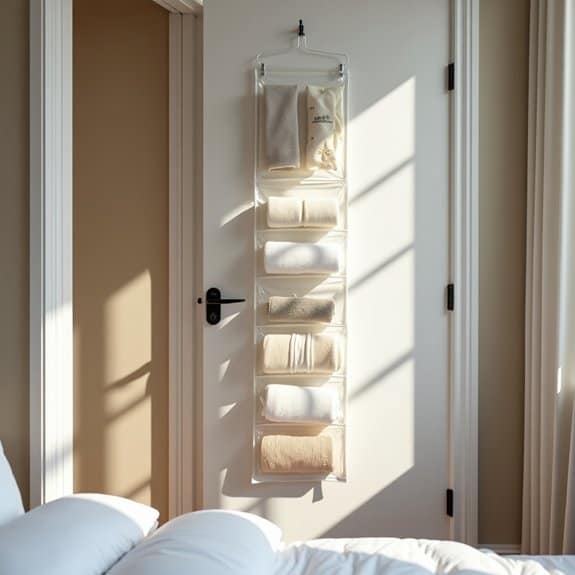
Making the most of vertical space is crucial in any bedroom, especially when floor space is limited. Over-door organizers represent one of the most underutilized storage solutions, offering valuable square footage without requiring any permanent installation or modification to your living space.
Over-door organizers transform dead space into functional storage areas, perfect for everything from shoes and accessories to toiletries and daily essentials. This organization method not only clears clutter from other areas of your bedroom but also keeps frequently used items easily accessible while maintaining a tidy appearance.
Required Items:
- Over-door organizer (with multiple pockets)
- Door hooks or hanging brackets
- Measuring tape
- Level
- Labels (optional)
- Storage bins or containers that fit the pockets
- Command strips (optional for securing)
Select an over-door organizer that fits your door’s dimensions, ensuring it won’t interfere with the door’s closure. Install the organizer by placing the hooks over the top of the door, adjusting them to sit evenly using a level. If the organizer moves too much when the door opens and closes, secure the bottom corners with command strips.
Sort items by category and assign specific pockets for different types of belongings – keeping frequently used items at eye level and lesser-used items in higher or lower pockets.
For maximum effectiveness, create zones within your over-door organizer. The top section can store seasonal or rarely used items, the middle section for daily essentials, and the bottom section for frequently accessed items. Consider using clear storage containers that fit within the pockets to keep smaller items contained and visible.
Label each pocket or section to maintain organization long-term and make it easier for everyone in the household to maintain the system.
Additional Tip: Conduct a monthly review of items stored in the over-door organizer, removing anything that hasn’t been used in the past 30 days. This prevents the organizer from becoming a catch-all for unnecessary items and ensures the space remains efficiently used. Consider rotating seasonal items to keep the organizer relevant to your current needs.
Invest in Under-Bed Storage Solutions
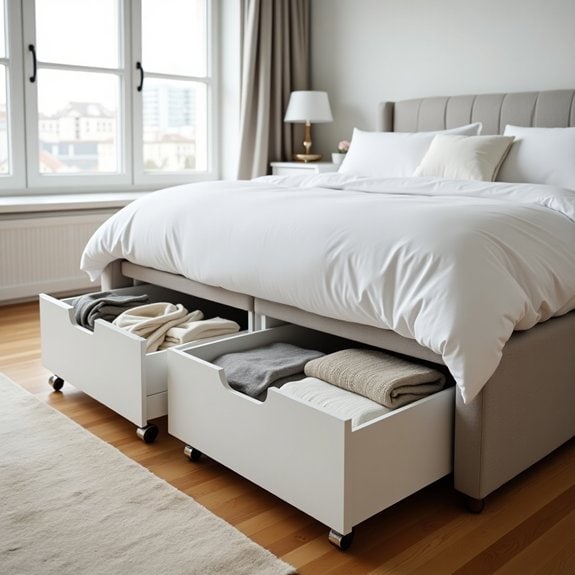
Making use of under-bed space is one of the most effective ways to maximize storage in any bedroom. This often-overlooked area can provide substantial storage capacity, equivalent to several dresser drawers, while keeping items easily accessible yet out of sight.
Under-bed storage is particularly valuable for seasonal items, extra bedding, clothing, or shoes that aren’t needed daily but should remain within reach. Proper organization of this space not only helps declutter your visible living area but also protects stored items from dust and preserves their condition.
Required Items:
- Under-bed storage containers or drawers
- Bed risers (if needed)
- Storage bags or vacuum-seal bags
- Labels and marker
- Measuring tape
- Anti-dust covers
- Drawer dividers or organizers
- Cleaning supplies
Start by measuring the available space under your bed, including height, width, and depth. If needed, install bed risers to create additional clearance. Select appropriate storage containers that maximize the available space while allowing easy sliding in and out.
Sort items into categories before storing, using vacuum-seal bags for soft items like blankets or off-season clothing to reduce bulk. Place frequently accessed items toward the front and seasonal items toward the back.
Position containers systematically, creating clear paths for sliding them out. Label each container clearly on both the end and top for easy identification. Consider using clear containers for better visibility or maintaining a detailed inventory list.
For items requiring extra protection, use anti-dust covers or sealed containers with secure lids. To maintain organization long-term, establish a twice-yearly rotation schedule for seasonal items and regularly assess stored contents.
Use drawer dividers within larger containers to prevent items from shifting, and consider installing wheels on storage containers for easier access. Keep a small gap between containers for air circulation and to prevent moisture buildup.
Create a Capsule Wardrobe System
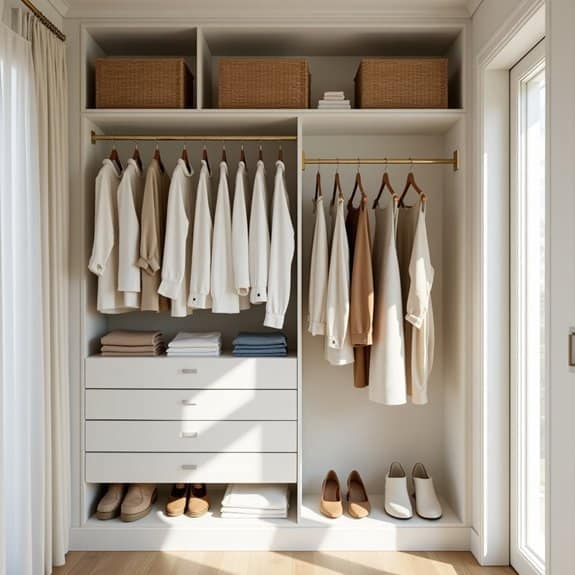
A capsule wardrobe system revolutionizes how you approach getting dressed each day by streamlining your clothing choices to a carefully curated collection of versatile pieces. This minimalist approach to organizing your wardrobe eliminates decision fatigue, saves time during morning routines, and maximizes your closet space by keeping only the items you truly wear and love.
The key to a successful capsule wardrobe lies in selecting high-quality, timeless pieces that coordinate well with each other, creating multiple outfit combinations from fewer items. This system typically consists of 30-40 pieces per season, including clothing, shoes, and accessories, making it easier to maintain an organized and clutter-free closet while ensuring you always have something appropriate to wear.
Required Items:
- Large clear space or bed for sorting
- Storage containers or boxes
- Clothing rails or hangers
- Drawer organizers
- Labels
- Full-length mirror
- Seasonal storage containers
- Donation bags
- Notepad and pen
Start by removing everything from your closet and sorting items into three categories: keep, donate, and seasonal storage. For the “keep” pile, select versatile pieces that fit well, match your lifestyle, and can be mixed and matched easily. Choose a color palette with 2-3 base colors and 1-2 accent colors to ensure everything coordinates. Focus on quality over quantity, keeping classic pieces that can be styled multiple ways.
Next, organize your capsule wardrobe by category: tops, bottoms, dresses, outerwear, and accessories. Arrange items by color within each category for visual harmony and easy outfit planning. Store off-season items in sealed containers, and maintain a “one in, one out” rule when adding new pieces to your capsule collection.
To maintain your capsule wardrobe system, regularly assess your clothing needs and lifestyle changes. Take photos of successful outfit combinations for future reference, and keep a list of any gaps in your wardrobe that need filling. Consider factors like your daily activities, work environment, and personal style when making adjustments to your capsule collection, and resist the urge to add items that don’t align with your established wardrobe system.
Install Floating Shelves for Wall Storage
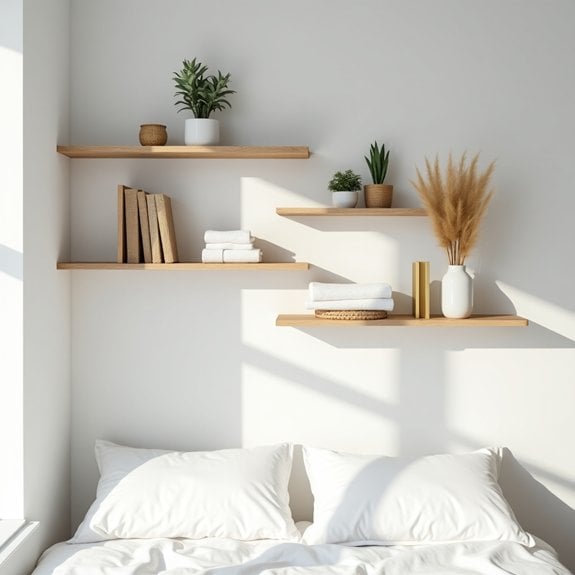
Adding floating shelves to your bedroom walls creates valuable storage space while maintaining a clean, modern aesthetic. These versatile installations can transform unused vertical space into functional storage areas for books, decorative items, and everyday essentials, helping to declutter your bedroom surfaces and maximize floor space.
Strategic placement of floating shelves not only provides practical storage solutions but also creates an opportunity to display personal items artistically. This dual-purpose approach to storage makes floating shelves an ideal choice for bedrooms of any size, particularly those where floor space is limited.
Required Items:
- Floating shelves (appropriate weight capacity)
- Stud finder
- Level
- Pencil
- Drill and drill bits
- Screwdriver
- Wall anchors
- Measuring tape
- Wall brackets
- Safety goggles
- Dust mask
Start by determining the ideal location for your floating shelves, using a stud finder to locate wall studs for secure mounting. Measure and mark your intended shelf positions, ensuring they’re level and properly spaced. When mounting multiple shelves, maintain consistent spacing between them for visual appeal.
Install wall brackets according to the manufacturer’s instructions, typically by drilling pilot holes, inserting wall anchors if necessary, and securing brackets with screws.
For optimal organization, arrange items on your floating shelves by both function and aesthetics. Place frequently used items at eye level or within easy reach. Create visual balance by alternating between larger and smaller items, and consider using bookends or decorative objects as functional dividers. Group similar items together and maintain some empty space to prevent a cluttered appearance.
Additional Organization Tip: Maximize the efficiency of your floating shelves by using small containers or decorative boxes to corral smaller items. This not only keeps things organized but also creates a cohesive look. Consider adjusting shelf arrangements seasonally to accommodate changing storage needs and to refresh your room‘s appearance periodically.
Choose Multi-Functional Furniture Pieces

Multi-functional furniture has become essential in modern living spaces, particularly in bedrooms where square footage is often limited. These versatile pieces serve multiple purposes while maintaining style and functionality, effectively reducing clutter and maximizing available space.
By carefully selecting furniture that can perform double duty, you create a more efficient and organized bedroom environment. Multi-functional pieces not only save space but also reduce the total number of furniture items needed, leading to a cleaner, more streamlined aesthetic while maintaining all necessary bedroom functions.
Required Items:
- Measuring tape
- Floor plan or room dimensions
- List of storage needs
- Budget worksheet
- Furniture catalog or online resources
- Space planning app (optional)
- Camera or smartphone
- Notebook for planning
When selecting multi-functional furniture, start by measuring your bedroom space and identifying prime locations for furniture placement. Focus on pieces that combine storage with other functions, such as ottoman beds with under-bed storage, nightstands with charging stations and drawers, or wardrobes with built-in desks.
Consider vertical space utilization by choosing tall storage units that combine hanging space with shelving. Prioritize furniture that matches your specific needs – for example, a window seat with hidden storage or a bed frame with integrated bookshelf headboard.
For optimal organization, select pieces that complement each other and create a cohesive storage system. A dresser that doubles as a TV stand should align with the height of your bed for visual balance. Murphy beds with integrated desks should be positioned near power outlets for functionality.
Ensure each piece serves at least two purposes while maintaining easy access to all storage areas.
Additional Tip: Before purchasing any multi-functional furniture, create a detailed list of your storage requirements and daily activities in the bedroom. This helps ensure your selected pieces truly serve your needs rather than just looking appealing.
Consider future needs as well, choosing adaptable pieces that can evolve with your lifestyle changes.
Utilize Corner Spaces With Smart Storage
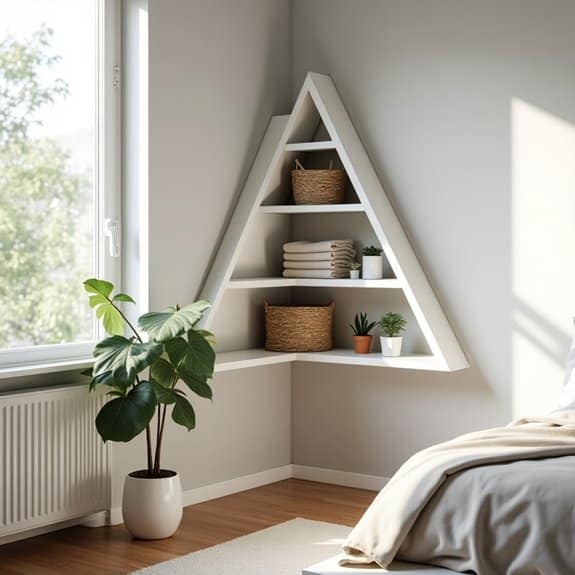
Corner spaces in bedrooms often become neglected dead zones or catch-alls for clutter, wasting valuable square footage in your living space. These awkward angles actually present unique opportunities for maximizing storage potential, especially in smaller bedrooms where every inch counts.
Smart corner organization can transform these traditionally underutilized areas into functional storage solutions that maintain clean sight lines while significantly expanding your bedroom’s storage capacity. When properly executed, corner storage can blend seamlessly with your room’s aesthetic while providing designated spaces for everything from clothing to books to decorative items.
Required Items:
- Corner shelving unit or floating shelves
- Corner desk or cabinet (if desired)
- Storage bins or baskets
- Measuring tape
- Level
- Wall anchors
- Screwdriver
- Labels
- Corner garment rack (optional)
Start by thoroughly measuring your corner space, including height and width on both walls, noting any baseboards or molding that might affect installation. Clear the entire corner area and clean thoroughly.
Install your chosen corner storage solution, whether it’s floating shelves, a corner unit, or built-in storage, ensuring everything is properly anchored and level. If using a corner desk or cabinet, position it first as your base piece.
For vertical storage, work from bottom to top, placing heavier items at lower levels. Install corner shelving in a way that creates a visual pyramid effect, with larger items at the bottom transitioning to smaller items toward the top.
Utilize storage bins or baskets to group similar items together, maintaining a cohesive look while maximizing space efficiency. Consider implementing a rotation system for seasonal items, keeping currently used items at easy-to-reach heights while storing off-season items in higher or lower spaces.
Label all storage containers clearly and establish a consistent organization system that works with your daily routine. For maximum efficiency, reassess your corner storage setup every few months, adjusting the configuration based on changing needs and usage patterns.
Master the Art of Drawer Organization
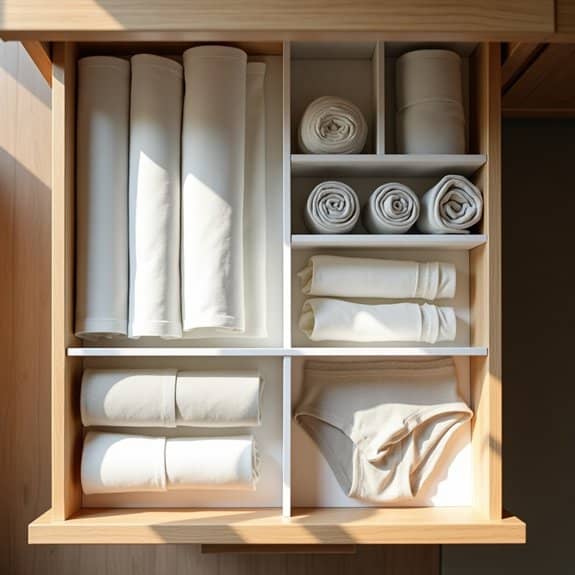
A well-organized drawer system serves as the foundation for an efficiently running bedroom. When drawers are properly arranged, you save precious minutes each day avoiding the frustration of searching for items, and maintain a clutter-free environment that promotes peace of mind and better sleep quality.
Drawer organization goes beyond simply sorting items into designated spaces. It’s about creating a sustainable system that works with your daily routines and habits, making it easier to maintain order long-term while maximizing the available storage space in your bedroom.
Required Items:
- Drawer dividers or organizers
- Storage boxes or bins
- Drawer liner paper
- Measuring tape
- Labels
- Sorting bins (temporary)
- Cleaning supplies
- Garbage bag
- Clear plastic containers (various sizes)
Empty all drawers completely and clean them thoroughly with appropriate cleaning supplies. Sort items into categories such as undergarments, socks, accessories, and seasonal clothing. Measure drawer dimensions and install drawer liners to protect the surfaces.
Use drawer dividers or organizers that fit your specific measurements, creating designated zones for each category. Implement the file-folding method for clothing items to maximize visibility and space efficiency. For smaller items like accessories or socks, utilize small containers or specialized organizers to prevent items from becoming jumbled.
Place frequently used items in the most accessible drawers, typically the top ones. Position items vertically rather than stacking them horizontally to maintain visibility and prevent disturbing other items when retrieving something. Arrange items by color, size, or frequency of use within their designated sections.
Additional optimization can be achieved by conducting seasonal rotations of drawer contents, regularly reassessing the organization system’s effectiveness, and maintaining a “one-in-one-out” policy to prevent overflow. Consider using vacuum storage bags for seasonal items and implementing a regular maintenance schedule to keep drawers organized and functional throughout the year.
Declutter Your Nightstand Setup
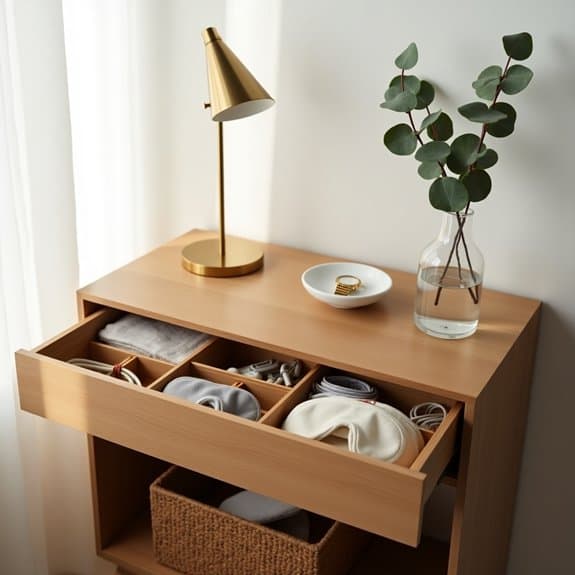
A well-organized nightstand is essential for creating a peaceful bedroom environment and ensuring a smooth morning and bedtime routine. This small but crucial space often becomes a catch-all for various items, leading to unnecessary clutter that can disrupt your sleep environment and make it difficult to find important items when needed.
An organized nightstand setup not only enhances the aesthetic appeal of your bedroom but also contributes to better sleep hygiene by reducing visual chaos and keeping essential items within arm’s reach. When everything has its designated place, you can easily access what you need without creating disorder or wasting time searching through accumulated clutter.
Required Items:
- Small drawer organizers or dividers
- Desktop organizer or small tray
- Storage boxes or containers
- Cord management clips
- Cleaning supplies
- Trash bag
- Label maker (optional)
- Small catch-all dish
Start by removing everything from your nightstand surface and drawers, wiping down all surfaces thoroughly. Sort items into three categories: essential daily items, occasionally needed items, and items that belong elsewhere.
Install cord management clips to keep charger cables neat and accessible without tangling. Place a small tray or organizer on top of the nightstand for frequently used items like reading glasses, remote controls, or your phone.
For drawer organization, use drawer dividers to create designated spaces for different categories of items. Keep only items you use regularly in the top drawer, such as medications, hand cream, or a sleep mask. Reserve lower drawers for items used less frequently. Position items based on frequency of use, with the most commonly accessed items closest to the front.
Additional Tips:
Maintain your organized nightstand by implementing a weekly quick cleanup routine. Remove any items that have migrated there throughout the week, empty the trash, and reassess the necessity of stored items.
Consider using a small bedside journal to track items you actually use versus those that can be stored elsewhere, helping you refine your system over time.
Implement a Seasonal Rotation System
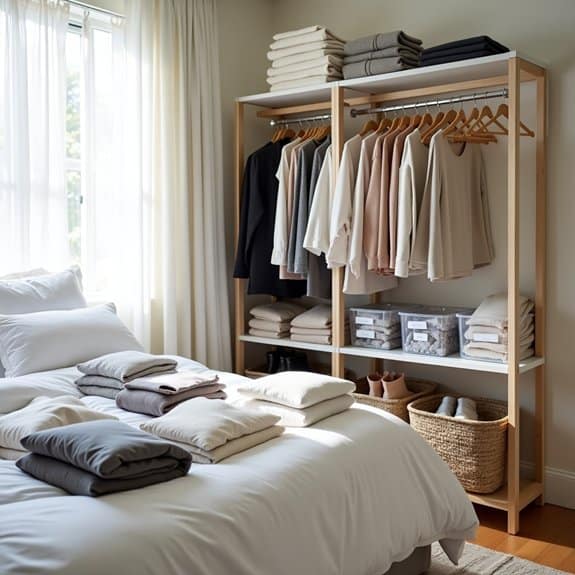
Maintaining a well-organized wardrobe throughout changing seasons can be overwhelming when all clothes compete for limited closet space. A seasonal rotation system allows you to maximize your storage space while keeping only relevant clothing accessible, reducing daily decision fatigue and maintaining better organization overall.
Implementing a seasonal rotation system transforms your bedroom from a cluttered space into an efficient, season-appropriate sanctuary. This systematic approach not only protects off-season clothing from unnecessary wear but also provides an opportunity to assess, maintain, and organize your wardrobe twice yearly.
Required Items:
- Storage containers or vacuum bags
- Labels and marker
- Garment bags
- Cedar blocks or lavender sachets
- Clean sheets or tissue paper
- Inventory list template
- Cleaning supplies
- Storage boxes for accessories
- Plastic bins for shoes
The seasonal rotation process starts with a complete assessment of your current wardrobe. Sort clothes into three categories: current season, next season, and year-round items.
Clean all off-season items thoroughly before storage, ensuring they’re completely dry to prevent mold and mildew. Pack delicate items in garment bags or acid-free tissue paper, while casual clothes can be vacuum-sealed to save space.
For optimal organization, store off-season items in clearly labeled containers, indicating contents and season. Choose storage locations based on climate control – avoid basements or attics with humidity fluctuations.
Maintain an inventory list of stored items, including their location, to easily locate specific pieces when needed. Schedule rotation dates around seasonal changes, typically spring/summer and fall/winter.
Additional Tips: Consider photographing stored outfits for future reference and maintaining a digital inventory. Include a sachet of cedar or lavender in each container to protect against moths and maintain freshness.
Before storing, repair any damages and remove items you haven’t worn in the past season. This system works best when combined with regular decluttering sessions, ensuring only frequently worn items make it into the rotation.
Add Hidden Storage Behind Doors

Making the most of every inch in your bedroom is crucial for maintaining a clutter-free space, and the area behind your doors represents prime real estate for additional storage. Door-mounted storage solutions can effectively double your storage capacity without taking up valuable floor or wall space, making them ideal for smaller bedrooms or rooms where maximizing space is essential.
Door storage systems are particularly effective for storing frequently used items like shoes, accessories, toiletries, or daily essentials. This organization method keeps items easily accessible while maintaining a clean, organized appearance when the door is closed, effectively creating a hidden storage zone that doesn’t impact the room’s aesthetic.
Required Items:
- Over-the-door hanging organizer
- Door-mounted rack system
- Command hooks or mounting hardware
- Measuring tape
- Level
- Screwdriver
- Anchors (if needed)
- Storage bins or baskets
- Labels
- Door stoppers
Start by measuring both the door width and the available space behind it when fully opened. Install door stoppers to prevent the door from hitting the wall and damaging your storage system.
Mount your chosen organizing system according to the manufacturer’s instructions, ensuring it’s level and secure. For over-the-door organizers, simply hang them over the top of the door, adjusting the height as needed. For mounted systems, mark your mounting points, install anchors if necessary, and secure the system firmly to the door.
Sort items by frequency of use, placing the most commonly accessed items at eye level. Use clear storage bins or labeled containers to keep smaller items organized and prevent them from falling out.
Consider using multiple organizing systems on the same door – for example, combining a shoe organizer at the bottom with hooks or baskets at the top for maximum efficiency.
To maintain the longevity of your door storage system, regularly check mounting hardware for security and avoid overloading pockets or shelves beyond their weight capacity.
Consider using rubber bumpers or felt pads where the organizer contacts the door to prevent scratches and reduce noise when opening and closing the door. Periodically reassess stored items to ensure you’re making the most of this hidden storage space and remove anything that’s no longer needed.
Organize With Clear Storage Containers
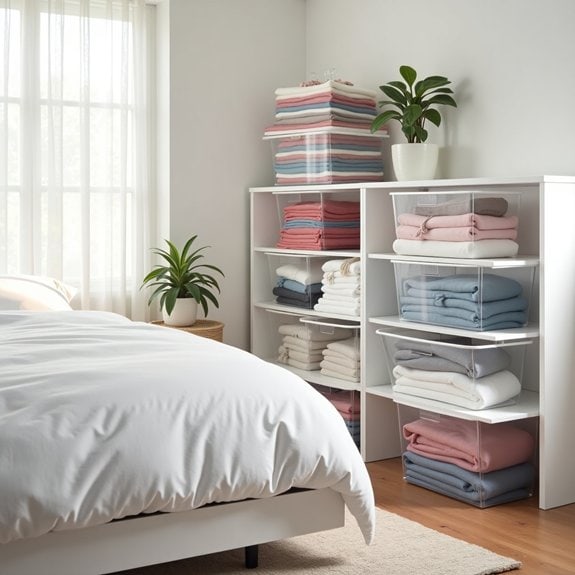
Clear storage containers are essential tools for creating an organized and visually appealing bedroom space. These transparent solutions eliminate the frustration of searching through opaque boxes and bins, allowing you to quickly locate items without disrupting your entire storage system.
The visibility offered by clear containers not only saves time but also helps maintain organization long-term. When you can see exactly what’s inside each container, you’re more likely to return items to their designated spots and maintain the organizational system you’ve established.
Required Items:
- Various sizes of clear plastic storage containers
- Label maker or adhesive labels
- Measuring tape
- Drawer dividers
- Clear shoe boxes
- Dust-proof lids
- Container risers or stackable options
- Clear zippered bags (various sizes)
Start by measuring your available storage spaces, including under-bed areas, closet shelves, and drawer dimensions. Sort items into categories such as seasonal clothing, accessories, shoes, or hobby supplies. Select appropriately sized clear containers for each category, ensuring they fit your designated storage spaces.
Place similar items together in containers, using smaller clear boxes or dividers within larger containers to separate individual pieces. For clothing storage, opt for flat, under-bed containers with wheels for seasonal items. Use medium-sized containers with secure lids for accessories and smaller clear boxes for jewelry or intimate items.
Stack containers vertically when possible, but avoid overloading to maintain easy access. Label each container clearly, even though contents are visible, to maintain a consistent organization system.
Additional Tips: Regularly assess and declutter container contents every three months to prevent overcrowding. Choose containers with secure, quality latches to prevent dust accumulation and protect stored items. Position frequently-used items in easily accessible containers at eye level, while storing seasonal or rarely-used items in higher or under-bed spaces.
Consider using clear containers with built-in humidity control for delicate fabrics or valuable items.
Design a Streamlined Closet Layout
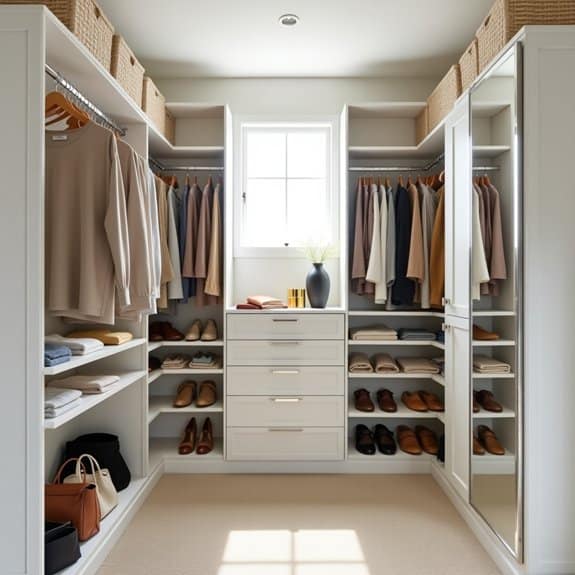
A well-organized closet serves as the foundation for an efficient morning routine and a clutter-free bedroom. When every item has its designated space, you eliminate the daily stress of searching for clothes and accessories, while maximizing the available storage area in your closet.
Creating a streamlined closet layout requires careful planning and a systematic approach to organization. The right layout not only accommodates your current wardrobe but also provides flexibility for seasonal changes and future additions, making it easier to maintain order throughout the year.
Required Items:
- Measuring tape
- Storage containers
- Clothing hangers (uniform style)
- Drawer organizers
- Shelf dividers
- Labels
- Storage boxes
- Rod extenders
- Hook racks
- Clear storage bins
Begin by removing everything from your closet and measuring the available space, including height, width, and depth. Divide your closet into distinct zones: everyday wear, formal attire, seasonal items, and accessories.
Install double hanging rods where possible to maximize vertical space, with longer items like dresses and coats on the upper rod and shorter items below. Group similar items together and assign specific areas based on frequency of use. Position frequently worn items at eye level and between shoulder and waist height for easy access.
Utilize the upper shelves for seasonal storage and lesser-used items. Install drawer units or shelving systems for folded items, and incorporate specialized storage solutions for accessories, shoes, and bags.
To maintain your newly organized closet, implement a one-in-one-out rule for new purchases and conduct seasonal reviews of your wardrobe. Consider using space-saving hangers, installing proper lighting, and adding hooks on empty wall space for additional storage.
Regular maintenance and periodic adjustments will ensure your closet layout continues to serve your needs effectively.

