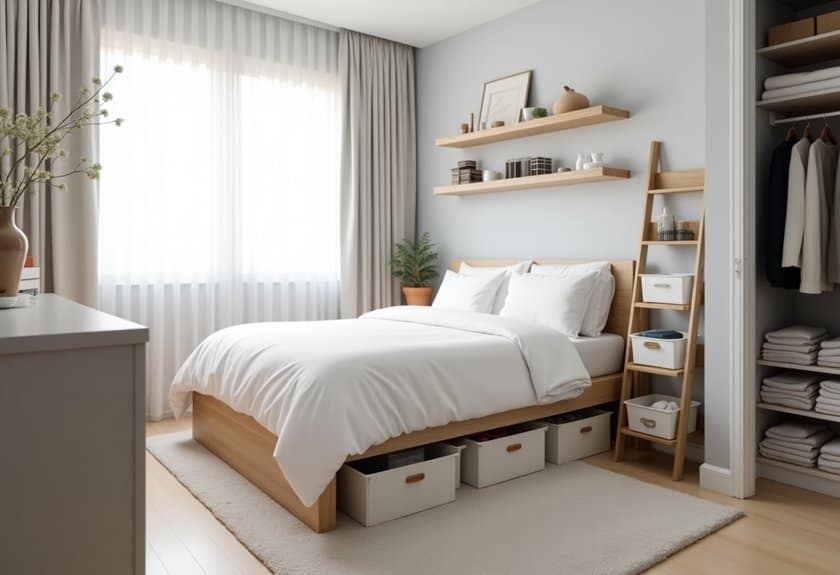
Like Marie Kondo meeting MacGyver in a tiny apartment showdown, organizing a small bedroom requires both wisdom and ingenuity. You’re probably familiar with that frustrating dance of trying to fit everything into your compact space while keeping it functional and peaceful. I’ve been there – staring at piles of clothes and wondering how they’ll ever find a proper home. But here’s the good news: I’ve discovered 20 genius hacks that’ll transform your cramped bedroom into an organizational masterpiece.

Maximize Vertical Space With Over-Door Organizers
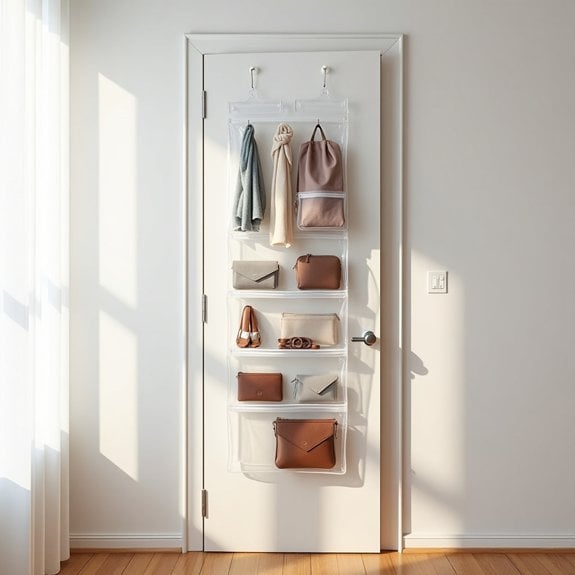
In small bedrooms, every inch of space counts, and the often-overlooked vertical space behind doors presents a valuable opportunity for additional storage. Over-door organizers transform this unused area into functional storage space, providing easy access to frequently used items while keeping them neatly contained and out of sight when the door is closed.
Utilizing over-door storage solutions not only maximizes space efficiency but also helps maintain a clutter-free environment by creating designated spots for various items. This organization method is particularly beneficial for items like shoes, accessories, cleaning supplies, or beauty products that might otherwise crowd valuable drawer or closet space.
Required Items:
- Over-door organizer (pocket style or hook style)
- Door hooks or hanging brackets
- Measuring tape
- Level
- Storage bins or baskets (optional)
- Labels (optional)
- Command strips (optional)
- Door bumpers
Installation and Organization Process:
Begin by measuring your door’s dimensions and ensuring the chosen organizer will fit properly without interfering with door closure. Install door bumpers to prevent damage to walls and accommodate the added thickness of the organizer.
Hang the organizer securely using the provided hooks or brackets, ensuring it’s level and properly positioned. For added stability, consider using command strips at the bottom corners to prevent swinging.
Sort items by category and frequency of use, placing frequently accessed items at eye level. If using a pocket-style organizer, distribute weight evenly across compartments to prevent sagging. For hook-style organizers, arrange items to maximize vertical space while maintaining easy access.
Consider using small bins or baskets within larger pockets to contain smaller items and maintain organization.
Additional Tips:
To maximize the effectiveness of over-door storage, regularly assess and rotate items based on seasonal needs. Use clear pockets or labels for easy identification, and avoid overloading compartments which can strain the organizer and door.
For shared spaces, consider assigning specific sections to different family members, and implement a regular maintenance schedule to prevent cluttering and ensure the system remains functional over time.
Install Floating Shelves for Extra Storage
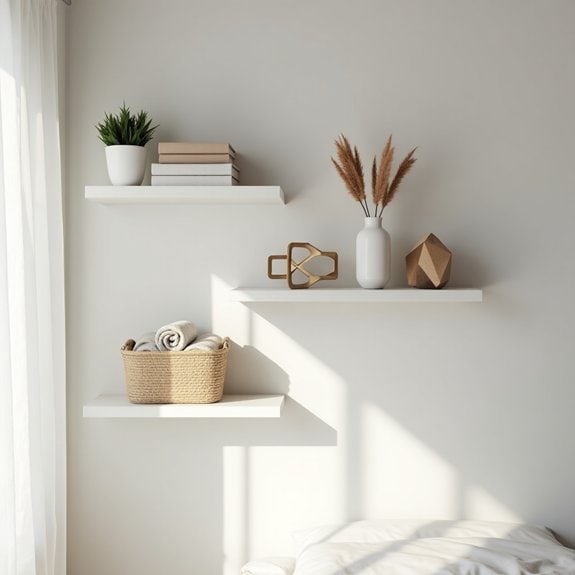
Floating shelves represent one of the most versatile and space-efficient storage solutions for small bedrooms. By utilizing vertical wall space rather than valuable floor area, these shelves create additional storage without making the room feel cramped or cluttered. They serve as both functional storage and decorative elements, allowing you to display books, photos, and cherished items while keeping them organized.
The key to successful floating shelf installation lies in strategic placement and thoughtful organization. When properly installed and organized, floating shelves can transform dead wall space into valuable storage real estate, creating designated areas for different categories of items while maintaining a clean, minimalist aesthetic that makes small rooms appear larger.
Required Items:
- Floating shelves (various sizes)
- Stud finder
- Level
- Drill and drill bits
- Screwdriver
- Wall anchors
- Measuring tape
- Pencil
- Storage bins or baskets
- Bookends
- Decorative objects
Install the floating shelves by first identifying wall studs using a stud finder and marking their locations with a pencil. Measure and mark the desired shelf positions, ensuring they’re level and properly spaced. Install wall anchors if not mounting directly into studs, then secure the shelf brackets firmly to the wall.
Once the shelves are mounted, organize items by category, keeping frequently used items at eye level and less-used items on higher shelves. Create visual balance by alternating between functional storage and decorative elements.
Group similar items together and use attractive storage containers to corral smaller objects. Books can be arranged both vertically and horizontally to create visual interest, while incorporating decorative objects as bookends adds both function and style. Consider leaving some negative space on each shelf to prevent a cluttered appearance.
To maximize the effectiveness of your floating shelf organization, regularly assess and rotate items based on seasonal needs and usage patterns. Implement a one-in-one-out rule to prevent overcrowding, and dust shelves weekly to maintain their appearance. Consider installing LED strip lighting under shelves to create ambiance and improve visibility of stored items.
Utilize Under-Bed Rolling Storage Containers
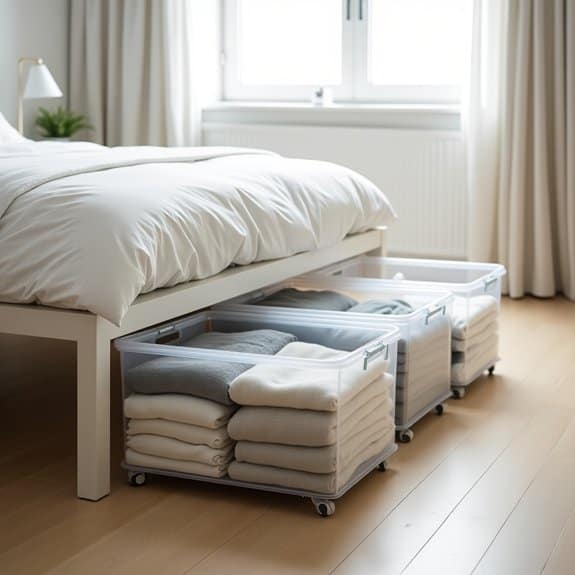
Under-bed storage represents one of the most underutilized spaces in the bedroom, offering valuable square footage for items that aren’t needed daily. This hidden storage solution keeps belongings dust-free while maintaining easy accessibility through rolling containers, effectively doubling your storage capacity without consuming visible space.
Maximizing under-bed storage through rolling containers creates an organized system that prevents the “out of sight, out of mind” problem common with under-bed storage. When properly implemented, this system allows for seasonal rotation of clothing, storage of extra bedding, or archiving of important documents while keeping them within reach.
Required Items:
- Rolling storage containers with lids
- Measuring tape
- Labels and marker
- Bed risers (optional)
- Storage dividers or organizers
- Vacuum storage bags (optional)
- Anti-dust covers or bags
- Inventory list template
Start by measuring the available space under your bed, including height, width, and depth. Select rolling containers that maximize this space while allowing enough clearance for smooth movement.
Sort items into categories (seasonal clothing, extra bedding, shoes, etc.) and use vacuum storage bags for soft items to maximize space within containers. Pack each container methodically, placing heavier items at the bottom and frequently accessed items toward the front.
Install bed risers if additional height is needed. Label each container clearly on both the lid and front edge for easy identification when containers are pushed under the bed. Create an inventory list noting the contents and location of each container.
For optimal organization, consider dividing containers into zones: frequently accessed items in front, seasonal items in the middle, and long-term storage in the back. Maintain clear pathways between containers for easy access, and use anti-dust covers to protect stored items.
Review and rotate contents seasonally to ensure the system remains efficient and relevant to your needs.
Create a Bedside Command Center
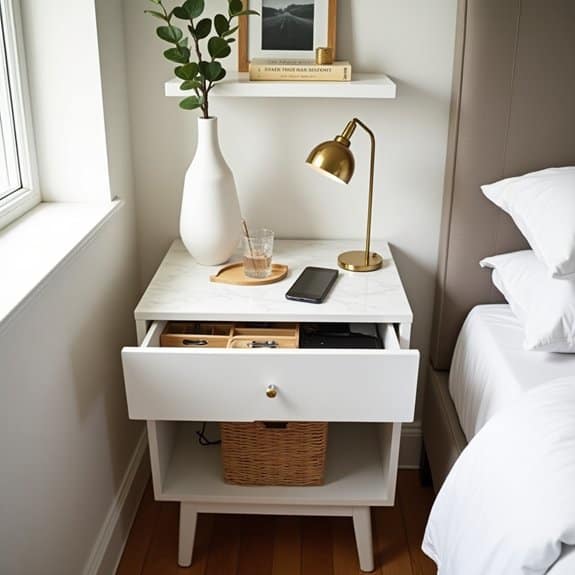
A well-organized bedside command center serves as the mission control for your daily life, keeping essential items within arm’s reach while maintaining a clutter-free environment.
This dedicated space helps streamline your morning and evening routines, reducing stress and saving precious time when you’re at your most vulnerable – just waking up or preparing for sleep.
Creating an efficient bedside command center is particularly crucial in small bedrooms where space optimization is paramount.
This organization system ensures that your medications, reading materials, electronics, and personal items are thoughtfully arranged and easily accessible without creating visual chaos or compromising the tranquility of your sleep space.
Required Items:
- Bedside table or floating shelf
- Small desk organizer or drawer dividers
- Charging station or cord management system
- Small container for medications
- Book end or magazine holder
- Desk lamp or reading light
- Small trash bin
- Multi-plug surge protector
- Storage basket or bin
- Small tray for loose items
The organization process begins with clearing the entire bedside area and grouping items by category: electronics, reading materials, personal care items, and miscellaneous.
Install a multi-plug surge protector behind or under the bedside table, ensuring all necessary devices can be charged simultaneously.
Position the charging station on top of the surface, using cord management solutions to prevent cable tangles.
Create designated zones within your command center: the top surface for immediate-access items like your phone, lamp, and water; the upper drawer or shelf for personal care items and medications; and lower storage areas for books, magazines, and less frequently used items.
Use drawer dividers or small containers to compartmentalize items and prevent them from sliding around.
Additional Success Tips: Implement a weekly maintenance routine to prevent clutter accumulation.
Each weekend, return items that have migrated to the command center back to their proper homes, wipe down surfaces, and reassess the necessity of stored items.
Consider using vertical space with wall-mounted solutions if your bedside table footprint is limited, and always maintain a clear path for easy access during emergencies.
Invest in Multi-Purpose Furniture Pieces

In small bedrooms, every square foot counts, making multi-purpose furniture essential for maximizing space efficiency. These versatile pieces serve multiple functions while maintaining style and comfort, effectively reducing the number of individual furniture items needed in the room.
Selecting the right multi-purpose furniture can transform a cramped bedroom into a functional living space that accommodates sleeping, studying, storage, and entertainment needs. Strategic furniture choices can double or even triple the utility of your available space while maintaining a clean, uncluttered aesthetic.
Required Items:
- Measuring tape
- Floor plan or room sketch
- Pencil and paper
- Level
- Basic tools (screwdriver, drill)
- Furniture sliders
- Storage bins or baskets
- Drawer organizers
- Labels
Start by measuring your room’s dimensions and creating a floor plan that identifies power outlets, windows, and doors. Select multi-purpose pieces that align with your primary needs, such as a bed frame with built-in drawers or a desk that converts to a dining table.
Position larger items first, like ottoman beds or murphy beds with integrated shelving, against walls to maximize floor space. Consider vertical storage solutions by incorporating tall, narrow pieces that serve multiple functions, such as a wardrobe with a pull-out desk or a bookshelf that doubles as a room divider.
Install modular furniture systems that can be reconfigured as needs change, ensuring each piece serves at least two distinct purposes.
Additional Tips: Regularly assess the functionality of your multi-purpose furniture and adjust configurations seasonally. Remove any single-purpose items that can be replaced with multi-functional alternatives. Keep frequently used functions easily accessible and maintain clear pathways between furniture pieces.
Consider using furniture risers to create additional storage space underneath elevated pieces, and invest in quality items that can withstand regular transformation between different uses.
Use Vacuum Storage Bags for Seasonal Items

Seasonal clothing and bedding can quickly overwhelm limited bedroom storage space, creating unnecessary clutter and making it difficult to access currently needed items. Vacuum storage bags offer an innovative solution by compressing bulky items to a fraction of their original size, maximizing valuable closet and under-bed space.
Using vacuum storage bags not only saves space but also protects items from dust, moisture, and pests while in storage. This organization method creates a systematic approach to rotating seasonal items, ensuring off-season belongings are safely stored until needed while keeping current-season items easily accessible.
Required Items:
- Vacuum storage bags (various sizes)
- Vacuum cleaner with hose attachment
- Clean, dry items to be stored
- Labels and marker
- Inventory list
- Storage container or designated space
- Dryer sheets (optional)
- Cleaning cloths
Sort seasonal items into categories and ensure they’re completely clean and dry before storage. Place similar items together in appropriately sized bags, being careful not to overfill. Remove as much air as possible by hand, seal the bag securely, then attach your vacuum hose to the bag’s valve and suction out remaining air until items are tightly compressed.
Label each bag clearly with contents and season. For effective storage, place compressed bags in plastic bins or designated areas where they won’t be punctured. Consider storing winter items like heavy coats, sweaters, and thick bedding during summer months, then swap them out for summer clothing and lightweight bedding during winter.
This rotation system keeps your active storage areas clutter-free while maintaining easy access to current-season items. To maximize the effectiveness of vacuum storage bags, include a dryer sheet in each bag to maintain freshness, store bags in a cool, dry place, and check them periodically for any loss of compression.
Consider creating a detailed inventory list of stored items to avoid purchasing duplicates and ensure nothing gets forgotten in storage. When removing items for use, allow them to air out and reshape naturally before wearing or using.
Add Corner Shelving Units
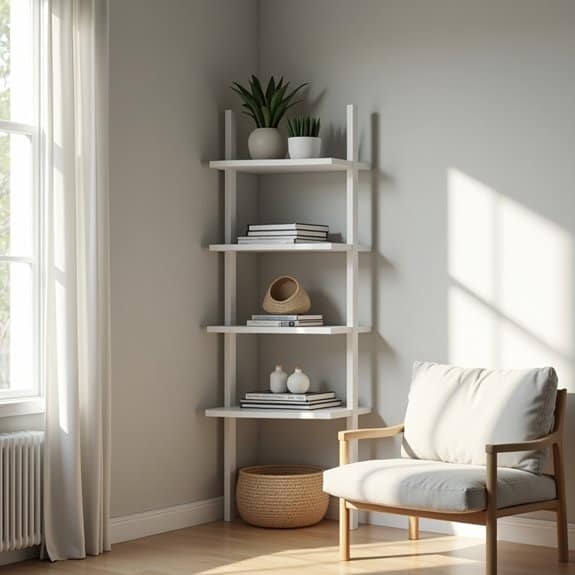
Bedroom corners often represent wasted space that could be transformed into valuable storage areas. Corner shelving units provide an elegant solution to maximize these overlooked spaces while adding both functionality and visual interest to your bedroom.
Installing corner shelves creates vertical storage opportunities that draw the eye upward, making rooms appear larger while providing dedicated spaces for books, decorative items, and essential belongings. This organization method is particularly effective in small bedrooms where floor space is limited, and traditional furniture pieces might be too bulky.
Required Items:
- Corner shelf units
- Level
- Measuring tape
- Pencil
- Wall anchors
- Screwdriver
- Power drill
- Stud finder
- Mounting brackets
- Wall screws
- Safety goggles
- Dust mask
Start by measuring your corner space and determining the desired height for your shelving unit. Use a stud finder to locate wall studs, marking their positions with a pencil.
Position the first bracket at your chosen height, ensuring it’s level, and mark the mounting holes. Drill pilot holes, insert wall anchors if needed, and secure the bracket to the wall. Repeat this process for additional brackets, maintaining equal spacing between levels.
Once all brackets are secured, place the shelf pieces onto the brackets, ensuring they’re firmly attached according to the manufacturer’s instructions.
To maximize your corner shelving organization, implement a strategic placement system. Position frequently used items at eye level, while storing seasonal or rarely used items on higher shelves.
Consider using decorative boxes or baskets to contain smaller items and maintain a clean appearance. Group similar items together and maintain proper weight distribution across the shelves.
Additional tip: When organizing your corner shelves, follow the “rule of three” for aesthetic appeal – arrange items in groups of three or triangular patterns. This not only creates visual harmony but also helps maintain organization.
Regularly dust and declutter your shelves to prevent them from becoming catch-all spaces, and periodically reassess item placement to ensure the most efficient use of this valuable storage solution.
Implement a Closet Organization System
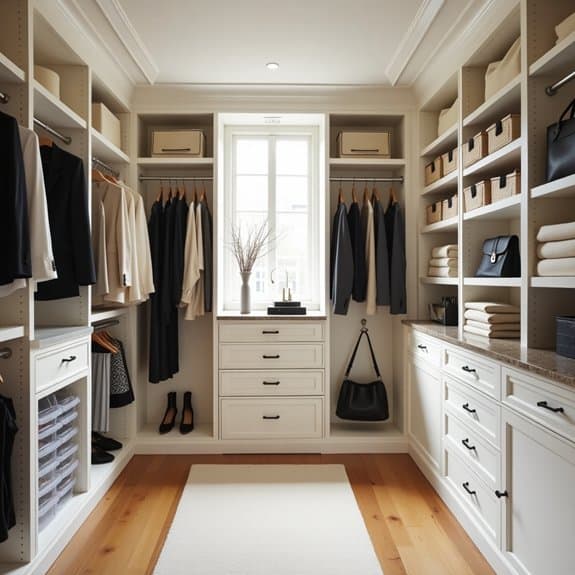
A well-organized closet serves as the foundation for an efficiently managed bedroom, transforming a potentially chaotic space into a functional storage solution. When clothes, accessories, and personal items each have their designated place, daily routines become smoother, and the overall bedroom atmosphere remains serene and clutter-free.
In small bedrooms, maximizing closet space becomes even more crucial as every inch matters. An organized closet system can effectively double your storage capacity while making items more accessible and visible, reducing the time spent searching for specific pieces and maintaining order in your daily life.
Required Items:
- Closet rod dividers
- Hanging organizers
- Storage boxes or bins
- Clear shoe containers
- Drawer organizers
- Labels and label maker
- Slim hangers
- Over-the-door organizers
- Shelf dividers
- Command hooks
Start by removing everything from your closet and sorting items into categories: keep, donate, and discard. Once sorted, group remaining items by type (shirts, pants, dresses) and frequency of use.
Install a double-rod hanging system if possible, with longer items like dresses and coats on the top rod and shorter items below. Utilize vertical space by adding shelf dividers and storage boxes for seasonal items or accessories.
Position frequently worn items at eye level for easy access, while storing seasonal or occasional pieces in higher or lower spaces. Implement drawer organizers for smaller items like accessories, undergarments, or folded clothes.
Install hooks on empty wall space for bags, belts, or scarves, and use clear shoe containers to maximize floor space while keeping footwear visible and protected.
For long-term success, maintain the system by following the “one-in-one-out” rule: when adding new items, remove something similar to prevent overcrowding. Regularly assess your organization system every three months, adjusting as needed based on seasonal changes and lifestyle requirements.
Consider investing in matching hangers and containers for a visually cohesive look that encourages maintaining the organized space.
Mount Hooks and Pegboards on Walls
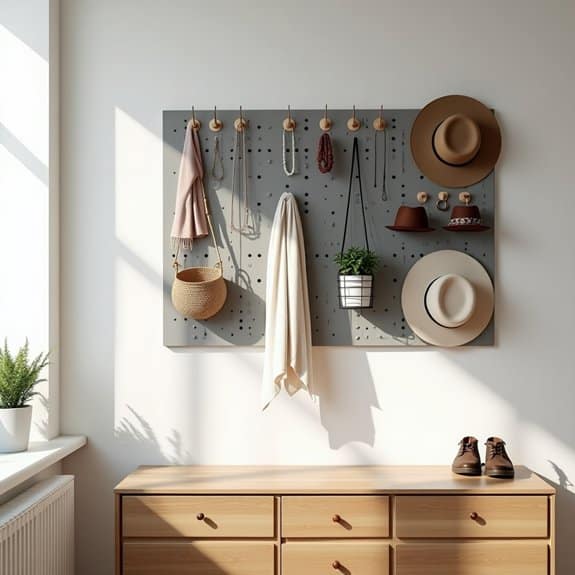
Maximizing vertical wall space is crucial in small bedrooms where floor space is limited. By utilizing hooks and pegboards, you can transform empty walls into functional storage areas that keep belongings organized and easily accessible while maintaining a clean, uncluttered appearance.
Mounting hooks and pegboards creates versatile storage solutions that can adapt to changing needs. This organization method works particularly well for frequently used items like accessories, bags, and clothing, while simultaneously adding a decorative element to your bedroom’s design.
Required Items:
- Pegboard panels
- Wall anchors and screws
- Mounting brackets
- Various hooks (different sizes)
- Command hooks
- Level
- Drill
- Pencil
- Measuring tape
- Stud finder
- Pegboard accessories (baskets, shelves, holders)
- Wall spacers
Start by determining the ideal location for your hooks and pegboard, using a stud finder to locate wall studs. Measure and mark the installation area, ensuring the pegboard will be level.
Install wall spacers and mounting brackets into the studs, then secure the pegboard to the brackets. For individual hooks, mark their positions and install them using appropriate wall anchors or Command strips, depending on the weight they’ll need to support.
Once the pegboard is mounted, customize it with various hooks, baskets, and holders to create designated spaces for specific items. Arrange accessories by frequency of use, with daily items at eye level and seasonal items higher up or to the sides.
For standalone hooks, consider creating zones for different categories of items, such as outerwear near the door and accessories near a mirror.
To maintain the effectiveness of your wall storage system, regularly assess the weight capacity of hooks and anchors, rotate items seasonally, and rearrange the layout as needed.
Consider adding labels or creating a visual organization system using color-coded hooks or zones. Keep frequently used items within easy reach and avoid overloading any single hook or section of the pegboard to ensure long-term durability and functionality.
Choose Furniture With Built-In Storage

Making the most of limited bedroom space requires strategic furniture choices that serve multiple purposes. Built-in storage furniture is a game-changer for small spaces, effectively combining functional storage with essential bedroom pieces to maximize every square foot.
Selecting furniture with integrated storage eliminates the need for additional storage units while maintaining a clean, uncluttered aesthetic. From bed frames with drawers to ottoman benches with hidden compartments, these dual-purpose pieces create organized storage solutions without sacrificing precious floor space.
Required Items:
- Measuring tape
- Floor plan or room dimensions
- List of storage needs
- Budget worksheet
- Furniture dimension specifications
- Storage containers or organizers
- Level tool
- Assembly tools
Start by assessing your specific storage needs and measuring your available space carefully. Map out potential furniture placement, ensuring adequate clearance for drawers and cabinet doors to open fully.
Focus on key pieces like platform beds with under-bed storage, nightstands with multiple drawers, or headboards with built-in shelving. Consider vertical storage solutions such as tall dressers with integrated mirrors or wardrobe units that extend to the ceiling.
Look for pieces that offer varied storage options – drawers for clothing, shelves for books and decor, and hidden compartments for personal items. When selecting furniture, prioritize pieces that offer the maximum storage capacity while maintaining proper scale for your room size.
Additional Success Tips:
Before purchasing, thoroughly review assembly requirements and maintenance needs of built-in storage furniture. Opt for quality construction materials that will withstand frequent use, and consider modular pieces that can be reconfigured as your needs change.
Install drawer organizers and storage dividers within built-in compartments to maintain organization and prevent items from becoming jumbled over time.
Organize With Clear Storage Containers
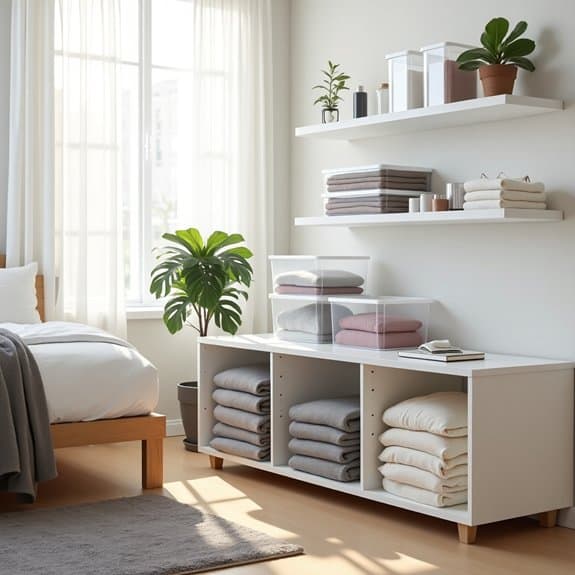
Clear storage containers are essential tools for maximizing bedroom organization, particularly in small spaces. These transparent containers allow you to instantly identify contents without opening multiple boxes, saving time and reducing frustration when searching for specific items.
The visual clarity of these containers not only helps maintain organization but also creates a clean, streamlined appearance that can make a small bedroom feel less cluttered. When properly labeled and systematically arranged, clear storage containers can transform a chaotic space into an efficient storage system.
Required Items:
- Clear plastic storage containers (various sizes)
- Labels or label maker
- Measuring tape
- Dividers or organizer inserts
- Storage container lids
- Marker or pen
- Inventory list template
- Drawer liner or padding (optional)
- Level (optional)
Start by measuring your available storage spaces, including under the bed, closet shelves, and any designated storage areas. Sort items into categories such as seasonal clothing, accessories, or memorabilia.
Select appropriately sized clear containers for each category, ensuring they fit your measured spaces. Remove items from their current storage, inspect for damage or wear, and discard unnecessary items before placing them in the new containers.
Create a labeling system that works for your needs, whether it’s by season, category, or frequency of use. Place frequently accessed items in easily reachable containers, while storing seasonal or rarely used items in less accessible spaces.
Stack containers strategically, keeping heavier items on the bottom and ensuring lids are secure.
Additional Tips:
Maximize organization efficiency by taking photos of container contents and creating a digital inventory. Consider using vacuum storage bags inside clear containers for bulky items like bedding or winter clothes.
Regularly assess and rotate items to maintain organization and prevent overflow. Remember to leave some empty space in each container to accommodate new items and maintain easy access to contents.
Install a Murphy Bed
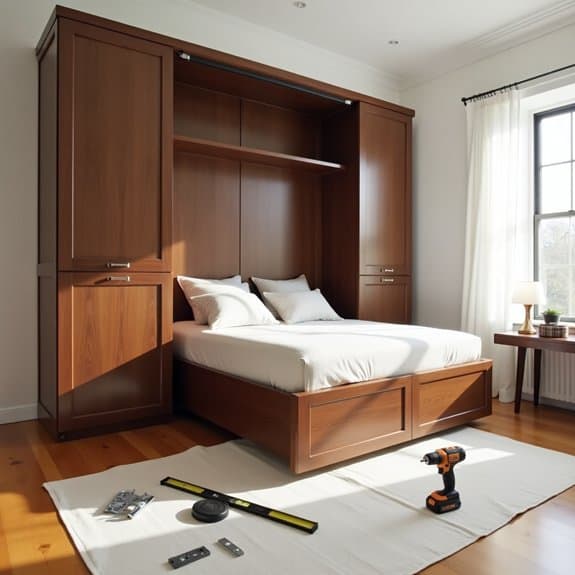
A Murphy bed represents one of the most transformative solutions for small bedroom spaces, effectively doubling the functionality of your room by creating a dual-purpose area. When folded up against the wall, the space previously occupied by a traditional bed becomes available for other activities, making it ideal for studio apartments, home offices, or guest rooms.
The installation of a Murphy bed requires careful planning and precise execution to ensure both safety and functionality. A properly installed Murphy bed not only saves space but also maintains the aesthetic appeal of your room while providing a comfortable sleeping solution that can be easily accessed when needed.
Required Items/Tools:
- Murphy bed kit or custom-built mechanism
- Power drill and drill bits
- Level
- Stud finder
- Measuring tape
- Pencil
- Screwdriver set
- Socket wrench set
- Wall anchors
- Safety glasses
- Work gloves
- Helper/assistant
- Mattress (specific size for Murphy bed)
The installation process begins with selecting the appropriate wall space and using a stud finder to locate and mark wall studs. Measure the area carefully, ensuring enough clearance for the bed when both folded and unfolded.
Assemble the bed frame according to the manufacturer’s instructions, typically starting with the mounting bracket that attaches to the wall. Secure the mounting bracket to the wall studs using appropriate hardware, ensuring it’s perfectly level.
Next, attach the bed frame to the mounting mechanism, install the springs or hydraulic system, and finally, add the cabinet surround if included in your design. For optimal safety and longevity, ensure all anchor points are properly secured and test the mechanism several times without the mattress.
Once confident in the installation, add the mattress and any additional features like integrated lighting or storage components. Make final adjustments to ensure smooth operation and proper balance.
To maximize the effectiveness of your Murphy bed installation, consider incorporating additional storage solutions around the unit, such as built-in shelving or cabinets. Regular maintenance of the mechanism, including lubricating moving parts and checking hardware tightness every few months, will ensure reliable operation and longevity.
Always clear the surrounding area before lowering the bed, and consider installing a locking mechanism if there are small children in the home.
Create Storage Behind the Headboard
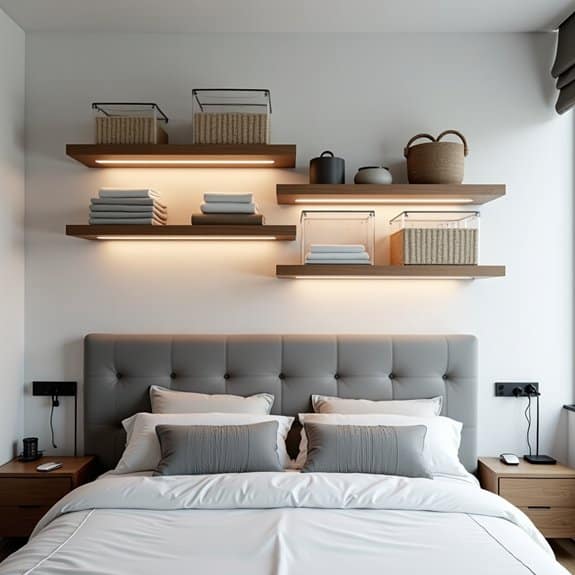
The often-overlooked space behind a headboard represents valuable storage potential in small bedrooms. This vertical space can accommodate everything from books and magazines to personal items and charging stations, effectively expanding your bedroom’s storage capacity without consuming precious floor space.
Making use of the headboard area not only maximizes storage but also keeps frequently used items within arm’s reach while in bed. This solution is particularly valuable for bedrooms lacking nightstands or those with limited drawer space, creating a clean, organized look while maintaining functionality.
Required Items:
- Floating shelves
- Wall-mounted storage bins
- Command hooks or mounting hardware
- Measuring tape
- Level
- Drill and screws
- Anchor bolts
- Storage baskets or containers
- Cable management solutions
- Stud finder
Start by measuring the width of your headboard and marking the available wall space. Install floating shelves at varying heights, ensuring they’re properly anchored to wall studs for security. Position the first shelf slightly above the headboard’s height, leaving enough clearance for easy access.
Add additional shelves or wall-mounted storage bins based on your needs, maintaining at least 8-12 inches between each level for adequate storage space.
For items requiring frequent access, install hooks or small containers at arm’s reach on either side of the headboard. Incorporate cable management solutions by drilling small holes through the shelving for charging cables, keeping electronics organized and accessible while hiding unsightly cords.
To optimize this storage system, use clear containers for better visibility of stored items and consider adding small LED strip lighting under shelves for improved accessibility at night.
Label storage containers clearly and reassess stored items every few months to maintain organization and prevent clutter accumulation behind the headboard.
Use Door-Mounted Mirror Storage
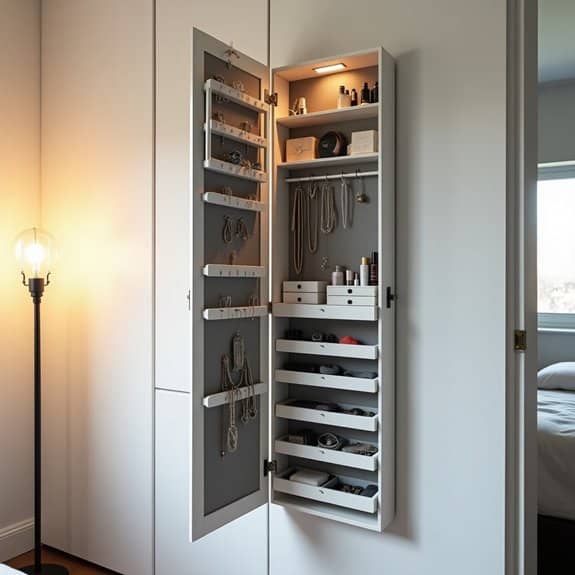
Making the most of vertical space is crucial in small bedrooms, and the back of your door presents a perfect opportunity for additional storage. Door-mounted mirror storage solutions combine functionality with space efficiency, offering both a full-length mirror and hidden storage compartments that keep everyday items easily accessible.
Door-mounted mirror storage units are particularly effective for storing jewelry, accessories, cosmetics, and small personal items that might otherwise clutter dresser tops or vanities. This organization method keeps items dust-free while maintaining a clean, minimal appearance in your bedroom.
Required Items:
- Door-mounted mirror with storage unit
- Mounting hardware (usually included)
- Drill and screwdriver
- Level
- Measuring tape
- Wall anchors (if needed)
- Cleaning supplies
- Storage containers or organizers that fit inside
- Command strips (optional backup support)
Installation and organization begins with measuring your door to ensure proper fit, accounting for doorknobs and existing hardware. Mount the unit according to manufacturer instructions, typically starting with the top brackets and working down, using a level to ensure proper alignment.
Once securely mounted, clean all compartments thoroughly before organizing. Sort items by category and frequency of use, placing frequently accessed items at eye level. Utilize small containers or drawer organizers within the storage compartments to prevent items from shifting when the door moves.
Consider using felt or non-slip liner in jewelry sections to prevent scratches and sliding. To maximize the longevity and functionality of your door-mounted mirror storage, regularly check mounting hardware for security, clean mirror and compartments monthly, and avoid overloading storage sections beyond their weight capacity.
Consider adding battery-operated LED strips inside for better visibility, and maintain organization by immediately returning items to their designated spots after use.
Optimize Closet Space With Double Hanging Rods
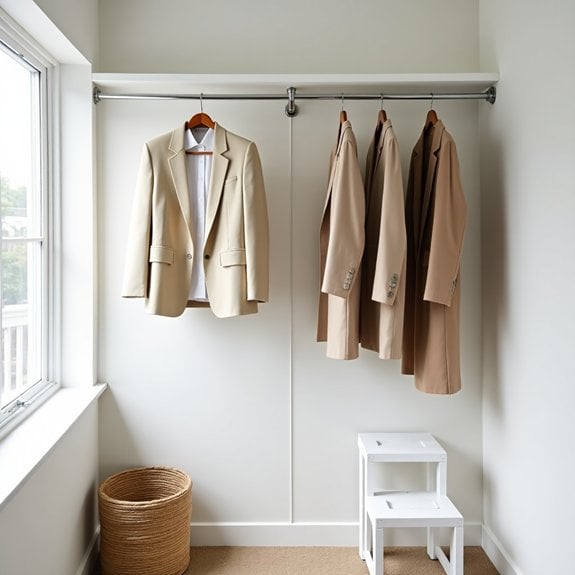
Double hanging rods are a game-changing solution for maximizing closet space, effectively doubling your storage capacity without requiring additional square footage. By installing a second rod below your existing one, you create two distinct zones for hanging clothes, allowing for better organization and easier access to your wardrobe.
The key to successful double hanging rod implementation lies in proper planning and height consideration. Most closets have enough vertical space to accommodate two rows of clothing, with shorter items like shirts and folded pants on top, and longer items like dresses and coats on the bottom. This vertical optimization can transform a cramped closet into an efficient storage space that makes getting dressed easier and more enjoyable.
Required Items:
- Double hanging rod kit
- Measuring tape
- Level
- Screwdriver
- Wall anchors
- Drill
- Pencil
- Stud finder
- Step ladder
- Installation hardware (typically included in kit)
Installation and organization begins with measuring your closet’s width and height, ensuring adequate space for both rods while maintaining accessibility. Install the upper rod at approximately 80 inches from the floor, and the lower rod about 40 inches from the floor, allowing proper clearance for hanging clothes. Secure the mounting brackets into wall studs or use appropriate wall anchors for stability.
Once the rods are installed, organize clothing by category and length. Place frequently worn, shorter items like shirts, blazers, and folded pants on the top rod for easy access. Use the bottom rod for longer items such as dresses, coats, and full-length garments.
Consider using slim, uniform hangers to maximize space and maintain a neat appearance. To enhance your double hanging rod system, incorporate additional organizing tools such as shelf dividers, storage boxes for seasonal items, and drawer units below the bottom rod for accessories and folded items.
Regular maintenance of this system, including periodic purging of unused items and maintaining proper spacing between garments, will ensure long-term organization success and maximize the efficiency of your newly optimized closet space.
Add Storage Ottoman at the Foot of the Bed
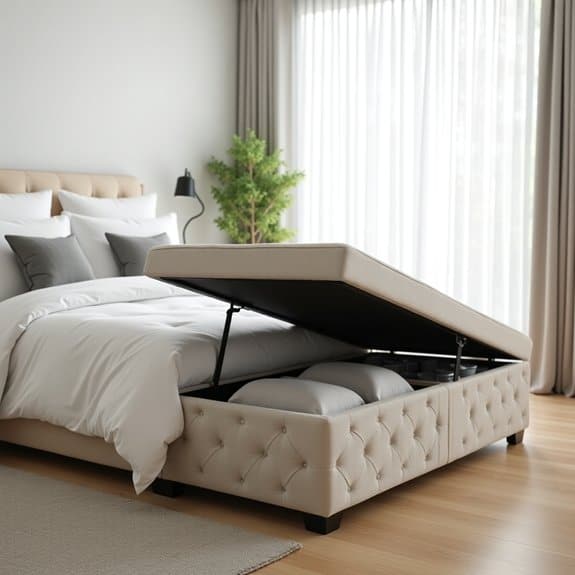
A storage ottoman at the foot of the bed serves as a multi-functional piece that can transform a bedroom’s organization while maintaining its aesthetic appeal. This strategic addition creates a convenient storage solution without sacrificing precious floor space, making it an ideal choice for small bedrooms where every square inch counts.
The foot of the bed is often an underutilized area that can become a clutter magnet or wasted space. By incorporating a storage ottoman, you create a designated spot for items like extra blankets, seasonal clothing, or rarely used belongings while adding an elegant seating option that enhances the room’s functionality.
Required Items:
- Storage ottoman with appropriate dimensions for bed width
- Storage bins or organizers
- Labels
- Fabric storage bags
- Vacuum storage bags (optional)
- Anti-slip mat
- Measuring tape
- Cleaning supplies
Position the storage ottoman at the foot of your bed, ensuring it doesn’t impede walkways or door clearance. Before loading items, categorize belongings into groups such as bedding, seasonal wear, or accessories. Use fabric storage bags or vacuum-sealed bags for soft items to maximize space and protect contents from dust.
Arrange items with the most frequently used ones toward the front of the ottoman for easy access. For optimal organization, consider implementing a rotation system based on seasons or usage frequency. Keep a list of stored items taped inside the ottoman lid for quick reference.
If storing delicate items, add cedar blocks or lavender sachets to maintain freshness and deter pests. Remember to periodically clean both the ottoman’s interior and exterior to maintain its appearance and functionality.
Additional Tip: To maximize the ottoman’s effectiveness, establish a quarterly review system to assess stored items, remove unnecessary belongings, and reorganize contents based on current needs.
Consider using clear storage containers within the ottoman to create distinct sections, making it easier to maintain organization long-term. Always ensure the ottoman’s weight capacity isn’t exceeded to maintain its structural integrity and prevent damage to stored items.
Install Pull-Out Drawer Organizers
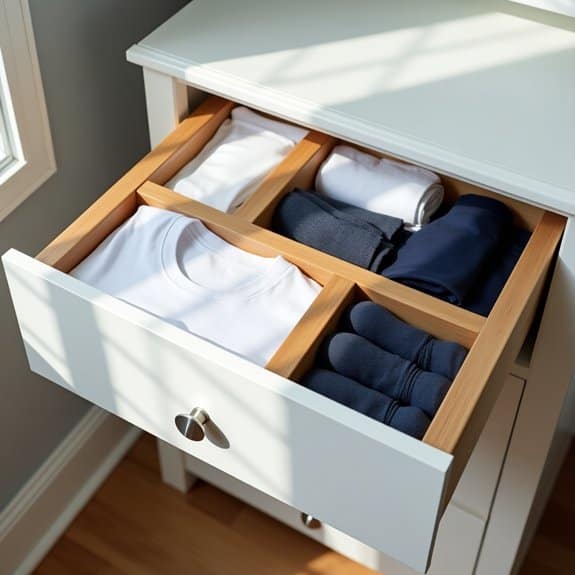
Drawer space is precious real estate in any bedroom, and maximizing its potential can transform your storage capabilities. Pull-out drawer organizers are game-changers that convert chaotic, jumbled drawers into efficiently compartmentalized spaces where every item has its designated spot.
Installing drawer organizers not only creates order but also makes items more accessible and visible at a glance. This organization method prevents clothes from becoming wrinkled, keeps accessories sorted, and eliminates the frustration of digging through piles to find what you need.
Required Items:
- Measuring tape
- Pull-out drawer organizers (expandable or fixed)
- Drawer liner (non-slip)
- Scissors
- Pencil
- Cleaning supplies
- Labels (optional)
- Small screwdriver (if needed for installation)
Start by removing everything from the drawer and thoroughly cleaning the interior. Measure the drawer’s dimensions, including depth, width, and height, to ensure your organizers will fit properly. Cut non-slip liner to fit the drawer bottom, which prevents organizers from sliding around.
Place the drawer organizers, starting with larger compartments for bulkier items and working your way down to smaller sections for accessories and delicate items. Adjust expandable organizers to fit snugly within the drawer space.
Sort items by category before returning them to the drawer. Assign specific compartments for different types of items: undergarments in one section, socks in another, accessories in smaller divisions. This systematic approach ensures everything has a designated space and makes it easier to maintain organization long-term.
To maintain the organization system, regularly assess and adjust compartment sizes based on your changing needs. Consider using clear organizers to easily view contents, and implement a one-in-one-out rule to prevent overflow. Label compartments if sharing the drawer with others, and periodically review contents to remove items that are no longer needed or used frequently.
Create a Vertical Shoe Storage System
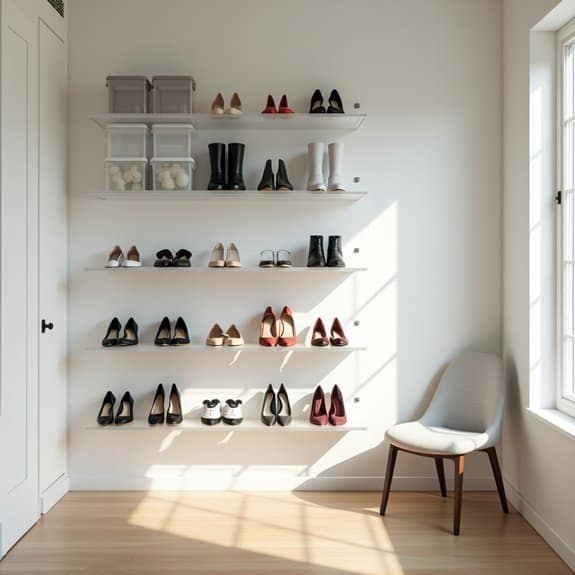
Maximizing vertical space in a bedroom is crucial for efficient storage, particularly when it comes to shoes. A well-organized vertical shoe storage system not only saves valuable floor space but also makes it easier to locate and access your footwear while keeping your shoes in better condition.
Vertical shoe storage transforms an otherwise cluttered floor space into a streamlined, accessible system that can accommodate numerous pairs of shoes in a fraction of the space. This organization method is particularly valuable in small bedrooms where every square foot matters, and it helps prevent damage to shoes from stacking or cramming them into confined spaces.
Required Items:
- Over-the-door shoe organizer
- Wall-mounted shoe racks
- Command hooks or mounting hardware
- Measuring tape
- Level
- Drill and screwdriver
- Pencil
- Wall anchors
- Clear shoe boxes (optional)
- Label maker (optional)
Installation and organization begins with measuring your available wall or door space and determining the best location for your vertical storage system. For over-the-door organizers, simply hang the unit on any standard door, ensuring it’s properly secured at the top and bottom to prevent swinging.
For wall-mounted solutions, mark your mounting points with a pencil, use a level to ensure straight alignment, and install wall anchors before securing the racks. Arrange shoes with frequently worn pairs at eye level and seasonal items higher up or lower down. Group shoes by category (formal, casual, athletic) to create an intuitive system.
To maximize your vertical shoe storage, implement a one-in-one-out rule to prevent overcrowding. Store special occasion shoes in clear boxes on higher shelves to protect them from dust while keeping them visible.
Consider installing motion-sensor lights for dark corners, and use the back of your storage system for storing shoe care supplies. Rotate shoes seasonally to maintain organization and ensure all available space is used effectively throughout the year.
Use Space-Saving Hangers
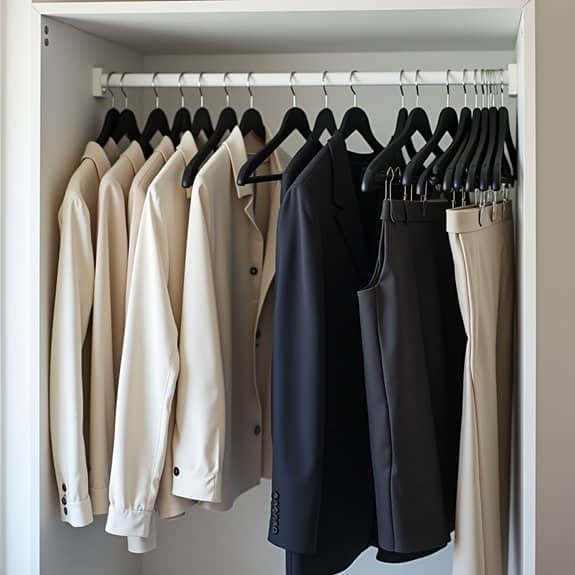
Maximizing closet space is essential in small bedrooms, and one of the most effective ways to achieve this is through the strategic use of space-saving hangers. Traditional hangers can take up unnecessary space and lead to cluttered, cramped closets that make it difficult to find and access clothing.
Space-saving hangers, with their slim profiles and innovative designs, can dramatically increase your closet’s capacity while keeping clothes organized and wrinkle-free. These specialized hangers can reduce closet space usage by up to 50%, creating room for additional storage or simply making your existing wardrobe more manageable.
Required Items:
- Slim velvet hangers
- Cascading hooks or wonder hangers
- S-type multiple garment hangers
- Vertical hanging organizers
- Storage boxes for discarded hangers
- Donation bag
- Labels or marker
- Measuring tape
Start by removing all clothing from your current hangers and sorting items by category (shirts, pants, dresses, etc.). Measure your closet space to determine how many space-saving hangers you’ll need.
Replace old hangers with slim velvet ones, ensuring all hangers match for uniformity and maximum space efficiency. For items that can be hung together, utilize cascading hooks or S-type hangers to create vertical storage solutions.
Group similar items together on your new hangers, using the velvet’s non-slip surface to prevent clothes from falling. Install vertical hanging organizers for accessories or smaller clothing items that don’t require full-length hanging space.
Position cascading hooks strategically to maximize vertical space while maintaining easy access to all garments.
To maintain your newly organized hanging system, regularly assess your clothing collection and remove items you no longer wear. Consider implementing a one-in-one-out rule to prevent overcrowding, and periodically check that hangers remain in good condition.
Always hang clothes immediately after laundering to prevent wrinkles and maintain the organized system you’ve created.
Mount Floating Nightstands
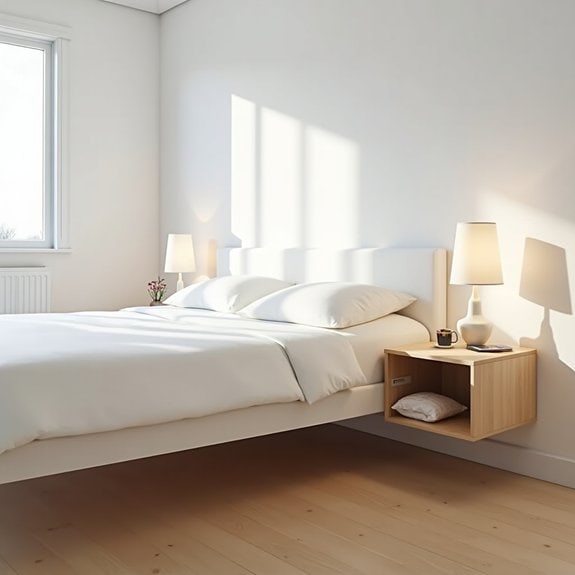
Floating nightstands are an ingenious solution for small bedrooms where floor space is at a premium. By mounting these essential pieces of furniture directly to the wall, you create the illusion of more space while maintaining the functionality of traditional bedside tables. This clever approach eliminates the need for bulky furniture pieces that can make a room feel cramped and cluttered.
The key to successful floating nightstand installation lies in proper planning and execution. Not only do wall-mounted nightstands save valuable floor space, but they also offer versatility in height placement and style options. When properly installed, they provide a sleek, modern look while offering practical storage for bedtime essentials.
Required Items:
- Floating shelf or wall-mounted nightstand
- Stud finder
- Level
- Pencil
- Measuring tape
- Power drill
- Drill bits
- Wall anchors
- Screws
- Screwdriver
- Wall bracket mounting hardware (if included)
- Safety goggles
- Work gloves
Installing floating nightstands requires careful attention to detail and proper wall support. Begin by using the stud finder to locate and mark wall studs, ensuring at least one stud will anchor each nightstand. Measure and mark the desired height for both nightstands, typically 2-4 inches above mattress level, ensuring they’re even with each other.
Use the level to draw straight lines where the brackets will be mounted. Drill pilot holes into the studs or insert wall anchors in locations without studs. Mount the brackets or cleats according to the manufacturer’s instructions, ensuring they’re completely level and secure. Finally, attach the floating nightstand to the mounted hardware, double-checking that everything is sturdy and level.
Additional tip: Consider the weight capacity of both the wall anchors and the floating nightstand itself before loading it with items. Install a small cord management system behind the nightstand to keep phone chargers and other cables organized and hidden from view. For added functionality, choose floating nightstands with built-in drawers or additional shelving to maximize storage capabilities while maintaining a minimal footprint.

