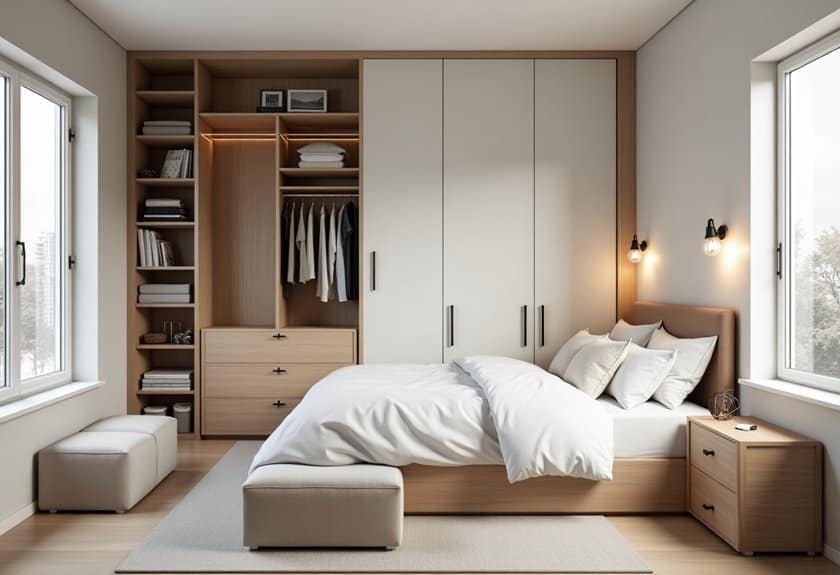
You’re about to discover how to transform your cramped bedroom closet into an organizational masterpiece! If you’ve ever struggled with a tiny closet that seems to swallow your clothes into a black hole of chaos, you’re not alone. I’ve been there, staring at that jam-packed space wondering how anyone manages to keep it tidy. But here’s the thing: with a few clever tricks and some strategic planning, you can double your storage space – and I’ll show you exactly how to make it happen.
Maximize Vertical Space With Over-Door Organizers
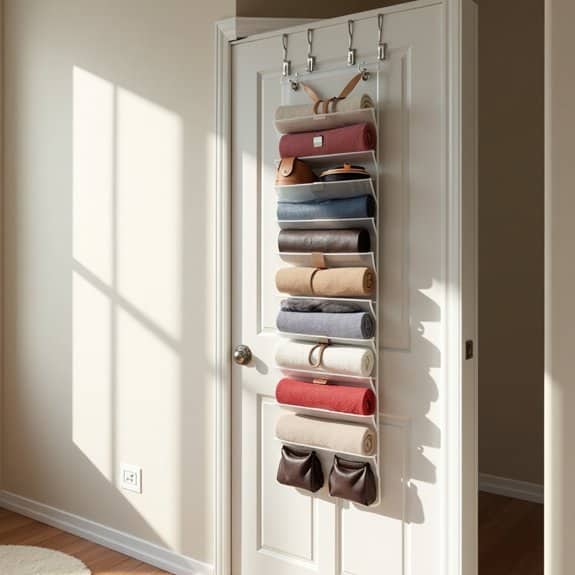
Making the most of vertical space in a bedroom is crucial, especially in smaller living spaces where every square inch counts. Over-door organizers represent one of the most underutilized yet valuable storage solutions, transforming dead space into functional storage areas without taking up precious floor space.
Over-door organizers can revolutionize bedroom organization by providing accessible storage for everything from shoes and accessories to daily essentials and seasonal items. This vertical storage solution keeps items visible, easily accessible, and protected while maintaining a clutter-free environment.
Required Items:
- Over-door organizer (mesh, clear plastic, or fabric)
- Door hooks or hanging brackets
- Level
- Measuring tape
- Optional command strips for added stability
- Storage bins or baskets (if using shelf-style organizers)
- Labels
- Cleaning supplies
Start by thoroughly cleaning both the door and the organizer before installation. Measure your door’s width and height to ensure proper fit, and consider the depth of the organizer when the door is in use.
Install the over-door hooks or brackets, ensuring they’re level and secure. If using additional command strips for stability, apply them to the bottom corners of the organizer. Before loading items, sort them by category and frequency of use.
When filling the organizer, place frequently used items at eye level for easy access. Heavier items should go in lower pockets or shelves to maintain stability. Consider using clear storage containers for smaller items within the organizer to prevent them from getting lost or tangled.
Create designated zones for different categories of items, such as accessories, beauty products, or office supplies.
For optimal organization, implement a regular maintenance schedule. Review contents monthly, removing unused items and adjusting categories as needed. Consider seasonal rotation of items to maximize space and ensure the organizer doesn’t become overloaded.
Use labels to maintain organization systems and make it easier for family members to maintain the system long-term. Remember to periodically check the security of hooks and brackets to prevent any potential damage to the door or stored items.
Install Multi-Level Clothing Rods
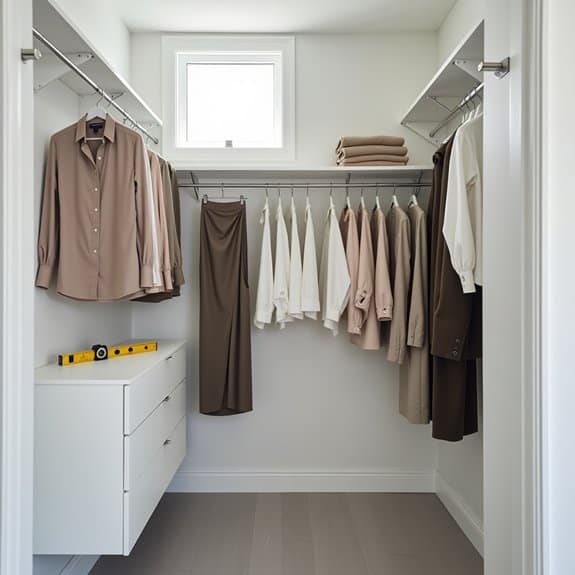
Maximizing vertical space in your closet through multi-level clothing rods is one of the most effective ways to double or even triple your storage capacity. This organization method takes advantage of unused vertical space while keeping clothes easily accessible and wrinkle-free, making it particularly valuable in small bedrooms or shared closets.
By implementing a multi-level rod system, you can separate clothing by category, length, or season, creating a more organized and efficient wardrobe management system. This setup allows you to store shorter items like shirts and folded pants on upper rods while keeping longer items like dresses and coats on lower rods, maximizing every inch of available space.
Required Items:
- Adjustable closet rods
- Wall brackets
- Mounting hardware (screws, anchors)
- Level
- Measuring tape
- Pencil
- Power drill
- Screwdriver
- Stud finder
Start by measuring your closet’s width and height, marking the desired placement for each rod level. Using a stud finder, locate and mark wall studs for secure mounting. Install the first set of brackets at the highest point, ensuring they’re level and properly anchored into studs or using wall anchors.
Mount the top rod and test its stability. Repeat the process for the lower rod, typically placing it 40 inches below the upper rod for optimal spacing. For three-tier systems, maintain approximately 30 inches between each level.
When configuring your rods, ensure the spacing accommodates your specific clothing lengths. Consider installing the bottom rod at a height that allows longer garments to hang freely without touching the floor, while keeping the top rod accessible without a step stool. Adjust the configuration based on your wardrobe composition and personal needs.
Additional Tips: Consider adding small LED strip lights under each rod level to improve visibility of all clothing items. Install rod dividers or markers to separate clothes by category or season. Regular maintenance checks of bracket security will ensure long-term stability and prevent potential clothing damage from fallen rods.
Utilize Under-Bed Storage Solutions
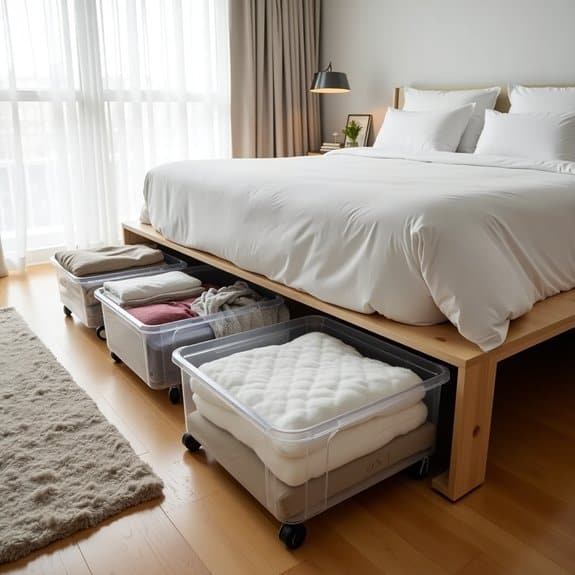
Making the most of under-bed storage space is crucial in modern homes where square footage comes at a premium. This often-overlooked area can provide valuable storage space equivalent to an entire dresser or closet, making it an essential solution for maintaining an organized and clutter-free bedroom.
Proper utilization of under-bed space not only maximizes storage capacity but also helps protect items from dust while keeping them easily accessible. When implemented correctly, under-bed storage can accommodate seasonal clothing, extra bedding, shoes, and various other items that would otherwise occupy valuable closet or drawer space.
Required Items:
- Bed risers (if needed)
- Under-bed storage containers with wheels
- Storage bags or vacuum-seal bags
- Measuring tape
- Labels and marker
- Dust-proof covers
- Clear plastic bins
- Drawer dividers
- Anti-moisture packets
Begin by measuring the available space under your bed, including height, width, and depth. Clear out the area completely and vacuum thoroughly. If additional height is needed, install bed risers to create more storage space.
Sort items into categories: seasonal clothing, shoes, extra bedding, and specialty items. Use vacuum-seal bags for soft items like clothing and bedding to maximize space efficiency.
Place frequently accessed items in wheeled containers near the foot or sides of the bed for easy access. Position less frequently used items toward the head of the bed. Implement a labeling system on all containers, noting contents and season if applicable. Create a rough map of where specific containers are located to avoid pulling everything out when searching for particular items.
For optimal organization maintenance, rotate seasonal items twice yearly, using this opportunity to clean the under-bed area thoroughly. Consider using clear containers for better visibility, and always include moisture-absorbing packets in storage containers to prevent mildew.
Maintain a minimum three-inch clearance between stored items and the bed frame to ensure proper air circulation and prevent dust accumulation.
Invest in Space-Saving Hangers
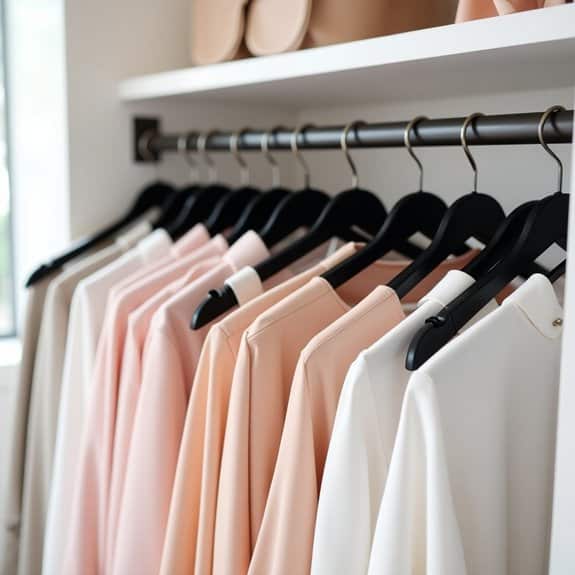
Maximizing closet space starts with selecting the right hangers, as traditional bulky hangers can consume valuable hanging space and limit your storage capacity. Space-saving hangers represent a simple yet transformative solution that can potentially triple your closet’s capacity while keeping clothes properly maintained and wrinkle-free.
The switch to space-saving hangers not only creates additional room but also brings uniformity to your closet, making it easier to organize and locate items. These specialized hangers, with their slim profiles and velvet-like surfaces, prevent clothes from slipping while maintaining a streamlined appearance throughout your wardrobe.
Required Items:
- Space-saving velvet hangers
- Hanger connector clips
- Storage box for old hangers
- Garment sorting bins
- Label maker
- Donation bag
- Measuring tape
- Step stool
Begin by removing all clothes from your current hangers and sorting them into categories (shirts, pants, dresses, etc.). Measure your closet rod to calculate how many space-saving hangers you’ll need, typically allowing for 1/4 inch between each hanger.
Replace old hangers with new space-saving ones, ensuring all hangers face the same direction for consistency. Working with one clothing category at a time, hang items back in your closet, positioning similar pieces together. Use hanger connector clips for coordinating outfits or to create double-hanging arrangements for pants and skirts.
The velvet texture will keep garments in place, so distribute weight evenly and avoid overloading individual hangers.
Additional Tips: Rotate hangers to face the opposite direction when wearing items, helping track which clothes you actually use. For delicate or heavyweight items, reinforce hangers with additional support clips.
Consider installing a secondary tension rod to maximize vertical space, and regularly assess your wardrobe to maintain the organized system. Store seasonal items separately to prevent overcrowding and maintain the efficiency of your space-saving hanger system.
Create a Seasonal Rotation System
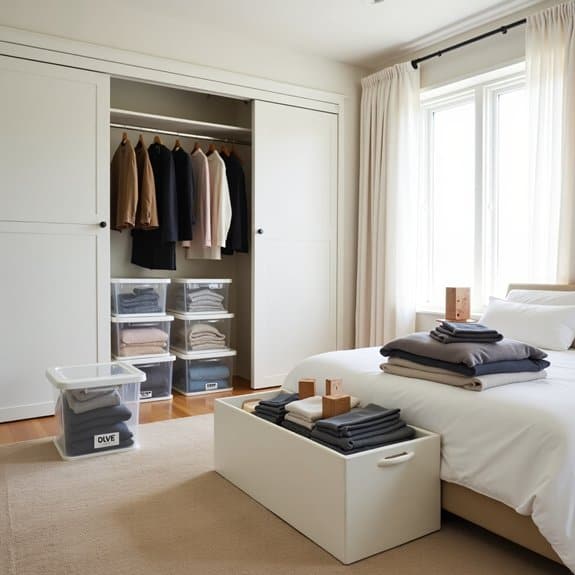
A seasonal rotation system is essential for maximizing bedroom storage space while maintaining an organized and clutter-free environment. By rotating clothing and accessories based on the current season, you can free up valuable closet and drawer space while ensuring easy access to items you actually need.
This systematic approach not only creates more space but also helps preserve the quality of your clothing and accessories by storing them properly during off-seasons. A well-implemented rotation system makes seasonal transitions smoother and helps you maintain a better inventory of your possessions.
Required Items:
- Storage containers with lids
- Vacuum storage bags
- Cedar blocks or lavender sachets
- Labels and marker
- Inventory list template
- Clean sheets or fabric for layering
- Garment bags
- Plastic bins
- Moisture absorbers
- Storage shelving or racks
Sort all clothing and accessories by season, creating distinct piles for each. Clean all items thoroughly before storage, ensuring they’re completely dry.
Pack off-season items in appropriate containers: vacuum bags for soft goods, plastic bins for accessories, and garment bags for formal wear. Label each container clearly with contents and season. Store containers in a cool, dry place such as under the bed, in top closet shelves, or in another designated storage area.
Additional Tips: Maintain a detailed inventory list of stored items to prevent unnecessary purchases and make seasonal transitions easier. Consider implementing a “one-in-one-out” rule when acquiring new items to prevent overflow.
Check stored items halfway through the off-season to ensure proper storage conditions and address any potential issues. Always leave some breathing room in storage containers to prevent damage to stored items and allow for proper air circulation.
Implement the KonMari Folding Method
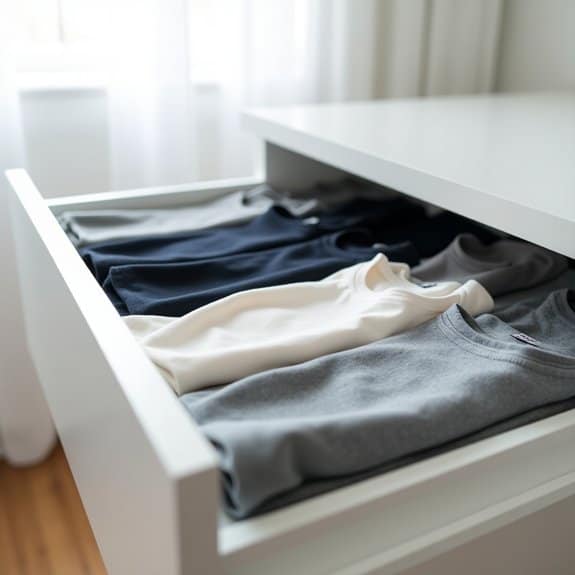
The KonMari folding method, developed by organizing consultant Marie Kondo, revolutionizes the way we store clothes by maximizing drawer space and keeping garments easily visible. This vertical folding technique can transform cluttered drawers into efficiently organized spaces, reducing the need for additional storage furniture in the bedroom.
When clothes are folded properly and stored vertically, they not only take up less space but also remain wrinkle-free and easily accessible. The KonMari method eliminates the frustration of searching through stacked piles of clothing and prevents the chaos that occurs when pulling items from the bottom of a pile.
Required Items:
- Clean, flat surface for folding
- Empty drawers
- Drawer dividers or boxes (optional)
- Clothing items to be folded
- Measuring tape or ruler (optional)
The KonMari folding process follows a specific sequence. Start by laying the garment flat and smoothing out any wrinkles. For shirts, fold both sides toward the center, creating a rectangle. Then fold the sleeves in, maintaining the rectangular shape. Finally, fold the rectangle into thirds, creating a small, compact package that can stand upright.
For pants, fold them in half lengthwise, then fold from the bottom up into thirds or quarters, depending on drawer height.
Once mastering the basic fold, organize garments by category in your drawers. Place similar items together, positioning them vertically like files in a filing cabinet. Start from left to right, with darker colored items at the left and lighter ones toward the right. This arrangement makes it easy to see every item at a glance and maintain organization long-term.
To maximize the effectiveness of the KonMari folding method, regularly assess and adjust your folded items. Use drawer dividers to maintain separate sections for different clothing categories, and consider seasonal rotation of garments to prevent overcrowding.
Remember that proper folding takes practice – spend time perfecting your technique, and the results will be worth the initial investment of time and effort.
Add Corner Shelving Units
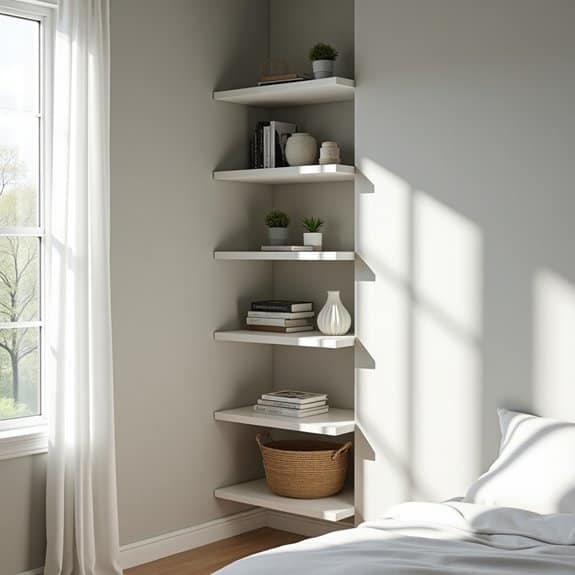
Making the most of corner spaces is essential in any bedroom, especially when square footage is limited. Corner shelving units provide valuable vertical storage while utilizing often-neglected areas of the room, turning dead space into functional storage solutions.
Corner shelves not only maximize storage capacity but also create an attractive display area for books, decorative items, and personal belongings. These units can dramatically reduce clutter while maintaining easy access to frequently used items, making them an ideal solution for bedrooms of any size.
Required Items:
- Corner shelving unit
- Level
- Measuring tape
- Pencil
- Wall anchors
- Screwdriver
- Drill
- Stud finder
- Clean cloth
- Wood cleaner (if using wooden shelves)
Begin by measuring your corner space carefully, accounting for both width and height. Once you’ve selected an appropriately sized unit, use the stud finder to locate wall studs and mark their positions. Install wall anchors where needed, ensuring the unit will be properly supported.
Mount the vertical supports first, checking with the level to ensure perfect alignment. Attach the shelves according to the manufacturer’s instructions, working from bottom to top for the most stable installation.
For optimal organization, place heavier items on lower shelves to maintain stability. Group similar items together and consider using decorative boxes or baskets to contain smaller objects. Keep frequently accessed items at eye level, while storing seasonal or rarely used items on upper shelves.
Maintain approximately 30% empty space on each shelf to prevent a cluttered appearance and allow for future additions.
Additional Tips: Consider installing adjustable shelves to accommodate items of varying heights and preserve flexibility in your storage system. Use bookends or small organizing boxes to keep items upright and neat. Clean shelves regularly to prevent dust accumulation, and reassess the arrangement every few months to ensure it continues to meet your needs effectively.
Use Drawer Dividers and Storage Boxes
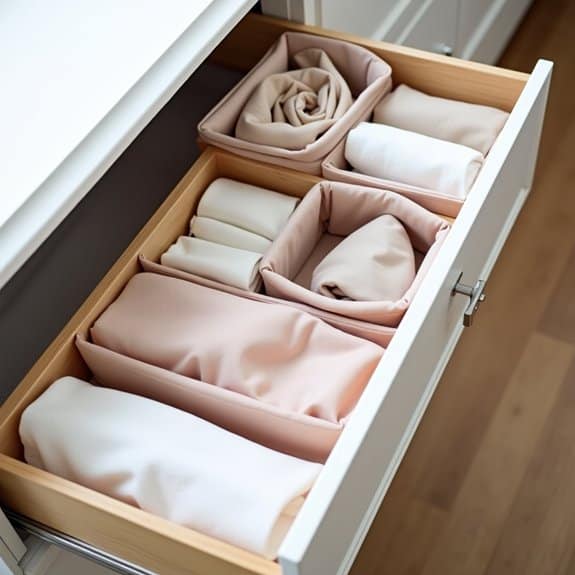
Organizing drawers and storage boxes is a fundamental step in maximizing bedroom space and creating an efficient storage system. Well-organized drawers eliminate the frustration of searching through messy piles and help maintain order in your daily routine, particularly when accessing frequently used items like clothing, accessories, or personal belongings.
Drawer dividers and storage boxes transform chaotic spaces into structured, easy-to-navigate storage solutions. This systematic approach not only saves time but also protects your belongings from damage while making the most of available drawer space, whether in dressers, nightstands, or under-bed storage units.
Required Items:
- Drawer dividers (adjustable or fixed)
- Storage boxes in various sizes
- Measuring tape
- Labels and marker
- Drawer liner (non-slip)
- Small containers for tiny items
- Dust cloth
- Sorting bins (temporary use)
Start by removing everything from the drawers and cleaning them thoroughly. Measure the interior dimensions of each drawer to determine the appropriate size and number of dividers needed. Install drawer liners to prevent items from sliding and protect the drawer bottom.
Sort items into categories based on use, size, or frequency of access. Place the dividers in the drawers, creating sections that accommodate your sorted items efficiently. For deeper drawers, utilize stackable storage boxes to create multiple layers of organization. Choose boxes that fit the drawer dimensions precisely to avoid wasted space.
Label each section or box clearly to maintain the system long-term. Arrange items vertically when possible, making them visible and easily accessible without disturbing other items.
To maintain this organization system, regularly assess and adjust the layout based on changing needs. Consider implementing a one-in-one-out rule to prevent overcrowding, and periodically review items to remove those no longer needed. Seasonal rotation of items can help maximize space and keep frequently used items more accessible during relevant times of the year.
Transform Dead Space Into Storage Nooks
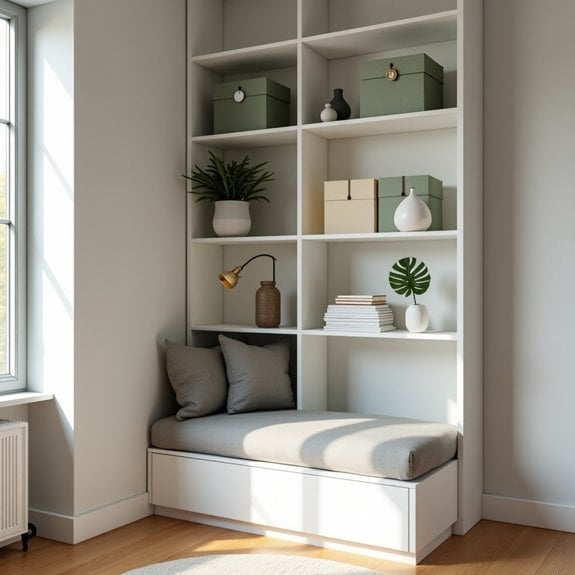
Making use of dead space in a bedroom is crucial for maximizing storage potential and maintaining an organized living environment. Often overlooked areas like corners, spaces between furniture, and vertical wall space represent untapped storage opportunities that can significantly increase a room’s functionality.
These unused spaces, when properly transformed into storage nooks, can house everything from books and accessories to seasonal clothing and personal items. Converting dead space into purposeful storage not only helps declutter your bedroom but also adds character and custom elements to your living space.
Required Items:
- Measuring tape
- Level
- Pencil
- Floating shelves
- Corner shelf units
- Under-bed storage containers
- Over-door organizers
- Tension rods
- Wall anchors
- Drill and screws
- Storage baskets or bins
- Labels
Start by conducting a thorough assessment of your bedroom’s dead spaces. Measure and mark potential storage areas, including corners, spaces above doors, areas between windows, and unused vertical wall space.
Install floating shelves in corners and between windows, ensuring they’re properly anchored to support weight. Utilize the space under your bed by adding storage containers on wheels for easy access. Transform the area behind doors with over-door organizers or hanging storage solutions.
For awkward corners, install corner shelf units or custom-built storage solutions that maximize the angular space. Consider adding tension rods in narrow vertical spaces to create impromptu closet areas.
Install hooks or pegboards on empty wall spaces to create versatile storage options that can be easily modified as needs change.
Additional Tips: When creating storage nooks, maintain a cohesive look by using matching storage containers or a consistent color scheme. Consider installing lighting in darker storage areas to improve visibility and accessibility.
Regular maintenance of these storage nooks is essential – schedule quarterly reorganization sessions to ensure the spaces remain functional and clutter-free. Remember to leave some breathing room in each storage area to prevent overcrowding and maintain easy access to stored items.
Optimize Closet Door Space

Making the most of closet door space has become increasingly important in modern homes where square footage is at a premium. Often overlooked, closet doors offer valuable vertical storage opportunities that can dramatically increase your bedroom’s storage capacity while keeping frequently used items easily accessible.
Maximizing closet door space not only helps declutter your bedroom but also creates an efficient storage system that works with your daily routine. By utilizing this often-neglected area, you can transform your closet doors into functional storage zones that complement your existing storage solutions.
Required Items:
- Over-the-door hooks
- Over-the-door organizers
- Command hooks or adhesive strips
- Wire baskets
- Clear shoe organizers
- Measuring tape
- Screwdriver
- Wall anchors
- Level
- Pencil
Start by measuring your closet door dimensions, including thickness, to ensure any organizers or hooks will fit properly. Install over-the-door hooks at the top of the door, ensuring they’re secure and won’t damage the door when it opens and closes.
For additional storage, mount wire baskets or clear shoe organizers on the inside of the door using appropriate hardware or strong adhesive hooks. Position frequently used items at eye level and heavier items toward the bottom of the door to maintain balance.
Organize items by category, such as accessories, shoes, or toiletries, using clear organizers to maintain visibility. If using multiple storage solutions, ensure they don’t conflict with each other when the door opens and closes.
For optimal organization results, regularly assess the items stored on your closet door and rotate them based on seasonal needs. Avoid overloading door organizers beyond their weight capacity, and periodically check all mounting hardware to ensure everything remains secure.
Consider using clear labels on pockets or baskets to maintain organization and make items easy to locate.
Install Pull-Out Storage Solutions
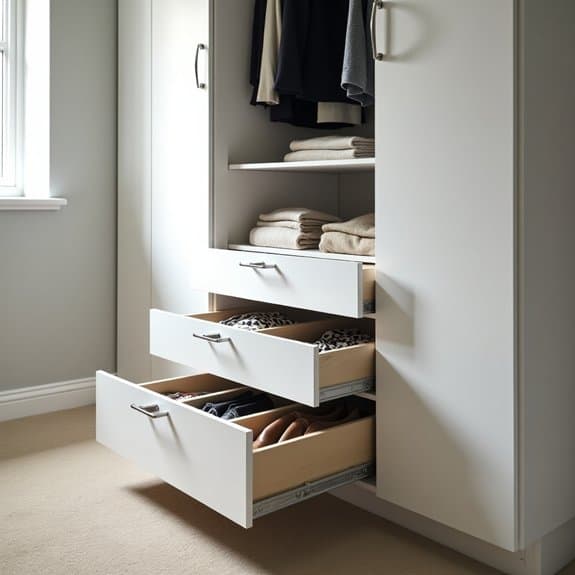
Space optimization becomes increasingly crucial in modern homes where square footage comes at a premium. Pull-out storage solutions represent one of the most efficient ways to maximize bedroom space, allowing you to utilize every inch of available area while maintaining easy access to your belongings.
These sliding systems transform dead space into functional storage areas, particularly in tight corners, under beds, and within closets. Pull-out solutions can double or triple your storage capacity while keeping items organized and readily accessible, eliminating the need to reach into deep, dark spaces or move multiple items to access what you need.
Required Items:
- Measuring tape
- Pencil and paper
- Level
- Drill and drill bits
- Screwdriver
- Pull-out drawer slides
- Storage containers or baskets
- Mounting brackets
- Wood screws
- Drawer handles or pulls
- Safety equipment (gloves, goggles)
Installation begins with careful measurement of your target spaces, ensuring proper fit for pull-out units. Mark mounting points clearly on both the wall and floor surfaces, using a level to guarantee straight installation.
Install drawer slides according to manufacturer specifications, typically requiring secure attachment to wall studs or solid furniture pieces. For under-bed solutions, mount wheels or glides to custom-built platforms, ensuring smooth movement across flooring surfaces.
When installing multiple pull-out units, arrange them strategically based on usage frequency. Position frequently accessed items at comfortable heights and easily reachable locations. Create zones within each pull-out system – designate specific units for clothing, accessories, or seasonal items. Label each unit clearly to maintain organization long-term.
To maximize the effectiveness of pull-out storage, incorporate dividers or smaller containers within each unit to prevent items from shifting during movement. Consider installing soft-close mechanisms to protect both the storage system and stored items from damage.
Regularly inspect and maintain the sliding mechanisms, keeping them clean and lubricated for smooth operation. Always test weight capacity before loading units to prevent structural issues and ensure long-term functionality.
Incorporate Multi-Functional Furniture
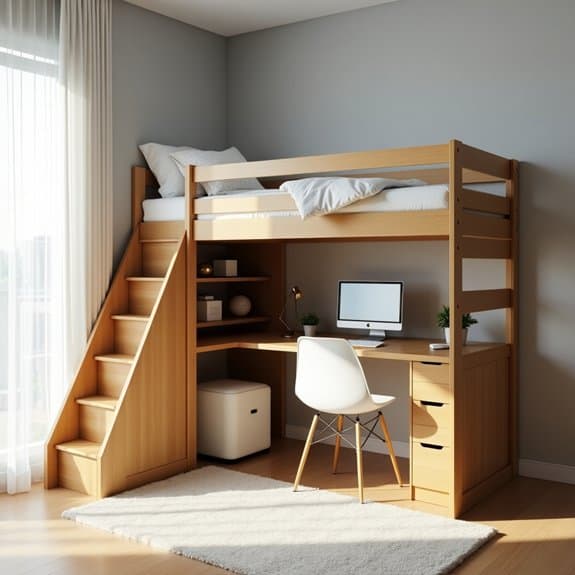
Multi-functional furniture serves as the cornerstone of smart space utilization in modern bedrooms, offering practical solutions for rooms of any size. These versatile pieces eliminate the need for multiple furniture items, effectively reducing clutter while maintaining functionality.
The strategic incorporation of dual-purpose furniture transforms a bedroom from a single-use space into a dynamic environment that can adapt to various needs throughout the day. Whether it’s a bed with storage compartments or a desk that converts into a dining table, these pieces maximize square footage while preserving style and comfort.
Required Items:
- Measuring tape
- Floor plan or room layout sketch
- Furniture catalog or shopping list
- Basic tools (screwdriver, drill, level)
- Storage containers
- Labels
- Planning notebook
- Budget worksheet
Start by assessing your bedroom’s dimensions and identifying high-traffic areas that require clear pathways. Select furniture pieces that serve multiple purposes while fitting within your space constraints. Popular options include ottoman beds with built-in storage, wall-mounted desks that fold away when not in use, and nightstands with charging stations.
Position these pieces against walls or in corners to maximize floor space, ensuring each item serves at least two distinct functions. Create designated zones within your room for different activities, such as sleeping, working, and storage. Install murphy beds or sofa beds to free up space during the day, and opt for bedside tables with drawers or shelving.
Consider vertical storage solutions like tall dressers with desk attachments or loft beds with workspace underneath. Ensure all furniture pieces can be easily accessed and operated without disrupting other functions.
Additional Tips: Prioritize furniture with built-in organization features, such as headboards with shelving or coffee tables with hidden compartments. Use modular furniture systems that can be reconfigured as needs change, and invest in quality pieces that will withstand frequent use and transformation.
Remember to maintain clear pathways and avoid overcrowding the space with too many convertible pieces, as this can defeat the purpose of space-saving solutions.

