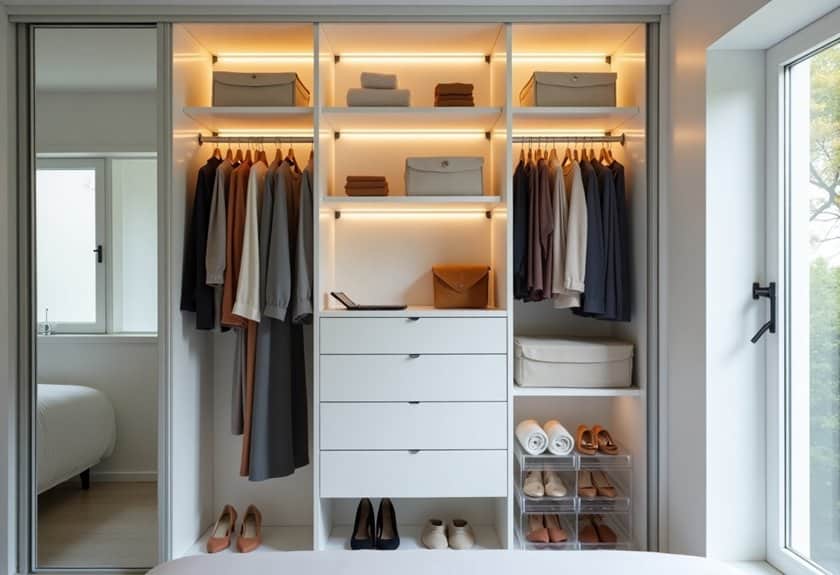
Have you ever felt like your tiny closet is secretly working against you? I get it – organizing a small bedroom closet can feel like solving a puzzle where half the pieces are missing. As someone who’s transformed countless cramped closets into organized sanctuaries, I’ve discovered that maximizing every inch doesn’t require a magic wand or endless budget. Ready to turn your chaotic closet into an efficient storage powerhouse? Let’s explore twelve game-changing solutions that’ll revolutionize your space.

Install Double Hanging Rods to Maximize Vertical Space
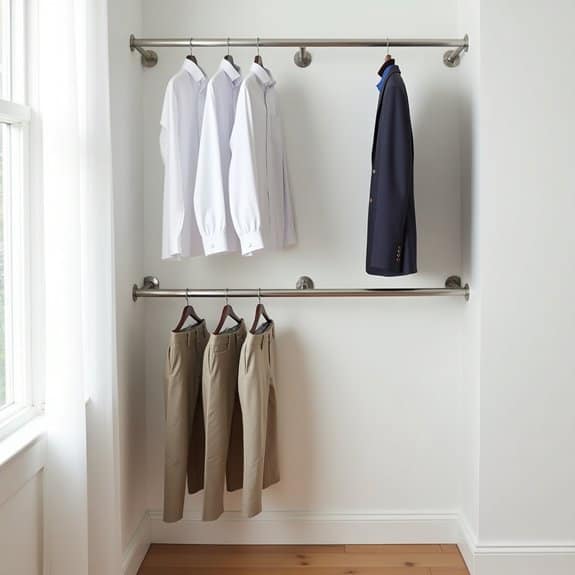
Maximizing vertical space in your closet is one of the most effective ways to double your storage capacity instantly. By installing double hanging rods, you can transform a single rod closet into a highly efficient storage system that accommodates twice the amount of clothing while maintaining easy access to all your items.
Double hanging rods are particularly valuable for storing shorter garments like shirts, blouses, jackets, and folded pants. This organization method creates distinct zones within your closet, allowing you to separate clothing by type, season, or purpose while making the most of otherwise wasted vertical space.
Required Items:
- Measuring tape
- Pencil
- Level
- Power drill
- Screwdriver
- Wall anchors
- Screws
- Double rod hanging brackets
- Closet rods (wood or metal)
- Rod end supports
- Stud finder
The installation process begins with measuring your closet space and marking the desired height for both rods. The upper rod should be positioned approximately 80-84 inches from the floor, while the lower rod should be installed 40-42 inches from the floor.
Using a stud finder, locate and mark wall studs for secure mounting. Install the brackets into the studs using appropriate screws, ensuring they’re level. If studs aren’t available, use heavy-duty wall anchors. Once brackets are secure, insert the rods and test their stability before hanging clothes.
To optimize your new double-rod system, consider these essential tips: Group similar items together on each rod level, with longer garments like dresses and coats on a separate single rod section if space permits. Use slim hangers to maximize rod space, and implement a seasonal rotation system to prevent overcrowding.
Regular maintenance of the rod brackets and periodic weight distribution checks will ensure long-term functionality and prevent potential structural issues.
Utilize Over-the-Door Storage Solutions
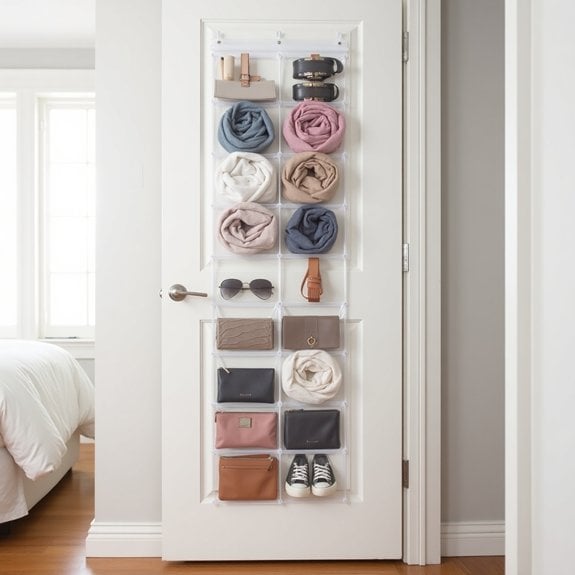
Making the most of vertical space is crucial in any organization strategy, and the back of your closet door represents prime real estate that often goes unused. Over-the-door storage solutions can effectively double your storage capacity while keeping frequently used items easily accessible without taking up valuable floor or shelf space.
By implementing over-the-door storage systems, you can create designated spaces for accessories, shoes, cleaning supplies, or daily essentials that might otherwise clutter your closet interior. This organization method is particularly valuable in small spaces or shared living situations where maximizing every square inch becomes essential.
Required Items:
- Over-the-door hanging organizer (fabric or clear plastic)
- Over-the-door hooks or rack system
- Measuring tape
- Level
- Screwdriver
- Command strips or mounting hardware (if needed)
- Storage bins or baskets (optional)
- Labels and label maker (optional)
Start by measuring your door’s dimensions and choosing an appropriate over-the-door storage system that fits within these measurements. Install the hanging brackets or hooks at the top of the door, ensuring they’re secure and level. For added stability, consider using command strips at the bottom corners of the organizer to prevent swinging.
Sort items by category before placing them in the storage compartments, keeping frequently used items at eye level and heavier items in lower pockets. When arranging items, implement a logical organization system. Store similar items together, such as grouping all shoes in one section or dedicating specific pockets to particular accessories.
If using a clear organizer, take advantage of the visibility by creating an intuitive layout that makes items easy to locate. For fabric organizers, consider adding labels to each pocket for quick identification.
For optimal results, regularly assess and adjust your over-the-door storage system. Rotate seasonal items to more accessible locations when needed, and periodically review contents to prevent overflow. Consider using small containers or bins within larger pockets to contain smaller items, and always ensure the door can close properly without catching or straining the storage system.
Remember that over-the-door storage works best when it’s not overloaded, so maintain a balance between utility and weight capacity.
Add Slim Hangers for Better Space Management
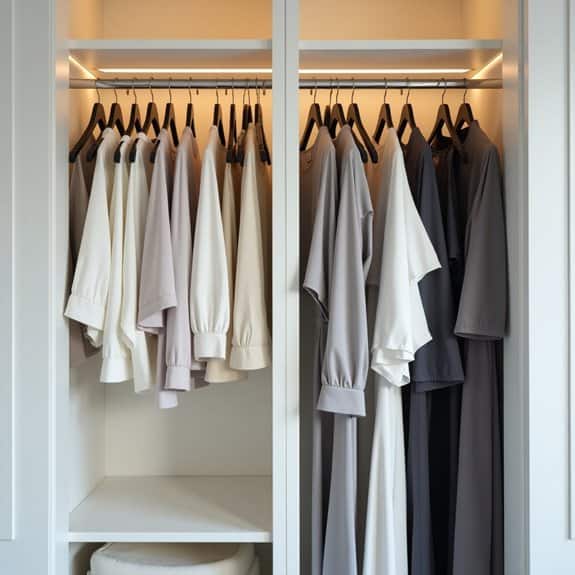
Making the switch to slim hangers is one of the most impactful ways to maximize closet space and create a more organized wardrobe. Traditional plastic and wooden hangers take up unnecessary room, leading to cramped closets and wrinkled clothing. By implementing slim hangers, you can immediately increase your hanging space by up to 50%.
Slim hangers not only save space but also protect your clothing better than conventional options. Their velvet coating prevents garments from slipping off while maintaining the shape of shoulders and delicate items. This systematic approach to hanging clothes creates a uniform, boutique-like appearance while making it easier to see and access your entire wardrobe.
Required Items:
- Slim velvet hangers
- Storage box for old hangers
- Sorting bins or bags
- Label maker (optional)
- Measuring tape
- Dust cloths
- Garbage bag
Start by removing all clothing from your current hangers and sorting items into categories (shirts, pants, dresses, etc.). Measure your closet rod to calculate how many slim hangers you’ll need, typically allowing for 1/4 inch between each hanger. Remove all old hangers and clean the closet rod thoroughly.
Begin transferring clothes onto new slim hangers, ensuring all hangers face the same direction. Group similar items together and arrange them by category, color, or frequency of use. For optimal organization, place frequently worn items at eye level and in easy-to-reach locations.
Maintain consistency by using the same style and color of slim hangers throughout your closet. Consider implementing a system where hangers face one direction for worn items and the opposite direction for fresh clothes, making it easier to track what needs laundering.
Additional Tips: To maintain the effectiveness of slim hangers, avoid overloading them with heavy items, and replace any damaged hangers promptly. Consider using coordination techniques like the reverse hanger method (turning hangers backward and only correcting them after wearing items) to identify clothes that aren’t being used. This helps maintain an organized closet while also providing insight into your wearing habits.
Implement Drawer Organizers and Dividers
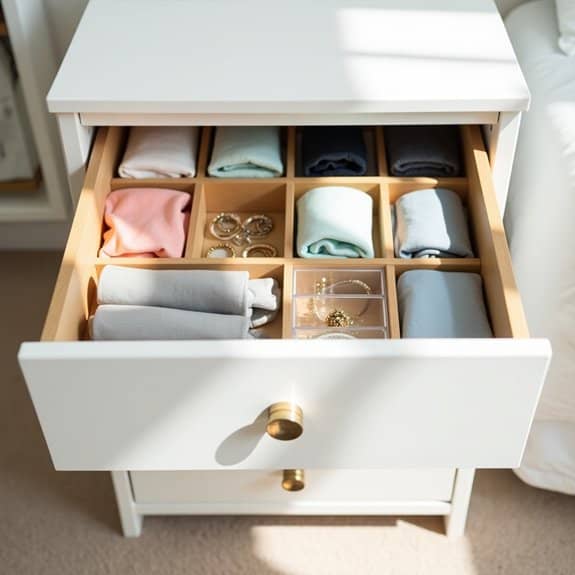
Drawer organization stands as a fundamental aspect of maintaining an orderly closet system. Without proper compartmentalization, drawers quickly become chaotic catch-alls where items get lost, wrinkled, and forgotten. A well-organized drawer system not only maximizes storage space but also protects your belongings and makes daily routines more efficient.
Implementing drawer organizers and dividers transforms cluttered spaces into systematic storage solutions that keep items visible, accessible, and properly separated. This organization method prevents smaller items from getting mixed up, eliminates the frustration of searching for specific pieces, and maintains the original folding or arrangement of your belongings.
Required Items:
- Drawer dividers (adjustable or fixed)
- Small organizing boxes or bins
- Drawer liner material
- Measuring tape
- Scissors
- Labels
- Storage containers in various sizes
- Drawer organizer inserts
- Cloth storage bags
Start by removing everything from the drawers and measuring the interior dimensions. Install drawer liners to protect the surface and prevent items from sliding. Select appropriate dividers or organizers that fit your drawer measurements and accommodate the items you plan to store.
Position larger dividers first to create main sections, then use smaller containers or organizers within these sections for more detailed organization. Group similar items together and assign specific zones within the drawer. For example, dedicate sections to undergarments, socks, accessories, or seasonal items.
Use smaller containers or fabric boxes within the divided spaces to further separate items by color, size, or frequency of use. Position frequently used items toward the front of the drawer for easy access.
For optimal maintenance and longevity of your drawer organization system, reassess the arrangement every few months. Adjust dividers as needed, replace worn liner material, and evaluate whether the current system still serves your needs effectively.
Consider using clear containers for better visibility and implement a one-in-one-out rule to prevent overflow and maintain the organizational structure.
Create a Seasonal Rotation System
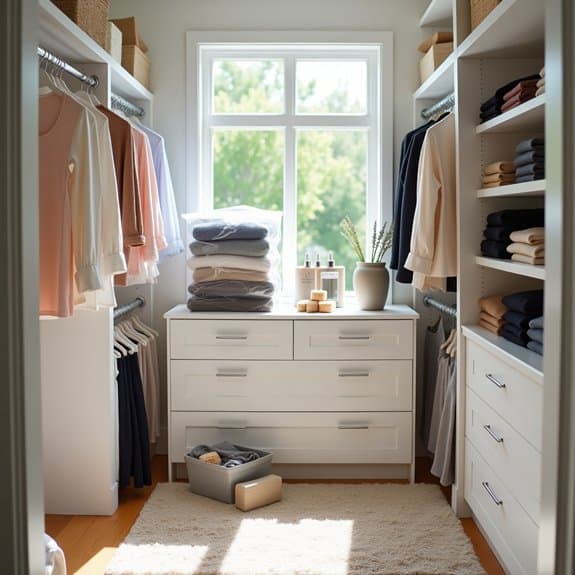
A seasonal rotation system is a game-changer for closet organization, allowing you to maximize your available space while keeping your wardrobe relevant and accessible throughout the year.
By rotating clothes based on seasons, you eliminate the frustration of sifting through heavy winter coats in summer or trying to find your favorite shorts buried behind fall sweaters. This systematic approach not only streamlines your daily dressing routine but also helps preserve your clothing by storing off-season items properly.
When implemented correctly, a seasonal rotation system can reduce closet clutter by up to 50% and make it easier to assess your wardrobe needs for each season.
Required Items:
- Storage containers or vacuum-seal bags
- Labels and markers
- Clean cloth garment bags
- Cedar blocks or lavender sachets
- Plastic bins with lids
- Storage space (attic, basement, or under-bed)
- Inventory checklist
- Cleaning supplies
Start by completely emptying your closet and sorting clothes into seasonal categories. Create distinct piles for winter, summer, spring, and fall items, considering your local climate patterns.
Clean all items before storage, ensuring they’re completely dry to prevent mold and mildew. Pack off-season clothes in appropriate storage containers, using vacuum bags for bulky items like coats and sweaters, and cloth garment bags for delicate pieces.
Transfer the packed containers to your designated storage area, clearly labeling each box with the contents and season. Keep an inventory list of stored items, including their location, to easily locate specific pieces when needed.
Maintain a two-season rotation in your active closet space, typically combining adjacent seasons like spring/summer or fall/winter.
To ensure success with your seasonal rotation system, schedule bi-annual rotation dates on your calendar, typically in spring and fall. Inspect all items during the rotation process for damage or wear, and take the opportunity to donate or discard pieces you haven’t worn.
Consider installing a small dehumidifier in your storage area to protect your clothing investment, and always include moth deterrents in stored clothing containers.
Mount Hooks and Racks on Empty Wall Space
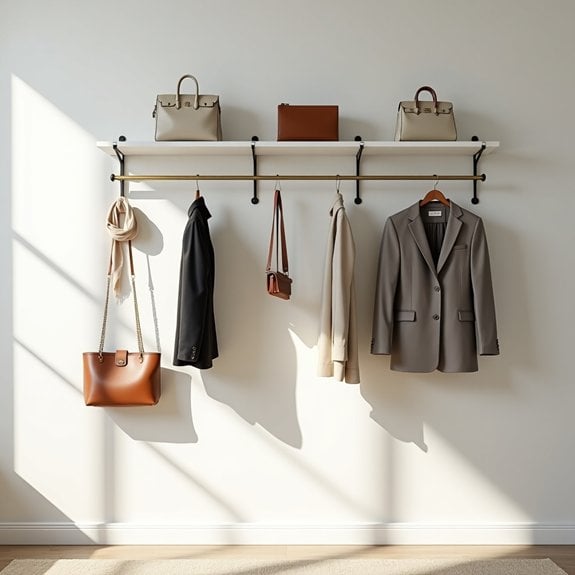
Making use of empty wall space in your closet can dramatically increase its storage capacity while keeping items easily accessible. Vertical storage solutions like hooks and racks transform otherwise wasted space into valuable organizing real estate, allowing you to store everything from accessories to outerwear in plain sight.
Strategic placement of hooks and racks not only maximizes storage but also creates a visually appealing display of your belongings. This organization method works particularly well for frequently used items that you need to grab quickly, while simultaneously protecting delicate items from being crushed or wrinkled in drawers.
Required Items:
- Stud finder
- Drill and drill bits
- Screwdriver
- Level
- Measuring tape
- Pencil
- Wall anchors
- Various hooks (single, double, decorative)
- Mounting racks
- Screws
- Hammer
- Safety glasses
The organization process starts with careful planning and measurement. Using a stud finder, locate and mark wall studs with a pencil. Determine optimal placement for hooks and racks based on the items you plan to hang and the height requirements for each.
Install larger racks first, ensuring they’re level and properly anchored into studs when possible. For areas between studs, use appropriate wall anchors to support the weight of your items. Space individual hooks at least 6-8 inches apart to prevent crowding and allow easy access to hanging items.
For heavy-duty storage needs, consider installing a combination of different hook styles and rack systems. Mount longer racks higher on the wall for items like scarves or belts, while positioning sturdy individual hooks lower for coats and bags.
Create zones within your wall space, designating specific areas for different types of items to maintain organization.
Additional tip: Consider adding small adhesive labels above hook sections to maintain organization systems long-term. Install hooks at varying heights to accommodate different item lengths, and always factor in weight capacity when choosing mounting hardware.
Periodically check that all mounted items remain secure, and adjust placement as your storage needs change throughout the year.
Use Clear Storage Bins for Visibility
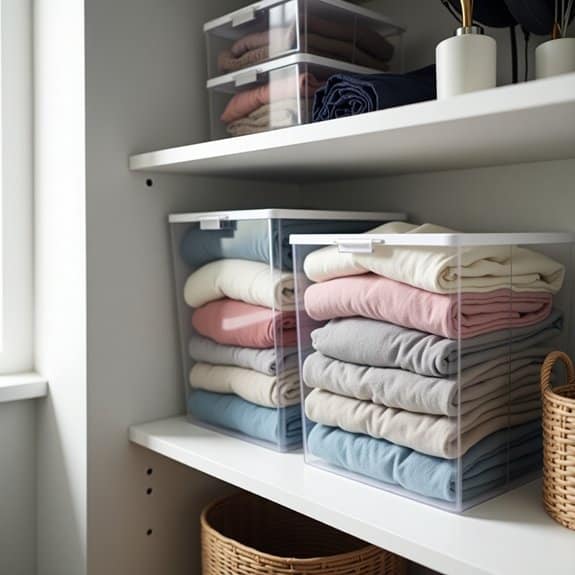
Clear storage bins represent a game-changing solution for closet organization, allowing you to instantly locate items without rummaging through opaque containers. The transparency of these bins eliminates the need for labels and reduces the time spent searching for specific items, making your daily routine more efficient and stress-free.
The visual accessibility of clear storage containers also helps maintain organization long-term, as you’re more likely to return items to their designated spots when you can see exactly where they belong. This visibility serves as a natural inventory system, making it easy to track what you have and what needs restocking or replacing.
Required Items:
- Clear plastic storage bins (various sizes)
- Measuring tape
- Shelf liner (optional)
- Labels and marker
- Drawer dividers (optional)
- Dust cloth
- Level
- Step stool
Start by measuring your closet shelves and spaces to determine appropriate bin sizes. Sort items into categories such as accessories, seasonal wear, or specific clothing types. Select bins that fit your designated spaces and accommodate your grouped items.
Position the larger bins on lower shelves for heavier items, and place frequently used items at eye level. For optimal organization, stack similar-sized bins together and ensure they’re easily accessible. Leave about an inch of space between bins for easy removal.
Consider using drawer-style bins for smaller items and stackable options for maximizing vertical space. Keep bins no more than 75% full to maintain visibility and prevent overflow.
To maintain the effectiveness of clear storage bins, regularly assess their contents and clean both the bins and items inside. Consider using silica gel packets in bins storing delicate materials to prevent moisture buildup, and periodically rotate seasonal items to different bins based on current needs.
Avoid overfilling bins, as this can lead to damaged items and defeat the purpose of visibility.
Install Pull-Out Storage Baskets
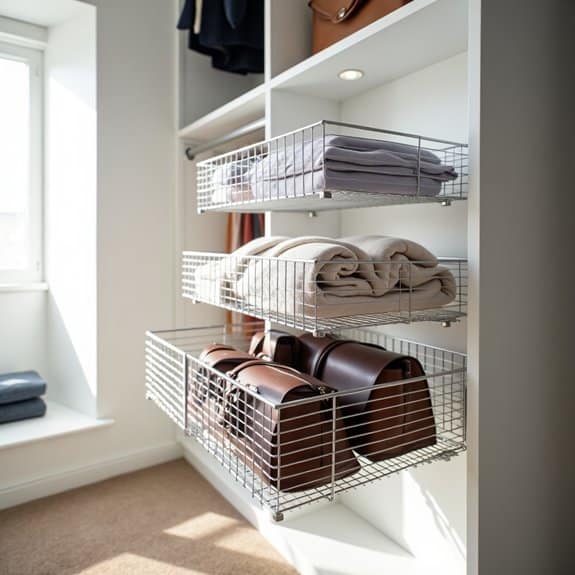
Pull-out storage baskets are a game-changing solution for maximizing closet space and accessibility. These versatile organizers transform cluttered corners and hard-to-reach areas into efficient storage zones, allowing you to utilize every inch of available space while keeping items easily accessible.
Installing pull-out baskets creates a systematic approach to organizing smaller items that often get lost in traditional closet layouts. This solution works particularly well for accessories, undergarments, seasonal items, and folded clothing, providing a clear view of contents while maintaining a clean, organized appearance.
Required Items:
- Pull-out wire or mesh baskets
- Mounting brackets
- Screws and anchors
- Power drill
- Screwdriver
- Level
- Measuring tape
- Pencil
- Stud finder
- Installation template (if provided)
Begin the installation process by measuring your closet space and marking the desired locations for your pull-out baskets. Use a stud finder to locate wall studs for secure mounting. Install the mounting brackets according to the manufacturer’s specifications, ensuring they’re level and properly anchored.
Attach the slide mechanisms to both the brackets and baskets, testing the sliding action before fully securing them. For optimal organization, arrange baskets vertically with adequate spacing between each unit. Consider installing different sized baskets based on your storage needs – larger ones for bulky items and smaller ones for accessories.
Ensure all mounting hardware is tightly secured and that baskets slide smoothly without catching or tilting.
Additional Tips: Label each basket to maintain organization and consider using clear bins inside the baskets for further compartmentalization. Install stops or soft-close mechanisms to prevent baskets from being pulled out completely. Regularly check and tighten hardware to maintain smooth operation and prevent sagging.
When organizing items within the baskets, place frequently used items in easily accessible locations and consider using drawer liners to prevent items from shifting during use.
Incorporate Shelf Dividers for Neat Stacks
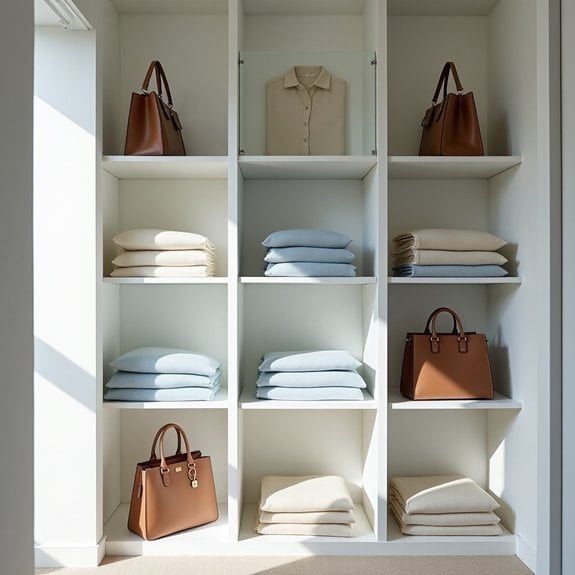
Shelf dividers are essential tools for maintaining order in any closet space, preventing stacked items from toppling over and keeping categories clearly separated. These simple organizers transform chaotic shelves into well-defined sections that make it easier to find and access items while maximizing vertical storage space.
When properly implemented, shelf dividers create distinct compartments that prevent clothes and accessories from mixing together, essentially creating invisible walls between different types of items. This organization method is particularly effective for sweaters, handbags, clutches, and folded clothing that tends to slouch or collapse when stacked.
Required Items:
- Shelf dividers (acrylic or wire)
- Measuring tape
- Shelf liner (non-slip)
- Labels or label maker
- Clean microfiber cloth
- Cleaning spray
- Storage boxes (optional)
Start by removing all items from the shelf and thoroughly cleaning the surface. Measure the depth of your shelves and ensure your dividers are compatible. Place non-slip liner on the shelf to prevent items from sliding. Position dividers at strategic intervals based on the size of items you plan to store – typically 12-15 inches apart for sweaters and 8-10 inches for smaller items like purses or accessories. Secure the dividers firmly to the shelf edge.
Sort items by category and begin placing them between the dividers, keeping stacks at a manageable height (no more than 6-8 items per stack). Heavier items should be placed at the bottom of each stack, with lighter pieces on top. For optimal organization, maintain consistent folding techniques within each section to create uniform stacks that maximize space and visibility.
To maintain this organization system, regularly assess the contents of each compartment and adjust divider spacing as needed. Consider using clear storage boxes within the divided sections for smaller items, and implement a one-in-one-out rule to prevent overcrowding.
Label each section clearly if sharing the closet with others or to maintain long-term organization habits. Periodically check that dividers remain secure and adjust as needed to prevent slipping or misalignment.
Add Corner Shelving Units
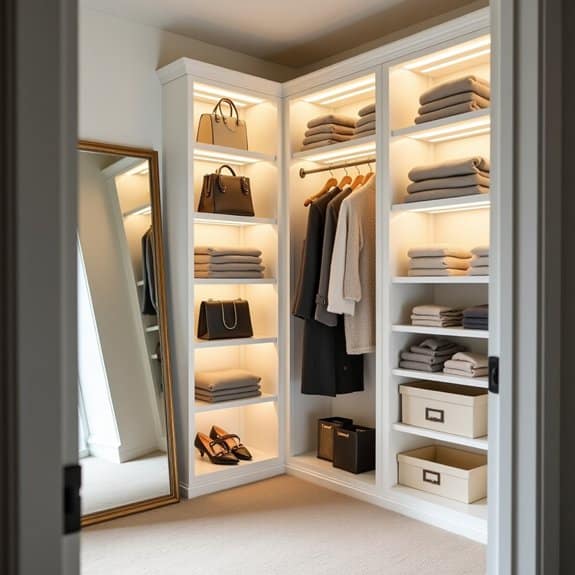
Corner spaces in closets are often overlooked and underutilized, resulting in valuable storage space going to waste. These awkward angles can actually become prime real estate for storing folded clothes, accessories, shoes, and other items when properly equipped with corner shelving units.
Making use of these corners can dramatically increase your closet’s storage capacity while maintaining a clean, organized appearance. Corner shelving transforms dead space into functional storage areas, allowing you to maximize every inch of your closet.
These units are particularly effective in walk-in closets where corner spaces are more accessible, but they can also work wonders in reach-in closets when properly planned and executed.
Required Items:
- Corner shelving unit (pre-made or custom)
- Level
- Measuring tape
- Pencil
- Drill
- Wall anchors
- Screws
- Stud finder
- Screwdriver
- Safety goggles
- Dust mask
Installing corner shelving requires careful planning and precise execution. Start by measuring your corner space and selecting an appropriately sized shelving unit that fits your needs.
Use a stud finder to locate wall studs and mark their positions. Position the first shelf at your desired height, ensuring it’s level, and mark the mounting points. Install wall anchors where needed, then secure the shelf to the wall with screws, making sure to catch at least one stud for stability.
Continue adding additional shelves, maintaining consistent spacing between each level for a clean look. Once installed, organize items by category and frequency of use. Place frequently accessed items at eye level, with less-used items on higher or lower shelves.
Consider using shelf dividers or small bins to keep items separated and prevent stacks from toppling over. Maximize vertical space by adjusting shelf heights to accommodate different item sizes while maintaining an efficient use of space.
To ensure long-term success with your corner shelving system, regularly assess the weight distribution on each shelf and avoid overloading. Label shelves or sections to maintain organization, and consider implementing a rotation system for seasonal items.
Periodically clean and check the stability of the shelving units, tightening any loose screws as needed to maintain their structural integrity and safety.
Install Motion-Sensor Lighting
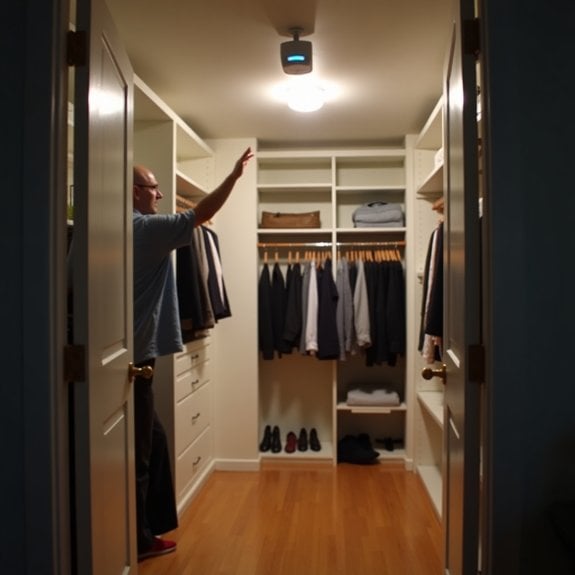
Proper lighting in a closet is essential for efficiently locating and organizing clothing, accessories, and stored items. Traditional pull-chain lights or manual switches can be inconvenient, especially when your hands are full of clothes or storage boxes.
Motion-sensor lighting eliminates this hassle while providing immediate illumination exactly when needed. Motion-sensor lighting not only adds convenience but also contributes to energy efficiency by automatically turning off when the closet isn’t in use.
This smart lighting solution can transform a dark, challenging space into a well-lit, functional area that makes daily routines smoother and more enjoyable.
Required Items:
- Motion sensor light fixture
- Wire strippers
- Screwdriver
- Wire nuts
- Electrical tape
- Voltage tester
- Mounting screws
- Wire connectors
- Ladder or step stool
- Safety glasses
Installing motion-sensor lighting requires careful attention to electrical safety and proper positioning. First, turn off power to the closet at the circuit breaker and verify with a voltage tester.
Remove the existing light fixture if present, carefully disconnecting the wires. Mount the motion sensor fixture’s mounting bracket to the electrical box, ensuring it’s secure. Connect the corresponding wires (black to black, white to white, and ground to ground) using wire nuts and electrical tape for added security.
Attach the fixture to the mounting bracket, then adjust the sensor’s sensitivity and timer settings according to manufacturer specifications.
Final Tips: Position the sensor to cover the entire closet entrance area, typically angled slightly downward at 30-45 degrees. Test the sensor’s range and timing during different times of day to ensure optimal performance.
Consider installing multiple sensors for larger closets or L-shaped spaces to eliminate blind spots. Regular dusting of the sensor will maintain its effectiveness and longevity.
Maximize Floor Space With Shoe Storage Solutions
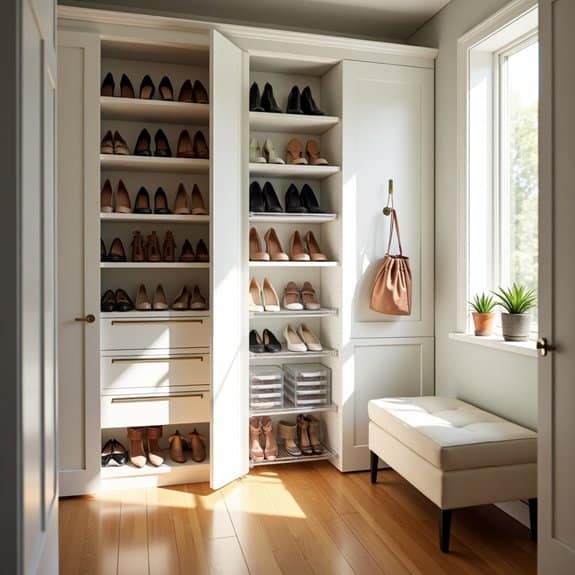
A well-organized shoe storage system is crucial for maintaining an orderly closet and maximizing valuable floor space. Shoes scattered across the closet floor not only create visual chaos but also make it difficult to access other items and maintain a clean environment. Proper shoe organization can transform a cluttered closet into an efficient storage space while protecting your footwear investment.
When floor space is at a premium, vertical storage solutions become essential. By utilizing wall space, door space, and clever storage solutions, you can store dozens of pairs of shoes while keeping them easily accessible and visible. This organization method prevents damage to shoes, extends their lifespan, and makes daily outfit selection more efficient.
Required Items:
- Over-the-door shoe organizer
- Shoe rack or shelving unit
- Clear shoe boxes
- Label maker
- Measuring tape
- Storage bench (optional)
- Hanging shoe organizer
- Shoe slots or stackable organizers
- Dust bags for delicate shoes
Start by removing all shoes from the closet and sorting them by category (formal, casual, athletic) and frequency of use. Measure your available space and install a combination of storage solutions based on your specific needs.
Mount an over-the-door organizer for frequently worn shoes, and utilize wall-mounted shelving for special occasion footwear. For boots and taller shoes, implement boot shapers or stackable organizers to maintain their shape while maximizing vertical space.
Store seasonal shoes in clear boxes on upper shelves or under-bed storage containers, ensuring they’re clean and dry before storing. Use shoe slots or stackable organizers on existing shelves to double the capacity while maintaining visibility.
Place frequently worn shoes at eye level and occasional-use footwear in less accessible spaces.
Additional Tips: Rotate your shoe collection seasonally to maximize space and maintain organization. Consider installing motion-sensor lights to illuminate dark corners of shoe storage areas.
Clean shoes before storing them, and use cedar blocks or moisture-absorbing packets in storage containers to prevent odors and maintain freshness. Regular maintenance of your organization system, including weekly straightening and seasonal purging, will ensure long-term success in maximizing your closet’s floor space.

