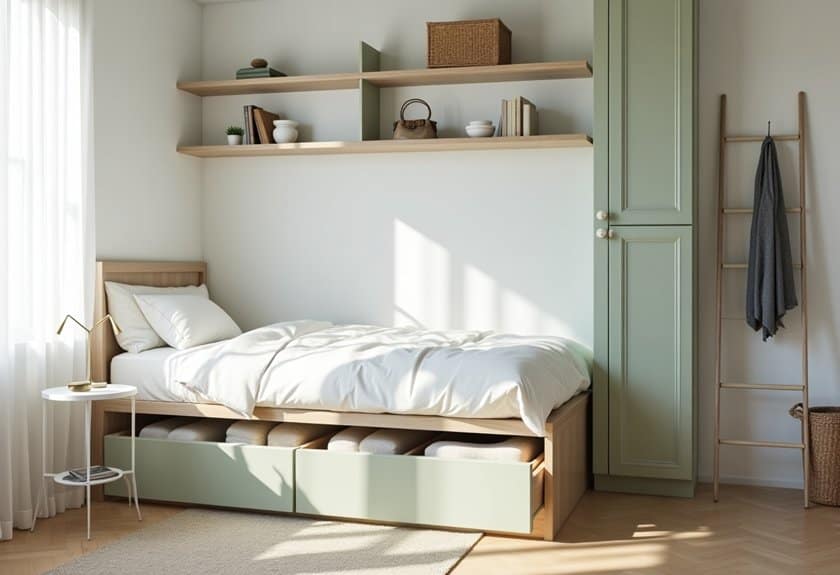
Did you know that the average person spends over 12,000 hours in their bedroom each year? That’s a lot of time to feel cramped and disorganized! I’ve transformed countless tiny bedrooms into functional sanctuaries, and I’ve learned that smart storage isn’t about having more space—it’s about maximizing every inch you’ve got. Whether you’re working with a cozy 10×10 or a snug studio setup, I’m excited to share the clever tricks that’ll help you create the organized oasis you’ve been dreaming of.
Under-Bed Rolling Storage Drawers
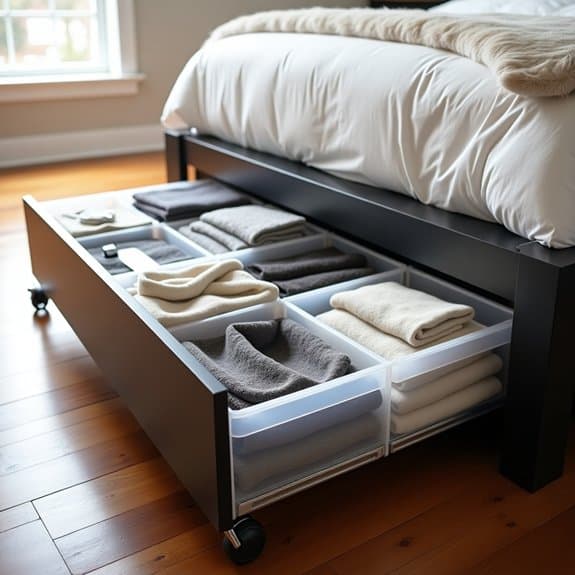
Making use of under-bed space is crucial in small bedrooms where every square inch counts. Under-bed rolling storage drawers offer an elegant solution to maximize this often-overlooked area, providing easy access to seasonal items, extra bedding, or clothing while keeping them dust-free and organized.
Rolling storage drawers transform dead space into functional storage that’s both accessible and protected. Unlike traditional under-bed boxes, wheeled drawers allow smooth access without lifting or struggling to reach items pushed against the wall, making them particularly valuable for those with limited mobility or in rooms with tight spaces.
Required Items:
- Under-bed rolling storage containers
- Drawer dividers or organizers
- Labels or label maker
- Measuring tape
- Clear plastic bags or vacuum storage bags
- Anti-moisture packets
- Drawer liner material
- Dust brush or vacuum cleaner
Start by measuring your under-bed clearance and mapping out how many containers will fit. Sort items into categories: seasonal clothing, extra bedding, shoes, or special occasion items. Pack items in clear bags or vacuum storage bags to protect against dust and moisture. Place frequently used items in drawers closer to the bed’s foot for easier access.
Roll out drawer liner material to protect the bottom of each container and prevent items from sliding. Install drawer dividers to create designated spaces for different categories. Arrange items vertically when possible to maximize visibility and accessibility. Label each drawer clearly on both the front and top edges to eliminate guesswork when searching for specific items.
For optimal organization, rotate stored items seasonally and conduct quarterly reviews of stored contents. Consider installing bed risers to create additional height clearance if needed, and always leave some space between containers for proper air circulation. Keep a small handheld vacuum nearby for regular cleaning of the under-bed area to prevent dust accumulation around the storage drawers.
Floating Nightstand Solutions
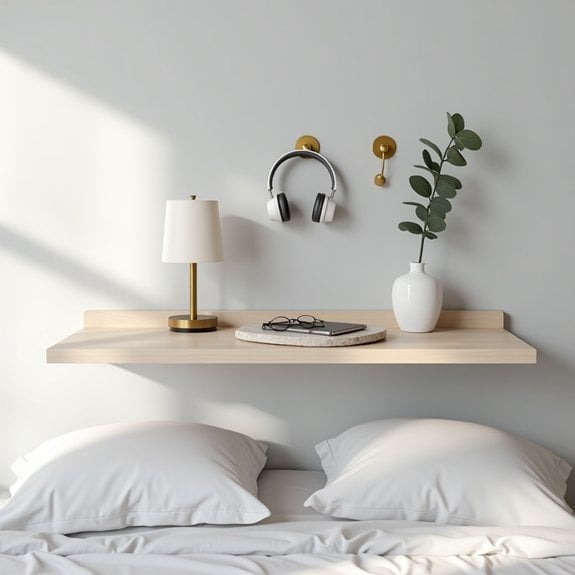
Floating nightstands represent a game-changing solution for small bedrooms, maximizing floor space while maintaining essential bedside storage. By elevating storage off the floor, these wall-mounted alternatives create an illusion of more space and contribute to a cleaner, more minimalist aesthetic.
Proper organization of floating nightstands is crucial for maintaining functionality without creating visual clutter. Since these surfaces typically offer limited space compared to traditional nightstands, strategic organization becomes essential for keeping frequently used items accessible while maintaining a tidy appearance.
Required Items:
- Wall-mounted floating shelf or nightstand
- Wall anchors and mounting hardware
- Level
- Drill
- Screwdriver
- Storage containers or dividers
- Cable management solutions
- Small decorative tray
- Command strips or hooks
- Measuring tape
Installing and organizing a floating nightstand requires careful planning and execution. Start by determining the ideal height for your nightstand, typically 2-4 inches above mattress level. Mark and install the floating shelf securely using appropriate wall anchors.
Create designated zones on the surface: a small tray for daily essentials like glasses and phone, a compact container for personal items, and space for a reading lamp or water glass. If the floating nightstand includes a drawer or additional shelving, implement drawer organizers or small bins to separate items by category.
When organizing the top surface, maintain a minimalist approach by limiting items to daily essentials. Consider installing a small hook on the side for hanging items like headphones or charging cables.
Utilize the wall space above the floating nightstand by adding small shelves or hooks for additional storage while maintaining the floating aesthetic.
For optimal organization maintenance, implement a weekly reset routine to prevent clutter accumulation. Use cable management solutions to keep charging cords tidy, and consider adding battery-operated lighting to eliminate the need for corded lamps.
Remember that floating nightstands work best when items are curated regularly, keeping only the most essential items within arm’s reach.
Over-Door Organizers and Hooks
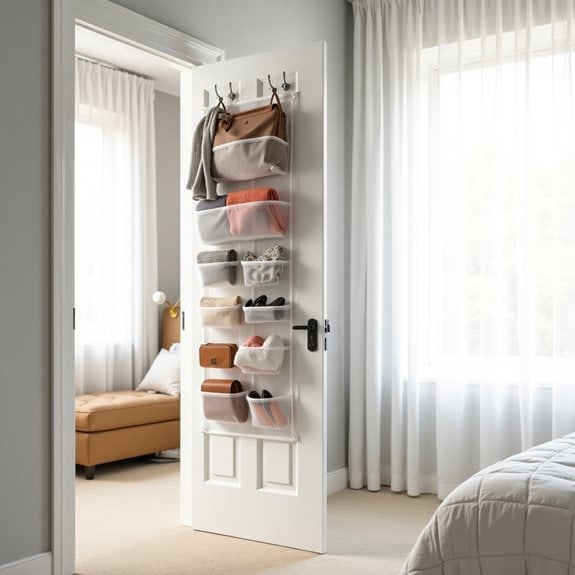
Over-door organizers and hooks represent one of the most underutilized yet valuable storage solutions for small bedrooms. These vertical storage options transform dead space behind doors into functional organizing zones, creating additional storage without consuming precious floor space or requiring permanent installation.
When properly implemented, over-door storage systems can house everything from shoes and accessories to cleaning supplies and clothing items. This organization method is particularly valuable for renters who can’t make permanent modifications to their space, and it provides instant access to frequently used items while keeping them neatly contained and out of sight when the door is closed.
Required Items:
- Over-door hanging organizer (with pockets)
- Over-door hooks or hook rack
- Door bumpers or felt pads
- Tension rods (optional)
- Clear storage pouches (optional)
- Labels
- Measuring tape
- Level
Start by measuring your door’s dimensions and checking the door’s thickness to ensure proper fit of your chosen organizers. Install door bumpers or felt pads where the organizer will make contact with the door to prevent damage. Place the over-door hooks or rack at the top of the door, ensuring it’s level and secure.
If using a pocket organizer, hang it first and then adjust the hooks around it as needed. Sort items by frequency of use, placing frequently accessed items at eye level. Utilize clear storage pouches within the pockets for smaller items, and implement a labeling system if multiple family members share the space.
For maximum efficiency, consider using tension rods horizontally across wider pockets to create additional divisions for storing smaller items. To maintain the organization system’s effectiveness, regularly audit stored items and rotate seasonal pieces as needed.
Avoid overloading pockets or hooks, as this can strain the door and organizing systems. Consider installing a full-length mirror on the opposite side of the door to maximize functionality while maintaining organization. Remember to periodically check and tighten all components to ensure they remain secure and functional.
Multi-Functional Ottoman Storage
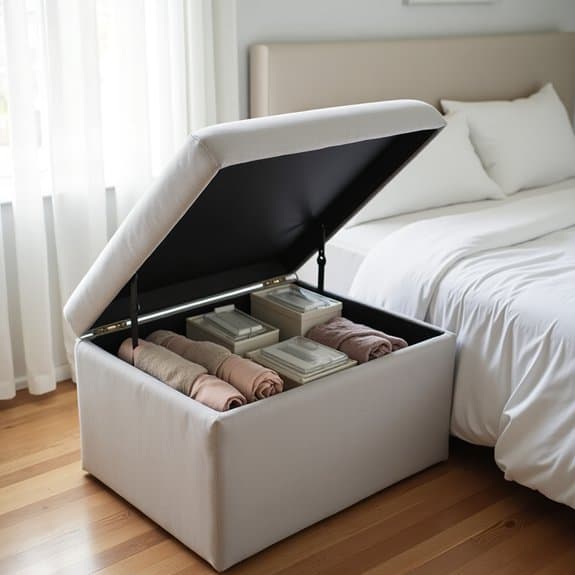
A well-organized ottoman storage solution can transform a small bedroom by maximizing space efficiency while maintaining style and functionality. When properly utilized, an ottoman serves multiple purposes: seating, storage, and even an impromptu table, making it an invaluable piece of furniture in compact living spaces.
Multi-functional ottoman storage becomes particularly crucial in small bedrooms where every square inch matters. The hidden storage compartment can house seasonal items, extra bedding, accessories, or daily essentials while keeping them easily accessible yet out of sight, contributing to a clutter-free environment.
Required Items:
- Storage ottoman
- Storage bins or organizers
- Labels or tags
- Drawer liner or fabric
- Clear zip-top bags
- Vacuum storage bags (optional)
- Shelf dividers (optional)
- Storage boxes (optional)
To organize your ottoman storage effectively, start by emptying the compartment completely and cleaning it thoroughly. Line the bottom with drawer liner or fabric to protect stored items.
Categorize your belongings into distinct groups such as bedding, seasonal wear, accessories, or books. Use appropriately sized storage bins or clear bags to separate different categories, ensuring items remain organized and easily identifiable.
For maximum efficiency, place frequently used items toward the front of the ottoman for easy access. Consider using vacuum storage bags for bulky items like extra pillows or winter blankets to maximize space.
If storing smaller items, utilize drawer organizers or small boxes to prevent items from becoming jumbled. Label each container clearly to maintain organization long-term.
To maintain your ottoman storage system, conduct monthly reviews of stored items, removing anything that’s no longer needed. Consider rotating seasonal items to the front when appropriate, and always return items to their designated spots after use.
For items that require protection from dust, use clear zip-top bags or covered containers, and avoid overloading the ottoman to prevent damage to the hinges or storage mechanism.
Vertical Shelving Systems
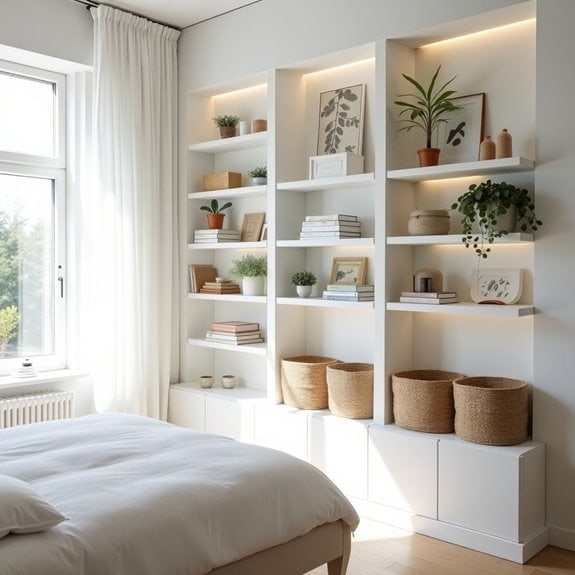
Maximizing vertical space in a small bedroom is crucial for creating additional storage without sacrificing precious floor space. Vertical shelving systems transform empty wall space into functional storage areas, allowing you to display decorative items while keeping essential belongings organized and easily accessible.
When properly implemented, vertical shelving can double or triple your storage capacity while creating an aesthetically pleasing focal point in your room. These systems are particularly valuable for storing books, displaying photos, housing small plants, and organizing everyday items that might otherwise clutter horizontal surfaces.
Required Items:
- Wall-mounted shelving units
- Wall anchors and screws
- Level
- Measuring tape
- Pencil
- Power drill
- Stud finder
- Screwdriver
- Storage baskets or bins
- Shelf brackets (if needed)
- Cleaning supplies
Start by measuring your wall space and mapping out the shelving arrangement using a pencil and level. Locate wall studs using a stud finder, as these will provide the most secure mounting points. Install the first shelf bracket or mounting hardware at your desired height, ensuring it’s perfectly level.
Continue mounting additional shelves, maintaining consistent spacing between each level. For floating shelves, ensure proper weight distribution by using appropriate wall anchors and following manufacturer guidelines for installation.
Once the shelving system is securely mounted, organize items by category and frequency of use. Place frequently accessed items at eye level, while storing seasonal or rarely used items on higher shelves. Incorporate storage baskets or bins to contain smaller items and maintain a clean appearance.
Consider leaving some open space between items to prevent a cluttered look and allow for future additions. To maintain an organized vertical shelving system, regularly assess items for relevance and rotate seasonal belongings. Use bookends to keep books upright, and implement a one-in-one-out rule when adding new items.
Consider installing LED strip lighting under shelves to illuminate displayed items and create ambiance while making it easier to locate stored items in the evening.
Corner Space Maximizers
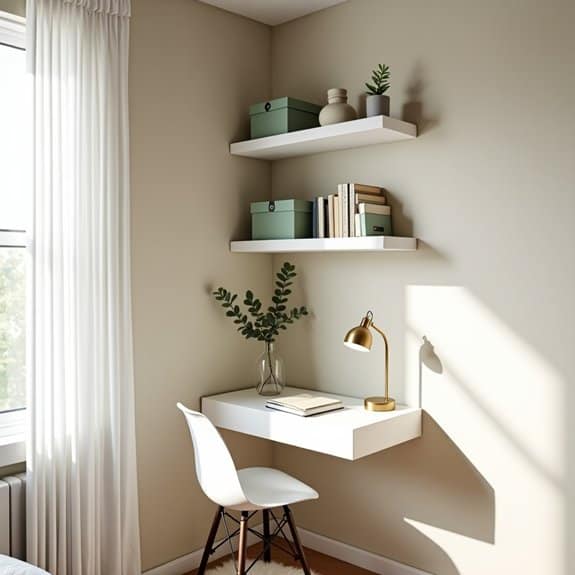
Corners are often the most underutilized spaces in small bedrooms, becoming catch-all spots for clutter or remaining completely empty. These awkward angles actually represent valuable real estate in a compact room, offering unique opportunities for storage, display, and functionality without consuming precious floor space in the main area of the room.
Making the most of corner spaces can dramatically increase your bedroom’s storage capacity while maintaining a clean, organized appearance. Corner solutions can range from floor-to-ceiling shelving units to floating corner desks, effectively turning these traditionally challenging spaces into practical zones that serve multiple purposes.
Required Items:
- Corner shelf unit or floating shelves
- Corner desk (if desired)
- Storage bins or baskets
- Corner tension rod
- Level
- Measuring tape
- Wall anchors
- Screwdriver
- Drill
- Corner protectors
Start by thoroughly measuring your corner space, including height and width on both walls, noting any obstacles like outlets or vents. Install a corner shelf unit or floating shelves, ensuring they’re properly anchored to support weight.
Position larger items like storage bins on lower shelves for stability, while keeping frequently accessed items at eye level. For maximum functionality, consider implementing a layered approach. Install a corner desk at work height (typically 30 inches), then mount floating shelves above it in a vertical arrangement.
Alternatively, create a corner closet system using a tension rod installed diagonally, perfect for hanging clothes or creating a makeshift dressing area. To maintain organization long-term, use clear storage containers for smaller items, label everything clearly, and establish a rotation system for seasonal items.
Consider installing LED strip lighting under shelves to illuminate dark corners and make the space more functional. Remember to periodically review and adjust your corner organization system to ensure it continues meeting your changing needs.
Bedside Charging Stations
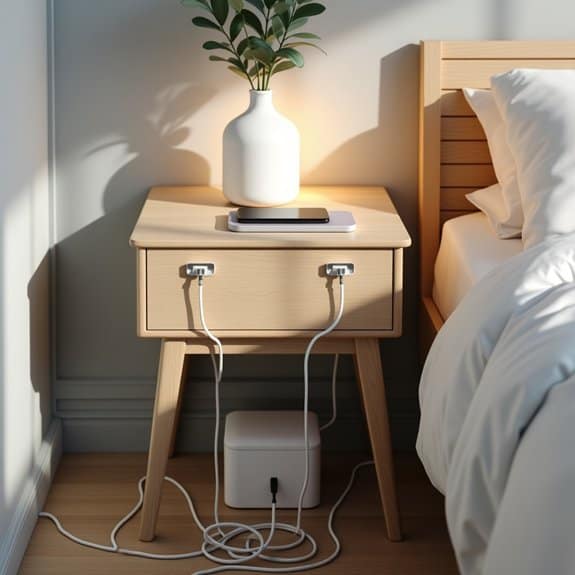
A well-organized bedside charging station is essential in today’s digital world, where most people rely on multiple devices that need regular charging. Without proper organization, charging cables can become a tangled mess, creating visual clutter and making it difficult to find the right cable when needed.
An efficiently organized charging station not only keeps your devices powered but also maintains a clean, streamlined appearance in your bedroom. It eliminates the frustration of searching for cables in the dark and prevents wear and tear on charging cords that can occur from improper storage.
Required Items:
- Cable management box or container
- Cable clips or cord organizers
- Multi-port USB charging hub
- Surge protector
- Cable labels or markers
- Velcro cable ties
- Drawer organizer or small tray
- Command strips or mounting tape
- Cable sleeves
Start by selecting an appropriate location near your bedside table, ensuring easy access to power outlets. Install a surge protector and multi-port USB hub to create a central charging hub. Use a cable management box to house the surge protector and excess cord length, making sure to leave small openings for cables to exit cleanly.
Attach cable clips to the side of your nightstand or wall to guide cords neatly to their destination. Label each cable clearly to avoid confusion and organize them by device type. Route cables through cable sleeves to bundle them together neatly when multiple devices are being charged simultaneously.
Position the charging hub or docking station on top of your nightstand in a way that allows easy access while maintaining a clean appearance.
Additional Tips: Consider investing in wireless charging pads to reduce cable clutter further. Keep spare cables in a designated drawer organizer, and regularly assess which cables are actually needed. Implement a regular maintenance schedule to check for damaged cables and clean accumulated dust.
Position your charging station away from water sources and ensure proper ventilation to prevent overheating.
Wall-Mounted Jewelry Displays

Organizing jewelry on wall-mounted displays transforms cluttered dresser tops and tangled necklaces into an elegant, accessible collection. This approach not only preserves valuable surface space in a small bedroom but also turns jewelry into decorative art, adding personality to your walls while keeping pieces visible and tangle-free.
Wall-mounted jewelry organization prevents common jewelry storage problems like tangled chains, lost earrings, and forgotten pieces buried in traditional jewelry boxes. By displaying items vertically, you maximize space efficiency while ensuring each piece remains easily accessible for daily wear.
Required Items:
- Wall hooks
- Picture frames
- Mesh screen or decorative wire
- Cork board
- Push pins
- Wall anchors
- Screwdriver
- Level
- Measuring tape
- Command strips
- Picture hanging wire
- Wire cutters
Select a wall space near your dressing area and map out your display configuration. Install larger pieces like frames or cork boards first, using wall anchors for security. Convert picture frames into jewelry displays by replacing the glass with mesh screening or adding rows of small hooks.
Position necklace hooks at staggered heights to prevent tangling, and create designated zones for different types of jewelry – earrings on mesh screens, bracelets on horizontal bars, and necklaces on individual hooks.
Create a clear organization system by grouping similar items together. Arrange frequently worn pieces at eye level for easy access, while special occasion pieces can be displayed higher up. Leave space between items to prevent overcrowding and maintain visual appeal.
Consider incorporating multiple display types to accommodate different jewelry styles – hooks for necklaces, pin cushions for earrings, and shallow trays for rings.
To maximize the longevity and functionality of your wall-mounted jewelry display, rotate pieces periodically to prevent dust accumulation and inspect the mounting hardware monthly.
Consider installing a small LED light strip to illuminate your collection and create ambiance. Keep a few empty hooks available for new additions, and adjust the layout seasonally to feature pieces appropriate for the current weather and fashion trends.
Hidden Cabinet Solutions
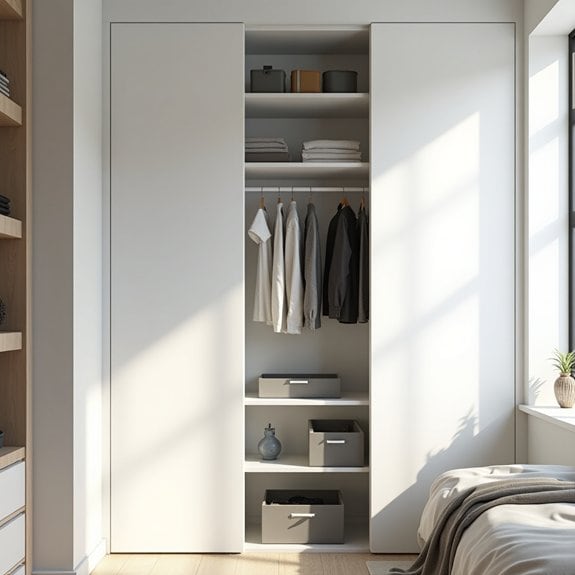
Hidden cabinets represent an untapped potential in small bedroom spaces, offering discrete storage solutions that maintain a room’s clean aesthetic while maximizing every available inch.
These clever storage options can transform awkward corners, dead space, and underutilized walls into functional storage areas that keep personal items organized and out of sight.
When properly implemented, hidden cabinet solutions can double or even triple your storage capacity without making your bedroom feel cluttered or cramped.
These innovative storage spaces work particularly well for seasonal items, rarely-used belongings, and daily essentials that you’d prefer to keep concealed.
Required Items:
- Measuring tape
- Level
- Screwdriver
- Wall anchors
- Cabinet hardware
- Push-to-open mechanisms
- Wood or MDF panels
- Cabinet hinges
- Mounting brackets
- Pencil
- Drill
- Cabinet pulls (optional)
Start by identifying potential hidden cabinet locations in your bedroom, such as knee walls, window seats, or space between wall studs.
Measure these areas precisely, accounting for depth and clearance needed for doors to open fully.
Install wall anchors at marked points, ensuring they can support the weight of both the cabinet and its future contents.
Mount the cabinet box securely, checking for level alignment.
Attach hinges and doors, implementing push-to-open mechanisms for a seamless look.
Test the functionality of doors and adjusting as needed for smooth operation.
Create zones within your hidden cabinets using removable shelf dividers or small containers to maximize organization.
Consider installing battery-operated LED lights with motion sensors to illuminate cabinet interiors.
Label sections clearly but discretely to maintain organization long-term.
Additional Tips:
Position frequently-used items at eye level and implement a bi-annual rotation system for seasonal items.
Install mirror panels on cabinet doors to create the illusion of more space while maintaining functionality.
Consider using soft-close hinges to prevent noise and damage, and regularly clean tracking mechanisms to ensure smooth operation over time.
Space-Saving Clothing Racks
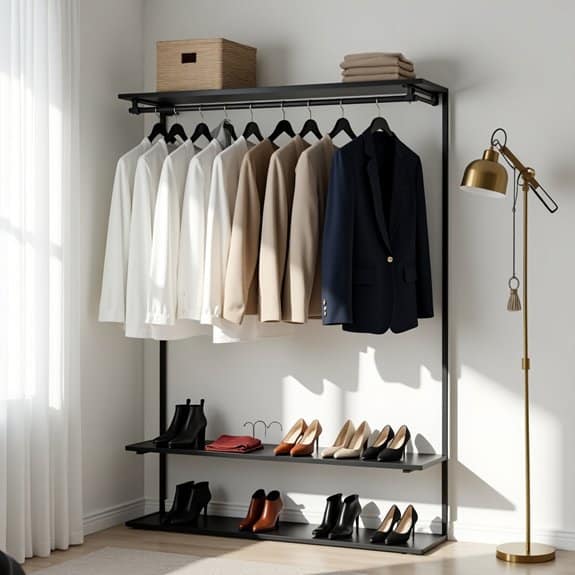
A well-organized clothing rack system can transform a cramped bedroom into a functional, boutique-like space. When floor space is limited, vertical storage solutions become essential, and clothing racks offer a practical way to maximize every available inch while keeping garments easily accessible.
Strategic placement and organization of clothing racks not only creates additional storage space but also allows for better outfit visualization and planning. This systematic approach reduces morning stress, protects clothing from damage, and maintains the aesthetic appeal of your bedroom while making the most of limited square footage.
Required Items:
- Wall-mounted or freestanding clothing rack
- Slim hangers
- S-hooks or hanging clips
- Clothing dividers
- Storage boxes or baskets
- Wall anchors and mounting hardware
- Measuring tape
- Level
- Drill and screwdriver
- Step ladder
Start by selecting the ideal location for your clothing rack, ensuring it doesn’t obstruct movement or block natural light. Measure the wall space carefully and mark mounting points, using a level to ensure proper alignment. For freestanding racks, position them in corners or along walls where they won’t interfere with daily activities.
Once installed, organize clothes by category (work wear, casual, formal) and color to create a visually appealing and practical system. Utilize slim hangers to maximize space and maintain garment shape. Install additional hooks or bars beneath the main rack for accessories, bags, or scarves.
Consider adding a small shelf above the rack for folded items or storage boxes. To maintain organization and extend the lifespan of your clothing rack system, avoid overloading the bars with too many items. Rotate seasonal clothing to storage when not in use, and regularly assess your wardrobe to remove unused items.
Install proper lighting near the rack to improve visibility and create an inviting dressing area. Consider using clear garment bags for special occasions or delicate items to protect them while maintaining visibility.
Drawer Dividers and Organizers
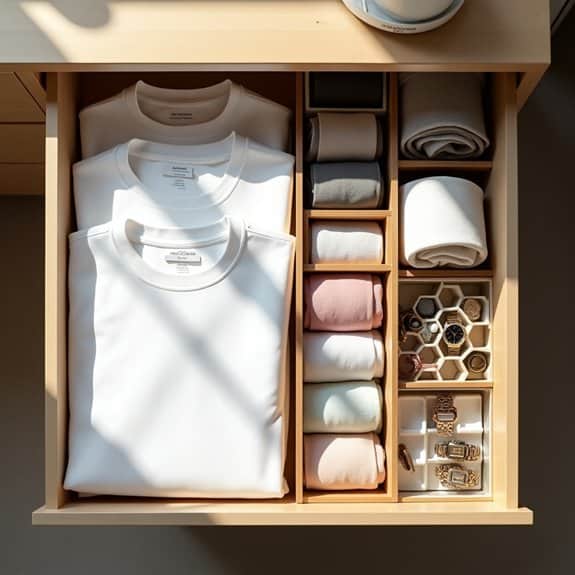
Drawer organization is crucial in small bedrooms where every inch of storage space matters. Well-organized drawers eliminate the frustration of rummaging through messy piles and help maintain order in your most-used items, from clothing to accessories.
Implementing drawer dividers and organizers transforms chaotic storage spaces into efficient systems that maximize vertical space and create designated spots for different categories of items. This organization method not only saves time during daily routines but also helps preserve the condition of your belongings by preventing items from becoming tangled or damaged.
Required Items:
- Drawer dividers (adjustable or fixed)
- Small organizing boxes or bins
- Drawer liner material
- Measuring tape
- Scissors
- Labels
- Storage containers in various sizes
- Drawer organizing trays
- Sock and underwear organizers
Start by removing everything from the drawers and sorting items into categories. Measure the interior dimensions of each drawer, accounting for both width and height.
Install drawer liners to protect the surface and prevent items from sliding. Place adjustable dividers or organizing boxes strategically to create compartments that match the size of your item categories. For clothing drawers, arrange items vertically using the file-folding method to maximize visibility and space. For accessories and smaller items, use smaller containers or specialized organizers that fit within the divided sections.
Maintain the organization system by implementing a regular review process every few months. Remove items that haven’t been used, adjust divider positions as needs change, and clean the drawer interiors.
Label sections clearly if multiple family members share the storage space, and consider using clear containers to easily identify contents. Store frequently used items in the most accessible areas, and group similar items together to maintain an intuitive organization system that works with your daily routine.
Vacuum-Sealed Storage Bags
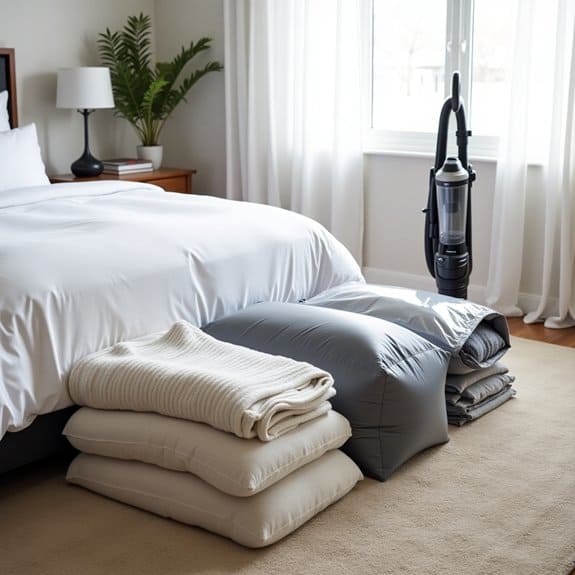
Vacuum-sealed storage bags represent a game-changing solution for maximizing storage space in small bedrooms, particularly for bulky items like seasonal clothing, extra bedding, and pillows.
These innovative storage solutions can reduce the volume of soft goods by up to 75%, creating valuable space in closets, under beds, and in storage containers.
When properly utilized, vacuum storage bags not only save space but also protect stored items from dust, moisture, and insects. This organized approach to storage allows you to keep seasonal items readily accessible while maintaining a clutter-free environment in your limited bedroom space.
Required Items:
- Vacuum-sealed storage bags (various sizes)
- Vacuum cleaner with hose attachment
- Clean, dry items to store
- Labels and marker
- Storage containers or boxes (optional)
- Dryer sheets (optional)
- Inventory list
Sort items by category and season, ensuring they’re completely clean and dry before packing. Place items loosely in the vacuum bags, being careful not to overfill them.
Smooth out any wrinkles and arrange items evenly within the bag. Seal the bag‘s closure completely, then attach your vacuum hose to the valve and remove the air until the bag is fully compressed.
Once compressed, seal the valve and check for any air leaks. For optimal storage, label each bag clearly with its contents and storage date.
Stack compressed bags in storage containers or directly in closets, ensuring they’re not punctured by sharp edges. Consider storing bags horizontally rather than vertically to maintain even compression and prevent items from bunching at one end.
Maximize efficiency by periodically checking the bags for air leaks and resealing if necessary. Add dryer sheets to bags containing clothing to maintain freshness, and keep an inventory list of stored items to avoid unnecessary unpacking when searching for specific items.
Store bags in cool, dry places away from direct sunlight to prevent potential moisture buildup and protect the integrity of both the bags and their contents.
Pegboard Wall Systems
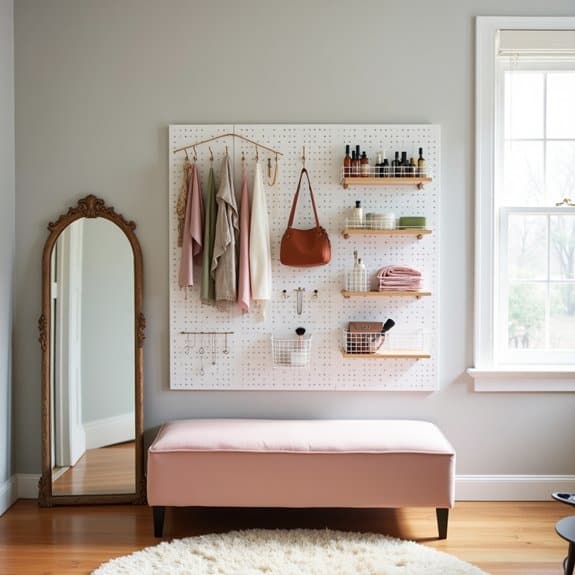
A pegboard wall system represents one of the most versatile and space-efficient storage solutions for small bedrooms. By utilizing vertical wall space, pegboards transform otherwise unused areas into highly functional organization zones that can adapt to changing storage needs. This customizable system allows you to maximize every square inch while keeping frequently used items easily accessible.
When properly installed and organized, a pegboard system can store everything from jewelry and accessories to craft supplies and daily essentials. The beauty of pegboards lies in their flexibility – hooks, shelves, and containers can be rearranged instantly without leaving permanent marks, making them perfect for renters or those who frequently update their organization systems.
Required Items:
- Pegboard panels
- Wall anchors and screws
- Spacers or furring strips
- Power drill
- Level
- Pencil
- Measuring tape
- Various pegboard hooks and accessories
- Storage bins and baskets
- Wire shelving units for pegboards
- Cable ties or wire for securing items
Installation and Organization Process:
Start by measuring your wall space and cutting the pegboard to size if necessary. Install furring strips on the wall to create space between the wall and pegboard for hook insertion. Mount the pegboard securely using wall anchors and screws, ensuring it’s level.
Before adding accessories, plan your layout by drawing a rough sketch of where different items will go, grouping similar items together. Install your hooks, shelves, and storage accessories according to your plan, starting from the top and working down. Consider creating zones for different categories – accessories, tools, daily essentials, etc.
Maximizing Your Pegboard:
For optimal organization, utilize a combination of hook types and accessories. S-hooks work well for hanging bags and scarves, while straight pegs are perfect for tools and smaller items. Add small baskets or containers for items that can’t hang, and consider using label makers or color-coding to maintain organization.
Leave some empty spaces for future additions and regularly assess your layout to ensure it continues meeting your needs effectively.
Bed Frame With Built-In Storage
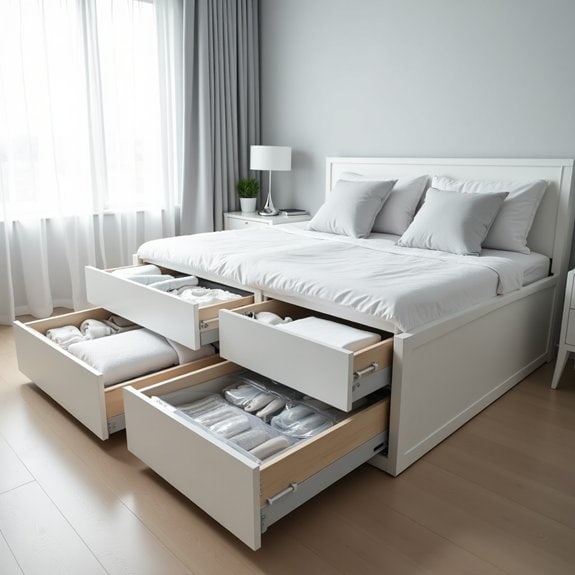
A bed frame with built-in storage serves as a game-changer in small bedroom organization, effectively doubling the functionality of your sleeping space. By utilizing this clever storage solution, you can eliminate the need for additional storage furniture, creating a more spacious and uncluttered environment.
The key to maximizing a storage bed frame lies in strategic organization and proper categorization of items. When properly organized, these built-in compartments can house seasonal clothing, extra bedding, shoes, books, and other belongings that would otherwise occupy valuable floor or closet space.
Required Items:
- Storage containers or bins
- Drawer organizers
- Labels
- Vacuum storage bags
- Clear plastic boxes
- Dust-proof covers
- Drawer liners
- Sachet bags or cedar blocks
- Measuring tape
- Inventory list
To organize your bed frame storage, start by categorizing items based on frequency of use and season. Place frequently accessed items in easily reachable drawers or compartments. Use vacuum storage bags for bulky items like winter blankets or heavy clothing. Install drawer organizers to create designated spaces for smaller items, and line the drawers with protective material to prevent dust accumulation.
Label all containers clearly and maintain an inventory list to track stored items. Consider organizing one drawer for sleep-related items like extra pillowcases and sheets, another for seasonal clothing, and a third for shoes or accessories. For hydraulic lift-up storage beds, utilize clear containers to easily identify contents without lifting the entire mattress.
Place heavier items toward the center of the bed frame for better weight distribution.
Additional Tip: Rotate stored items seasonally and conduct a bi-annual review to prevent the storage space from becoming a catch-all for unnecessary items. Use sachet bags or cedar blocks to keep stored items fresh, and regularly clean the storage compartments to maintain organization and prevent dust buildup.
Consider taking photos of organized drawers to maintain the system over time.
Folding Desk Arrangements
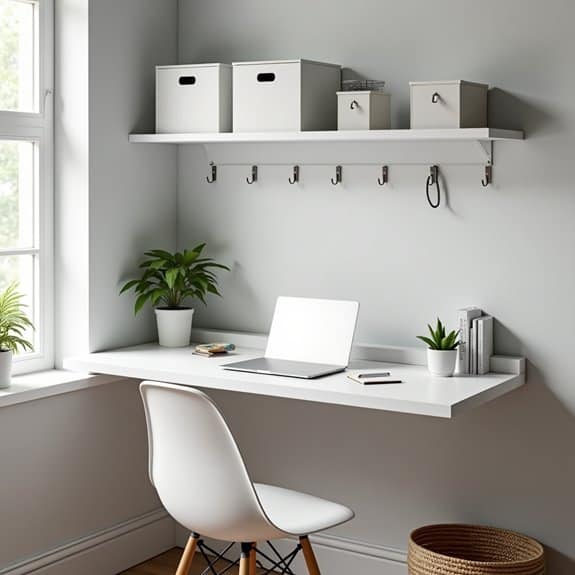
A well-organized folding desk arrangement is crucial in a small bedroom, serving as both a functional workspace and a space-saving solution. When properly set up, it can transform from a productive work area to a nearly invisible feature within minutes, maximizing your room’s versatility.
The key to successful folding desk organization lies in creating a system that allows for quick setup and breakdown while keeping all necessary items easily accessible. This approach ensures you maintain productivity without sacrificing precious floor space in your compact bedroom environment.
Required Items:
- Folding desk
- Wall-mounted storage hooks
- Cable organizers
- Desk organizer trays
- Storage containers
- Command strips or mounting hardware
- Label maker
- Storage basket
- Drawer dividers
- Multi-purpose storage pouches
Start by selecting an appropriate wall location for your folding desk, ensuring it has enough clearance when both open and closed. Install wall-mounted storage hooks at proper heights – some for hanging the desk when folded and others for storing frequently used items like headphones or charging cables.
Organize desk supplies into clearly labeled, portable containers that can be quickly stored in a nearby drawer or shelf when the desk isn’t in use. Create designated zones within your desk setup: a primary work area in the center, a technology zone for electronics and cables on one side, and a supply zone on the other.
Use desk organizer trays that can be quickly stacked and stored when packing up. Install cable organizers along the desk’s edge to prevent cord tangles and maintain a clean appearance even when the desk is folded.
For optimal maintenance, establish a “pack-up protocol” where items return to their designated storage spots immediately after use. Consider using clear storage containers to easily identify contents, and maintain a small basket nearby for items that need quick access during work sessions.
This system ensures your folding desk arrangement remains functional while maintaining the room’s overall organization and appearance.
Magnetic Storage Strips
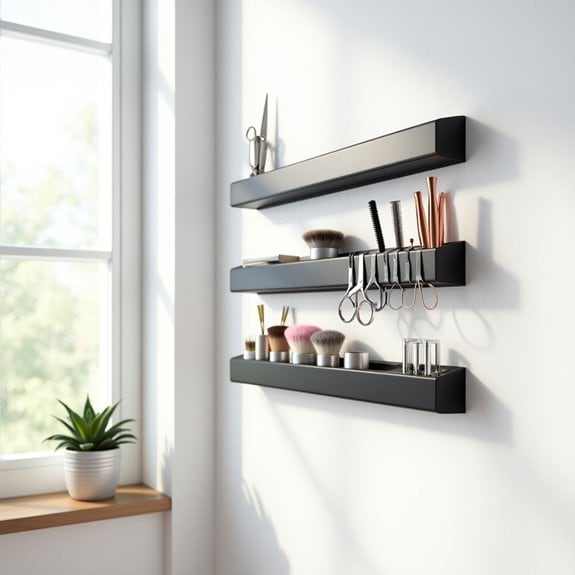
In small bedrooms, vertical storage solutions become essential for maximizing space and maintaining organization. Magnetic storage strips offer an innovative way to store metal items while keeping them easily accessible and creating an organized, aesthetic display on walls that would otherwise go unused.
These versatile organizers are particularly valuable for storing everyday items like scissors, tweezers, makeup tools, and small craft supplies. By implementing magnetic strips in your bedroom organization system, you can free up valuable drawer space while keeping frequently used items within arm’s reach.
Required Items:
- Heavy-duty magnetic strips
- Mounting hardware (screws and anchors)
- Power drill
- Level
- Pencil
- Measuring tape
- Stud finder
- Screwdriver
- Command strips (optional alternative to drilling)
Installation and Organization Process:
First, determine the ideal location for your magnetic strips by considering both accessibility and visual appeal. Use a stud finder to locate wall studs, which will provide the most secure mounting.
Measure and mark your desired placement, using a level to ensure straight alignment. If mounting multiple strips, space them approximately 6-8 inches apart vertically or horizontally, depending on your storage needs.
Install the magnetic strips according to the manufacturer’s instructions, typically using the included mounting hardware or Command strips for rental-friendly installation. Once secured, begin arranging your metal items on the strips, grouping similar items together.
Consider frequency of use when positioning items, keeping the most-used pieces at eye level.
Optimization Tips:
To maximize the effectiveness of your magnetic storage system, regularly assess which items are being stored and rotate them based on seasonal needs or usage patterns.
Add small magnetic hooks or clips to the strips to hang non-magnetic items, and consider labeling sections for better organization. Clean the magnetic strips periodically with a slightly damp cloth to maintain their holding power and appearance, and avoid overloading any single section to prevent strips from pulling away from the wall.
Double-Duty Furniture Pieces
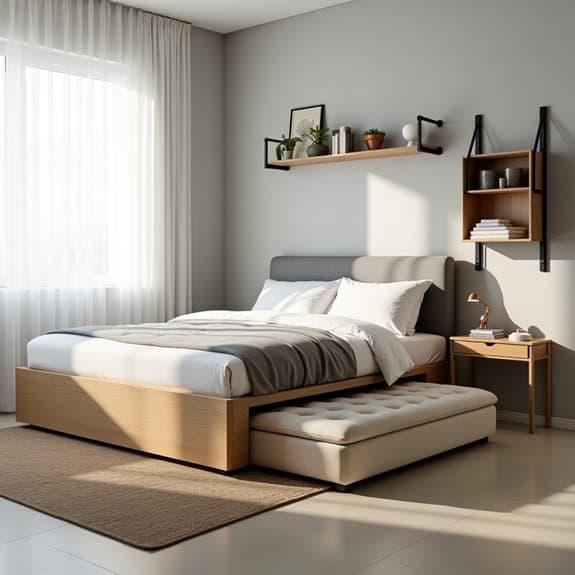
Making the most of limited bedroom space requires strategic thinking and innovative solutions. Double-duty furniture pieces serve as the cornerstone of small bedroom organization, offering multiple functions while minimizing the footprint of essential items.
Maximizing space efficiency through multi-functional furniture not only creates a more organized environment but also reduces clutter and promotes a sense of spaciousness. These versatile pieces can transform a cramped bedroom into a well-organized sanctuary that serves multiple purposes without compromising style or comfort.
Required Items:
- Bed frame with built-in storage
- Ottoman with storage compartment
- Fold-down desk
- Nightstand with drawers
- Storage bench
- Murphy bed system
- Expandable side tables
- Wall-mounted shelving brackets
- Storage baskets or containers
- Measuring tape
Select furniture pieces that serve at least two distinct purposes and arrange them strategically within the room. Start with the bed as the focal point, choosing a frame with built-in drawers or lifting mechanism for under-bed storage.
Position multi-functional pieces along the walls, such as a storage bench that doubles as seating or a fold-down desk that can be tucked away when not in use. Install wall-mounted furniture that can be collapsed or expanded based on immediate needs.
Designate specific storage zones within each piece of furniture to maintain organization. Use the ottoman for storing extra bedding, the bench for shoes and accessories, and the nightstand drawers for daily essentials.
Label storage compartments clearly and implement a system where frequently used items are easily accessible while seasonal items can be stored in less convenient spaces.
Additional Tips: Regularly assess the functionality of each furniture piece and adjust their arrangement or purpose as needed. Consider vertical storage solutions that can be integrated with existing double-duty furniture, and maintain clear pathways between pieces to ensure easy access to all storage areas.
Periodically declutter stored items to prevent overcrowding and maintain the efficiency of your multi-functional setup.
Closet Door Organization Systems
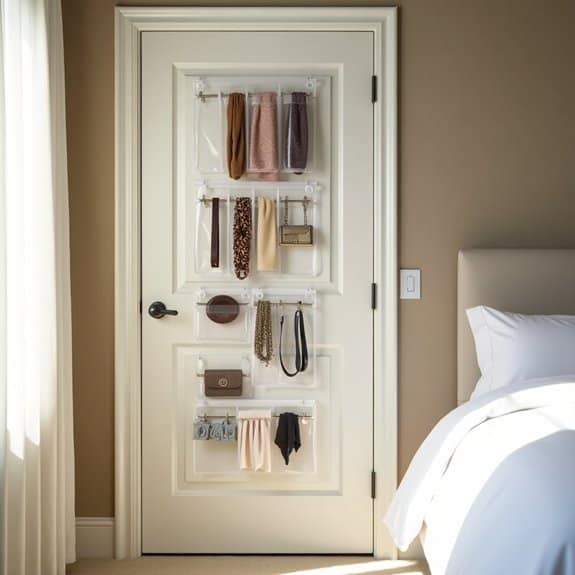
Maximizing storage space in a small bedroom requires creative thinking, and closet doors present an often-overlooked opportunity for additional organization. The back of closet doors can effectively double your storage capacity while keeping frequently used items easily accessible and visible.
Installing an over-the-door organization system transforms wasted vertical space into a functional storage area, perfect for accessories, shoes, jewelry, or daily essentials. This solution is particularly valuable in small bedrooms where every square inch counts, and it helps maintain a clutter-free environment by utilizing otherwise unused space.
Required Items:
- Over-the-door hooks or hanging rack
- Door-mounted organizer (mesh, clear plastic, or fabric)
- Command strips or mounting hardware
- Measuring tape
- Level
- Screwdriver
- Pencil
- Storage bins or baskets (optional)
- Label maker (optional)
Installation and organization begins with measuring your closet door’s dimensions to ensure proper fit of your chosen organization system. Mount the over-the-door hooks or rack securely, ensuring it doesn’t interfere with door closure.
For pocket doors or those without traditional frames, use command strips or mounting hardware to secure organizers directly to the door surface. Arrange storage components based on frequency of use, with most-accessed items at eye level.
Position heavier items at the bottom of the door organizer to maintain balance and prevent strain on the mounting system. Categorize items by type or use, such as morning routine essentials in one section and evening items in another.
Consider using clear storage pockets to easily identify contents, or implement a labeling system for fabric organizers.
Optimize your door organization system by regularly reassessing its contents and adjusting the layout as needed. Remove items that haven’t been used within three months, and rotate seasonal items to maintain efficiency.
Consider installing LED strip lights around the door frame to illuminate the organized space, particularly useful for early morning or late-night access without disturbing others.
Ceiling-to-Floor Storage Units
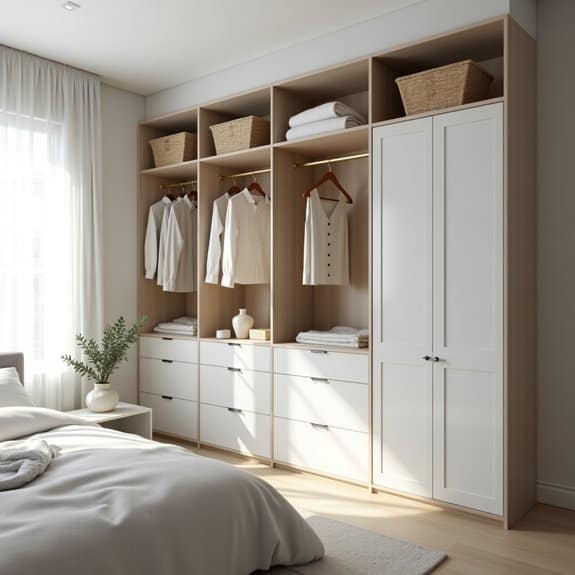
Maximizing vertical space in a small bedroom is crucial for creating an organized and functional living space. Ceiling-to-floor storage units take advantage of often-overlooked vertical real estate, transforming empty wall space into valuable storage solutions that can accommodate clothing, accessories, books, and decorative items.
Installing floor-to-ceiling storage units creates a streamlined look while significantly increasing storage capacity without consuming precious floor space. These units can be customized to fit specific needs and room dimensions, making them an ideal solution for bedrooms of any size.
Required Items:
- Measuring tape
- Level
- Pencil
- Wall anchors
- Power drill
- Screwdriver
- Floor-to-ceiling storage unit or components
- Mounting brackets
- Screws
- Safety goggles
- Step ladder or platform
- Installation manual
Start by measuring the wall space where the storage unit will be installed, including height, width, and depth. Mark the installation points on the wall using a level to ensure straight lines. Install wall anchors at marked points, ensuring they can support the unit’s weight.
Assemble the base components according to manufacturer instructions, securing them firmly to the floor. Work your way up, connecting vertical supports and horizontal shelving pieces, checking for levelness at each step. Once the framework is complete, install any doors, drawers, or additional organizational components.
For optimal organization, sort items by category before placing them in the unit. Position frequently used items at eye level, seasonal items on upper shelves, and heavier items near the bottom for stability. Install lighting if needed to illuminate darker corners and make items more accessible.
Additional tip: Consider using clear storage containers or labels for items stored in higher sections to easily identify contents from below. Incorporate a mix of open shelving and closed storage to maintain a clean appearance while hiding less attractive items. Regularly assess and rotate items based on seasonal needs to maintain an efficient organization system throughout the year.
Behind-the-Door Storage Solutions
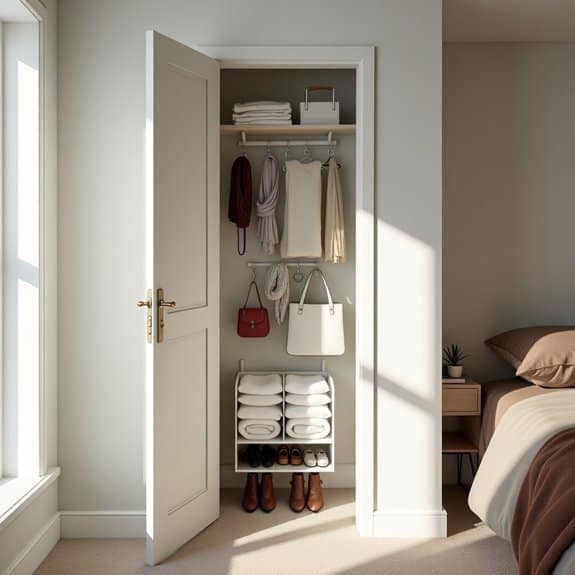
Maximizing storage space in a small bedroom requires creative thinking, and the often-overlooked area behind the door presents a valuable opportunity for additional storage. This vertical space can accommodate everything from shoes and accessories to cleaning supplies and daily essentials, effectively turning dead space into a functional storage zone.
Behind-the-door storage is particularly effective because it doesn’t intrude into the room’s living space and remains hidden when the door is open. This solution works equally well for bedroom doors, closet doors, and even bathroom doors within the bedroom suite, providing multiple opportunities to expand storage capacity.
Required Items:
- Over-the-door hanging organizer
- Command hooks or mounting hardware
- Measuring tape
- Level
- Screwdriver
- Door-mounted rack or hooks
- Storage baskets or bins
- Label maker (optional)
- Door bumper guards
The organization process starts with measuring your door’s dimensions and allowing for proper clearance when the door opens and closes. Install door bumper guards first to prevent damage to walls.
Select an over-the-door organizer that fits within these measurements, ensuring it won’t interfere with the door’s functionality. For heavier items, consider using screws to mount the organizer instead of relying solely on over-the-door hooks.
Arrange items strategically within the organizer, placing frequently used items at eye level and heavier items toward the bottom for stability. If using multiple organizing solutions, such as combining a shoe organizer with additional hooks, maintain at least two inches of space between them to prevent overcrowding and ensure smooth door operation.
Consider using clear storage pockets or labeling each compartment to maintain organization over time. Implement a rotation system for seasonal items, and periodically assess the weight distribution to prevent strain on the door.
Remember to check the door’s hinges every few months to ensure they remain tight and secure, especially if storing heavier items.

