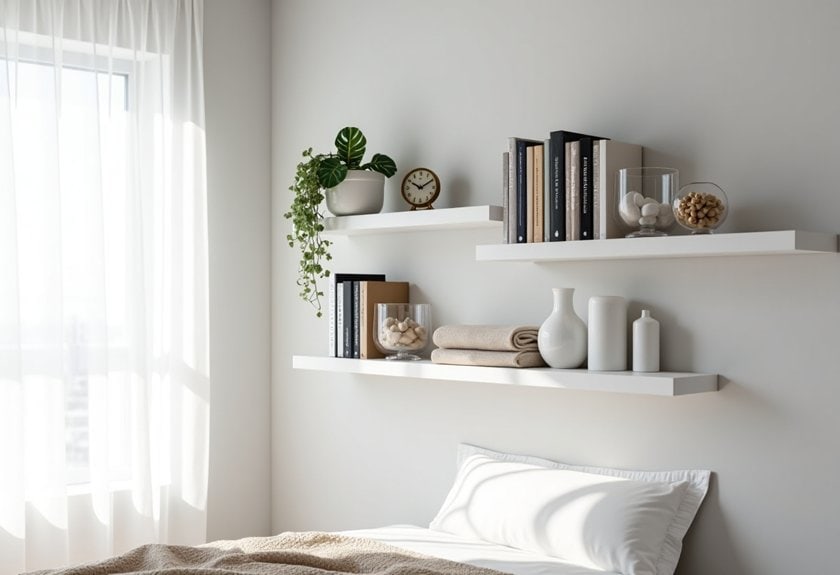
Did you know that the average bedroom has over 50 square feet of unused vertical storage space? You’re probably looking at your walls right now and wondering how to tap into all that potential. I’ve transformed countless cluttered bedrooms into organized sanctuaries using clever shelf arrangements, and I can’t wait to share my favorite space-saving secrets with you. These 15 practical ideas will help you maximize every inch while creating a stylish, peaceful retreat you’ll love coming home to.
Color-Coded Book Arrangement for Visual Appeal
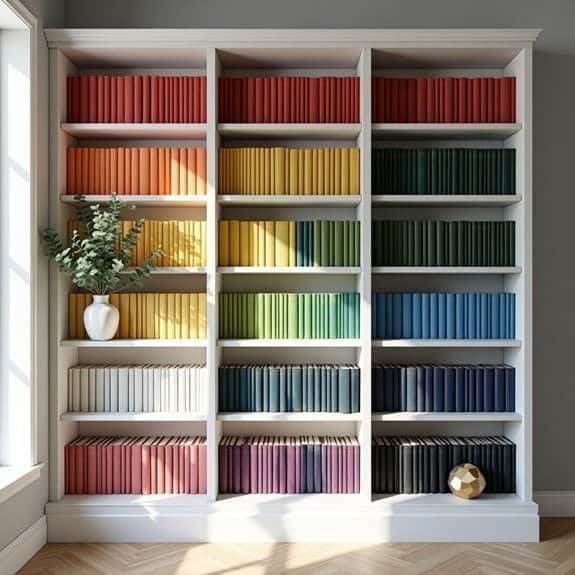
Color-coding books transforms ordinary shelves into striking visual displays while maintaining a systematic organization method. This approach not only creates an aesthetically pleasing focal point in any room but also makes it easier to locate and return books to their designated spots.
Beyond the decorative aspect, color-coordinating books can have a profound impact on your space’s overall ambiance. The arrangement creates a cohesive, intentional look that can complement your existing décor while serving as an artistic expression of your personal library.
Required Items:
- Books
- Step stool or ladder
- Clean cloth for dusting
- Temporary storage boxes
- Post-it notes or markers
- Measuring tape
- Level
- Camera (for reference photos)
Starting with empty, clean shelves, sort all books by color, creating distinct piles for each shade. Begin with white books at one end, progressing through the spectrum to black at the other end.
Within each color group, arrange books by height to create clean lines and visual flow. For multi-colored books, use the dominant color as the determining factor. Position books vertically, maintaining consistent depths along the shelf face, and consider creating small horizontal stacks to break up monotony while preserving the color scheme.
When dealing with spines of varying shades within the same color family, arrange them in gradient order, transitioning smoothly from lighter to darker tones. This technique creates a sophisticated ombré effect that adds depth to the overall display.
Remember to leave approximately 10% of shelf space empty to allow for future additions and prevent overcrowding.
Additional Tips: Incorporate decorative objects in complementary colors to enhance the visual impact, but limit them to one or two items per shelf to avoid cluttering.
Take photos of your arrangement to help maintain the system when returning books to shelves. Consider seasonal adjustments, bringing forward colors that complement holiday décor or seasonal changes in your home’s color scheme.
Decorative Boxes and Baskets for Hidden Storage
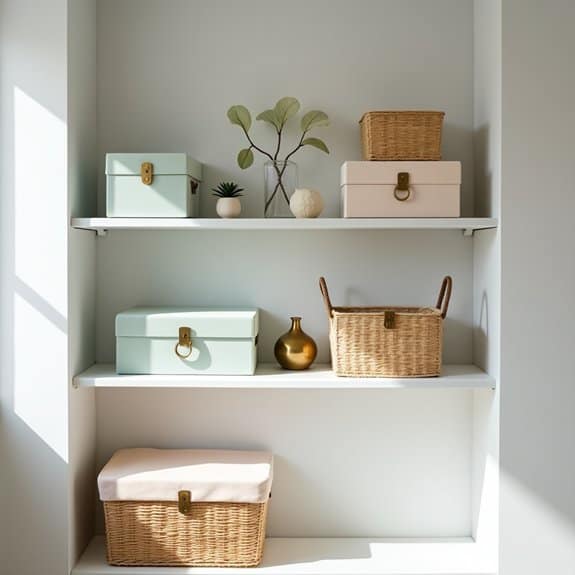
Integrating decorative boxes and baskets into shelf organization creates a dual-purpose solution that combines aesthetics with functionality. These storage solutions transform cluttered shelves into sophisticated displays while concealing everyday items that might otherwise create visual chaos in your space.
Well-chosen storage boxes and baskets serve as design elements while maintaining order and reducing visible clutter. This approach to organization allows you to maximize shelf space efficiently while creating a cohesive look that enhances your room’s overall design scheme.
Required Items:
- Decorative boxes in various sizes
- Storage baskets
- Labels or label maker
- Measuring tape
- Container dividers
- Shelf liner (optional)
- Clear storage containers (optional)
- Drawer organizers (optional)
Start by measuring your shelves and selecting boxes and baskets that fit properly while leaving enough clearance for easy removal. Sort items into categories based on frequency of use and type. Choose containers that complement your décor while providing adequate space for your items – opt for boxes with lids for dusty environments and open baskets for frequently accessed items.
Label each container clearly, either on the exterior or with a discrete tag inside, to maintain organization long-term.
When placing containers on shelves, position frequently used items at eye level and heavier boxes on lower shelves for stability. Group similar items together and maintain a consistent style of containers within each shelf section. Consider using clear containers for items you need to identify quickly, and utilize smaller boxes within larger ones to compartmentalize tiny objects.
Additional Tips: Regularly assess and adjust your storage system, removing items that are no longer needed and redistributing space as necessary. Consider implementing a color-coding system for different categories of items, and always leave some empty space in each container for future additions.
Photograph your organized shelves as a reference for maintaining the arrangement over time.
Floating Corner Shelves to Maximize Space
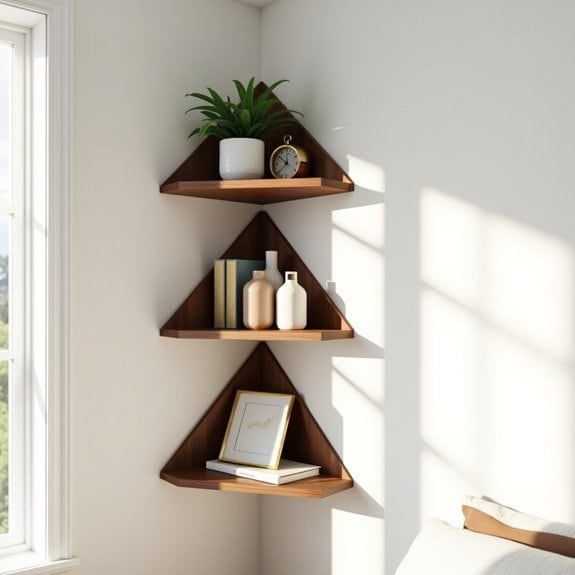
Corner spaces often become dead zones in homes, collecting dust or remaining completely unused. Floating corner shelves transform these overlooked areas into functional storage and display spaces, adding both style and practicality to any room. By utilizing corners effectively, you can maximize your available space without compromising floor area or creating visual clutter.
Installing floating corner shelves requires careful planning and precise execution to ensure stability and aesthetic appeal. When properly organized, these shelves can showcase decorative items, house everyday essentials, or create an efficient home office setup, making them an invaluable addition to any space-conscious home.
Required Items:
- Level
- Stud finder
- Drill and drill bits
- Screwdriver
- Wall anchors
- Corner floating shelves
- Measuring tape
- Pencil
- Storage containers or baskets
- Cleaning supplies
- Command strips (optional)
- Shelf liner (optional)
Start by measuring your corner space and determining the optimal height placement for each shelf. Install the shelves according to manufacturer instructions, ensuring they’re level and secure. Once mounted, group similar items together and assess which items will be stored on each level.
Place heavier items on lower shelves for stability, and position frequently used items at eye level for easy access. Consider using attractive storage containers or baskets to corral smaller items and maintain a clean appearance.
To maximize visibility and accessibility, arrange items in a graduated height pattern, with taller items at the back corner and shorter ones toward the front edges. Create visual balance by alternating dense and light objects, and maintain some negative space to prevent a cluttered appearance.
Additional Tips: Rotate items seasonally to keep the display fresh and functional. Use clear containers to easily identify contents, and implement a regular dusting schedule to maintain the shelves’ appearance.
Consider adding LED strip lighting underneath the shelves to illuminate dark corners and create ambiance. Remember to periodically reassess the organization system and adjust as needed to maintain optimal functionality.
Clear Acrylic Organizers for Small Items
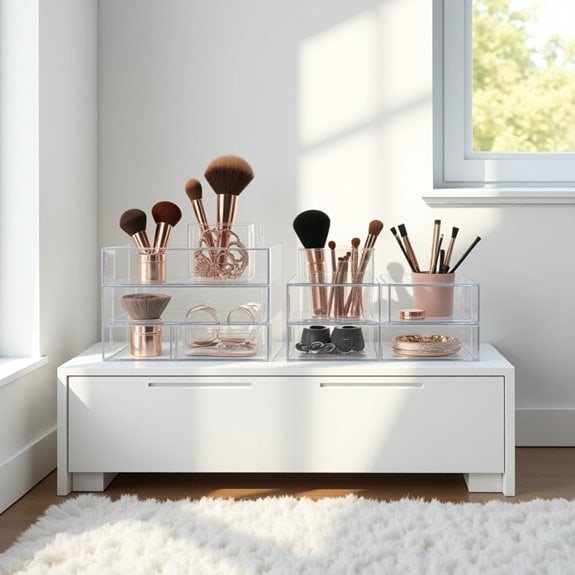
Clear acrylic organizers have revolutionized the way we store and access small items on shelves. These transparent solutions not only create a clean, sophisticated look but also make it incredibly easy to locate items at a glance. The crystal-clear material allows light to pass through, creating an illusion of more space while keeping items dust-free and perfectly visible.
When properly implemented, acrylic organizers can transform cluttered shelves into functional, aesthetically pleasing storage spaces. Whether organizing makeup in a bathroom, office supplies in a home office, or small pantry items in the kitchen, these versatile containers provide a systematic approach to storage while maintaining a modern, minimalist appearance.
Required Items:
- Clear acrylic organizers in various sizes
- Measuring tape
- Shelf liner (non-slip)
- Labels or label maker
- Cleaning cloth
- All-purpose cleaner
- Small sorting bins (temporary use)
- Division inserts (optional)
Start by removing everything from your shelves and measuring the available space, accounting for height clearance and depth. Sort small items into categories based on frequency of use and function. Select appropriately sized acrylic organizers that fit your shelf dimensions and accommodate your sorted items.
Place non-slip liner on the shelves to prevent organizers from sliding. Position larger organizers toward the back of the shelf and smaller ones in front for easy access. Insert items into their designated containers, using drawer dividers or smaller compartments when necessary to prevent items from shifting.
To maximize the effectiveness of your organization system, label each container clearly, either on the top edge or front face. Consider implementing a tiered system using risers or stepped organizers to improve visibility of items stored toward the back. Keep similar items together and arrange containers so that the most frequently used items are easily accessible.
Vertical Space Optimization With Stacking Solutions
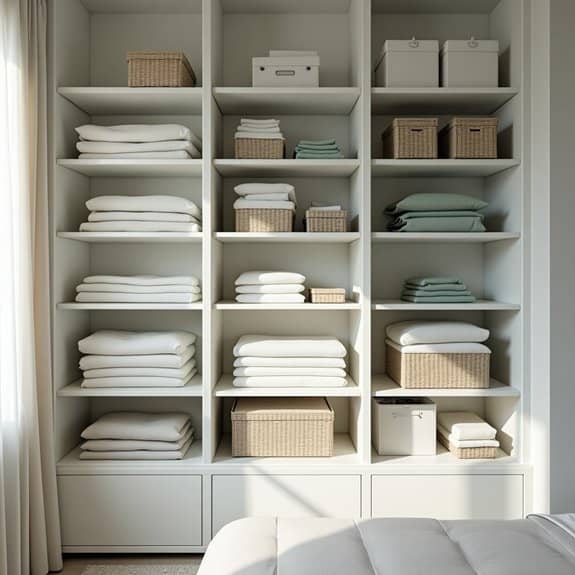
Making the most of vertical space on shelves has become increasingly crucial in modern living spaces where square footage is at a premium. Proper stacking solutions can effectively double or triple your storage capacity while maintaining easy access to items and creating a visually appealing arrangement.
Strategic vertical organization transforms cluttered, inefficient shelving into a functional storage system that maximizes every inch of available space. This approach not only improves storage capacity but also creates a more organized environment that saves time when retrieving items and maintains a cleaner, more professional appearance.
Required Items:
- Stackable containers
- Shelf risers
- Clear bins
- Label maker
- Measuring tape
- Drawer organizers
- Vertical file holders
- Shelf dividers
- Step stool
- Container straps (for stability)
Begin by measuring your shelf heights and depths to determine the maximum stacking potential. Remove all items and group them by category, considering which items need frequent access and which can be stored higher up.
Install shelf risers where appropriate to create additional levels within existing shelves. Place heavier items at the bottom of stacks for stability, using clear containers whenever possible to maintain visibility of contents.
For optimal organization, implement a vertical filing system for documents and flat items, using standing file holders or magazine organizers. Create zones within your shelving unit, dedicating specific areas to different categories of items.
Ensure frequently accessed items are placed at eye level, while seasonal or rarely used items can be stored in higher stacks.
To maintain long-term success, regularly review and adjust your stacking system. Use drawer organizers within larger containers to prevent small items from becoming jumbled, and always label containers on multiple sides for easy identification.
Consider using container straps or stabilizers for taller stacks, and leave some vertical space between the top of your stacks and the next shelf to facilitate easy removal and replacement of items.
Plant and Decor Balance for Aesthetic Impact

Creating a harmonious balance between plants and decorative elements on shelves transforms an ordinary storage space into a stunning visual display. The careful arrangement of living plants alongside decorative pieces adds depth, texture, and organic energy to any room while maintaining a sophisticated aesthetic that enhances the overall interior design.
Achieving the perfect balance between greenery and decorative objects requires thoughtful consideration of scale, color, and spatial relationships. When done correctly, this combination creates focal points that draw the eye while maintaining a sense of order and intentional design, preventing shelves from appearing cluttered or overwhelming.
Required Items:
- Various sized plants in complementary pots
- Decorative objects of different heights
- Books or storage boxes
- Plant care tools
- Cleaning supplies
- Measuring tape
- Level
- Plant risers or stands
- Decorative bookends
- Small trays or dishes
Start by clearing the shelves completely and grouping items by category. Position larger plants at varying heights, using the rule of thirds to create visual interest. Place substantial plants at the ends of shelves or near the middle of larger units to anchor the display.
Integrate decorative objects between plant groupings, ensuring they complement rather than compete with the greenery. Layer smaller décor items in front of larger pieces, maintaining clear sight lines and avoiding overcrowding. Create depth by positioning some items slightly forward or back on the shelf.
Alternate between plants and decorative elements to maintain balance, using books or boxes as risers when needed to achieve desired heights. For optimal results, rotate plants regularly to ensure even growth and maintain their health.
Consider the care requirements of each plant when positioning them on shelves, keeping high-maintenance varieties easily accessible. Group plants with similar water needs together, and use protective bases under pots to prevent water damage to shelves.
Regularly edit and adjust your display to maintain fresh appeal and accommodate seasonal changes in both plant growth and décor preferences.
Drawer Dividers and Mini-Shelf Inserts
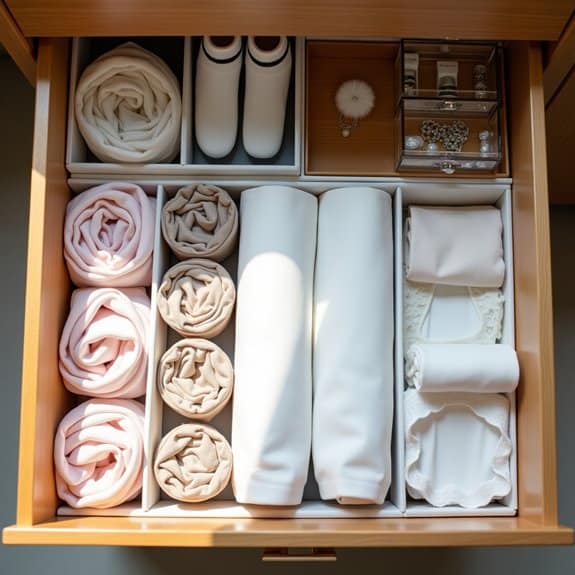
The organization of drawers and shelves through dividers and inserts is crucial for maintaining order in any space, whether it’s a kitchen, office, or bedroom. Without proper compartmentalization, drawers quickly become chaotic catch-alls where items get lost or damaged, leading to wasted time searching and unnecessary replacements.
Implementing drawer dividers and mini-shelf inserts creates designated spaces for specific items, making it easier to maintain organization long-term. This system not only maximizes storage space but also protects items from damage and makes it simple to find what you need quickly, turning formerly cluttered areas into efficient storage solutions.
Required Items:
- Measuring tape
- Drawer dividers (adjustable or fixed)
- Mini-shelf inserts
- Non-slip shelf liner
- Scissors
- Labels
- Storage containers (various sizes)
- Drawer organizer bins
- Clear plastic organizers
Start by removing everything from the drawer or shelf and measuring the available space, including height clearance. Sort items into categories based on frequency of use and function. Install non-slip liner at the bottom of drawers to prevent organizers from sliding.
For drawers, position adjustable dividers to create appropriately sized sections for your items, ensuring they’re firmly secured. For shelf organization, place mini-shelf inserts to create additional levels of storage, maximizing vertical space. Position frequently used items at the front and at easily accessible heights.
Use clear containers or organizers for smaller items, ensuring they fit within the created compartments. Label each section clearly to maintain the organizational system.
Additional Tips: Review and adjust your organizational system every few months to ensure it still meets your needs. Consider using expandable dividers for flexibility as your storage needs change. Keep similar items together and implement the “one in, one out” rule to prevent overflow.
For deep drawers or shelves, use tiered organizers to prevent items from getting lost in the back, and consider using drawer pulls or handles for easier access to lower compartments.
Modular Shelf Systems for Customizable Storage
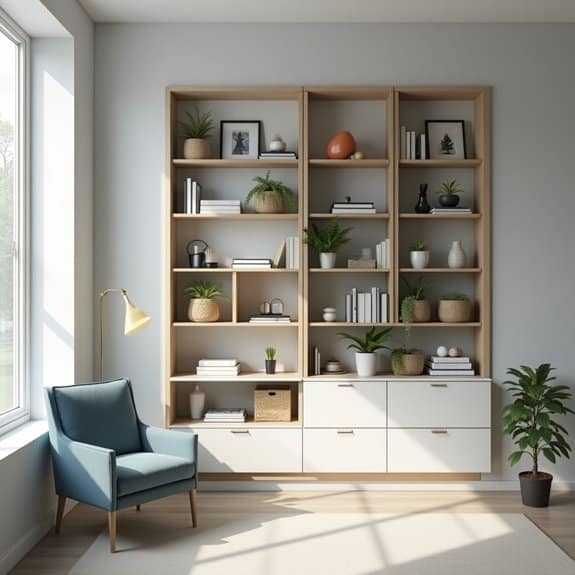
Modular shelf systems represent the perfect solution for those seeking adaptable storage solutions that grow and change with their needs. These versatile units allow users to create custom configurations that maximize space efficiency while maintaining a cohesive, organized appearance throughout their home or office.
The beauty of modular shelving lies in its flexibility to accommodate various items and spaces while maintaining a systematic approach to organization. Whether storing books, decorative items, office supplies, or household goods, modular systems can be adjusted, expanded, or reconfigured to meet changing storage demands.
Required Items:
- Modular shelf units
- Level
- Measuring tape
- Pencil
- Wall anchors
- Screwdriver
- Installation hardware
- Shelf pins or connectors
- Storage bins or baskets
- Labels
- Safety gear (gloves, safety glasses)
Start by measuring your available space and sketching a layout plan that accounts for both current and future storage needs. Install the base units according to manufacturer specifications, ensuring they’re level and properly secured to the wall.
Connect additional modules systematically, working from bottom to top and side to side, checking stability at each step. Once the framework is in place, insert shelves at desired heights, considering the items to be stored and maintaining proper weight distribution throughout the system.
For optimal organization, group similar items together and assign specific zones within your modular system. Use storage bins or baskets to contain smaller items, and implement a labeling system to maintain order.
Adjust shelf heights to accommodate items of varying sizes, leaving room for future additions or changes. To maintain the effectiveness of your modular shelf system, regularly assess your storage needs and reconfigure as necessary.
Keep weight limits in mind, place frequently used items at easily accessible heights, and periodically review the contents to prevent clutter accumulation. Consider leaving some empty space for future storage needs and maintain flexibility in your organizational system to accommodate changing requirements.
Under-Shelf Hooks and Hanging Solutions
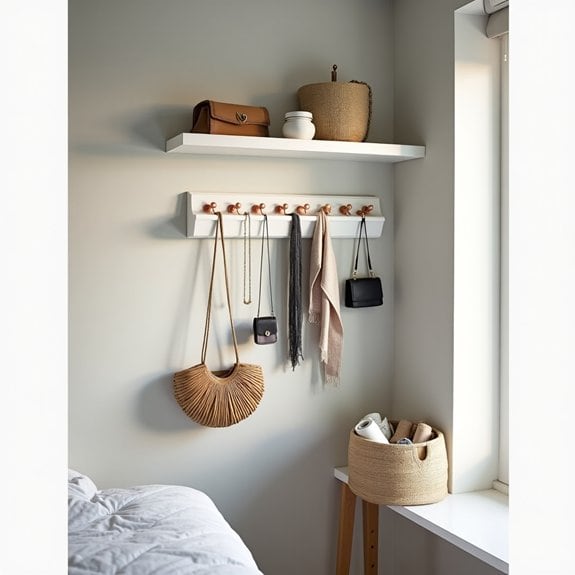
Maximizing vertical storage space is crucial in any organized home, and the often-overlooked area beneath shelves presents a golden opportunity for additional storage. Under-shelf hooks and hanging solutions effectively double your storage capacity without requiring additional floor or wall space, making them an invaluable organization strategy for any room.
The space beneath shelves can accommodate a variety of items, from coffee mugs and wine glasses in the kitchen to accessories and tools in the garage. By implementing proper hanging solutions, you create a systematic approach to storage while keeping frequently used items easily accessible and preventing cluttered surfaces above.
Required Items:
- Under-shelf baskets or racks
- Adhesive hooks
- Screw-in hooks
- Cup hooks
- S-hooks
- Measuring tape
- Pencil
- Drill and drill bits
- Screwdriver
- Level
Start by measuring the space beneath your shelves and determining what items you plan to hang. Install screw-in hooks by marking points at equal intervals, pre-drilling pilot holes if necessary, and securing the hooks firmly.
For lightweight items, adhesive hooks can be applied directly to the shelf’s underside after cleaning the surface thoroughly.
For basket installations, measure and mark mounting points carefully, ensuring they’re level and aligned. Attach the mounting brackets according to the manufacturer’s instructions, typically using screws or a slide-on mechanism.
Space multiple baskets evenly to maintain a balanced appearance and ensure easy access to contents.
To optimize your under-shelf organization system, rotate items seasonally and assess weight limitations carefully. Consider using clear containers for smaller items, and implement a labeling system for baskets.
Regular maintenance checks will ensure hooks remain secure and prevent any potential accidents from overloaded or loose fixtures. Remember to leave adequate space between hanging items to prevent tangling or damage during retrieval.
LED-Lit Display Areas for Accent Pieces
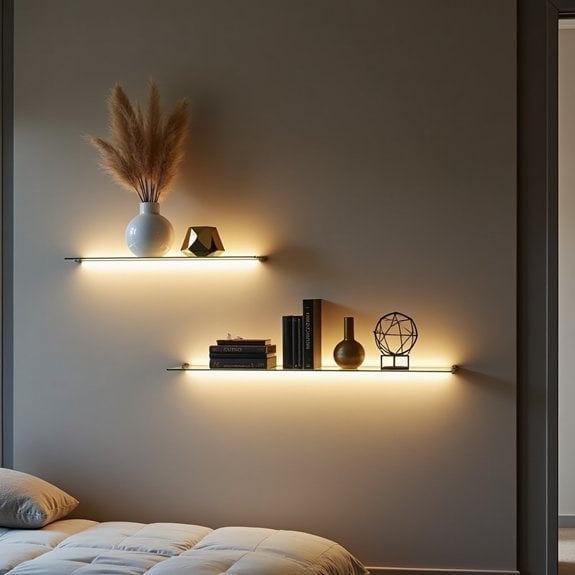
Proper lighting transforms ordinary shelving into stunning display areas that showcase your cherished collections and decorative pieces. LED lighting, in particular, offers an energy-efficient and versatile solution for highlighting accent pieces while creating ambiance in any room. Strategic illumination can draw attention to specific items, create depth, and establish focal points within your space.
The combination of thoughtful organization and LED lighting can elevate your shelving from purely functional storage to an artistic display. When accent pieces are properly lit, they cast interesting shadows, reveal intricate details, and create a professional, gallery-like atmosphere that makes your items appear more valuable and intentionally curated.
Required Items:
- LED strip lights or puck lights
- Wire clips or mounting tape
- Power supply unit
- Wire concealment channels
- Measuring tape
- Pencil
- Wire cutters
- Clean cloth
- Glass cleaner
- Level
- Drill and screws (if needed)
Begin by thoroughly cleaning your display shelves and planning the placement of your accent pieces. Measure each shelf and determine the type of LED lighting that best suits your display – strip lights work well for continuous illumination along shelf edges, while puck lights are ideal for spotlighting individual items.
Install the wire concealment channels first, ensuring they’re hidden behind or underneath the shelving. Mount the LED lights according to your plan, securing them with clips or mounting tape, and connect them to the power supply.
Arrange your accent pieces strategically, considering both the lighting effect and visual balance. Place larger items toward the back and shorter pieces in front to create depth. Position lights to eliminate harsh shadows and ensure each piece receives appropriate illumination. Test the lighting at different times of day to achieve the desired effect in varying ambient light conditions.
For optimal results, incorporate dimmer switches to adjust lighting levels based on time of day or desired mood. Consider using warm white LEDs (2700-3000K) for a cozy atmosphere or cool white (4000-5000K) for a modern look.
Regular dusting of both the lights and display items will maintain the professional appearance, and periodically check all connections to ensure the lighting system remains secure and functional.
Minimalist Shelf Styling With Purpose
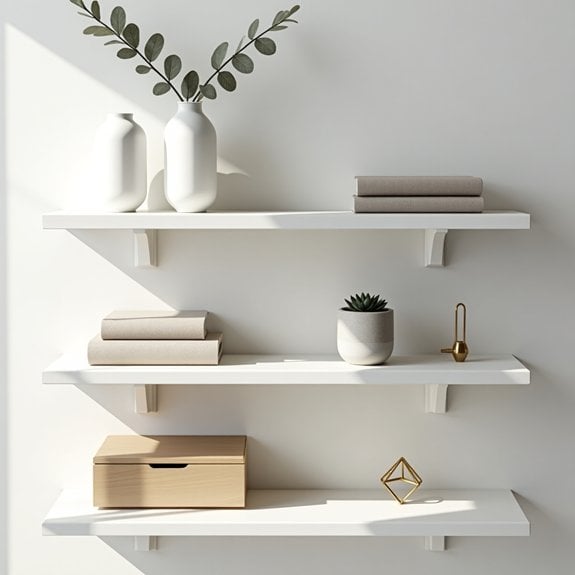
Minimalist shelf styling represents more than just an aesthetic choice; it’s a practical approach to organizing spaces that promotes clarity of mind and reduces visual clutter. When shelves are styled with intention and purpose, they become functional art pieces that serve daily needs while maintaining a clean, sophisticated appearance.
A purposeful minimalist shelf arrangement eliminates the common problem of overcrowded displays and dusty collections. This approach ensures every item earns its place through either utility or meaningful visual impact, creating spaces that are both beautiful and practical to maintain.
Required Items:
- Measuring tape
- Cleaning supplies
- Storage containers
- Label maker
- Organizing bins
- Basic tools for shelf adjustment
- Storage boxes in neutral colors
- Bookends
- Drawer organizers (if applicable)
Begin the organization process by completely clearing all shelves and cleaning them thoroughly. Group similar items together and assess each piece, keeping only what serves a purpose or brings genuine joy. Establish a hierarchy of needs: daily-use items should be placed at eye level or within easy reach, while less frequently used items can occupy higher or lower shelves.
When styling shelves, maintain visual balance by varying heights and depths while keeping adequate negative space. Position larger items first, then layer in medium-sized objects, finishing with smaller accessories. Create intentional groupings of three to five items maximum, ensuring each grouping has a clear purpose and visual cohesion. For books, arrange them both horizontally and vertically to create visual interest while maintaining functionality.
Additional Tips:
Maintain the minimalist arrangement by implementing a one-in-one-out rule for new items. Regular evaluation of shelf contents prevents clutter from accumulating. Consider seasonal rotation of decorative elements to keep spaces fresh while adhering to minimalist principles. Use natural materials and neutral colors to enhance the calm, organized atmosphere, and always leave some empty space to allow the arrangement to breathe.
Multi-Functional Shelf-Desk Combinations
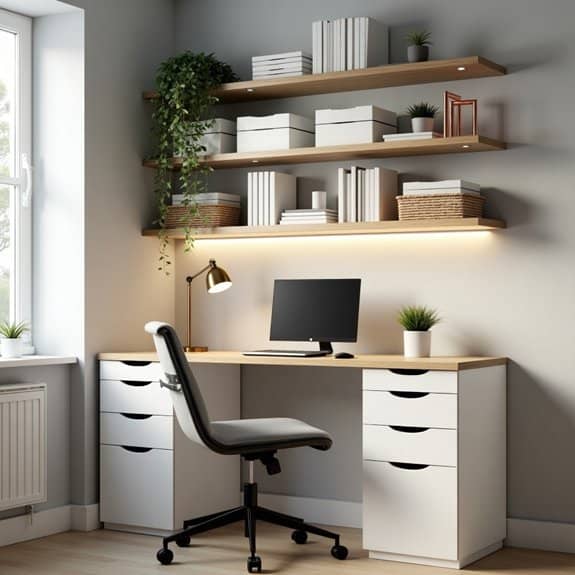
The modern home office demands versatility and efficiency, making multi-functional shelf-desk combinations an essential solution for maximizing space while maintaining productivity. These hybrid furniture pieces serve as both workstations and storage units, allowing users to seamlessly transition between tasks while keeping necessary items within arm’s reach.
By properly organizing a shelf-desk combination, you create a dynamic workspace that adapts to various needs throughout the day. Whether you’re working remotely, pursuing creative projects, or managing household tasks, a well-organized shelf-desk system eliminates clutter and promotes better focus and workflow management.
Required Items:
- Desk-shelf combination unit
- Storage containers or baskets
- Cable management solutions
- Drawer organizers
- Label maker
- Desktop organizers
- File folders
- Bookends
- LED strip lighting
- Small storage boxes
Start by designating specific zones on your shelf-desk combination: a primary workspace area on the desk surface, reference materials on eye-level shelves, and less frequently used items on higher shelves.
Install cable management solutions to keep wires tidy and prevent them from cluttering your workspace. Organize frequently used items in desktop organizers within easy reach of your seated position.
Group similar items together on shelves using coordinated storage containers, maintaining a balance between accessibility and aesthetics. Position heavier items on lower shelves for stability, and use vertical space efficiently by implementing stackable storage solutions.
Ensure that items used daily are stored between waist and shoulder height to prevent strain.
Additional Tips:
Regularly reassess your organization system and adjust it based on changing needs. Incorporate adequate lighting at both the desk and shelf levels to create a well-lit workspace.
Consider using a color-coding system for different categories of items, and maintain clear pathways to frequently accessed materials. Remember to leave some empty space for future additions and to prevent visual overcrowding.
Seasonal Rotation System for Clothing Storage

A well-organized seasonal clothing rotation system is essential for maximizing closet space and maintaining garment quality throughout the year. By properly storing off-season clothing, you can protect valuable pieces from dust, damage, and unnecessary wear while keeping your current wardrobe easily accessible and clutter-free.
Implementing a seasonal rotation system not only creates more space in your primary closet but also helps you take inventory of your clothing twice yearly. This regular assessment allows you to evaluate what you actually wear, identify items that need repair, and make informed decisions about future purchases.
Required Items:
- Storage containers with tight-fitting lids
- Vacuum storage bags
- Cedar blocks or lavender sachets
- Acid-free tissue paper
- Labels and marker
- Clean laundry bags
- Garment cleaning supplies
- Storage bins inventory list
- Climate-controlled storage space
Start by thoroughly cleaning all garments before storage, as even invisible stains can set during long-term storage. Sort clothes into categories: heavy winter items, lightweight summer pieces, and transitional garments.
Fold heavy sweaters and knits with tissue paper to prevent creasing, and use vacuum bags for bulky items like coats and winter bedding. Store delicate items in breathable garment bags, placing cedar blocks or lavender sachets to repel moths and maintain freshness.
Create detailed labels for each storage container, listing contents and season. Stack containers in your designated storage area, keeping frequently needed transition pieces more accessible. Maintain a digital or written inventory of stored items, including their location and condition, to streamline future seasonal switches.
For optimal results, perform the rotation twice yearly, typically in spring and fall. During each transition, inspect garments for damage, create a maintenance list for repairs, and evaluate each piece’s continued value in your wardrobe.
Keep seasonal accessories with their corresponding clothing to maintain a complete organization system. Consider photographing particularly successful outfit combinations before storing them to remember winning combinations in the following year.
Glass Jars and Containers for Visible Organization
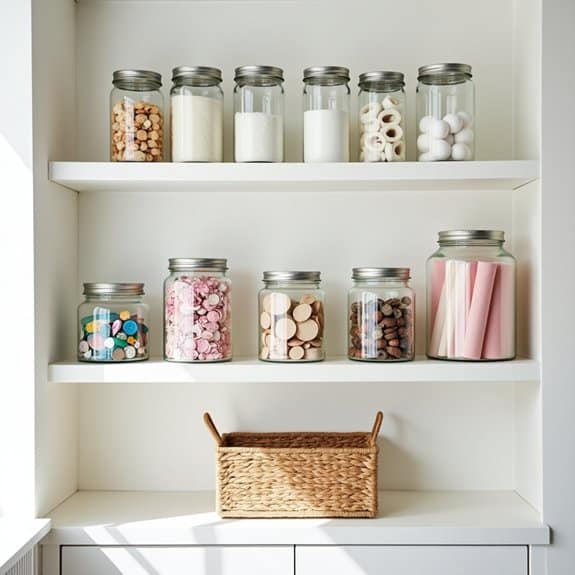
Using glass jars and containers for organization transforms cluttered shelves into an aesthetically pleasing and functional storage system. The transparency of glass containers allows for quick identification of contents while maintaining a cohesive, clean appearance that enhances any space, from pantries to craft rooms.
This organizing method not only improves visibility and accessibility but also helps preserve items longer by protecting them from moisture and pests. Glass containers create an airtight seal that maintains freshness while showcasing the contents in an appealing way that can actually motivate better organization habits.
Required Items:
- Assorted glass jars with tight-fitting lids
- Labels or label maker
- Measuring cups and funnels
- Clean cloth or paper towels
- Storage baskets or trays
- Shelf liner (optional)
- Dry-erase marker
- Container cleaning supplies
Select appropriately sized glass containers based on the items you plan to store. Remove all items from their original packaging and clean the containers thoroughly. Group similar items together and transfer them to the jars, ensuring each container is properly sealed. Create clear, legible labels indicating contents and any relevant information such as expiration dates or usage instructions.
Arrange containers on shelves with frequently used items at eye level and heavy containers on lower shelves for safety. When organizing multiple shelves, consider creating zones based on usage frequency or category. Place shorter containers toward the front and taller ones in the back for optimal visibility.
Use square or rectangular containers when possible to maximize shelf space, and consider using turntables or risers for corner spaces or deep shelves.
Additional Tips: Maintain your organization system by cleaning containers regularly and updating labels as needed. Consider using erasable labels for items that rotate frequently, and keep a few empty containers on hand for new items or reorganization. Regularly check seals and replace any damaged containers promptly to maintain freshness and prevent spills.
Label Systems for Easy Item Location
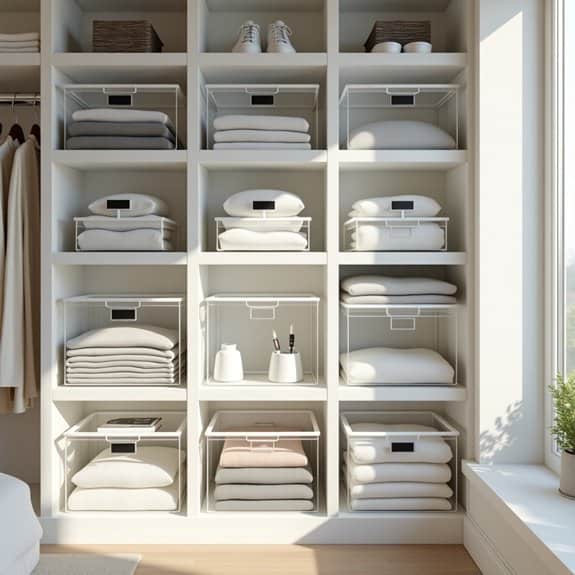
A well-organized labeling system transforms ordinary shelves into an efficient storage solution, eliminating the frustration of searching for items and maintaining order long-term.
Whether in a pantry, closet, or office space, proper labels serve as visual guides that help everyone in the household quickly locate and return items to their designated spots.
Implementing a consistent label system not only saves time but also creates a sense of order that can reduce stress and improve productivity.
When items have clear, designated homes, the entire space becomes more functional, and maintaining organization becomes second nature rather than a constant challenge.
Required Items:
- Label maker or printer
- Clear adhesive labels
- Waterproof markers
- Measuring tape
- Storage containers or bins
- Scissors
- Clear tape
- Category cards
- Label holders (optional)
- Color-coding supplies (optional)
Start by categorizing all items that will be stored on the shelves and determining the most logical groupings.
Create a master list of categories and subcategories that will guide your labeling system.
Choose a consistent label format that includes clear, legible text and considers factors like viewing distance and lighting conditions.
For containers or bins, place labels on both the front and top for maximum visibility.
Apply labels at a consistent height and position on each shelf or container.
Use broad category labels for shelf sections and more specific labels for individual containers or items.
Consider implementing a color-coding system to further enhance visual organization, such as using different colored labels or markers for distinct categories.
For optimal results, select weather-resistant labels for areas prone to moisture or temperature changes, and maintain consistent terminology throughout your labeling system.
Review and update labels periodically to ensure they remain relevant and legible, and keep extra labeling supplies on hand for quick adjustments or additions to your organization system.

