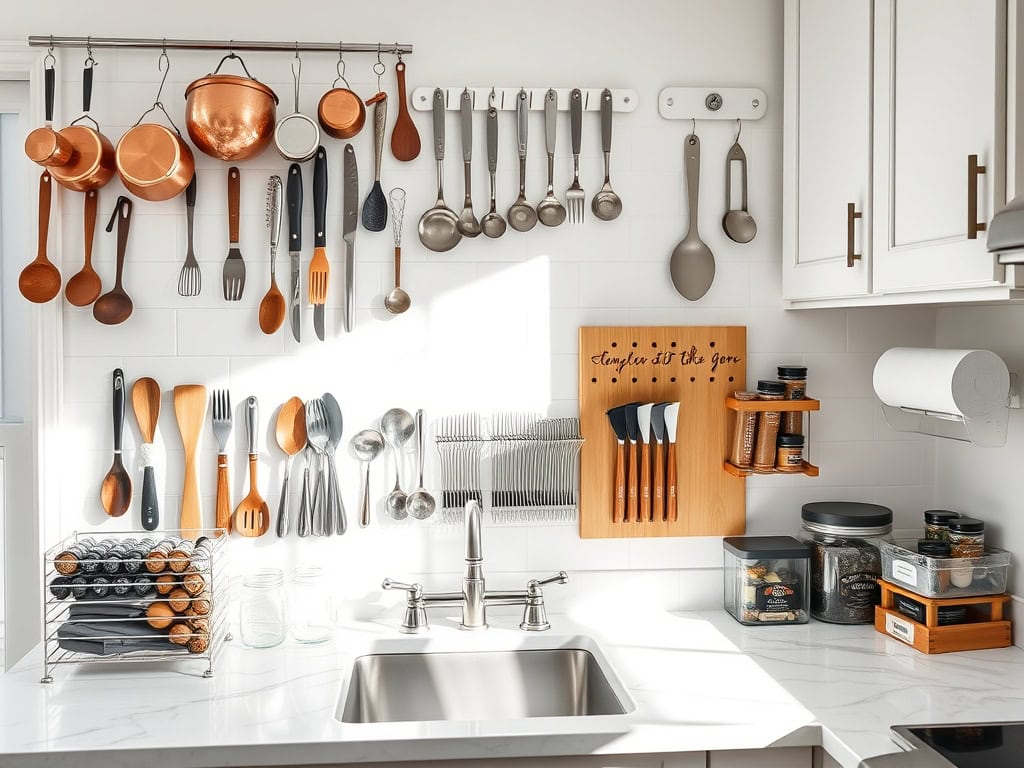
You’ve probably noticed that kitchen organization can feel like solving a puzzle – especially when your cabinets are bursting with gadgets and gizmos. I’ve been there, staring at my cluttered countertops and wondering where it all went wrong! But here’s the good news: with a few clever hacks and some strategic thinking, you can transform your chaotic kitchen into an efficient cooking space. Let me share some game-changing solutions that’ll make your daily meal prep so much easier.
Magnetic Strips: The Ultimate Solution for Knife Storage
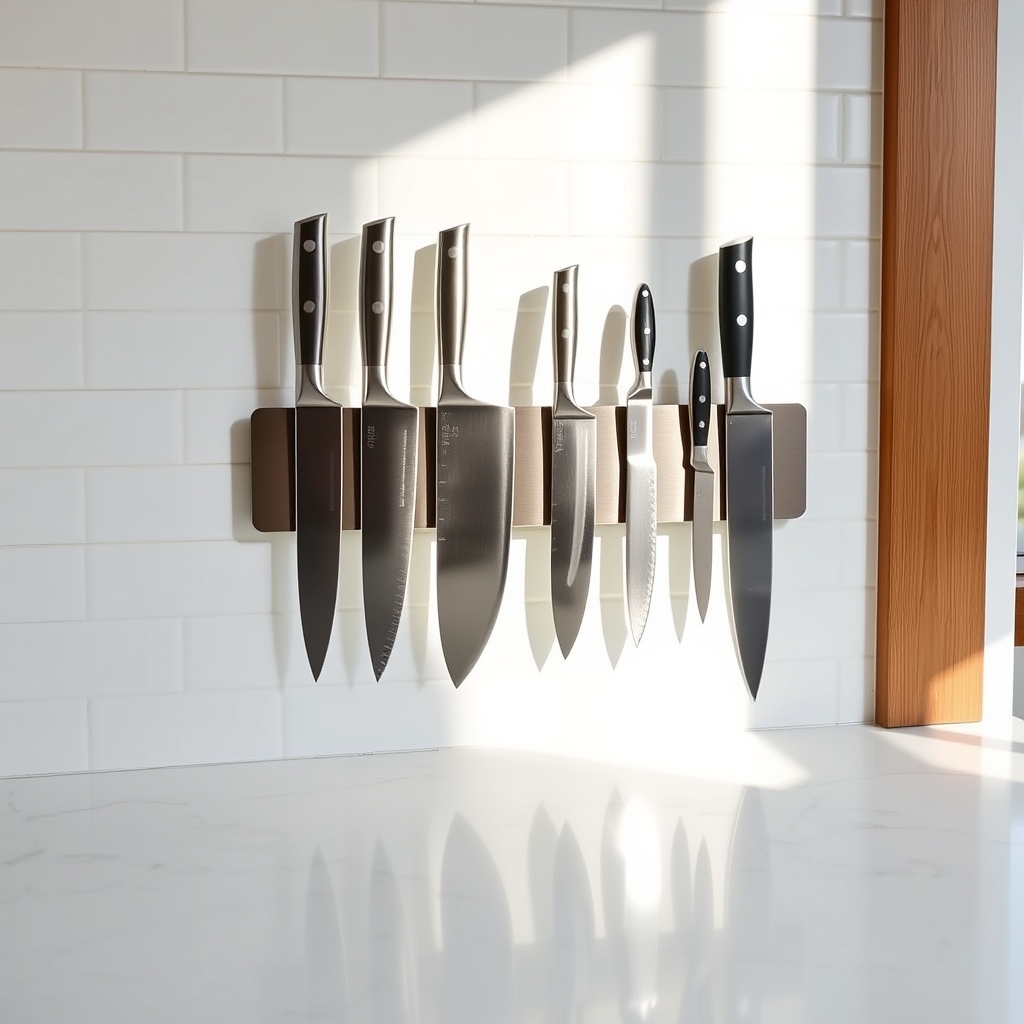
Proper knife storage is crucial for both safety and maintaining the quality of your kitchen knives. Scattered knives in drawers can become dulled, damaged, and pose serious safety risks when reaching for utensils. Additionally, improperly stored knives can take up valuable drawer space that could be better utilized for other kitchen tools.
Magnetic strips offer an elegant and practical solution for knife storage, keeping blades easily accessible while protecting their edges. This storage method not only creates a professional-looking display but also ensures your knives remain sharp and ready for use while freeing up precious counter and drawer space.
Required Items:
- Magnetic knife strip
- Mounting hardware (screws, anchors)
- Level
- Pencil
- Drill
- Screwdriver
- Measuring tape
- Stud finder
- Clean cloth
Installation and Organization Process:
Select an appropriate wall space that’s easily accessible but away from high-traffic areas where people might accidentally bump into the knives. Use a stud finder to locate wall studs for secure mounting. Mark the desired height and position with a pencil, ensuring the strip will be level.
For drywall installation, drill pilot holes and insert anchors; for mounting directly into studs, pilot holes alone suffice. Secure the magnetic strip using the provided mounting hardware, ensuring it’s firmly attached to the wall. Clean the magnetic surface thoroughly before use.
When arranging knives on the strip, position them with handles pointing in the same direction for a uniform look. Place frequently used knives at easy-to-reach heights and positions. Ensure each knife makes full contact with the magnetic surface for secure holding. Leave adequate space between knives to prevent blades from touching each other.
Additional Tips:
Consider installing multiple magnetic strips at different heights to accommodate various knife sizes and create a tiered display. Keep heavier knives closer to the center of the strip for better weight distribution. Clean both the magnetic strip and knife blades regularly to maintain strong magnetic contact.
For kitchens with children, install strips at a height that’s out of reach. Periodically check the mounting hardware to ensure the strip remains securely fastened to the wall.
Transform Tension Rods Into Under-Sink Organizers
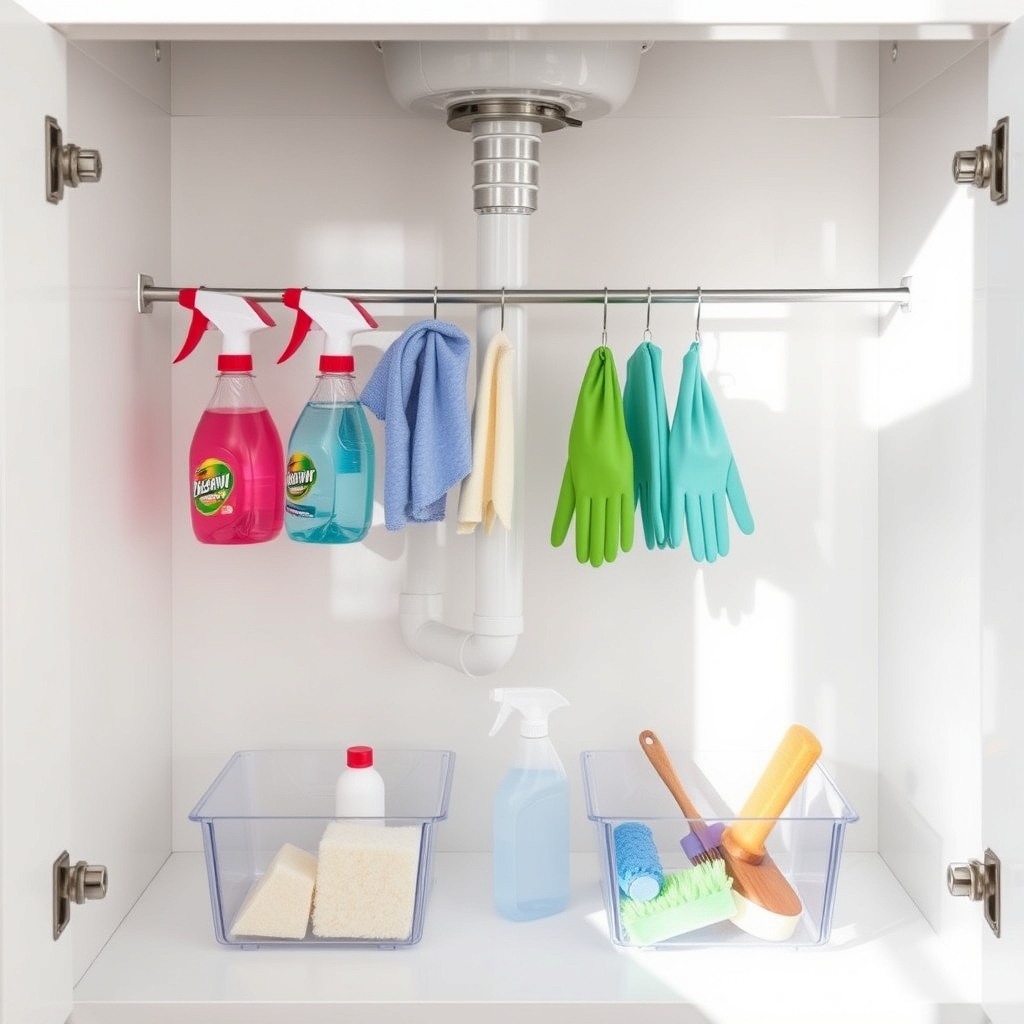
The space under the kitchen sink often becomes a chaotic collection of cleaning supplies, sponges, and various household items. Without proper organization, this valuable storage area can quickly turn into a jumbled mess where finding specific items becomes a frustrating task, and products may even go to waste because they’re forgotten in the back.
Tension rods offer an innovative and cost-effective solution for maximizing under-sink storage. These versatile tools can create multiple levels of organization, allowing you to hang spray bottles, separate cleaning supplies, and establish designated spaces for different categories of items, all while making use of vertical space that typically goes unused.
Required Items:
- 2-3 adjustable tension rods
- Measuring tape
- Cleaning supplies to organize
- Storage bins (optional)
- Labels (optional)
- Cabinet liner (optional)
Start by removing everything from under the sink and measuring the cabinet’s width and height. Install the first tension rod at the highest point possible while avoiding any pipes or plumbing. Position it roughly 2-3 inches from the back of the cabinet.
Install a second tension rod about 6-8 inches in front of the first one, slightly lower to create a tiered effect. If space allows, add a third rod even further forward.
Hang spray bottles by their triggers on the back rod, ensuring the nozzles don’t touch the cabinet’s top. Use the front rod(s) to hang smaller items like glass cleaner bottles or dishwashing gloves. Place frequently used items toward the front for easy access.
Consider adding small bins on the cabinet floor beneath the rods for items that can’t be hung, such as sponges, scrub brushes, or extra supplies.
To maintain this organization system, regularly check the tension rods‘ stability and adjust as needed. Keep heavier items on the cabinet floor rather than hanging them to prevent overloading the rods.
Consider using clear bins to easily identify contents and implement a rotation system where newer products go to the back while older ones move forward to ensure supplies are used before expiring.
Create a DIY Pegboard Wall for Hanging Utensils
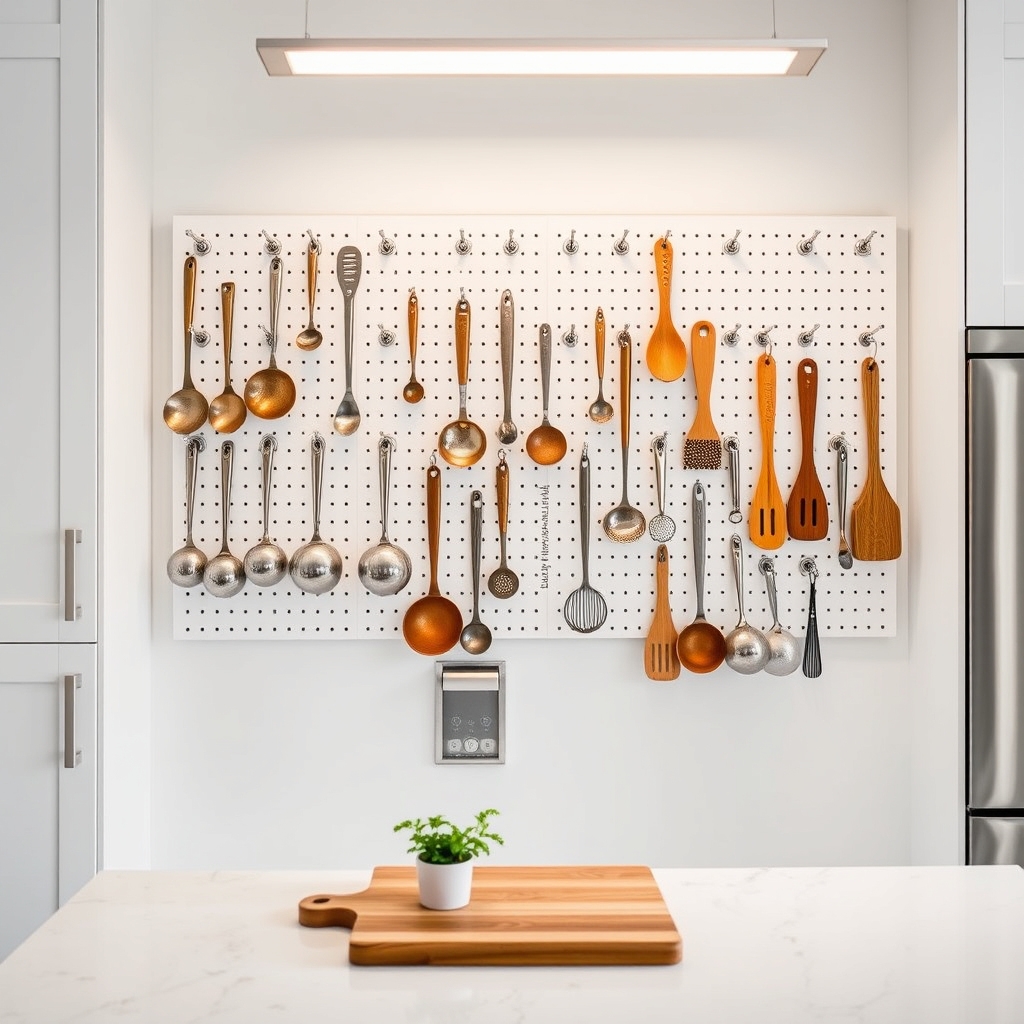
A well-organized kitchen is essential for efficient cooking and meal preparation, and one of the most challenging aspects is keeping utensils easily accessible yet neatly stored. A DIY pegboard wall solution transforms unused wall space into a functional storage system that keeps your cooking tools within arm’s reach while adding a professional, industrial-style aesthetic to your kitchen.
Installing a pegboard wall not only maximizes vertical storage space but also creates a customizable system that can evolve with your kitchen needs. Unlike traditional drawer storage, pegboards allow you to visualize all your utensils at once, making cooking more efficient and preventing the accumulation of unnecessary duplicate tools.
Required Materials:
- Pegboard (sized to your wall space)
- Pegboard hooks and holders (various sizes)
- Wall anchors and screws
- Wooden furring strips
- Level
- Drill and drill bits
- Pencil
- Measuring tape
- Screwdriver
- Paint and paintbrush (optional)
- Stud finder
- Safety glasses
- Work gloves
Start by measuring your wall space and cutting the pegboard to size if necessary. Install furring strips horizontally along the wall, ensuring they’re anchored into wall studs for maximum support. The strips create necessary spacing between the wall and pegboard for hook insertion.
Mount the pegboard to the furring strips using screws, making sure it’s level and secure. After installation, paint the pegboard if desired to match your kitchen’s aesthetic. Once dry, begin inserting hooks and holders strategically based on your utensil sizes and weights.
Group similar items together and consider workflow when deciding placement. For heavier items, use multiple hooks or specialized holders designed for increased weight capacity. Organize utensils by frequency of use, keeping everyday items at eye level and less-used tools higher or lower.
Consider installing small shelves or baskets on the pegboard for items that don’t hang well. Label hook locations with small stickers underneath to maintain organization when items are removed for use. Periodically review and adjust the layout to optimize functionality based on your cooking habits and needs.
Pro Tips: Use rubber washers behind hooks to prevent them from falling out when removing items. Consider installing LED strip lighting above or below the pegboard to illuminate your tools. Leave some empty hooks for future additions and rotate seasonal cooking tools as needed.
Clean the pegboard regularly with a damp cloth to prevent grease and dust accumulation, and check hook security monthly to ensure safe storage of your utensils.
Use Command Hooks to Maximize Cabinet Door Space
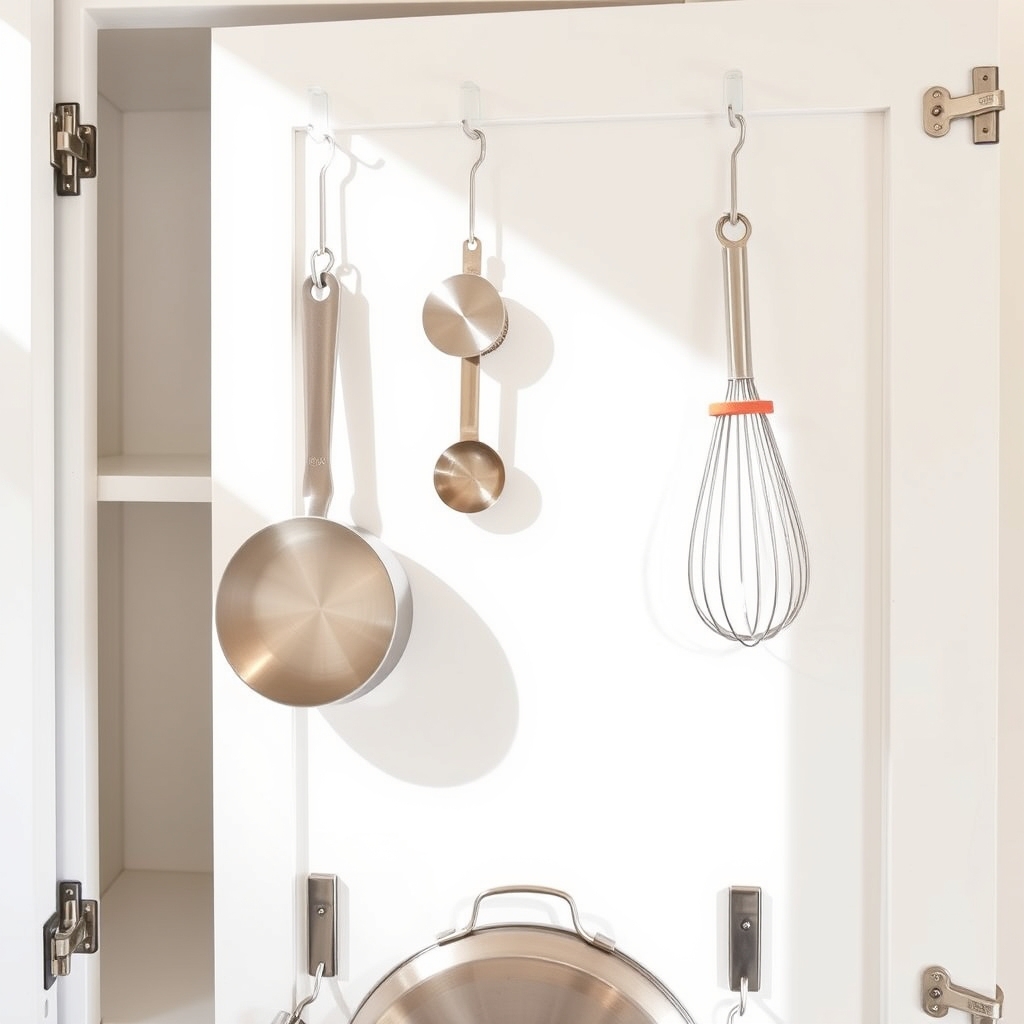
Maximizing storage space in kitchen cabinets is crucial for maintaining an organized and efficient cooking environment. Cabinet doors represent valuable but often overlooked real estate that can be transformed into functional storage areas for lightweight kitchen tools, measuring cups, pot lids, and other everyday items.
Command hooks offer a damage-free solution for utilizing this vertical space, as they can be easily installed and removed without leaving marks on cabinet surfaces. This organizing method not only creates additional storage but also improves accessibility to frequently used items while keeping countertops clear and cabinets less cluttered.
Required Items:
- Command hooks (various sizes)
- Measuring tape
- Pencil
- Clean cloth
- Rubbing alcohol
- Kitchen items to hang
- Label maker (optional)
- Small basket hooks (optional)
Start by thoroughly cleaning the interior cabinet door surface with rubbing alcohol and allowing it to dry completely. Measure and mark potential hook locations, ensuring adequate spacing between items and clearance from shelves when the door closes.
Install Command hooks according to package instructions, typically pressing firmly for 30 seconds and waiting one hour before hanging items. Position hooks strategically – larger hooks at the bottom for heavier items and smaller hooks at the top for lightweight tools. Consider the natural workflow of your kitchen when deciding which items to hang where.
For optimal organization results, place frequently used items at eye level and group similar items together. Install hooks in a pattern that maximizes space while maintaining a neat appearance. For instance, stagger hooks to accommodate longer utensils or arrange them in parallel rows for uniform items like measuring cups.
Additional tip: To prevent items from swinging when opening and closing cabinet doors, consider installing small rubber bumpers on the cabinet frame or using Command hooks with rubber grips.
Regularly inspect the hooks for secure attachment and replace any that show signs of wear. Label the spots above hooks to maintain organization when replacing items, and avoid hanging anything too heavy that might compromise the hook’s adhesive strength.
Organize Lids With a Desktop File Organizer
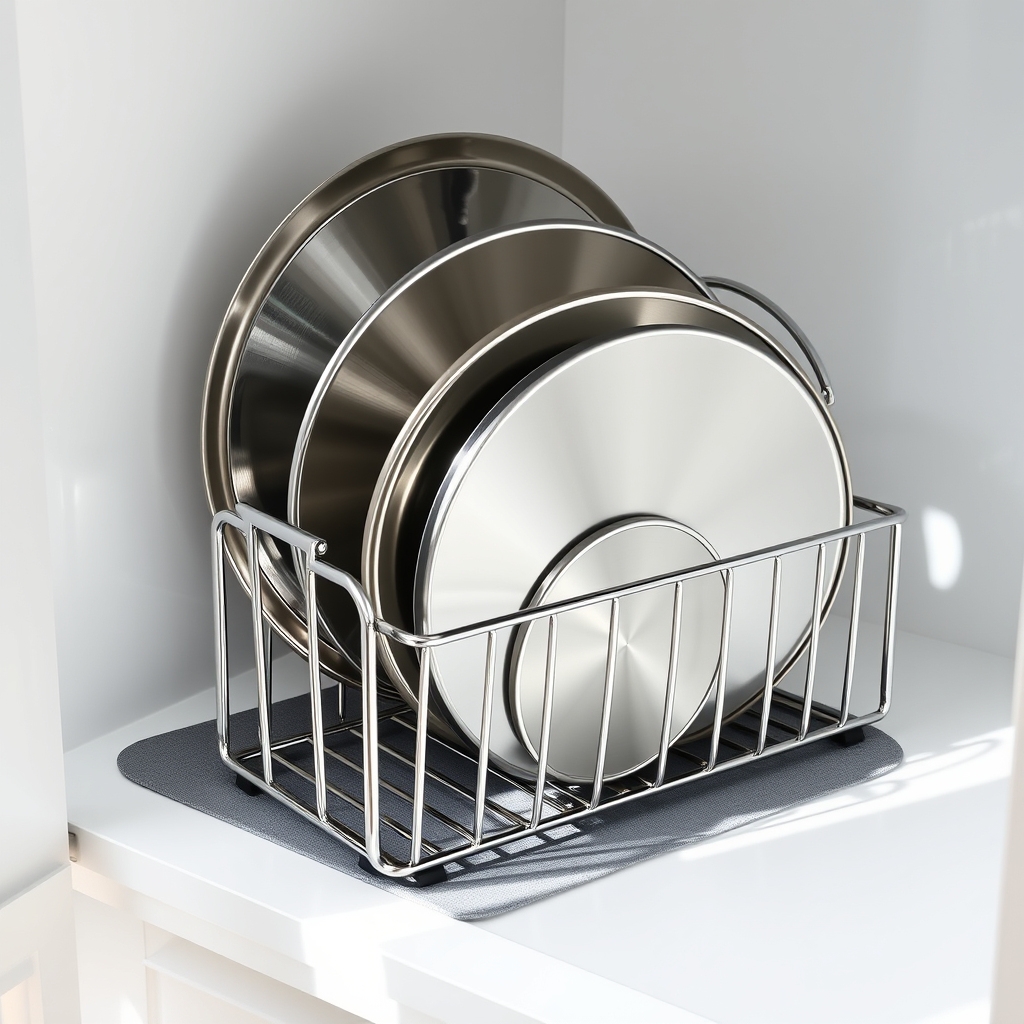
Pot and pan lids are notorious for creating chaos in kitchen cabinets, often leading to frustration when cooking and inefficient use of storage space. Without proper organization, these essential items can become scattered, damaged, or lost behind other cookware, turning meal preparation into an unnecessary treasure hunt.
A desktop file organizer offers an innovative solution to this common kitchen storage problem. Originally designed for office documents, these organizers are perfectly suited for storing lids vertically, making them easily accessible while maximizing cabinet space. This repurposing of office supplies demonstrates how thinking outside the box can lead to practical kitchen storage solutions.
Required Items:
- Desktop file organizer (metal or sturdy plastic)
- Measuring tape
- Cabinet liner (non-slip)
- Label maker (optional)
- Cleaning cloth
- All-purpose cleaner
Start by measuring your cabinet space and selecting an appropriately sized desktop file organizer that will accommodate your lid collection. Clean both the organizer and the cabinet space thoroughly. Place non-slip liner in the cabinet to prevent the organizer from sliding.
Position the file organizer in the cabinet, ensuring there’s enough clearance for the cabinet door to close properly. Sort your lids by size, starting with the largest at one end and progressing to the smallest. Place each lid vertically in the slots of the file organizer, maintaining about an inch of space between each lid to prevent scratching.
If using multiple organizers, consider grouping lids by function (such as pot lids in one, container lids in another) and labeling each section accordingly. For optimal organization maintenance, regularly assess the arrangement and adjust as needed.
Consider placing frequently used lids in the most accessible slots, and remove any lids that no longer have matching containers or pots. Clean the organizer monthly to prevent dust accumulation and maintain a hygienic kitchen environment. If space allows, keep a small gap at the end of the organizer for new lids that may join your collection in the future.
Install a Pull-Out Pantry in Narrow Spaces
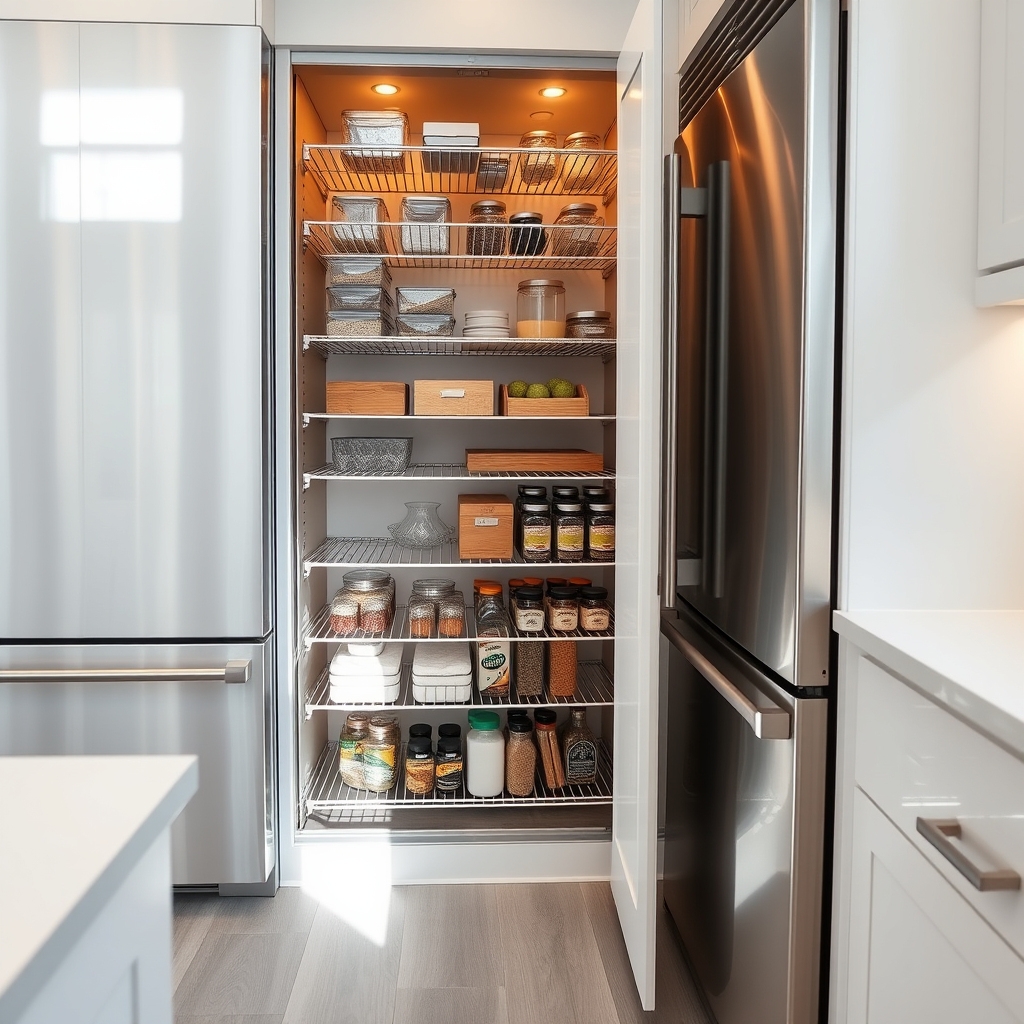
Making the most of narrow spaces in your kitchen is essential for maximizing storage and accessibility. Those seemingly useless gaps between appliances or cabinets can be transformed into valuable storage real estate with a well-designed pull-out pantry system.
A pull-out pantry not only utilizes vertical space efficiently but also makes items easily accessible by eliminating the need to reach into deep, dark corners. This organization solution can store everything from canned goods and spices to cooking oils and small appliances, keeping them organized and within arm’s reach.
Required Items:
- Pull-out pantry frame/system
- Mounting brackets
- Screws and anchors
- Power drill
- Level
- Measuring tape
- Pencil
- Screwdriver
- Wire shelves or solid panels
- Wood shims (if needed)
Installation begins with precise measurements of your available space, including height, width, and depth. Remove any existing shelving or obstacles from the installation area. Mark the mounting points on the wall or cabinet sides, ensuring they’re level.
Install the sliding track system according to manufacturer specifications, typically starting with the bottom track followed by the side supports. Attach the shelving units or panels to the frame, making sure they’re secure and properly aligned with the sliding mechanism.
The pull-out system should be tested for smooth operation before loading items. Start organizing from the bottom up, placing heavier items on lower shelves and frequently used items at eye level. Consider using shelf liner to prevent items from sliding during operation.
To maximize your pull-out pantry’s effectiveness, incorporate clear containers for loose items, implement a labeling system, and regularly review contents to maintain organization. Consider adding LED strip lighting to illuminate the space when pulled out, and use shelf dividers to create designated zones for different categories of items.
Repurpose Wine Racks for Rolling Pin Storage
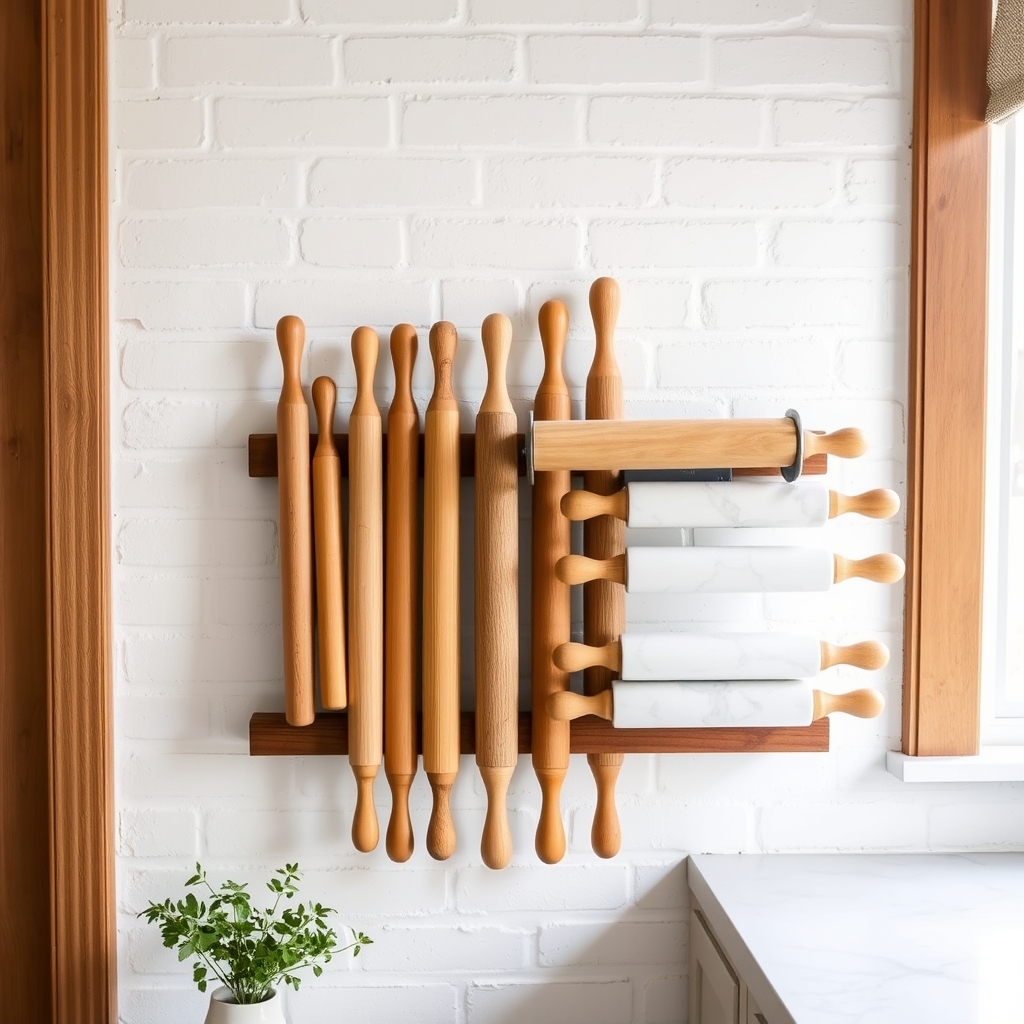
Rolling pins are essential baking tools that often prove challenging to store properly. Their awkward shape and length can make them difficult to fit in drawers or cabinets, leading to cluttered countertops or inefficient use of kitchen space. Proper storage ensures these tools remain easily accessible while protecting them from damage.
Repurposing wine racks for rolling pin storage offers an elegant and practical solution that transforms these often-overlooked items into organized, display-worthy kitchen tools. This method not only keeps rolling pins within easy reach but also adds a creative design element to your kitchen while making use of vertical space.
Required Items:
- Wall-mounted or countertop wine rack
- Screws and wall anchors (if mounting)
- Drill and screwdriver
- Level
- Measuring tape
- Pencil
- Rolling pins
- Cleaning cloth
The conversion process begins with selecting an appropriate wine rack, preferably one with horizontal compartments sized to accommodate your rolling pins’ dimensions. For wall-mounted racks, locate wall studs and mark mounting points, ensuring the rack will be level. Install wall anchors if necessary, then secure the rack firmly to the wall.
For countertop models, simply clean the designated space and position the rack where it’s easily accessible but protected from water and heat sources. Test the stability of each compartment before placing rolling pins inside.
Additional optimization: Consider arranging rolling pins by size or frequency of use, with most-used items at eye level. Label each compartment if storing specialty rolling pins with specific uses.
Keep the rack dust-free with regular wiping, and periodically check that mounting hardware remains secure. This storage solution works best when positioned away from heat sources and direct sunlight to prevent warping of wooden rolling pins.
Make a Rotating Corner Cabinet Organizer
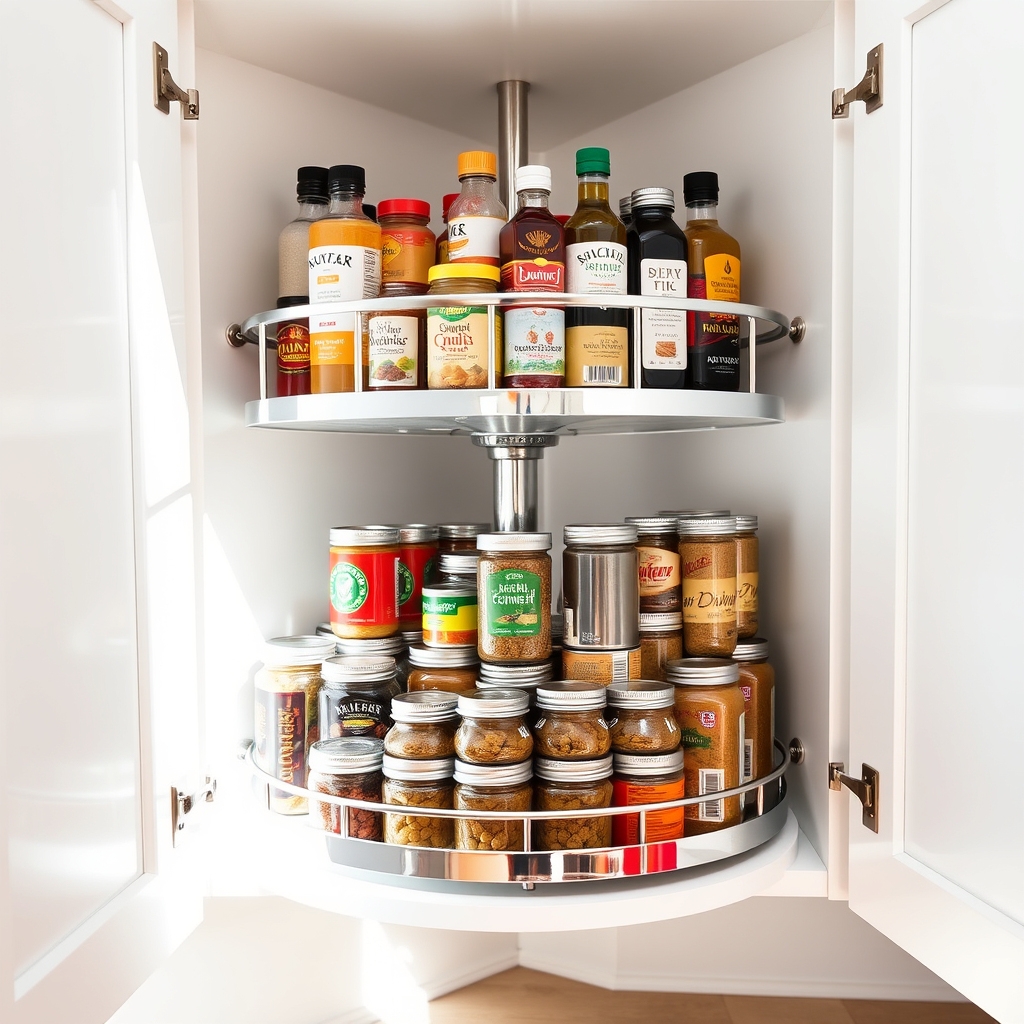
Corner cabinets often become the black holes of kitchen storage, with items disappearing into their depths never to be seen again. A rotating corner cabinet organizer, also known as a Lazy Susan, transforms this awkward space into one of the most functional areas of your kitchen, providing easy access to items that would otherwise be difficult to reach.
Maximizing corner cabinet space not only increases storage capacity but also saves valuable time during meal preparation. Rather than crawling halfway into your cabinet to retrieve items, a rotating organizer brings them to you with a simple spin, making it an essential solution for modern kitchens.
Tools and Materials Needed:
- Rotating cabinet organizer mechanism (Lazy Susan)
- Measuring tape
- Screwdriver
- Mounting brackets
- Wood screws
- Level
- Pencil
- Drill
- Cabinet shelf liner (non-slip)
- Cleaning supplies
Installation and organization begins with thoroughly cleaning and measuring your corner cabinet space. Remove all items and measure the cabinet’s width, depth, and height to ensure proper fit of your rotating mechanism.
Install the base plate of the Lazy Susan according to manufacturer instructions, typically by securing it to the cabinet floor with mounting brackets and screws. Once the mechanism is stable and level, attach the rotating platforms, ensuring they spin freely without hitting cabinet walls.
After installation, organize items by category, placing frequently used items on the top tier and less-used items on lower tiers. Group similar items together – baking supplies on one level, canned goods on another.
Use non-slip liner on each tier to prevent items from shifting during rotation. To maintain optimal functionality, regularly inspect the rotating mechanism for smooth operation, clean the surfaces, and reorganize items as needed.
Consider adding small containers or dividers to keep smaller items from tipping over, and maintain weight distribution by evenly spacing heavier items around each tier. Remember to periodically review and purge unused items to prevent overcrowding and maintain easy access to all stored items.
Use Drawer Dividers for Utensil Management
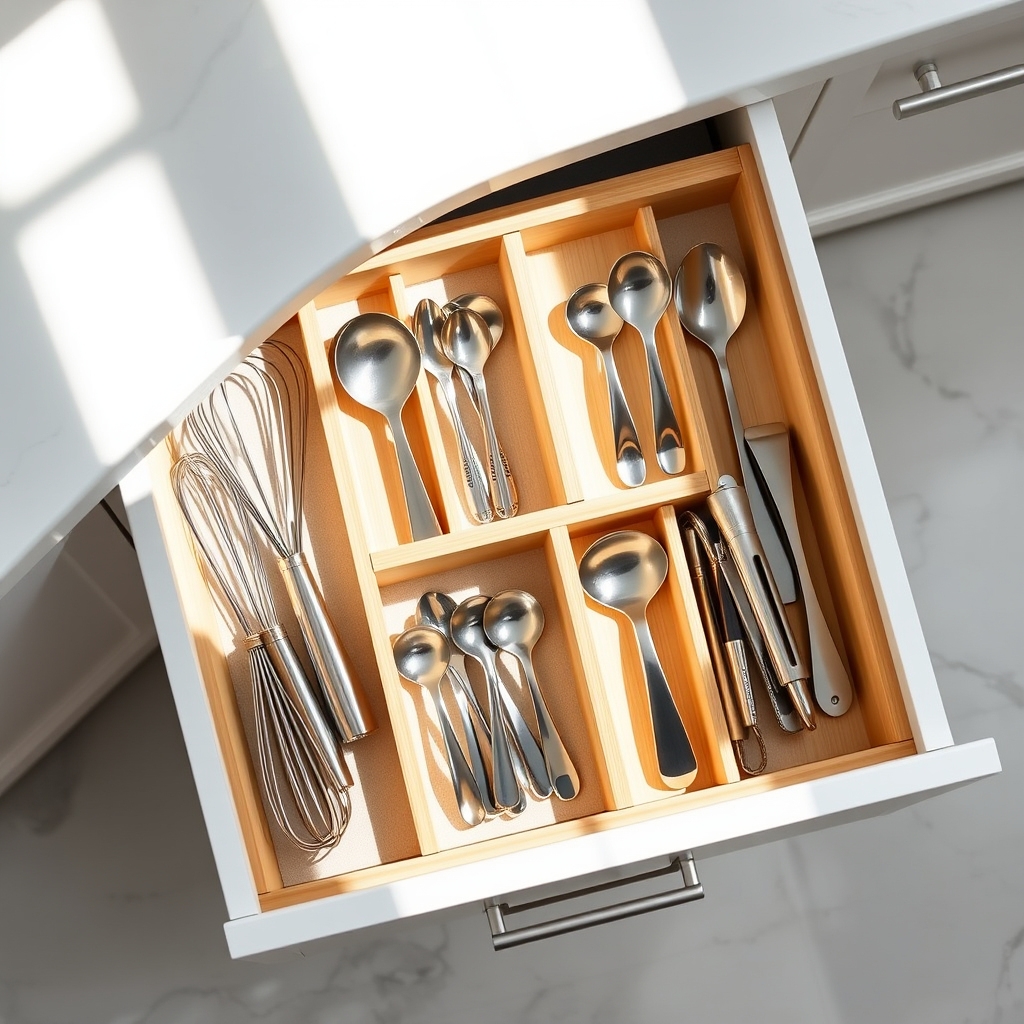
Organizing kitchen utensils is a fundamental step in creating an efficient cooking space. When utensils are properly sorted and divided, you can quickly locate the exact tool needed without wasting precious time rummaging through cluttered drawers. This organization system prevents damage to utensils and maintains their longevity by keeping them from scratching against each other.
Drawer dividers transform chaotic utensil storage into a streamlined system that maximizes space utilization. By categorizing utensils based on function and frequency of use, you create a practical workflow that enhances your cooking experience and maintains order even during busy meal preparations.
Required Items:
- Drawer dividers (adjustable or fixed)
- Measuring tape
- Cleaning supplies
- Labels (optional)
- Drawer liner material
- Container for overflow items
- Sorting bins (temporary use)
Start by removing all utensils from the drawer and thoroughly cleaning the space. Measure the drawer dimensions and install appropriate dividers, ensuring they fit snugly and create compartments suitable for your utensil sizes.
Group utensils by category – serving pieces, measuring tools, cooking implements, and specialty items. Arrange the most frequently used items in easily accessible front sections, with less-used items toward the back. Position handles in the same direction for uniform appearance and easier grabbing.
When organizing the sections, consider creating zones based on cooking tasks. For example, keep all baking utensils together, group stovetop cooking tools in another section, and designate a space for measuring implements. This systematic approach ensures that related items stay together, making it intuitive to find what you need quickly.
To maintain the organization system, regularly assess utensils for duplicates or rarely used items that can be stored elsewhere. Consider using drawer liners to prevent items from sliding around, and periodically clean both the utensils and dividers to maintain hygiene.
Adjust the layout if you notice certain sections becoming overcrowded or underutilized, and resist the temptation to force additional items into already-full compartments.
Mount a Spice Rack Behind Cabinet Doors
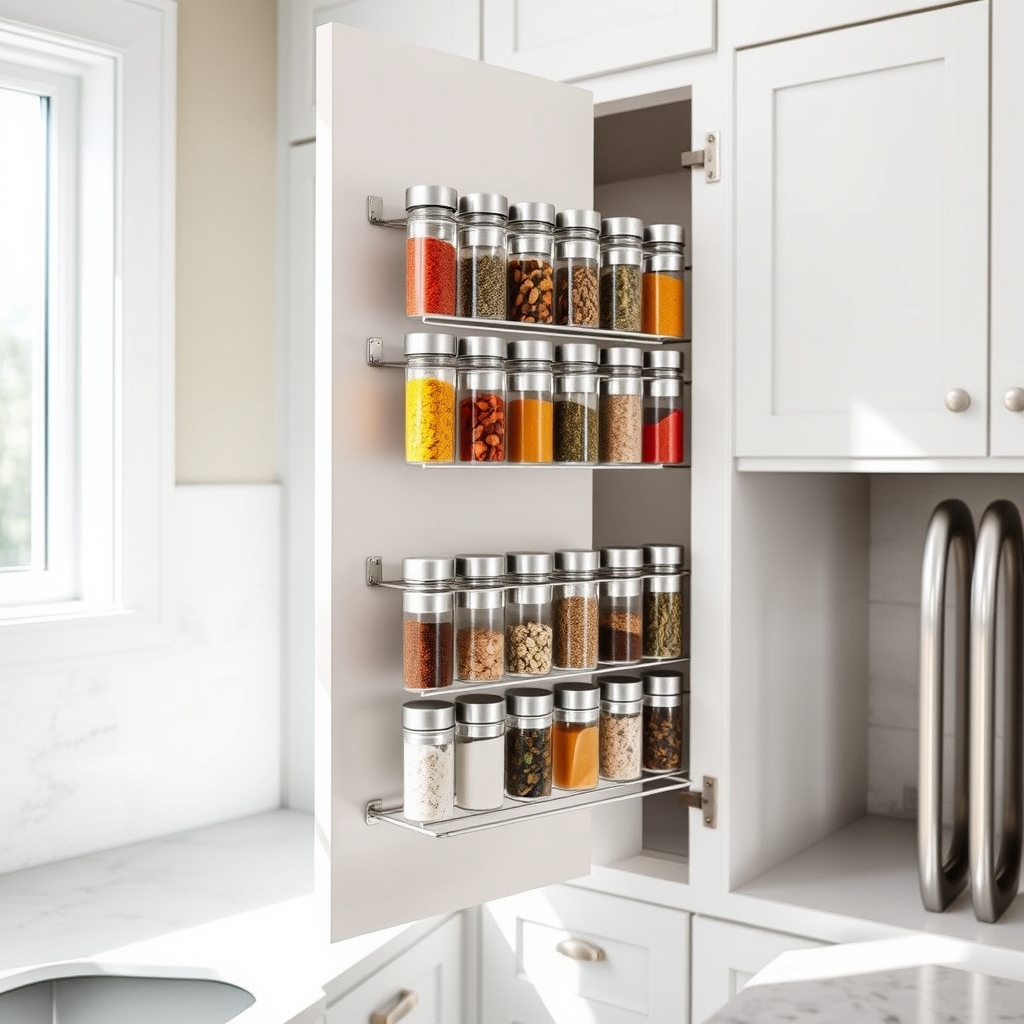
Organizing spices is a perpetual challenge in most kitchens, with bottles and containers often scattered throughout drawers or taking up valuable counter space. A behind-the-door mounting system maximizes previously unused space while keeping spices easily accessible and protected from light and heat, which can degrade their quality over time.
Installing a spice rack behind cabinet doors creates a streamlined storage solution that transforms cluttered cabinets into an efficient cooking station. This organization method allows you to see all your spices at once, making meal preparation faster and ensuring you don’t purchase duplicates of spices you already own.
Required Items:
- Door-mounted spice rack or rack strips
- Mounting screws and anchors
- Measuring tape
- Pencil
- Level
- Drill and drill bits
- Screwdriver
- Cabinet door bumpers
- Clear adhesive spice labels
- Small command strips (optional)
The installation process begins with measuring the inside of your cabinet door and selecting an appropriately sized rack system. Mark the mounting points on the door’s interior, ensuring the rack won’t interfere with shelves or cabinet contents when closed.
Using a level, confirm your markings are straight before drilling pilot holes for the mounting screws. Install the rack securely, making sure it’s firmly anchored to support the weight of filled spice containers.
Once mounted, organize spices alphabetically or by frequency of use, placing everyday seasonings at eye level. Add cabinet door bumpers at the corners to prevent the rack from banging against the cabinet frame. Apply clear labels to the tops of spice containers for easy identification when viewing from above.
Additional Tips: Consider installing LED strip lighting inside the cabinet to illuminate your spice collection. Use uniform containers when possible to create a cohesive look and maximize space efficiency. Keep a master list of your spices taped inside the cabinet door for quick inventory checks.
Test the door’s weight capacity before loading all spices, and periodically check mounting screws to ensure they remain tight.

