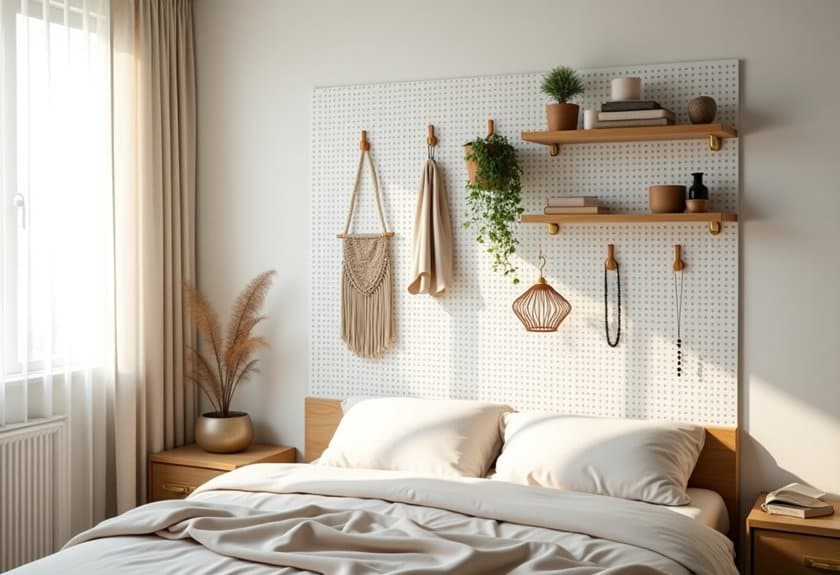
You’ve probably noticed that bedroom clutter has a way of multiplying overnight – I know I have! That’s why I’m excited to share these 15 genius pegboard ideas that’ll transform your space from chaos to calm. Whether you’re wrestling with tangled jewelry or searching for that perfect spot to display your plant collection, pegboards offer endless possibilities. As a long-time pegboard enthusiast, I can tell you there’s something incredibly satisfying about seeing everything in its proper place. Let’s explore how you can make your bedroom both organized and Instagram-worthy.
Floating Jewelry Display Wall
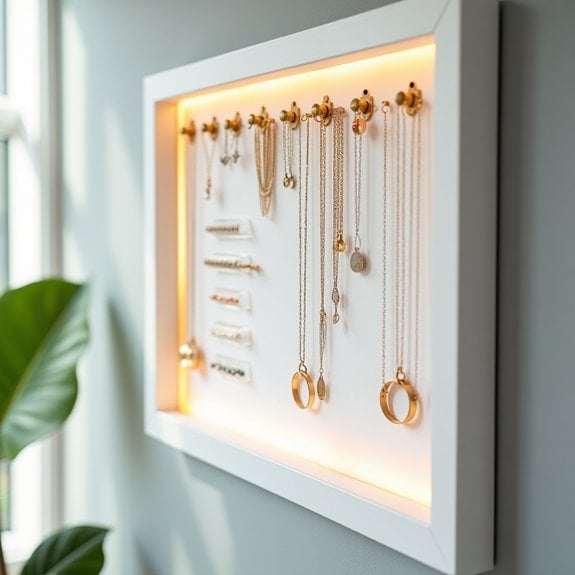
A well-organized jewelry display not only protects your valuable accessories but also transforms them into an artistic wall feature that enhances your bedroom’s aesthetic appeal. When jewelry is displayed vertically on a pegboard, it becomes easily accessible while freeing up valuable drawer and counter space.
Creating a floating jewelry display wall using pegboard is a practical solution that allows you to see all your pieces at once, preventing tangled necklaces and lost earrings. This system can be customized to accommodate your specific collection and can be modified as your jewelry collection grows or changes.
Required Materials:
- Pegboard panel (sized to your wall space)
- Wall anchors and screws
- Pegboard spacers or furring strips
- Various pegboard hooks and accessories
- Small baskets or containers
- Level
- Drill
- Pencil
- Measuring tape
- Wire cutters
- Small jewelry pliers
Mount the pegboard by first attaching furring strips to the wall using appropriate anchors, ensuring they’re level and securely fastened. Place the pegboard over the furring strips, creating the necessary space behind the board for hooks to slide in and out easily. Secure the pegboard to the furring strips with screws, making sure all corners and edges are firmly attached.
Organize your jewelry by type, creating designated zones for necklaces, bracelets, earrings, and rings. Install hooks at appropriate heights and spacing – longer hooks for necklaces at the top, shorter hooks for bracelets in the middle, and small pegs or containers for earrings and rings at eye level.
Consider your daily routine and place frequently worn pieces in the most accessible locations. For optimal organization and longevity, avoid overloading individual hooks, and leave space between items to prevent tangling. Install small baskets or containers for delicate pieces or those that don’t hang well.
Consider adding LED strip lighting around the pegboard to create both ambient lighting and better visibility when selecting jewelry. Regularly dust the display and check that all hooks remain secure to maintain both the aesthetic appeal and functionality of your jewelry wall.
Bedside Storage Station
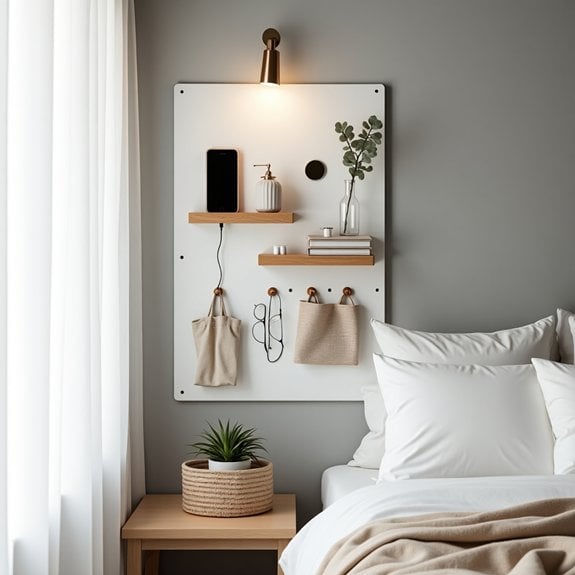
A well-organized bedside storage station is essential for maintaining a clutter-free and functional bedroom environment. With a pegboard system, you can transform the space beside your bed into an efficient hub for daily essentials, ensuring everything you need is within arm’s reach without creating visual chaos.
The vertical storage potential of a pegboard bedside station maximizes space utilization while keeping frequently used items organized and easily accessible. This setup is particularly valuable for small bedrooms or spaces where traditional nightstands mightn’t fit or provide adequate storage solutions.
Required Items:
- Pegboard panel (sized to fit your wall space)
- Wall anchors and screws
- Pegboard hooks (various sizes)
- Small containers or baskets
- Book holders
- Phone/tablet holder
- Wire shelving units for pegboards
- Level
- Drill
- Pencil
- Measuring tape
- Wire organizers
Mount the pegboard at a comfortable height next to your bed, ensuring it’s properly secured to wall studs or using appropriate wall anchors. Begin arranging hooks and accessories starting from the most frequently used items at arm’s level.
Install phone holders and charging stations at the top portion, followed by book holders or small shelves in the middle section. Place storage containers for smaller items like reading glasses, medications, or hand cream on the lower portion of the board.
Position wire baskets or containers strategically to hold items that don’t hang well on hooks. Create designated zones for different categories: entertainment (books, tablets), personal care (lip balm, hand lotion), and practical items (reading glasses, water bottle).
Ensure proper spacing between items to maintain a clean look and easy access. For optimal organization, regularly assess and adjust your pegboard layout based on usage patterns. Keep frequently used items at eye level and consider using color-coded hooks or containers to create visual organization systems.
Add small LED lights or a reading light attachment to enhance functionality during nighttime use, and maintain some empty space for flexibility in future modifications.
Makeup and Beauty Corner
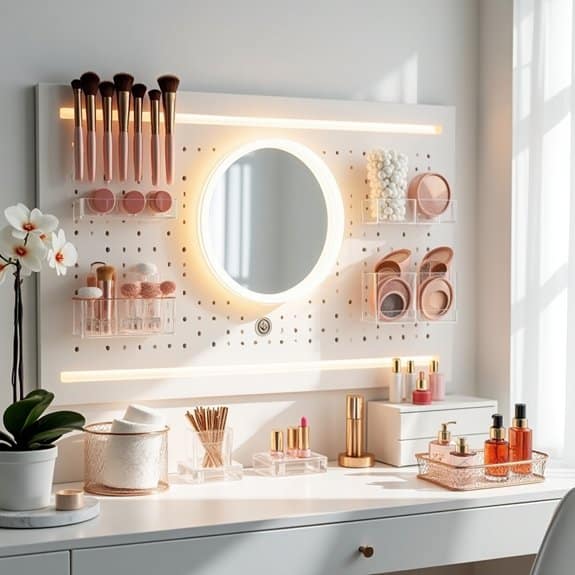
A well-organized makeup and beauty corner is essential for maintaining a streamlined morning routine and protecting valuable cosmetic investments. With the right pegboard setup, you can transform a cluttered vanity area into an efficient, Instagram-worthy space that makes finding and using your beauty products a joy rather than a frustration.
Pegboard organization specifically allows for vertical storage solutions that keep frequently used items within arm’s reach while maximizing limited counter space. This system is particularly beneficial for cosmetics as it provides visibility of all products, preventing forgotten items from expiring unused in drawers and ensuring proper storage conditions for sensitive beauty products.
Required Items:
- Pegboard (painted or pre-finished)
- Pegboard hooks (various sizes)
- Small baskets and containers
- Brush holders
- Acrylic organizers
- Mirror
- LED strip lighting
- Mounting hardware
- Wire shelving units
- Small cups or containers for smaller items
Mount the pegboard at a comfortable height above your vanity or designated makeup area, ensuring it’s securely attached to wall studs. Begin arranging your items by category, placing frequently used products at eye level and grouping similar items together.
Install LED lighting strips to provide proper illumination for makeup application. Add specialized holders for brushes, keeping them upright to maintain their shape and cleanliness. Incorporate small baskets and acrylic organizers for items like palettes, skincare products, and daily essentials.
Position a mirror in the center of your setup, creating a focal point for your beauty routine. Arrange products by frequency of use, with daily items closest to the mirror. Use clear containers to store smaller items like bobby pins, hair ties, and cotton swabs, making them easily visible and accessible.
Consider adding a small shelf below the pegboard for items that don’t hang well, such as foundation bottles or larger skincare containers.
Professional Tip: Implement a rotation system for your products by adding small date labels to track expiration dates. Consider seasonal reorganization of your pegboard to bring weather-appropriate products forward and store off-season items in less accessible spots.
Clean your organizational tools monthly to prevent product buildup and maintain a hygienic beauty station.
Home Office Pegboard Command Center
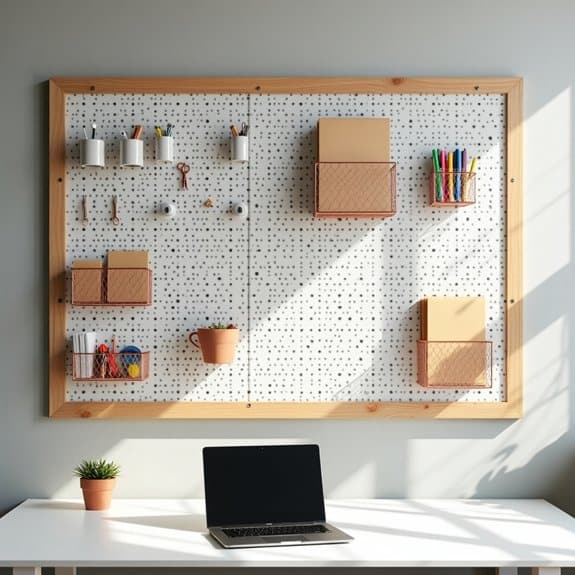
A well-organized home office command center is essential for maintaining productivity and reducing stress in today’s hybrid work environment. When incorporated into a bedroom workspace, a pegboard system serves as both a functional organization tool and an aesthetic element that keeps essential items visible yet orderly.
A pegboard command center transforms vertical wall space into a customizable workspace that adapts to changing needs while keeping desk surfaces clear. This system is particularly valuable in bedroom offices where space is often limited and maintaining a calm, clutter-free environment is crucial for both work and rest.
Required Items:
- Pegboard panel (wood or metal)
- Mounting hardware
- Pegboard hooks (various sizes)
- Small storage bins
- Wire baskets
- Document holders
- Clipboards
- Cable organizers
- Calendar or planner
- Desk supplies holders
- Labels
- Mounting tape or screws
- Level
- Drill
- Measuring tape
Mount the pegboard at a comfortable height above your desk, ensuring it’s properly secured to wall studs. Begin organizing by creating distinct zones: one for immediate tasks and documents, another for frequently used supplies, and a third for reference materials.
Position storage containers and hooks strategically, placing frequently used items at eye level and arm’s reach. Install wire baskets for papers and folders, and add small bins for office supplies like pens, staplers, and paper clips.
Group similar items together and establish a clear workflow system from left to right or top to bottom. Incorporate a calendar or task board in the center of your command center, surrounded by essential tools and documents. Use labels to designate specific areas and maintain organization over time. Consider leaving some empty spaces for flexibility and future additions.
Additional Tips: Review and adjust your organization system every few weeks to ensure it continues to meet your needs. Implement a color-coding system for different projects or priorities, and keep a small container of extra hooks and accessories nearby for quick modifications.
Remember to dust and clean your pegboard regularly to maintain its professional appearance and prevent item buildup.
Reading Nook With Book Storage
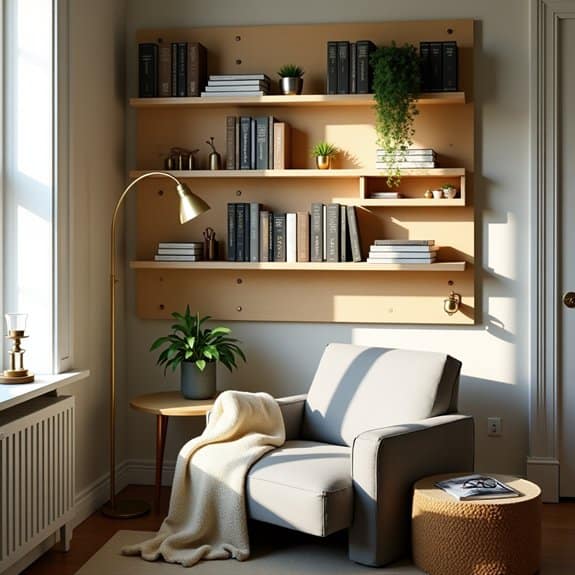
A well-organized reading nook transforms any bedroom into a personal sanctuary for literary escape. The combination of pegboard storage with a cozy reading space maximizes both functionality and comfort, creating an inviting spot that keeps books easily accessible while maintaining a clutter-free environment.
Incorporating pegboard storage into a reading nook addresses common challenges like limited shelf space and disorganized book collections. This versatile solution allows readers to display favorite titles, keep current reads within arm’s reach, and create an aesthetically pleasing arrangement that encourages regular reading habits.
Required Items:
- Pegboard panel
- Pegboard hooks and brackets
- Book shelf brackets
- Small floating shelves
- Comfortable chair or cushions
- Reading lamp
- Storage baskets or containers
- Mounting hardware
- Book ends
- Reading accessories organizer
Install the pegboard panel on the wall adjacent to your chosen reading spot, ensuring it’s securely mounted at a comfortable height. Arrange pegboard hooks and brackets to accommodate different book sizes, creating a mix of horizontal and vertical storage options.
Install floating shelves at varying heights to display larger books or collections, and position storage baskets for magazines or reading accessories. Keep frequently read books at eye level, with less-used volumes stored higher or lower.
Create zones within your pegboard system: one for current reads, another for to-be-read books, and a third for completed books or reference materials. Consider using color-coding or category labels to maintain organization.
Position your reading chair to take advantage of natural light while ensuring easy access to the pegboard storage. Add task lighting for evening reading sessions and integrate small storage solutions for reading accessories like bookmarks, glasses, or electronic devices.
Additional Tips: Rotate your book display seasonally to prevent dust accumulation and maintain visual interest. Implement a one-in-one-out rule to prevent overcrowding, and regularly assess your collection to donate or sell books you’ve finished.
Use adjustable brackets to modify your storage configuration as your collection grows or changes, and consider incorporating plants or personal mementos to create a more inviting atmosphere.
Accessory and Hat Gallery
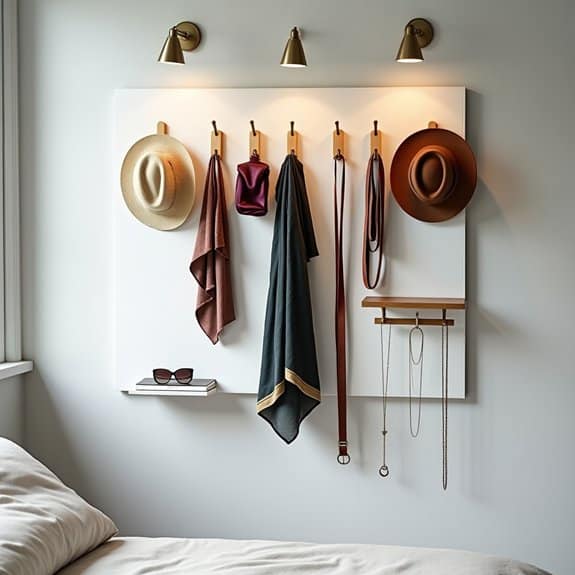
Creating a dedicated space for accessories and hats not only keeps these items easily accessible but also transforms them into an artistic display. A well-organized accessory and hat gallery on a pegboard can turn an ordinary bedroom wall into a functional fashion statement while protecting delicate items from damage or tangling.
When accessories and hats are displayed properly, you’re more likely to wear them regularly and maintain their condition. This organization method allows you to see everything at a glance, making outfit coordination effortless while maximizing vertical space in your bedroom.
Required Items:
- Pegboard panel
- Pegboard hooks (various sizes)
- S-hooks
- J-hooks
- Hat pegs
- Scarf rings
- Belt hooks
- Mounting hardware
- Level
- Drill
- Measuring tape
- Pencil
Start by mapping out your pegboard layout, considering the length and weight of different accessories. Install longer hooks for scarves and belts at the top section, allowing them to hang freely without touching other items.
Position hat pegs with adequate spacing between them to prevent crowding and maintain shape. Create designated zones for different accessory types – one area for hats, another for scarves, and separate sections for belts and other accessories.
For hats, install sturdy pegs at a slight upward angle to prevent slipping. Arrange them by style or color, keeping everyday items at eye level. Utilize S-hooks for lightweight scarves and accessories, spacing them evenly to prevent tangling.
Install specialized belt hooks horizontally, allowing belts to hang in loose loops rather than tight coils to prevent creasing.
Additional Tips:
Rotate your accessories seasonally to keep the display fresh and relevant. Install a small shelf at the bottom of the pegboard for items that don’t hang well, such as sunglasses or small clutches.
Consider adding small LED lights to illuminate your collection and create ambiance. Regularly dust and maintain the area to keep accessories in pristine condition, and adjust the layout as your collection grows or changes.
Artistic Pegboard Headboard Design
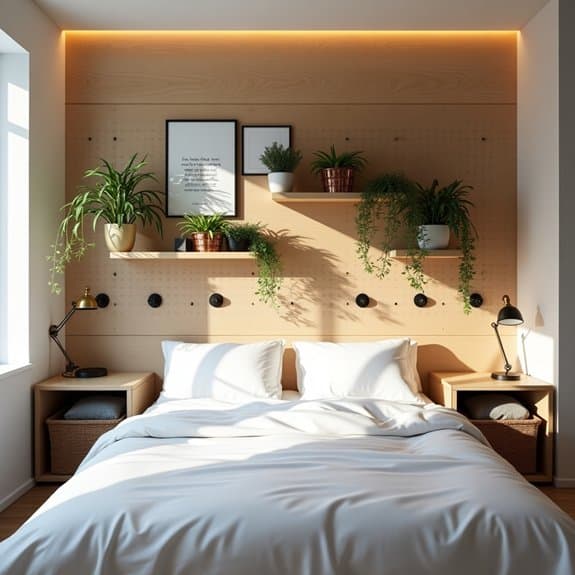
Creating a pegboard headboard transforms an ordinary bedroom into a dynamic, functional space while adding a distinctive artistic element. This innovative approach to bedroom organization combines storage solutions with decorative possibilities, allowing you to display and arrange items in a way that’s both practical and visually appealing.
A pegboard headboard serves multiple purposes – it can showcase artwork and photographs, hold bedside essentials, and provide flexible storage that adapts to changing needs. The vertical storage space eliminates the need for additional furniture while keeping important items within arm’s reach.
Required Items:
- Large pegboard panel(s)
- Mounting brackets and hardware
- Wall anchors
- Electric drill
- Level
- Pencil
- Measuring tape
- Various pegboard hooks and accessories
- Paint or wood stain (optional)
- Decorative trim (optional)
- Storage baskets or containers
- LED strip lights (optional)
Mount the pegboard securely to the wall behind your bed, ensuring it’s properly anchored and level. Create a spacing gap between the wall and pegboard using furring strips or mounting brackets to allow hook insertion. If desired, paint or stain the pegboard to match your room’s decor. Install the pegboard high enough to clear your mattress and pillows, extending upward to your preferred height.
Organize your headboard by creating distinct zones – perhaps a reading area with book holders, a charging station for electronics, and a decorative section for artwork or photos. Use a combination of hooks, shelves, and containers to maximize versatility. Consider incorporating LED lighting behind the pegboard for ambient illumination and added visual interest.
For optimal organization, rotate items seasonally and regularly assess the functionality of your layout. Keep frequently used items at arm’s reach while placing decorative elements at eye level for visual impact. Use matching containers or a consistent color scheme to maintain a cohesive look, and avoid overcrowding the board to preserve its artistic appeal while maintaining practical functionality.
Craft Supply Organization Hub
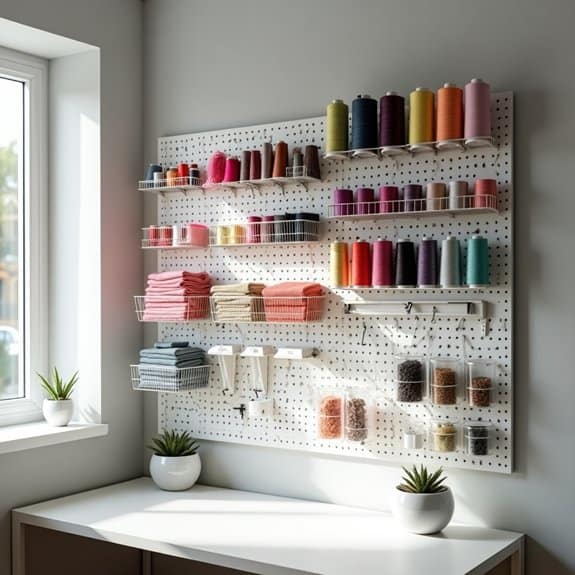
A well-organized craft supply hub using pegboard storage can transform a chaotic creative space into an efficient and inspiring work area. When craft supplies are visible and easily accessible, you’re more likely to engage in creative projects and complete them without the frustration of searching for materials.
Creating a dedicated craft organization system on a pegboard allows you to customize storage solutions based on your specific supplies and workflow needs. This vertical storage solution maximizes bedroom space while keeping craft items off horizontal surfaces, resulting in a cleaner, more organized environment that sparks creativity rather than stress.
Required Items:
- Pegboard panel
- Pegboard hooks (various sizes)
- Pegboard baskets and containers
- Small bins and cups
- Clear containers
- Label maker or labels
- Mounting hardware
- Measuring tape
- Level
- Power drill
- Heavy-duty wall anchors
- Small tool organizers
- Wire shelving attachments
Mount the pegboard securely to the wall using appropriate wall anchors and ensure it’s level. Start organizing supplies by category, such as drawing materials, painting supplies, and crafting tools.
Install hooks and accessories at comfortable reaching height, placing frequently used items at eye level. Add pegboard baskets and containers to hold smaller items, ensuring they’re properly secured to prevent falling.
Group similar items together and create zones for different types of crafts. Use clear containers to store small items like beads, buttons, or pins, making them easily visible. Install wire shelving attachments for items that need flat surface storage, such as paper pads or fabric pieces.
Consider leaving some empty space for future additions or temporary project storage.
Additional Tips: Implement a color-coding system or clear labeling to maintain organization long-term. Review and adjust the layout periodically based on usage patterns and new supply additions.
Keep a small basket nearby for collecting items that need to be returned to their proper places, and make it a habit to clean up and reorganize after each crafting session to maintain the system’s efficiency.
Modular Shelving System
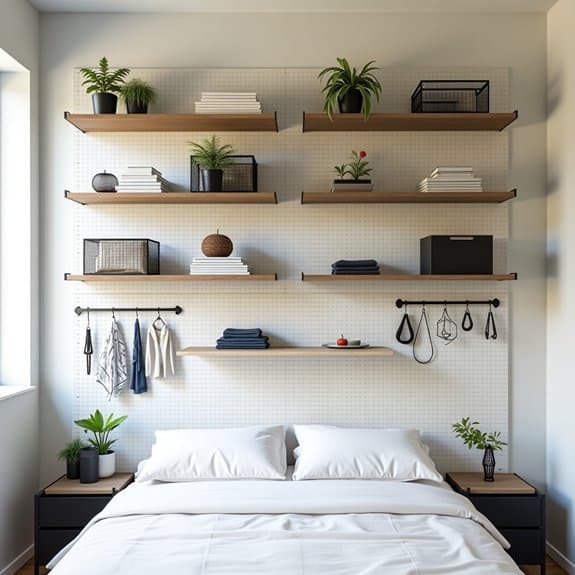
Creating an efficient modular shelving system using pegboard transforms bedroom storage from static to adaptable. The versatility of pegboard shelving allows you to modify your storage configuration as needs change, making it an ideal solution for evolving storage requirements in any bedroom space.
The modular nature of pegboard systems provides endless possibilities for customization, from hanging shelves at varying heights to incorporating hooks, bins, and baskets. This flexibility makes it particularly valuable in bedrooms where storage needs often shift with seasons, hobbies, or lifestyle changes.
Required Items:
- Pegboard panels
- Wall anchors and screws
- Spacers
- Level
- Drill
- Measuring tape
- Pencil
- Modular shelving brackets
- Shelves (wood or metal)
- Pegboard hooks (various sizes)
- Storage bins
- Wire baskets
- Cable ties
Install the pegboard panels first, ensuring proper spacing from the wall using spacers to allow hook insertion. Measure and mark the desired location, checking for level placement before securing to wall studs.
Once mounted, plan your shelf configuration by arranging brackets at corresponding heights, ensuring weight distribution is even across the board. Install shelving brackets into the pegboard holes, testing their stability before placing shelves.
Add complementary storage solutions like hooks, baskets, and bins in strategic locations to maximize vertical space and create functional zones for different items.
Success Tips: Rotate stored items seasonally to maintain organization and prevent dust accumulation. Consider using clear storage containers to easily identify contents, and implement a color-coding system for different categories.
Always factor in weight limits for both the pegboard and individual shelves, and periodically check bracket stability to ensure continued safety and functionality.
Vanity Mirror and Storage Solution
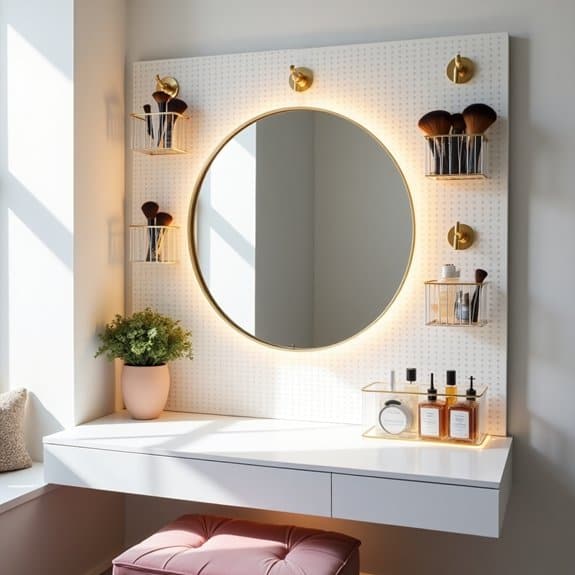
A well-organized vanity area serves as both a functional space for daily grooming routines and a stylish focal point in any bedroom. By incorporating a pegboard system around or adjacent to your vanity mirror, you can transform a cluttered surface into an efficient, Instagram-worthy beauty station that keeps essential items within arm’s reach.
The combination of a vanity mirror with pegboard storage maximizes vertical space while minimizing desktop clutter. This organization method allows for customization based on your specific needs and the products you use most frequently, while also making it easier to maintain a clean, organized space that can adapt as your storage needs change.
Required Items:
- Pegboard panel
- Mirror
- Pegboard hooks (various sizes)
- Hanging baskets or containers
- Small shelves for pegboard
- Mounting hardware
- Wire baskets
- Acrylic organizers
- LED strip lights (optional)
- Paint or wood stain (optional)
- Measuring tape
- Level
- Drill and screws
Mount the pegboard panel on the wall, ensuring it’s properly secured with appropriate wall anchors. Position your vanity mirror in the center of the pegboard, or mount it separately with the pegboard flanking one or both sides.
Install various pegboard hooks, shelves, and containers around the mirror in a layout that makes sense for your daily routine. Group similar items together – makeup tools on one side, hair accessories on another, and skincare products in easily accessible locations.
Consider installing LED strip lighting around the mirror for optimal visibility. Keep frequently used items at eye level and store less-used products in lower or higher positions. Use clear acrylic containers to maintain visibility of products while protecting them from dust. Incorporate small hanging baskets for items like hair ties, bobby pins, or cotton swabs.
Label containers clearly to maintain organization over time. For optimal maintenance of your pegboard vanity system, regularly assess the arrangement of items and adjust as needed. Clean containers and hooks monthly, and rotate seasonal items to more accessible positions when relevant.
Consider adding a small cushioned stool that can be tucked underneath when not in use, and keep a small wastebasket nearby for daily cleanup. This system works best when you commit to returning items to their designated spots after each use.
Seasonal Clothing Display

Organizing seasonal clothing on a pegboard system revolutionizes the way you interact with your wardrobe while maximizing vertical space in your bedroom. A well-organized seasonal display allows you to quickly access current-season items while keeping off-season pieces visible but separate, eliminating the frustration of sorting through irrelevant clothing during daily dressing routines.
Creating a seasonal clothing display on your pegboard not only keeps your clothing accessible and wrinkle-free but also transforms your wardrobe into an attractive, boutique-style display. This system works particularly well for those who prefer to maintain a visual inventory of their clothing and want to rotate pieces seamlessly as seasons change.
Required Items:
- Pegboard panels
- Heavy-duty wall anchors
- Pegboard hooks (various sizes)
- S-hooks
- Hanging rods
- Clothing hangers
- Storage baskets
- Label maker
- Mounting hardware
- Level
- Drill
- Measuring tape
Mount the pegboard at a comfortable height, ensuring all areas are easily reachable. Divide the board into distinct zones: current season (eye-level, center), transitional pieces (middle section), and off-season items (upper or lower edges). Install a combination of hooks, rods, and baskets to accommodate different types of clothing. Position longer items like dresses and pants on the sides, keeping shorter pieces in the center for a balanced visual display.
For optimal organization, group items by category and color within their seasonal sections. Utilize pegboard baskets for accessories and smaller items specific to each season. Implement a rotation system where you can easily swap positions as seasons change, moving current items to prime accessibility zones. Consider using color-coded hangers or labels to quickly identify seasonal categories.
Additional Tips: Install proper lighting to illuminate your seasonal display, making it easier to distinguish colors and find specific items. Leave some empty hooks and space for flexibility when seasons overlap or for new purchases. Consider adding a small section for “transition” pieces that work across multiple seasons, and regularly assess items for wear or relevance to maintain an efficient system.
Plant Shelf and Garden Tools Storage
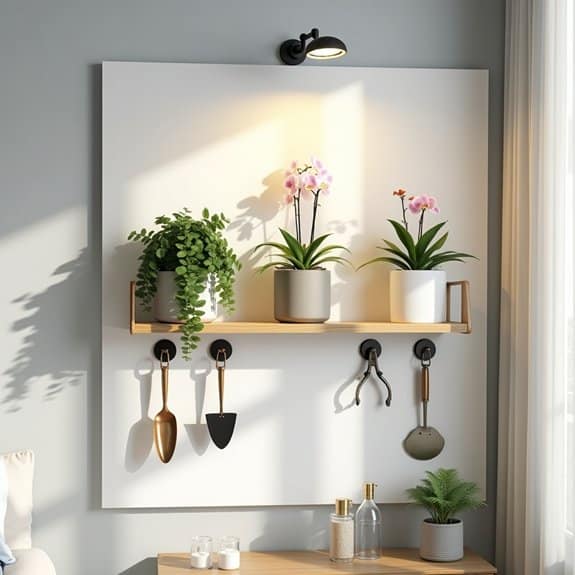
Creating a dedicated plant shelf and garden tools storage area using pegboard can transform an underutilized bedroom wall into a functional and aesthetically pleasing space. A well-organized plant station not only keeps your indoor gardening supplies readily accessible but also creates a living display that adds natural beauty to your room.
Efficient organization of plant care tools and supplies ensures proper maintenance of your indoor plants while preventing clutter from accumulating on surfaces. The vertical storage solution maximizes floor space and keeps potentially dirty garden tools contained in one designated area, maintaining the cleanliness of your bedroom.
Required Items:
- Pegboard panel
- Pegboard hooks (various sizes)
- Mounting hardware
- Plant shelf brackets
- Wooden shelving
- Small storage bins
- Plant tool hooks
- Labels
- Plant mister
- Pruning shears
- Hand trowel
- Plant food
- Watering can
Install the pegboard securely to wall studs using appropriate mounting hardware. Position the plant shelf brackets at desired heights, ensuring they’re level and can support the weight of potted plants.
Install wooden shelving on the brackets, creating dedicated spaces for plants of varying sizes. Arrange hooks strategically to hang frequently used tools like pruning shears, hand trowels, and plant misters within easy reach. Incorporate small storage bins for items like plant food, spare pots, and soil amendments.
Group similar items together and position them based on frequency of use.
Final tips: Consider using clear storage containers to easily identify contents and maintain organization. Install a small LED grow light above the plant shelf for additional lighting during darker months.
Keep a maintenance schedule visible nearby to track watering and feeding schedules for different plants. Regularly assess the organization system and adjust tool placement based on seasonal needs and changing plant care routines.
Study Zone With School Supplies
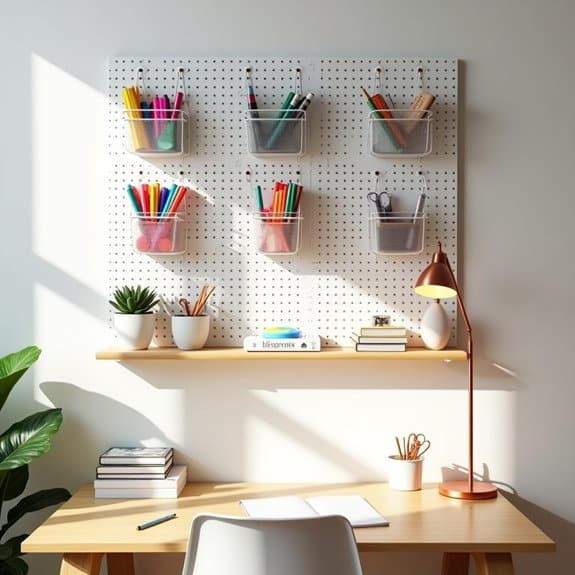
A well-organized study zone is crucial for academic success and productivity, especially in a bedroom setting where space might be limited. A pegboard system dedicated to school supplies creates an efficient workspace while keeping essential items visible and within easy reach.
Having school supplies properly organized on a pegboard eliminates the frustration of searching through drawers or bins, reducing study time interruptions and maintaining focus. This system also helps students maintain better habits by providing visual cues about which supplies need replenishing.
Required Items:
- Pegboard panel
- Pegboard hooks (various sizes)
- Small baskets or containers
- Label maker
- Mounting hardware
- Wire pencil holders
- Small shelves for pegboard
- Clear containers
- Binder clips
- Command strips
- Metal hooks
First, mount the pegboard securely to the wall at an appropriate height for comfortable reach while seated at the desk. Install a variety of hooks, focusing on creating zones for different categories of supplies.
Position wire holders for frequently used items like pens, pencils, and markers at eye level. Add small shelves or baskets for bulkier items such as textbooks, notebooks, or calculators. Arrange supplies by frequency of use, with daily items most accessible.
For optimal organization, create distinct sections: writing tools, paper supplies, technology accessories, and project materials. Use clear containers attached to the pegboard to store small items like paper clips, thumb tacks, and erasers.
Implement a color-coding system using different colored hooks or labels to distinguish between subject areas or types of supplies.
Additional Tips: Regularly assess and adjust the layout based on changing needs throughout the academic year. Keep a small container of extra hooks nearby for flexibility in reorganizing.
Consider leaving some empty spaces for future additions or seasonal items. Clean and dust the pegboard weekly to maintain its professional appearance and prevent supply damage. Review the organization system monthly to ensure it continues to serve its intended purpose effectively.
Minimalist Pegboard Closet System
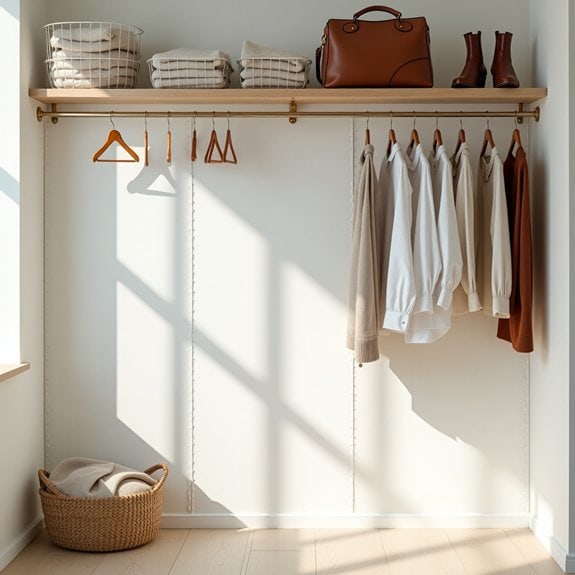
A well-organized closet system is essential for maintaining order in any bedroom, and a minimalist pegboard approach offers a versatile, customizable solution that maximizes vertical space while keeping essentials visible and accessible. By implementing a pegboard closet system, you can transform a cluttered space into a streamlined storage area that aligns with minimalist principles.
The beauty of a minimalist pegboard closet lies in its ability to adapt to changing needs while maintaining a clean, uncluttered aesthetic. This system eliminates the need for bulky furniture or multiple storage containers, instead utilizing vertical wall space to create an efficient organization system that can be easily modified as your storage needs evolve.
Required Items:
- Large pegboard panels
- Wall mounting hardware
- Pegboard hooks (various sizes)
- Hanging rods
- Wire baskets
- Shelf brackets
- Wood shelving
- Label maker
- Level
- Drill
- Measuring tape
- Pencil
- Stud finder
Install the pegboard panels securely to the closet walls, ensuring they’re anchored into wall studs for maximum stability. Begin by measuring and marking the desired height and width for your pegboard installation, using a level to ensure straight alignment.
Once mounted, create distinct zones within your closet system: one area for hanging clothes, another for accessories, and a third for shoes and bags. Install hanging rods at appropriate heights for different types of clothing, and position wire baskets and shelves strategically to accommodate folded items.
Position hooks and accessories according to your specific needs, keeping frequently used items at eye level and less-used items higher up or lower down. Arrange clothing by category and color, maintaining ample space between items to preserve the minimalist aesthetic.
Install shelf brackets and wooden shelves for folded items, ensuring they’re level and secure. To maintain the minimalist pegboard system’s effectiveness, regularly assess and edit your belongings, removing items that haven’t been used in the past season.
Implement a one-in-one-out rule when adding new items, and periodically adjust hook and shelf positions to accommodate changing storage needs. Consider using clear containers for small items and adding labels to maintain organization over time. This flexibility ensures your closet system remains functional while preserving its clean, minimalist appearance.
Multi-functional Entertainment Wall
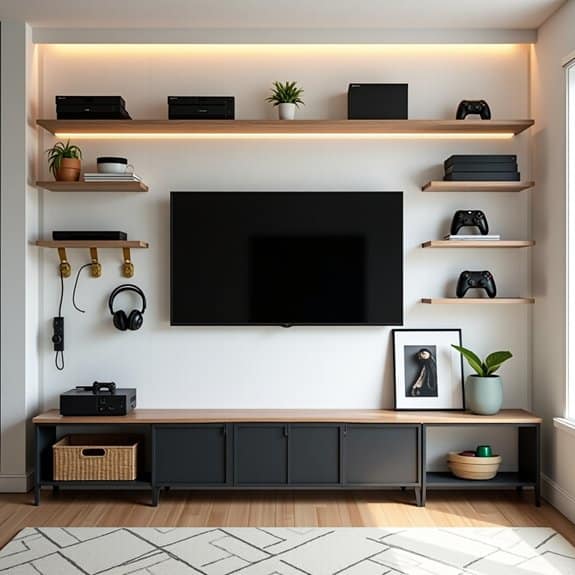
A well-organized entertainment wall serves as the centerpiece of any bedroom, combining functionality with style while maximizing valuable wall space. By utilizing pegboard organization, you can create a flexible system that adapts to changing entertainment needs, from gaming consoles to streaming devices, while maintaining a clean and organized appearance.
Modern bedrooms often double as entertainment spaces, making it crucial to have an organized setup that accommodates various devices, cables, and accessories without creating visual clutter. A pegboard entertainment wall solution offers the perfect balance between accessibility and aesthetics, while providing ample storage options for both tech equipment and decorative elements.
Required Items:
- Large pegboard panels
- Pegboard hooks (various sizes)
- Cable management clips
- Mounting brackets
- Power strip
- Cable ties
- Shelf brackets
- Floating shelves
- Entertainment center or TV mount
- Storage baskets or containers
- Wire mesh organizers
- LED strip lights
- Screwdriver and drill
- Level
- Measuring tape
Mount the pegboard panels on the wall, ensuring they’re properly secured and level. Position the TV mount or entertainment center as the focal point, then arrange shelving units around it for gaming consoles, streaming devices, and other electronics.
Install cable management clips and wire mesh organizers to keep cords tidy and hidden from view. Create designated zones for different types of entertainment equipment, using storage baskets and containers to group similar items together.
Add hooks and brackets strategically to hold headphones, controllers, and other accessories within easy reach. Consider incorporating LED strip lighting behind the TV or shelving units to reduce eye strain and create ambient lighting. Leave some pegboard space open for future additions or seasonal decor changes.
For optimal organization maintenance, implement a regular cleaning schedule and periodic assessment of the layout. Label power cords and cables for easy identification, and consider using color-coded storage solutions for different entertainment categories.
Keep frequently used items at eye level, while storing rarely used equipment in higher or lower zones. Regularly test the security of mounted items and adjust the layout as needed to accommodate new devices or changing entertainment preferences.

