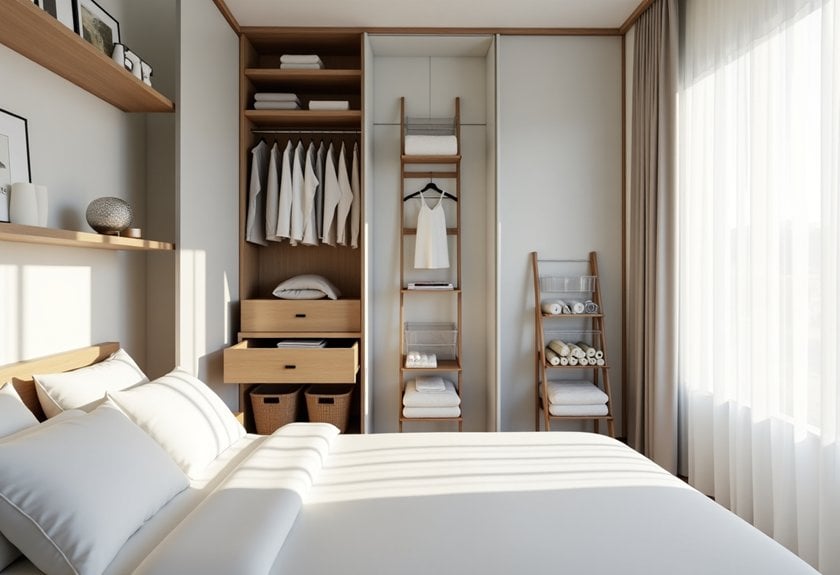
You’ve probably noticed how a messy bedroom can throw off your entire day. Trust me, I’ve been there! But after years of testing different organization methods, I’ve discovered that transforming your sleeping space doesn’t have to be overwhelming. From clever under-bed storage tricks to game-changing vertical solutions, these 20 must-try organization ideas will help you create the peaceful sanctuary you deserve. Let’s start with the game-changer that revolutionized my own bedroom setup.
Under-Bed Storage Solutions
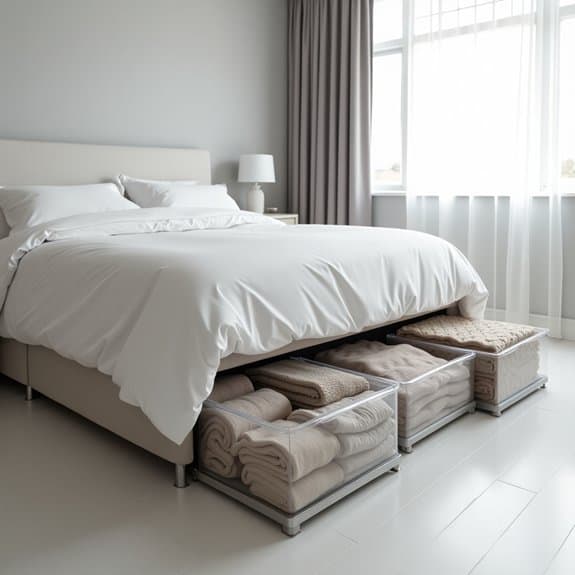
Making use of under-bed space transforms an often-neglected area into valuable storage real estate. This hidden space can store seasonal clothing, extra bedding, shoes, and other items that aren’t needed daily, freeing up precious closet and drawer space for frequently used items.
Proper under-bed storage not only maximizes bedroom space but also protects stored items from dust and debris. When implemented correctly, this storage solution maintains a clean, clutter-free bedroom while keeping necessary items easily accessible.
Required Items:
- Under-bed storage containers or drawers
- Bed risers (if needed)
- Measuring tape
- Labels and marker
- Vacuum cleaner
- Dust cloth
- Storage bags for clothing
- Moisture absorbers
- Drawer dividers or organizers
Begin by measuring the available space under your bed, including height, width, and depth. Clean the area thoroughly, removing all dust and debris. Select appropriate storage containers that maximize the available space while allowing easy sliding in and out.
Sort items by category (seasonal clothing, shoes, extra bedding) and pack them into containers using compression bags for soft items to save space. If additional height is needed, install bed risers beneath your bed frame legs. Place frequently accessed items toward the front of the storage space and less-used items toward the back.
Use clear containers when possible to easily identify contents, and always label containers clearly with their contents and the date of storage. Consider creating a rotation schedule for seasonal items and regularly inspect stored items for any signs of moisture or damage.
Use cedar blocks or lavender sachets to keep stored clothing fresh and protect against moths. Maintain organization by immediately returning items to their designated containers after use and conducting a thorough review of stored items twice yearly to eliminate unnecessary items.
Vertical Wall Shelving Systems
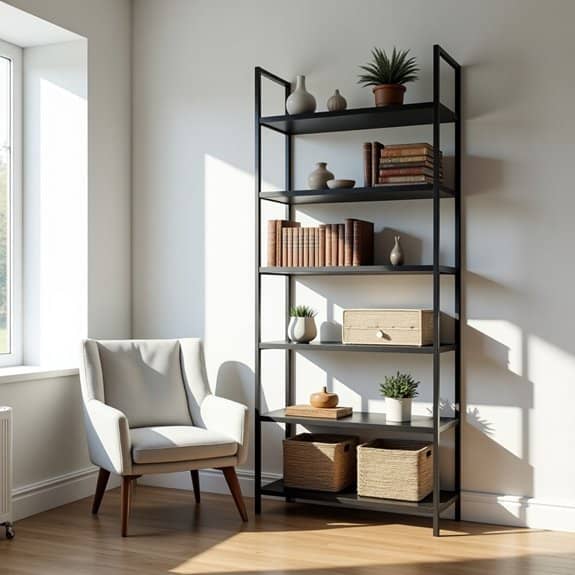
Vertical wall shelving systems represent a game-changing solution for maximizing bedroom storage space while maintaining a clean, modern aesthetic. By utilizing vertical wall space, these systems transform otherwise unused areas into functional storage zones, creating more floor space and reducing clutter.
Installing a proper vertical shelving system not only adds valuable storage options but also provides an opportunity to display decorative items, books, and personal collections in an organized manner. This dual-purpose approach to storage makes vertical shelving particularly valuable in smaller bedrooms or spaces where traditional storage furniture might be impractical.
Required Items:
- Wall-mounted shelving tracks
- Shelf brackets
- Shelf boards or pre-made shelves
- Wall anchors and screws
- Level
- Stud finder
- Power drill
- Measuring tape
- Pencil
- Safety goggles
- Wall patch kit
- Screwdriver
Begin by measuring your wall space and planning the layout of your shelving system. Use a stud finder to locate and mark wall studs, as these will provide the most secure mounting points for your tracks.
Install the vertical tracks first, ensuring they’re perfectly level and properly anchored into the wall studs or using appropriate wall anchors. Once the tracks are secure, attach the brackets at your desired heights, making sure they’re level across multiple tracks. Finally, place your shelving boards onto the brackets, securing them if recommended by the manufacturer.
Consider organizing your shelves by category or function, placing frequently used items at eye level and storing lesser-used items on higher shelves. Use bookends, decorative boxes, and baskets to keep items organized and create visual appeal. Remember to leave some open space between items for a clean, uncluttered look.
To maintain the effectiveness of your vertical shelving system, regularly assess the weight distribution on each shelf and periodically check that all mounting hardware remains tight and secure.
Consider adding LED strip lighting under shelves for ambiance and improved visibility, and rotate displayed items seasonally to keep the space feeling fresh and dynamic. When styling your shelves, follow the rule of thirds and vary the heights of displayed items to create visual interest while maintaining functionality.
Drawer Dividers and Organizers
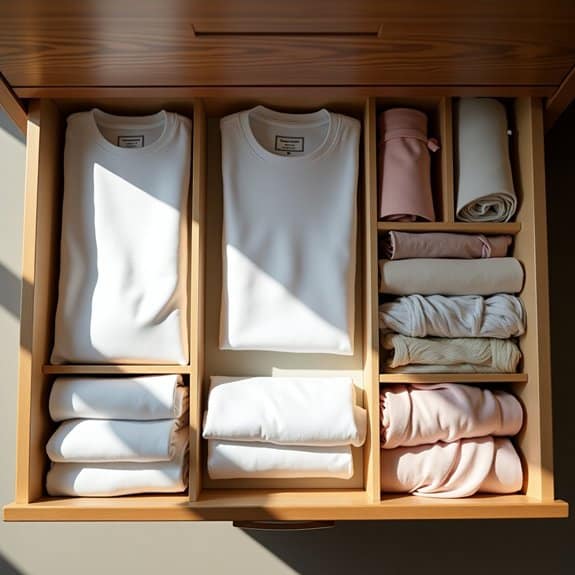
A well-organized drawer system serves as the foundation for an efficient and stress-free bedroom environment. When drawers are properly compartmentalized and organized, finding specific items becomes effortless, saving valuable time during daily routines and preventing the frustration of rummaging through jumbled contents.
Drawer organizers and dividers transform chaotic storage spaces into systematic arrangements where every item has its designated place. This organization method not only maximizes storage capacity but also helps maintain the condition of stored items, preventing damage and extending their lifespan while making it easier to track inventory and identify when items need replacement.
Required Items:
- Drawer dividers (adjustable or fixed)
- Small organizing boxes or containers
- Drawer liner material
- Measuring tape
- Scissors
- Labels and label maker (optional)
- Storage bins in various sizes
- Mesh organizers
- Drawer-depth assessment tool
Start by removing all items from the drawers and sorting them into categories. Measure the interior dimensions of each drawer, including depth, to ensure proper fit of organizers. Install drawer liners to protect the surface and prevent items from sliding.
Select appropriate dividers or organizers based on the items being stored and the drawer dimensions. Position larger dividers first to create main sections, then use smaller organizers for detailed compartmentalization.
For clothing drawers, implement the file-folding method, storing items vertically rather than stacked. Position frequently used items at the front of drawers for easy access. Create designated zones for different categories – undergarments in one section, socks in another, and accessories in their own compartments.
Ensure dividers are securely positioned to prevent shifting when drawers are opened and closed.
Additional Tips: Reassess drawer organization every three months to maintain effectiveness. Consider using clear organizers to easily view contents, and label sections for shared spaces. Leave about 10% of space empty in each drawer to prevent overcrowding and maintain organization. Rotate seasonal items to maintain relevant, accessible storage throughout the year.
Closet Optimization Techniques
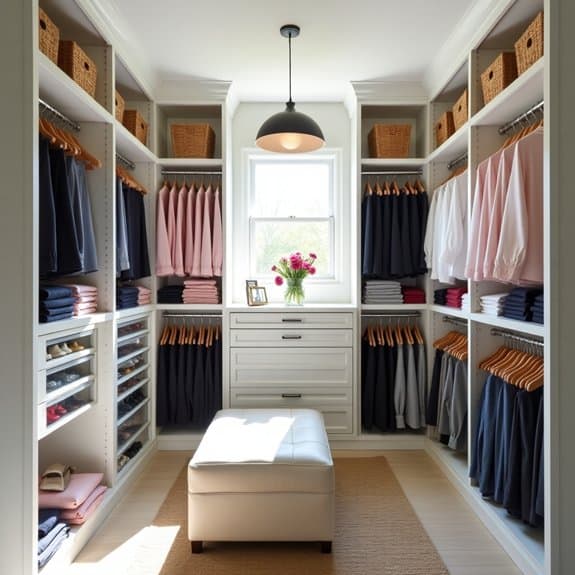
A well-organized closet serves as the foundation for an efficient bedroom and streamlined daily routine. When closet space is optimized, getting dressed becomes easier, clothing stays in better condition, and the entire bedroom maintains a cleaner, more organized appearance.
Proper closet organization can reduce morning stress, save valuable time, and help maintain the longevity of clothing investments. An organized closet system also makes it easier to inventory clothing, identify gaps in your wardrobe, and prevent unnecessary duplicate purchases.
Required Items:
- Clothes hangers (matching set)
- Drawer organizers or dividers
- Storage boxes or bins
- Shelf dividers
- Hanging rod organizers
- Label maker
- Measuring tape
- Storage baskets
- Space-saving hangers
- Over-the-door hooks
Start by removing everything from the closet and sorting items into categories: keep, donate, repair, and discard. Measure the closet space and plan zones for different types of clothing.
Install a double-hanging rod system if vertical space permits, using the upper rod for shirts and jackets and the lower rod for pants and skirts. Group similar items together, arranging clothes by category, color, or season.
Position frequently worn items at eye level and in easily accessible areas. Install shelf dividers to maintain neat stacks of folded items and prevent toppling. Use drawer organizers for smaller items like accessories, undergarments, and socks.
Maximize vertical space by adding hooks or pegboards to unused wall areas for belts, scarves, and jewelry.
For optimal maintenance, implement the “one-in-one-out” rule when adding new items to your wardrobe. Review and reorganize the closet seasonally, rotating clothes as needed and reassessing organization systems.
Use clear storage containers for off-season items and label everything clearly to maintain the organizational system long-term.
Bedside Storage Maximization
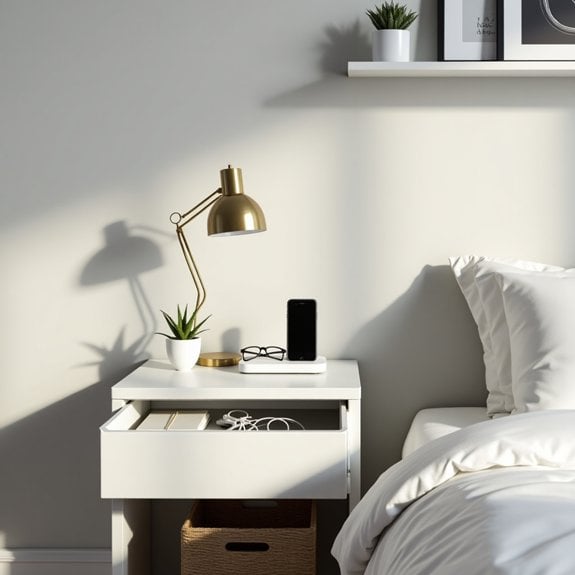
A well-organized bedside area serves as the command center for your daily routines, housing essential items within arm’s reach while maintaining a clutter-free environment. This space impacts both the start and end of each day, making it crucial for maintaining efficient morning and evening routines.
Maximizing bedside storage not only enhances functionality but also contributes to better sleep hygiene by reducing visual clutter and stress. A properly organized nightstand area eliminates the frustration of searching for items in the dark and ensures that everything from medications to reading materials remains readily accessible.
Required Items:
- Bedside table or nightstand
- Drawer organizers or dividers
- Small storage boxes or containers
- Cable management solutions
- Desk lamp
- Charging station
- Storage basket
- Drawer liners
- Label maker
- Cleaning supplies
Begin by completely clearing your bedside table and wiping all surfaces clean. Sort items into categories: daily essentials, occasional use, and items that belong elsewhere. Install drawer organizers or small containers to create designated spaces for different items, such as medications, reading glasses, or charging cables.
Position frequently used items in the top drawer or on the surface for easy access. For electronics, establish a charging station that keeps cords neat and organized, preferably using cable clips or a dedicated charging dock. Utilize vertical space by adding a small shelf or wall-mounted organizer above the nightstand if additional storage is needed.
Consider implementing a rotation system for reading materials to prevent accumulation, keeping only current books or magazines in the space.
Additional Tips:
Maintain the organization by conducting weekly mini-decluttering sessions, removing items that have migrated to the space unnecessarily. Consider using a bedside caddy that hangs between the mattress and box spring for extra storage without taking up floor space.
Regularly assess the items kept bedside and adjust storage solutions as needs change throughout different seasons or lifestyle changes.
Floating Shelves for Small Items

Floating shelves serve as an elegant and practical solution for organizing small items in bedrooms while maximizing vertical space. These versatile storage solutions keep frequently used items within easy reach while creating an aesthetically pleasing display that doubles as room decor.
When properly organized, floating shelves can transform cluttered surfaces into orderly arrangements that enhance both functionality and visual appeal. By implementing a systematic approach to shelf organization, you can create designated spaces for everything from books and decorative items to daily essentials, ensuring your bedroom remains tidy and well-structured.
Required Items:
- Floating shelves
- Level
- Stud finder
- Drill and drill bits
- Screwdriver
- Anchors and screws
- Measuring tape
- Pencil
- Small organizing bins or containers
- Bookends
- Dust cloth
Start by installing your floating shelves at varying heights, ensuring they’re properly secured to wall studs. Group similar items together and designate specific shelves for different categories – one for books, another for decorative items, and perhaps another for daily essentials.
Position frequently used items at eye level or within easy reach, while placing purely decorative pieces higher up. For maximum organization, incorporate small containers or decorative boxes on the shelves to corral smaller items like jewelry, charging cables, or personal care products.
Create visual balance by alternating tall and short items, and maintain some empty space between groupings to prevent a cluttered appearance. Consider the weight capacity of each shelf and distribute heavier items across multiple shelves rather than concentrating them on a single one.
To maintain your organized floating shelves, implement a regular dusting schedule and reassess the arrangement every few months. Remove items that are no longer needed or used, and adjust groupings based on seasonal changes or evolving needs.
Keep heavier items toward the back of the shelves for stability, and use bookends or small decorative objects as attractive ways to keep items upright and in place.
Multi-Purpose Furniture Selection

Multi-purpose furniture serves as the cornerstone of an efficiently organized bedroom, maximizing space utilization while maintaining functionality. When every square foot counts, selecting furniture pieces that can serve multiple functions becomes essential for creating a clutter-free, well-organized living space.
The strategic selection of dual-purpose furniture pieces not only saves valuable floor space but also reduces the need for additional storage solutions. This approach particularly benefits those living in smaller spaces, urban apartments, or rooms where standard furniture arrangements might feel cramped or overwhelming.
Required Items:
- Measuring tape
- Floor plan or room dimensions
- Calculator
- Notebook
- Camera/smartphone
- Storage needs inventory list
- Budget worksheet
- Furniture catalog or online resources
- Space planning grid paper
- Tape for marking floor layouts
Start by assessing your room’s dimensions and creating a detailed list of necessary functions the space must accommodate. Identify key activities like sleeping, studying, storage, and leisure.
Select bed frames with built-in drawers or lifting mechanisms for under-bed storage. Consider ottomans or benches with hidden compartments for the foot of the bed, and choose nightstands with multiple drawers or shelving. Install murphy beds or daybed configurations that transform into seating during daytime hours.
For desk areas, select models with integrated shelving systems or convertible designs that can fold away when not in use. Prioritize vertical storage solutions, such as tall dressers with mirrors that double as vanity stations, or armoires that can house both clothing and entertainment systems.
Ensure each piece selected maintains proper proportion to the room size while maximizing its functional potential.
Additional Tips: Before finalizing furniture selections, create a scaled layout to visualize traffic flow and accessibility. Test the functionality of moving parts and storage mechanisms in person whenever possible.
Consider future needs and adaptability when selecting pieces, and ensure furniture materials and construction quality can withstand frequent use in multiple configurations. Remember to maintain a cohesive style throughout your selections to preserve the room’s aesthetic appeal while maximizing functionality.
Over-the-Door Storage Hacks
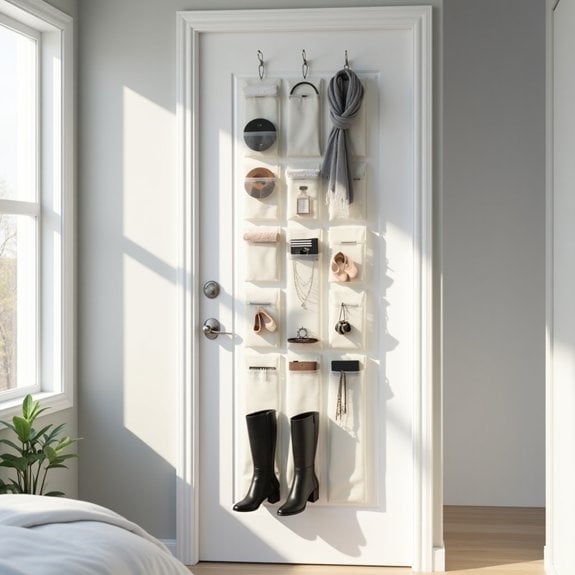
Making the most of vertical space is crucial in any bedroom, and over-the-door storage presents an often overlooked opportunity to maximize storage capacity without sacrificing valuable floor space. This unused area can transform into a functional storage zone for everything from shoes and accessories to daily essentials.
Over-the-door storage solutions offer particular value for small bedrooms or rental properties where permanent mounting solutions aren’t feasible. These systems can effectively double your storage capacity while keeping items easily accessible and visible, reducing the likelihood of forgotten possessions and cluttered surfaces.
Required Items:
- Over-the-door hanging rack or organizer
- Door hooks (multiple sizes)
- Clear storage pockets or pouches
- Measuring tape
- Label maker or tags
- Small command hooks
- Storage bins that fit organizer pockets
- Tension rods (optional)
- S-hooks (optional)
Start by measuring your door’s dimensions, including width and thickness, to ensure proper fit of your chosen organizer. Install the over-the-door hooks or hanging mechanism, ensuring it’s level and secure.
Sort items by category before placing them in the organizer – designate specific zones for different items such as accessories, beauty products, or clothing items. Position frequently used items at eye level and lesser-used items higher or lower.
For shoes, utilize specialized over-the-door shoe organizers with clear pockets, arranging pairs by type and frequency of use. For accessories and smaller items, implement small bins or organizers within the pockets to prevent items from becoming jumbled.
Consider using multiple organizers on different doors within the bedroom to create dedicated storage zones for specific categories. To maintain the effectiveness of your over-the-door storage system, regularly assess and rotate items based on seasonal needs.
Install additional hooks on the sides of the organizer for hanging lightweight items, and use clear pockets for better visibility. Consider adding a small tension rod within larger pockets to hang delicate items or create double-hanging capacity, maximizing the versatility of your storage solution.
Decluttering Your Nightstand
Organization Ideas for a Well-Organized Bedroom
Decluttering Your Nightstand
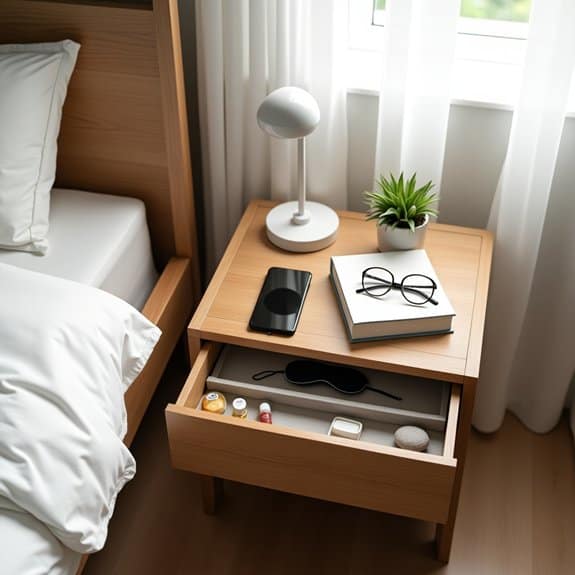
A well-organized nightstand serves as the command center for your bedroom, housing essential items within arm’s reach while you rest. This small but crucial space often becomes a catchall for various items, leading to clutter and frustration when trying to locate important things during the night or upon waking.
An organized nightstand not only improves the aesthetic appeal of your bedroom but also enhances your daily routines. By maintaining a clutter-free surface and organized drawers, you can easily access necessities without disrupting your sleep or morning schedule, contributing to a more peaceful and efficient lifestyle.
Required Items:
- Small drawer organizers or dividers
- Container for cables and chargers
- Small trash bin
- Cleaning cloth
- Storage boxes or baskets
- Label maker (optional)
- Multi-plug surge protector
- Cable clips or ties
Start by removing everything from your nightstand’s surface and drawers. Sort items into three categories: keep, relocate, and discard. Clean all surfaces thoroughly.
For items to keep, group similar objects together: electronics and charging accessories, reading materials, medications, and personal care items. Install a surge protector to manage electronic devices and use cable clips to prevent cord tangles.
In the top drawer, place frequently accessed items in designated compartments using drawer organizers. Store electronics and charging accessories in one section, personal care items in another, and maintain a small area for essential medications.
For the lower drawer, use storage boxes or baskets to contain less frequently used items like extra reading materials or seasonal accessories.
Additional Tips:
Maintain your organized nightstand by implementing a weekly quick cleanup routine. Regularly assess items and remove anything that doesn’t belong.
Consider using a small tray on top to corral daily essentials and prevent surface clutter. Keep only one book or magazine at a time, and rotate reading materials as needed.
Position your surge protector and cables at the back of the nightstand to maintain a clean appearance while ensuring easy access to charging ports.
Seasonal Clothing Rotation
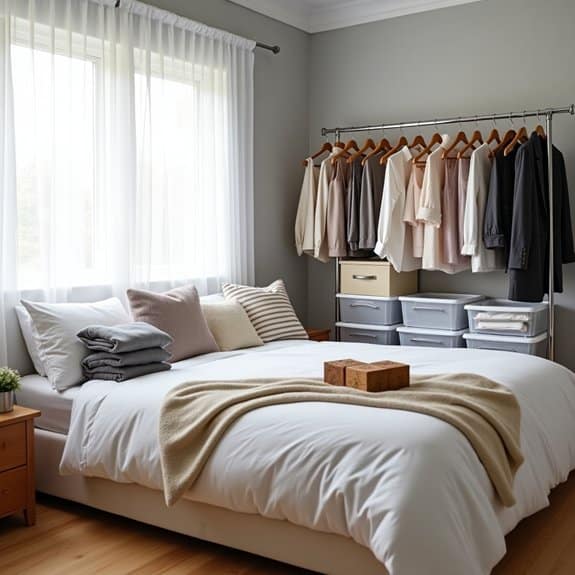
Seasonal clothing rotation is a crucial aspect of maintaining an organized and clutter-free bedroom. By strategically cycling your wardrobe according to the seasons, you maximize closet space and ensure easy access to weather-appropriate clothing while protecting off-season items from damage, dust, and unnecessary wear.
This organizational system not only creates more space in your daily-use closet but also provides an opportunity to assess your wardrobe twice yearly. During the rotation process, you can evaluate which items need repair, which pieces you no longer wear, and what gaps exist in your seasonal wardrobes, making future shopping more intentional and effective.
Required Items:
- Storage containers or vacuum-seal bags
- Labels and marker
- Clothing rack or bed for sorting
- Cedar blocks or mothballs
- Clean storage area (under bed, attic, or spare closet)
- Garment brush
- Laundry supplies
- Basic sewing kit
- Inventory list template
Start by removing all clothing from your closet and sorting items into three categories: current season, opposite season, and year-round pieces. Thoroughly clean and inspect each item before making your decision. Wash or dry clean all clothes before storage, as invisible stains can set during long-term storage and attract pests.
Fold items carefully or hang them on appropriate hangers, using vacuum-seal bags for bulky items like sweaters and coats. Store off-season clothing in clearly labeled containers, noting the contents and season. Choose a cool, dry location away from direct sunlight and potential water damage.
Place cedar blocks or mothballs in containers to prevent pest damage, and ensure containers are properly sealed. Keep an inventory list of stored items to prevent unnecessary purchases and make the next rotation easier.
For maximum organization success, schedule your seasonal rotation during traditional transition months (March/April and September/October). Keep a small selection of opposite-season clothing accessible for unexpected weather changes.
Consider maintaining a digital photo inventory of stored items, and set calendar reminders for your next rotation date to maintain the system’s effectiveness.
Shoe Storage Strategies
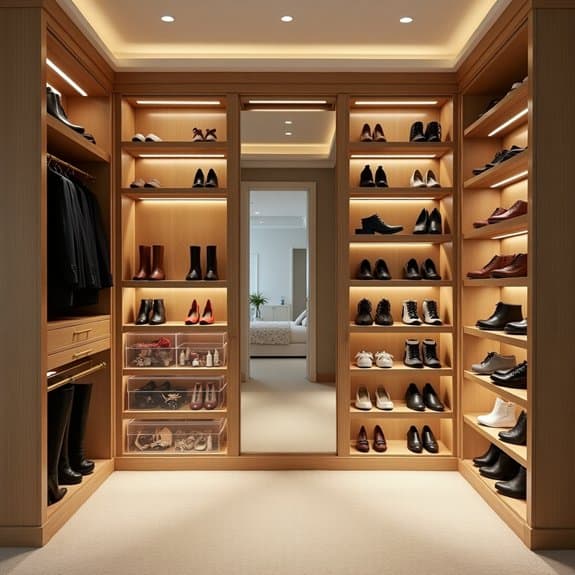
Proper shoe storage is essential for maintaining an organized and clutter-free bedroom. Shoes scattered across the floor not only create visual chaos but also collect dust, lose their shape, and can become a tripping hazard. A well-planned shoe storage system helps protect your footwear investment while making it easier to find and access the pairs you need.
An organized shoe collection contributes to a smoother daily routine, as you can quickly locate specific pairs without searching through piles. This organization system also helps you track what shoes you own, prevents unnecessary duplicate purchases, and allows you to properly care for different types of footwear based on their materials and usage frequency.
Required Items:
- Shoe rack or shelving unit
- Over-the-door shoe organizer
- Clear plastic shoe boxes
- Shoe trees or stuffing material
- Labels or label maker
- Storage bench (optional)
- Under-bed storage containers (optional)
- Deodorizing sachets
- Measuring tape
- Cleaning supplies
Start by sorting all shoes into categories: daily wear, special occasion, seasonal, and rarely worn. Remove any damaged pairs beyond repair or those you haven’t worn in over a year. Clean all shoes thoroughly before organizing.
Install your chosen storage solution based on available space – whether it’s a dedicated shoe rack, over-the-door organizer, or under-bed storage. Position frequently worn shoes at eye level for easy access, with seasonal items stored higher up or in separate containers.
For optimal organization, store boots upright using boot shapers or rolled magazines to maintain their shape. Place special occasion shoes in clear boxes with photos attached for easy identification. Use shoe trees for leather footwear, and stuff athletic shoes with paper to absorb moisture and maintain shape.
Create a rotation system for heavily worn shoes to extend their life and prevent odors.
Additional Tips: Implement a one-in-one-out rule to maintain your organized system. Place deodorizing sachets near athletic shoes and rotate them monthly. Consider installing motion-sensor lights in dark closet corners to improve visibility.
Review your shoe collection quarterly, adjusting storage solutions as needed and maintaining the organization system you’ve established.
Accessory Organization Methods
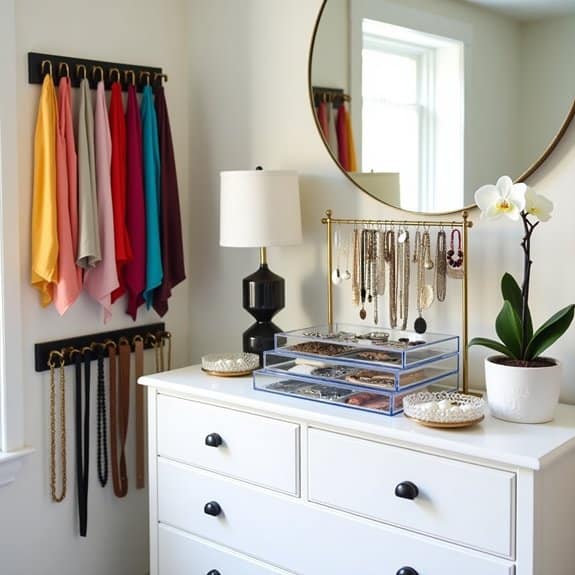
Organizing accessories is crucial for maintaining a clutter-free bedroom and protecting valuable items from damage or loss. When accessories like jewelry, scarves, belts, and other small items are properly organized, they remain visible, accessible, and in good condition, eliminating the frustration of tangled necklaces or mismatched earrings.
A well-planned accessory organization system not only preserves the quality of your items but also saves time during daily routines. Rather than digging through drawers or untangling chains, you can quickly select and coordinate accessories with your outfits, making morning preparations more efficient and enjoyable.
Required Items:
- Jewelry organizer or stand
- Clear storage boxes
- Drawer dividers
- Hook rack
- Belt hangers
- Scarf organizers
- Small fabric pouches
- Label maker
- Storage containers with compartments
- Decorative trays
- Command hooks
Start by sorting accessories into categories: jewelry, scarves, belts, hair accessories, and other small items. Install a dedicated jewelry organizer on your dresser or wall, utilizing specialized compartments for different types of pieces. Hang necklaces individually to prevent tangling, and store earrings in paired compartments.
For scarves and belts, install hooks or specialized hangers in your closet, arranging items by color or frequency of use. Utilize drawer dividers for smaller accessories, creating designated spaces for each category.
Place frequently used items in easily accessible locations, while storing special occasion pieces in protective containers. Use clear storage boxes on higher shelves for seasonal accessories, ensuring they remain visible but protected from dust. Consider using decorative trays on dressers or vanities for daily-wear items, combining functionality with aesthetic appeal.
Additional Success Tips: Implement a “one-in-one-out” rule to maintain organization and prevent overcrowding. Review your accessory collection seasonally, removing damaged items and those no longer worn.
Consider photographing your organized spaces when first completed, using these images as reference points for maintaining the system. Clean and inspect items regularly, ensuring proper storage continues to protect your accessories effectively.
Hidden Storage Compartments

Hidden storage compartments are essential elements in maximizing bedroom space while maintaining a clean, uncluttered appearance. These discrete storage solutions allow you to store items out of sight while keeping them easily accessible, effectively doubling your storage capacity without compromising your room’s aesthetic appeal.
By utilizing hidden storage compartments strategically throughout your bedroom, you create organized spaces for seasonal items, extra bedding, personal belongings, and rarely used possessions. This approach not only helps maintain order but also contributes to a more peaceful and relaxing bedroom environment, as visual clutter is minimized.
Required Items:
- Under-bed storage containers
- Over-door hanging organizers
- Bed risers
- Ottoman with storage
- Drawer dividers
- Vacuum storage bags
- Command hooks
- Storage bench
- Floating shelves
- Storage boxes with lids
The organization process begins with identifying potential hidden storage areas in your bedroom. Install bed risers to create additional under-bed storage space, then use flat storage containers to organize items by category.
Utilize the back of doors by installing over-door organizers for shoes, accessories, or clothing. Create hidden storage within furniture by using ottoman storage for extra blankets or adding a storage bench at the foot of your bed. Install floating shelves with hidden compartments for valuable items or personal documents.
For closet organization, maximize vertical space by installing hooks on the sides of wardrobes or behind doors. Use vacuum storage bags to compress seasonal clothing and bedding, storing them in otherwise unused spaces like high shelves or under dressers. Incorporate drawer dividers to create concealed compartments within existing storage spaces, perfect for organizing smaller items or valuables.
Additional Tips: Label all hidden storage containers clearly to avoid forgetting what’s stored where, and create a storage map to track items in less accessible spaces. Regularly review and rotate items in hidden storage to ensure frequently used items remain easily accessible.
Consider using clear containers for visibility while maintaining a clean appearance, and implement a seasonal rotation system to maximize storage efficiency throughout the year.
Color-Coding Your Closet
Organization Ideas for a Well-Organized Bedroom
Color-Coding Your Closet
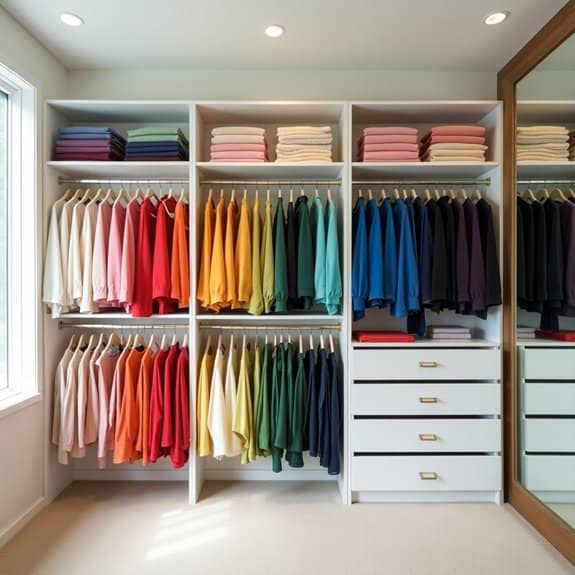
A color-coded closet system transforms a chaotic wardrobe into an efficient, visually appealing space that streamlines your daily routine. When clothes are arranged by color, finding specific items becomes intuitive, reducing the time spent searching through hangers and folded piles. This organization method also helps identify gaps in your wardrobe and prevents unnecessary duplicate purchases.
The psychological benefits of a color-coded closet extend beyond mere organization. Studies show that visual harmony reduces stress and decision fatigue, making your morning routine more peaceful and efficient. Additionally, this system makes it easier to create coordinated outfits and maintain a clear inventory of your clothing collection.
Required Items:
- Matching hangers
- Closet dividers
- Storage boxes
- Labels or markers
- Sorting bins
- Color wheel (optional)
- Measuring tape
- Clear storage containers
- Drawer organizers
Start by removing all clothing items from your closet and sorting them into color groups. Begin with white, moving through neutrals (beige, gray, brown), then progress through the color spectrum: red, pink, orange, yellow, green, blue, purple, and finally black.
Within each color section, organize items by shade intensity, from lightest to darkest. Create subsections within each color group based on clothing type (dresses, shirts, pants) to maintain functionality alongside aesthetic organization.
For multi-colored or patterned items, choose the dominant color as the determining factor for placement. Install closet dividers between color sections to maintain clear boundaries and prevent mixing. Consider seasonal rotation by moving off-season colors to storage containers while maintaining the same color-coding system.
Additional Tips:
Photograph your organized closet for reference and maintain the system by immediately placing new items in their designated color section. Use the empty hanger method – when you wear an item, turn the empty hanger backward to track clothing usage patterns.
Review and adjust the system quarterly, removing items that haven’t been worn and reassessing the effectiveness of your color groupings.
Folding and Rolling Techniques
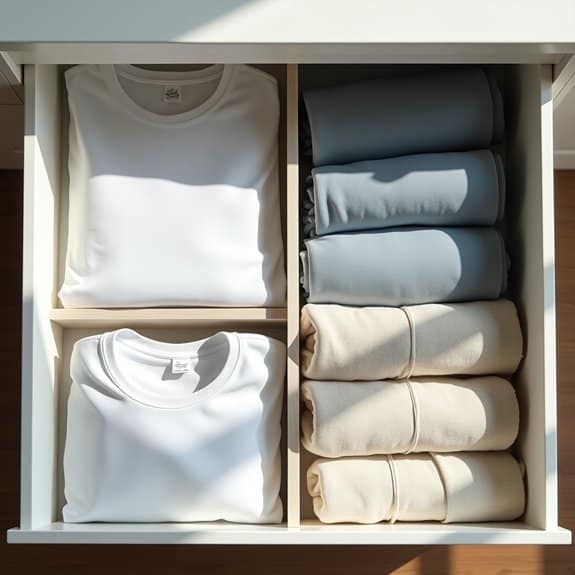
Proper folding and rolling techniques are fundamental to maintaining an organized bedroom, particularly when it comes to maximizing drawer and closet space. When clothes are properly folded and rolled, they not only take up less space but also remain wrinkle-free and easily visible, eliminating the frustration of digging through messy piles to find specific items.
The KonMari method and military rolling techniques have revolutionized the way we store clothing, proving that the right folding approach can transform cluttered spaces into efficient storage systems. These methods allow you to store up to 50% more items in the same space while keeping everything accessible and maintaining the integrity of your garments.
Required Items:
- Flat surface for folding
- Drawer dividers or organizers
- Storage boxes
- Slim hangers
- Drawer liner (non-slip)
- Labels
- Folding board (optional)
The process begins with sorting clothes by category (t-shirts, pants, underwear, etc.). For t-shirts and sweaters, lay the item face-down, fold the sides toward the center, and fold the bottom up in thirds. This creates a compact rectangle that stands upright in drawers.
For pants, fold them in half lengthwise, smooth out wrinkles, then fold from bottom to top in thirds. For items like workout clothes, tank tops, and underwear, use the rolling method: fold in the sides, then tightly roll from top to bottom, creating compact cylinders that can be stored side by side.
For delicate items or clothes prone to wrinkles, use tissue paper between folds to prevent creasing. Store folded items vertically rather than stacked to maintain organization and visibility. Group similar items together and use drawer dividers to keep categories separate and prevent items from shifting when opening and closing drawers.
To maintain these folding and rolling systems, dedicate time weekly to refold any disheveled items and reassess your organization. Consider seasonal rotation of clothing to prevent overcrowding, and always fold items immediately after laundering to prevent the build-up of unfolded clothes.
Remember that consistency in folding techniques is key to maintaining an organized system long-term.
Storage Ottoman Ideas
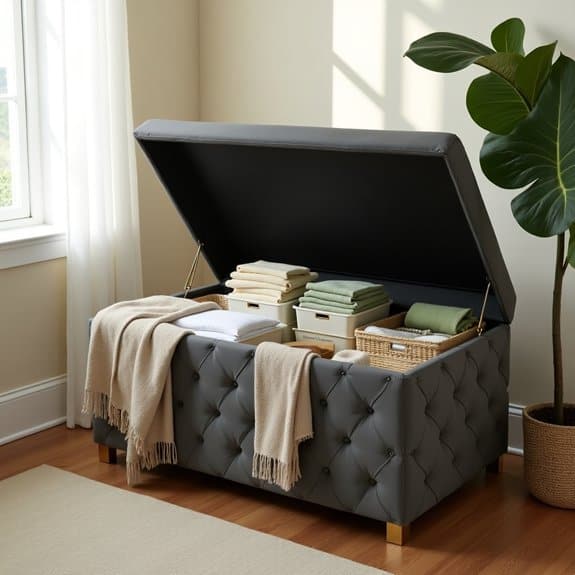
Storage ottomans serve as versatile pieces of furniture that combine seating, storage, and style in one compact solution. When properly organized, these multi-functional pieces can dramatically reduce bedroom clutter while maintaining easy access to frequently used items.
Maximizing storage ottoman space requires thoughtful planning and systematic organization. The right approach can transform these pieces from catch-all containers into efficient storage systems for seasonal items, extra bedding, or daily essentials while maintaining the ottoman’s functionality as additional seating.
Required Items:
- Storage bins or baskets
- Drawer organizers
- Labels or label maker
- Vacuum storage bags
- Clear zippered pouches
- Fabric storage boxes
- Drawer liner or shelf liner
- Measuring tape
- Storage containers in various sizes
- Decluttering bins (donate/trash/keep)
Start by emptying the storage ottoman completely and measuring its internal dimensions. Sort items into categories based on frequency of use and size. Use appropriately sized containers or fabric boxes that maximize vertical space while allowing the ottoman to close properly.
Position frequently accessed items near the top or front for easy reach. For clothing or linens, employ vacuum storage bags to compress bulky items and maximize space. Create designated zones within the ottoman using smaller containers or dividers to prevent items from mixing.
Additional Tips: Maintain organization by conducting quarterly reviews of stored items. Consider using clear containers to easily identify contents, and always keep a small amount of extra space for flexibility.
Protect stored items by lining the ottoman’s interior with shelf liner to prevent moisture damage, and avoid storing anything that could create odors or attract pests. Regular rotation of seasonal items will help maintain the system’s efficiency while preventing forgotten items from accumulating.
Clear Container Systems
Organization Ideas for a Well-Organized Bedroom
Clear Container Systems
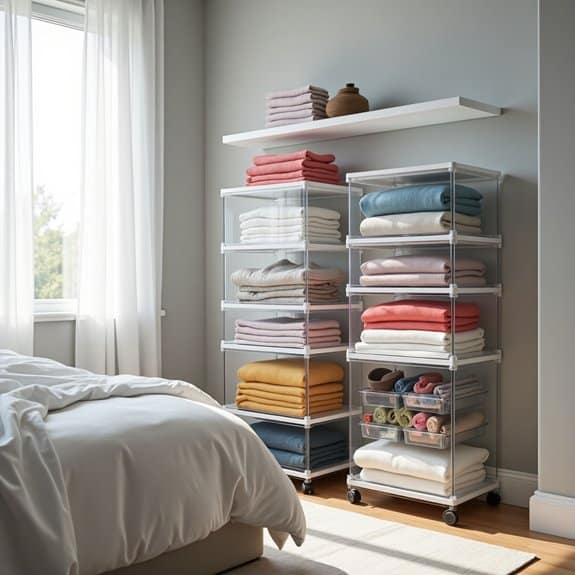
A well-implemented clear container system transforms bedroom organization from chaotic to systematic, making it easier to locate items quickly and maintain order long-term. Clear containers eliminate the guesswork of what’s stored where, reducing the time spent searching for specific items and preventing the accumulation of forgotten belongings.
These transparent storage solutions work particularly well in bedrooms because they can be easily integrated into closets, under beds, and on shelves while maintaining visual appeal. The ability to see contents at a glance helps maintain organization systems and encourages regular decluttering of unnecessary items.
Required Items:
- Various sized clear plastic containers
- Labels and label maker
- Drawer dividers
- Clear shoe boxes
- Container measuring tape
- Shelf liner
- Storage bins with lids
- Clear drawer organizers
- Box cutter
- Container markers
Start by measuring your available storage spaces, including closet shelves, under-bed areas, and drawer dimensions. Sort items into categories such as seasonal clothing, accessories, shoes, and memorabilia. Select appropriately sized containers for each category, ensuring they fit their designated spaces.
Remove items from their current locations, clean the spaces thoroughly, and place shelf liner where needed. Sort items into their designated containers, using smaller clear organizers within larger bins to separate related items. Label each container clearly, including both the contents and the storage location if applicable.
Stack containers strategically, with frequently used items in easily accessible locations and seasonal items in higher or more remote storage areas. For maximum effectiveness, implement a regular maintenance schedule for your clear container system. Review contents quarterly, removing unnecessary items and adjusting organization as needed.
Consider using standardized container sizes when possible to maintain a cohesive look and enable easy reconfiguration of storage spaces. Keep a few empty containers on hand for future storage needs or temporary organization projects.
Corner Space Utilization
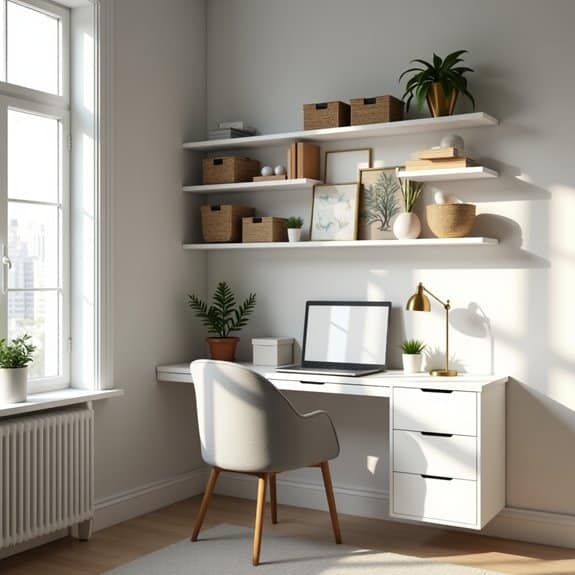
Bedroom corners often become dead spaces or cluttered catch-alls, wasting valuable square footage in what could be prime storage or functional areas.
These overlooked nooks can transform into productive zones that add both aesthetic value and practical storage solutions to your bedroom, making the entire room feel more spacious and organized.
Maximizing corner spaces requires strategic planning and the right combination of furniture and storage solutions. When properly utilized, corners can house everything from workspace areas to reading nooks, or serve as efficient storage zones with vertical shelving systems that take advantage of the full height of your walls.
Required Items:
- Corner shelving units
- Corner desk (if applicable)
- Storage baskets or bins
- Corner lamp or lighting
- Measuring tape
- Level
- Wall anchors
- Screwdriver
- Corner shelf brackets
- Command hooks or mounting hardware
Start by measuring your corner space, including both width and height, to determine the maximum dimensions for furniture or shelving.
Clear the corner completely and clean the area thoroughly. Install corner shelving units starting from the bottom up, ensuring each shelf is properly leveled and securely anchored to the wall. If opting for a corner desk setup, position it first and arrange storage solutions above and around it in a way that maintains easy access.
For maximum organization, divide your corner space into zones based on function. The lower area can accommodate larger items or furniture, while upper spaces work well for display items or less-frequently used objects.
Implement a combination of open shelving and closed storage solutions to maintain a clean appearance while maximizing storage capacity.
Additional success tips: Incorporate adequate lighting to prevent the corner from becoming a dark, unused space. Use clear containers for stored items to maintain visibility, and label everything clearly.
Regularly reassess the corner’s organization system and adjust as needed, removing items that are no longer necessary to prevent clutter accumulation.
Consider using mirror elements or light colors in corner installations to create the illusion of more space and brightness.
Hanging Storage Solutions
Organization Ideas for a Well-Organized Bedroom
Subtopic: Hanging Storage Solutions
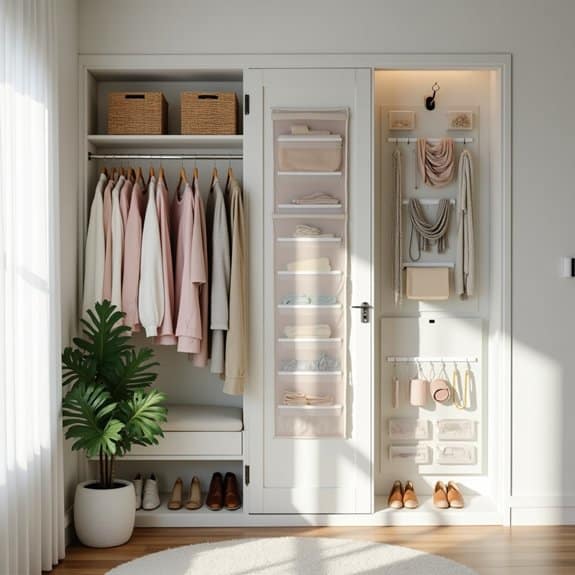
Maximizing vertical space through hanging storage solutions is one of the most effective ways to organize a bedroom while maintaining valuable floor space. When properly implemented, hanging storage systems can transform cluttered areas into efficient, accessible storage zones that keep items visible and within easy reach.
Hanging storage solutions work particularly well for clothing, accessories, and everyday items that tend to create clutter when left without a designated space. These systems can be installed on walls, doors, or within closets, making them versatile options for bedrooms of any size or configuration.
Required Items:
- Over-the-door hooks
- Clothing rod or garment rack
- Wall-mounted hooks
- Hanging organizers with multiple pockets
- Command strips or mounting hardware
- Tension rods
- S-hooks or hanging clips
- Storage baskets with hanging capabilities
- Measuring tape
- Level
- Drill and screwdriver (if mounting)
Begin by assessing your wall space and door areas to determine the best locations for hanging storage. Install wall-mounted hooks or rods at appropriate heights, ensuring they’re properly secured to wall studs or using appropriate wall anchors. Position over-the-door hooks on closet or bedroom doors, making sure they don’t interfere with door operation.
For closet organization, install additional tension rods to create multiple hanging levels. Next, sort items by category and frequency of use. Arrange frequently used items at eye level and within easy reach. Install hanging organizers with pockets for smaller items like accessories, shoes, or folded clothing.
Use S-hooks to hang baskets or additional organizers from installed rods, creating customized storage solutions for specific needs. Create a maintenance routine by regularly assessing the weight load on hanging storage systems and checking that all mounting hardware remains secure.
Rotate seasonal items to more accessible locations as needed, and periodically evaluate whether your current configuration continues to meet your storage needs. Consider using clear organizers or labeling systems to maintain organization long-term.
Digital Organization for Bedroom Items
Organization Ideas for a Well-Organized Bedroom
Digital Organization for Bedroom Items
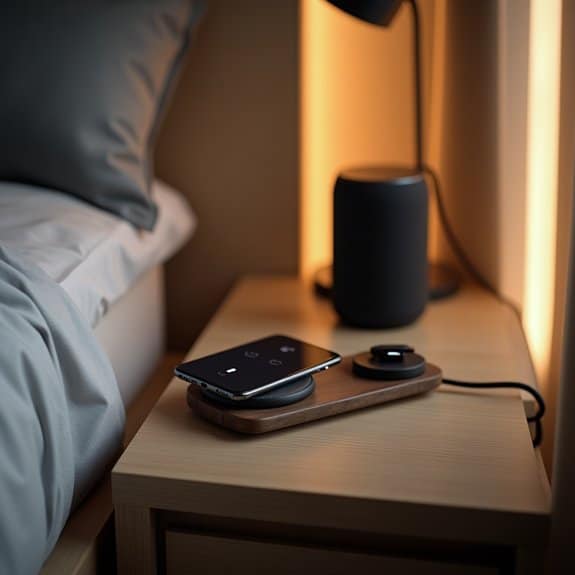
In today’s digital age, organizing the electronic aspects of our bedroom space has become just as crucial as managing physical items. From charging stations to digital entertainment systems, proper digital organization can transform a cluttered, wire-filled bedroom into a streamlined, tech-friendly sanctuary that promotes both functionality and relaxation.
Digital organization extends beyond merely managing cables and devices; it encompasses creating systems for digital storage, establishing efficient charging stations, and implementing smart home features that enhance bedroom functionality. A well-organized digital space reduces stress, saves time, and creates a more peaceful bedroom environment.
Required Items:
- Cable management sleeves
- Multi-port charging station
- Power strip with surge protection
- Cable clips or adhesive cable holders
- Label maker
- Storage boxes for unused electronics
- USB hub
- Smart home hub (optional)
- External hard drive or cloud storage subscription
- Cable ties or velcro straps
Start by conducting a complete inventory of all electronic devices and their corresponding cables in your bedroom. Group similar items together and eliminate any redundant or unused devices and cables.
Install a designated charging station in an easily accessible location, preferably near your bedside table or desk. Use cable management sleeves to bundle and route cords along walls or furniture edges, keeping them hidden from view. Mount power strips in convenient locations and secure them to prevent sliding.
Create a digital filing system for any bedroom-related documents, such as furniture assembly instructions, warranty information, or decoration ideas. Implement a smart home system if desired, programming routines for lighting, temperature, and other automated features.
Establish a regular backup system for any digital devices kept in the bedroom, ensuring important data is protected. For optimal digital organization maintenance, schedule monthly checks of your cable management system, clean charging stations, and update digital filing systems.
Consider implementing a “one in, one out” rule for new electronic devices and regularly assess whether digital items truly serve a purpose in your bedroom space. Keep a small supply of spare cables and adapters in a labeled container for emergencies, but resist the urge to accumulate unnecessary tech accessories.

