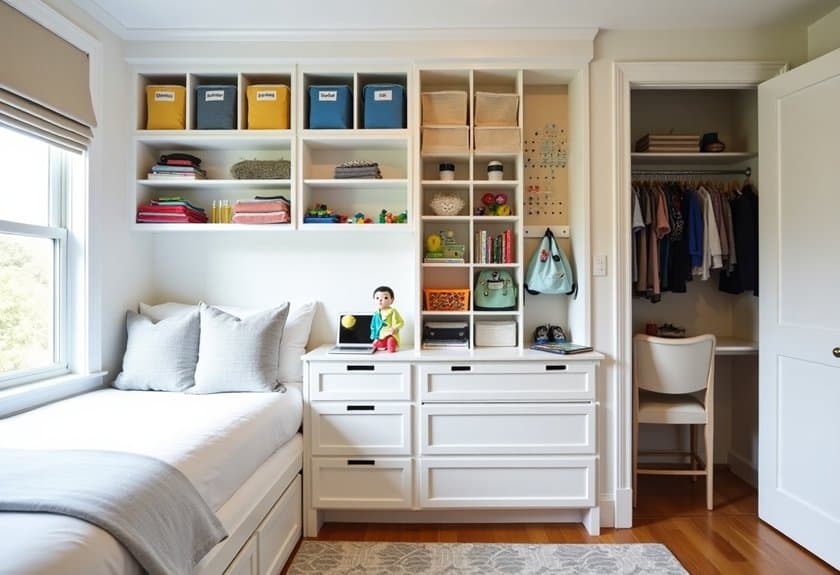
Is your kid’s bedroom a chaotic maze of toys, a jumble of clothes, or a puzzle of misplaced items? I’ve been there! As a mom of three, I’ve learned that organizing a child’s space isn’t just about making it look neat – it’s about creating a system that actually works for your little ones. After years of trial and error (and stepping on my fair share of LEGOs), I’ve discovered some game-changing solutions that’ll transform any kid’s room from chaos to calm. Let me share my favorite tricks!
Create Zones for Different Activities
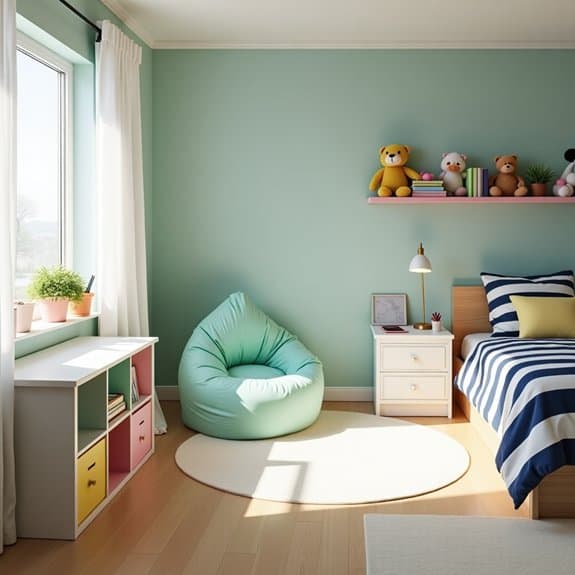
Creating distinct activity zones in a child’s bedroom is essential for both functionality and cognitive development. When children have clearly defined spaces for specific activities, they’re better able to focus, maintain organization, and develop healthy habits around playtime, study time, and rest.
Well-designed activity zones help children understand spatial boundaries and encourage independence in maintaining their own space. These designated areas also make cleanup easier and help children transition between different activities throughout their day, from getting dressed to doing homework to winding down for bedtime.
Required Items:
- Storage bins or baskets
- Labels or label maker
- Shelving units
- Room dividers or bookcases
- Small table and chair
- Storage ottoman or bench
- Area rugs
- Desk lamp
- Toy organizers
- Hooks or pegboards
Start by mapping out the room and identifying potential zones based on your child’s daily activities. Common zones include a sleeping area, study space, reading nook, play area, and dressing zone.
Position the bed away from distracting areas and create a calm sleeping zone. Set up the study area near natural light if possible, with all necessary supplies within reach. Establish a cozy reading corner with comfortable seating and good lighting. Designate a play zone with easy-access toy storage and adequate floor space. Finally, arrange the dressing area near the closet with accessible clothing storage and a hamper for dirty clothes.
For optimal organization, maintain clear boundaries between zones using visual cues like area rugs, furniture arrangement, or room dividers. Install appropriate storage solutions in each zone, such as bookcases for the reading area, bins for toys in the play zone, and desktop organizers for the study space.
Ensure proper lighting for each activity area and consider using color coding or labels to help maintain organization within each zone.
Additional Tips: Involve your child in the zone-creation process to ensure the layout meets their needs and preferences. Review and adjust zones periodically as your child grows and their activities change.
Consider implementing a rotation system for toys and books to prevent overcrowding and maintain interest. Keep frequently used items at child-height and less-used items in higher storage spaces to maintain organization while maximizing accessibility.
Install Kid-Height Storage Solutions
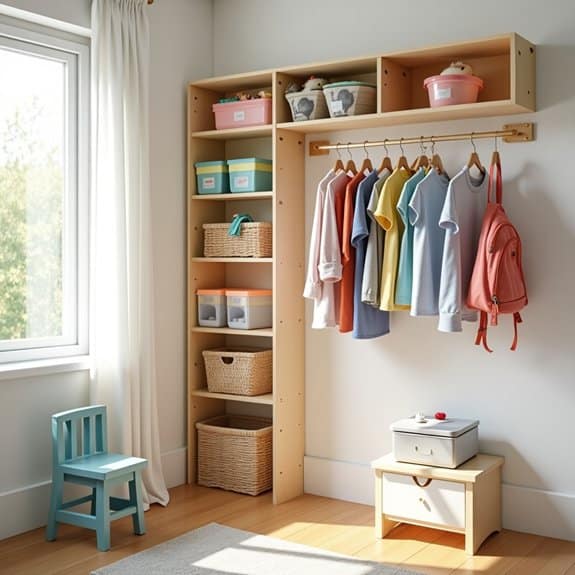
Creating accessible storage solutions at your child’s height is fundamental to teaching independence and maintaining an organized bedroom. When children can easily reach their belongings, they’re more likely to put items away independently and develop lasting organizational habits.
Kid-height storage enables children to take ownership of their space and participate actively in keeping their room tidy. This approach not only makes daily activities more manageable but also builds confidence as children learn to care for their belongings without constant adult assistance.
Required Items:
- Measuring tape
- Level
- Wall anchors
- Screwdriver
- Low-height shelving units
- Storage bins or baskets
- Labels or label maker
- Child-safe hooks
- Low clothing rods
- Step stool (if needed)
Start by measuring your child’s reaching height while standing flat-footed, and use this measurement as your maximum height for storage installations. Install open shelving units approximately 24-36 inches from the floor, ensuring they’re securely anchored to the wall.
Mount clothing rods at a height where your child can easily hang and retrieve items, typically around 36-42 inches from the floor. Position storage bins and baskets on lower shelves or directly on the floor for easy access.
Organize items by category, keeping frequently used items at the most accessible heights. Install hooks at eye level for backpacks, coats, and other daily essentials. Consider using clear storage containers or picture labels to help younger children identify where items belong.
Create designated zones for different activities, such as a reading corner with low book storage or an art supply area with easily accessible drawers.
Additional Tips: Regularly reassess and adjust storage heights as your child grows, and involve them in the organization process to ensure the system meets their needs. Use safety straps or wall anchors for all mounted storage solutions, and avoid placing heavy items on higher shelves where they might pose a safety risk.
Consider implementing a rotation system for toys and clothes to prevent overcrowding and maintain organization.
Maximize Closet Space With Double Rods
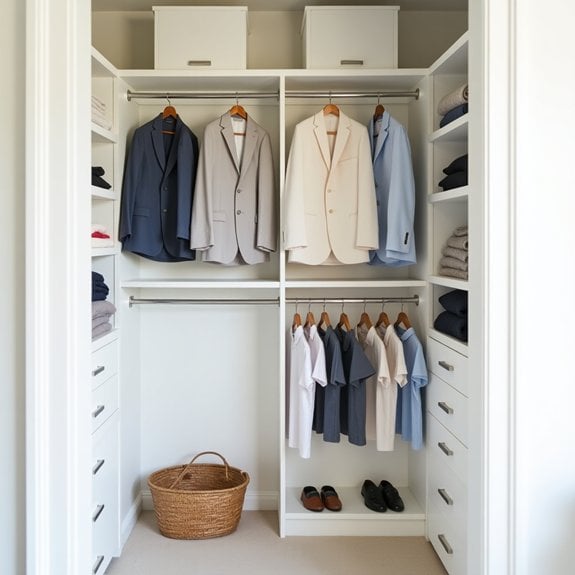
A well-organized closet with double rods can effectively double the available hanging space in your child’s bedroom, making it easier to store and access clothing while keeping items neatly arranged. This efficient use of vertical space helps create designated areas for different types of clothing, from shorter items like shirts and folded pants to longer pieces like dresses and coats.
Installing double rods transforms a standard single-rod closet into a dynamic storage solution that grows with your child. The upper rod can store out-of-season or less frequently used items, while the lower rod remains accessible for daily wear. This system also teaches children organizational skills and independence in managing their wardrobe.
Required Items:
- Closet rod kit with brackets
- Power drill
- Screwdriver
- Level
- Measuring tape
- Pencil
- Wall anchors
- Screws
- Stud finder
- Safety goggles
- Dust mask
Start by removing all clothing and the existing rod from the closet. Using a stud finder, locate and mark wall studs. Measure and mark the desired height for both rods – typically, the upper rod should be about 80 inches from the floor, while the lower rod should be approximately 40 inches high.
Install wall brackets into the studs using appropriate screws, or use wall anchors if needed. Ensure brackets are level before securing them firmly. Cut the rods to size if necessary, and place them securely in the brackets.
Once installed, test the stability of both rods before hanging clothes. Sort clothing by type and length, placing longer items on the top rod and shorter pieces on the bottom. Consider using slim hangers to maximize space further, and implement a front-to-back organization system where newer or more frequently worn items are placed toward the front of each rod.
For optimal organization, incorporate additional storage solutions like small bins for accessories on nearby shelves, drawer units for folded items, and labeled containers for seasonal clothing. Consider adding hooks on the closet walls for backpacks or robes, and implement a regular rotation system for clothing to prevent overcrowding and maintain organization long-term.
Set Up a Daily Cleanup Station
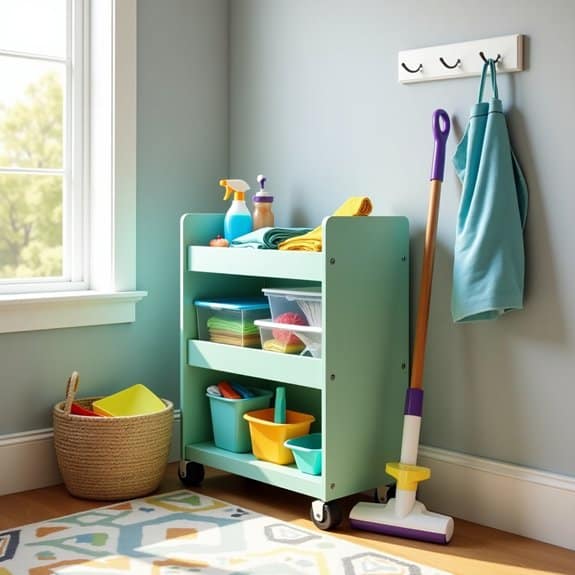
Teaching children to maintain a tidy bedroom starts with creating an accessible and efficient cleanup station. This designated area serves as a central hub for organizing daily cleanup activities, making it easier for kids to develop consistent tidying habits and take ownership of their space. When children know exactly where their cleaning supplies are and how to use them, they’re more likely to participate in regular room maintenance.
A well-planned cleanup station transforms the often-dreaded task of bedroom organization into a manageable routine. By establishing a specific location for cleaning supplies and clear instructions, parents can empower their children to handle basic tidying tasks independently, fostering responsibility and self-sufficiency.
Required Items:
- Small storage cart or caddy
- Cleaning cloths or dusters
- Child-safe cleaning spray
- Small handheld vacuum or dustpan set
- Storage bins or baskets
- Labels or label maker
- Cleaning checklist template
- Timer
- Reward chart (optional)
- Storage hooks or wall organizers
Choose a convenient corner or wall space in the bedroom and position the storage cart or caddy within easy reach. Stock the cleanup station with age-appropriate cleaning supplies, ensuring all items are clearly labeled and organized by frequency of use. Create a visual cleaning checklist using pictures for younger children or text for older ones, and mount it at eye level.
Arrange the supplies in categories: daily items on top, weekly cleaning supplies in the middle, and less frequently used items on the bottom tier. The cleanup station should include designated spots for both cleaning supplies and organizational tools. Include small baskets or bins for collecting scattered items, making it simple for children to gather toys and belongings during cleanup time.
Install hooks or wall organizers nearby to hang dusters, dustpans, or other handled tools where they’re easily visible and accessible. To maximize the effectiveness of the cleanup station, establish a regular “cleanup time” each day and post a simple routine chart nearby.
Consider implementing a timer system to make tidying more engaging, and rotate cleaning supplies seasonally to maintain interest. Remember to periodically review the station’s organization with your child, adjusting the setup as needed to better suit their changing capabilities and bedroom needs.
Label Everything With Pictures and Words
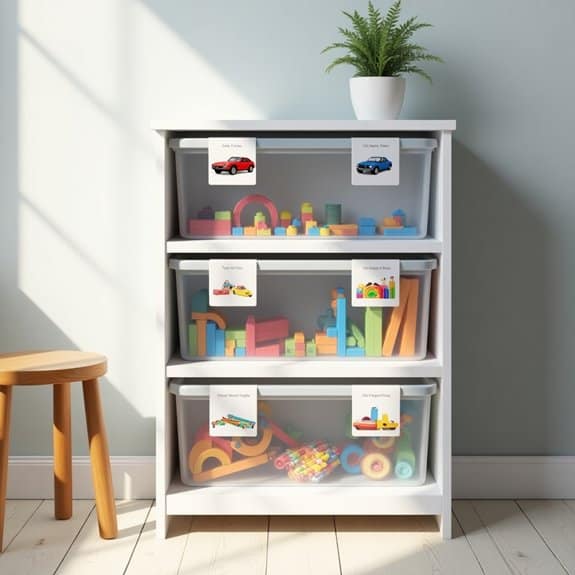
Labeling items in a child’s bedroom is a crucial step toward teaching independence and maintaining organization. When children can easily identify where things belong, they’re more likely to put items away properly and develop good organizational habits that last a lifetime.
Using both pictures and words for labels creates a dual-learning system that works for children at different developmental stages. Pre-readers can follow picture cues, while emerging readers benefit from seeing the corresponding words, making the labeling system grow with your child’s abilities.
Required Items:
- Label maker
- Clear adhesive labels
- Printer
- Card stock
- Laminator and pouches
- Scissors
- Clear packing tape
- Markers or pens
- Digital camera or smartphone
- Velcro dots (optional)
Start by photographing or finding clear images of the items that need labels, such as toys, books, or clothing categories. Print these images in color on card stock, ensuring they’re large enough to be easily visible.
Create corresponding word labels either with a label maker or by printing them in a clear, child-friendly font. Combine the picture and word labels on the same card, then laminate them for durability. Attach the labels to containers, shelves, or drawers using strong adhesive or Velcro dots, positioning them at your child’s eye level. Ensure the labels clearly indicate both the contents and quantity of items that belong in each space.
For best results, involve your child in the labeling process. Let them help choose pictures and placement of labels, and demonstrate how to use the system multiple times.
Consider creating a master chart showing all labels and their locations, making it easier to maintain the system over time. Regularly review and update labels as your child’s needs and abilities change, and don’t hesitate to adjust the system if certain labels aren’t working effectively.
Use Under-Bed Storage Efficiently
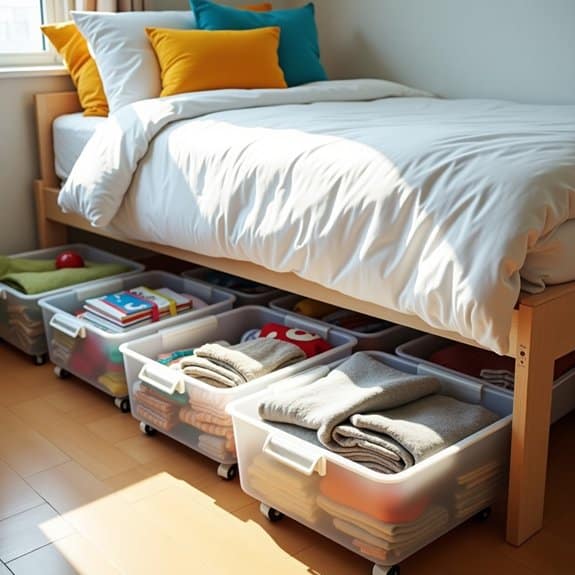
Making the most of under-bed storage space is crucial in children’s bedrooms, where floor space is often limited and toys, clothes, and seasonal items need proper storage solutions. This often-overlooked area can provide significant storage capacity, equivalent to a large dresser or cabinet, while maintaining a clean, uncluttered appearance in the room.
Proper under-bed organization not only maximizes available space but also teaches children the value of systematic storage and makes cleanup time more manageable. When items have designated spots underneath the bed, children can easily access their belongings and, more importantly, know exactly where to return them.
Required Items:
- Under-bed storage containers or drawers
- Bed risers (if needed)
- Labels or label maker
- Measuring tape
- Dust-proof storage bags
- Clear plastic bins
- Drawer dividers
- Storage containers with wheels
- Vacuum storage bags for soft items
The organization process starts with measuring the available space under the bed, including height, width, and depth. Clear out the area completely and vacuum thoroughly. Sort items into categories: seasonal clothing, toys, books, or memorabilia.
Select appropriately sized containers that maximize the space while allowing easy sliding in and out. Position frequently used items toward the foot or sides of the bed for easier access, while seasonal or less-used items can be stored toward the head of the bed.
For optimal organization, create a mapping system by labeling each container clearly and maintaining a simple diagram showing what’s stored where. Consider using clear containers for better visibility or adding wheels to containers for smoother access. Implement a rotating system for seasonal items, bringing relevant containers forward during their season of use.
To maintain the organization system, establish a quarterly review schedule to assess stored items, remove outgrown clothing or unused toys, and adjust the storage layout as needed.
Consider using vacuum storage bags for bulky items like extra bedding or winter clothes to maximize space, and always leave a small gap between containers for air circulation to prevent moisture buildup.
Design a Homework and Study Corner
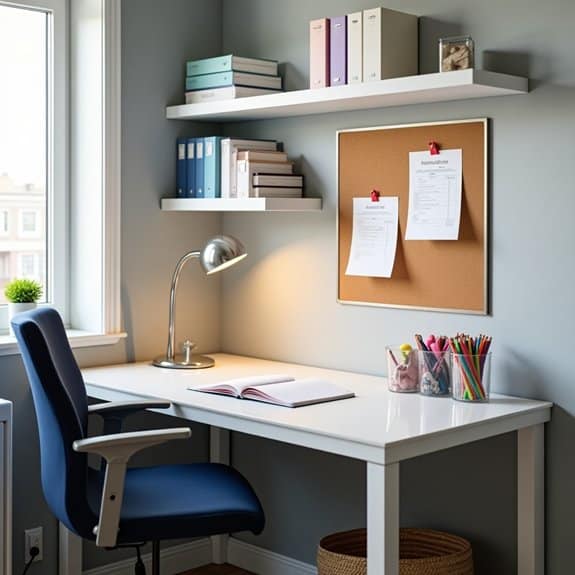
A dedicated homework and study corner is essential for developing good academic habits and maintaining focus during learning activities. This designated space helps children associate the area with productivity and creates a consistent routine for completing schoolwork, leading to better concentration and academic performance.
Creating an organized study space minimizes distractions and ensures all necessary supplies are within reach. When children have a well-structured workspace, they’re more likely to stay on task and develop independent study habits, making homework time more efficient and less stressful for the entire family.
Required Items:
- Desk or table appropriate for child’s height
- Ergonomic chair
- Task lighting
- Storage containers or organizers
- Pencil holder
- File folders or document organizers
- Bookshelf or floating shelves
- Bulletin board or whiteboard
- Cable management solutions
- Storage bins for supplies
- Dictionary and reference materials
Start by positioning the desk near a window for natural light, but avoid direct sunlight that could cause glare. Install task lighting on the left side for right-handed children (or right side for left-handed children) to prevent shadows while writing.
Mount a bulletin board or whiteboard at eye level for posting schedules, assignments, and important reminders. Organize the desk surface using designated zones: a primary workspace in the center, frequently used supplies on the dominant-hand side, and reference materials on the opposite side.
Install floating shelves above the desk for books and less-frequently used items. Use drawer organizers or desktop containers to sort writing implements, paper clips, and other small supplies by category.
Additional success tips: Implement a daily cleanup routine to maintain organization, and regularly review and purge unnecessary items. Consider using color-coding for different subjects or types of materials, and keep a backup supply of commonly used items to prevent interruptions during study time.
Encourage children to personalize their space while maintaining its functionality, helping them take ownership of their study area.
Rotate Seasonal Clothes and Toys
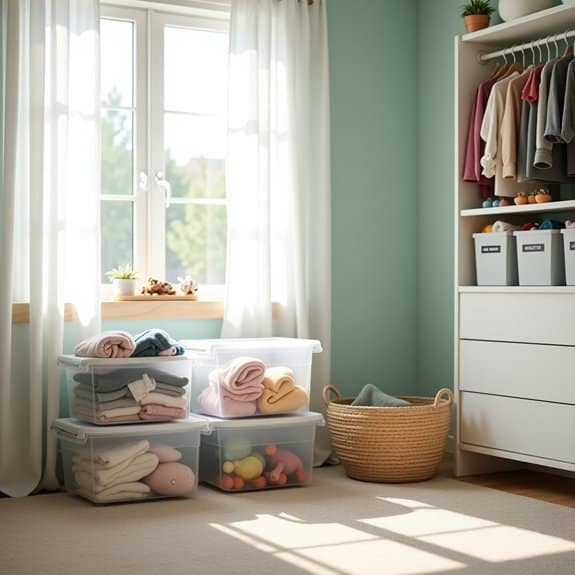
Rotating seasonal clothes and toys is a crucial aspect of maintaining an organized and clutter-free kids’ bedroom. When out-of-season items occupy valuable storage space, it creates unnecessary chaos and makes it difficult for children to access and enjoy their current-season belongings.
This systematic rotation not only maximizes available space but also helps parents track their children’s growing needs and preferences. It provides an opportunity to assess what items still fit, what needs replacing, and which toys continue to engage their interest, ultimately creating a more functional and enjoyable space for children.
Required Items:
- Storage bins with secure lids
- Labels and marker
- Inventory list
- Vacuum storage bags
- Clear plastic containers
- Storage boxes
- Clothing dividers
- Trash bags for donations
- Climate-controlled storage space
Start by sorting all clothes and toys into three categories: keep for current season, store for next season, and donate/discard. For clothing, examine each piece for fit, wear, and seasonal appropriateness.
Pack away off-season clothes in vacuum storage bags to maximize space and protect from moisture and insects. Label each container clearly with contents and size. For toys, create a rotation schedule that brings out different toys every few months, keeping children engaged while maintaining order.
Store away seasonal toys (like outdoor summer toys or winter sports equipment) in clearly labeled bins.
Additional tip: Create a digital inventory of stored items, including sizes, quantities, and storage locations. Set calendar reminders for seasonal switches, typically during spring and fall.
Before storing any items, ensure they’re clean and in good condition to prevent unpleasant surprises during the next rotation. Consider implementing a one-in-one-out rule when new items are acquired to maintain the system’s effectiveness and prevent overflow.
Build Vertical Storage With Wall Space
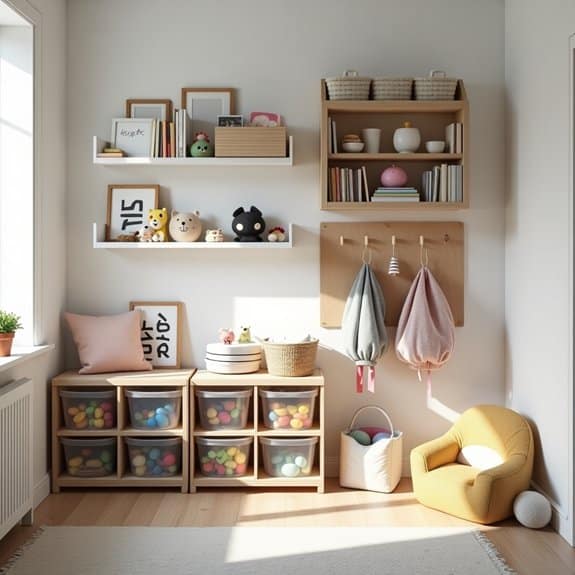
Making the most of vertical wall space is crucial in children’s bedrooms, where floor space is often limited and play areas are essential. Vertical storage solutions can transform previously unused wall areas into valuable storage opportunities, keeping toys, books, and essentials organized while maintaining an open, clutter-free environment.
Wall-mounted storage systems not only maximize space efficiency but also make it easier for children to access and return items to their designated spots. This approach to organization teaches children responsibility while keeping their belongings within reach, promoting independence and good organizational habits from an early age.
Required Items:
- Wall anchors and screws
- Measuring tape
- Level
- Drill
- Pencil
- Floating shelves
- Wall-mounted bins or baskets
- Hook systems
- Cube organizers
- Hanging storage pockets
- Wall-mounted bookracks
Begin by assessing the wall space and mapping out your storage plan. Measure the available area and mark the spots where you’ll install different storage components, keeping frequently used items at child height.
Install the larger items first, such as floating shelves or cube organizers, ensuring they’re properly anchored to wall studs. Follow with smaller components like hooks and hanging organizers, creating zones for different categories of items – reading materials, art supplies, and frequently used toys.
Consider creating a combination of open and closed storage solutions. Install clear bins on lower shelves for easy toy access, and use higher shelves for less frequently used items or seasonal storage. Incorporate adjustable systems that can be modified as your child grows and their storage needs change.
Additional Tips:
Label all storage containers and designate specific zones for different activities to maintain organization long-term. Rotate items seasonally and regularly assess the functionality of your vertical storage system, making adjustments as needed.
Consider using colorful or themed storage solutions that complement the room’s decor while maintaining their practical purpose. Regularly review the system with your child to ensure it remains accessible and effective for their changing needs.
Choose Multi-Purpose Furniture Pieces

Maximizing space in a child’s bedroom is crucial for maintaining organization and creating a functional environment that grows with them. Multi-purpose furniture pieces serve as the foundation for smart storage solutions while keeping the room clutter-free and adaptable to changing needs.
Selecting furniture that serves multiple functions not only saves valuable floor space but also teaches children practical organization skills. These versatile pieces can transform from storage units to study areas, or from seating to sleeping spaces, making them essential investments for long-term bedroom organization.
Required Items:
- Bed with built-in storage drawers
- Ottoman with storage compartment
- Desk with integrated shelving
- Bookshelf with fold-down desk
- Storage bench
- Convertible chair bed
- Adjustable closet organizers
- Stackable storage cubes
- Measuring tape
- Room layout plan
Start by measuring the room and creating a layout that maximizes wall space and natural traffic flow. Position larger multi-purpose pieces, such as storage beds or desk-shelf combinations, against walls to create designated zones for sleeping, studying, and playing.
Install adjustable closet organizers that can be modified as your child grows, and incorporate storage benches under windows for additional seating and storage space.
When selecting individual pieces, prioritize furniture that offers at least two functions, such as a loft bed with a desk underneath or storage cubes that double as seating. Arrange these pieces to create distinct activity areas while maintaining easy access to stored items.
Consider the height and accessibility of storage components to ensure they’re age-appropriate and encourage independent organization.
Additional Success Tips: Regularly assess the functionality of each piece and adjust configurations as needed. Label storage areas clearly and establish a rotation system for seasonal items.
Choose furniture with neutral designs that can adapt to changing tastes, and involve your child in the organization process to promote ownership and maintenance of their organized space.

