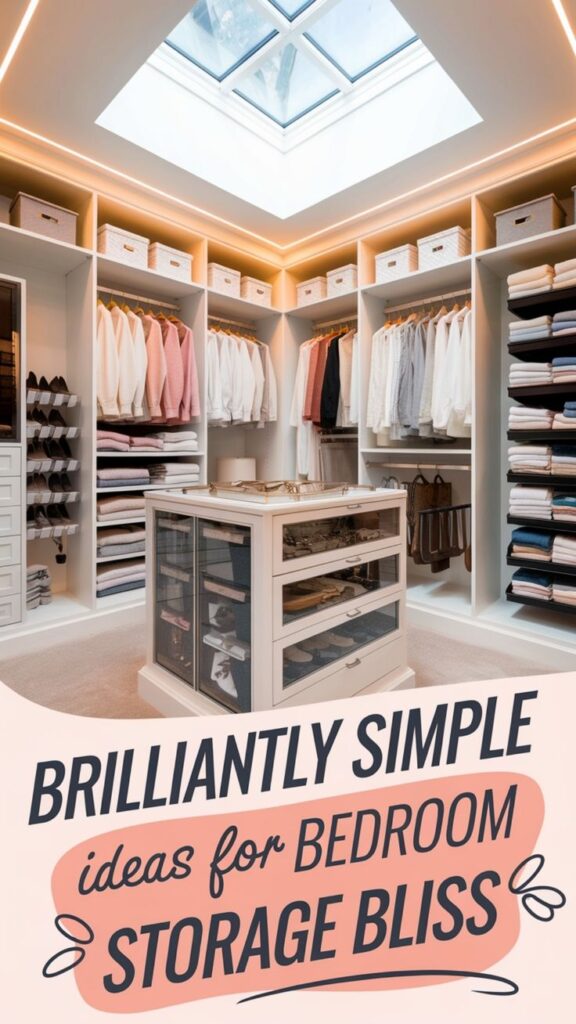
You’ve probably experienced that frustrating moment when you can’t find your favorite sweater buried somewhere in your cramped closet. Trust me, I’ve been there! But here’s the good news: transforming your bedroom storage doesn’t require a complete renovation or endless space. With these 12 clever organization tricks, you’ll discover how to double your storage capacity, keep clothes pristine, and create a system that actually stays organized. Ready to turn your clothing chaos into calm?
Utilize Under-Bed Storage Solutions
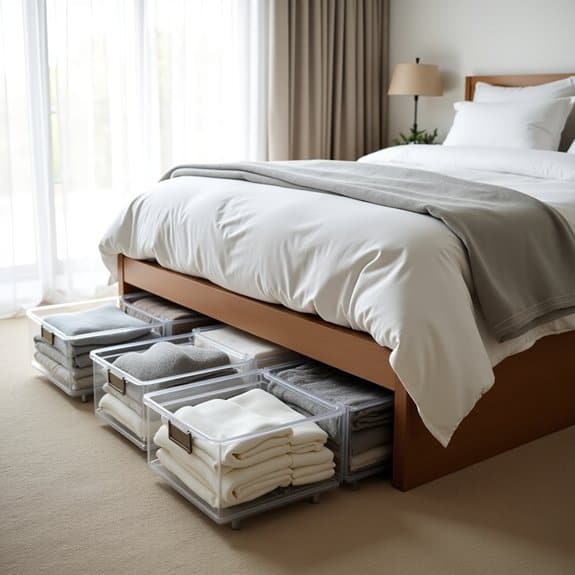
Making use of under-bed space represents one of the most overlooked yet valuable storage opportunities in any bedroom. This often-neglected area can provide substantial square footage for storing seasonal items, extra bedding, clothing, and other belongings that aren’t needed daily. Proper utilization of this space can dramatically increase your bedroom’s storage capacity without impacting its visual appeal.
Organizing under-bed storage effectively creates a systematic approach to accessing items while protecting them from dust and damage. When properly implemented, this storage solution can help maintain a clutter-free bedroom while keeping necessary items within easy reach, essentially turning dead space into functional storage real estate.
Required Items:
- Under-bed storage containers or drawers
- Measuring tape
- Bed risers (optional)
- Label maker or labels
- Dust-proof bags
- Vacuum storage bags
- Clear plastic bins
- Drawer dividers
- Rolling carts (optional)
- Anti-dust covers or sheets
Start by measuring the available space under your bed, including height, width, and depth. Select appropriate storage containers that maximize the space while allowing easy sliding in and out.
Sort items into categories: seasonal clothing, extra bedding, shoes, or memorabilia. Use vacuum storage bags for soft items like blankets and clothing to maximize space efficiency. Position frequently accessed items toward the bed’s edges for easier retrieval, while long-term storage can go toward the center.
For optimal organization, create a detailed inventory of stored items and attach labels to each container. Consider using clear containers or taking photos of contents to easily identify items without pulling everything out. If using multiple containers, establish a systematic arrangement – perhaps seasonal items on one side and everyday items on the other.
Additional Tips: Install small wheels on storage containers for smoother access, and consider creating a map of your under-bed storage layout to remember where specific items are located. Use cedar blocks or lavender sachets to keep stored items fresh, and schedule bi-annual cleaning and reorganizing sessions to maintain the system’s efficiency. Regular maintenance prevents the space from becoming a catch-all for forgotten items.
Install Double-Hanging Closet Rods
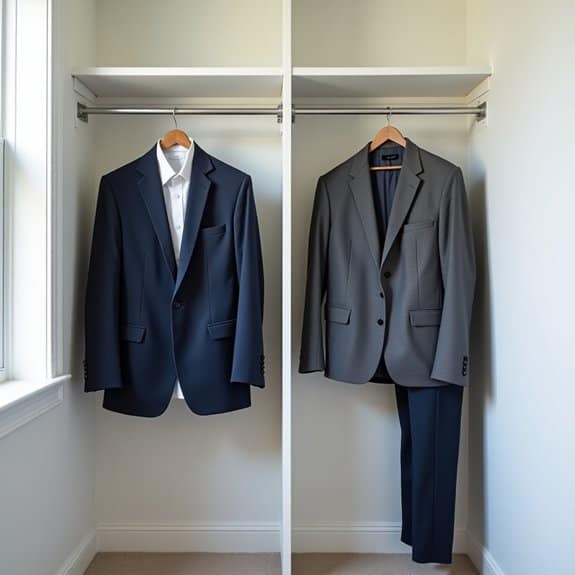
Maximizing closet space is crucial in any bedroom, and double-hanging closet rods present one of the most effective solutions for instantly doubling your hanging storage capacity. This simple modification can transform a cluttered, cramped closet into an efficiently organized space that accommodates twice the amount of clothing while maintaining easy accessibility.
The double-rod system works particularly well for separating different types of clothing, such as hanging shirts on the top rod and pants or skirts on the bottom. This separation creates a natural organization system that makes it easier to locate specific items and maintains a neater appearance in your closet space.
Required Tools and Materials:
- Measuring tape
- Pencil
- Level
- Power drill
- Screwdriver
- Wall anchors
- Mounting brackets
- Closet rods (preferably adjustable)
- Screws
- Stud finder
- Safety goggles
Begin by measuring your closet’s width and marking the desired height for both rods. The top rod should be positioned approximately 80 inches from the floor, while the bottom rod should be about 40 inches from the floor. Use a stud finder to locate wall studs and mark their positions.
Install the mounting brackets for the top rod first, ensuring they’re level and securely fastened to the wall studs or using appropriate wall anchors. Once the top rod is secure, repeat the process for the bottom rod, maintaining proper alignment with the upper rod.
For optimal organization, consider grouping clothes by category and length. Shorter items like shirts, jackets, and folded pants work well on both rods, while longer items like dresses and coats should be reserved for the top rod. Ensure there’s adequate spacing between the rods to prevent clothes from touching or becoming wrinkled.
Additional Tips: Invest in matching slim hangers to maximize space and create a uniform look. Consider installing rod-mounted hooks or sliding organizers for accessories like belts and scarves. Leave a few inches of space at either end of the rods for easy movement of hangers, and periodically check the bracket screws to ensure they remain tight and secure.
Create a Seasonal Rotation System

A seasonal rotation system is essential for maximizing bedroom storage space and maintaining an organized, clutter-free environment. By systematically cycling clothing and accessories based on the current season, you can free up valuable closet and drawer space while ensuring easy access to items you actually need.
Implementing this system not only streamlines your daily routine but also helps preserve your clothing by storing off-season items properly. This approach prevents overcrowding in your primary storage areas and makes it easier to assess your wardrobe needs throughout the year.
Required Items:
- Storage bins with secure lids
- Vacuum storage bags
- Cedar blocks or lavender sachets
- Labels and marker
- Inventory checklist
- Clean cotton sheets or garment bags
- Storage containers in various sizes
- Moisture absorbers
- Heavy-duty tape
- Climate-controlled storage space
The rotation process begins with a thorough assessment of your current wardrobe. Sort items into seasonal categories, considering your climate and lifestyle needs.
Pack away off-season clothing in vacuum storage bags to maximize space and protect against moisture and insects. Label each container clearly with contents and season, and maintain an inventory list for easy reference.
Store packed items in a clean, dry space such as under-bed storage, high closet shelves, or a separate storage area. When transitioning between seasons, inspect all items for damage or wear, clean them thoroughly before storing, and consider donating pieces you haven’t worn in the past year.
Arrange the current season’s items in your primary closet space, organizing by color, type, or frequency of use. For optimal results, schedule your seasonal rotation during traditional transition periods (spring/fall) and allow sufficient time to properly clean and organize items.
Keep a small selection of transitional pieces accessible year-round, and regularly update your inventory list to track what you own and what you might need for the upcoming season. Consider taking photos of stored items to remember what you have in storage without unpacking everything.
Maximize Door Space With Over-Door Organizers
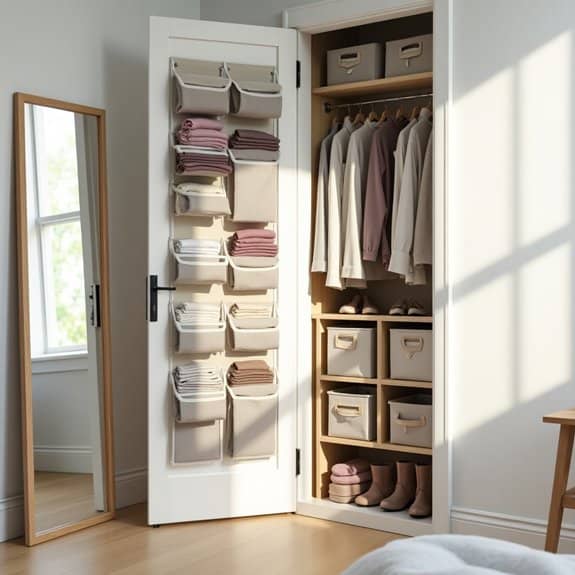
Making the most of vertical space is crucial in any bedroom, and doors represent a largely untapped storage opportunity. Over-door organizers transform this overlooked area into valuable storage real estate, providing easy access to frequently used items while keeping them off valuable floor or drawer space.
Door storage solutions are particularly beneficial in smaller bedrooms or shared living spaces where every square inch counts. These organizers can accommodate everything from shoes and accessories to toiletries and clothing items, effectively creating a custom storage system that works with your existing space rather than demanding additional room.
Required Items:
- Over-door hooks or hanging rack
- Over-door shoe organizer (clear plastic or fabric)
- Over-door mirror with storage
- Command hooks or mounting hardware
- Measuring tape
- Level
- Storage bins or baskets (if needed)
- Labels
- Tension rods (optional)
Start by measuring your door’s dimensions, including thickness, to ensure proper fit of your chosen organizers. Remove the door from its hinges if necessary to install any permanent mounting hardware. Position the main over-door organizer, ensuring it doesn’t interfere with door closure.
For maximum efficiency, arrange items by frequency of use, keeping daily essentials at eye level and less-used items toward the bottom. If using multiple organizers, layer them strategically. Install a mirror with storage at eye level, position shoe organizers below, and utilize any remaining space with additional hooks or small shelving units.
Consider using clear organizers on the room-facing side for aesthetics and fabric organizers on the closet-facing side for additional storage. For optimal organization maintenance, regularly assess stored items and rotate them based on seasonal needs.
Consider using compression bags for soft items to maximize pocket space, and install small tension rods within larger pockets to create additional dividers. Label each section clearly to maintain organization and ensure family members can easily maintain the system.
Remember to periodically check that all mounting hardware remains secure, especially for heavier items.
Implement the KonMari Folding Method
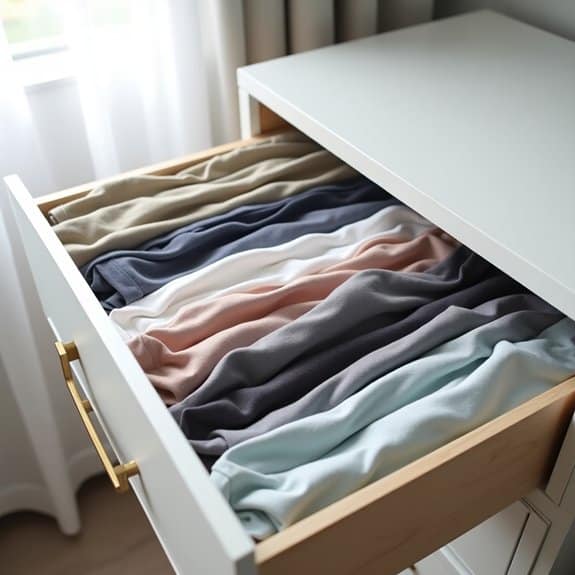
The KonMari folding method revolutionizes how we store clothing in drawers and closets, transforming cluttered spaces into orderly, accessible storage solutions. This vertical folding technique, developed by Marie Kondo, allows you to see all your clothes at once, preventing items from being forgotten at the bottom of drawers or behind other garments.
When properly implemented, this method can reduce the space needed for clothing storage by up to 50%, while simultaneously making it easier to maintain organization long-term. The vertical storage approach not only maximizes space but also helps preserve the quality of your clothes by preventing unnecessary wrinkles and creases.
Required Items:
- Flat surface for folding
- Clean drawers or storage boxes
- Drawer dividers or small boxes (optional)
- Clothing categories sorted (tops, bottoms, undergarments)
- Timer for practicing folding techniques
- Measuring tape (optional)
The KonMari folding method follows a specific sequence of steps for each clothing type. For t-shirts and tops, lay the garment flat and fold both sides toward the center, creating a rectangle. Then fold the sleeves in, maintaining the rectangular shape. Finally, fold the rectangle into thirds or quarters (depending on drawer height), ensuring it can stand upright.
For pants, fold them in half lengthwise, then fold from the bottom up in thirds or quarters. Undergarments follow similar principles but may require smaller folds based on their size.
Once mastering the basic folds, arrange items vertically in your drawers, similar to filing documents. Place heavier items toward the back of the drawer and lighter ones toward the front. Use drawer dividers or small boxes to maintain the vertical arrangement and prevent items from falling over. Each category of clothing should have its designated space, making it easy to maintain the system long-term.
To ensure lasting success with the KonMari folding method, practice the folding techniques regularly until they become second nature. Start with a small category of clothing and gradually expand to your entire wardrobe. Regularly assess the organization system and adjust as needed, removing items that no longer serve you. Consider seasonal rotation of clothes to maintain manageable drawer contents and prevent overcrowding.
Add Clear Storage Bins for Accessories
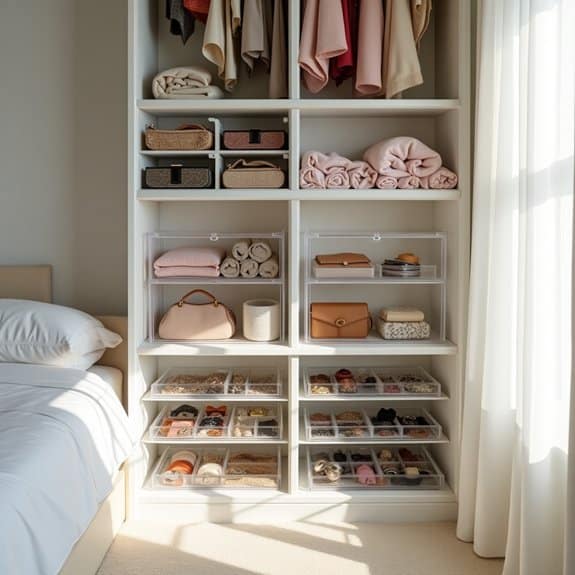
Organizing accessories in clear storage bins transforms a cluttered bedroom into an efficient, visually appealing space. When accessories are scattered across dresser tops, nightstands, or tucked away in various drawers, finding the right item becomes a daily challenge that wastes precious time and can lead to damaged or lost pieces.
Clear storage bins revolutionize accessory organization by providing visibility, protection, and systematic arrangement of items. This system allows you to quickly locate what you need while keeping similar items grouped together, making your morning routine smoother and helping maintain order in your bedroom space.
Required Items:
- Various sizes of clear plastic storage bins
- Drawer dividers or small compartment organizers
- Labels and label maker
- Dust-proof lids
- Measuring tape
- Anti-slip drawer liner
- Small fabric pouches
- Silica gel packets
Begin by sorting accessories into categories such as jewelry, scarves, belts, hair accessories, and small handbags. Select appropriately sized clear bins for each category, ensuring they fit your storage space dimensions. Place larger accessories like scarves and belts in deeper bins, while utilizing smaller compartmentalized containers for jewelry and hair accessories. Position frequently used items in easily accessible locations.
For jewelry organization, insert drawer dividers or small compartment organizers inside the clear bins to prevent items from tangling or scratching. Line the bottom of each bin with anti-slip material to keep items in place. For delicate pieces, use small fabric pouches before placing them in the bins to prevent tarnishing.
Additional Tips: Incorporate silica gel packets in each bin to prevent moisture damage, and implement a seasonal rotation system by storing off-season accessories in labeled bins on higher shelves. Review and declutter your accessory collection quarterly to maintain organization and prevent overflow.
Consider using stackable bins to maximize vertical space and maintain a clean, uncluttered appearance.
Design a Custom Drawer Organization System
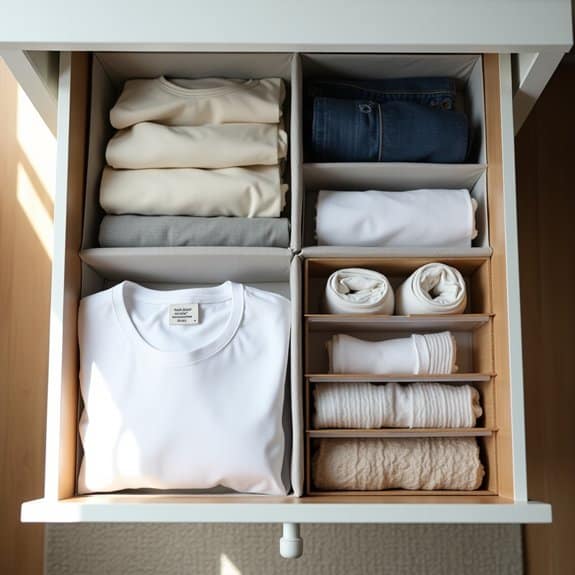
A well-organized drawer system serves as the foundation for an efficiently managed bedroom. When drawers are properly organized, finding specific items becomes effortless, saving valuable time during daily routines and reducing the stress of searching through cluttered spaces.
Custom drawer organization transforms chaotic storage spaces into systematic, user-friendly compartments that maintain order long-term. This personalized approach ensures that every item has a designated place, maximizing storage capacity while keeping belongings easily accessible and visible at a glance.
Required Items:
- Drawer dividers (adjustable or fixed)
- Small storage boxes or containers
- Drawer liner material
- Measuring tape
- Scissors
- Labels or label maker
- Organizing bins in various sizes
- Drawer organizer trays
- Clear storage containers
Start by removing all items from the drawers and sorting them into categories based on type, frequency of use, and size. Measure the interior dimensions of each drawer, accounting for both depth and width.
Install drawer liners to protect the surface and prevent items from sliding. Position drawer dividers or organizer trays according to your measurements, creating designated zones for different categories of items.
For clothing drawers, implement the file-folding method, storing items vertically rather than stacked. Use smaller containers or organizing bins within larger drawers to separate accessories, undergarments, or smaller items.
Position frequently used items at the front of drawers for easy access, while seasonal or less-used items can be stored toward the back.
Label each section clearly to maintain the system long-term. Consider using clear containers to easily identify contents.
Review and adjust the organization system after a few weeks of use, refining the layout based on daily habits and needs. Regular maintenance, including periodic decluttering and reorganizing, will ensure the custom drawer system continues to function effectively while adapting to changing storage needs.
Build Vertical Storage With Wall-Mounted Units
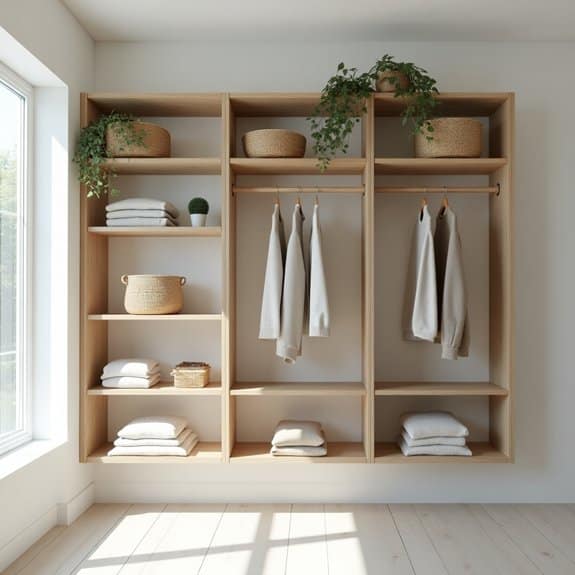
Maximizing vertical space in bedrooms has become increasingly important, especially in urban living where square footage is at a premium. Wall-mounted storage units offer a practical solution by utilizing otherwise unused wall space while keeping the floor area clear and creating a more spacious feel in the room.
Wall-mounted storage not only provides functional organization but also serves as an opportunity to create an aesthetically pleasing display. These units can accommodate everything from books and decorative items to clothing and accessories, making them versatile additions to any bedroom setup.
Required Items:
- Wall-mounted shelving units
- Stud finder
- Level
- Drill and drill bits
- Anchors and screws
- Measuring tape
- Pencil
- Screwdriver
- Storage baskets or bins
- Wall brackets
- Safety goggles
- Dust sheets
Begin the installation process by using a stud finder to locate and mark wall studs. Measure and mark the desired height and spacing for your storage units, ensuring they’re positioned at comfortable reaching distances.
Use a level to draw straight lines where the units will be mounted. Install wall brackets or mounting hardware into the studs using appropriate screws, or use heavy-duty wall anchors for sections without stud support.
Once the main mounting hardware is secure, attach the storage units according to manufacturer specifications. Start with larger units at the bottom and work your way up, maintaining proper spacing between each level. Test the strength of each unit before loading items onto the shelves.
For optimal organization and longevity, avoid overloading the units beyond their weight capacity. Use matching storage containers or baskets to create a cohesive look, and consider installing adjustable shelving options to accommodate changing storage needs over time.
Regularly inspect the mounting hardware and tighten any loose components to ensure long-term stability and safety.
Incorporate Space-Saving Hangers

The way clothes are hung in a closet can make a significant difference in storage capacity and accessibility. Traditional hangers often waste valuable space and can cause clothing to become wrinkled or misshapen over time. By implementing space-saving hangers, closet space can be maximized by up to 50%, creating room for additional items while keeping clothing in better condition.
Space-saving hangers, with their slim profiles and innovative designs, revolutionize closet organization by allowing garments to hang closer together while maintaining proper spacing for air circulation. These specialized hangers also help prevent clothing from slipping off and falling to the floor, reducing the time spent reorganizing and re-hanging items.
Required Items:
- Velvet-coated slim hangers
- Cascading hooks or wonder hangers
- Multi-tiered pants hangers
- Vertical shirt hangers
- Storage boxes for old hangers
- Sorting bins
- Donation bag
- Label maker
Start by removing all clothing from the closet and sorting items by category (shirts, pants, dresses, etc.). Replace traditional hangers with velvet-coated slim hangers, ensuring all hangers match for a uniform look and maximum space efficiency.
For frequently worn items, use cascading hooks to create vertical storage solutions that maximize vertical space while keeping clothing easily accessible. Implement multi-tiered hangers for pants and skirts, allowing multiple garments to hang in the space typically occupied by one item.
Group similar items together on specialized hangers, such as using vertical shirt hangers for button-downs or cascading hangers for tank tops and lightweight items. Arrange clothing by category and color, ensuring the most frequently worn items are placed at eye level and easily accessible.
Consider implementing a front-facing system where hangers are placed backward after use to track wearing frequency.
For optimal results, maintain organization by immediately hanging clean clothes on appropriate hangers and regularly assessing the effectiveness of different hanger types for specific garments.
Consider seasonal rotation of clothing and invest in additional specialized hangers as needed to accommodate different types of garments. Remove empty hangers promptly and store them in a designated area to prevent cluttering the closet space.
Set Up a Clothing Category Zone System
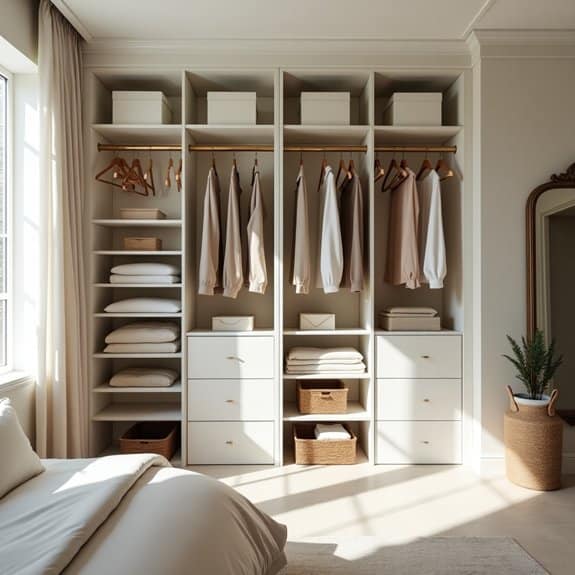
Creating an effective clothing category zone system transforms a chaotic bedroom into a functional, boutique-like space where every item has its designated place. This organizational method not only saves time during daily routines but also helps maintain order long-term by establishing clear boundaries for different types of clothing.
When clothes are organized by category zones, decision-making becomes effortless, and the morning rush becomes more manageable. This system prevents clothes from migrating to wrong spaces and makes it easier to track what you own, reducing unnecessary purchases and maximizing your wardrobe’s potential.
Required Items:
- Closet rod dividers
- Storage bins or boxes
- Labels or label maker
- Hangers (matching set recommended)
- Drawer organizers
- Shelf dividers
- Measuring tape
- Storage baskets
- Space-saving hooks
Start by removing all clothing items and sorting them into major categories: work wear, casual clothes, formal attire, seasonal items, and accessories. Measure your available closet and drawer space, then designate specific zones for each category based on frequency of use and the amount of space needed.
Install closet rod dividers to create distinct sections, and use drawer organizers to separate smaller items within each category. Place frequently worn items at eye level and within easy reach. Work clothes should occupy prime real estate if used daily, while seasonal or special occasion items can be stored in higher or lower zones.
Utilize vertical space by installing hooks for bags and belts, and implement shelf dividers to maintain neat stacks of folded items. Maximize organization success by implementing a one-in-one-out rule for each category zone, preventing overflow and maintaining the system’s integrity.
Color-code hangers or labels for different categories to make the system more intuitive, and perform monthly quick assessments to ensure items haven’t drifted from their designated zones. Consider keeping a small donation box nearby to regularly purge items that no longer serve your needs, maintaining the efficiency of your category zone system.
Install Pull-Out Closet Organizers

Maximizing closet space has become increasingly important in modern homes where storage is often at a premium. Pull-out closet organizers represent a game-changing solution that transforms traditionally cramped, hard-to-reach spaces into easily accessible storage areas while significantly increasing the usable space in your closet.
These innovative systems allow you to organize clothing, accessories, and personal items in a way that makes them instantly visible and reachable. By installing pull-out organizers, you can eliminate the frustration of digging through piles of clothes or losing items in the depths of your closet, ultimately saving time during your daily routine.
Required Items:
- Pull-out closet organizer kit
- Power drill
- Screwdriver
- Level
- Measuring tape
- Pencil
- Mounting brackets
- Screws and anchors
- Wire cutters (if removing existing wire shelving)
- Safety glasses
- Work gloves
The installation process begins with removing any existing shelving or hanging rods from your closet space. Measure the width, height, and depth of your closet carefully, marking the locations where the mounting brackets will be installed.
Install the vertical mounting brackets first, ensuring they’re perfectly level and securely anchored into wall studs. Next, attach the horizontal support rails according to your chosen organizer system’s specifications. Finally, mount the pull-out components – drawers, shelves, or hanging rods – onto the rails, testing each one to ensure smooth operation.
For clothing organization, install multiple levels of pull-out rods at different heights to maximize hanging space. If including drawers, position them at waist level for easiest access, with shelving units above and below. Ensure all components are securely fastened and tested for weight capacity before loading them with items.
Additional Tips: Consider installing LED strip lighting on the underside of shelves to illuminate darker corners when drawers are pulled out. Label each drawer or section clearly to maintain organization long-term, and leave some space for future additions or seasonal rotation of clothing.
Regular maintenance of the sliding mechanisms, including cleaning and lubricating as needed, will ensure smooth operation and longevity of your pull-out organizer system.
Create a Dedicated Shoe Storage Area
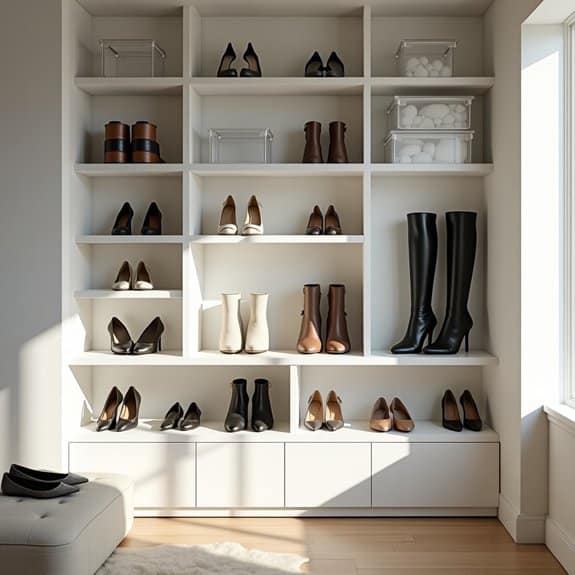
A dedicated shoe storage area in your bedroom is essential for maintaining order and protecting your footwear investment. Scattered shoes not only create visual clutter but can also lead to damaged shoes, lost pairs, and wasted time searching for specific footwear when you’re trying to get ready.
Creating an organized shoe storage system transforms your bedroom into a more functional space while extending the life of your shoes through proper storage and care. A well-planned shoe storage area also makes it easier to assess your collection, rotate seasonal footwear, and maintain a clutter-free floor space.
Required Items:
- Shoe rack or shelving unit
- Clear plastic shoe boxes
- Label maker or labels
- Measuring tape
- Dust bags for delicate shoes
- Boot shapers or clips
- Dehumidifier sachets
- Cleaning supplies
- Storage bench (optional)
- Over-door organizer (optional)
Start by measuring your designated storage area and selecting an appropriate storage solution that fits your space and shoe collection size. Sort your shoes by category (formal, casual, athletic) and season, discarding or donating any worn-out or unused pairs.
Clean each pair thoroughly before placing them in storage, using appropriate cleaning products for different materials. For optimal organization, store frequently worn shoes in easily accessible locations, while seasonal or special occasion footwear can be placed in clear boxes on higher shelves.
Install boot shapers in tall boots to maintain their shape, and use dust bags for delicate or expensive shoes. Position shoes facing alternate directions to maximize space efficiency, and consider using vertical storage solutions like over-door organizers for additional capacity.
To maintain your organized shoe storage system, implement a one-in-one-out rule when purchasing new shoes, regularly clean and assess your collection, and use dehumidifier sachets to prevent moisture damage.
Consider installing a small mirror near your shoe storage area to make outfit coordination easier, and keep basic shoe care supplies nearby for quick touch-ups and maintenance.


