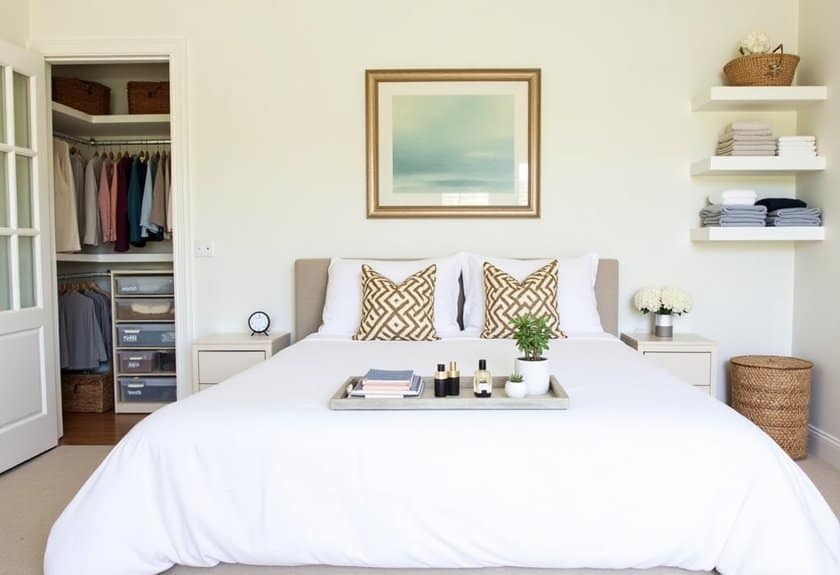
You’re about to transform your bedroom from a chaotic catch-all into a peaceful retreat that’ll make you smile every time you walk in. I’ve spent years perfecting these organization techniques, and I’ll tell you what really works (and what’s just Pinterest fantasy). Whether you’re dealing with a tiny space or a master suite, these 20 expert tips will help you create the organized oasis you’ve been dreaming of. Let’s start with the game-changing first step that most people skip!
Start With a Clean Slate: The Power of Decluttering
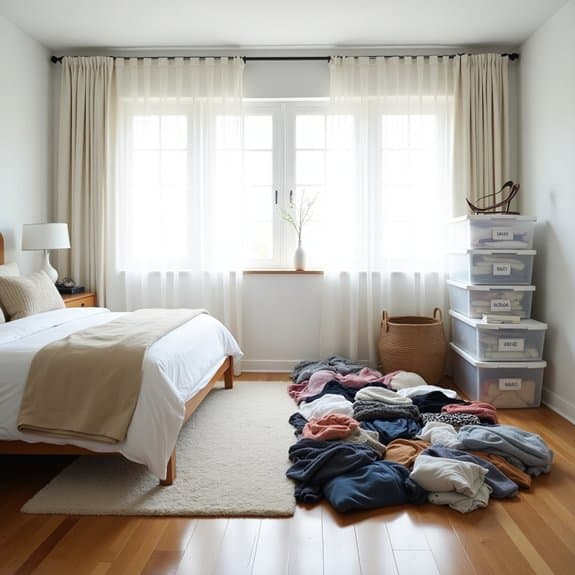
A cluttered bedroom creates mental chaos and disrupts sleep quality. When items pile up and storage becomes disorganized, the space meant for rest and rejuvenation transforms into a source of stress and anxiety. Decluttering serves as the foundation for any successful bedroom organization system, allowing you to assess your space and belongings with clarity.
Starting with a clean slate through decluttering not only creates physical space but also helps establish new habits and systems for maintaining an organized bedroom. This process requires honest evaluation of possessions and a willingness to let go of items that no longer serve a purpose, allowing you to build an environment that promotes relaxation and efficiency.
Required Items:
- Large boxes or bins (3-4)
- Trash bags
- Labels or marker
- Storage containers
- Cleaning supplies
- Timer
- Notepad and pen
- Storage bags for clothes
- Donation bags
Begin the decluttering process by removing everything from surfaces, drawers, and closets. Sort items into four categories: keep, donate, trash, and relocate. Examine each item carefully, considering its utility, emotional value, and frequency of use. Items that haven’t been used in the past year should be seriously evaluated for removal.
Once sorting is complete, thoroughly clean all surfaces, drawers, and storage areas before returning items to their designated spaces. Group similar items together and ensure frequently used items are easily accessible. Create designated zones for different categories of belongings, such as clothing, accessories, and personal items.
Maintain momentum by implementing a “one-in-one-out” rule for future purchases and schedule regular mini-decluttering sessions every few months. Consider investing in proper storage solutions for items you’re keeping, and document your organized spaces with photos to serve as reference points for maintaining the system you’ve created.
Create Designated Zones for Different Activities
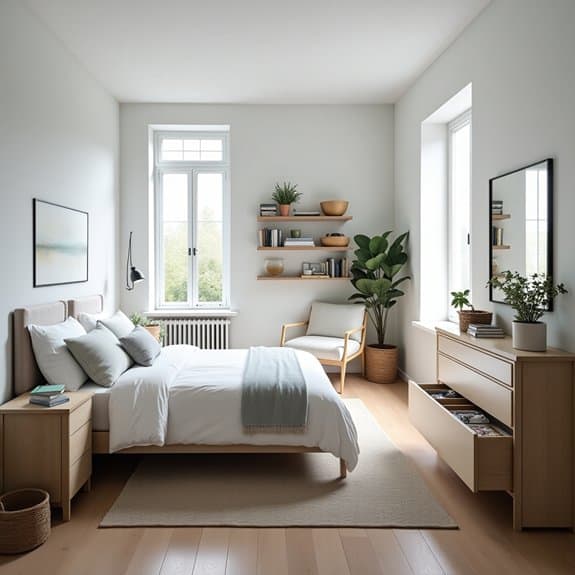
Creating distinct zones in your bedroom transforms it from a simple sleeping space into a multi-functional sanctuary that serves various aspects of your daily life. When each activity has its dedicated area, you naturally maintain better organization and experience less stress from clutter and disorganization.
Proper zone designation allows you to mentally shift between activities – from working to relaxing, from dressing to reading – while keeping necessary items for each task readily accessible and contained. This systematic approach prevents items from different activities from mixing and creating chaos in your space.
Required Items:
- Room dividers or screens
- Storage containers
- Desk or work surface
- Comfortable seating
- Lighting options
- Storage bins or baskets
- Labels
- Drawer organizers
- Small storage furniture
- Area rugs (optional)
Start by identifying the activities you regularly perform in your bedroom, such as sleeping, dressing, reading, working, or exercising. Measure your room and sketch a basic floor plan, allocating space for each zone based on the frequency of use and importance.
Position your bed first, then work outward to establish other zones. Place storage furniture and organizers strategically within each zone to house related items. Ensure proper lighting for each area – bright task lighting for work zones, soft ambient lighting for relaxation areas.
Consider traffic flow when positioning furniture and creating zones. Leave clear pathways between areas and avoid overcrowding. Keep frequently used items at eye level or easily accessible within their designated zones. Use vertical space with wall-mounted storage or tall furniture to maximize floor space, particularly in smaller rooms.
To maintain the effectiveness of your zones, implement a “return to zone” rule where items must be returned to their designated areas after use. Use drawer organizers, bins, and labels within each zone to maintain micro-organization.
Regularly assess the functionality of your zones and adjust the layout if certain areas aren’t working as intended. Remember that zones can be defined subtly through furniture arrangement and lighting, without requiring physical barriers or room dividers.
Maximize Under-Bed Storage Space
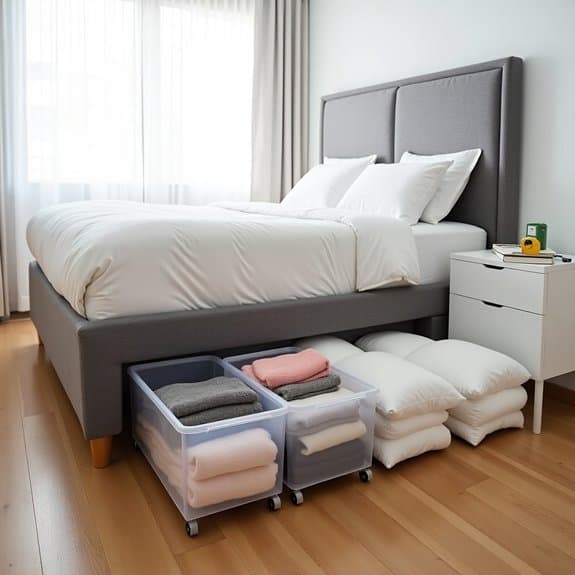
Under-bed storage represents one of the most underutilized spaces in the bedroom, offering vast potential for storing seasonal items, extra bedding, and rarely-used possessions.
This often-forgotten area can provide valuable square footage in your bedroom, effectively doubling your storage capacity without taking up any visible space in the room.
Making the most of under-bed storage requires strategic planning and the right storage solutions. When properly organized, this space can help maintain a clutter-free bedroom while keeping important items easily accessible and protected from dust and debris.
Required Items:
- Under-bed storage containers or drawers
- Bed risers (if needed)
- Measuring tape
- Labels
- Vacuum storage bags
- Anti-dust covers
- Drawer dividers
- Clear plastic bins
- Storage bags with handles
Start by measuring the height, width, and depth of your under-bed space, accounting for any bed frame structures that might limit access.
Clear out the area completely and vacuum thoroughly. Sort items you plan to store by category, prioritizing seasonal items and things you don’t need frequent access to.
Select storage containers that maximize the available space while allowing easy sliding in and out. For soft items like clothing or bedding, use vacuum storage bags to compress them and save space.
When placing items under the bed, position frequently accessed items toward the foot or sides of the bed for easier reach.
Create a storage map noting where specific items are located, and label all containers clearly on multiple sides. If using multiple containers, consider installing wheels on them for smoother access.
For items requiring extra protection, use anti-dust covers or sealed plastic bins.
For optimal organization maintenance, conduct seasonal reviews of under-bed storage, rotating items as needed and reassessing storage solutions.
Consider using bed risers to create additional height if needed, and install motion-sensor lights to illuminate the space when accessing items.
Keep a small handheld vacuum nearby for regular cleaning, and maintain clear pathways to all storage containers to ensure easy access when needed.
Install a Proper Closet Organization System
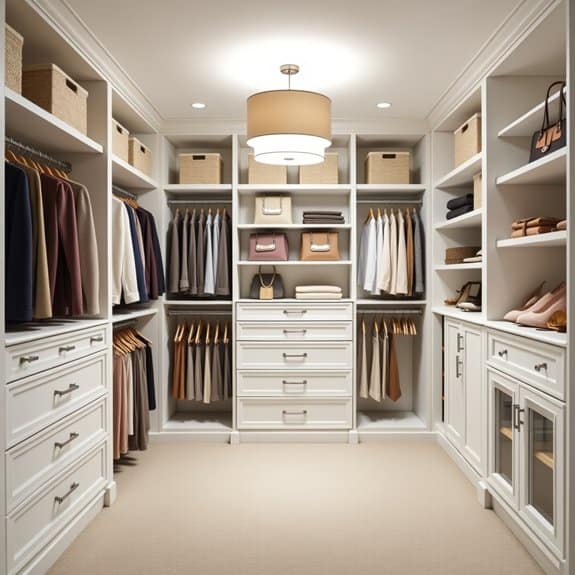
A well-organized closet serves as the foundation for a clutter-free bedroom and a streamlined morning routine. When clothes, accessories, and belongings have designated spaces, you eliminate the daily stress of searching for items and maintain order more effectively.
Installing a proper closet organization system transforms a basic storage space into a functional, customized solution that maximizes every inch of available space. This investment not only increases your storage capacity but also helps protect your clothing and accessories while making them more accessible.
Required Items:
- Measuring tape
- Level
- Drill and drill bits
- Screwdriver
- Wall anchors
- Closet system components (rods, shelves, drawers)
- Wire baskets or bins
- Hangers (matching set)
- Storage boxes
- Labels
- Pencil
- Stud finder
Start by removing everything from your closet and measuring the space carefully, including height, width, and depth. Draw a detailed plan considering your specific storage needs, such as the ratio of hanging space to shelving.
Install the main support brackets into wall studs, ensuring they’re perfectly level. Mount horizontal rails first, followed by vertical standards. Add customizable components like shelves, drawers, and rods according to your plan.
Work systematically to install additional organizational elements such as shoe racks, belt hooks, and accessory drawers. Position frequently used items at eye level, with seasonal or less-used items stored higher up or lower down.
Consider installing motion-sensor lighting to illuminate dark corners and make items more visible.
Additional Tips: Maintain flexibility in your system by installing adjustable components that can be modified as your storage needs change. Use slim, uniform hangers to maximize space and prevent clothing damage.
Install hooks on the back of the closet door for robes or frequently worn items, and consider adding a full-length mirror for convenience. Regular maintenance of the hardware ensures the longevity of your organization system.
Master the Art of Drawer Organization
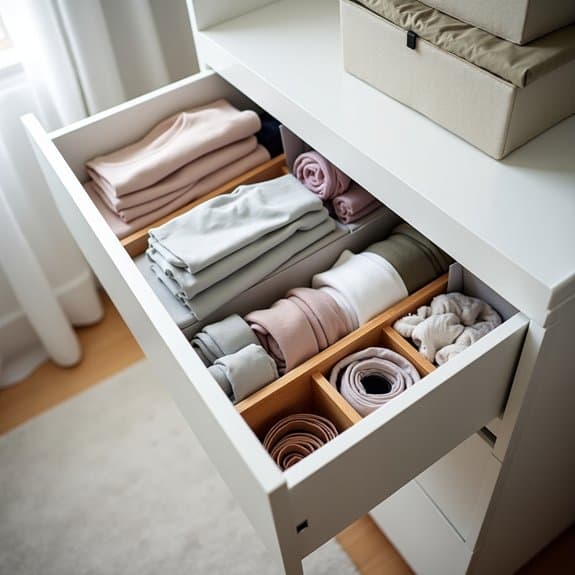
Well-organized drawers serve as the foundation of an efficient bedroom storage system. When drawers are properly arranged, finding clothing and accessories becomes effortless, saving valuable time during daily routines and reducing the stress of searching for specific items.
Drawer organization transforms chaotic spaces into functional storage solutions that maintain order long-term. By implementing proper organization techniques, you can maximize available space, protect your belongings, and create a system that’s easy to maintain while keeping your items visible and accessible.
Required Items:
- Drawer dividers
- Storage bins or boxes
- Drawer liner
- Measuring tape
- Labels
- Folding board
- Storage bags
- Declutter bin
- Cleaning supplies
Empty all drawers completely and clean them thoroughly. Sort items into categories such as undergarments, socks, t-shirts, and accessories. Measure drawer dimensions and install appropriate drawer dividers or organizers to create designated spaces for each category.
Implement the file folding method for clothing, placing items vertically rather than stacked, allowing for better visibility and access. Position frequently used items at the front of drawers and seasonal items toward the back.
For smaller items like socks and accessories, use small containers or divided organizers to prevent items from mixing. Arrange items by color, size, or frequency of use within their designated sections. Install drawer liners to protect both the drawer and its contents while keeping items in place.
Label sections clearly if needed, especially for shared spaces or multiple drawer units.
Additional Tips: Conduct regular maintenance checks every three months to prevent reverting to disorganization. Remove items that haven’t been used in the past year. Consider using vacuum storage bags for seasonal items to maximize space.
Rotate clothing seasonally, keeping current-season items in prime drawer locations. Always fold and store items immediately after laundering to maintain the organizational system.
Utilize Vertical Wall Space Effectively
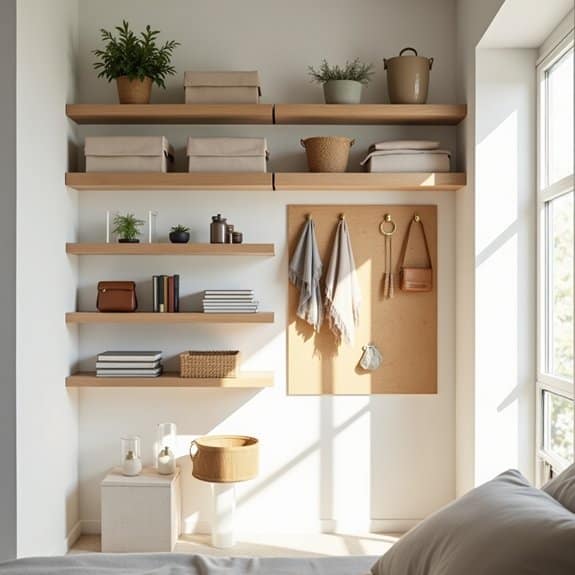
Making the most of vertical wall space is essential in modern bedroom organization, particularly when floor space is limited. Vertical storage solutions can transform unused wall areas into functional storage zones while maintaining a clean, uncluttered appearance that promotes relaxation and calm in your sleeping space.
By thinking vertically, you can multiply your storage capacity without sacrificing precious floor space. Proper vertical organization not only creates additional storage but also adds visual interest to your bedroom walls, turning storage solutions into design elements that enhance your room’s overall aesthetic.
Required Items:
- Stud finder
- Level
- Drill and drill bits
- Wall anchors
- Screwdriver
- Measuring tape
- Pencil
- Floating shelves
- Wall-mounted hooks
- Pegboards
- Over-door organizers
- Mounting brackets
- Command strips or adhesive strips
Start by mapping out your wall space using a measuring tape and pencil, marking the locations of wall studs with a stud finder. Install floating shelves at varying heights, ensuring proper weight distribution and secure mounting to studs or wall anchors. Position frequently used items at eye level, with seasonal or less-used items stored higher up.
Create designated zones for different categories – decorative items at eye level, books and media slightly higher, and storage boxes on upper shelves.
Add versatility with a combination of storage solutions: mount pegboards for adaptable storage options, install hooks for hanging items like bags and accessories, and consider adding wall-mounted cabinets for items requiring concealment. Ensure all mounted items are secured properly using appropriate hardware and wall anchors, testing weight capacity before fully loading shelves or organizers.
To maximize your vertical organization system, rotate items seasonally and regularly assess the functionality of your layout. Keep heavier items at lower levels for safety and easier access.
Consider using clear storage containers on higher shelves to easily identify contents, and maintain some empty wall space to prevent a cluttered appearance. Label storage containers and zones to maintain organization long-term.
Choose Multi-Functional Furniture Pieces

Selecting multi-functional furniture for your bedroom is a game-changing strategy that maximizes both space and functionality. These versatile pieces serve multiple purposes, effectively reducing the number of separate furniture items needed while maintaining all essential bedroom functions. This approach is particularly valuable in smaller spaces but benefits rooms of any size.
In today’s compact living environments, every square foot matters, and multi-functional furniture has evolved to meet these demands with style and innovation. From beds with built-in storage to desk-dresser combinations, these pieces help maintain organization while eliminating clutter and creating a more streamlined living space.
Required Items:
- Measuring tape
- Floor plan or room dimensions
- List of storage needs
- Budget worksheet
- Furniture catalog or online resources
- Space planning app (optional)
- Camera or smartphone
- Notebook for dimensions and ideas
The process of choosing and implementing multi-functional furniture starts with assessing your specific needs. Measure your room’s dimensions carefully, including windows, doors, and any architectural features that might impact furniture placement.
Create a list of essential functions your bedroom must serve (sleeping, studying, storage, etc.). Research furniture pieces that combine these functions, such as ottoman beds with storage, murphy beds with built-in desks, or nightstands with charging stations and hidden compartments. Prioritize pieces that serve your most frequent activities while complementing your existing decor.
When selecting pieces, consider the flow of movement in your room and ensure furniture placement won’t obstruct daily activities. Choose items that can adapt to your changing needs over time, such as modular systems that can be reconfigured or expanded.
Install pieces according to manufacturer specifications, paying special attention to weight limits and stability requirements for convertible furniture. For optimal results, regularly assess how well your multi-functional pieces serve their intended purposes.
Keep instruction manuals for convertible furniture readily available, and perform periodic maintenance on moving parts. Consider seasonal adjustments to your furniture configuration to accommodate changing storage needs or activities throughout the year.
Remember that the most successful multi-functional spaces maintain a balance between utility and aesthetic appeal.
Implement the One-In-One-Out Rule
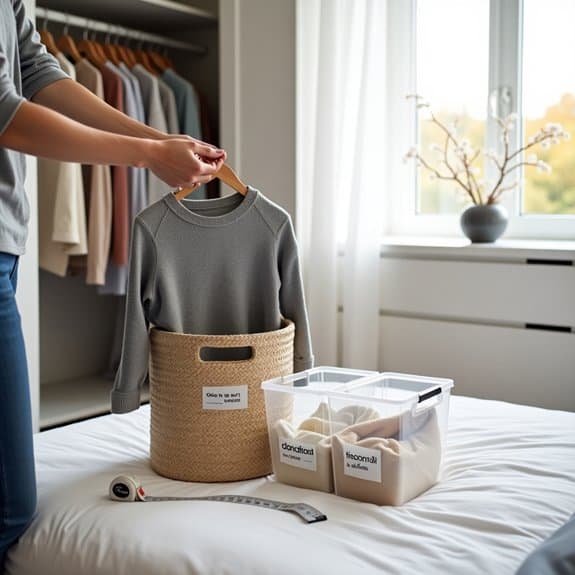
The One-In-One-Out Rule stands as a fundamental principle of maintaining an organized bedroom and preventing clutter accumulation. This simple yet powerful approach helps maintain balance in your living space by ensuring that your belongings don’t gradually overtake your room, leading to disorganization and stress.
When consistently applied, this organizational method creates a natural system of checks and balances for your possessions. It prevents overcrowding in closets, drawers, and storage spaces while encouraging mindful consumption habits. The rule helps establish a sustainable cycle of organization that becomes second nature over time.
Required Items:
- Donation box or bag
- Trash bag
- Storage containers
- Labels
- Notebook for inventory
- Cleaning supplies
- Storage bins
- Measuring tape
The implementation of the One-In-One-Out Rule begins with a thorough inventory of your current belongings. For every new item you bring into your bedroom, identify a similar item to remove through donation, sale, or disposal. This process requires creating designated spaces for outgoing items and maintaining a systematic approach to categorizing belongings.
When purchasing new items, immediately identify their older counterparts for removal, ensuring the balance remains constant. The rule applies across all bedroom categories – clothing, accessories, books, decorative items, and personal belongings. Create a staging area where outgoing items can be temporarily stored until they’re removed from your space.
Regular evaluation of your belongings helps maintain this system, making it easier to identify items that no longer serve a purpose or bring value to your life. To maximize success with the One-In-One-Out Rule, establish a monthly review system where you assess recent acquisitions and corresponding removals.
Keep a simple log of items entering and leaving your space, and set aside specific dates for processing outgoing items. This prevents the accumulation of items marked for removal and ensures the system remains effective long-term.
Organize Your Nightstand Like a Pro
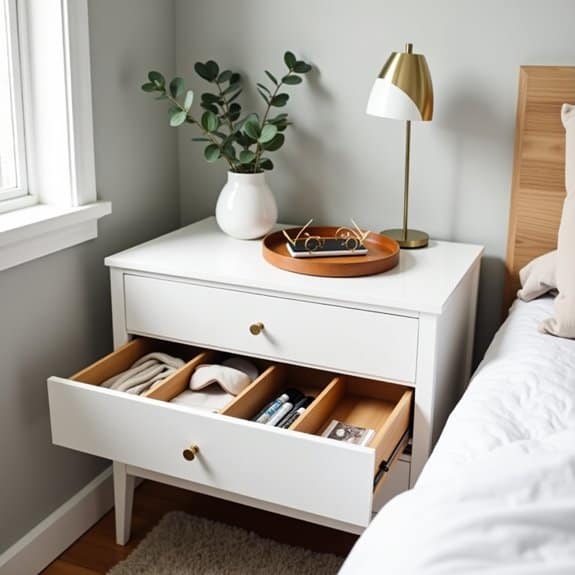
A well-organized nightstand is essential for creating a peaceful bedroom environment and ensuring easy access to nighttime necessities. This small but crucial space serves as command central for items you need before sleep and upon waking, making it one of the most frequently used surfaces in your bedroom.
When your nightstand is cluttered or disorganized, it can create stress and inefficiency at the most important times of your day. An organized nightstand not only looks aesthetically pleasing but also helps streamline your bedtime and morning routines, allowing you to start and end each day with clarity and purpose.
Needed Items:
- Drawer organizers or small containers
- Cleaning supplies
- Multi-compartment tray
- Small trash bin
- Storage boxes
- Drawer liners
- Label maker
- Disinfecting wipes
Start by removing everything from your nightstand drawers and surface. Clean all surfaces thoroughly with disinfecting wipes. Sort items into categories: daily essentials (reading glasses, remote controls, phone charger), occasional use items (books, magazines, hand cream), and unnecessary items to be relocated or discarded.
Install drawer liners and position drawer organizers to create designated spaces for different items. Place frequently used items in the top drawer or on the surface of the nightstand for easy access. Store occasional-use items in lower drawers, using small containers to prevent items from sliding around.
Position a small multi-compartment tray on top of the nightstand to corral daily essentials while maintaining a clean appearance. Keep only items used daily on the surface, and ensure charging cords are neatly wrapped and secured.
Additional Tips:
Review and reorganize your nightstand contents monthly to prevent clutter accumulation. Consider using a small desk lamp instead of a larger one to maximize surface space, and implement a “one in, one out” rule when adding new items. Keep a small trash bin nearby to dispose of tissues, receipts, or other items that might otherwise accumulate on the nightstand surface.
Design a Functional Wardrobe Layout
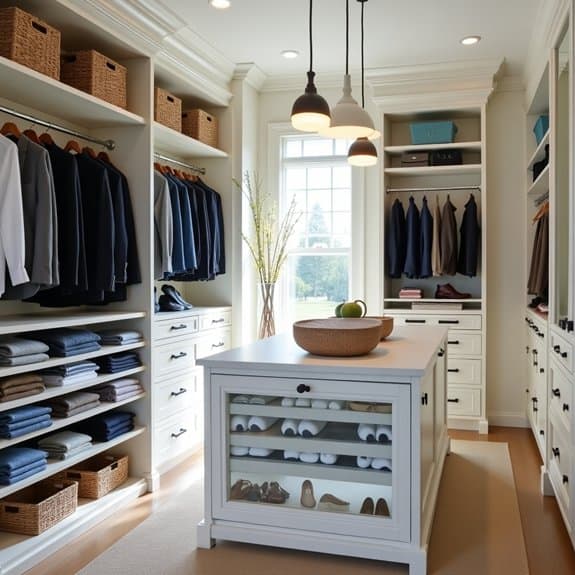
A well-organized wardrobe serves as the foundation for an efficient morning routine and a clutter-free bedroom. When clothes and accessories are strategically arranged, you can easily locate items, maintain their condition, and maximize available space, ultimately reducing stress and saving valuable time.
Creating a functional wardrobe layout requires careful planning and consideration of your specific needs and habits. The right organization system should accommodate your clothing collection while providing flexibility for seasonal changes and future additions, ensuring long-term sustainability of your organizational efforts.
Required Items:
- Measuring tape
- Hangers (uniform style)
- Drawer organizers
- Storage boxes
- Shelf dividers
- Clothing rod(s)
- Labels
- Storage hooks
- Baskets or bins
- LED lighting (optional)
Start by removing all items from your wardrobe and measuring the available space. Divide the wardrobe into distinct zones: hanging space for longer items like dresses and coats, double-hanging sections for shirts and pants, shelving for folded items, and drawers for smaller pieces.
Install adjustable rods at appropriate heights, ensuring adequate clearance for different clothing lengths. Position frequently used items at eye level and between shoulder and hip height for easy access.
Create designated areas for specific categories: work clothes, casual wear, formal attire, and accessories. Implement the “one in, one out” rule to maintain organization and prevent overcrowding. Use drawer organizers for smaller items like underwear and socks, and install hooks or specialized hangers for belts, scarves, and bags.
Consider incorporating pull-out storage solutions or rotating seasonal items to maximize space efficiency.
Additional Tips: Install adequate lighting to improve visibility and make color coordination easier. Leave some empty space for future additions and maintain breathing room between items to prevent wrinkles.
Review and adjust your organization system quarterly to ensure it continues meeting your needs and lifestyle changes. Consider using clear storage containers for seasonal items and maintaining a donation box for clothes that no longer serve you.
Set Up a Seasonal Rotation System
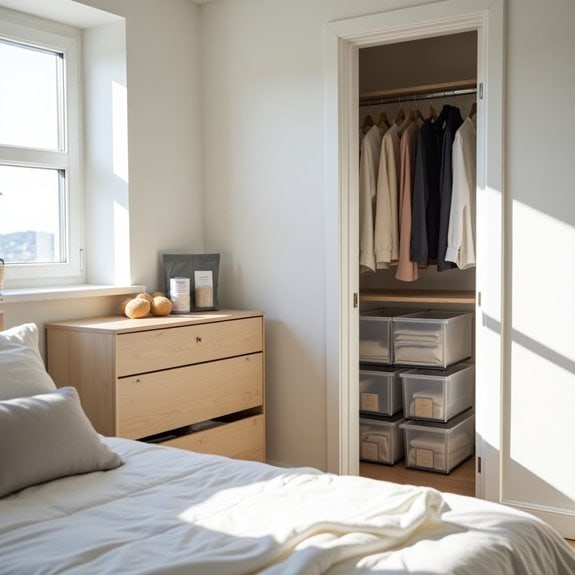
A seasonal rotation system is a fundamental organizing strategy that maximizes bedroom space while ensuring all your clothing and accessories remain accessible when needed. By rotating items based on the season, you can free up valuable closet and drawer space, reduce clutter, and better protect off-season items from damage or wear.
Implementing a seasonal rotation system transforms your bedroom from an overcrowded space into a well-organized, functional area that changes with the weather. This systematic approach not only makes daily dressing more efficient but also helps preserve the quality of your clothing and provides an opportunity to regularly assess your wardrobe.
Required Items:
- Storage containers with lids
- Vacuum storage bags
- Labels and marker
- Garment bags
- Cedar blocks or lavender sachets
- Storage bins or boxes
- Inventory list template
- Cleaning supplies
- Clothing rack
- Acid-free tissue paper
Start by sorting all clothing and accessories into seasonal categories. Remove items from your closet and drawers, creating distinct piles for each season. Thoroughly clean and inspect each item before storage, addressing any repairs or cleaning needs.
Pack off-season items in appropriate storage containers, using vacuum bags for bulky items like winter coats and sweaters. Label each container clearly with contents and season.
For the transition, establish a designated storage area for off-season items, whether it’s under the bed, in a spare closet, or in a climate-controlled attic. Create an inventory list of stored items, including their location and condition. This process should be repeated twice yearly, typically in spring and fall, allowing enough time to properly clean and prepare items for storage or use.
To ensure success with your seasonal rotation system, maintain a detailed calendar marking transition periods and set reminders several weeks before each season change. Store items in cool, dry places away from direct sunlight, and use moisture absorbers and pest deterrents in storage containers.
Consider keeping a small selection of transitional pieces accessible year-round for unexpected weather changes, and regularly review your inventory to prevent forgotten items from remaining unused.
Create an Efficient Folding Method
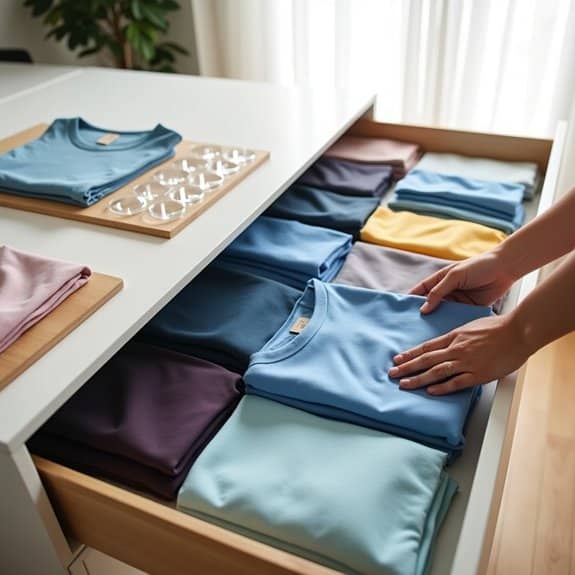
A well-organized closet starts with properly folded clothing, as this maximizes space and keeps garments wrinkle-free. When clothes are folded consistently and efficiently, it becomes easier to see and access everything you own, reducing the time spent searching for specific items and maintaining order in your bedroom storage spaces.
The right folding technique can transform cluttered drawers into displays of perfectly arranged clothing, similar to what you might see in high-end retail stores. This method not only makes your clothes more visible but also helps preserve their shape and condition, ultimately extending their lifespan and maintaining their appearance.
Required Items:
- Flat surface for folding
- Storage boxes or drawer dividers
- Thin hangers
- Shelf dividers
- Folding board (optional)
- Labels
- Measuring tape
- Storage bins
Start by sorting your clothes into categories based on type (shirts, pants, sweaters). For shirts and t-shirts, lay the garment face-down and smooth out wrinkles. Fold both sides toward the center, creating three equal sections. Then fold from bottom to top, creating a compact rectangle.
For pants, align the legs and fold in half lengthwise, then fold from bottom to top in thirds. Sweaters should be folded similarly to shirts but with extra care to prevent stretching at the shoulders.
Store folded items vertically rather than stacked on top of each other, using the file-folding method popularized by Marie Kondo. This allows you to see all items at once and prevents items at the bottom from being crushed or forgotten. Group similar items together and maintain consistent folding dimensions to create uniform, easy-to-maintain sections.
To maintain your folding system, set aside dedicated time each week for refolding and reorganizing. Consider using folding templates or guides for consistent results, and implement a one-in-one-out rule to prevent overflow.
Remember to adjust fold sizes based on your drawer dimensions and leave about an inch of space in each drawer to prevent overpacking, which can lead to wrinkles and disorganization.
Tackle Hidden Storage Opportunities
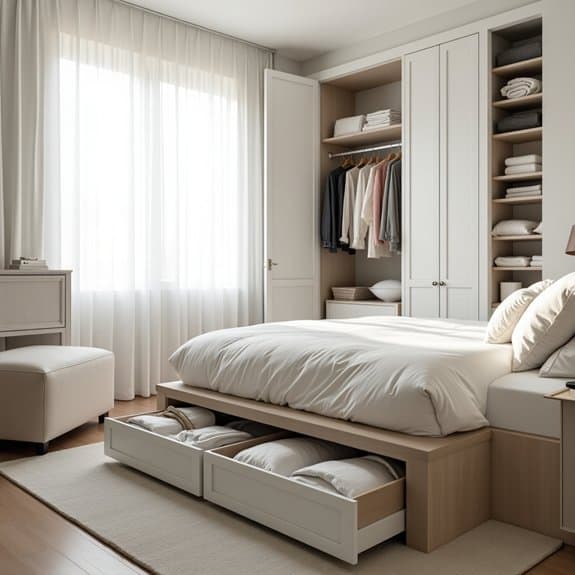
Making the most of hidden storage spaces in your bedroom is crucial for maintaining a clutter-free and peaceful environment. Many homeowners overlook potential storage areas, leading to unnecessary crowding of visible spaces and inefficient use of the room’s full capacity.
Hidden storage solutions can transform your bedroom from a cramped space into an organized sanctuary. By identifying and utilizing overlooked areas like under-bed spaces, behind-door zones, and vertical wall spaces, you can maximize storage while maintaining the room’s aesthetic appeal.
Required Items:
- Under-bed storage containers
- Over-door organizers
- Command hooks
- Storage ottomans
- Vacuum storage bags
- Drawer organizers
- Clear storage bins
- Labels
- Measuring tape
- Space-saving hangers
Begin by conducting a thorough assessment of your bedroom’s potential hidden storage areas. Measure under-bed clearance and install bed risers if needed to create additional space.
Install over-door organizers for accessories, shoes, or beauty products. Utilize the vertical space behind furniture by adding slim rolling carts or narrow shelving units. Convert dead corner spaces into storage opportunities with corner shelves or floor-to-ceiling organizers.
For closet optimization, install additional rods at different heights to double hanging space. Use vacuum storage bags for seasonal items and store them in high places or under the bed. Maximize drawer space with organizers and dividers, ensuring every inch is utilized effectively.
Consider furniture pieces that serve dual purposes, such as storage ottomans or beds with built-in drawers.
Additional Tips: Regularly evaluate and rotate stored items based on seasonal needs. Use clear containers for easy visibility and implement a labeling system to track contents.
Consider installing motion-sensor lights in dark storage areas to improve accessibility. Remember to leave some hidden storage space empty for future needs or temporary storage during room cleaning and reorganization projects.
Establish a Daily Tidying Routine

A daily tidying routine forms the foundation of a consistently organized bedroom. When you establish and maintain regular cleaning habits, you prevent clutter from accumulating and maintain a peaceful, orderly space that promotes better sleep and reduced stress.
Creating a structured approach to daily bedroom maintenance eliminates the need for time-consuming deep cleaning sessions and major reorganization projects. This systematic method ensures your bedroom remains a tranquil sanctuary rather than becoming a source of chaos and anxiety in your life.
Required Items:
- Laundry hamper
- Storage basket
- Bedding
- Microfiber dusting cloth
- Small trash bin
- Closet hangers
- Drawer organizers
- Basic cleaning supplies
- Timer or clock
The most effective daily tidying routine starts with making your bed immediately upon waking. This simple act sets a productive tone for the day and creates an instant improvement in the room’s appearance.
Follow this by collecting any dirty clothes and placing them in the designated hamper. Next, clear surfaces of any items that don’t belong, returning them to their proper places. Spend 2-3 minutes dusting visible surfaces and straightening any decorative items.
Before leaving for the day, conduct a final sweep of the room. Put away any items left out, ensure clothes are properly hung or folded, and quickly check that nothing has accumulated on floors or surfaces.
Before bed, prepare the room for the next day by clearing nightstand surfaces, setting out clothes for tomorrow, and removing any items that don’t belong in the bedroom.
To maximize the effectiveness of your daily routine, set specific times for these tasks and stick to them religiously. Consider using a checklist until the routine becomes habit, and time yourself to ensure these maintenance tasks don’t exceed 10-15 minutes total per day.
Remember that consistency is more important than perfection – even a partial routine completed regularly will maintain better organization than sporadic deep cleaning sessions.
Organize Accessories and Jewelry
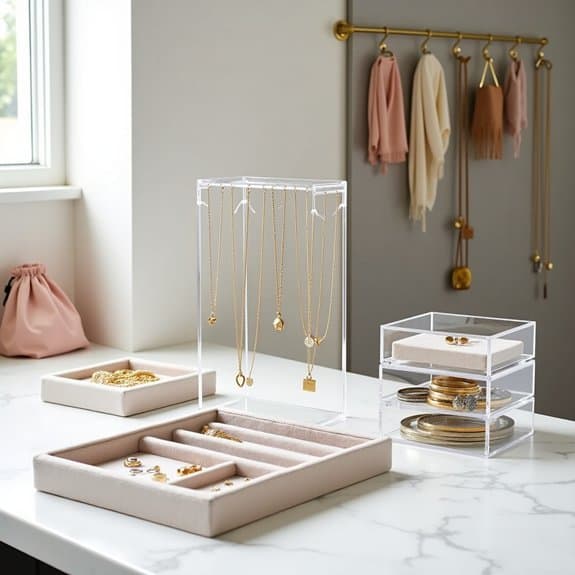
Organizing accessories and jewelry is crucial for protecting valuable pieces while ensuring easy access to your favorite items. A well-organized jewelry and accessory collection prevents tangling, damage, and loss while saving precious time during your daily routine.
When accessories and jewelry are properly organized, you can instantly see your entire collection, make better outfit choices, and avoid the frustration of untangling necklaces or searching for missing earring pairs. This organization system also helps extend the life of your pieces by keeping them properly stored and protected from dust and moisture.
Required Items:
- Jewelry box or organizer
- Drawer dividers
- Small fabric pouches
- Ring holders
- Earring cards
- Hanging organizer
- Clear containers
- Soft cloth or felt
- Labels
- Hooks or wall mounting hardware
Start by sorting all accessories and jewelry into categories: necklaces, bracelets, rings, earrings, watches, and other accessories. Remove any tarnished, broken, or unwanted pieces. Clean all items before organizing.
Install wall-mounted hooks or a hanging organizer for longer necklaces to prevent tangling. Use drawer dividers or small containers with compartments for smaller items like rings and earrings. Place frequently worn pieces in easily accessible locations.
Store special occasion jewelry in fabric pouches or boxes to protect from dust and oxidation. Use clear containers to maintain visibility of your collection, and consider adding silica gel packets to prevent tarnishing. Label containers or sections clearly to maintain the organization system.
Maintain your organized collection by returning items to their designated spots immediately after use. Consider rotating seasonal accessories to the front of your storage system, and periodically review your collection to remove damaged or unused pieces.
Implement a “one-in-one-out” rule when acquiring new pieces to prevent overcrowding and maintain the organization system’s effectiveness.
Streamline Your Morning Essentials
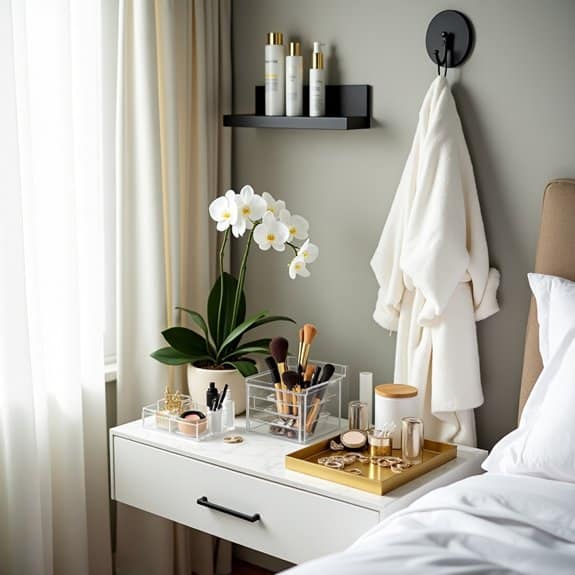
Starting your day smoothly depends heavily on having quick access to everything you need during your morning routine. When morning essentials are disorganized, precious time is wasted searching for items, leading to unnecessary stress and potential delays in your schedule.
Creating a dedicated morning essentials zone in your bedroom transforms your daily routine into an efficient, stress-free process. This organizational system ensures that everything from your daily accessories to grooming items is readily available, allowing you to move through your morning with purpose and clarity.
Required Items:
- Clear storage containers
- Drawer organizers
- Small trays or catchalls
- Labels
- Hooks
- Small shelf or bedside table
- Drawer dividers
- Storage boxes
- Clear makeup organizers
- Jewelry stand
Select a dedicated space near your getting-ready area, ideally within arm’s reach of where you prepare for the day. Sort your morning essentials into categories: grooming items, accessories, medications, and daily wear items. Use clear containers to store frequently used items, ensuring visibility and easy access.
Install hooks for items like tomorrow’s outfit or your robe. Position a small tray or catchall for daily jewelry and accessories.
Implement a daily reset routine where items return to their designated spots after use. Consider creating a morning essentials checklist and attach it inside your closet door or drawer. This system helps maintain organization and ensures nothing is forgotten during busy mornings.
To maximize this organizational system, rotate items seasonally and regularly assess what truly belongs in your morning essentials zone. Remove items that aren’t used daily and store them elsewhere.
Consider keeping a backup supply of frequently used items in a separate location to replenish when needed, and clean your organizational containers monthly to maintain freshness and functionality.
Manage Small Items and Electronics
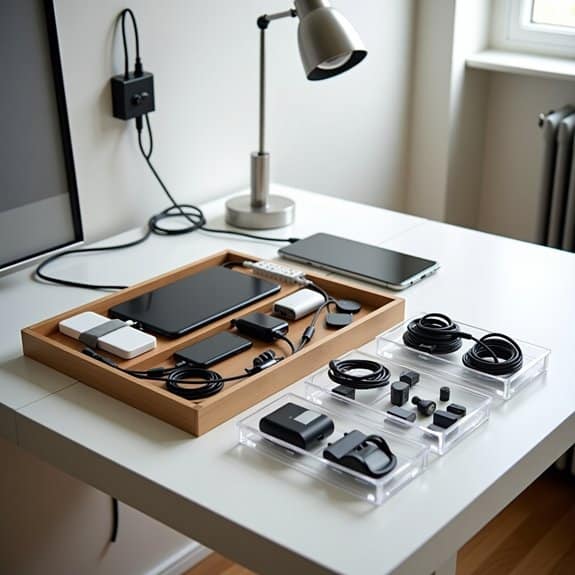
In today’s digital age, bedrooms have become more than just sleeping spaces – they’re often filled with various electronics, chargers, small accessories, and personal items that can quickly create clutter. Proper organization of these items is crucial not only for maintaining a tidy space but also for protecting and extending the life of valuable electronics.
Efficient management of small items and electronics prevents the frustration of searching for misplaced chargers, tangled cables, or lost earbuds. A well-organized system ensures everything is easily accessible when needed and properly stored when not in use, leading to better productivity and reduced stress in your daily routine.
Required Items:
- Drawer organizers or small bins
- Cable ties or velcro straps
- Electronics charging station
- Small storage boxes
- Label maker
- Desk organizer
- Cable clips
- Drawer dividers
- Storage tray for nightstand
- Power strip
Start by designating specific zones for different categories of items. Create a charging station area, preferably near your nightstand or desk, where all electronics can be charged simultaneously.
Install a power strip and use cable clips to keep wires neat and organized along walls or furniture edges. Sort small items into categories such as jewelry, accessories, tech gadgets, and personal care items.
Use drawer organizers or small bins within larger drawers to separate items by category. Label each section clearly to maintain the system long-term. For electronics, wrap cables neatly using cable ties or velcro straps, and store them in labeled boxes or bags.
Keep frequently used items in easily accessible locations, while storing rarely used items in higher shelves or deeper drawers.
Additional Tips: Review your organization system every few months to eliminate unused items and adjust the layout as needed. Consider implementing a “one in, one out” rule for small items and electronics to prevent accumulation.
Keep a small basket or tray specifically for items that need to be charged, ensuring devices are never misplaced during charging. Regular maintenance of this system will prevent the gradual return of clutter and keep your electronic items in good working order.
Sort and Store Bedding Efficiently
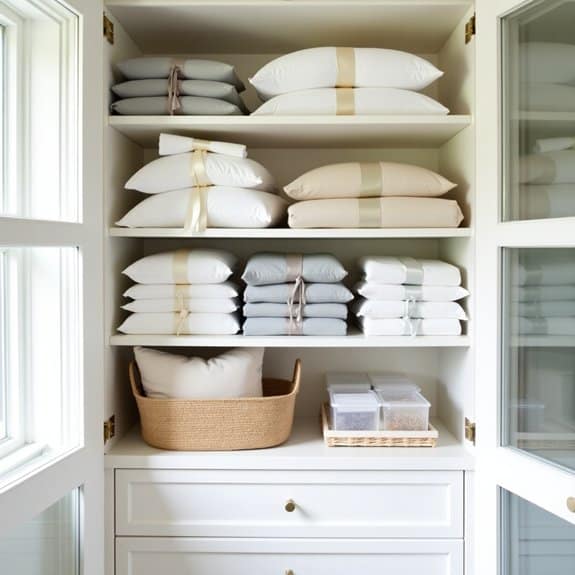
Organizing bedding is a crucial aspect of maintaining an orderly bedroom and ensuring easy access to clean linens when needed. A well-organized bedding system eliminates the frustration of searching through jumbled sheets and pillowcases, while also protecting your investment in quality bedding items from damage or premature wear.
Proper bedding organization extends beyond mere tidiness – it helps preserve fabric quality, prevents musty odors, and makes seasonal rotation of bedding sets effortless. When bedding items are properly stored, they remain wrinkle-free, fresh-smelling, and ready for immediate use, saving valuable time during bed changes or guest preparations.
Required Items:
- Storage bins or containers
- Shelf liner
- Labels or label maker
- Cedar blocks or lavender sachets
- Vacuum storage bags
- Drawer dividers
- Linen closet or dedicated storage space
- Clear plastic bags for sets
- Fabric softener sheets
Start by sorting all bedding items by size (twin, full, queen, king) and type (sheets, pillowcases, duvet covers). Group complete sets together and evaluate each item’s condition, discarding worn-out pieces.
Fold fitted sheets using the proper technique: tuck the corners into each other to create a neat rectangle, then fold flat sheets and pillowcases to match these dimensions. Store each complete set inside one of its pillowcases to keep sets together, or use clear plastic bags with labels.
For seasonal items like heavy quilts or winter duvets, utilize vacuum storage bags to compress bulky items and protect them from dust and moisture. Place frequently used items at eye level in your storage space, with less-used items stored higher or lower. Incorporate cedar blocks or lavender sachets between layers to maintain freshness and repel moths.
Additional optimization: Implement a rotation system by placing newly washed sets at the bottom of the stack, ensuring even wear across all bedding items. Use shelf liner to prevent snags on delicate fabrics, and maintain proper airflow by avoiding overcrowded storage spaces.
Consider keeping one complete guest set readily accessible for unexpected visitors, and store specialty items like holiday bedding separately with clear seasonal labels.
Label Everything for Easy Maintenance
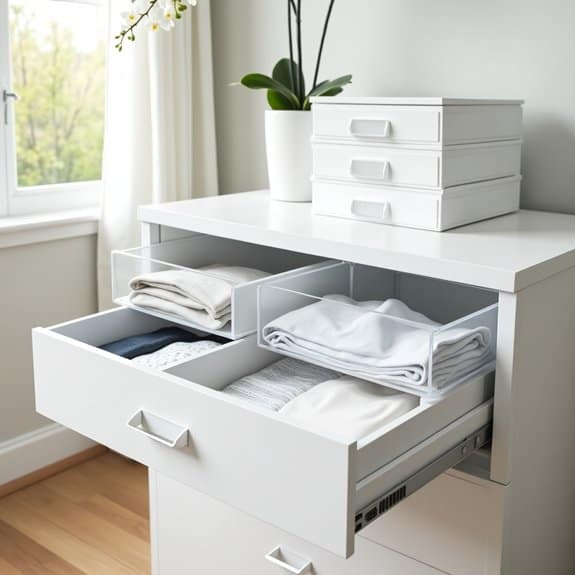
Labeling is a fundamental aspect of maintaining an organized bedroom space that often gets overlooked. When items have clear, designated places marked by labels, it becomes significantly easier to maintain order and quickly locate what you need, reducing the time spent searching through drawers, boxes, and storage containers.
A well-labeled bedroom creates a system that not only helps you stay organized but also assists other household members in knowing where things belong. This practice is particularly valuable when dealing with seasonal items, stored linens, or rarely used accessories that might otherwise be forgotten or misplaced.
Required Items:
- Label maker or printer
- Clear adhesive labels
- Permanent markers
- Clear tape
- Small blank tags
- Storage containers
- File folders
- Scissors
- Measuring tape
Begin by sorting your bedroom items into clear categories such as seasonal clothing, accessories, linens, and memorabilia. Create detailed, legible labels for each storage container, drawer, and shelf space. Use consistent formatting and font sizes for a cohesive look.
For drawer organization, consider creating labels both on the outside and inside of drawers, particularly for items that are stacked or stored in compartments. Apply labels at eye level when possible, and ensure they’re securely attached to prevent peeling or falling off.
When labeling clothing storage, include specific categories like “Winter Sweaters” or “Summer Dresses” rather than general terms. For boxes stored under the bed or in closets, create labels on multiple sides for easy identification from different angles. Consider using color-coding for seasonal items or different family members’ belongings.
To maximize the effectiveness of your labeling system, regularly review and update labels as your storage needs change. Use clear, water-resistant labels in areas prone to moisture, such as near windows or in bathroom-adjacent closets.
Consider creating an inventory list of labeled items, particularly for seasonal storage, and keep it in an easily accessible location for quick reference.
Design a Clutter-Free Dresser Top

A cluttered dresser top can create visual chaos in your bedroom and make it difficult to find essential items you use daily. As one of the most prominent horizontal surfaces in your bedroom, the dresser top often becomes a catch-all for everything from jewelry and cosmetics to loose change and random papers, contributing to a disorganized and stressful environment.
Creating an organized dresser top not only enhances the aesthetic appeal of your bedroom but also establishes a functional space that supports your daily routines. When properly organized, this space can serve as an efficient staging area for getting ready while maintaining a calm, serene atmosphere conducive to relaxation.
Required Items:
- Decorative tray
- Small organizing boxes or containers
- Drawer organizers
- Jewelry stand or box
- Small waste basket
- Microfiber cloth
- Surface cleaner
- Storage containers
- Labels
Start by removing everything from your dresser top and thoroughly cleaning the surface. Sort items into three categories: daily essentials, decorative pieces, and items that belong elsewhere.
Select a few meaningful decorative pieces to display, such as a small plant, framed photo, or artwork. Position these items strategically, typically in corners or along the back of the dresser. For frequently used items, utilize attractive organizing solutions like decorative trays or boxes that complement your bedroom’s décor.
Arrange these containers to create clear zones for different categories of items, such as jewelry, personal care products, or accessories. Keep the front portion of the dresser clear for daily use and maintain a minimum of three inches of space between items to prevent a crowded appearance.
Ensure that frequently used items are easily accessible while maintaining a visually balanced arrangement. Consider height variations in your display to create visual interest without overwhelming the space.
Additional Tips: Implement a daily reset routine where you return items to their designated spots before bedtime. Regularly reassess the items on your dresser top and remove anything that hasn’t been used within the past month.
Consider installing a small wall shelf above the dresser if you need additional storage space while keeping the dresser top minimal and functional. Choose organizing solutions in cohesive colors or materials to maintain a polished, intentional look.

