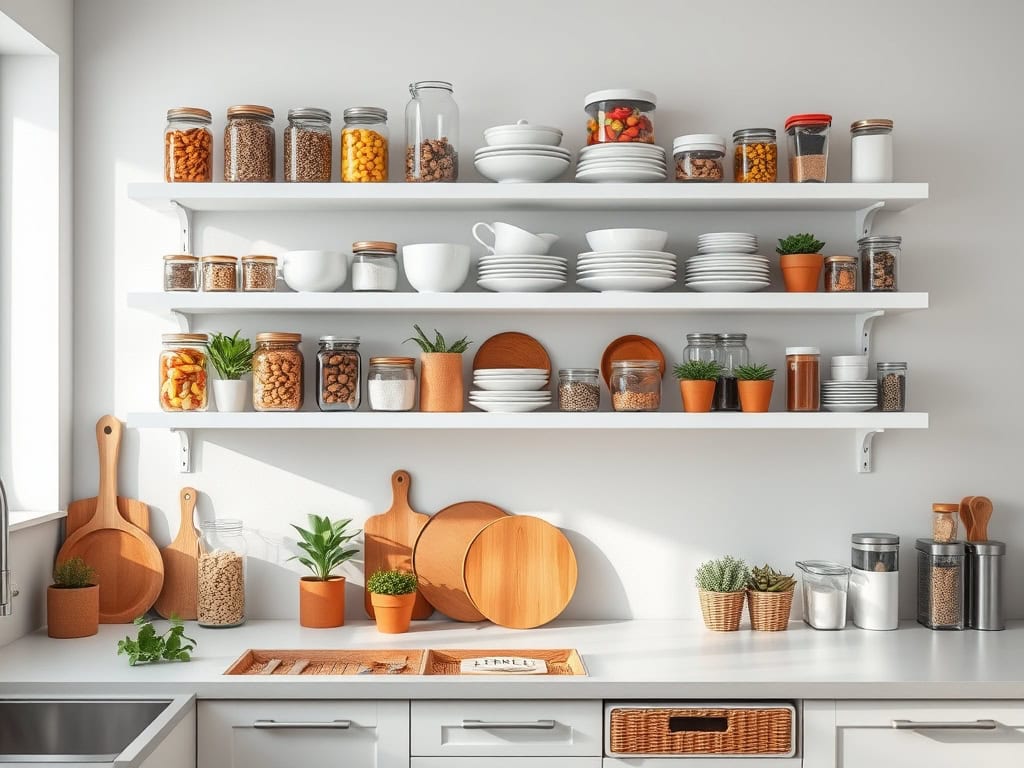
If you’re tired of playing kitchen cabinet Tetris every time you need something, you’re not alone! I used to waste precious minutes searching through cluttered shelves until I discovered these game-changing organization solutions. From maximizing vertical space to implementing smart storage systems, these 10 practical ideas will transform your chaotic cabinets into an efficient cooking command center. Let’s explore how you can turn that frustrating kitchen space into an organized oasis that actually works for you.
Clear Storage Containers for Better Visibility
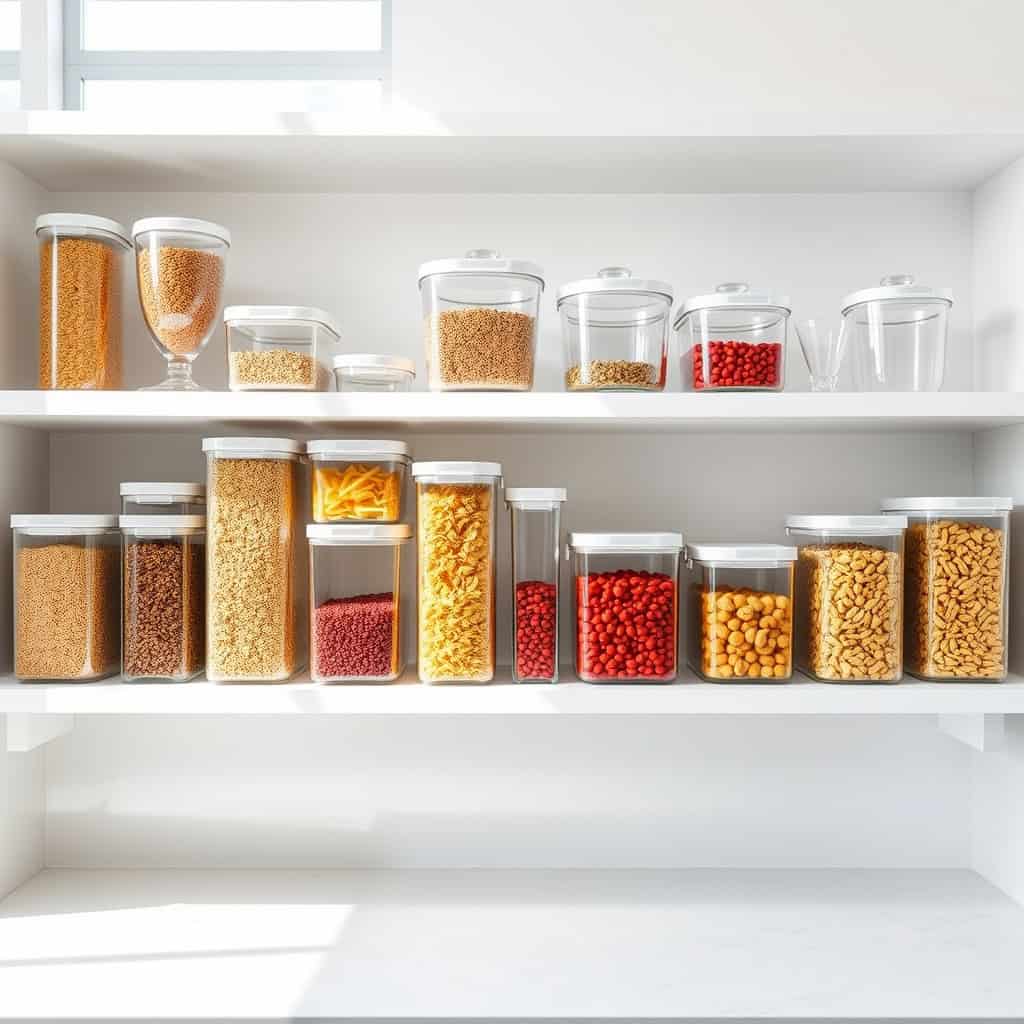
Clear storage containers revolutionize kitchen organization by eliminating the guesswork of what’s stored on your shelves. When dry goods, snacks, and ingredients are visible at a glance, meal preparation becomes more efficient, and inventory management becomes second nature. You’ll waste less food by being aware of what you have and when items need to be replenished.
Implementing a clear container system transforms cluttered shelves into an aesthetically pleasing and functional space. Not only does this system protect food from moisture and pests, but it also standardizes storage dimensions, making it easier to maximize shelf space and maintain a consistent look throughout your kitchen.
Required Items:
- Clear airtight containers in various sizes
- Label maker or waterproof labels
- Measuring cups
- Funnel
- Clean cloth
- Food-safe marker
- Container cleaning brush
- Shelf liner
- Measuring tape
Start by emptying your shelves completely and measuring the available space. Sort your dry goods by category (baking supplies, grains, snacks, etc.) and assess how much storage space each category requires. Select appropriately sized containers that will fit your shelves while accommodating the quantity of each item.
Transfer dry goods into the containers using a funnel to prevent spills, ensuring each container is completely clean and dry before use. Leave about 20% space at the top of each container to allow for easy pouring and product settling.
Label each container with the product name, date of purchase, and any relevant cooking instructions. Arrange containers on shelves by category, placing frequently used items at eye level and heavier containers on lower shelves. Group similar items together to create intuitive zones that match your cooking habits.
For optimal maintenance, establish a rotation system where newer products are stored behind older ones. Clean containers thoroughly between refills, and periodically audit contents to ensure freshness.
Consider keeping a small inventory list inside your pantry door to track when staples need replenishing, and always store containers away from direct sunlight to prevent degradation of both the containers and their contents.
Vertical Space Maximizers and Shelf Risers
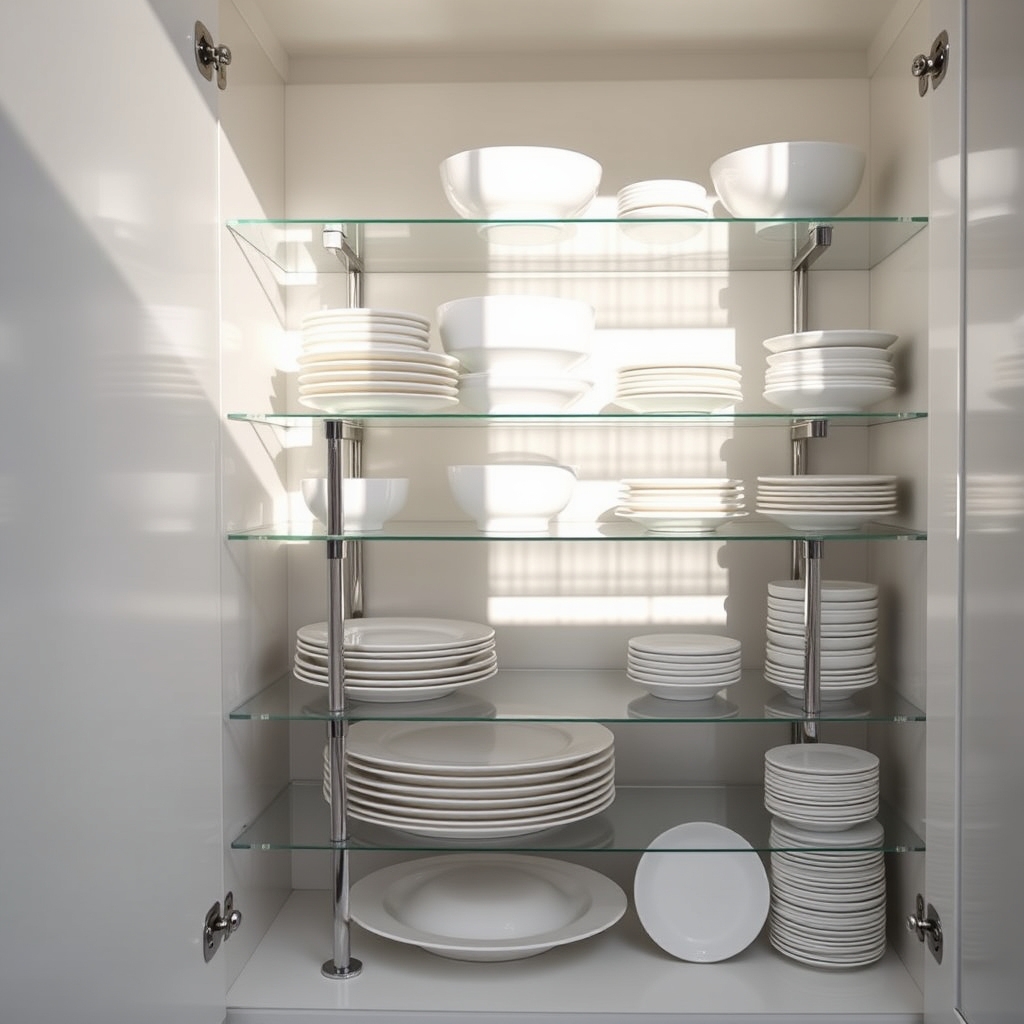
Making the most of vertical space in kitchen cabinets is crucial for maximizing storage capacity and maintaining an organized kitchen. When shelves are properly utilized from bottom to top, storage capacity can increase by up to 50%, allowing for better visibility and easier access to items that might otherwise get lost in the depths of cabinets.
Shelf risers and vertical organizers transform unused vertical space into functional storage areas, creating multiple levels within existing shelves. This systematic approach not only increases storage capacity but also makes it easier to categorize items by size, frequency of use, or type, ultimately streamlining your cooking and meal preparation process.
Required Items:
- Shelf risers in various sizes
- Expandable vertical dividers
- Cabinet organizer racks
- Measuring tape
- Non-slip shelf liner
- Label maker
- Storage containers
- Clear bins or baskets
- Stackable containers
Start by removing all items from your shelves and measuring the available space, including height, width, and depth. Install non-slip liner on existing shelves to prevent organizers from sliding. Place shelf risers strategically, ensuring taller items can fit underneath while shorter items go on top.
Position vertical dividers to create designated spaces for cutting boards, baking sheets, and platters. Group similar items together, using the newly created levels to separate them by size or frequency of use. For optimal organization, place frequently used items at eye level and within easy reach. Store heavier items on lower shelves, and lighter, less frequently used items on higher shelves.
Use clear bins or baskets to group smaller items together, preventing them from getting lost behind larger objects. Consider installing under-shelf baskets to utilize the space between shelves further.
Additional Tips: Regularly assess the effectiveness of your vertical organizers and adjust their placement as needed. Label different sections to maintain organization long-term, and consider using expandable organizers that can adapt to changing storage needs. Keep a small step stool nearby for safely accessing items stored at higher levels, and periodically review stored items to remove those that are no longer needed or have expired.
Pull-Out Drawer Systems for Deep Cabinets
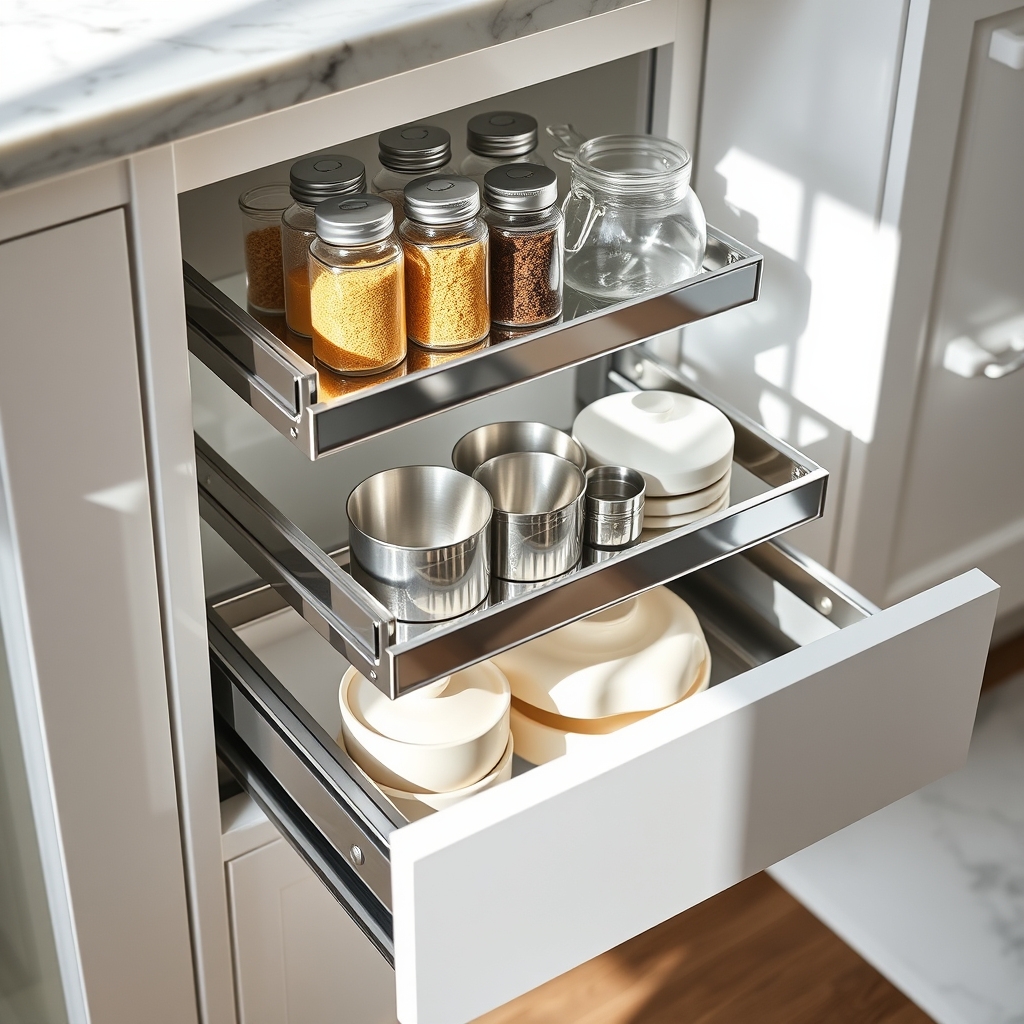
Deep kitchen cabinets often become black holes where items disappear into the far reaches, making it frustrating to access necessary cooking tools and ingredients. Pull-out drawer systems transform these problematic spaces into efficient, accessible storage areas that maximize every inch of cabinet space while keeping contents visible and within easy reach.
Installing pull-out drawer systems can dramatically improve kitchen workflow by eliminating the need to remove multiple items to reach those in the back. This organization method not only saves time during meal preparation but also prevents forgotten items from expiring and reduces the likelihood of purchasing duplicates of items already owned.
Required Items:
- Pull-out drawer system kit
- Measuring tape
- Screwdriver
- Power drill
- Level
- Pencil
- Cabinet hardware
- Drawer liner material
- Clear storage containers
- Labels
- Mounting brackets
- Wood screws
The organization process starts with measuring the interior cabinet dimensions carefully, including width, depth, and height, to ensure proper fit of the pull-out system. Install the drawer slides according to manufacturer specifications, ensuring they’re level and properly secured to support the weight of stored items.
Once the framework is installed, arrange items by frequency of use, with everyday items on upper or more accessible drawers and less-used items on lower levels. Sort cabinet contents into categories before returning them to the newly installed pull-out drawers. Place heavy items at the bottom for stability, and use clear containers to group similar items together.
Implement zones within each drawer – for example, baking supplies in one section, canned goods in another – and maintain proper weight distribution throughout the system.
Additional Success Tips: Regularly maintain the drawer slides by cleaning and lubricating them to ensure smooth operation. Consider installing drawer stops to prevent overextension, and use non-slip liner material to keep items from shifting. Label the front edges of each drawer to identify contents without pulling them out, and establish a quarterly review system to assess organization effectiveness and make necessary adjustments.
Label Everything: A Systematic Approach
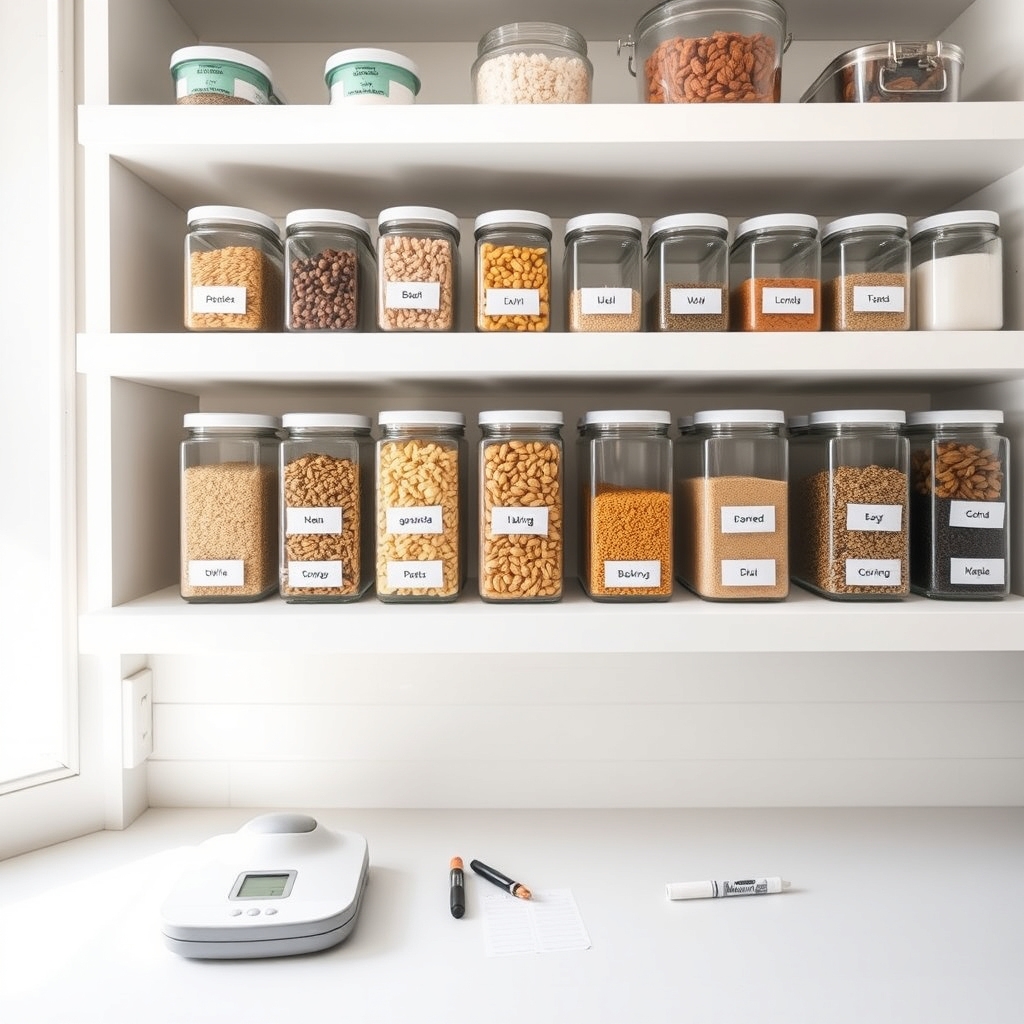
Clear labeling is the cornerstone of maintaining an organized kitchen, transforming chaotic shelves into an efficient, easy-to-navigate space. When everything has a designated spot and clear identification, family members can quickly locate items and, more importantly, return them to their proper places.
A well-labeled kitchen reduces waste, saves time, and eliminates the frustration of searching through multiple containers or shelves. This system is particularly valuable for pantry items, spices, and storage containers, ensuring that ingredients are used before expiring and preventing duplicate purchases.
Required Items:
- Label maker or printer
- Clear adhesive labels
- Waterproof markers
- Container tags
- Clear storage containers
- Measuring tape
- Cleaning supplies
- Small adhesive chalkboard labels (optional)
- Category dividers
- Label protectors
Start by removing all items from your shelves and grouping them by category. Clean all surfaces thoroughly and allow them to dry completely. Measure your shelf spaces and plan category zones based on frequency of use and logical workflow. Transfer dry goods into clear, airtight containers that fit your shelves efficiently.
Create a consistent labeling system using your chosen method – whether electronic labels, handwritten tags, or chalkboard labels. Include essential information such as contents, expiration dates, and any special storage instructions. Position labels at eye level when possible, and ensure they’re visible from multiple angles.
Apply labels to both containers and shelf edges to maintain organization even when containers are removed. Create a master inventory list of shelf contents and establish zones for different categories, such as baking supplies, breakfast items, or snacks.
Success Tips: Implement a quarterly review system to maintain your labeling organization. Remove outdated labels promptly, update information as needed, and ensure all family members understand the system. Consider using color-coding for different categories or dietary requirements, and keep extra labeling supplies readily available for new items or replacements.
Group Similar Items by Zones
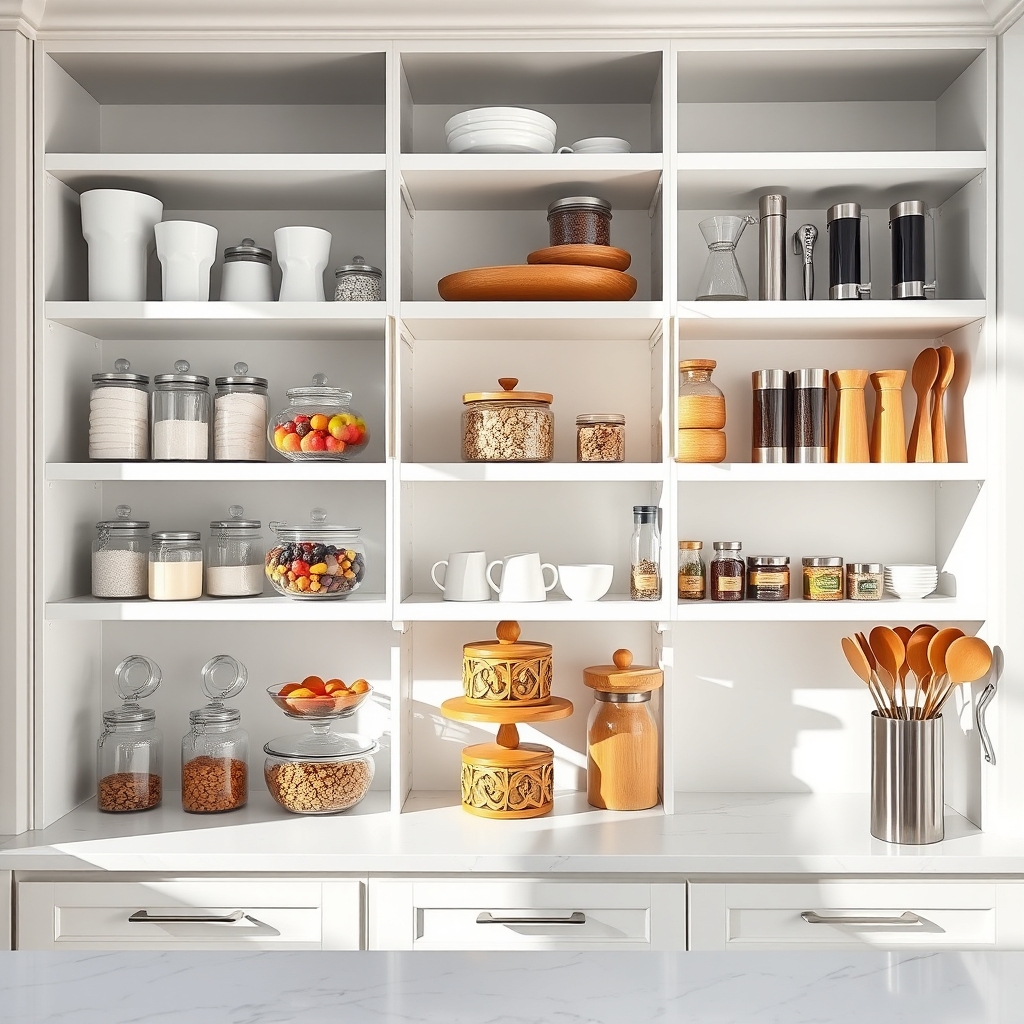
Creating designated zones in your kitchen shelving is a fundamental organizing principle that can transform your cooking space from chaotic to efficient. When items are grouped logically by their function or use, you spend less time searching and more time actually cooking, making meal preparation a smoother, more enjoyable experience.
Organizing by zones not only saves time but also helps maintain order long-term. When each item has a dedicated space based on its purpose, family members can easily learn where things belong and return them to their proper places. This system creates a natural flow in your kitchen that matches your cooking habits and daily routines.
Required Items:
- Clear bins or containers
- Label maker or labels
- Shelf liner (non-slip)
- Measuring tape
- Shelf risers
- Clear food storage containers
- Basket organizers
- Cleaning supplies
Start by completely emptying your shelves and cleaning them thoroughly. Create distinct zones based on usage patterns: cooking zone (oils, seasonings, cooking tools), baking zone (flour, sugar, baking tools), breakfast zone (cereals, coffee supplies), snack zone, and canned goods zone.
Measure your shelves and use appropriate containers or organizers for each zone. Position frequently used items at eye level and between waist and shoulder height for easy access.
Group items within each zone by subcategories. For example, in the baking zone, keep all measuring tools together, place dry ingredients in airtight containers, and store cake decorating supplies in a separate bin. Use shelf risers to maximize vertical space and ensure smaller items remain visible.
Label each container and zone clearly to maintain organization.
To ensure long-term success, implement a quarterly review system to assess the effectiveness of your zones. Adjust the arrangement based on seasonal needs and changing kitchen habits. Keep a small buffer space in each zone for new items, and regularly check for expired products or items that need to be relocated to a more practical zone.
Consider using clear containers to easily identify contents and maintain inventory awareness.
Rotating Carousel and Lazy Susan Solutions
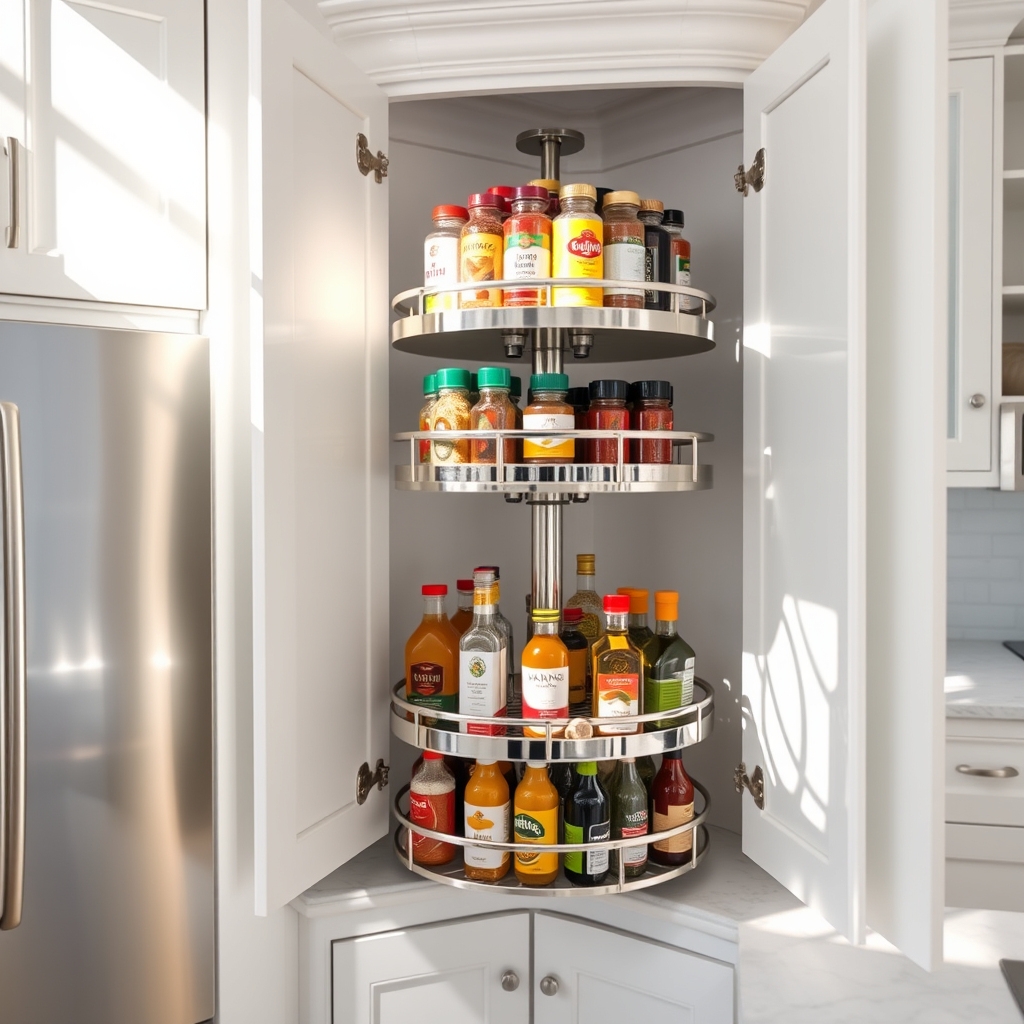
Rotating storage solutions have revolutionized kitchen organization by making corner cabinets and deep shelves more accessible.
These spinning organizers eliminate the frustration of reaching into dark corners or forgetting about items pushed to the back of cabinets, effectively utilizing previously wasted space.
Lazy Susans and carousel organizers transform cluttered shelves into efficient storage systems by creating designated zones that are easily accessible with a simple spin.
This organization method not only maximizes space but also reduces the time spent searching for items and helps prevent food waste by keeping everything visible and within reach.
Required Items:
- Single or multi-tier Lazy Susan turntables
- Corner cabinet carousel system
- Non-slip liner
- Container labels
- Clear storage containers
- Measuring tape
- Cleaning supplies
- Box for discarded items
Start by completely emptying the designated cabinet or shelf space and cleaning it thoroughly.
Measure the space to ensure your rotating organizers will fit properly, accounting for height clearance and door swing radius.
Group similar items together based on frequency of use and category (spices, oils, canned goods, etc.).
Install the carousel or place the Lazy Susan in position, ensuring it rotates freely without catching on cabinet walls.
Position frequently used items on the front sections of each tier, with less-used items toward the back.
For multi-tier systems, place heavier items on the bottom tier and lighter ones on top.
Transfer appropriate items into clear containers and label everything clearly, including expiration dates when applicable.
To maintain optimal functionality, regularly check that the rotating mechanism moves smoothly and apply food-grade lubricant if needed.
Consider using shelf liners to prevent items from sliding during rotation, and implement a quarterly rotation schedule to check expiration dates and reorganize as needed.
Leave about 20% of space free to accommodate new items and prevent overcrowding, which can impede the rotating function.
Door-Mounted Organizers and Racks
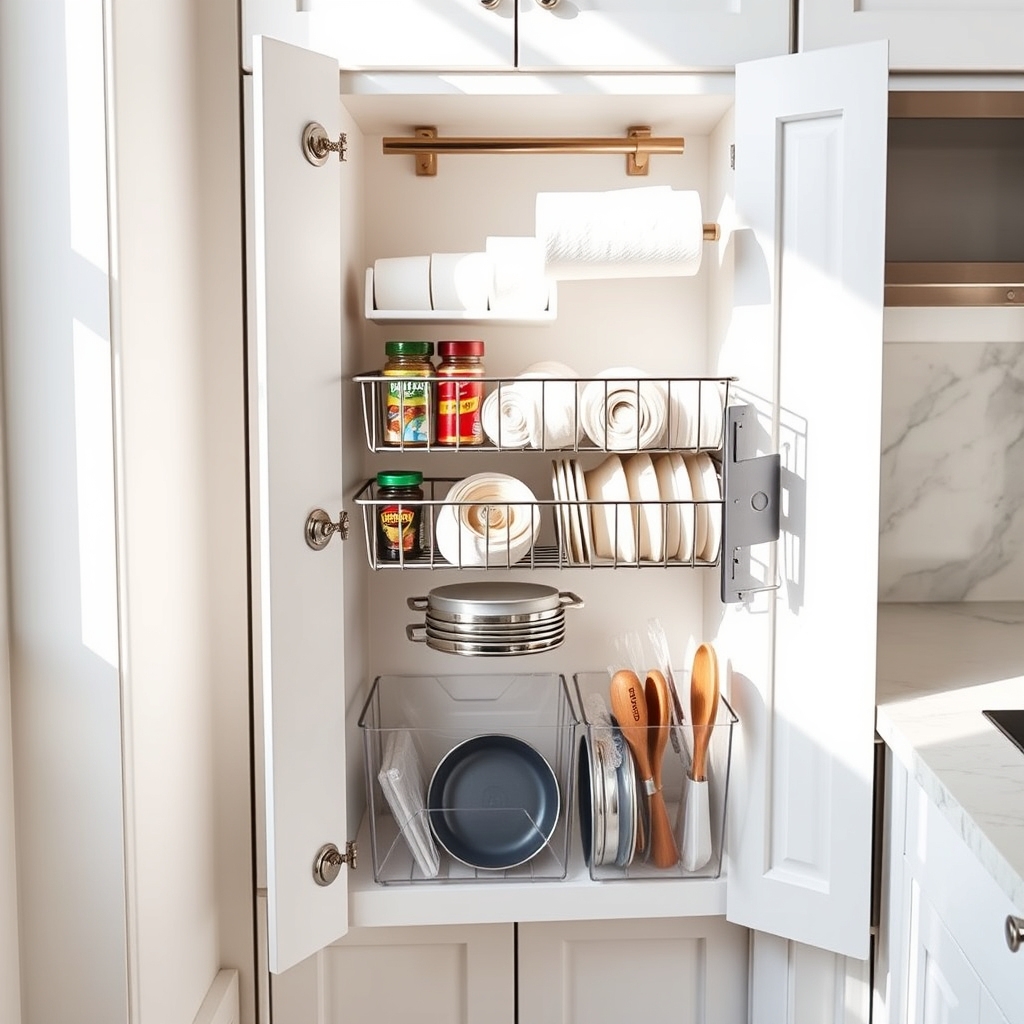
Cabinet doors represent some of the most underutilized storage spaces in the kitchen. By maximizing these vertical surfaces, you can effectively double your storage capacity while keeping frequently used items within easy reach. Door-mounted organizers are particularly valuable in smaller kitchens where every inch of space counts.
Door-mounted storage solutions not only help declutter countertops and shelves but also create designated spaces for specific items, making them easier to locate and access. This organization method can transform chaotic cabinets into efficiently managed storage areas, saving valuable time during meal preparation and cleanup.
Required Items:
- Over-the-door organizers
- Adhesive hooks
- Command strips
- Measuring tape
- Screwdriver
- Door-mounted spice racks
- Wire baskets
- Paper towel holders
- Plastic bag dispensers
- Level
- Pencil
Start by measuring your cabinet doors‘ dimensions, including thickness, to ensure proper fit of organizing units. Remove cabinet doors and lay them flat to mark mounting positions for organizers, ensuring they won’t interfere with shelves or cabinet contents when closed.
Install over-the-door hangers or mount organizing units using screws or strong adhesive strips, depending on door material and weight capacity. Position heavier items at the bottom of door-mounted systems to maintain balance and prevent strain on mounting hardware.
Group similar items together, such as cleaning supplies, spices, or cooking utensils. Ensure all mounted items clear cabinet frames and adjacent cabinets when doors open and close.
Pro Tip: Consider installing bumpers or felt pads where organizers might contact cabinet frames to prevent damage and noise. Regularly check mounting hardware and weight distribution to maintain security and functionality.
For rental properties or those hesitant about permanent installation, prioritize over-the-door options and removable mounting solutions that won’t damage surfaces.
Adjustable Dividers for Different-Sized Items
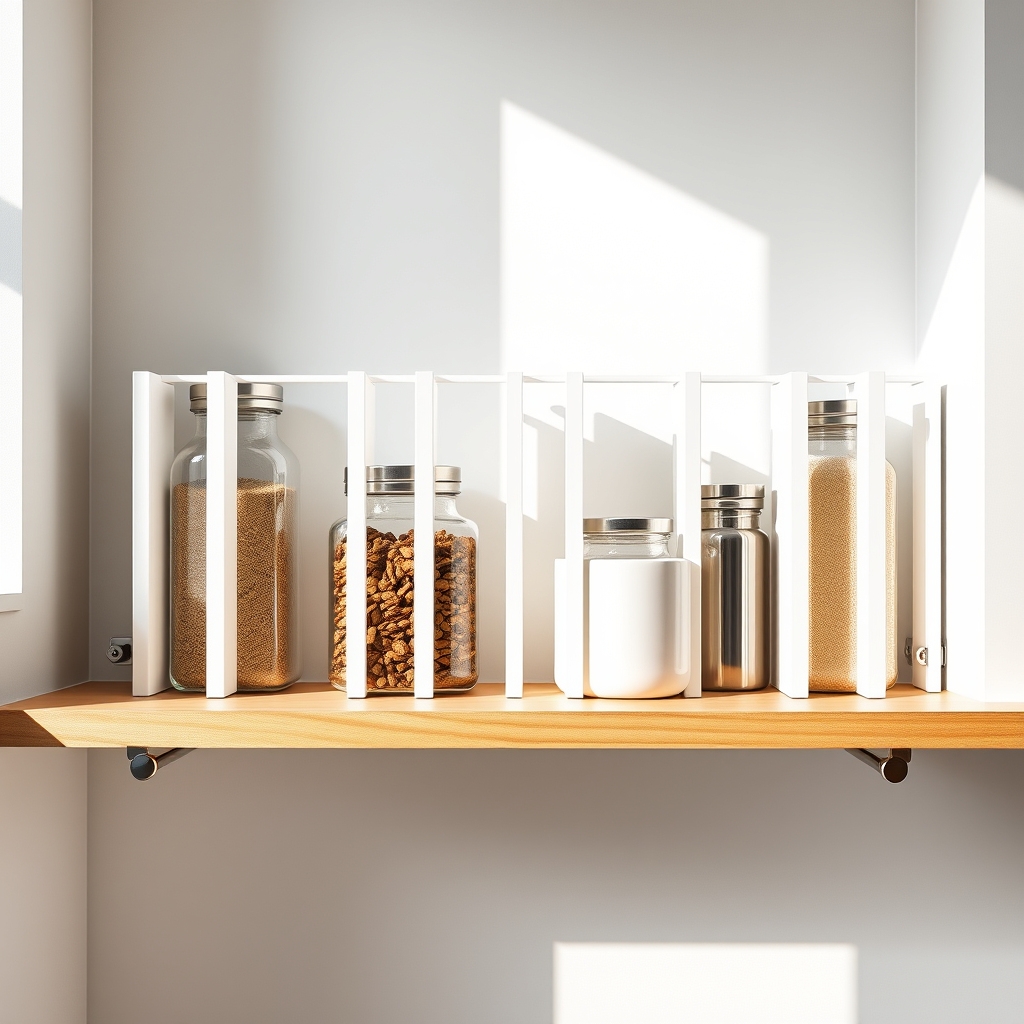
Organizing kitchen shelves with adjustable dividers is a game-changing solution for maintaining order among various-sized containers, appliances, and cooking supplies. When items of different heights and widths are stored together without proper separation, they often create chaos, making it difficult to find what you need quickly and potentially leading to damaged or knocked-over items.
Adjustable dividers transform cluttered shelves into efficient storage spaces by creating customized compartments that can be modified as your storage needs change. This system not only maximizes vertical and horizontal space but also ensures that items remain upright and easily accessible, reducing the time spent searching for specific items during meal preparation.
Required Items:
- Adjustable shelf dividers
- Measuring tape
- Non-slip shelf liner
- Label maker
- Cleaning supplies
- Storage bins (optional)
- Drawer organizers (optional)
- Shelf risers (optional)
Start by removing all items from the shelf and cleaning the surface thoroughly. Measure the shelf depth and width to determine the appropriate size for your dividers. Install the adjustable dividers by securing them firmly to the shelf edges, spacing them according to the sizes of items you plan to store.
Create sections based on item categories and sizes, such as tall bottles, small jars, or cooking appliances. For maximum stability, place heavier items at the bottom and lighter ones on top within each divided section.
When arranging items within the divided spaces, group similar items together and position frequently used items at the front for easy access. Adjust the dividers as needed to accommodate different-sized containers while maintaining clean sight lines and preventing items from tipping over.
Consider using clear storage bins within the divided sections for smaller items that might otherwise get lost.
For optimal organization maintenance, regularly assess the effectiveness of your divider placement and make adjustments as your storage needs evolve. Consider implementing a rotation system for stored items, keeping track of expiration dates, and periodically cleaning both the dividers and shelf surfaces.
Label each section clearly to ensure all household members can maintain the organizational system, and leave some extra space in each compartment to accommodate new items without disrupting the entire arrangement.
Stack-Friendly Bins and Baskets
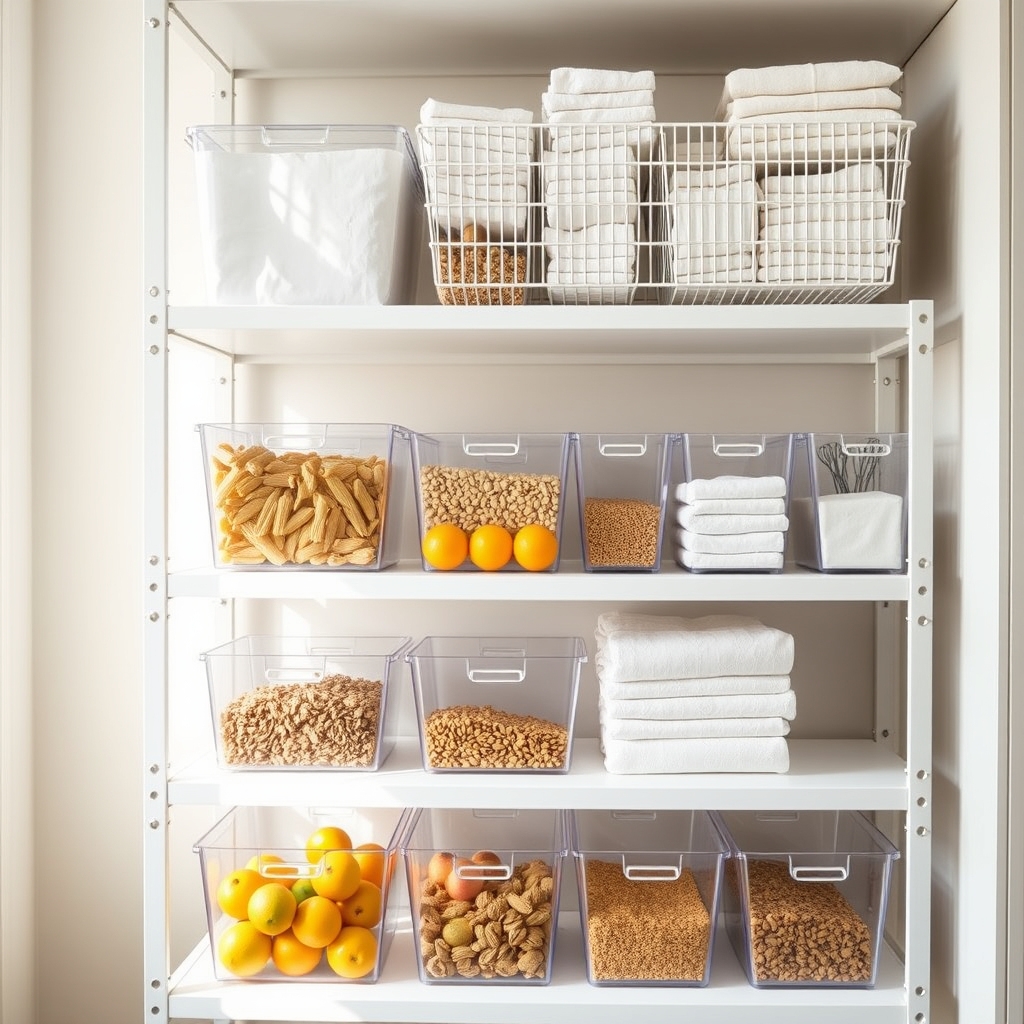
Maximizing vertical space in kitchen shelves through stackable storage solutions is essential for creating an efficient and well-organized kitchen. Stack-friendly bins and baskets not only optimize shelf space but also make items more accessible while maintaining a clean, cohesive appearance throughout your storage areas.
When implemented correctly, a system of stack-friendly containers transforms cluttered shelves into functional storage zones that streamline daily kitchen activities. These organizational tools help group similar items together, prevent items from getting lost in the back of deep shelves, and make it easier to maintain order long-term.
Required Items:
- Clear plastic stackable bins
- Wire mesh baskets
- Labeled containers
- Shelf liner
- Label maker or labels
- Measuring tape
- Container height dividers
- Drawer organizers
- Storage bins with handles
Start by measuring your shelf dimensions and mapping out zones for different categories of items. Sort your kitchen items into groups based on frequency of use and function. Select appropriately sized stackable containers that fit your shelf depth and height, ensuring they can be easily removed without disturbing other stacks.
Position frequently used items in front and at eye level, with less-used items toward the back or top of stacks. Create vertical organization by using same-sized containers that stack securely. Implement a system where smaller items are contained in shallow bins that stack on top of deeper ones.
Use clear containers for pantry items to maintain visibility, and add labels to the front of each container for quick identification. Consider leaving some space between stacks for easy access and air circulation.
To maintain this organization system effectively, regularly audit contents and adjust stack arrangements as needed. Use drawer organizers or smaller containers within larger bins to prevent small items from shifting.
Consider purchasing containers from the same product line to ensure consistent stacking capability, and always leave about an inch of clearance above stacks for easy removal and replacement of containers.
Space-Saving Corner Shelf Solutions
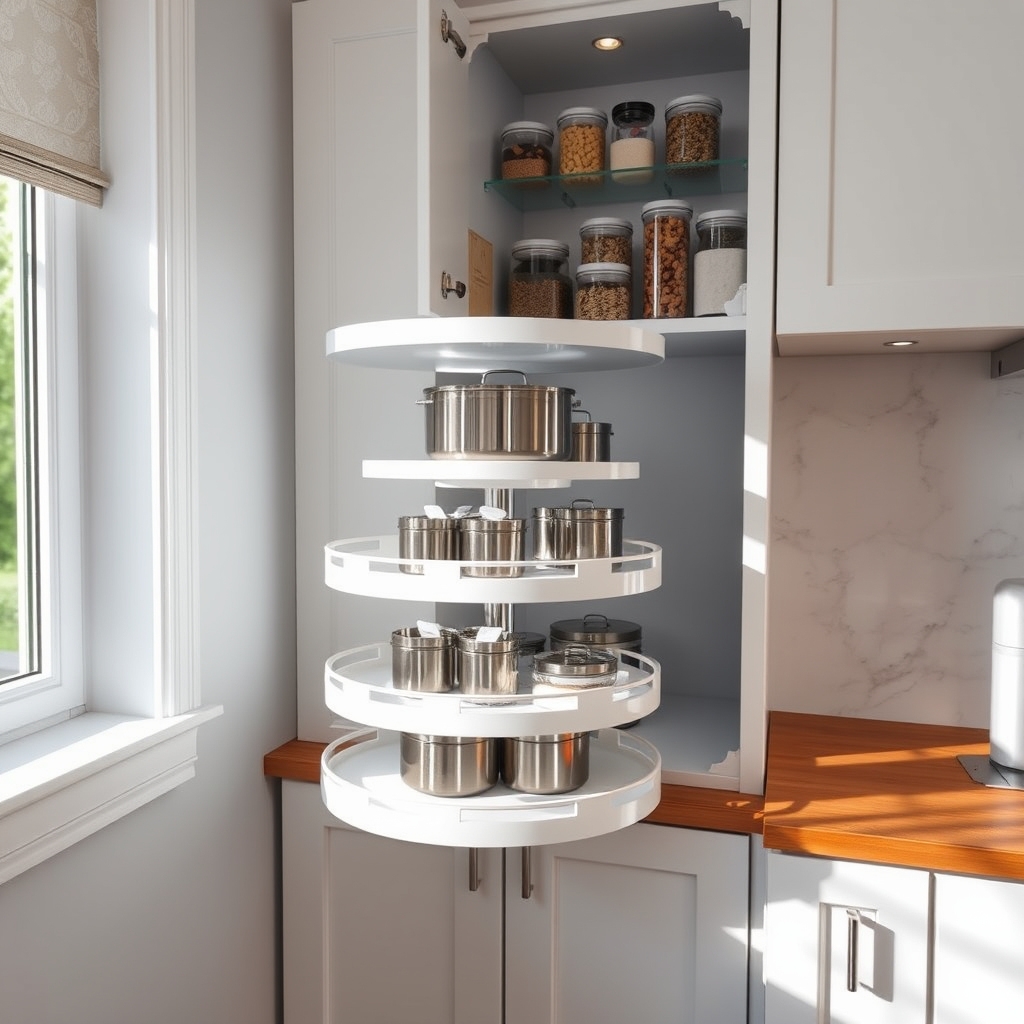
Corner spaces in kitchens often become neglected dead zones where items disappear into the dark recesses, never to be seen again. These awkward angles can actually transform into highly functional storage areas when properly organized, maximizing every inch of available space in your kitchen.
Implementing smart corner shelf solutions not only doubles your storage capacity but also improves accessibility to items that would otherwise be difficult to reach. An organized corner shelf system creates a seamless flow in your kitchen workspace while maintaining visual appeal and practical functionality.
Required Items:
- Lazy Susan turntables (single or multi-tier)
- Corner shelf risers
- Clear storage containers
- Label maker
- Measuring tape
- Pull-out corner basket systems
- LED strip lights
- Non-slip shelf liners
- Corner brackets
- Mounting hardware
Start by completely emptying the corner shelf space and measuring all dimensions, including height, width, and depth. Install appropriate corner brackets if needed for additional support.
Place larger, less-frequently used items at the back of the bottom shelf, then position a lazy Susan or pull-out basket system in front for everyday items. For upper shelves, implement tiered risers to create vertical storage zones, ensuring all items remain visible and accessible.
Group similar items together and use clear containers to maintain organization while maximizing vertical space. Consider incorporating LED strip lighting to illuminate dark corners, making it easier to locate items.
Install non-slip liners on each shelf surface to prevent items from sliding. Label all containers and zones clearly to maintain the organizational system long-term.
Additional Tips: Perform a quarterly audit of corner shelf items to prevent clutter accumulation. Rotate seasonal items to the back during off-seasons, and keep frequently used items at eye level.
When selecting storage solutions, choose systems that can be easily modified or expanded as your storage needs change. Consider using magnetic strips on the sides of corner shelves to hold small metal items or create additional vertical storage opportunities.

